 MetaTrader 5
 Experts
 Indicators
 Libraries
 Utilities
 Widgets
 Rules
Rules
Watch the Market tutorial videos on YouTube
How to buy а trading robot or an indicator
Run your EA on
virtual hosting
virtual hosting
Test аn indicator/trading robot before buying
Want to earn in the Market?
How to present a product for a sell-through

Unfortunately, "SMC Retest Trading System" is not available for purchasing anymore.
If you have purchased this product before, you can continue using it without any limitations and install new copies as longs as you have activations left:
- Open your MetaTrader 5 terminal.
- Specify your MQL5.community account credentials in the settings: menu Tools\Options\Community.
- Go to the Navigator\Market\My Purchases.
- Click "Install" button located to the right of the product name.
For more information, please see the documentation.
Check out other MetaTrader 5 apps

PROP FIRM READY! ( download SETFILE ) WARNING: Only a few copies left at current price! Final price: 990$ Get 1 EA for free (for 3 trade accounts) -> contact me after purchase Ultimate Combo Deal -> click here JOIN PUBLIC GROUP: Click here
Live Signal Client Signal YouTube Reviews LATEST MANUAL
Welcome to the Gold Reaper! Build on the very succesfull Goldtrade Pro, this EA has been designed to run on multiple timeframes at the same time, and has the option to set the trade frequency fro

The Legend Continues. The Queen Evolves. Welcome to Quantum Queen X — the next generation of the legendary GOLD trading system that builds upon the proven success of Quantum Queen. Quantum Queen X is built on the same proven core engine as Quantum Queen, introducing a powerful new Custom Mode that allows traders to choose exactly which strategies to enable or disable. Every strategy has been individually reviewed, refined, and optimized to deliver even better performance and adaptability across

The Quantum ecosystem is entering a new battlefield—and a new Commander is taking control. Developed exclusively for the US30 index, Quantum Commander is the fully automated Expert Advisor built for one of the world’s most dynamic markets.
In a world saturated with GOLD EAs, Quantum Commander stands apart. After several GOLD-focused releases, we are advancing into new territory with US30—a new instrument, a different strategy, and a powerful opportunity to bring true diversification to the Qua

Bringing institutional-grade trading to the Quantum ecosystem, Quantum Titan sets a new standard for precision, discipline, and proven live-market performance. Developed for traders who expect more from a GOLD Expert Advisor, Titan represents the next evolution of Quantum trading technology.
Availability is strictly limited to 1,000 lifetime licenses worldwide. Once all 1,000 copies have been claimed, Quantum Titan will no longer be available.
Special launch discount price. Final price $1999

AIKON — AUTOMATED TRADING. CONVERSATIONAL CONTROL. AIKON is an AI-powered Expert Advisor (EA) for MetaTrader 5. Once configured and enabled, it can analyze markets, open trades and manage positions automatically within your chosen settings and risk controls. Ask Aikon gives you a direct way to understand and control your trading system—in plain language. Build your setup. Ask why a market did or did not trade. Review your exposure. Prepare changes from your desktop or through Telegram on your ph

IMPORTANT : This package will only be sold at current price for a very limited number of copies. Price will go to 1999$ soon! + 300 Strategies included and more coming!
BONUS : choose 5 of my other EA's for free! ALL SET FILES + COMPLETE SETUP AND OPTIMIZATION GUIDE VIDEO GUIDE LIVE SIGNALS REVIEW (3rd party)
NEW - 44-STRATEGIES LIVE SIGNAL
Welcome to the ULTIMATE BREAKOUT SYSTEM! I'm pleased to present the Ultimate Breakout System, a sophisticated and proprietary Expert Advisor (EA)

FROM $349 TO $299 FINAL 18 COPIES.
ONCE THESE 20 ARE SOLD, MOONDOG WILL NO LONGER BE AVAILABLE FOR SALE. EXISTING CUSTOMERS WILL CONTINUE TO RECEIVE FUTURE UPDATES AND SUPPORT.
OFFICIAL LIVE SIGNALS
VIEW THE MAIN MOONDOG LIVE SIGNAL VIEW THE SECOND MOONDOG LIVE SIGNAL
START HERE — USER GUIDE OPEN THE COMPLETE MOONDOG V4.18 USER GUIDE Please read the guide before using MoonDog. It explains the installation, trading modes, risk settings, MoonLock, news protection, dashboard and chart control

AI-DRIVEN GOLD TRADING REVOLUTION -------------------------------------------------------------------------------- My AI Gold is not just another automated trading tool—it is the culmination of advanced neural network engineering, proprietary custom architecture, and rigorous real-world optimization. Built from the ground up utilizing cutting-edge repositories and state-of-the-art machine learning frameworks from GitHub, My AI Gold harnesses deep data analysis to decode the complexities of the

Scalping Robot Pro is a professional trading system designed specifically for fast and precise scalping on XAUUSD using the M1 timeframe. The system is built to capture short term market movements with accurate execution and controlled risk management. It focuses on real time price behavior, momentum shifts, short term volatility, and selective grid based trade management techniques to identify high probability trading opportunities in the gold market. Scalping Robot Pro is optimized for traders

No Grid / No Martingale / No Recovery / No Hedging / Single Entry with SL / One Shot
Smart Gold Hunter is an Expert Advisor for XAUUSD / Gold trading on MetaTrader 5. It is designed for traders who prefer a Gold EA with no grid, no martingale, real Stop Loss and Take Profit logic, and controlled risk management.
You can check the live signal before making a decision:
Live Main Signal :
https://www.mql5.com/en/signals/2365400?source=Site
Smart Gold Hunter is not a grid EA and it is not a m

Ghost Scalper MT5 4.0 is a fully automated Expert Advisor for XAUUSD / Gold on MetaTrader 5 . Ghost was developed for selective breakout and momentum movements in the gold market. The EA waits for the conditions of its four independent strategies and does not open trades constantly. Version 4.0 adds different trailing profiles, an automatic Auto Offset system for Dynamic Fast, enhanced execution and broker monitoring, and additional dashboard analysis features. LIVE SIGNALS Ghost is publicly tra

ThunderGold Scalper ThunderGold Scalper is an Expert Advisor developed for automated gold trading on MetaTrader 5. The EA is designed for XAUUSD and GOLD on the M15 timeframe. It uses a proprietary multi-factor decision engine to identify qualified trading opportunities and manage positions automatically. The system combines market structure, trend direction, candle quality, volume, momentum and execution controls. It is designed to wait for suitable conditions instead of opening trades continuo

ONLY FEW COPIES LEFT - $ 199 / $ 299 NEXT / $ 399 final price. The earlier you decide, the less you pay.
Check the live signal / Read the manual / Why are the back-test numbers that good - is it real or over-fitted? One shot. One target. Zero recovery. GoldenShot is a single-position gold EA built for controlled, long-term trading. It waits for a qualified setup, takes one clean shot with a real stop loss, and if the idea does not work, it manages the trade instead of rescuing it.

Smarter Control. Refined Precision.
Welcome to Quantum Athena X — the next generation of the focused GOLD trading system that builds upon the precision, efficiency, and disciplined execution of Quantum Athena.
Quantum Athena X is built on the same streamlined core engine and the same 6 carefully selected strategies as Quantum Athena. Each strategy has been individually refined and optimized for current GOLD market conditions, while the new powerful Custom Mode allows traders to choose exactly

LIVE SIGNAL 22 Gold Trading Strategies. One Coordinated System. PHILOSOPHER is the flagship XAUUSD Expert Advisor in my Roman EA Series, developed for MetaTrader 5. Gold can trend, consolidate, break out and reverse within the same trading session. PHILOSOPHER brings together 22 specialized strategy models to evaluate different types of opportunity, with shared rules for execution, position sizing and basket management. Choose a broker preset, select your sizing profile and follow the system's a
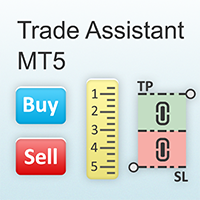
It helps to calculate the risk per trade, the easy installation of a new order, order management with partial closing functions, trailing stop of 7 types and other useful functions.
Additional materials and instructions
Installation instructions - Application instructions - Trial version of the application for a demo account
Line function - shows on the chart the Opening line, Stop Loss, Take Profit. With this function it is easy to set a new order and see its additional characteristics bef

Real Trading Account — LIVE SIGNAL | IC MARKETS: https://www.mql5.com/en/signals/2339082 GoldWave Ultra uses the same core trading logic and execution framework as the verified live signal shown above on MQL5. When running the EA with the recommended optimized settings on a reputable ECN/RAW-spread broker ( e.g., TMGM ), its live trading behavior is designed to closely follow the trade structure, risk management, and execution characteristics demonstrated by the live signal. Please note that ind

Quantum iGold MT5 – Advanced AI Trading System (XAUUSD)
Quantum iGold MT5 is a fully automated trading system built using advanced Artificial Intelligence techniques. It employs a hybrid neural architecture that integrates LSTM and Transformer models to analyze price behavior on XAUUSD . This structure enables the system to detect market patterns, adapt to volatility changes, and generate technically refined trading signals in real time. After purchase, please contact me via MQL5 private messa

SMART TREND TRADING SYSTEM — SPECIAL OFFER Your trading system. Your automation EA. Your training and support. Get Smart Trend Trading System for MT5 for $99 and receive Smart Universal Expert Advisor FREE to automate its signals. STTS brings trend direction, entry and exit signals, reversal zones, and important price levels together on your chart. Follow the system manually, or connect the included EA for automated execution using your chosen settings. The current $99 price applies to the next

No gimmicks. No empty claims. Silent Exit is crafted for traders focused on a single goal: steady performance.
All Major pairs included: EURUSD,USDCAD,USDJPY,NZDUSD,USDCHF,AUDUSD,GBPUSD
Whether you are pushing through a prop trading challenge or handling client funds, this EA maintains discipline — and produces results.
SIGNAL Link: https://www.mql5.com/en/signals/2388541 remember this is a 100k darwinex zero account and i didnt deposit 100k its only for showing live results.
How the Stra

100K Real Signal: https://www.mql5.com/en/signals/2386516
No gimmicks. No empty claims. Iron Stops caters to traders focused on one crucial aspect: consistency. Whether you’re working through a prop challenge or overseeing client funds, this EA keeps within set boundaries and delivers reliable results. Positions close within 36 hours. Run it on a single chart: Simply apply it to XAUUSD using the M30 timeframe. That’s all you need. One chart. One powerful tool.
Proper configuration is essenti

Quantum King EA — Intelligent Power, Refined for Every Trader
IMPORTANT! After the purchase please send me a private message to receive the installation manual and the setup instructions.
Special Launch Price Live Signal: CLICK HERE
MT4 version : CLICK HERE
Quantum King channel: Click Here
***Buy Quantum King MT5 and you could get Quantum StarMan for free !*** Ask in private for more details!
Rule your trading with precision and discipline.
Quantum King EA brings the strength of

Fewer trades. Better trades. Consistency above all. • Live Signal Mode 1
Live Signal Mode 2
Twister Pro EA is a high-precision scalping Expert Advisor developed exclusively for XAUUSD (Gold) on the M15 timeframe. It trades less — but when it does, it trades with purpose. Every entry passes through 5 independent validation layers before a single order is placed, resulting in an extremely high win rate on the Default configuration. TWO MODES: • Mode 1 (recommended) — Very high assertiveness, fe

PRICE INCREASE SOON! If you value honesty and a real trading system built for live trading, not just a perfect-looking straight-line backtest that can end up blowing your account, then this might be for you. Prop Firm Ready! No Martingale / No Grid 23 Months Live Signal +300% Live Growth [Live Signal] | [FTMO Results] | [Main Portfolio] | [Backtest Guide] Why Range Breakout EA is so Stable ? Range Breakout EA is based on a well-known market behaviour: changes in volatility between trading

AXIO GOLD EA MT5 Live Signal Reference on MQL5 https://www.mql5.com/en/signals/2378982?source=Site+Signals+My AXIO GOLD EA MT5 is an automated trading system developed for XAUUSD Gold on MetaTrader 5. This EA uses the same logic and execution rules as the verified live signal shown on MQL5. When used with the recommended, optimized settings on a reputable ECN/RAW-spread broker such as TMGM , the EA's live trading behavior is designed to closely align with the trade structure and execution charac

Now $499 — Only 10 Copies Available
Secure your copy at $499 before the next price increase to $699.
DeMoore Expert Advisor is a high-precision scalping Expert Advisor developed exclusively for XAUUSD (Gold) on the M5 timeframe. The De Moore Expert Advisor performs market analysis based on trend-following and price action concepts. The analysis is also based on multi-timeframe analysis. Live Signal How De Moore EA Works for You
Buy the EA on MQL5 Market Install on MetaTrader 5 Run on a 24

Adaptive Gold Scalper Important Pre-notice: This strategy requires a long period of practical verification, and favorable trading returns cannot be guaranteed in the short run. Traders must select brokers with ultra-low order latency, minimal slippage and zero/low stop level requirement; poor broker conditions will lead to disastrous trading results.
I have over 14 years of professional trading experience. With proper brokerage conditions and sufficient running time, this fully automated scalpi

Dynamic Liquidity Intelligence is an Expert Advisor designed to analyze market structure and execute trades using pending orders. The system calculates recent highs and lows based on market volatility to place Buy Stop and Sell Stop orders at potential breakout levels. The EA manages each position individually. It does not utilize Grid, Martingale, or position averaging strategies. Every order is executed with a strictly predefined Stop Loss and Take Profit. Live Monitoring Live Signal Fix 0.01

LIMITED COPIES AT CURRENT PRICE! Simple Plug & Play Setup No Risky Martingale/Grid Live Signal | FTMO Results | Public Community Final Price: $999 The Strategy
Prop Firm Gold EA is a multi-strategy trading system designed specifically for Gold (XAUUSD) on the MT5 platform.
The system combines multiple logics, using breakout-based concepts to capture the dominant intraday direction, together with intraday price patterns.
This allows it to adapt to different intraday market conditions rathe
ONLY 10 COPIES LEFT AT 199$ | NEXT 299$ | 499$ FINAL PRICE User manual Live signals
Cepheus Loyalty Cepheus Ultimate (both breakout engines
Cepheus Discipline Two Synergistic Engines. Zero Grid. Zero Martingale. Defined Risk. Cepheus is a dual-engine algorithmic trading system developed specifically for XAUUSD (Gold) . Instead of relying on a single trading model, Cepheus combines two independent strategies designed to identify different types of market opportunities. Each engine has its own

Live Signal: https://www.mql5.com/en/signals/2382857 Live Signal-2: https://www.mql5.com/en/signals/2390825 Live Signal Setfile (Risk 2% per trade) IMPORTANT - READ BEFORE CHOOSING A MODE: full backtest of all 11 Trading Modes → https://www.mql5.com/en/blogs/post/775822 You've watched Gold rip 1500 points in a straight line and felt your stomach drop - not because you were wrong about the direction, but because you were still staring at your phone, half a second too slow to click. You've set a

Gold Snap — A Fast Profit Capture System for Gold Gold Snap v2. 1 Launch Offer: The first 10 perpetual licenses ( only 7 remaining) are available for just $ 599 each, with a complimentary in- house EA for personal use. The offer ends when all promotional licenses are sold. Regular price: $ 999. Live Signal:
https://www.mql5.com/en/signals/2362714
Live Signal2:
https://www.mql5.com/en/signals/2372603 Live Signal 3:
https://www.mql5.com/en/signals/2379945 Important:
After purchase, please conta

Trend Sniper X is a multi-timeframe trend-following indicator for MetaTrader 5 that helps traders identify trend direction and potential reversal points with clarity and precision. for MT4: https://www.mql5.com/en/market/product/193245 Price Information: The current price is promotional and is subject to change as upcoming updates and new features are released.
Bonus Offer: To get the FREE Auto-Trade Assistant EA for this indicator, please message the author after purchasing. Code2Profit Channe

TITANFORGE EA MT5 ALGORITHMIC IMPULSE SWING SYSTEM FOR XAUUSD H1 TitanForge EA is an automated trading system developed specifically for Gold on the H1 timeframe. The strategy focuses on directional momentum, volatility expansion and controlled position management. It is designed to wait for selected market conditions rather than remain permanently exposed to the market. No Grid. No Martingale. No uncontrolled averaging. Every position is opened with predefined protection, including a hard Stop

Scalping Index Pro is a professional trading system designed specifically for fast and precise scalping on US30 and DE40 using the M1 timeframe . The system has been developed specifically for the unique behavior of major stock indices, focusing on short term price movements, rapid momentum changes, market volatility, and selective grid based trade management techniques to identify high probability trading opportunities . Scalping Index Pro is optimized for traders who prefer dynamic trading wit

SixtyNine EA – A Gold Expert Advisor for MetaTrader 5, featuring 6 integrated strategy layers, predefined Stop Loss on every trade, and a clean trading structure without Martingale, Recovery systems, or Grid trading. Public Live Signal: $500 Start, Fixed 0.02 Lot, 500%+ Growth, 20 Weeks Live
The public live signal is the central proof point of SixtyNine EA . The account started with a $500 balance , used a fixed 0.02 lot size per trade , and has been active for more than 20 weeks of live tradin

The XG Gold Robot MT5 is specially designed for Gold. We decided to include this EA in our offering after extensive testing . XG Gold Robot and works perfectly with the XAUUSD, GOLD, XAUEUR pairs. XG Gold Robot has been created for all traders who like to Trade in Gold and includes additional a function that displays weekly Gold levels with the minimum and maximum displayed in the panel as well as on the chart, which will help you in manual trading. It’s a strategy based on Price Action, Cycle S

Trade Manager MT5 is an advanced position size calculator and trade management tool for MetaTrader 5, designed to help traders plan trades faster, control risk more precisely, and manage open positions directly from the chart. It combines order placement, risk based lot calculation, Stop Loss and Take Profit management, Break Even, Trailing Stop, Partial Close, Equity Protection, and external trade management in one panel. Whether you trade forex, indices, metals, commodities, crypto, or future

The Yen Master
The Yen Master is an Expert Advisor for USDJPY that runs twelve independent breakout strategies on one chart. Each strategy has its own levels, stop loss, take profit and trade management.
Live monitoring: the Expert Advisor runs on a public signal , so you can compare its live trading with the backtest.
How it trades The Expert Advisor trades breakouts of support and resistance levels on USDJPY. It finds swing highs and swing lows on the H1 and H4 charts and places stop order

Welcome to Big Gold Wins ! This is a Fully automated GOLD Trading System with 9 uniq strategies! We don't use "AI", We don't use "Machine Learning ", We don't use "ChatGPT", We don't use Martingale, We don't use Non-Realistic Backtests! Each trade has a Fixed TakeProfit and Stop Loss . Each strategy has its own Algorithm for Tracking Profitable Positions. Big Gold Wins contains 9 separate different strategies within itself, each of them with its own logic and profit-taking mechanism. Live P er

Prop Firm Ready! Chiroptera is a non-martingale, non-grid, multi-currency Expert Advisor that operates in the quiet hours of the night. It uses single-placed trades (of all 28 pairs!) with tactically placed Take Profits and Stop Losses, that are continuously adjusted to maximize gains and minimize losses. It keeps track of past and upcoming news reports to ensure impacts are minimized and carefully measures real-time volatility to prevent impacts due to unpredictable geo-political disturbances c

What is Lizard? Lizard is a fully automated Expert Advisor for XAUUSD (Gold) on MetaTrader 5. It uses a multi-strategy swing breakout system: the Expert Advisor identifies key structural levels on the chart and places pending stop orders at calculated entry points. No martingale, no grid, no averaging into losses. Every trade is opened with a defined stop loss and take profit and is then managed by a multi-layer exit system, around the clock and without manual intervention. Support For support,

Duelist is a dual-module Expert Advisor designed to trade EURUSD and AUDCAD from a single EURUSD chart. Each module uses its own pair-specific trading logic and operates independently, with separate Magic Numbers, direction controls, lot sizing, trading schedules and protection settings. You can enable EURUSD, AUDCAD or both modules according to your preferred configuration.
Duelist uses a managed basket and grid approach . When its strategy conditions are met, a directional basket may contain

The GBPUSD Robot Pro is an advanced automated trading system developed specifically for the unique dynamics of the GBP/USD currency pair. Using advanced technical analysis, the robot continuously analyzes historical and real-time market data to identify trends, key support and resistance levels, price momentum, volatility, and other important market conditions specific to GBP/USD. The Robot opens positions every day, from Monday to Friday, and all positions are secured with Take Profit, Stop Los

Introducing Quantum Emperor EA , the groundbreaking MQL5 expert advisor that's transforming the way you trade the prestigious GBPUSD pair! Developed by a team of experienced traders with trading experience of over 13 years. IMPORTANT! After the purchase please send me a private message to receive the installation manual and the setup instructions. ***Buy Quantum Emperor EA and you could get Quantum StarMan for free !*** Ask in private for more details Verified Signal: Click Here
MT4 Version

Smart Golden Portfolio is an XAUUSD Expert Advisor designed for traders who want a stable strategy that can remain part of a trading portfolio for the long term. Live IC Markets Signal You can follow the live IC Markets signal results from today here:
https://www.mql5.com/en/signals/2389307 The core strategy was developed before 2025 as part of a much larger research process involving thousands of generated and tested strategies. From that pool, only a small number were selected for extended for

Are you ready to power up your Gold trading?
Impulse by Starpoint Trading — A six-strategy gold EA that waits for the perfect shot. Come chat with us in our public MQL5 channel! https://www.mql5.com/en/channels/starpoint Read my analysis of Impulse compared to similar grid systems: https://www.mql5.com/en/blogs/post/773192 Impulse v2.00 is here! The biggest update in Impulse's history has arrived. Version 2.00 takes everything that made Impulse a disciplined, patient Gold trading system and e

Gold Beaver - limited offer $250 instead of $450. 10 copies at this price. Live signal
GOLD BEAVER MT5 — XAUUSD EA One-click setup. Drag onto an XAUUSD M1 chart and it trades. Defaults are ready to run, no tuning required. Not HFT. No low-latency connection required. Trades are evaluated on M15 boundary candles, so OHLC testing is sufficient. 12 selectable strategies, developed with a custom JIT-compiled Python research engine independent of the MT5 tester. They are not hand-tuned and n

ArtQuant Gold — Multi-Module Expert Advisor for XAUUSD ArtQuant Gold is an automated trading system developed exclusively for Gold trading on MetaTrader 5. The EA combines multiple independent trading modules with centralized portfolio management, exposure limits, execution filters, virtual trade management and account-protection tools. It is designed for traders who want a dedicated XAUUSD system without having to configure individual indicators or internal strategy parameters. ArtQuant Gold su

Neuro Poseidon is a new indicator by Daria Rezueva. It combines precise trading signals with adaptive TP/SL levels - creating best possible trades as a result!
Message me and get Neuro Poseidon Assistant as a gift to automize your trading process!
What makes it stand out?
1. Proven profitability on all assets and timeframes
2. Only confirmed BUY and SELL signals present on the chart
3. Adaptive TP & SL levels generated by the software for each trade
4. Easy to understand - suitable for al

PROP FIRM READY! --> DOWNLOAD ALL SET FILES WARNING: Only a few copies left at current price! Final price: 990$ NEW (from 399$ only) : Choose 1 EA for Free! (limited to 2 trade accounts numbers, any of my EAs except UBS) Ultimate Combo Deal -> click here JOIN PUBLIC GROUP: Click here Live Signal Live Signal 2
!! THE GOLD PHANTOM IS HERE !!
After the massive success of The Gold Reaper, I'm extremely proud to introduce its powerful brother:
The Gold Phantom , a pure, no-nonsense breako

Live Trading Signal
Public real-time monitoring of trading activity:
https://www.mql5.com/en/signals/2378119
Official Information
Seller profile
Official channel
User Manual
Setup instructions and usage guidelines:
View user manual
Mavrik Scalper represents a new generation of AI-driven trading systems built around a Hybrid Attention neural network architecture.
Unlike conventional algorithmic strategies that rely primarily on fixed technical indicators or predefined market rules, Mav

Edge Boost Pro is a professional Support and Resistance (SnR) trading system designed to identify important market levels and trade both breakouts and rebounds from these areas. It continuously analyzes current market structure, calculates the most relevant Support and Resistance levels, and combines them with advanced market filters to identify high-probability trading opportunities.
Take advantage of the current launch promo price . ONLY 10 copies of Edge Boost Pro are available at $499. Pric

Please note that I do not sell this EA through any third-party resellers, affiliates, or alternative distribution channels. Monitoring - Live signal Public channel - Here This EA trades two symbols and looks for short-term imbalance between them. When the symbols move differently from their normal relationship, the EA can open trades and close them when the imbalance becomes smaller. This is not a grid EA. This is not martingale. The EA does not open many recovery orders. It uses only 1 positio

INSTITUTIONAL SMC ROBOT Advanced Smart Money Concepts Trading System for MetaTrader 5 Executive Overview Institutional SMC Robot is an automated trading solution engineered for modern financial markets. Built around elite Smart Money Concepts (SMC) architecture, the algorithm identifies and executes high-probability trades based on institutional order flow, market structure shifts, and liquidity dynamics. Advanced News Protection: Integrated high-impact news filter designed to automatically pa

Sentinel SWP is an automated multi-pair Expert Advisor designed around positive swap accumulation, controlled exposure, and long-term position management. The main objective of Sentinel SWP is simple: keep positions exposed to positive swap for as long as possible while maintaining controlled drawdown and avoiding unnecessary risk. Unlike traditional short-term trading systems, Sentinel SWP is not designed to constantly enter and exit the market. Its objective is to identify suitable opportuniti

Built to dominate the gold market. Official Information Seller profile Official channel User Guide LIMITED PRICE — $799 Aura Gold Pro Edition is available for $799 until the end of September . Starting October 1 , the price will increase to $999 — secure your copy before the price goes up. Live Trading Signals Roboforex https://www.mql5.com/en/signals/2366593 FPMarkets https://www.mql5.com/en/signals/2358523 ICTrading https://www.mql5.com/en/signals/2380859 Description Aura Gold PRO Edition is

Neo Delta is an automated Expert Advisor for MetaTrader 5 that trades exclusively on Gold (XAUUSD). Its decisions are based on volume-delta momentum – the balance between buying and selling pressure inside each candle. A machine-learning filter reviews every potential entry before a position is opened. Support For support, please read the profile info! https://www.mql5.com/de/users/masthetics Live Signal Follow the live performance of this EA on our verified MQL5 signal:
View Live Signal → 5m Lo

AETHERION ZENITH AI EA The Evolution of Precision Gold Automation Public live signal for real-time monitoring: https://www.mql5.com/ru/signals/2381671 Limited Launch Offer The first 7 copies are available for only $259 . Once these copies are sold, the price will increase immediately by $100 — to $359 . This introductory offer is intended for traders who want to join Aetherion Zenith AI EA at the earliest stage and follow the evolution of the system through public live monitoring from the beginn

ASIC Gold — XAUUSD Price Action EA — No grid. No martingale. Real stop loss on every trade. Signal of ASIC Strategy: ASIC H1 Trend Drive Special Launch Offer: Only $149 for the first 20 copies! Resources & Documentation Resource Description ASIC Gold Official Channel Latest updates, set files, and announcements ASIC Gold Manual Every setting explained, with quick-start steps How to Set Up ASIC Gold Step-by-step installation guide Understanding the Trading Strategy ASIC Gold is a fully automat

No Grid /No Martingale/ No Dca /No rocovery Smart Gold Impulse is now available in a special early launch phase. You can follow the signal results here for informational purposes, https://www.mql5.com/en/signals/2390103 . Results can significantly change between brokers, account types, slippage, spread conditions, and VPS setups.Set files of the current running signal account and live chat access link will be shared only with Smart Gold Impulse buyers after the buyer sends a short comment from t

LIVE SIGNAL REACHED NEW HIGH Live Signal on Vantage https: // www.mql5.com/en/signals/2378090 https: // www.mql5.com/en/signals/2378091 live signal is running mode/option 1 with autolot 2 % risk. Join telegram group https://t.me/+UaALtDiYMb4xYTk1 Overview: The Gold Space is a fully automated, professional-grade Expert Advisor specifically engineered for the XAUUSD (Gold) market. Designed natively for MetaTrader 5, this EA capitalizes on high-probability volatility expansions using a precise,

UNIX SCALPER — SPECIAL OFFER Find the setup. See the plan. Choose how to trade it. Get UNIX Scalper for MT5 for $99 and receive Smart Universal Expert Advisor FREE to automate its signals. UNIX Scalper brings market analysis, BUY/SELL/WAIT decisions and Entry, Stop Loss, TP1 and TP2 levels into one organized panel. Follow the trade plan manually or connect the included EA for automated execution using your chosen settings. The current $99 price applies to the next 30 purchases. After that, the p

Scalper speed with sniper entries. Built for Gold. Last couple of licenses - 399 USD only instead of 499 USD Tired of all the fake EAs that eventually disappear? Most authors just create another EA when it fails - I wanted to do it differently.
Wave Rider is my personal project built out of passion - honest, transparent EA without any fake AI or manipulated back-test that's been continuously updated for more than 6 months, that I am using myself from very first day. Check the Manual or Broker