AW Supply Demand MT4
- Indicators
-
AW Trading Software Limited
 ______________ AW Trading Software ______________
📢 mql5com channel 👉 https://www.mql5.com/en/channels/awtradingsoftware - Version: 1.0
- Activations: 15
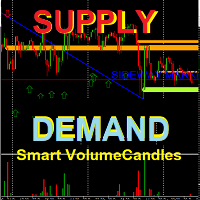
AW Supply Demand finds supply and demand zones the classic way: a base of a few small candles followed by a strong departure of price from it. Every zone receives an open score from 0 to 10 built from six named components, passes through a life cycle from fresh to broken and flipped, and the panel assembles a ready setup from the zones with entry, stop and target levels. The indicator shows zones from up to three higher timeframes on one chart, sends notifications and passes all data to buffers for Expert Advisors.
Zones are not redrawn. A zone appears a set number of closed bars after its base, its boundaries do not change after confirmation, and only the state, the score and the touch counter change afterwards.
How to trade with the indicator:
Step 1 - Choosing a zone
The panel shows a setup for the zone worth trading and a verdict based on its score. Limit order - score 9 and above, a limit order from the near edge of the zone. Confirm entry - score from 8 to 9, entry on a reversal candle from the zone. Skip - score below 8, the zone is passed over.
Step 2 - Determining StopLoss
The stop is placed beyond the far edge of the zone with a buffer in fractions of ATR, the buffer is set by the Stop loss buffer beyond the zone variable.
Step 3 - Determining TakeProfit
The target is the near edge of the nearest opposing zone on any enabled timeframe. The panel shows Entry / SL / TP and the Risk / Reward ratio for the setup, the level lines are drawn on the chart.
Advantages:
- Does not redraw zones, boundaries are fixed after confirmation
- Open zone score from 0 to 10, breakdown by components in the tooltip
- Zone life cycle: Fresh, Tested, Weak, Broken, Flipped
- Up to three higher timeframes on one chart, Auto mode selects them
- Ready setup in the panel: zone, verdict, Entry / SL / TP, Risk / Reward
- Notifications for seven events with filters by score, freshness and direction
- 64 buffers for Expert Advisors, works in the strategy tester
Zone score:
The score is the sum of six components and modifiers, the breakdown is visible when hovering the cursor over a zone.
Strength - strength of the price departure from the base, in ATR and in zone heights
Margin - room to the nearest opposing zone relative to the trade risk
Picture - agreement with the direction of higher timeframes and nesting inside a higher timeframe zone of the same type
Fresh - number of touches, an untouched zone gets the maximum
Time - number of candles in the base, a short base gets more
Arrival - the way price approaches the zone on the first visit
Mods - bonuses for a reversal pattern, a price gap on the departure and a liquidity sweep before the base
Grades: A - score 9 and above, B - from 8, C - from 7, D - below 7. Zones below the display threshold stay in the calculation but are not drawn, the chart stays clean.
Panel:
Bias - direction from the structure of the chart timeframe: supply zones broken in a row give UP, demand zones broken in a row give DOWN
Live zones and Timeframes - number of live zones above the display threshold and the list of timeframes in use
Nearest Supply and Nearest Demand - boundaries of the nearest zones, timeframe, state, score with grade and distance to the zone in points and ATR
Setup - the zone to trade with its verdict, Entry / SL / TP levels, risk and reward in points, Risk / Reward
Zones found, Held 1st touch - number of zones found and the share of zones that held the first touch, separately for grades A and B
The panel collapses into a compact strip, there are dark and light schemes, panel and font scaling for high resolution screens.
Input variables:
MAIN SETTINGS
Preset - a set of detection settings. Balanced, Conservative and Aggressive set the departure threshold, the display threshold and the number of zones per side, Custom leaves the DETECTION SETTINGS block as is
Zone boundaries - the way zone boundaries are built
Classic - from the edge of the base candle bodies to the edge of the wicks
Full candle - from wick to wick
Body only - candle bodies only
Minimum score to show a zone - score threshold for showing a zone on the chart, from 0 to 10
Maximum bars of history - history depth for the calculation
Show panel - show or hide the panel
Disable all chart drawing - turn off all drawing on the chart, for use inside an Expert Advisor
Disable all notifications - turn off all notifications
Hotkeys H / O / L / T - hotkeys: H higher timeframe zones, O broken zones, L zone labels, T trade levels
Show broken zones - show broken zones
MULTI-TIMEFRAME SETTINGS - higher timeframes for zones and their display threshold
DETECTION SETTINGS - parameters of the base, price departure, touches, breaks and zone overlaps
TRADE LEVELS - Entry / SL / TP lines and the stop buffer beyond the zone
NOTIFICATIONS SETTINGS - notification channels, events and filters
GRAPHICS SETTINGS - panel scheme and scale, zone colors and labels
The description of every variable, the buffer map for Expert Advisors and connection via iCustom are in the manual linked above.