Ultimate SMC Dashboard with Price Action
- Indicators
- Version: 6.0
- Activations: 10

This is a Smart Money Concepts (SMC) Trading Engine and Multi-Pair Dashboard built for MetaTrader 4 (MQL4). It scans the markets for automated structural shifts, draws active institutional zones right onto your chart, and tracks multiple currency pairs simultaneously.
Here is a breakdown of what this indicator does and how to read its dynamic signals.
1. The Core Architecture: Market Structure Engine
The code automates three key elements of Smart Money Concepts:
-
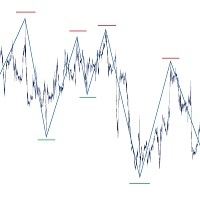
Swing Highs & Lows (The Foundation): It scans for peaks and valleys by looking for a candle that has higher highs (or lower lows) than the SwingPeriod (default is 5) candles to its left and right.
-
BOS (Break of Structure): When a candle closes completely past a previous validated swing point, the code plots a dotted line across your chart and tags it as a "Bullish BOS" or "Bearish BOS".
-
Zone Generation (OB & FVG): The moment a BOS is printed, the engine reaches back into history and instantly spawns two primary types of institutional footprints:
-
Order Blocks (OB): The final counter-trend candle before the massive structural break took place.
-
Fair Value Gaps (FVG): Imbalances left behind by explosive price expansion, mapped out by tracking gaps between the high of Candle 1 and the low of Candle 3.
-
2. Dynamic Zone Monitoring (How it Acts in Real-Time)
The indicator dynamically reads price action inside these boxes. Instead of just leaving static rectangles on your screen, it monitors every candle's behavior as it interacts with an active zone and prints updates directly onto the chart:
WICK REJECTION (Gold): Price dipped into the zone but quickly snapped back out, leaving behind a sharp wick. This signals strong institutional defense of the level.
BODY HOLD ZONE (Cyan): The candle body closed inside the box but did not cross the critical invalidation invalidation line. This indicates a steady accumulation or distribution of orders.
ZONE BREACHED (FAILED) (Orange-Red): Price closed past the opposite boundary of the zone. The level failed, and the indicator instantly deletes the dead box from the screen to keep your workspace pristine.
3. The Heads-Up Display (HUD) Matrix
If ShowDashboard is active, the indicator anchors a clean HUD grid to your chart window (controlled by DashboardX and DashboardY ). It calculates market data in the background across an entire basket of pairs simultaneously (e.g., EURUSD, GBPUSD, AUDUSD, USDJPY, USDCAD).
The matrix prints out a table structured exactly like this:
| PAIR | BOS STATUS | ORDER BLOCK | FVG STATUS | SETUP STATUS |
| EURUSD | BULL BOS | BULL OB | BULL FVG | VALID BUY |
| GBPUSD | BEAR BOS | BEAR OB | BEAR FVG | VALID SELL |
| USDJPY | NONE | NONE | NONE | NO SETUP |
Unlocking the "Setup Status" Logic
The engine doesn't just look for labels; it calculates mitigation. A setup changes from NO SETUP to a bright VALID BUY or VALID SELL only if:
-
A fresh structural break (BOS) has occurred.
-
An OB and an FVG both exist simultaneously.
-
Price has not yet traveled back to tap either of those levels since the break happened (meaning the resting institutional liquidity remains completely unmitigated).
4. Fully Interactive Navigation
The entire grid functions like a custom operating system interface. The asset tags in the "PAIR" column are rendered as clickable MT4 Chart Buttons.
If you spot a VALID BUY on GBPUSD while analyzing EURUSD , you can click the GBPUSD button on the overlay. The indicator triggers a core chart shift, immediately flipping your entire window to GBPUSD so you can take action without digging through your market watch folder.