RelicusRoad Support Resistance MT4
- Indicators
- Version: 2.297
- Activations: 10

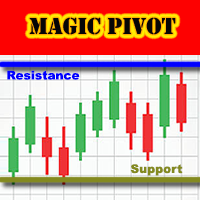
RelicusRoad Support Resistance is a support and resistance indicator for MetaTrader 4 and MetaTrader 5 that builds supply and demand zones from fractal swings and grades each one by its strength and recent tests.
It keeps a short map of zones above and below price, each labeled with its grade, width and recent test count.
How it works
Swing highs and lows are collected into price zones rather than single lines. A swing is a bar whose high or low is not exceeded by the 7 bars on either side, and larger 15-bar swings and swings with a strong reaction afterwards count for more. The weighted swings are added up along the price axis, and the densest separated areas become zones. Each zone gets a strength score, every repeated test wears that score down, and zones are kept at least 0.75 of the Average True Range (ATR) apart without overlapping.
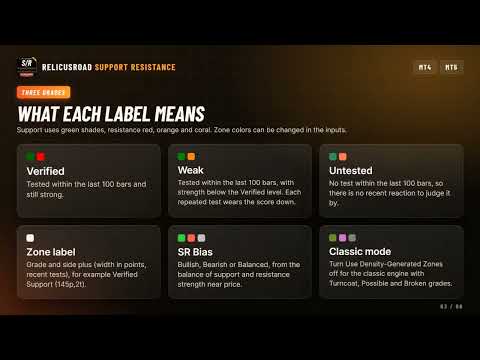
- Verified: tested within the last 100 bars and still strong.
- Weak: tested within the last 100 bars, with strength below the Verified level.
- Untested: no test within the last 100 bars.
- Turncoat, Possible and Broken: flipped, unconfirmed and broken zones, produced only when Use Density-Generated Zones is off.
Older swings count for less than recent ones. The indicator first picks strong zones within about six ATR of price, then fills in until each side has three zones and the chart has six, so a weaker or more distant zone can appear when few strong ones are nearby. With Adapt Geometry By Timeframe on, M1 and M5 zones are tighter, while H4 and D1 charts look further from price.
What it draws
- Graded zones: filled rectangles, with support below the last close and resistance above it.
- Zone labels: the grade and side, for example Verified Support (145p,2t), where p is the zone width in points and t is the number of recent tests.
- SR Bias: a top-right corner label that reads Bullish, Bearish or Balanced from the balance of support and resistance strength near price.
- Boundary lines: zone edges with adjustable width and style.
- Zone span: each rectangle starts a few bars before its oldest swing and ends a few bars past the current bar, where the label sits.
Reading the chart
Support zones use green shades and resistance zones use red, orange and coral shades. The zone colors can be changed in the inputs. The label text is always light gray.
A Verified zone is one where price has come back recently and the zone has kept its strength. A Weak zone has been tested but carries less strength, often because repeated tests have worn it down. An Untested zone has not been visited within the last 100 bars, so there is no recent reaction to judge it by.
Support or resistance is decided by where a zone sits relative to the last closed price, so a zone changes side when price crosses it. The grades describe what price has already done at each zone, not what it will do next.
Inputs
Zone building:
- Timeframe: build zones from the chart timeframe or from a higher one.
- Total History and Zone History: how many bars are scanned and the upper limit on zones kept.
- Use Density-Generated Zones: on by default; turn it off to use the classic zone mode with Turncoat, Possible and Broken zones.
- Adapt Geometry By Timeframe: tighter zones on M1 and M5, a wider view on H4 and above.
- Maximum Zones Per Side and Recent Test Window: how many zones each side may hold and how many bars count as recent, 5 and 100 by default.
- Zone Sensitivity and Merge Near SRs: apply to the classic mode only and have no effect while density zones are on.
Display:
- Show Verified, Weak, Untested and the other grades: each grade toggles on its own, and Possible and Broken start hidden.
- Show Info and Show Points: turn the grade text and the width and test figures on or off.
- Show SR Bias: turn the corner label on or off.
- Fill Colors, Boundary Line Width and Boundary Line Style: how the rectangles look.
- Label Font and Label Size: the typeface and size of the zone labels and the bias label.
- Zone colors: a separate support and resistance color for every grade.
Recommended use
Built for forex, gold (XAUUSD), indices, stocks and crypto. Zones are most useful on H1 and above, where each one has had time to be tested.
Common questions
Can I show higher timeframe zones on a lower chart? Yes. Set Timeframe to H4 or D1 and the zones from that timeframe are drawn on your current chart. On the lower chart they can shift slightly between full recalculations.
Why does a level that held several times show as Weak? Each recent test wears the strength down, so a level that has been tested again and again can drop below the Verified level even though it held.
Does it place trades? No. It is an indicator that draws and grades zones. It does not open or close positions.
About and support
Zone grading is the support and resistance engine from RelicusRoad Pro, published separately for traders who already have their own entries and only need the levels. It runs standalone and needs no other RelicusRoad product.
Questions and support are handled in the product comments and through the mql5.com messaging system.