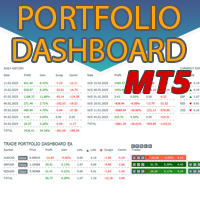
Trade Portfolio Dashboard MT5
- Utilities
-
Lee Samson
 Have been trading since 1998, started in stocks and indices before moving over to Forex after around 5 years. Have been on the journey learning to trade like most traders, taking countless courses and trying every indicator and strategy under the sun.
 - Version: 1.51
- Updated: 22 January 2026
- Activations: 10
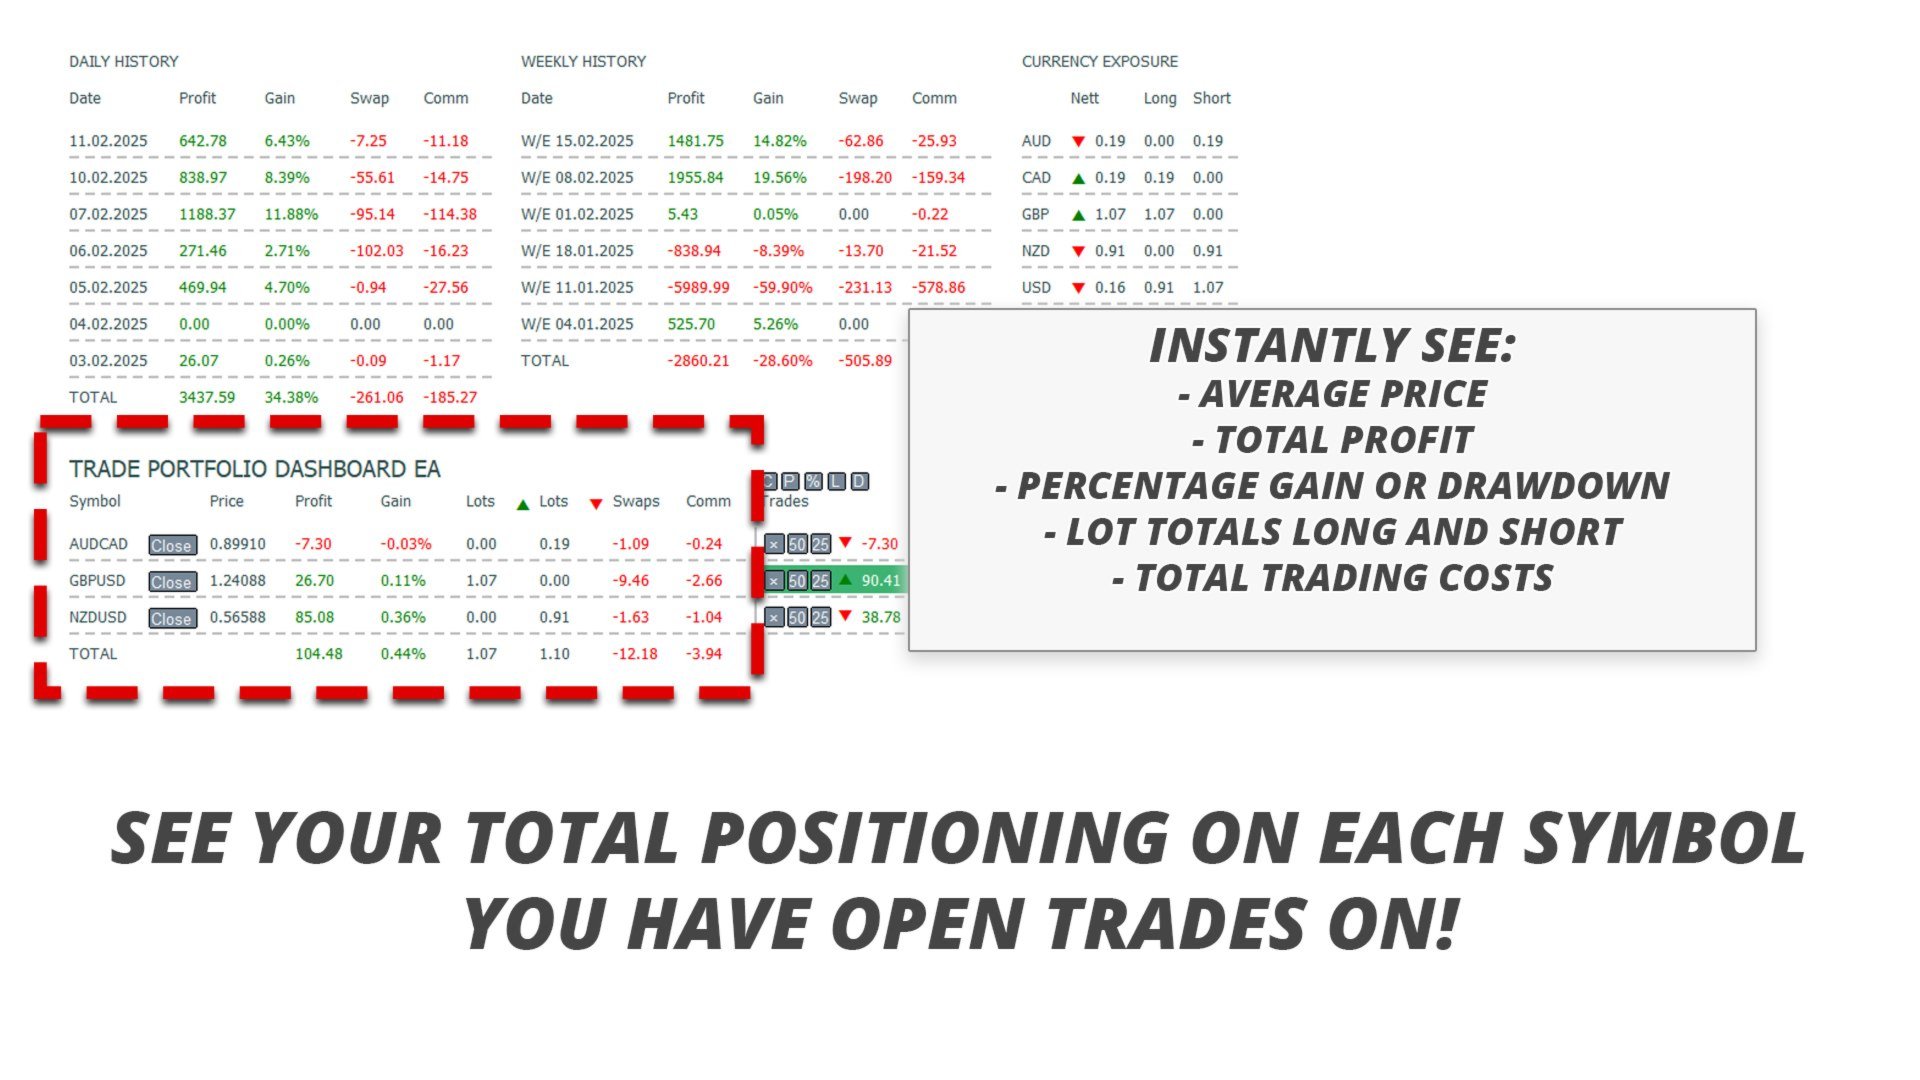
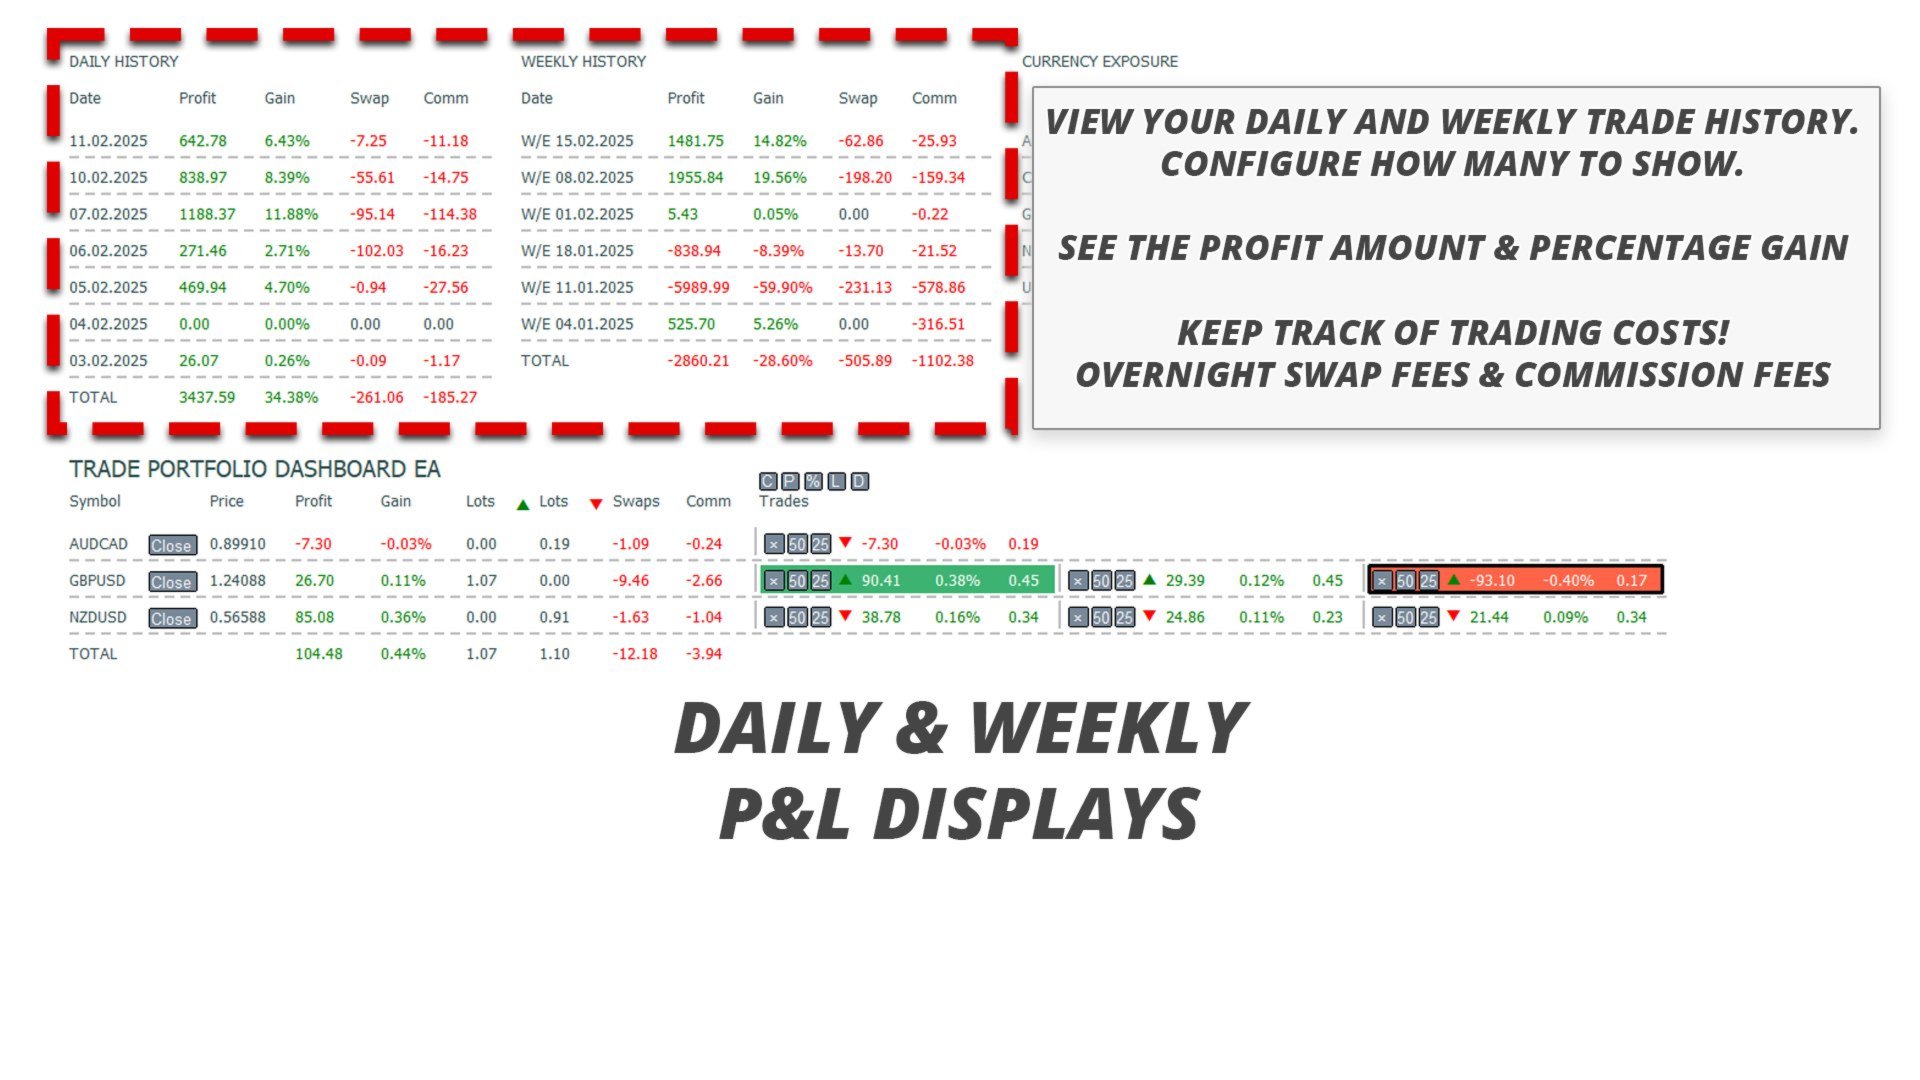
Instantly see your closed trade history by day and week, your current open trades, and forex exposure on one chart! Use the heatmap to identify profitable trades and where your current drawdown is within your trading portfolio.
MT4 Version - https://www.mql5.com/en/market/product/132081/
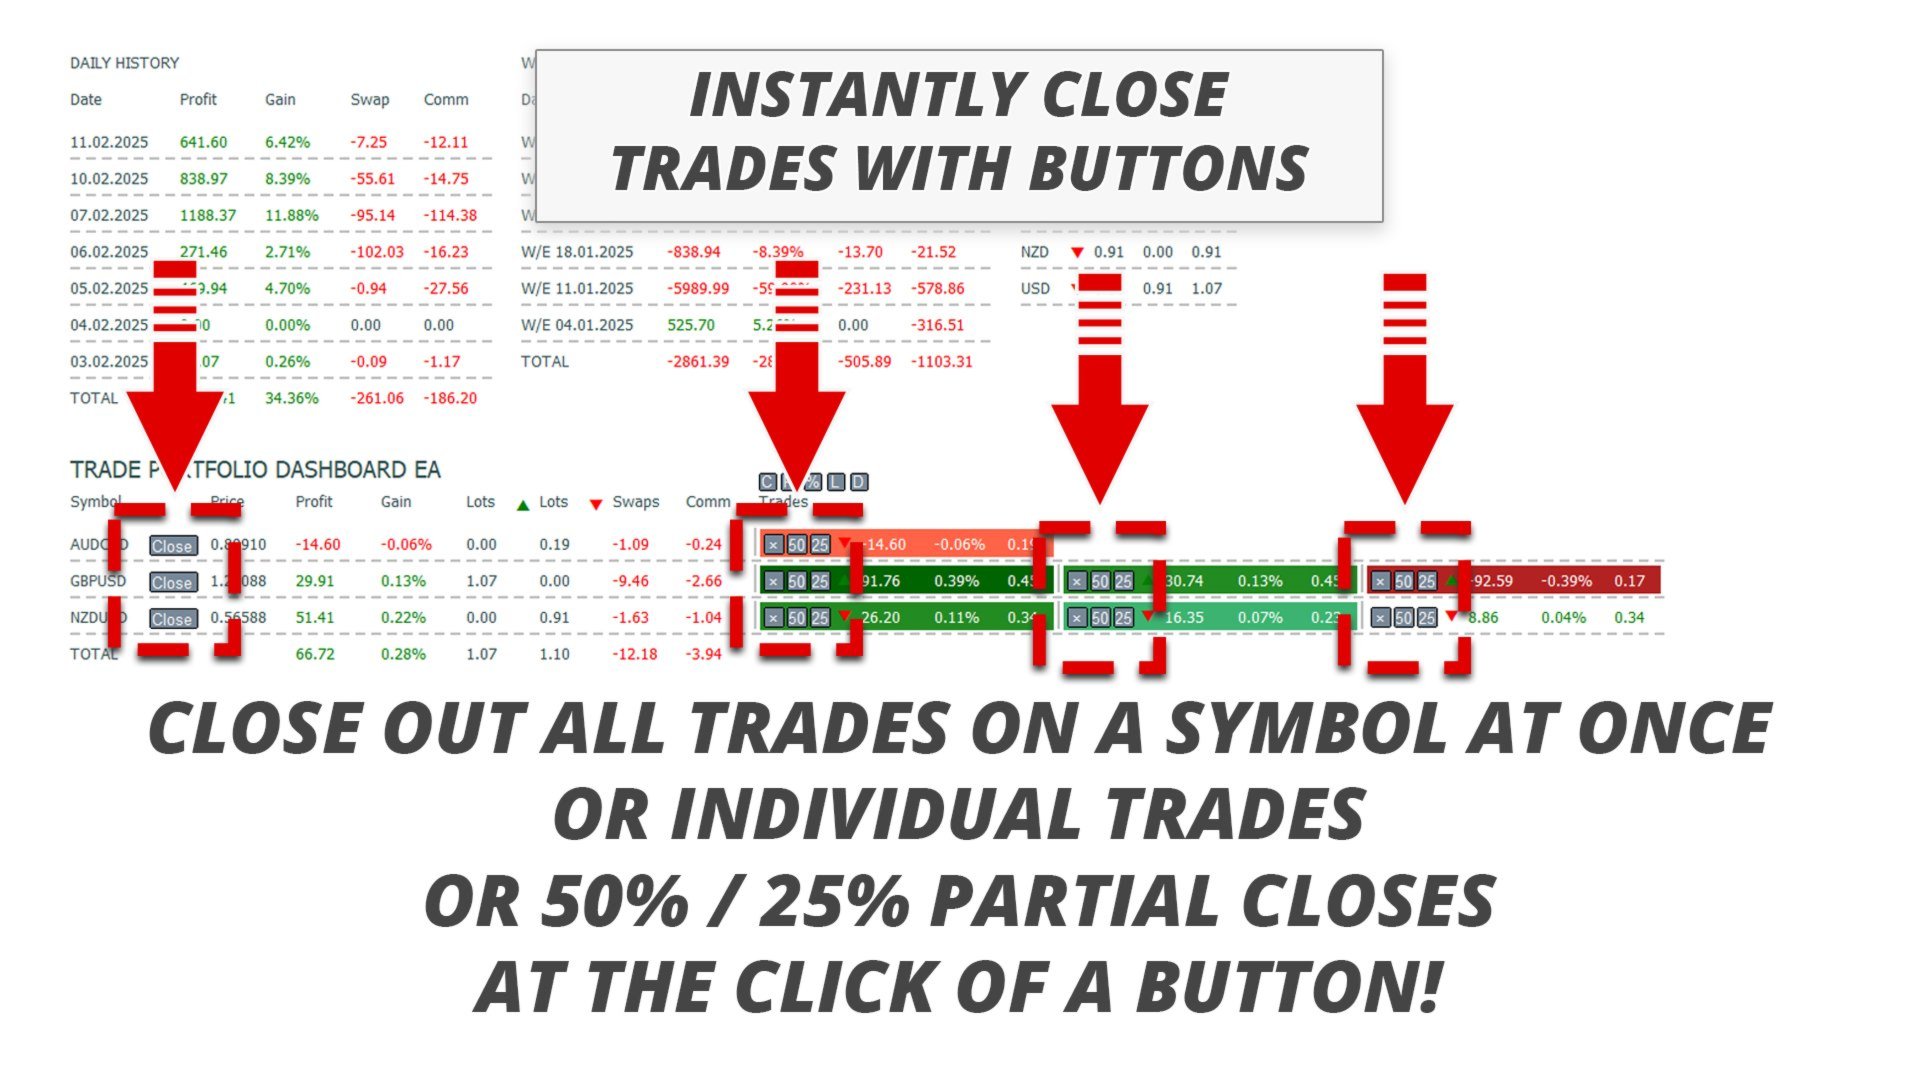
Quick Close Buttons
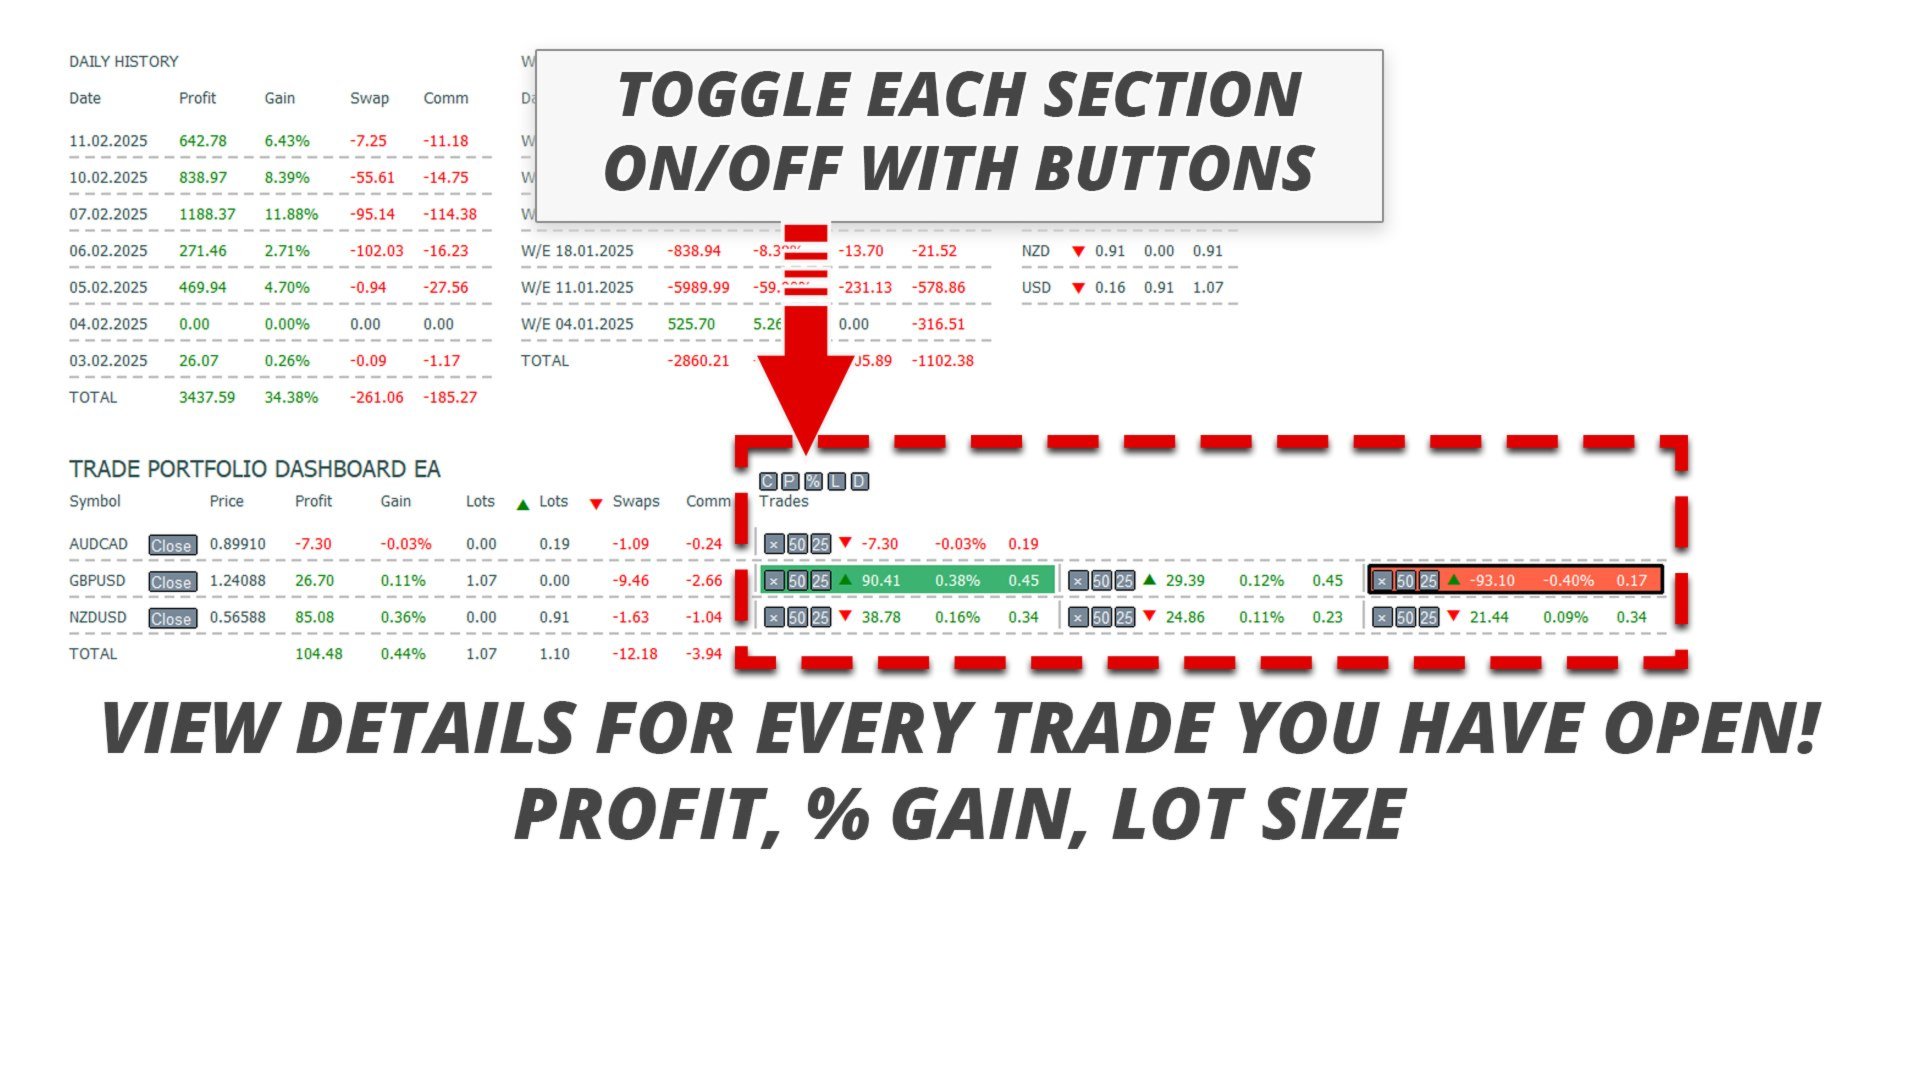
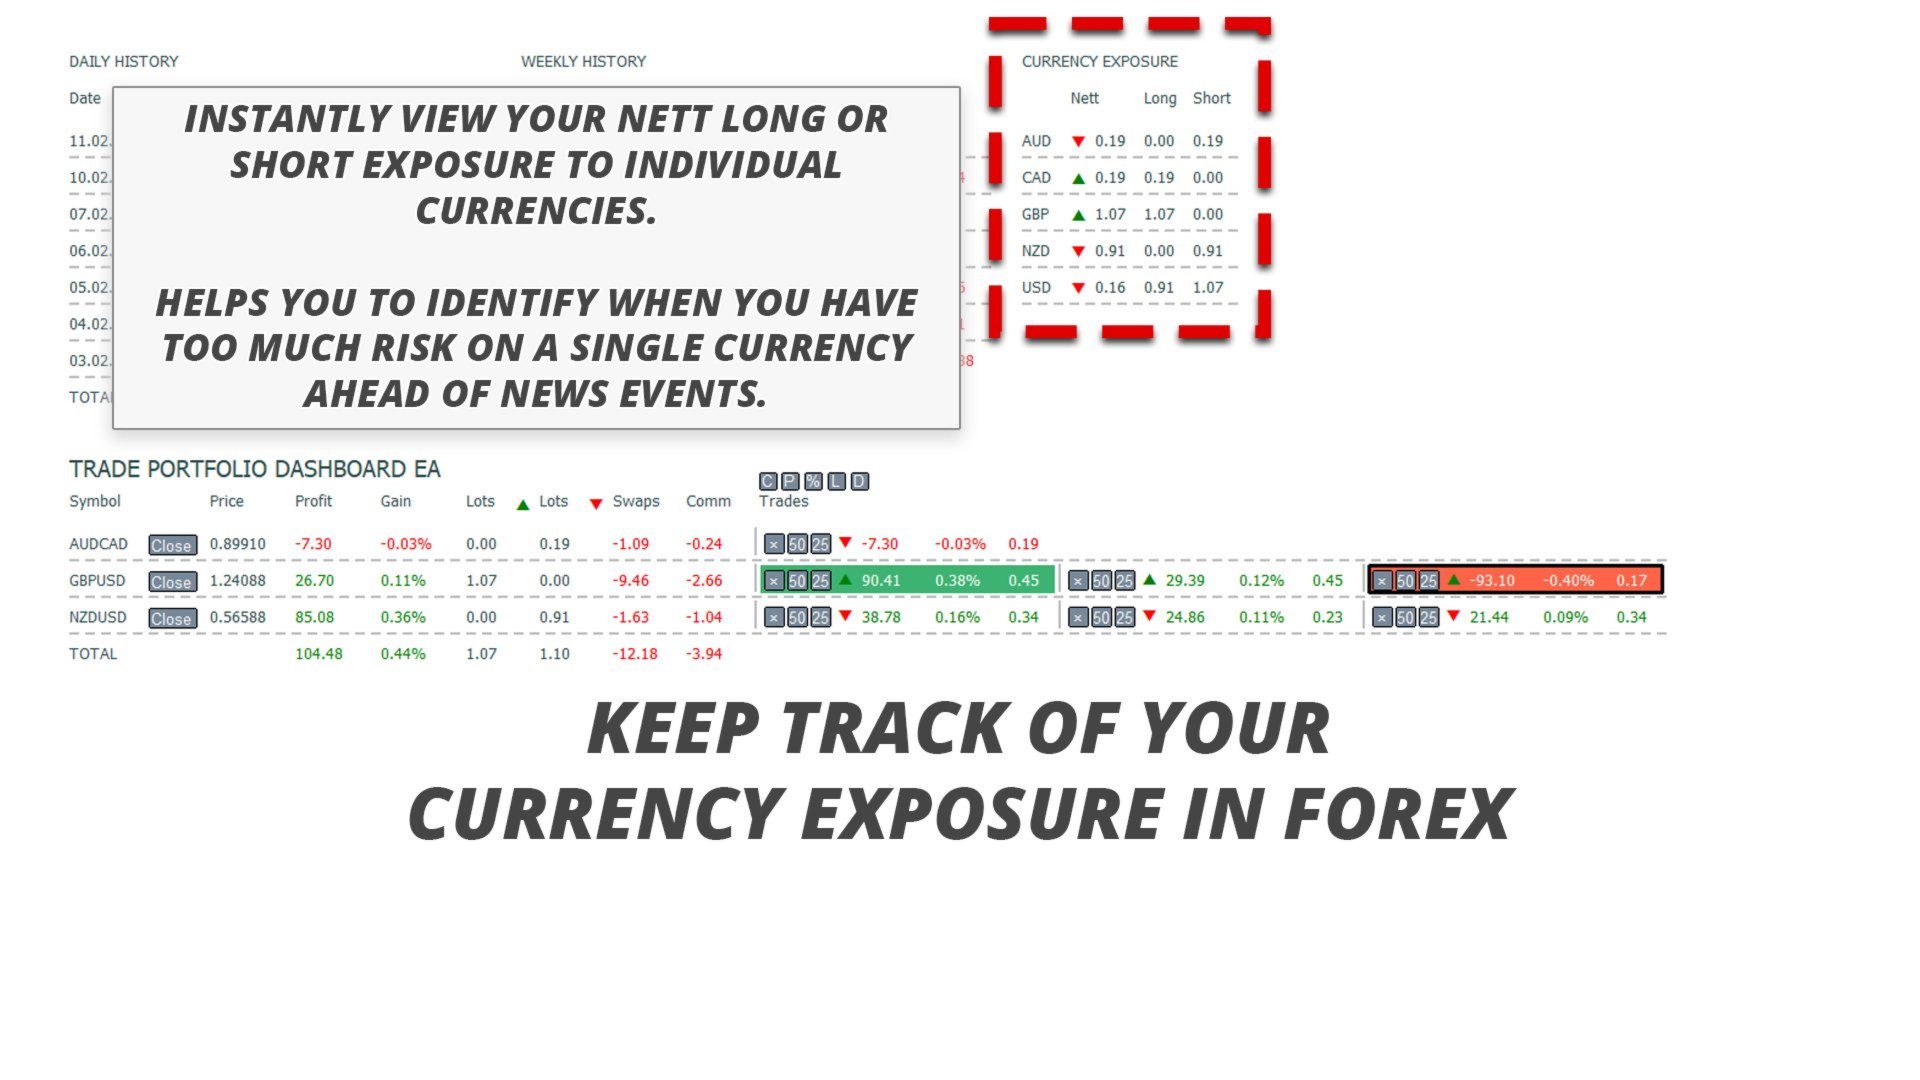
Use the quick close buttons to close every trade on a single symbol, close out individual trades in full, or take partial profits or losses at the click of a button. No more hunting for trades in a list and working out how to close part of your trades. The dashboard also shows your current exposure on each currency symbol while trading forex pairs, this helps you identify areas you may be over exposed in ahead of major news events. You can use the buttons to quickly reduce your exposure instantly before news, or if news has already happened and taken you into profit, quickly bank that profit with a single click!
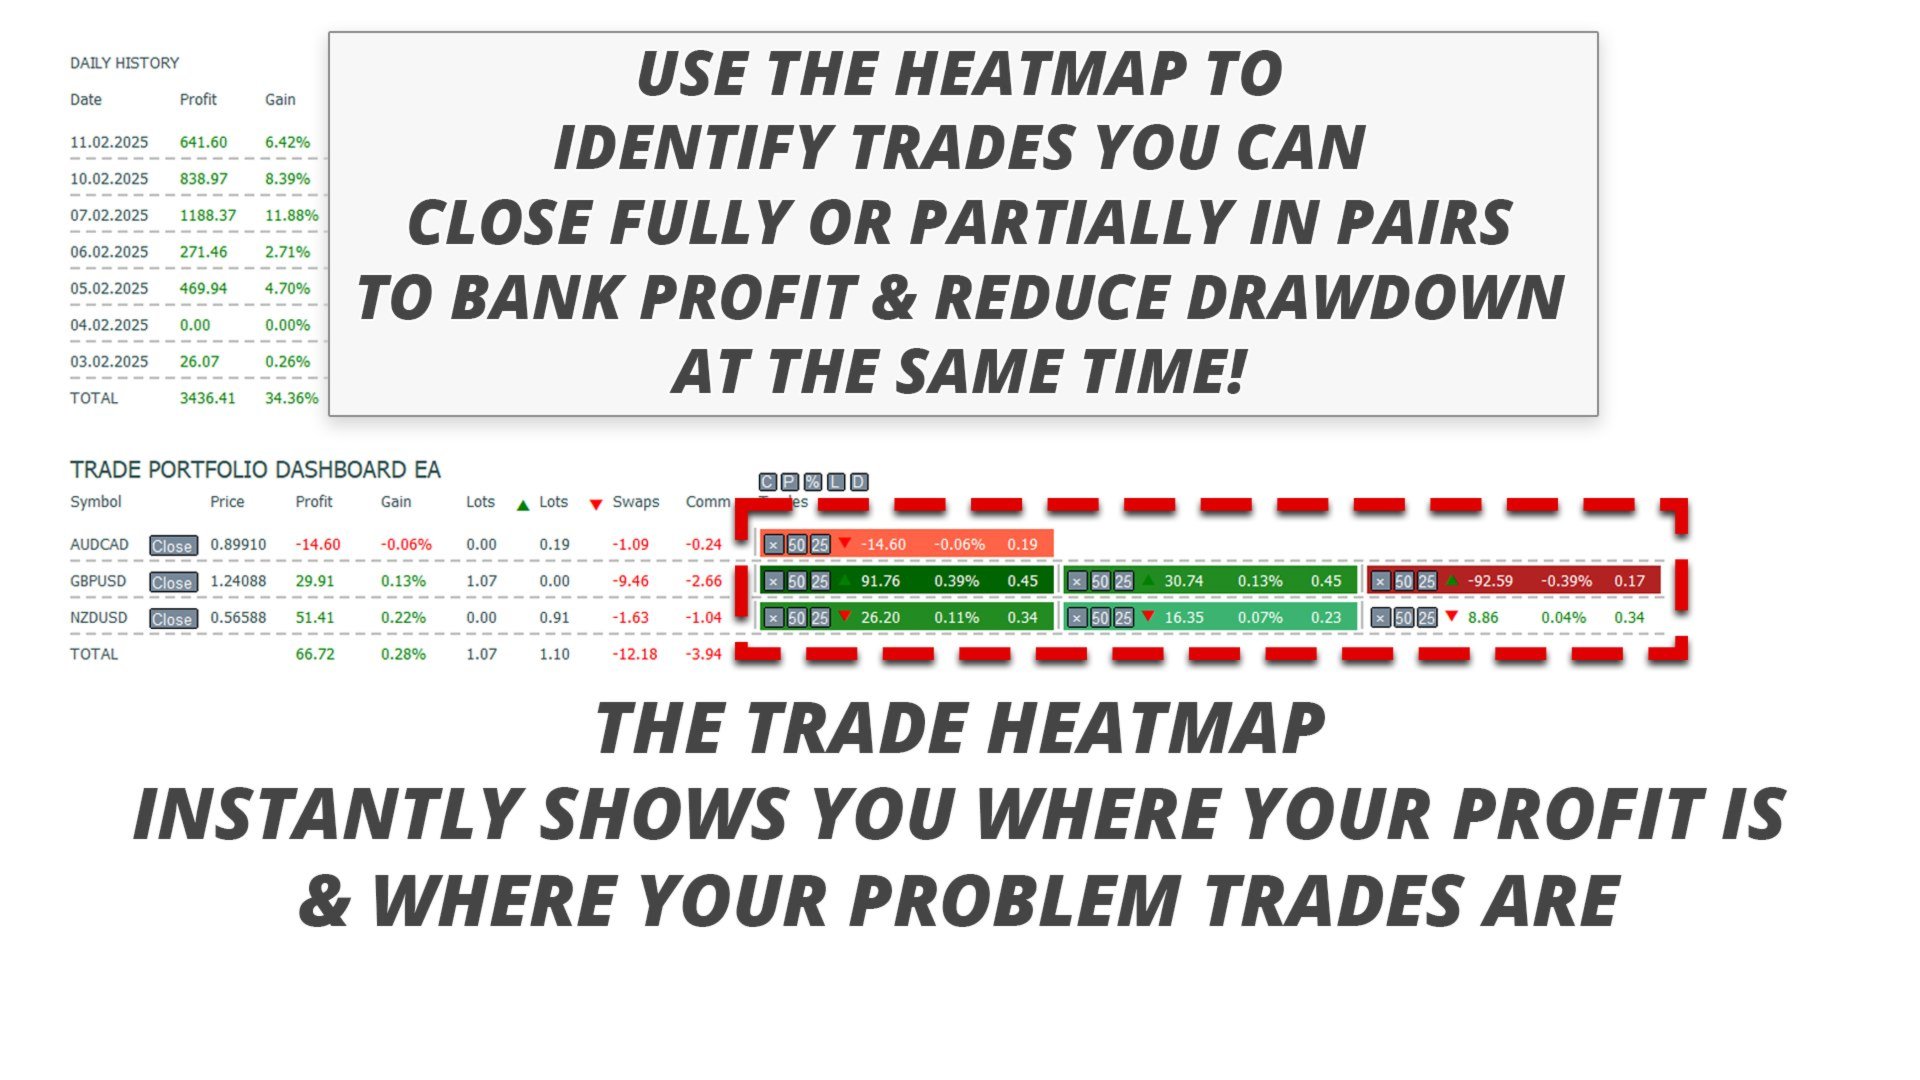
Open Trade Heatmap
The trade heatmap is a visual tool that is specifically designed for traders that use position trading or swing trading strategies, using dollar cost averaging to scale in and out of trades. You can quickly identify individual trades in your portfolio that can be banked, along with trades in drawdown that you can close out partial size in. This will gain an overall profit, while reducing your drawdown at the same time. Simply use the close full or partial buttons to instantly make money and reduce risk.
Quickly Identify Drawdown Control Opportunities
The drawdown control toggle, "D button", will highlight all trades in drawdown in your portfolio that are above the average price on each traded symbol. This is done by adding a rectangle around the individual trades on all symbols, so you can see which ones you want to focus on first. This allows you to instantly see which trades you can close out in full or partially to improve your overall portfolio and reduce risk. Closing out trades that improve your average price, and bring the currenct price closer to your average allows you to exit positions on symbols faster. This reduces the speed of drawdown if positions push further against you.
Fully Configurable
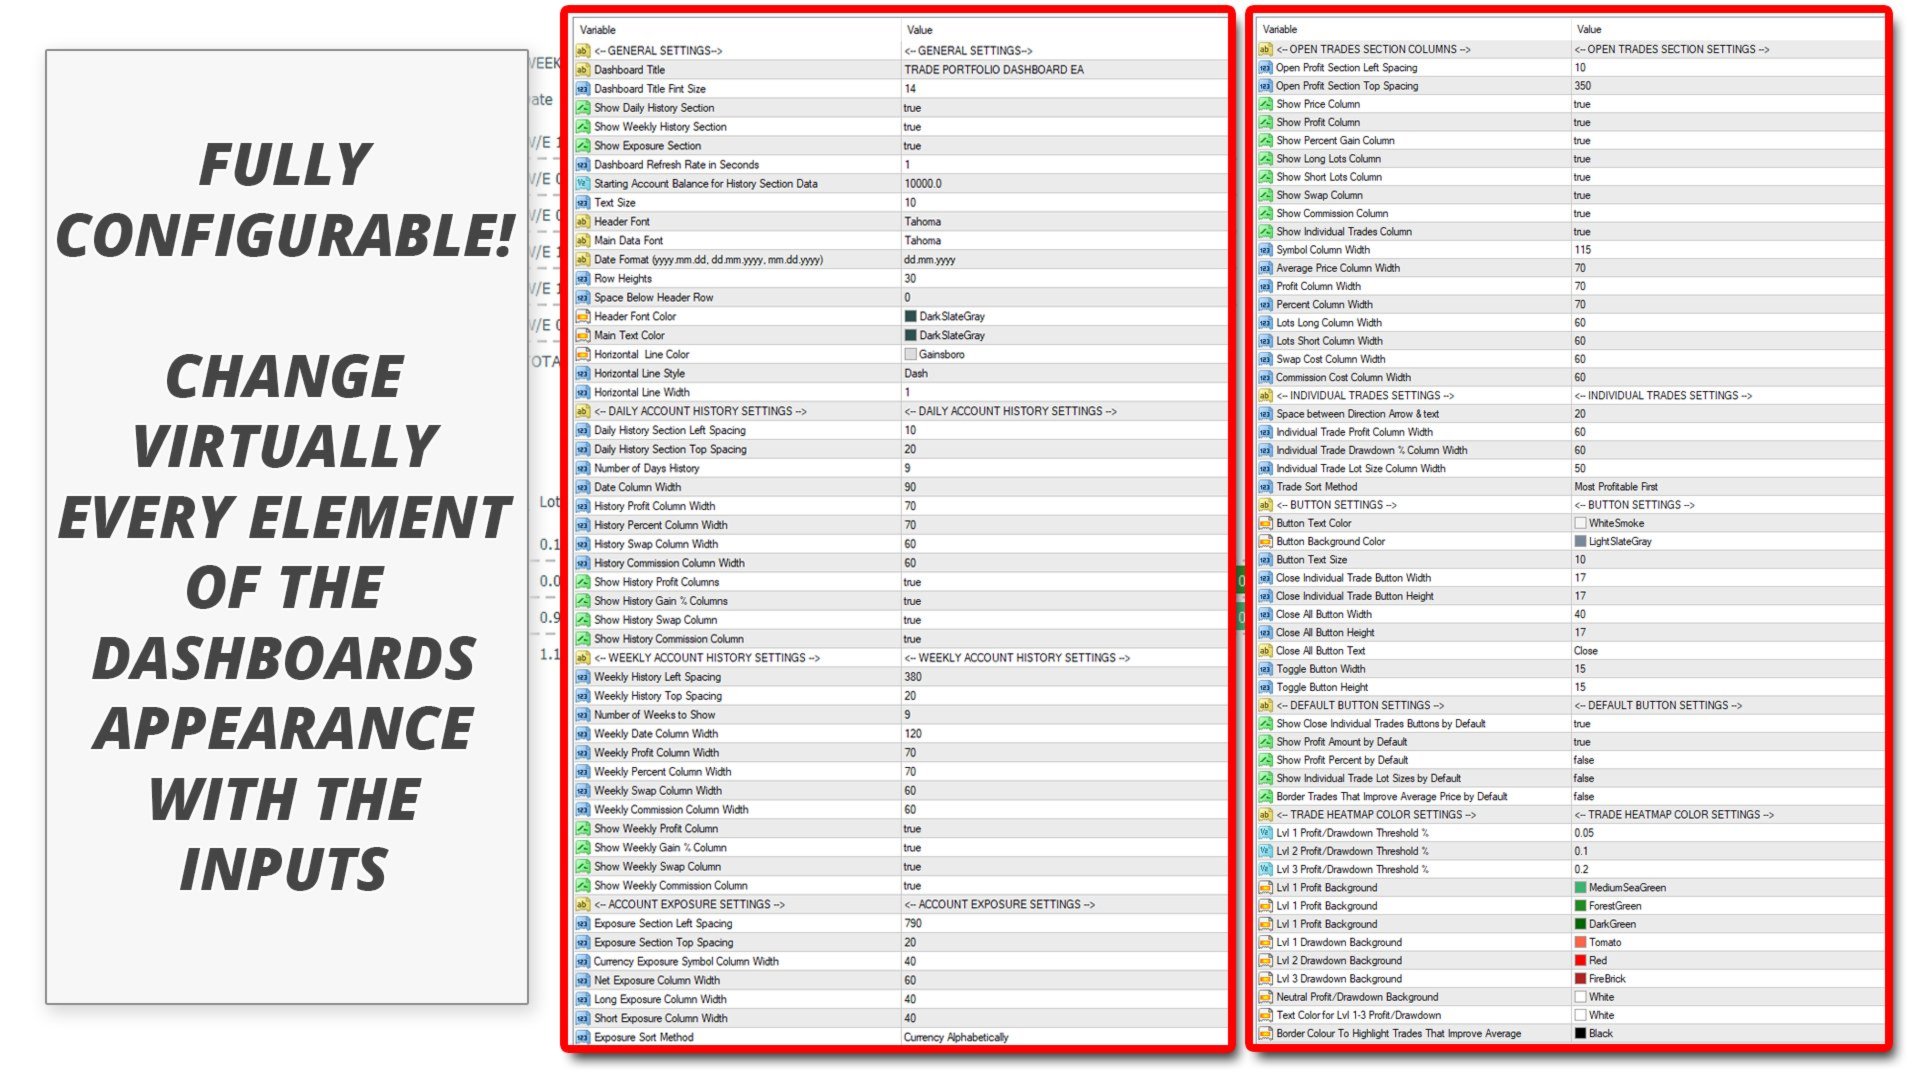
The heatmap colours and all aspects of the dashboard are configurable, so you can hide and show individual sections, or columns within sections, to suit your preference and colour scheme. The individual trades on the heatmap can be toggled to show different data depending on your preference right from the dashboard without going into the inputs in the EA.
***** NEW IN VERSION 5 *****
Auto Close Trade Pairs
Overview
Auto Close Trade Pairs is an intelligent position management system that automatically pairs profitable trades with losing trades to lock in profits while strategically reducing exposure on losing positions. Instead of simply closing all trades when you hit a profit target, this feature allows you to take profits AND simultaneously reduce (not eliminate) your losing positions, giving them room to recover while still banking gains.
How It Works - The Logic Flow
Step 1: Identify a Profitable Trade
The system continuously monitors all open positions looking for trades that meet your profit target:
- The trade must be in profit (positive P&L including swap and commission)
- Must meet either the Money Target (e.g., $50+) OR Percent Target (e.g., 0.25% of balance)
- If either threshold is met, this trade becomes a candidate for pairing
Step 2: Find a Suitable Losing Trade to Pair
Once a profitable trade is found, the EA searches for losing trades that meet ALL of these criteria:
Filter 1: Minimum Drawdown Threshold
- The losing trade must have significant drawdown, not just be slightly in the red
- Must meet either Min Loss Amount (e.g., -$50) OR Min Loss Percent (e.g., 0.25% of balance)
- This prevents wasting your profitable trade on closing out positions with minimal drawdown
Filter 2: Minimum Trade Count on Symbol
- The symbol must have a minimum number of open trades (e.g., 3 or more)
- This ensures you're not closing your last position on a symbol prematurely
- Gives your strategy room to work with multiple entries
Filter 3: Scope Selection
- Same Symbol Only: Pairs with losing trades on the same symbol as the winner
- Any Symbol: Can pair with any losing trade regardless of symbol
- Helps maintain balance in your portfolio based on your strategy
Filter 4: Improves Average Price (CRITICAL)
- The losing trade must be one that, if closed, would IMPROVE the average entry price of remaining positions
- For BUY trades: Only closes trades opened ABOVE the current average (worst entries)
- For SELL trades: Only closes trades opened BELOW the current average (worst entries)
- This is the "smart reduction" logic - you're trimming the fat, not the lean
Filter 5: Selection Priority
- Largest Loss First: Closes the trade with the biggest dollar loss (most risk)
- Largest Lot Size First: Closes the trade with the most volume (most exposure)
- Allows you to prioritize based on your risk management preference









































User didn't leave any comment to the rating