
Universal Oscillator with a GUI

Contents
- Introduction
- Analyzing the Problem
- A Set of Parameters
- Plan
- Creating a Base Class of the Indicator
- Child Classes of 'Calculate'
- Child Classes of Indicators
- Creating a Universal Oscillator (beginning)
- Graphical Interface Creation Plan
- The Form Class
- Controls on the Form
- Completing the Universal Oscillator
- Conclusion
- Attachments
Introduction
An appropriate indicator for a trading system is usually selected after a thorough monitoring of various indicators with various parameters on a chart. If you test every indicator by dragging it from the Navigator window and by opening the indicator properties window each time in order to change its parameter, the process would take too much time. There is a way to speed up this process.
It includes creation of a graphical interface that is accessible straight from the chart, which enables users to quickly change indicator parameters and immediately see the new result. A fast switch of indicators can be implemented by combining various indicators into one common indicator with a graphical interface.
Analyzing the Problem
The task of creating a universal indicator is not particularly difficult. It requires a bit of object-oriented programming: a base class and a lot of child classes of the same type.
The parameters of each specific indicator will be passed to the child class constructor. In this case, when creating an object, MetaEditor will open a prompt with a list of parameters that will greatly facilitate the development process (Fig. 1)

Fig. 1. A hint with the constructor parameters when creating an object
The main difficulty would arise in the practical use of such an indicator. Different oscillators have different sets of external parameters. If we prepared separate parameters for each oscillator and use different prefixes for them, we would be able to use the indicator manually, but it would not be suitable for use in the iCustom() or IndicatorCreate() function due to a large number of parameters. The number of passed parameters is limited to 256 for IndicatorCreate() and to 64 for iCustom(). This value includes common parameters such as the symbol and indicator name, so the actual number of available parameters is even less than that. We can also use a small universal set of parameters, but the indicator will be inconvenient to use in this case: we will need to check the reference in order to know what parameters are used for a specific indicator.
A graphical interface can solve this problem: its dialog box can feature specific controls that correspond to the selected indicator. We should also provide the possibility to call the indicator using iCustom() or IndicatorCreate(), therefore the indicator properties window will have a small universal set of external parameters.
A Set of Parameters
Let us define the required minimum set of external parameters. Check the list of oscillators in the terminal: Main Menu - Insert - Indicators - Oscillators, add them to a table.
Table 1. All oscillators of the terminal
| Function | Name | Buffers | Parameters |
|---|---|---|---|
| iATR | Average True Range | 1. line | 1. int ma_period — averaging period |
| iBearsPower | Bears Power | 1. histogram | 1. int ma_period — averaging period |
| iBullsPower | Bulls Power | 1. line | 1. int ma_period — averaging period |
| iCCI | Commodity Channel Index | 1. line | 1. int ma_period — averaging period 2. ENUM_APPLIED_PRICE applied_price — price type |
| iChaikin | Chaikin Oscillator | 1. line | 1. int fast_ma_period — fast period 2. int slow_ma_period — slow period 3. ENUM_MA_METHOD ma_method — smoothing type 4. ENUM_APPLIED_VOLUME applied_volume — volume used |
| iDeMarker | DeMarker | 1. line | 1. int ma_period — averaging period |
| iForce | Force Index | 1. line | 1. int ma_period — averaging period 2. ENUM_MA_METHOD ma_method — smoothing type 3. ENUM_APPLIED_VOLUME applied_volume — type of volume used for calculations |
| iMomentum | Momentum | 1. line | 1. int mom_period — averaging period 2. ENUM_APPLIED_PRICE applied_price — price type |
| iMACD | Moving Averages Convergence-Divergence | 1. histogram 2. line | 1. int fast_ema_period — fast MA period 2. int slow_ema_period — slow MA period 3. int signal_period — difference averaging period 4. ENUM_APPLIED_PRICE applied_price — price type |
| iOsMA | Moving Average of Oscillator (MACD histogram) | 1. histogram | 1. int fast_ema_period — fast MA period 2. int slow_ema_period — slow MA period 3. int signal_period — difference averaging period 4. ENUM_APPLIED_PRICE applied_price — price type |
| iRSI | Relative Strength Index | 1. line | 1. int ma_period — averaging period 2. ENUM_APPLIED_PRICE applied_price — price type |
| iRVI | Relative Vigor Index | 1. line 2. line | 1. int ma_period — averaging period |
| iStochastic | Stochastic Oscillator | 1. line 2. line | 1. int Kperiod — number of bars for calculation 2. int Dperiod — primary smoothing period 3. int slowing — final smoothing 4. ENUM_MA_METHOD ma_method — smoothing type 5. ENUM_STO_PRICE price_field — Stochastic calculation method |
| iTriX | Triple Exponential Moving Averages Oscillator | 1. line | 1. int ma_period — averaging period 2. ENUM_APPLIED_PRICE applied_price — price type |
| iWPR | Williams' Percent Range | 1. line | 1. int calc_period — averaging period |
Based on the Parameters column, we create a list of all types of parameters and determine their maximum number.
Table 2. The types and number of parameters
| Type | Number |
|---|---|
| int | 3 |
| ENUM_APPLIED_PRICE | 1 |
| ENUM_MA_METHOD | 1 |
| ENUM_APPLIED_VOLUME | 1 |
| ENUM_STO_PRICE | 1 |
Plan
The greater the number of smaller independent tasks a large common task can be broken down to, the easier and more convenient would be its implementation. Therefore, our work will consist of three stages:
- Creating classes for a universal oscillator and creating this oscillator without a GUI.
- Creating classes for GUI.
- Combining the universal oscillator and the graphical interface.
One of the important points to which you should pay attention includes the default settings. We should provide the possibility to configure the indicator parameters both using the graphical interface and from the properties window (for maximum versatility of the universal indicator). When configuring parameters in the properties window, which includes a small set of universal parameters, we need to ensure that all parameters with default settings could generally provide the natural appearance of the indicators.
Consider the default values of different oscillators. For example, Stochastic has periods of 5, 3, 3 (the first parameter is greater than the second one), while MACD uses 12, 26, 9 (the first parameter is smaller than the second one). The first parameter of MACD means the period of the mast moving average, and the second one is the period of the slow MA; so the first parameter must be smaller than the second one. The same ratio of the first and second parameters is good for Chaikin Oscillator (which also uses the fast and slow MA periods). This ratio is not so important for Stochastic, and it will correspond to price movement with any values. If we set the first parameter larger than the second one for MACD, the indicator will be directed opposite to price movement (we need to keep this in mind when setting default parameters).
When using the graphical interface, the indicator should start operation with a normal set of default parameters: MACD with periods 12, 26, 9, Stochastic with periods 5, 3, 3, etc. In addition, it is desirable to enable new selected indicator to start operation either with default parameters or with the same parameters of the previous indicator. For example, we analyze RSI and CCI, and we want to see changes in the lines of different indicators that use the same parameters. So we should provide this possibility when implementing classes.
Creating a Base Class of the Indicator
Let us create a new folder 'UniOsc' in the Include folder. All the additional indicator files will be located in this new folder. The set of used oscillators is defined in table 1. Let's create a corresponding enumeration for selecting the oscillator type. We might need to use the enumeration somewhere else in addition to the indicator file, therefore we will add it to a separate file UniOscDefines.mqh (in folder 'UniOsc'):
OscUni_ATR,
OscUni_BearsPower,
OscUni_BullsPower,
OscUni_CCI,
OscUni_Chaikin,
OscUni_DeMarker,
OscUni_Force,
OscUni_Momentum,
OscUni_MACD,
OscUni_OsMA,
OscUni_RSI,
OscUni_RVI,
OscUni_Stochastic,
OscUni_TriX,
OscUni_WPR
};
Nothing else will be added to this file.
Let's create "CUniOsc.mqh" for the indicator file and write the COscUni class template to it:
protected:
public:
};
The 'protected' section is determined in the template, because some of the class members need to be protected but should still be accessible for child classes (members of 'private' section are protected but are not available to child classes).
The main method of the base class is the method corresponding to the OnCalculate() function of the indicator, let's call it Calculate(). The first two parameters of the method correspond to the appropriate parameters of OnCalculate(): rates_total (the total number of bars) and prew_calculate (the number of calculated bars). There is no need to pass data arrays to the Calculate() method, because data of another indicator are used. But we need to pass two indicator buffers, which will be filled with data. Even when using indicators with one buffer, we will need to control the second buffer, so in any case two indicator buffers will be passed to the Calculate() method. The code of Calculate() will depend on the type of oscillator used: either it will have one indicator buffer or two. So, the Calculate() method will be virtual:
const int prev_calculated,
double & buffer0[],
double & buffer1[]
){
return(rates_total);
}
When loading different indicators, we will need a variable for storing the indicator handle. We declare it in the protected section.
In addition, we will need some more variables for various buffer display properties. These properties will be determined when loading each individual indicator, i.e. values of these variables will be set in child classes:
int m_bufferscnt; // the number of used buffers
string m_name; // indicator name
string m_label1; // the name of buffer 1
string m_label2; // the name of buffer 2
int m_drawtype1; // drawing type of buffer 1
int m_drawtype2; // drawing type of buffer 2
string m_help; // a tip on indicator parameters
int m_digits; // the number of decimal places in the indicator values
int m_levels_total; // the number of levels
double m_level_value[]; // an array for the level values
We need to check if the indicator has been successfully loaded, so we need an appropriate method for checking the indicator handle:
return(m_handle!=INVALID_HANDLE);
}
If we change the oscillator via the graphical interface, we need to determine whether the indicator is completely calculated. This can be done using the BarsCalculated() function, the call of which requires an indicator handle. So, we add a method to get a handle:
return(m_handle);
}
In the class constructor we need to initialize the handle, to check it in the destructor and to call IndicatorRelease() if needed:
m_handle=INVALID_HANDLE;
}
void ~COscUni(){
if(m_handle!=INVALID_HANDLE){
IndicatorRelease(m_handle);
}
}
Let's provide access to the rest of variables that determine the display of various indicators, and create methods for receiving their values:
return(m_name);
}
int BuffersCount(){ // the number of oscillator buffers
return(m_bufferscnt);
}
string Label1(){ // the name of the first buffer
return(m_label1);
}
string Label2(){ // the name of the second buffer
return(m_label2);
}
int DrawType1(){ // the drawing type of the first buffer
return(m_drawtype1);
}
int DrawType2(){ // the drawing type of the second buffer
return(m_drawtype2);
}
string Help(){ // a hint on the use of parameters
return(m_help);
}
int Digits(){ // the number of decimal places in the indicator values
return(m_digits);
}
int LevelsTotal(){ // the number of indicator levels
return(m_levels_total);
}
double LevelValue(int index){ // getting the value of level with the specified index
return(m_level_value[index]);
}
All these methods return a value corresponding to the variable, and the values of the variables will be assigned in the child classes of oscillators.
Child Classes of 'Calculate'
Let us create two child classes: for indicators with one buffer and for indicators with two buffers. For indicators with one buffer:
public:
void COscUni_Calculate1(){
m_bufferscnt=1;
}
virtual int Calculate( const int rates_total,
const int prev_calculated,
double & buffer0[],
double & buffer1[]
){
int cnt,start;
if(prev_calculated==0){
cnt=rates_total;
start=0;
}
else{
cnt=rates_total-prev_calculated+1;
start=prev_calculated-1;
}
if(CopyBuffer(m_handle,0,0,cnt,buffer0)<=0){
return(0);
}
for(int i=start;i<rates_total;i++){
buffer1[i]=EMPTY_VALUE;
}
return(rates_total);
}
};
Let's consider this class. The class has the COscUni_Calculate1 constructor, the number of buffers (in this case 1) is set in the constructor. The number of buffer elements to copy (variable 'cnt') and the index of the bar starting from which we need to clear the second buffer (variable 'start') are calculated in the Calculate() method, depending on the values of rates_total and prev_calculate. If data copying fails (when calling CopyBuffer()) 0 is returned from the method in order to perform all calculations from the very beginning on the next tick. At the end of the method rates_total is returned.
A child class for indicators with two buffers:
public:
void COscUni_Calculate2(){
m_bufferscnt=2;
}
virtual int Calculate( const int rates_total,
const int prev_calculated,
double & buffer0[],
double & buffer1[]
){
int cnt;
if(prev_calculated==0){
cnt=rates_total;
}
else{
cnt=rates_total-prev_calculated+1;
}
if(CopyBuffer(m_handle,0,0,cnt,buffer0)<=0){
return(0);
}
if(CopyBuffer(m_handle,1,0,cnt,buffer1)<=0){
return(0);
}
return(rates_total);
}
};
This class is even easier than that for single-buffer indicators. The number of elements to copy (variable 'cnt') is calculated at the beginning of the Calculate() method, and the buffers are copied.
Child Classes of Indicators
Now we create child classes for the oscillators. These will be child classes of COscUni_Calculate1 or of COscUni_Calculate2. All these classes will have only one constructor. Parameters corresponding to the appropriate oscillator and a couple of additional parameters will be passed to each class constructor. Additional parameters will determine whether to use the values of the parameters passed to the constructor or to set the default values (the 'use_default' variable). The second parameter keep_previous determines whether to set the default values to all the indicator parameters or only to those that has not yet been used.
The first indicator on the list is ATR, let's start writing a child class for it. First we take the class template:
public:
void COscUni_ATR(bool use_default,bool keep_previous,int & ma_period){
}
};
Note that the ma_period parameter is passed by reference, in order to provide access to the parameters values in the universal oscillator, when setting default parameters to an indicator.
Writing code in the constructor:
if(keep_previous){
if(ma_period==-1)ma_period=14;
}
else{
ma_period=14;
}
}
If use_default=true, a default value is set in this part of code. If keep_previous=true, a default value is only set if the resulting parameter is -1, i.e. it has not been used before that. Therefore, during the initialization of the universal oscillator, we will need to assign the value of -1 to all parameters.
Now let us analyze the most important line of code in the child class constructor, which includes indicator loading:
And a few lines that set display parameters:
m_label1="ATR"; // buffer name
m_drawtype1=DRAW_LINE; // drawing type
m_help=StringFormat("ma_period - Period1(%i)",ma_period); // a tip
m_digits=_Digits+1; // the number of decimal places in the indicator values
m_levels_total=0; // the number of levels
Let us analyze some of the steps of child class creation for a more complex indicator MACD. The creation principle is the same, though more code is required in this case. Therefore, let us consider fragments. Setting the default parameters:
if(keep_previous){
if(fast_ema_period==-1)fast_ema_period=12;
if(slow_ema_period==-1)slow_ema_period=26;
if(signal_period==-1)signal_period=9;
if(applied_price==-1)applied_price=PRICE_CLOSE;
}
else{
fast_ema_period=12;
slow_ema_period=26;
signal_period=9;
applied_price=PRICE_CLOSE;
}
}
Setting the display parameters:
Period(),
fast_ema_period,
slow_ema_period,
signal_period,
(ENUM_APPLIED_PRICE)applied_price);
m_name=StringFormat( "iMACD(%i,%i,%i,%s)",
fast_ema_period,
slow_ema_period,
signal_period,
EnumToString((ENUM_APPLIED_PRICE)applied_price));
m_label1="Main";
m_label2="Signal";
m_drawtype1=DRAW_HISTOGRAM;
m_drawtype2=DRAW_LINE;
m_help=StringFormat( "fast_ema_period - Period1(%i), "+
"slow_ema_period - Period2(%i), "+
"signal_period - Period3(%i), "+
"applied_price - Price(%s)",
fast_ema_period,
slow_ema_period,
signal_period,
EnumToString((ENUM_APPLIED_PRICE)applied_price));
m_digits=_Digits+1;
Constructor parameters:
bool keep_previous,
int & fast_ema_period,
int & slow_ema_period,
int & signal_period,
long & applied_price
){
Please note that the applied_price variable for the standard ENUM_APPLIED_PRICE enumeration is declared as long. This provides the possibility to set the variable to -1 in order to indicate that the parameter has not yet been used.
Let's look at another fragment from the class for the RSI indicator, it includes the part of the code in which levels are set:
ArrayResize(m_level_value,3);
m_level_value[0]=30;
m_level_value[1]=50;
m_level_value[2]=70;
It sets the number of levels, changes the array size and fills it with the level values.
I will not describe here how other oscillator classes were created. The article attachment contains a ready class with the full set of oscillators (CUniOsc.mqh file).
Creating a Universal Oscillator (beginning)
The oscillator classes are ready, and we can create a universal oscillator, though without a graphical oscillator yet.
Create a new indicator, e.g. "iUniOsc". Then, in the indicator creation wizard select function type OnCalculate(...open,high,low,close), create one external variable (so it will be easier to find place for external variables) and two buffers of the Line type.
Before the external variable, we need to connect files with enumerations and oscillator classes:
#include <UniOsc/CUniOsc.mqh>
Create an external variable for selecting the oscillator type:
Variables UseDefault and KeepPrevious:
input bool KeepPrev = true;
Universal variables for the parameters of oscillators:
input int Period2 = 14;
input int Period3 = 14;
input ENUM_MA_METHOD MaMethod = MODE_EMA;
input ENUM_APPLIED_PRICE Price = PRICE_CLOSE;
input ENUM_APPLIED_VOLUME Volume = VOLUME_TICK;
input ENUM_STO_PRICE StPrice = STO_LOWHIGH;
Some indicators draw one line, the others draw two. The first buffer is sometimes displayed as a line, and sometimes it is drawn as a histogram. We will make our lines bright, and the histogram will be gray, so we create three variables of colors:
input color ColorLine2 = clrRed;
input color ColorHisto = clrGray;
Since we are going to create a GUI, it will be possible to change the oscillator type and parameters without restarting the indicator, so let's create duplicates of the Type variable and variables for indicator parameters:
int _Period2;
int _Period3;
long _MaMethod;
long _Price;
long _Volume;
long _StPrice;
EOscUnyType _Type;
Let us declare a pointer variable for the universal oscillator object:
And some more variables to declare:
string ShortName;
These variables will be used for generating the name of the indicator displayed in the upper left corner of the sub-window.
Now we'll add the code at the end of the OnInit() function, but first we need to prepare for that. We also prepare oscillator parameters in accordance with the values of UseDefault and KeepPrevious (and assign a value to the _Type variable), write it as a function to make the code conveniently structured:
_Type=Type;
if(UseDefault && KeepPrev){
_Period1=-1;
_Period2=-1;
_Period3=-1;
_MaMethod=-1;
_Volume=-1;
_Price=-1;
_StPrice=-1;
}
else{
_Period1=Period1;
_Period2=Period2;
_Period3=Period3;
_MaMethod=MaMethod;
_Volume=Volume;
_Price=Price;
_StPrice=StPrice;
}
}
If UseDefault and KeepPrevious are used, the -1 value is assigned to all variables, so that we could see in the class constructor the variables that we have not used, and only set them to the default values. Values from the properties window will be assigned in all other cases. These values will be used as is, or they will be substituted with the default values when an object is created.
After preparing parameters, load the selected oscillator. The loading code is also written as a function:
switch(_Type){
case OscUni_ATR:
osc=new COscUni_ATR(UseDefault,KeepPrev,_Period1);
break;
case OscUni_BearsPower:
osc=new COscUni_BearsPower(UseDefault,KeepPrev,_Period1);
break;
case OscUni_BullsPower:
osc=new COscUni_BullsPower(UseDefault,KeepPrev,_Period1);
break;
...
}
}
After loading the oscillator, we need to check the handle:
Alert("indicator loading error "+osc.Name());
return(INIT_FAILED);
}
If successfully loaded, set the drawing styles received through appropriate object methods. This code part is also implemented as a function:
// Setting styles
if(osc.BuffersCount()==2){
PlotIndexSetInteger(0,PLOT_DRAW_TYPE,osc.DrawType1());
PlotIndexSetInteger(1,PLOT_DRAW_TYPE,osc.DrawType2());
PlotIndexSetInteger(0,PLOT_SHOW_DATA,true);
PlotIndexSetInteger(1,PLOT_SHOW_DATA,true);
PlotIndexSetString(0,PLOT_LABEL,osc.Label1());
PlotIndexSetString(1,PLOT_LABEL,osc.Label2());
if(osc.DrawType1()==DRAW_HISTOGRAM){
PlotIndexSetInteger(0,PLOT_LINE_COLOR,ColorHisto);
}
else{
PlotIndexSetInteger(0,PLOT_LINE_COLOR,ColorLine1);
}
PlotIndexSetInteger(1,PLOT_LINE_COLOR,ColorLine2);
}
else{
PlotIndexSetInteger(0,PLOT_DRAW_TYPE,osc.DrawType1());
PlotIndexSetInteger(1,PLOT_DRAW_TYPE,DRAW_NONE);
PlotIndexSetInteger(0,PLOT_SHOW_DATA,true);
PlotIndexSetInteger(1,PLOT_SHOW_DATA,false);
PlotIndexSetString(0,PLOT_LABEL,osc.Label1());
PlotIndexSetString(1,PLOT_LABEL,"");
if(osc.DrawType1()==DRAW_HISTOGRAM){
PlotIndexSetInteger(0,PLOT_LINE_COLOR,ColorHisto);
}
else{
PlotIndexSetInteger(0,PLOT_LINE_COLOR,ColorLine1);
}
}
// Setting digits
IndicatorSetInteger(INDICATOR_DIGITS,osc.Digits());
// Setting levels
int levels=osc.LevelsTotal();
IndicatorSetInteger(INDICATOR_LEVELS,levels);
for(int i=0;i<levels;i++){
IndicatorSetDouble(INDICATOR_LEVELVALUE,i,osc.LevelValue(i));
}
}
First one of the two available style setting options is implemented depending on the number of buffers of the oscillator. If the first buffer is a histogram, the appropriate buffer type is set. Then the number of decimal places in the indicator values is set. Levels are set at the end.
Here is the full code of OnInit(), which includes calls of the newly created functions:
SetIndexBuffer(0,Label1Buffer,INDICATOR_DATA);
SetIndexBuffer(1,Label2Buffer,INDICATOR_DATA);
PrepareParameters();
LoadOscillator();
if(!osc.CheckHandle()){
Alert("Error while loading indicator "+osc.Name());
return(INIT_FAILED);
}
SetStyles();
Print("Parameters matching: "+osc.Help());
ShortName=ProgName+": "+osc.Name();
IndicatorSetString(INDICATOR_SHORTNAME,ShortName);
return(INIT_SUCCEEDED);
}
Note that Print is called at the end of the function, it contains a hint about the used parameters of the properties windows, and then a short indicator name is set.
Now the first stage of our project for creating a universal oscillator is complete, i.e. we have prepared an indicator using which we can test preciously created classes. Next we create a GUI class.
A ready indicator called iUniOsc is attached to the article (minor amendments will be made to the indicator code later, so it will slightly differ from the one available on the current stage).
Graphical Interface Creation Plan
In order to create a graphical interface, we could use graphical objects including "entry field" for entering numeric values, and a few buttons for enum type parameters (drop down lists). However, this would be a difficult approach. You can find various ready MQL5 libraries for creating a graphical interface. The libraries allow creating standard controls, such as dialog boxes, entry fields with spin boxes, drop-down lists, and more. The terminal includes a set of standard classes for creating panels and dialogs. The "Articles" section features a large series of articles related to the creation of a graphical interface.
A series of three articles (article 1, article 2, article 3) describes a very simple and fast way to create graphical interfaces. In addition to theory, a library is created in these articles. This library allows working with graphical objects and creating a graphical interface. All the above options have their advantages and disadvantages, all of them were taken into account when writing this article. Finally, I chose the last option of the above (the incGUI library).
The MetaTrader 5 terminal is being actively developed and improved, so some controls from this library can be considered obsolete (e.g. scrollbars), but they still can be used. To start using the library, download the attachment of "Custom Graphical Controls. Part 3. Forms for MetaTrader 5", unpack it, save the incGUI_v3.mqh file to the Include folder available in the terminal data directory.
The Form Class
Graphical interface creation will be implemented in a separate file "UniOscGUI.mqh". First we need to include the library:
Compile it. Now, a few warning messages will appear during compilation. The improved compiler reveals these code parts and allows correcting them. The corrected "inc_GUI_v4" file is attached to the article. Instead of IncGUI_v3.mqh we include IncGUI_v4.mqh and UniOscDefines.mqh.
#include <UniOsc/UniOscDefines.mqh>
Let's save a copy of iUniOsc as iUniOscGUI. After that the iUniOsc indicator can be edited by hiding the UseDefault and KeepPrev parameters. They are meaningless in an indicator without a GUI, but we need to set them to false:
bool KeepPrev = false;
After that the iUniOsc indicator is considered to be fully completed.
Let us continue working with the iUniOscGUI indicator. Include the UniOscGUI.mqh file to it. We need to include three files in total:
#include <UniOsc/CUniOsc.mqh>
#include <UniOsc/UniOscGUI.mqh>
After compiling the indicator, you can check the code and immediately see the GUI on a chart. As for now, all the work will be performed in the UniOscGUI.mqh file.
The GUI will be represented as a dialog box; a drop-down list of oscillators will be available in its upper part, below which a set of appropriate controls for each oscillator will be located. So, in the file we will place a class for creating a form, and a group of classes (parent and several child classes) for creating controls on this form.
Let's start with the form. The detailed step-by-step description of the form creation process is available in the article "Custom Graphical Controls. Part 3. Forms for MetaTrader 5". Here we go through this process for our specific task.
1. First we need to copy the CFormTemplate class from the IncGUI_v4.mqh file to UniOscGUI.mqh, and rename it to CUniOscForm.
2. Setting the properties. This is done in the MainProperties() method of the CUniOscForm class. Let's set the following properties:
m_Name = "UniOscForm";
m_Width = FORM_WIDTH;
m_Height = 150;
m_Type = 0;
m_Caption = "UniOsc";
m_Movable = true;
m_Resizable = true;
m_CloseButton = true;
}
Note that the m_Heigh variable is set to FORM_WIDTH. At the final stage, we will need to find the right size and shape for the controls, so let's add the following constants at the beginning of the file:
#define SPIN_BOX_WIDTH 110 // spin box width
#define COMBO_BOX_WIDTH 110 // the width of the drop-down list
After that the form can be applied in the indicator. Then we declare in the indicator an external variable UseGUI with the default value 'true' (at the beginning of the Properties window):
After the external variables, we need to declare a pointer to the form class:
If UseGUI = true, we create an object in the indicator's OnInit() and prepare it for use by calling methods for setting additional properties:
frm.Init(); // initialization
frm.SetSubWindow(0); // creating a subwindow in which the form is displayed
frm.SetPos(10,30); // setting the initial position of the form
frm.Show(); // enabling the visibility of the form
In the OnDeinit() function, we hide the form and delete the object:
frm.Hide();
delete(frm);
}
Call the Event() method from the OnChartEvent() function:
const long &lparam,
const double &dparam,
const string &sparam)
{
frm.Event(id,lparam,dparam,sparam);
}
Now, if you attach the indicator to a chart, you will see the form (Fig. 2).
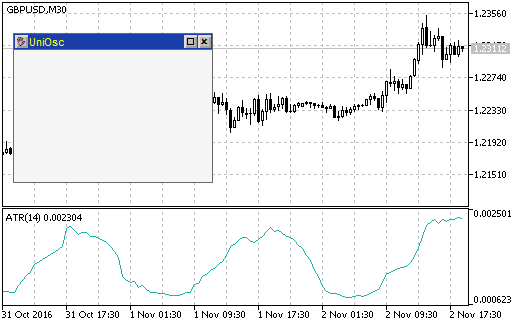
Fig. 2. A form created by the CUniOscForm after running the iUniOscGUI indicator on a chart
All the buttons on the form are effective: the form can be moved by using a button in the upper left corner (click the button and point at a new location by a click), it can also be minimized (a button with a rectangle in the upper right corner). A click on a cross button closes the form, in this case the indicator should be deleted from the chart. The indicator can be removed using the ChartIndicatorDelete() function. In order to apply this function, you need to know the index of the indicator subwindow, which you can find out by using the ChartWindowFind() function, which in turn requires the short name of the indicator.
When clicking on the form closing button, the Event() method returns 1. Check the return value and remove the indicator from the chart if necessary:
ChartIndicatorDelete(0,win,ShortName); // removing the indicator
ChartRedraw(); // accelerating chart redrawing
Now, a click on the cross closes the form and additionally removes the indicator from the chart.
Let's add the main control to the form: a drop-down list for selecting an oscillator type. It can be created using the CComBox class. We add some code to the CUniOscForm class. Declaring a variable for the object:
Then call the Init() method of the class in the OnInitEvent() method:
The name of the control is passed to the method (a prefix for the names of graphical objects), the width of the control and a label.
Calling the Show() method in OnShowEvent():
Here the coordinates of the control position within the form are specified (with an indent of 10 pixels from the upper left corner of the form space).
Calling the Hide() method in OnHideEvent():
The event of change of selection in the main list should be followed by loading of another indicator. This can be conveniently done in the indicator file, therefor the Event() method of the list of oscillators should be called from the OnChartEvent() function of the indicator rather than from the EventsHandler() method of the form. Also the event should be handled:
if(me==1){
Alert(frm.m_cmb_main.SelectedText());
}
Standard parameters of the chart event are passed to the method, and when the method returns the value of 1, a message box is opened.
The list should be filled with options. Several approaches are possible:
- everything can be done in the OnInitEvent() method of the form
- an additional method can be added to the form class, and then it can be called from the indicator after the Init() method
- the list methods can be accessed directly from the indicator.
Let us use the third option, which requires less code. First, we need to create an array of the oscillator types in the indicator:
OscUni_ATR,
OscUni_BearsPower,
OscUni_BullsPower,
OscUni_CCI,
OscUni_Chaikin,
OscUni_DeMarker,
OscUni_Force,
OscUni_Momentum,
OscUni_MACD,
OscUni_OsMA,
OscUni_RSI,
OscUni_RVI,
OscUni_Stochastic,
OscUni_TriX,
OscUni_WPR
};
Then, after the call of frm.Init() in the indicator, we fill in the list and set a default option:
frm.m_cmb_main.AddItem(EnumToString(osctype[i]));
}
frm.m_cmb_main.SetSelectedIndex(0);
A check can be performed on this stage. A drop-down list with the types of oscillators should be displayed on the form. When the selection is changed, a box with an appropriate text should be displayed (Fig. 3):
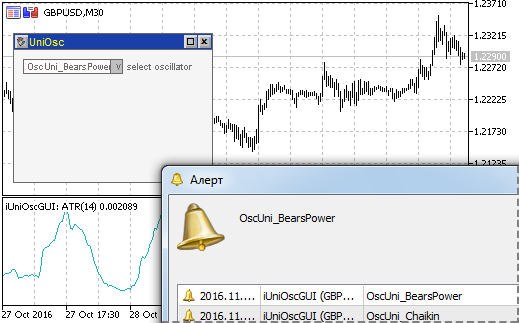
Fig. 3. A form with a list of oscillators and a message box after selecting another item
Controls on the Form
At the beginning of the article, we defined the maximum number of external parameters by type (three parameters for entering numeric values and four parameters for standard enumerations). In order to enter numeric values, we will use the CSpinInputBox elements (an entry field with buttons) of the incGUI library. The CComBox element (a drop-down list) will be used for standard enumerations.
At the beginning of the file with the graphical interface class we declare arrays with the values of standard enumerations:
PRICE_OPEN,
PRICE_HIGH,
PRICE_LOW,
PRICE_MEDIAN,
PRICE_TYPICAL,
PRICE_WEIGHTED
};
ENUM_MA_METHOD e_method[]={MODE_SMA,MODE_EMA,MODE_SMMA,MODE_LWMA};
ENUM_APPLIED_VOLUME e_volume[]={VOLUME_TICK,VOLUME_REAL};
ENUM_STO_PRICE e_sto_price[]={STO_LOWHIGH,STO_CLOSECLOSE};
Now, in the form class, we declare variables for controls (three variables for CSpinInputBox and four for CComBox):
CSpinInputBox m_value2;
CSpinInputBox m_value3;
CComBox m_price;
CComBox m_method;
CComBox m_volume
CComBox m_sto_price;
In the OnInitEvent() method of the form class, we initialize drop-down lists (CComBox class objects) and fill them using previously declared arrays:
m_method.Init("method",COMBO_BOX_WIDTH," method");
m_volume.Init("volume",COMBO_BOX_WIDTH," volume");
m_sto_price.Init("sto_price",COMBO_BOX_WIDTH," price");
for(int i=0;i<ArraySize(e_price);i++){
m_price.AddItem(EnumToString(e_price[i]));
}
for(int i=0;i<ArraySize(e_method);i++){
m_method.AddItem(EnumToString(e_method[i]));
}
for(int i=0;i<ArraySize(e_volume);i++){
m_volume.AddItem(EnumToString(e_volume[i]));
}
for(int i=0;i<ArraySize(e_sto_price);i++){
m_sto_price.AddItem(EnumToString(e_sto_price[i]));
}
Since the sets of controls displayed for different indicators are different, let us create classes (base and child classes) to form the sets. The base class is CUniOscControls, here is its template:
protected:
CSpinInputBox * m_value1;
CSpinInputBox * m_value2;
CSpinInputBox * m_value3;
CComBox * m_price;
CComBox * m_method;
CComBox * m_volume;
CComBox * m_sto_price;
public:
void SetPointers(CSpinInputBox & value1,
CSpinInputBox & value2,
CSpinInputBox & value3,
CComBox & price,
CComBox & method,
CComBox & volume,
CComBox & sto_price){
...
}
void Hide(){
...
}
int Event(int id,long lparam,double dparam,string sparam){
...
return(0);
}
virtual void InitControls(){
}
virtual void Show(int x,int y){
}
virtual int FormHeight(){
return(0);
}
};
The SetPointers() method will be called at the beginning of use of this class object. Pointers to all controls will be passed to this method and will be saved in individual class variables within the method:
CSpinInputBox & value2,
CSpinInputBox & value3,
CComBox & price,
CComBox & method,
CComBox & volume,
CComBox & sto_price){
m_value1=GetPointer(value1);
m_value2=GetPointer(value2);
m_value3=GetPointer(value3);
m_price=GetPointer(price);
m_method=GetPointer(method);
m_volume=GetPointer(volume);
m_sto_price=GetPointer(sto_price);
}
These pointers are used for hiding all controls (the Hide() method):
m_value1.Hide();
m_value2.Hide();
m_value3.Hide();
m_price.Hide();
m_method.Hide();
m_volume.Hide();
m_sto_price.Hide();
}
Their events need to be handled (the Event() method):
int e1=m_value1.Event(id,lparam,dparam,sparam);
int e2=m_value2.Event(id,lparam,dparam,sparam);
int e3=m_value3.Event(id,lparam,dparam,sparam);
int e4=m_price.Event(id,lparam,dparam,sparam);
int e5=m_method.Event(id,lparam,dparam,sparam);
int e6=m_volume.Event(id,lparam,dparam,sparam);
int e7=m_sto_price.Event(id,lparam,dparam,sparam);
if(e1!=0 || e2!=0 || e3!=0 || e4!=0 || e5!=0 ||e6!=0 || e7!=0){
return(1);
}
return(0);
}
Other methods are virtual, every oscillator will have its specific code in child classes. The Show() method will be used for displaying controls. The FormHeight() will return the height of the form. The InitControls() method only allows changing text displayed next to the controls (Fig. 4).
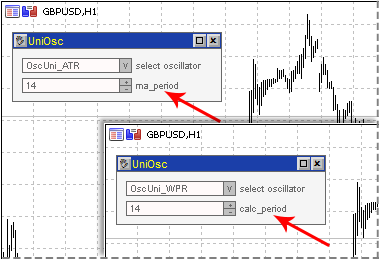
Fig. 4. Different text displayed next to controls for different oscillators
Actually, controls from the incGUI library only have the minimum required sets of methods, but do not have methods for changing the text. Classes are designed so that you could change the text if necessary, by calling the Init() method. Since the text is changed using Init(), the method is called InitControls().
Consider some child classes. The simplest of them is for the ATR indicator, the most difficult one is for Stochastic.
For ATR:
void InitControls(){
m_value1.Init("value1",SPIN_BOX_WIDTH,1," ma_period");
}
void Show(int x,int y){
m_value1.Show(x,y);
}
int FormHeight(){
return(70);
}
};
The Init() method of a control is called in InitControls(). Its most important feature (why we had to prepare this virtual method) is passing the text "ma_period" that will be displayed next to the control.
In the Show() method of the form class, the Show() method of the CUniOscControls class is called. During its call the coordinates of the upper left corner of the first (upper) control unit are specified. The FormHeight() method simply returns a value.
For Stochastic:
void InitControls(){
m_value1.Init("value1",SPIN_BOX_WIDTH,1," Kperiod");
m_value2.Init("value2",SPIN_BOX_WIDTH,1," Dperiod");
m_value3.Init("value3",SPIN_BOX_WIDTH,1," slowing");
}
void Show(int x,int y){
m_value1.Show(x,y);
m_value2.Show(x,y+20);
m_value3.Show(x,y+40);
m_method.Show(x,y+60);
m_sto_price.Show(x,y+80);
}
int FormHeight(){
return(150);
}
};
Coordinates of every control are calculated in Show(), the rest should be clear.
Finally, let us view how controls are added to the form. In the form class, declare a pointer to the class with control elements:
Deleting the object in the destructor:
delete(m_controls);
}
Adding the SetType() method in the form class. The method will be called for specifying the type of the used oscillator.
if(CheckPointer(m_controls)==POINTER_DYNAMIC){
delete(m_controls);
m_controls=NULL;
}
switch((EOscUniType)type){
case OscUni_ATR:
m_controls=new CUniOscControls_ATR();
break;
case OscUni_BearsPower:
m_controls=new CUniOscControls_BearsPower();
break;
case OscUni_BullsPower:
m_controls=new CUniOscControls_BullsPower();
break;
case OscUni_CCI:
m_controls=new CUniOscControls_CCI();
break;
case OscUni_Chaikin:
m_controls=new CUniOscControls_Chaikin();
break;
case OscUni_DeMarker:
m_controls=new CUniOscControls_DeMarker();
break;
case OscUni_Force:
m_controls=new CUniOscControls_Force();
break;
case OscUni_Momentum:
m_controls=new CUniOscControls_Momentum();
break;
case OscUni_MACD:
m_controls=new CUniOscControls_MACD();
break;
case OscUni_OsMA:
m_controls=new CUniOscControls_OsMA();
break;
case OscUni_RSI:
m_controls=new CUniOscControls_RSI();
break;
case OscUni_RVI:
m_controls=new CUniOscControls_RVI();
break;
case OscUni_Stochastic:
m_controls=new CUniOscControls_Stochastic();
break;
case OscUni_TriX:
m_controls=new CUniOscControls_TriX();
break;
case OscUni_WPR:
m_controls=new CUniOscControls_WPR();
break;
}
m_controls.SetPointers(m_value1,m_value2,m_value3,m_price,m_method,m_volume,m_sto_price);
m_controls.InitControls();
m_value1.SetReadOnly(false);
m_value2.SetReadOnly(false);
m_value3.SetReadOnly(false);
m_value1.SetMinValue(1);
m_value2.SetMinValue(1);
m_value3.SetMinValue(1);
m_Height=m_controls.FormHeight();
}
If there was an object, it should be deleted at the beginning of the method. Then, an appropriate class is loaded depending on the type of the indicator. At the end SetPointers() and InitControls() are called. Then some additional actions are performed: for the SpinBox objects, a possibility to enter a value from the keyboard is enabled (call of the ReadOnly() method), minimal values are set (call of SetMinValue()), and a new value of the form height is set for m_Height.
Appropriate methods of the m_controls objects should be called in OnShowEvent() and OnHideEvent():
m_cmb_main.Show(aLeft+10,aTop+10);
m_controls.Show(aLeft+10,aTop+10+20);
}
void OnHideEvent(){
m_cmb_main.Hide();
m_controls.Hide();
}
Now we need to "activate" the events of the m_controls object. Add Event() call to the OnChartEvent() function:
Add the call of the SetType() method of the form to the indicator's OnInit() (after the call of SetSelectedIndex()):
After loading the oscillator, the values of its parameters should be displayed on the form, so we add the SetValues() method to the form class:
int period2,
int period3,
long method,
long price,
long volume,
long sto_price
){
m_value1.SetValue(period1);
m_value2.SetValue(period2);
m_value3.SetValue(period3);
for(int i=0;i<ArraySize(e_price);i++){
if(price==e_price[i]){
m_price.SetSelectedIndex(i);
break;
}
}
for(int i=0;i<ArraySize(e_method);i++){
if(method==e_method[i]){
m_method.SetSelectedIndex(i);
break;
}
}
for(int i=0;i<ArraySize(e_volume);i++){
if(volume==e_volume[i]){
m_volume.SetSelectedIndex(i);
break;
}
}
for(int i=0;i<ArraySize(e_sto_price);i++){
if(sto_price==e_sto_price[i]){
m_sto_price.SetSelectedIndex(i);
break;
}
}
}
In the SetValues() method, values to the SpinBox controls are set as is, while for enumerations an index in arrays with the enumeration values is searched. Call the SetValues() method after the call of SetType():
At this point, we can assume that the GUI is fully complete (Fig. 5), but the indicator still does not know how to react to it.
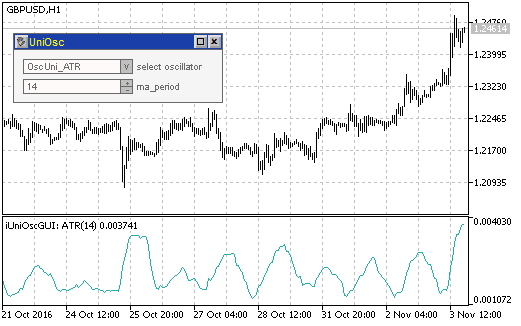
Fig. 5. A window with controls for the ATR indicator
Completing the Universal Oscillator
Oscillator classes are ready, GUI classes are also ready, so now we need to combine them.
At this stage the OnChatEvent() function should look like this:
const long &lparam,
const double &dparam,
const string &sparam)
{
int e=frm.Event(id,lparam,dparam,sparam);
if(e==1){
int win=ChartWindowFind(0,ShortName);
ChartIndicatorDelete(0,win,ShortName);
ChartRedraw();
}
int me=frm.m_cmb_main.Event(id,lparam,dparam,sparam);
int ce=frm.m_controls.Event(id,lparam,dparam,sparam);
}
We need to handle the event of indicator change (variable me), as well as change of parameters (variable ce).
Changing the indicator:
// indicator reload
_Type=osctype[frm.m_cmb_main.SelectedIndex()]; // new type
delete(osc); // deleting the old object
LoadOscillator(); // loading a new indicator
if(!osc.CheckHandle()){
Alert("Error while loading indicator "+osc.Name());
}
SetStyles(); // setting styles
// Setting the short name
ShortName=ProgName+": "+osc.Name();
IndicatorSetString(INDICATOR_SHORTNAME,ShortName);
// Refreshing the form
frm.SetType(osctype[frm.m_cmb_main.SelectedIndex()]); // setting the type
frm.SetValues(_Period1,_Period2,_Period3,_MaMethod,_Price,_Volume,_StPrice); // setting values
frm.Refresh(); // refreshing the form
// Indicator recalculation
EventSetMillisecondTimer(100);
}
Let's examine the code in details. When selecting an indicator from the main list, the Event() method returns 1. In this case a new type value is assigned to the _Type variable, the old object is deleted, a new object is loaded, styles and the short name are set. The form appearance is refreshed at the end of indicator loading: the type and parameters are set, and the Refresh() method is called in order to change the form appearance in accordance with the new parameters. A timer is started at the end (it will be mentioned later).
Let us consider part of code where parameters are changed:
if((int)frm.m_value1.Value()>0){
_Period1=(int)frm.m_value1.Value();
}
if((int)frm.m_value2.Value()>0){
_Period2=(int)frm.m_value2.Value();
}
if((int)frm.m_value3.Value()>0){
_Period3=(int)frm.m_value3.Value();
}
if(frm.m_method.SelectedIndex()!=-1){
_MaMethod=e_method[frm.m_method.SelectedIndex()];
}
if(frm.m_price.SelectedIndex()!=-1){
_Price=e_price[frm.m_price.SelectedIndex()];
}
if(frm.m_volume.SelectedIndex()!=-1){
_Volume=e_volume[frm.m_volume.SelectedIndex()];
}
if(frm.m_sto_price.SelectedIndex()!=-1){
_StPrice=e_sto_price[frm.m_sto_price.SelectedIndex()];
}
delete(osc);
LoadOscillator();
if(!osc.CheckHandle()){
Alert("Error while loading indicator "+osc.Name());
}
ShortName=ProgName+": "+osc.Name();
IndicatorSetString(INDICATOR_SHORTNAME,ShortName);
EventSetMillisecondTimer(100);
}
When parameters are changed, the Event() method of the controls class returns 1. In this case, new values are assigned to all variables after their verification. The values of SpinBox controls must be greater than zero, while the values of drop-down lists must not be equal to -1. Further code is similar to choosing another indicator.
About the timer. Indicator calculation requires some time. Therefore, a timer is started, and in its function BarsCalculated() is used to periodically check if the indicator is ready. If the return value is greater than zero, it means that the indicator calculation has completed, and the Calculate() method of the osc object is called:
if(BarsCalculated(osc.Handle())>0){
if(osc.Calculate(Bars(Symbol(),Period()),0,Label1Buffer,Label2Buffer)!=0){
ChartRedraw();
EventKillTimer();
}
}
}
The number of bars is passed to Calculate() as the first parameter, and the second parameter is 0, which enables full indicator recalculation. After that the chart is redrawn (ChartRedaraw()) and the timer is turned off.
Now the indicator should respond to the GUI. It means the indicator is almost ready.
Add a little finishing touch: let us provide the possibility for the indicator to work without a GUI. To do this, add an external variable UseGUI:
The part of the OnInit() code connected with the form creation will only be performed if the UseGUI variable is enabled:
frm=new CUniOscForm();
frm.Init();
int ind=0;
for(int i=0;i<ArraySize(osctype);i++){
frm.m_cmb_main.AddItem(EnumToString(osctype[i]));
if(osctype[i]==_Type){
ind=i;
}
}
frm.m_cmb_main.SetSelectedIndex(ind);
frm.SetType(_Type);
frm.SetValues(_Period1,_Period2,_Period3,_MaMethod,_Price,_Volume,_StPrice);
frm.SetSubWindow(0);
frm.SetPos(10,30);
frm.Show();
}
And another small finishing touch. The incGUI library supports change of color schemes for controls. Let us use this possibility.
Add the following code after external parameters:
DefaultScheme=0,
YellowBrownScheme=1,
BlueScheme=2,
GreenScheme=3,
YellowBlackScheme=4,
LimeBlackScheme=5,
AquaBlackScheme=6
};
input eColorScheme ColorScheme=DefaultScheme;
This code adds to the indicator properties window a drop-down list for selecting a color scheme. Add a line at the beginning of the OnInit() function:
Now the iUniOscGUI indicator is fully complete, and the graphical interface can have different colors (Fig. 6).
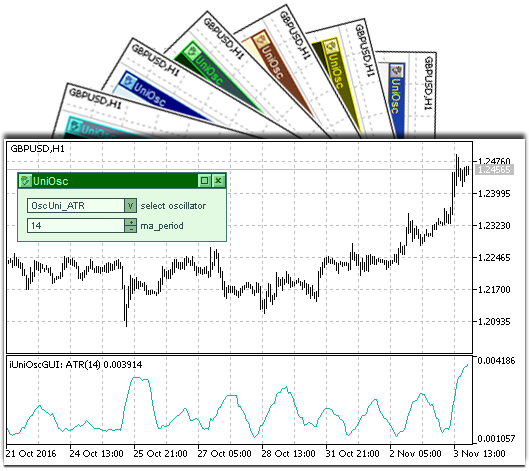
Fig. 6. Different GUI color schemes of the iUniOscGUI indicator
Conclusion
The resulting indicator allows not only comparing values from various indicators, but it also allows you to observe the influence of external parameters on the indicator. The indicator appearance instantly changes once you change its parameters. This effect cannot be obtained when using the properties window, and therefore you cannot get the same impressions of the influence of indicator parameters on its appearance.
Attachments
- UniOscDefines.mqh: the file contains an enumeration of oscillator types.
- CUniOsc.mqh: universal oscillator classes.
- iUniOsc.mq5: the universal oscillator without a GUI.
- UniOscGUI.mqh: classes for creating a graphical interface of the oscillator.
- iUniOscGUI.mq5: the universal oscillator with a GUI.
- IncGUI_v4.mqh: a library for working with graphical objects and creating a graphical interface. There was confusion with the library versions. There were two files of version 3 with the same names: in the article and in the CodeBase (with the updated class for the creation of tables CTable). In addition to corrections, the IncGUI_v4 file contains a new class for creating tables (available in the CodeBase).
Translated from Russian by MetaQuotes Ltd.
Original article: https://www.mql5.com/ru/articles/2788
Warning: All rights to these materials are reserved by MetaQuotes Ltd. Copying or reprinting of these materials in whole or in part is prohibited.
This article was written by a user of the site and reflects their personal views. MetaQuotes Ltd is not responsible for the accuracy of the information presented, nor for any consequences resulting from the use of the solutions, strategies or recommendations described.

 Graphical Interfaces X: Text Edit box, Picture Slider and simple controls (build 5)
 Universal ZigZag
 Statistical distributions in the form of histograms without indicator buffers and arrays
- Free trading apps
- Over 8,000 signals for copying
- Economic news for exploring financial markets
You agree to website policy and terms of use
New article A Universal Oscillator with a GUI has been published:
Author: Dmitry Fedoseev
It is better to read the indicators on the chart and change their parameters. And not only oscillators.
While I was try to use the indicator that uses a Divergence indicator which uses this indicator for getting oscillator data I came across these lines of indicator handles
My expectation was these lines would look like this:
Can you help me clarify this doubt. How to use the indicator on a Multi-Symbol EA