Fibonacci Bollinger Bands
- Indicators
- Version: 1.6

1. Introduction
Fibonacci Bollinger Bands (FBB) is a technical analysis indicator that combines three tools: Bollinger Bands, Fibonacci Ratios, and the Volume-Weighted Moving Average (VWMA).
The purpose of this indicator is to provide a multi-dimensional view of the market by helping to identify:
- Dynamic support and resistance zones.
- The general market trend.
- Volatility levels and potential accumulation phases (squeezes).
- Price breakouts from the main channel.
2. Core Components
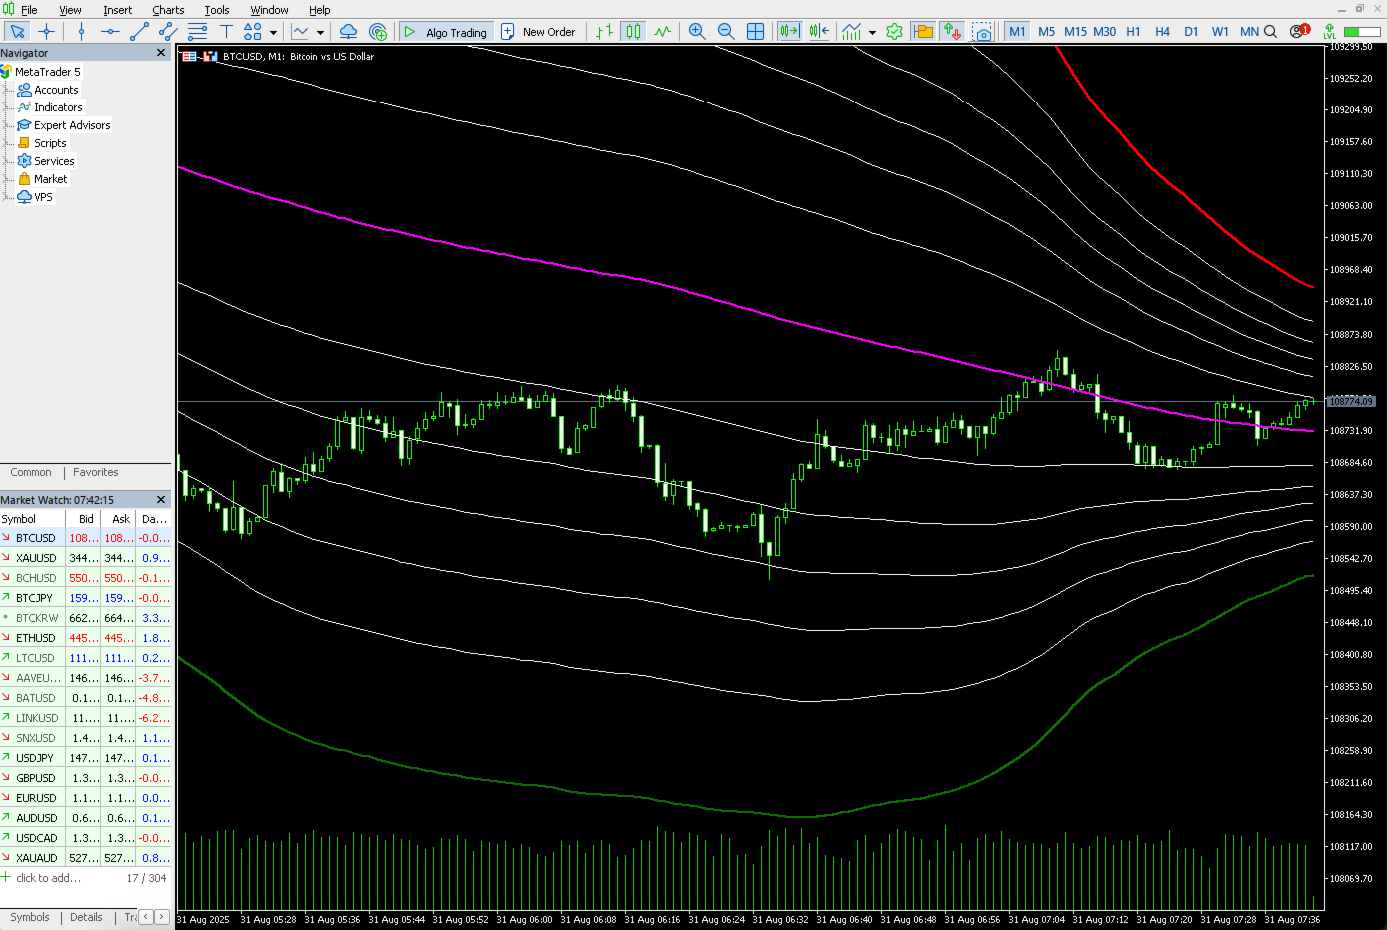
The indicator consists of a system of price channels drawn directly on the chart.
- Basis Line (Purple): This is the central line of the system, calculated using a 200-period VWMA. It acts as a baseline for trend assessment. Price consistently above this line may suggest an uptrend, while price consistently below may suggest a downtrend.
- Fibonacci Bands: Includes 12 price bands (6 upper, 6 lower) calculated based on the price's standard deviation and key Fibonacci ratios (0.236, 0.382, 0.5, 0.618, 0.764, 1.0).
- Outer Bands (Red & Green): These are the primary bands, corresponding to the 1.0 standard deviation level. They form the main price channel.
- Inner Bands (White): These are intermediate levels that can function as potential support or resistance.
3. How to Interpret the Indicator
3.1. Trend and Dynamic Levels
- Trend Assessment: The purple basis line serves as a reference for the long-term trend. A sloping line with price staying on one side can indicate a strong trend. In contrast, a flat line with price crossing it frequently may indicate a sideways or ranging market.
- Dynamic Support and Resistance:
- In an uptrend, the lower bands and the basis line can be interpreted as potential dynamic support zones.
- In a downtrend, the upper bands and the basis line can be interpreted as potential dynamic resistance zones.
3.2. Volatility Analysis
- High Volatility: The bands expand and move far apart. This indicates an active market with significant price movement.
- Low Volatility (Squeeze): The bands contract and move close together. This represents a period of consolidation, which often precedes a significant price move.
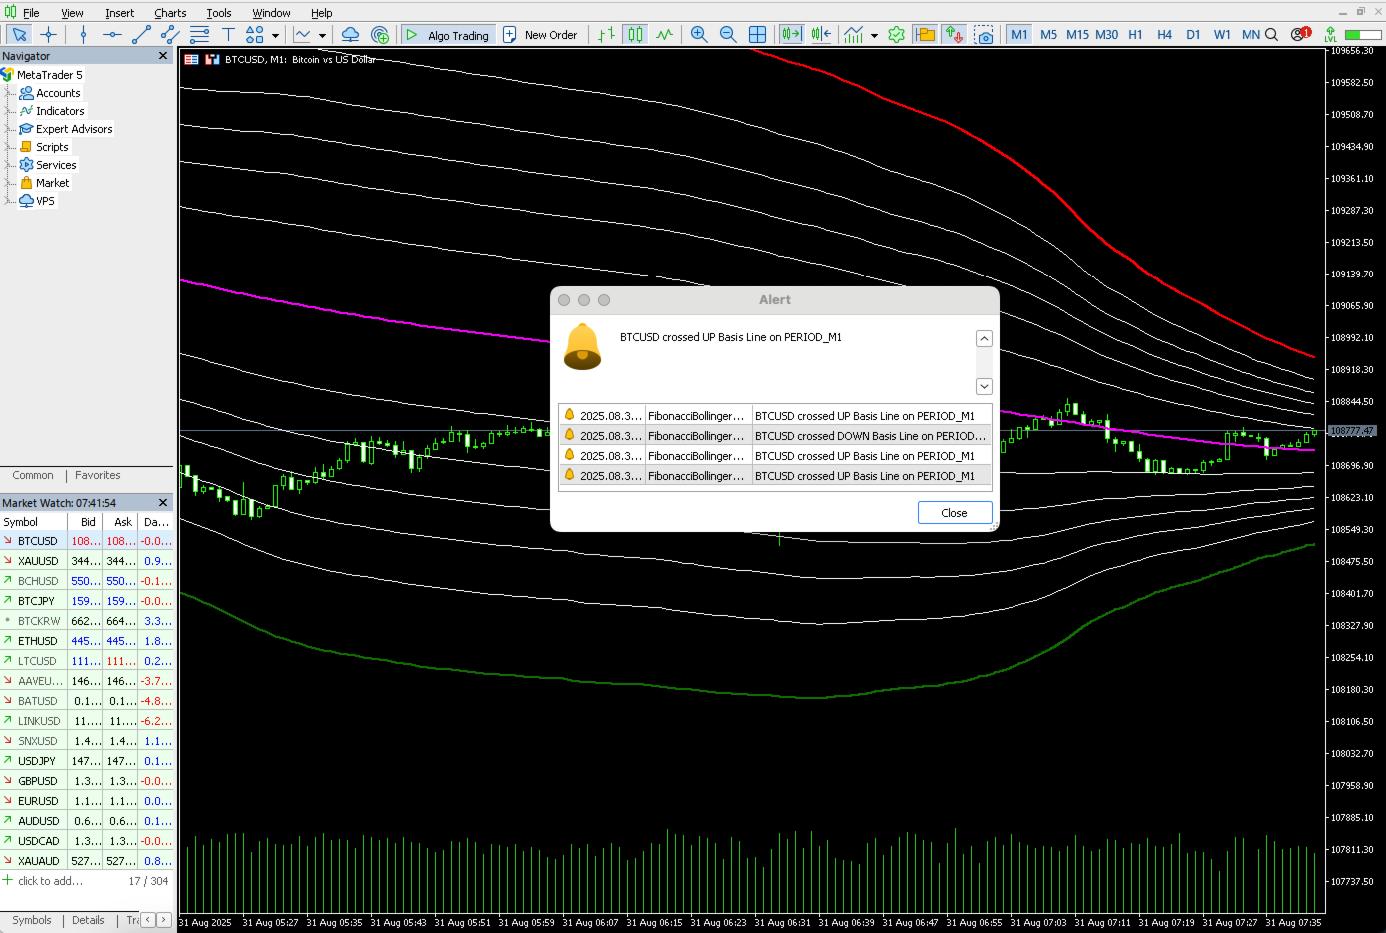
3.3. Breakout Signals (Arrows)
The indicator can display arrows to highlight when the price closes outside of the primary channel. This feature can be enabled or disabled in the settings.
- Blue Arrow (Up): A blue arrow appears below a price candle when its closing price is above the outer upper band (red). This highlights a significant bullish breakout.
- Orange-Red Arrow (Down): An orange-red arrow appears above a price candle when its closing price is below the outer lower band (green). This highlights a significant bearish breakout.
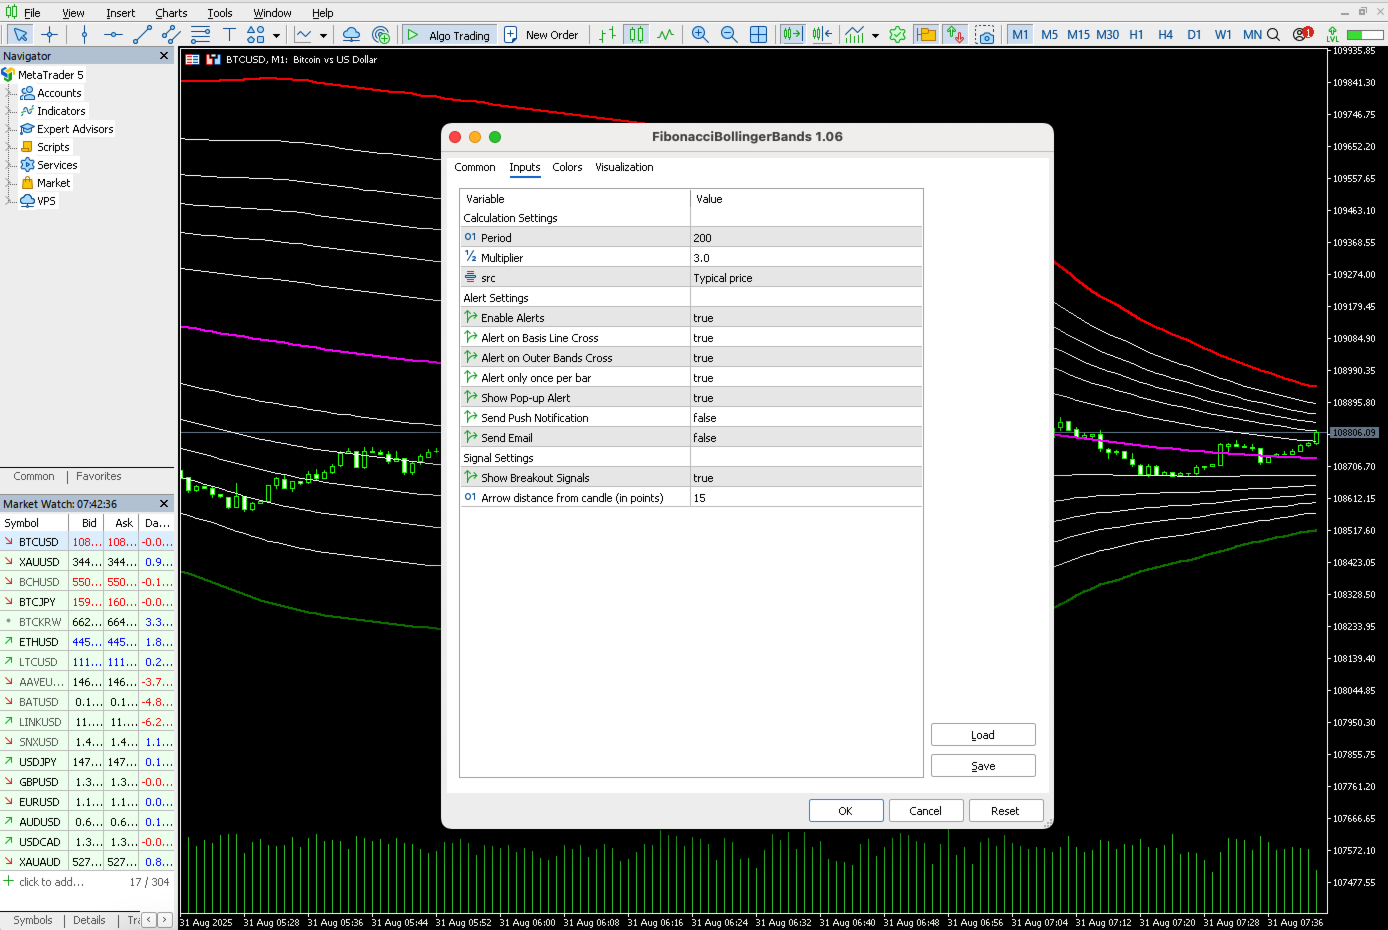
4. Indicator Settings (Inputs)
When adding the indicator to the chart, you can customize the following parameters:
Calculation Settings
- length : The calculation period for the VWMA and standard deviation. Default is 200.
- mult : The multiplier for the standard deviation to draw the bands. Default is 3.0.
- src : The source price used for calculations. Default is PRICE_TYPICAL (average of High, Low, and Close prices).
Alert Settings
- alertEnable : Globally enables or disables all alert features.
- alertOnBasisCross : Enables alerts for when the price crosses the basis line (purple).
- alertOnOuterBandCross : Enables alerts for when the price crosses the outer bands (red/green).
- alertOnNewBarOnly : Alerts only once per new bar.
- alertShowPopup : Displays alerts as a pop-up window.
- alertSendPush : Sends push notifications to the MetaTrader 5 mobile app.
- alertSendEmail : Sends alerts via email.
Signal Settings
- showBreakoutSignals : Enables or disables the display of breakout signal arrows.
- arrowSignalGapPoints : The distance (in points) of the arrow from the signal candle.
Disclaimer: Trading on financial markets involves significant risk. Technical indicators are analytical tools and should not be considered as a trading signal or a guarantee of profit. Past performance is not indicative of future results. Always use risk management and make your own informed decisions.