The View and Controller components for tables in the MQL5 MVC paradigm: Simple controls

Contents
- Introduction
- Controller Component. Refining Base Classes
- Simple Controls
- Auxiliary Classes
- Text Label
- Simple Button
- Two-way Button
- Up Arrow Button
- Down Arrow Button
- Left Arrow Button
- Right Arrow Button
- Checkbox
- Radio Button
- Testing the Result
- Conclusion
Introduction
As part of the development of the Table View control in MVC (Model-View-Controller) paradigm, we created a table model (the Model component) and started creating the View component. At the first stage, a basic object was created, which is the progenitor of all other graphical elements.
Today we will start developing simple controls that will later serve as building blocks for composite UI elements. Each control element will possess functionality for interaction with the user and with other elements. In other words, this essentially corresponds to the functionality of the Controller component.
Since in the MQL language the event model is integrated into objects created using chart events, event handling will be organized in all subsequent controls to implement the connection between the View component and the Controller component. To do this, refine the base class of graphical elements.
Next, create simple controls — a text label and various buttons. Each element will support drawing icons. This will make it possible to create completely different controls from simple buttons. If you look at the string of the tree view, where an icon is on the left and text is on the right, then this seems to be a separate control. But we can easily create such a control by using a regular button as a base. At the same time, it will be possible to adjust the string parameters so that it either reacts by changing the color when the mouse cursor is focused on and clicked, or it is static, but reacts to clicks.
All this can be implemented with just a few configuration lines after creating the object. And from such elements, we will continue to create complex composite controls that are fully interactive and ready to use.
Controller Component. Refining Base Classes
So, in order to implement our plans, we must slightly refine the already implemented classes, macro substitutions, and enumerations. Most of the necessary functionality will be located in the base object of graphical elements. Therefore, it is it that will be mainly refined.
Previously, this class was at MQL5\Scripts\Tables\Controls\Base.mqh.
Today we will write a test indicator, so we want to create a new folder \Tables\Controls\ in the indicator directory \MQ5\Indicators\ and locate the Base.mqh file in it. That's what we'll be working on today.
Further, objects will contain lists of attached controls. Containers can be such objects, for example. In order for these lists to handle files correctly i.e. create objects stored in lists, it is necessary to declare all classes of elements being created in advance. Write a class declaration, new macro substitutions, enumerations, and enumeration constants into Base.mqh file:
//+------------------------------------------------------------------+
//|                                                         Base.mqh |
//|                                  Copyright 2025, MetaQuotes Ltd. |
//|                                             https://www.mql5.com |
//+------------------------------------------------------------------+
#property copyright "Copyright 2025, MetaQuotes Ltd."
#property link      "https://www.mql5.com"

//+------------------------------------------------------------------+
//| Include libraries                                                |
//+------------------------------------------------------------------+
#include <Canvas\Canvas.mqh>              // CCanvas class
#include <Arrays\List.mqh>                // CList class

//--- Forward declaration of control element classes
class    CImagePainter;                   // Image drawing class
class    CLabel;                          // Text label class
class    CButton;                         // Simple button class
class    CButtonTriggered;                // Two-position button class
class    CButtonArrowUp;                  // Up arrow button class
class    CButtonArrowDown;                // Down arrow button class
class    CButtonArrowLeft;                // Left arrow button class
class    CButtonArrowRight;               // Right arrow button class
class    CCheckBox;                       // CheckBox control class
class    CRadioButton;                    // RadioButton control class

//+------------------------------------------------------------------+
//| Macro substitutions                                              |
//+------------------------------------------------------------------+
#define  clrNULL              0x00FFFFFF  // Transparent color for CCanvas
#define  MARKER_START_DATA    -1          // Data start marker in a file
#define  DEF_FONTNAME         "Calibri"   // Default font
#define  DEF_FONTSIZE         10          // Default font size

//+------------------------------------------------------------------+
//| Enumerations                                                     |
//+------------------------------------------------------------------+
enum ENUM_ELEMENT_TYPE                    // Enumeration of graphical element types
  {
   ELEMENT_TYPE_BASE = 0x10000,           // Basic object of graphical elements
   ELEMENT_TYPE_COLOR,                    // Color object
   ELEMENT_TYPE_COLORS_ELEMENT,           // Color object of the graphical object element
   ELEMENT_TYPE_RECTANGLE_AREA,           // Rectangular area of the element
   ELEMENT_TYPE_IMAGE_PAINTER,            // Object for drawing images
   ELEMENT_TYPE_CANVAS_BASE,              // Basic canvas object for graphical elements
   ELEMENT_TYPE_LABEL,                    // Text label
   ELEMENT_TYPE_BUTTON,                   // Simple button
   ELEMENT_TYPE_BUTTON_TRIGGERED,         // Two-position button
   ELEMENT_TYPE_BUTTON_ARROW_UP,          // Up arrow button
   ELEMENT_TYPE_BUTTON_ARROW_DOWN,        // Down arrow button
   ELEMENT_TYPE_BUTTON_ARROW_LEFT,        // Left arrow button
   ELEMENT_TYPE_BUTTON_ARROW_RIGHT,       // Right arrow button
   ELEMENT_TYPE_CHECKBOX,                 // CheckBox control
   ELEMENT_TYPE_RADIOBUTTON,              // RadioButton control
  };

enum ENUM_ELEMENT_STATE                   // Control state
  {
   ELEMENT_STATE_DEF,                     // By default (e.g. button released etc.)
   ELEMENT_STATE_ACT,                     // Activated (e.g. button pressed, etc.)
  };

enum ENUM_COLOR_STATE                     // Enumeration of element state colors
  {
   COLOR_STATE_DEFAULT,                   // Normal state color
   COLOR_STATE_FOCUSED,                   // Color when hovering over an element
   COLOR_STATE_PRESSED,                   // Color when clicking on an element
   COLOR_STATE_BLOCKED,                   // Blocked element color
  };
//+------------------------------------------------------------------+
//| Functions                                                        |
//+------------------------------------------------------------------+
When creating methods for saving and loading objects to/from files, each method has constant repeating strings without changing from method to method:
//--- Check the handle
   if(file_handle==INVALID_HANDLE)
      return false;
//--- Save data start marker - 0xFFFFFFFFFFFFFFFF
   if(::FileWriteLong(file_handle,-1)!=sizeof(long))
      return false;
//--- Save the object type
   if(::FileWriteInteger(file_handle,this.Type(),INT_VALUE)!=INT_VALUE)
      return false;

//--- Save the ID
   if(::FileWriteInteger(file_handle,this.m_id,INT_VALUE)!=INT_VALUE)
      return false;
//--- Save the name
   if(::FileWriteArray(file_handle,this.m_name)!=sizeof(this.m_name))
      return false;
And there are the same methods Description and Print. So, it is reasonable to transfer these strings to load/save methods in the base object. Then they won't have to be written in every new load/save method in every new class where manipulations with files are provided.
Declare these methods in the base object:
public:
//--- Set (1) name and (2) ID
   void              SetName(const string name)                { ::StringToShortArray(name,this.m_name);    }
   void              SetID(const int id)                       { this.m_id=id;                              }
//--- Return (1) name and (2) ID
   string            Name(void)                          const { return ::ShortArrayToString(this.m_name);  }
   int               ID(void)                            const { return this.m_id;                          }

//--- Virtual methods of (1) comparing, (2) saving to file, (3) loading from file, (4) object type
   virtual int       Compare(const CObject *node,const int mode=0) const;
   virtual bool      Save(const int file_handle);
   virtual bool      Load(const int file_handle);
   virtual int       Type(void)                          const { return(ELEMENT_TYPE_BASE); }

//--- (1) Return and (2) display the object description in the journal
   virtual string    Description(void);
   virtual void      Print(void);

//--- Constructor/destructor
                     CBaseObj (void) : m_id(-1) { this.SetName(""); }
                    ~CBaseObj (void) {}
  };
And write their implementation:
//+------------------------------------------------------------------+
//| CBaseObj::Return the object description                          |
//+------------------------------------------------------------------+
string CBaseObj::Description(void)
  {
   string nm=this.Name();
   string name=(nm!="" ? ::StringFormat(" \"%s\"",nm) : nm);
   return ::StringFormat("%s%s ID %d",ElementDescription((ENUM_ELEMENT_TYPE)this.Type()),name,this.ID());
  }
//+------------------------------------------------------------------+
//| CBaseObj::Display the object description in the journal          |
//+------------------------------------------------------------------+
void CBaseObj::Print(void)
  {
   ::Print(this.Description());
  }
//+------------------------------------------------------------------+
//| CBaseObj::Save to file                                           |
//+------------------------------------------------------------------+
bool CBaseObj::Save(const int file_handle)
  {
//--- Check the handle
   if(file_handle==INVALID_HANDLE)
      return false;
//--- Save data start marker - 0xFFFFFFFFFFFFFFFF
   if(::FileWriteLong(file_handle,-1)!=sizeof(long))
      return false;
//--- Save the object type
   if(::FileWriteInteger(file_handle,this.Type(),INT_VALUE)!=INT_VALUE)
      return false;

//--- Save the ID
   if(::FileWriteInteger(file_handle,this.m_id,INT_VALUE)!=INT_VALUE)
      return false;
//--- Save the name
   if(::FileWriteArray(file_handle,this.m_name)!=sizeof(this.m_name))
      return false;

//--- All is successful
   return true;
  }
//+------------------------------------------------------------------+
//| CBaseObj::Load from file                                         |
//+------------------------------------------------------------------+
bool CBaseObj::Load(const int file_handle)
  {
//--- Check the handle
   if(file_handle==INVALID_HANDLE)
      return false;
//--- Load and check the data start marker - 0xFFFFFFFFFFFFFFFF
   if(::FileReadLong(file_handle)!=-1)
      return false;
//--- Load the object type
   if(::FileReadInteger(file_handle,INT_VALUE)!=this.Type())
      return false;

//--- Load the ID
   this.m_id=::FileReadInteger(file_handle,INT_VALUE);
//--- Load the name
   if(::FileReadArray(file_handle,this.m_name)!=sizeof(this.m_name))
      return false;

//--- All is successful
   return true;
  }
Now, for each new class, the Description and Print methods can be declared and implemented only if their logic differs from the logic prescribed in this class.
And in the methods of working with files in derived classes, instead of repeatedly writing the same code lines in each method of each class, we will simply address to the methods of working with files of this base object.
From all subsequent classes of this file (Base.mqh), remove all Print methods — they are already in the base object, and they completely repeat it.
In all methods of working with files, delete such strings:
//+------------------------------------------------------------------+
//| CColor::Save to file                                             |
//+------------------------------------------------------------------+
bool CColor::Save(const int file_handle)
  {
//--- Check the handle
   if(file_handle==INVALID_HANDLE)
      return false;
//--- Save data start marker - 0xFFFFFFFFFFFFFFFF
   if(::FileWriteLong(file_handle,-1)!=sizeof(long))
      return false;
//--- Save the object type
   if(::FileWriteInteger(file_handle,this.Type(),INT_VALUE)!=INT_VALUE)
      return false;

//--- Save the color
   if(::FileWriteInteger(file_handle,this.m_color,INT_VALUE)!=INT_VALUE)
      return false;
//--- Save the ID
   if(::FileWriteInteger(file_handle,this.m_id,INT_VALUE)!=INT_VALUE)
      return false;
//--- Save the name
   if(::FileWriteArray(file_handle,this.m_name)!=sizeof(this.m_name))
      return false;

//--- All is successful
   return true;
  }
Now, instead of these strings, we just have a call of the base class method:
//+------------------------------------------------------------------+
//| CColor::Save to file                                             |
//+------------------------------------------------------------------+
bool CColor::Save(const int file_handle)
  {
//--- Save the parent object data
   if(!CBaseObj::Save(file_handle))
      return false;

//--- Save the color
   if(::FileWriteInteger(file_handle,this.m_color,INT_VALUE)!=INT_VALUE)
      return false;

//--- All is successful
   return true;
  }
Such changes have already been made in all methods of working with files in this file. We will take these changes into account when writing subsequent classes.
In the CColorElement class, replace identical duplicate strings in class constructors.
//+-----------------------------------------------------------------------------+
//| CColorControl::Constructor with setting the transparent colors of the object|
//+-----------------------------------------------------------------------------+
CColorElement::CColorElement(void)
  {
   this.InitColors(clrNULL,clrNULL,clrNULL,clrNULL);
   this.m_default.SetName("Default"); this.m_default.SetID(1);
   this.m_focused.SetName("Focused"); this.m_focused.SetID(2);
   this.m_pressed.SetName("Pressed"); this.m_pressed.SetID(3);
   this.m_blocked.SetName("Blocked"); this.m_blocked.SetID(4);
   this.SetCurrentAs(COLOR_STATE_DEFAULT);
   this.m_current.SetName("Current");
   this.m_current.SetID(0);
  }
using one method Init():
public:
//--- Return a new color
   color             NewColor(color base_color, int shift_red, int shift_green, int shift_blue);

//--- Class initialization
   void              Init(void);

//--- Initialize colors for different states
...
Its implementation:
//+------------------------------------------------------------------+
//| CColorControl::Class initialization                              |
//+------------------------------------------------------------------+
void CColorElement::Init(void)
  {
   this.m_default.SetName("Default"); this.m_default.SetID(1);
   this.m_focused.SetName("Focused"); this.m_focused.SetID(2);
   this.m_pressed.SetName("Pressed"); this.m_pressed.SetID(3);
   this.m_blocked.SetName("Blocked"); this.m_blocked.SetID(4);
   this.SetCurrentAs(COLOR_STATE_DEFAULT);
   this.m_current.SetName("Current");
   this.m_current.SetID(0);
  }
//+------------------------------------------------------------------+
If a transparent color is passed to the color initialization method, then it does not need to be changed in any way for any states.
Mind it in method implementation:
//+----------------------------------------------------------------------+
//| CColorControl::Set the colors for all states based on the current one|
//+----------------------------------------------------------------------+
void CColorElement::InitColors(const color clr)
  {
   this.InitDefault(clr);
   this.InitFocused(clr!=clrNULL ? this.NewColor(clr,-20,-20,-20) : clrNULL);
   this.InitPressed(clr!=clrNULL ? this.NewColor(clr,-40,-40,-40) : clrNULL);
   this.InitBlocked(clrWhiteSmoke);
  }
In the CBound class, add a method that returns a flag for cursor presence inside a rectangular area. This is required when implementing the Controller component:
//+------------------------------------------------------------------+
//| Rectangular region class                                         |
//+------------------------------------------------------------------+
class CBound : public CBaseObj
  {
protected:
   CRect             m_bound;                                  // Rectangular area structure

public:
//--- Change the bounding rectangular (1) width, (2) height and (3) size
   void              ResizeW(const int size)                   { this.m_bound.Width(size);                                    }
   void              ResizeH(const int size)                   { this.m_bound.Height(size);                                   }
   void              Resize(const int w,const int h)           { this.m_bound.Width(w); this.m_bound.Height(h);               }

//--- Set (1) X, (2) Y and (3) both coordinates of the bounding rectangle
   void              SetX(const int x)                         { this.m_bound.left=x;                                         }
   void              SetY(const int y)                         { this.m_bound.top=y;                                          }
   void              SetXY(const int x,const int y)            { this.m_bound.LeftTop(x,y);                                   }

//--- (1) Set and (2) shift the bounding rectangle by the specified coordinates/offset size
   void              Move(const int x,const int y)             { this.m_bound.Move(x,y);                                      }
   void              Shift(const int dx,const int dy)          { this.m_bound.Shift(dx,dy);                                   }

//--- Returns the object coordinates, dimensions, and boundaries
   int               X(void)                             const { return this.m_bound.left;                                    }
   int               Y(void)                             const { return this.m_bound.top;                                     }
   int               Width(void)                         const { return this.m_bound.Width();                                 }
   int               Height(void)                        const { return this.m_bound.Height();                                }
   int               Right(void)                         const { return this.m_bound.right-(this.m_bound.Width()  >0 ? 1 : 0);}
   int               Bottom(void)                        const { return this.m_bound.bottom-(this.m_bound.Height()>0 ? 1 : 0);}

//--- Returns the flag indicating whether the cursor is inside the area
   bool              Contains(const int x,const int y)   const { return this.m_bound.Contains(x,y);                           }

//--- Return the object description
   virtual string    Description(void);


//--- Virtual methods of (1) comparing, (2) saving to file, (3) loading from file, (4) object type
   virtual int       Compare(const CObject *node,const int mode=0) const;
   virtual bool      Save(const int file_handle);
   virtual bool      Load(const int file_handle);
   virtual int       Type(void)                          const { return(ELEMENT_TYPE_RECTANGLE_AREA);                         }

//--- Constructors/destructor
                     CBound(void) { ::ZeroMemory(this.m_bound); }
                     CBound(const int x,const int y,const int w,const int h) { this.SetXY(x,y); this.Resize(w,h);             }
                    ~CBound(void) { ::ZeroMemory(this.m_bound); }
  };
Now it is necessary to add everything for the implementation of Controller component to the base class of the CCanvasBase graphical element canvas.
When graphic elements interact with the mouse, it is necessary to disable some properties of the chart, such as scrolling the chart with the wheel, the right mouse button menu, etc. Each object of the graphical elements will do this. But when you first start, you must remember the state of chart properties as it was before the program was launched. And after completing the work, return everything to its place.
To do this, in the private section of the CCanvasBase class declare variables for storing values of stored chart properties and declare a method for setting restrictions on chart properties:
//+------------------------------------------------------------------+
//| Base class of graphical elements canvas                          |
//+------------------------------------------------------------------+
class CCanvasBase : public CBaseObj
  {
private:
   bool              m_chart_mouse_wheel_flag;                 // Flag for sending mouse wheel scroll messages
   bool              m_chart_mouse_move_flag;                  // Flag for sending mouse cursor movement messages
   bool              m_chart_object_create_flag;               // Flag for sending messages about the graphical object creation event
   bool              m_chart_mouse_scroll_flag;                // Flag for scrolling the chart with the left button and mouse wheel


//--- Set chart restrictions (wheel scrolling, context menu, and crosshair)
   void              SetFlags(const bool flag);

protected:
UI elements can have two states (maybe more, but for now — two). For example, for a button — pressed, released. This means that we must control the color states of the element in its two states. In the protected section of the class, define a variable to store the state of the element, another set of color management objects, and separate transparency control for the background and foreground canvas:
protected:
   CCanvas           m_background;                             // Background canvas
   CCanvas           m_foreground;                             // Foreground canvas
   CBound            m_bound;                                  // Object boundaries
   CCanvasBase      *m_container;                              // Parent container object
   CColorElement     m_color_background;                       // Background color control object
   CColorElement     m_color_foreground;                       // Foreground color control object
   CColorElement     m_color_border;                           // Border color control object

   CColorElement     m_color_background_act;                   // Activated element background color control object
   CColorElement     m_color_foreground_act;                   // Activated element foreground color control object
   CColorElement     m_color_border_act;                       // Activated element frame color control object

   ENUM_ELEMENT_STATE m_state;                                 // Control state (e.g. buttons (on/off))
   long              m_chart_id;                               // Chart ID
   int               m_wnd;                                    // Chart subwindow index
   int               m_wnd_y;                                  // Cursor Y coordinate offset in the subwindow
   int               m_obj_x;                                  // Graphical object X coordinate
   int               m_obj_y;                                  // Graphical object Y coordinate
   uchar             m_alpha_bg;                               // Background transparency
   uchar             m_alpha_fg;                               // Foreground transparency
   uint              m_border_width;                           // Frame width
   string            m_program_name;                           // Program name
   bool              m_hidden;                                 // Hidden object flag
   bool              m_blocked;                                // Blocked element flag
   bool              m_focused;                                // Element flag in focus
Here, also declare methods for controlling the mouse cursor, color management, and virtual event handlers:
//--- Limit the graphical object by the container dimensions
   virtual void      ObjectTrim(void);
//--- Returns the flag indicating whether the cursor is inside the object
   bool              Contains(const int x,const int y);


//--- Check if the set color is equal to the specified one
   bool              CheckColor(const ENUM_COLOR_STATE state) const;
//--- Change the background, text, and border colors depending on the condition
   void              ColorChange(const ENUM_COLOR_STATE state);

//--- Initialize (1) the class object and (2) default object colors
   void              Init(void);
   virtual void      InitColors(void);

//--- (1) Cursor hovering (Focus), (2) button clicks (Press), (3) wheel scrolling (Wheel),
//--- (4) release (Release), (5) graphical object creation (Create) event handlers. Should be identified in the descendants
   virtual void      OnFocusEvent(const int id, const long lparam, const double dparam, const string sparam);
   virtual void      OnPressEvent(const int id, const long lparam, const double dparam, const string sparam);
   virtual void      OnReleaseEvent(const int id, const long lparam, const double dparam, const string sparam);
   virtual void      OnCreateEvent(const int id, const long lparam, const double dparam, const string sparam);
   virtual void      OnWheelEvent(const int id, const long lparam, const double dparam, const string sparam)      { return;   }  // handler is disabled here
//--- Handlers for custom events of the element when hovering, clicking, and scrolling the wheel in the object area
   virtual void      MouseMoveHandler(const int id, const long lparam, const double dparam, const string sparam)  { return;   }  // handler is disabled here
   virtual void      MousePressHandler(const int id, const long lparam, const double dparam, const string sparam) { return;   }  // handler is disabled here
   virtual void      MouseWheelHandler(const int id, const long lparam, const double dparam, const string sparam) { return;   }  // handler is disabled here

public:
In the public section of the class, add methods for getting element color management objects in the activated state and methods for getting colors in various states of the element:
public:
//--- Return the pointer to the canvas (1) background and (2) foreground
   CCanvas          *GetBackground(void)                       { return &this.m_background;                                                        }
   CCanvas          *GetForeground(void)                       { return &this.m_foreground;                                                        }

//--- Return the pointer to the color management object for the (1) background, (2) foreground and (3) border
   CColorElement    *GetBackColorControl(void)                 { return &this.m_color_background;                                                  }
   CColorElement    *GetForeColorControl(void)                 { return &this.m_color_foreground;                                                  }
   CColorElement    *GetBorderColorControl(void)               { return &this.m_color_border;                                                      }

//--- Return the pointer to the color management object for the (1) background, (2) foreground and (3) activated element border
   CColorElement    *GetBackColorActControl(void)              { return &this.m_color_background_act;                                              }
   CColorElement    *GetForeColorActControl(void)              { return &this.m_color_foreground_act;                                              }
   CColorElement    *GetBorderColorActControl(void)            { return &this.m_color_border_act;                                                  }

//--- Return the (1) background, (2) foreground and (3) border color
   color             BackColor(void)         const { return(!this.State() ? this.m_color_background.GetCurrent() : this.m_color_background_act.GetCurrent());  }
   color             ForeColor(void)         const { return(!this.State() ? this.m_color_foreground.GetCurrent() : this.m_color_foreground_act.GetCurrent());  }
   color             BorderColor(void)       const { return(!this.State() ? this.m_color_border.GetCurrent()     : this.m_color_border_act.GetCurrent());      }

//--- Return the DEFAULT color of (1) background, (2) foreground, (3) border
   color             BackColorDefault(void)  const { return(!this.State() ? this.m_color_background.GetDefault() : this.m_color_background_act.GetDefault());  }
   color             ForeColorDefault(void)  const { return(!this.State() ? this.m_color_foreground.GetDefault() : this.m_color_foreground_act.GetDefault());  }
   color             BorderColorDefault(void)const { return(!this.State() ? this.m_color_border.GetDefault()     : this.m_color_border_act.GetDefault());      }

//--- Return the FOCUSED preset color of the (1) background, (2) foreground, (3) border
   color             BackColorFocused(void)  const { return(!this.State() ? this.m_color_background.GetFocused() : this.m_color_background_act.GetFocused());  }
   color             ForeColorFocused(void)  const { return(!this.State() ? this.m_color_foreground.GetFocused() : this.m_color_foreground_act.GetFocused());  }
   color             BorderColorFocused(void)const { return(!this.State() ? this.m_color_border.GetFocused()     : this.m_color_border_act.GetFocused());      }

//--- Return the preset PRESSED color of the (1) background, (2) foreground, (3) frame
   color             BackColorPressed(void)  const { return(!this.State() ? this.m_color_background.GetPressed() : this.m_color_background_act.GetPressed());  }
   color             ForeColorPressed(void)  const { return(!this.State() ? this.m_color_foreground.GetPressed() : this.m_color_foreground_act.GetPressed());  }
   color             BorderColorPressed(void)const { return(!this.State() ? this.m_color_border.GetPressed()     : this.m_color_border_act.GetPressed());      }

//--- Return the BLOCKED color of (1) background, (2) foreground, (3) border
   color             BackColorBlocked(void)              const { return this.m_color_background.GetBlocked();                                      }
   color             ForeColorBlocked(void)              const { return this.m_color_foreground.GetBlocked();                                      }
   color             BorderColorBlocked(void)            const { return this.m_color_border.GetBlocked();                                          }

//--- Set background colors for all states
Now, in each of the color retrieving methods, the state of the element is checked (activated/deactivated) and the required color is returned according to the element state.
Add methods for setting the colors of the activated element and refine the methods for setting the colors of element states relative to the mouse cursor, given the state of the element as activated/non-activated:
//--- Set background colors for all states
   void              InitBackColorsAct(const color clr_default, const color clr_focused, const color clr_pressed, const color clr_blocked)
                       {
                        this.m_color_background_act.InitColors(clr_default,clr_focused,clr_pressed,clr_blocked);
                       }
   void              InitBackColorsAct(const color clr)        { this.m_color_background_act.InitColors(clr);                                      }

//--- Set foreground colors for all states
   void              InitForeColorsAct(const color clr_default, const color clr_focused, const color clr_pressed, const color clr_blocked)
                       {
                        this.m_color_foreground_act.InitColors(clr_default,clr_focused,clr_pressed,clr_blocked);
                       }
   void              InitForeColorsAct(const color clr)        { this.m_color_foreground_act.InitColors(clr);                                      }

//--- Set border colors for all states
   void              InitBorderColorsAct(const color clr_default, const color clr_focused, const color clr_pressed, const color clr_blocked)
                       {
                        this.m_color_border_act.InitColors(clr_default,clr_focused,clr_pressed,clr_blocked);
                       }
   void              InitBorderColorsAct(const color clr)      { this.m_color_border_act.InitColors(clr);                                          }

//--- Initialize the color of (1) background, (2) foreground and (3) frame with initial values
   void              InitBackColorActDefault(const color clr)  { this.m_color_background_act.InitDefault(clr);                                     }
   void              InitForeColorActDefault(const color clr)  { this.m_color_foreground_act.InitDefault(clr);                                     }
   void              InitBorderColorActDefault(const color clr){ this.m_color_border_act.InitDefault(clr);                                         }

//--- Initialize the color of (1) background, (2) foreground and (3) frame on hover with initial values
   void              InitBackColorActFocused(const color clr)  { this.m_color_background_act.InitFocused(clr);                                     }
   void              InitForeColorActFocused(const color clr)  { this.m_color_foreground_act.InitFocused(clr);                                     }
   void              InitBorderColorActFocused(const color clr){ this.m_color_border_act.InitFocused(clr);                                         }

//--- Initialize the color of (1) background, (2) foreground and (3) frame on click with initial values
   void              InitBackColorActPressed(const color clr)  { this.m_color_background_act.InitPressed(clr);                                     }
   void              InitForeColorActPressed(const color clr)  { this.m_color_foreground_act.InitPressed(clr);                                     }
   void              InitBorderColorActPressed(const color clr){ this.m_color_border_act.InitPressed(clr);                                         }

//--- Set the current background color to different states
   bool              BackColorToDefault(void)
                       {
                        return(!this.State() ? this.m_color_background.SetCurrentAs(COLOR_STATE_DEFAULT) :
                                               this.m_color_background_act.SetCurrentAs(COLOR_STATE_DEFAULT));
                       }
   bool              BackColorToFocused(void)
                       {
                        return(!this.State() ? this.m_color_background.SetCurrentAs(COLOR_STATE_FOCUSED) :
                                               this.m_color_background_act.SetCurrentAs(COLOR_STATE_FOCUSED));
                       }
   bool              BackColorToPressed(void)
                       {
                        return(!this.State() ? this.m_color_background.SetCurrentAs(COLOR_STATE_PRESSED) :
                                               this.m_color_background_act.SetCurrentAs(COLOR_STATE_PRESSED));
                       }
   bool              BackColorToBlocked(void)   { return this.m_color_background.SetCurrentAs(COLOR_STATE_BLOCKED);  }

//--- Set the current foreground color to different states
   bool              ForeColorToDefault(void)
                       { return(!this.State() ? this.m_color_foreground.SetCurrentAs(COLOR_STATE_DEFAULT) :
                                                this.m_color_foreground_act.SetCurrentAs(COLOR_STATE_DEFAULT));
                       }
   bool              ForeColorToFocused(void)
                       { return(!this.State() ? this.m_color_foreground.SetCurrentAs(COLOR_STATE_FOCUSED) :
                                                this.m_color_foreground_act.SetCurrentAs(COLOR_STATE_FOCUSED));
                       }
   bool              ForeColorToPressed(void)
                       { return(!this.State() ? this.m_color_foreground.SetCurrentAs(COLOR_STATE_PRESSED) :
                                                this.m_color_foreground_act.SetCurrentAs(COLOR_STATE_PRESSED));
                       }
   bool              ForeColorToBlocked(void)   { return this.m_color_foreground.SetCurrentAs(COLOR_STATE_BLOCKED);  }

//--- Set the current frame color to different states
   bool              BorderColorToDefault(void)
                       { return(!this.State() ? this.m_color_border.SetCurrentAs(COLOR_STATE_DEFAULT) :
                                                this.m_color_border_act.SetCurrentAs(COLOR_STATE_DEFAULT));
                       }
   bool              BorderColorToFocused(void)
                       { return(!this.State() ? this.m_color_border.SetCurrentAs(COLOR_STATE_FOCUSED) :
                                                this.m_color_border_act.SetCurrentAs(COLOR_STATE_FOCUSED));
                       }
   bool              BorderColorToPressed(void)
                       { return(!this.State() ? this.m_color_border.SetCurrentAs(COLOR_STATE_PRESSED) :
                                                this.m_color_border_act.SetCurrentAs(COLOR_STATE_PRESSED));
                       }
   bool              BorderColorToBlocked(void) { return this.m_color_border.SetCurrentAs(COLOR_STATE_BLOCKED);      }
Add methods for setting and returning the state of an element:
//--- Create OBJ_BITMAP_LABEL
   bool              Create(const long chart_id,const int wnd,const string object_name,const int x,const int y,const int w,const int h);

//--- (1) Set and (2) return the state
   void              SetState(ENUM_ELEMENT_STATE state)        { this.m_state=state; this.ColorsToDefault();                                       }
   ENUM_ELEMENT_STATE State(void)                        const { return this.m_state;                                                              }

//--- Return (1) the object's belonging to the program, the flag (2) of a hidden element, (3) a blocked element, (4) element in focus and (5) the graphical object name (background, text)
When setting the state of an element, after setting the status flag, all the colors of the element must be recorded as current. If the element is activated, for example, the button is pressed, then all the current colors are set as colors for the pressed button. Otherwise, current colors are taken from the colors list for the released button.
So far as we have now separated setting and returning transparency for the background and foreground, add new methods for transparency setting and returning:
   string            NameBG(void)                        const { return this.m_background.ChartObjectName();                                       }
   string            NameFG(void)                        const { return this.m_foreground.ChartObjectName();                                       }

//--- (1) Return and (2) set background transparency
   uchar             AlphaBG(void)                       const { return this.m_alpha_bg;                                                           }
   void              SetAlphaBG(const uchar value)             { this.m_alpha_bg=value;                                                            }
//--- (1) Return and (2) set the foreground transparency
   uchar             AlphaFG(void)                       const { return this.m_alpha_fg;                                                           }
   void              SetAlphaFG(const uchar value)             { this.m_alpha_fg=value;                                                            }

//--- Sets the background and foreground transparency
   void              SetAlpha(const uchar value)               { this.m_alpha_fg=this.m_alpha_bg=value;                                            }

//--- (1) Return and (2) set the frame width
Declare an event handler which is supposed to be called from the event handler of the control program:
//--- Event handler                                                    |
   void              OnChartEvent(const int id,const long& lparam,const double& dparam,const string& sparam);

//--- Constructors/destructor
                     CCanvasBase(void) :
                        m_program_name(::MQLInfoString(MQL_PROGRAM_NAME)), m_chart_id(::ChartID()), m_wnd(0),
                        m_alpha_bg(0), m_alpha_fg(255), m_hidden(false), m_blocked(false), m_focused(false), m_border_width(0), m_wnd_y(0), m_state(0) { this.Init(); }
                     CCanvasBase(const string object_name,const long chart_id,const int wnd,const int x,const int y,const int w,const int h);
                    ~CCanvasBase(void);
  };
In the constructor, correctly specify properties of the font being drawn on the canvas and call the Init() method to store properties of the chart and mouse:
//+------------------------------------------------------------------+
//| CCanvasBase::Constructor                                         |
//+------------------------------------------------------------------+
CCanvasBase::CCanvasBase(const string object_name,const long chart_id,const int wnd,const int x,const int y,const int w,const int h) :
   m_program_name(::MQLInfoString(MQL_PROGRAM_NAME)), m_wnd(wnd<0 ? 0 : wnd), m_alpha_bg(0), m_alpha_fg(255), m_hidden(false), m_blocked(false), m_focused(false), m_border_width(0), m_state(0)
  {
//--- Get the adjusted chart ID and the distance in pixels along the vertical Y axis
//--- between the upper frame of the indicator subwindow and the upper frame of the chart main window
   this.m_chart_id=this.CorrectChartID(chart_id);
   this.m_wnd_y=(int)::ChartGetInteger(this.m_chart_id,CHART_WINDOW_YDISTANCE,this.m_wnd);
//--- If the graphical resource and graphical object are created
   if(this.Create(this.m_chart_id,this.m_wnd,object_name,x,y,w,h))
     {
      //--- Clear the background and foreground canvases and set the initial coordinate values,
      //--- names of graphic objects and properties of text drawn in the foreground
      this.Clear(false);
      this.m_obj_x=x;
      this.m_obj_y=y;
      this.m_color_background.SetName("Background");
      this.m_color_foreground.SetName("Foreground");
      this.m_color_border.SetName("Border");
      this.m_foreground.FontSet(DEF_FONTNAME,-DEF_FONTSIZE*10,FW_MEDIUM);
      this.m_bound.SetName("Perimeter");

      //--- Remember permissions for the mouse and chart tools
      this.Init();
     }
  }
In the class destructor, destroy the created graphic object and restore the stored properties of the chart and mouse permissions:
//+------------------------------------------------------------------+
//| CCanvasBase::Destructor                                          |
//+------------------------------------------------------------------+
CCanvasBase::~CCanvasBase(void)
  {
//--- Destroy the object
   this.Destroy();
//--- Return permissions for the mouse and chart tools
   ::ChartSetInteger(this.m_chart_id, CHART_EVENT_MOUSE_WHEEL, this.m_chart_mouse_wheel_flag);
   ::ChartSetInteger(this.m_chart_id, CHART_EVENT_MOUSE_MOVE, this.m_chart_mouse_move_flag);
   ::ChartSetInteger(this.m_chart_id, CHART_EVENT_OBJECT_CREATE, this.m_chart_object_create_flag);
   ::ChartSetInteger(this.m_chart_id, CHART_MOUSE_SCROLL, this.m_chart_mouse_scroll_flag);
   ::ChartSetInteger(this.m_chart_id, CHART_CONTEXT_MENU, this.m_chart_context_menu_flag);
   ::ChartSetInteger(this.m_chart_id, CHART_CROSSHAIR_TOOL, this.m_chart_crosshair_tool_flag);
  }
In the method of creating a graphical element, the name of the graphic object to be created should not have spaces. This can be corrected by replacing spaces in the name with underscores:
//+------------------------------------------------------------------+
//| CCanvasBase::Create background and foreground graphical objects  |
//+------------------------------------------------------------------+
bool CCanvasBase::Create(const long chart_id,const int wnd,const string object_name,const int x,const int y,const int w,const int h)
  {
//--- Get the adjusted chart ID
   long id=this.CorrectChartID(chart_id);
//--- Correct the passed object name
   string nm=object_name;
   ::StringReplace(nm," ","_");
//--- Create a graphical object name for the background and create a canvas
   string obj_name=nm+"_BG";
   if(!this.m_background.CreateBitmapLabel(id,(wnd<0 ? 0 : wnd),obj_name,x,y,(w>0 ? w : 1),(h>0 ? h : 1),COLOR_FORMAT_ARGB_NORMALIZE))
     {
      ::PrintFormat("%s: The CreateBitmapLabel() method of the CCanvas class returned an error creating a \"%s\" graphic object",__FUNCTION__,obj_name);
      return false;
     }
//--- Create a graphical object name for the foreground and create a canvas
   obj_name=nm+"_FG";
   if(!this.m_foreground.CreateBitmapLabel(id,(wnd<0 ? 0 : wnd),obj_name,x,y,(w>0 ? w : 1),(h>0 ? h : 1),COLOR_FORMAT_ARGB_NORMALIZE))
     {
      ::PrintFormat("%s: The CreateBitmapLabel() method of the CCanvas class returned an error creating a \"%s\" graphic object",__FUNCTION__,obj_name);
      return false;
     }
//--- If created successfully, enter the program name into the OBJPROP_TEXT property of the graphical object
   ::ObjectSetString(id,this.NameBG(),OBJPROP_TEXT,this.m_program_name);
   ::ObjectSetString(id,this.NameFG(),OBJPROP_TEXT,this.m_program_name);

//--- Set the dimensions of the rectangular area and return 'true'
   this.m_bound.SetXY(x,y);
   this.m_bound.Resize(w,h);
   return true;
  }
A method that returns the cursor location flag inside an object:
//+-----------------------------------------------------------------------------------+
//| CCanvasBase::Return the flag indicating whether the cursor is inside the object   |
//+-----------------------------------------------------------------------------------+
bool CCanvasBase::Contains(const int x,const int y)
  {
//--- check and return the result
   int left=::fmax(this.X(),this.ObjectX());
   int right=::fmin(this.Right(),this.ObjectRight());
   int top=::fmax(this.Y(),this.ObjectY());
   int bottom=::fmin(this.Bottom(),this.ObjectBottom());
   return(x>=left && x<=right && y>=top && y<=bottom);
  }
Since the object size and the canvas size may vary (the ObjectTrim method resizes the canvas without resizing the object), here one of the values is taken as the bounds within which the cursor is located: either object bound or a corresponding edge of the canvas. The method returns a flag of location of the coordinates passed to the method within the received bounds.
In the element lock method, the setting of the lock flag must be before calling the element drawing method, fix:
//+------------------------------------------------------------------+
//| CCanvasBase::Block the element                                   |
//+------------------------------------------------------------------+
void CCanvasBase::Block(const bool chart_redraw)
  {
//--- If the element has already been blocked, leave
   if(this.m_blocked)
      return;
//--- Set the current colors as the colors of the blocked element,
//--- set the lock flag and redraw the object
   this.ColorsToBlocked();
   this.m_blocked=true;
   this.Draw(chart_redraw);
  }
This correction allows you to draw the blocked element correctly. Prior to this correction, when drawing an element, colors were taken from the default state, not from the blocked one, since the flag was set after the lock.
A Method for Setting Bans for the Chart:
//+------------------------------------------------------------------+
//| CCanvasBase::Set chart restrictions                              |
//| (wheel scrolling, context menu and crosshair)                    |
//+------------------------------------------------------------------+
void CCanvasBase::SetFlags(const bool flag)
  {
//--- If you need to set flags, and they have already been set before, leave
   if(flag && this.m_flags_state)
      return;
//--- If we need to reset the flags, and they have already been reset earlier, leave
   if(!flag && !this.m_flags_state)
      return;
//--- Set the required flag for the context menu,
//--- crosshair tool and scrolling the chart with the mouse wheel.
//--- After installation, remember the value of the set flag
   ::ChartSetInteger(this.m_chart_id, CHART_CONTEXT_MENU,  flag);
   ::ChartSetInteger(this.m_chart_id, CHART_CROSSHAIR_TOOL,flag);
   ::ChartSetInteger(this.m_chart_id, CHART_MOUSE_SCROLL,  flag);
   this.m_flags_state=flag;
//--- Update the chart to immediately apply the set flags
   ::ChartRedraw(this.m_chart_id);
  }
Class Initialization Method:
//+------------------------------------------------------------------+
//| CCanvasBase::Class initialization                                |
//+------------------------------------------------------------------+
void CCanvasBase::Init(void)
  {
//--- Remember permissions for the mouse and chart tools
   this.m_chart_mouse_wheel_flag   = ::ChartGetInteger(this.m_chart_id, CHART_EVENT_MOUSE_WHEEL);
   this.m_chart_mouse_move_flag    = ::ChartGetInteger(this.m_chart_id, CHART_EVENT_MOUSE_MOVE);
   this.m_chart_object_create_flag = ::ChartGetInteger(this.m_chart_id, CHART_EVENT_OBJECT_CREATE);
   this.m_chart_mouse_scroll_flag  = ::ChartGetInteger(this.m_chart_id, CHART_MOUSE_SCROLL);
   this.m_chart_context_menu_flag  = ::ChartGetInteger(this.m_chart_id, CHART_CONTEXT_MENU);
   this.m_chart_crosshair_tool_flag= ::ChartGetInteger(this.m_chart_id, CHART_CROSSHAIR_TOOL);
//--- Set permissions for the mouse and chart
   ::ChartSetInteger(this.m_chart_id, CHART_EVENT_MOUSE_WHEEL, true);
   ::ChartSetInteger(this.m_chart_id, CHART_EVENT_MOUSE_MOVE, true);
   ::ChartSetInteger(this.m_chart_id, CHART_EVENT_OBJECT_CREATE, true);

//--- Initialize the object default colors
   this.InitColors();
  }
Default Object Color Initialization Method:
//+------------------------------------------------------------------+
//| CCanvasBase::Initialize the object default colors                |
//+------------------------------------------------------------------+
void CCanvasBase::InitColors(void)
  {
//--- Initialize the background colors for the normal and activated states and make it the current background color
   this.InitBackColors(clrWhiteSmoke);
   this.InitBackColorsAct(clrWhiteSmoke);
   this.BackColorToDefault();

//--- Initialize the foreground colors for the normal and activated states and make it the current text color
   this.InitForeColors(clrBlack);
   this.InitForeColorsAct(clrBlack);
   this.ForeColorToDefault();

//--- Initialize the border colors for the normal and activated states and make it the current border color
   this.InitBorderColors(clrDarkGray);
   this.InitBorderColorsAct(clrDarkGray);
   this.BorderColorToDefault();

//--- Initialize the border color and foreground color for the disabled element
   this.InitBorderColorBlocked(clrLightGray);
   this.InitForeColorBlocked(clrSilver);
  }
A Method That Checks the Set Color for Equality to the Specified One:
//+------------------------------------------------------------------+
//| CCanvasBase::Check if the set color is equal to the specified one|
//+------------------------------------------------------------------+
bool CCanvasBase::CheckColor(const ENUM_COLOR_STATE state) const
  {
   bool res=true;
 //--- Depending on the event being checked
   switch(state)
     {
//--- check that all STANDARD background, text, and frame colors are equal to the preset values
      case COLOR_STATE_DEFAULT :
        res &=this.BackColor()==this.BackColorDefault();
        res &=this.ForeColor()==this.ForeColorDefault();
        res &=this.BorderColor()==this.BorderColorDefault();
        break;

//--- check if all FOCUSED background, text, and border colors are equal to the preset values
      case COLOR_STATE_FOCUSED :
        res &=this.BackColor()==this.BackColorFocused();
        res &=this.ForeColor()==this.ForeColorFocused();
        res &=this.BorderColor()==this.BorderColorFocused();
        break;

//--- check if all PRESSED background, text, and border colors are equal to the preset values
      case COLOR_STATE_PRESSED :
        res &=this.BackColor()==this.BackColorPressed();
        res &=this.ForeColor()==this.ForeColorPressed();
        res &=this.BorderColor()==this.BorderColorPressed();
        break;

//--- check if all BLOCKED background, text, and border colors are equal to the preset values
      case COLOR_STATE_BLOCKED :
        res &=this.BackColor()==this.BackColorBlocked();
        res &=this.ForeColor()==this.ForeColorBlocked();
        res &=this.BorderColor()==this.BorderColorBlocked();
        break;

      default: res=false;
        break;
     }
   return res;
  }
In order to change element colors only when the state of the element is toggled, this method returns the flag of already set colors corresponding to element state. If the current colors of the element are not equal to those set for the state checked, the method allows changing the color and redrawing the graphical element. If colors are already set according to the state of the element, there is no need to change the colors and redraw the object; the method bans color change.
A Method That Changes Colors of Object's Elements Based on an Event:
//+------------------------------------------------------------------+
//| CCanvasBase::Change the color of object elements by event        |
//+------------------------------------------------------------------+
void CCanvasBase::ColorChange(const ENUM_COLOR_STATE state)
  {
//--- Depending on the event, set the event colors as primary ones
   switch(state)
     {
      case COLOR_STATE_DEFAULT   :  this.ColorsToDefault(); break;
      case COLOR_STATE_FOCUSED   :  this.ColorsToFocused(); break;
      case COLOR_STATE_PRESSED   :  this.ColorsToPressed(); break;
      case COLOR_STATE_BLOCKED   :  this.ColorsToBlocked(); break;
      default                    :  break;
     }
  }
Depending on the event for which the color must be changed, current colors are set according to the event (element state).
Event handler:
//+------------------------------------------------------------------+
//| CCanvasBase::Event handler                                       |
//+------------------------------------------------------------------+
void CCanvasBase::OnChartEvent(const int id,const long& lparam,const double& dparam,const string& sparam)
  {
//--- If the chart changes
   if(id==CHARTEVENT_CHART_CHANGE)
     {
      //--- adjust the distance between the upper frame of the indicator subwindow and the upper frame of the chart main window
      this.m_wnd_y=(int)::ChartGetInteger(this.m_chart_id,CHART_WINDOW_YDISTANCE,this.m_wnd);
     }

//--- If the element is blocked or hidden, leave
   if(this.IsBlocked() || this.IsHidden())
      return;

//--- Mouse cursor coordinates
   int x=(int)lparam;
   int y=(int)dparam-this.m_wnd_y;  // Adjust Y by the height of the indicator window

//--- Event of cursor movement or mouse button click
   if(id==CHARTEVENT_MOUSE_MOVE || id==CHARTEVENT_OBJECT_CLICK)
     {
      //--- If the cursor is within the object
      if(this.Contains(x, y))
        {
         //--- If the object is not a part of the container, disable chart scrolling, the context menu, and the Crosshair tool
         if(this.m_container==NULL)
            this.SetFlags(false);
         //--- Get the state of the mouse buttons; if they are pressed, call the click handler
         if(sparam=="1" || sparam=="2" || sparam=="16")
            this.OnPressEvent(id, lparam, dparam, sparam);
         //--- buttons are not pressed - handle the cursor movement
         else
            this.OnFocusEvent(id, lparam, dparam, sparam);
        }
      //--- Cursor outside the object
      else
        {
         //--- Handle the cursor moving beyond the object boundaries
         this.OnReleaseEvent(id,lparam,dparam,sparam);
         //--- If the object is not a part of the container, enable chart scrolling, the context menu, and the Crosshair tool
         if(this.m_container==NULL)
            this.SetFlags(true);
        }
     }

//--- Mouse wheel scroll event
   if(id==CHARTEVENT_MOUSE_WHEEL)
     {
      this.OnWheelEvent(id,lparam,dparam,sparam);
     }

//--- Graphical object creation event
   if(id==CHARTEVENT_OBJECT_CREATE)
     {
      this.OnCreateEvent(id,lparam,dparam,sparam);
     }

//--- If a custom chart event has arrived
   if(id>CHARTEVENT_CUSTOM)
     {
      //--- do not handle its own events
      if(sparam==this.NameBG())
         return;

      //--- bring the custom event in line with the standard ones
      ENUM_CHART_EVENT chart_event=ENUM_CHART_EVENT(id-CHARTEVENT_CUSTOM);
      //--- If clicking an object
      if(chart_event==CHARTEVENT_OBJECT_CLICK)
        {
         this.MousePressHandler(chart_event, lparam, dparam, sparam);
        }
      //--- If the mouse cursor is moving
      if(chart_event==CHARTEVENT_MOUSE_MOVE)
        {
         this.MouseMoveHandler(chart_event, lparam, dparam, sparam);
        }
      //--- If the mouse wheel is scrolling
      if(chart_event==CHARTEVENT_MOUSE_WHEEL)
        {
         this.MouseWheelHandler(chart_event, lparam, dparam, sparam);
        }
     }
  }
The logic of handling the interaction of the mouse cursor with graphical elements is arranged in the base object of graphical elements. Virtual handlers are called for various events being monitored. Some handlers are implemented directly in this class, and some simply do nothing, and they must be implemented in descendant objects of this class.
The event handlers, which name ends in *Handler, are designated to handle interactions within controls between their constituent components. Whereas the handlers with *Event in their name directly handle chart events and send custom events to the chart, which can be used to determine the type of event and which control it was sent from. This will allow the user to handle such events in their program.
Out-of-focus Handler:
//+------------------------------------------------------------------+
//| CCanvasBase::Out of focus handler                                |
//+------------------------------------------------------------------+
void CCanvasBase::OnReleaseEvent(const int id,const long lparam,const double dparam,const string sparam)
  {
//--- The element is not in focus when the cursor is moved away
   this.m_focused=false;
//--- restore the original colors, reset the Focused flag and redraw the object
   if(!this.CheckColor(COLOR_STATE_DEFAULT))
     {
      this.ColorChange(COLOR_STATE_DEFAULT);
      this.Draw(true);
     }
  }
Cursor Hover Handler:
//+------------------------------------------------------------------+
//| CCanvasBase::Hover positioning handler                           |
//+------------------------------------------------------------------+
void CCanvasBase::OnFocusEvent(const int id,const long lparam,const double dparam,const string sparam)
  {
//--- Element in focus
   this.m_focused=true;
//--- If the object colors are not for Focused mode
   if(!this.CheckColor(COLOR_STATE_FOCUSED))
     {
      //--- set the colors and the Focused flag and redraw the object
      this.ColorChange(COLOR_STATE_FOCUSED);
      this.Draw(true);
     }
  }
Object Press Handler:
//+------------------------------------------------------------------+
//| CCanvasBase::Object click handler                                |
//+------------------------------------------------------------------+
void CCanvasBase::OnPressEvent(const int id,const long lparam,const double dparam,const string sparam)
  {
//--- The element is in focus when clicked on
   this.m_focused=true;
//--- If the object colors are not for Pressed mode
   if(!this.CheckColor(COLOR_STATE_PRESSED))
     {
      //--- set the Pressed colors and redraw the object
      this.ColorChange(COLOR_STATE_PRESSED);
      this.Draw(true);
     }

   //--- send a custom event to the chart with the passed values in lparam, dparam, and the object name in sparam
   ::EventChartCustom(this.m_chart_id, (ushort)CHARTEVENT_OBJECT_CLICK, lparam, dparam, this.NameBG());
  }
Handler for the Graphic Object Creation Event:
//+------------------------------------------------------------------+
//| CCanvasBase::Graphical object creation event handler             |
//+------------------------------------------------------------------+
void CCanvasBase::OnCreateEvent(const int id,const long lparam,const double dparam,const string sparam)
  {
//--- if this is an object belonging to this program, leave
   if(this.IsBelongsToThis(sparam))
      return;
//--- bring the object to the front
   this.BringToTop(true);
  }
The logic of all handlers is commented on in detail in the code. In fact, only a reaction to an event in the form of color changing of the graphical element is arranged here and, where necessary, sending custom events to the chart. The last handler reacts to the creation of a graphic object on the chart and transfers graphical elements to the foreground. This will allow, for example, the panel to always remain in the foreground.
All these handlers are virtual, and should be redefined in inherited classes if necessary.
We are done with the refinement of the base object of all graphical elements. Now, based on the created Controller component in the base object and the earlier created View component, start creating the simplest graphic elements (which are also part of the View component). And they will become the "building blocks" from which complex controls will eventually be created, and in particular, the Table View control, upon which implementation we have been working on for several articles.
Simple controls
In the same folder \MQL5\Indicators\Tables\Controls\ create a new include file Controls.mqh.
To the created file, connect the file of the base object of graphical elements Base.mqh and add some macro substitutions and enumerations:
//+------------------------------------------------------------------+
//|                                                     Controls.mqh |
//|                                  Copyright 2025, MetaQuotes Ltd. |
//|                                             https://www.mql5.com |
//+------------------------------------------------------------------+
#property copyright "Copyright 2025, MetaQuotes Ltd."
#property link      "https://www.mql5.com"

//+------------------------------------------------------------------+
//| Include libraries                                                |
//+------------------------------------------------------------------+
#include "Base.mqh"

//+------------------------------------------------------------------+
//| Macro substitutions                                              |
//+------------------------------------------------------------------+
#define  DEF_LABEL_W          40          // Text label default width
#define  DEF_LABEL_H          16          // Text label default height
#define  DEF_BUTTON_W         50          // Default button width
#define  DEF_BUTTON_H         16          // Default button height

//+------------------------------------------------------------------+
//| Enumerations                                                     |
//+------------------------------------------------------------------+
enum ENUM_ELEMENT_COMPARE_BY              // Compared properties
  {
   ELEMENT_SORT_BY_ID   =  0,             // Comparison by element ID
   ELEMENT_SORT_BY_NAME,                  // Comparison by element name
   ELEMENT_SORT_BY_TEXT,                  // Comparison by element text
   ELEMENT_SORT_BY_COLOR,                 // Comparison by element color
   ELEMENT_SORT_BY_ALPHA,                 // Comparison by element transparency
   ELEMENT_SORT_BY_STATE,                 // Comparison by element state
  };
//+------------------------------------------------------------------+
//| Functions                                                        |
//+------------------------------------------------------------------+

//+------------------------------------------------------------------+
//| Classes                                                          |
//+------------------------------------------------------------------+
In macro substitution, we have defined default sizes for text labels and buttons. In the enumeration, we have indicated the available properties of the base graphical element. You can use these properties to search for objects, sort them, and compare them. When adding new properties to any objects, add new constants to this enumeration.
Auxiliary Classes
Each graphic element can have an image in its composition. This will enable to draw icons for buttons, lines of text, etc.
Create a special class for drawing images, which will be an integral part of simple controls.
A Class for Drawing Images Within a Defined Area
//+------------------------------------------------------------------+
//| Classes                                                          |
//+------------------------------------------------------------------+
//+------------------------------------------------------------------+
//| Image drawing class                                              |
//+------------------------------------------------------------------+
class CImagePainter : public CBaseObj
  {
protected:
   CCanvas          *m_canvas;                                 // Pointer to the canvas where we draw
   CBound            m_bound;                                  // Image coordinates and boundaries
   uchar             m_alpha;                                  // Transparency

//--- Check the canvas validity and correct dimensions
   bool              CheckBound(void);

public:
//--- (1) Assigns the canvas to draw on, (2) sets and (3) returns transparency
   void              CanvasAssign(CCanvas *canvas)             { this.m_canvas=canvas;                }
   void              SetAlpha(const uchar value)               { this.m_alpha=value;                  }
   uchar             Alpha(void)                         const { return this.m_alpha;                 }

//--- (1) Set the coordinates and (2) change the area size
   void              SetXY(const int x,const int y)            { this.m_bound.SetXY(x,y);             }
   void              SetSize(const int w,const int h)          { this.m_bound.Resize(w,h);            }
//--- Set the area coordinates and dimensions
   void              SetBound(const int x,const int y,const int w,const int h)
                       {
                        this.SetXY(x,y);
                        this.SetSize(w,h);
                       }

//--- Returns the image boundaries and dimensions
   int               X(void)                             const { return this.m_bound.X();             }
   int               Y(void)                             const { return this.m_bound.Y();             }
   int               Right(void)                         const { return this.m_bound.Right();         }
   int               Bottom(void)                        const { return this.m_bound.Bottom();        }
   int               Width(void)                         const { return this.m_bound.Width();         }
   int               Height(void)                        const { return this.m_bound.Height();        }

//--- Clear the area
   bool              Clear(const int x,const int y,const int w,const int h,const bool update=true);
//--- Draw a filled (1) up, (2) down, (3) left and (4) right arrow
   bool              ArrowUp(const int x,const int y,const int w,const int h,const color clr,const uchar alpha,const bool update=true);
   bool              ArrowDown(const int x,const int y,const int w,const int h,const color clr,const uchar alpha,const bool update=true);
   bool              ArrowLeft(const int x,const int y,const int w,const int h,const color clr,const uchar alpha,const bool update=true);
   bool              ArrowRight(const int x,const int y,const int w,const int h,const color clr,const uchar alpha,const bool update=true);

//--- Draw (1) checked and (2) unchecked CheckBox
   bool              CheckedBox(const int x,const int y,const int w,const int h,const color clr,const uchar alpha,const bool update=true);
   bool              UncheckedBox(const int x,const int y,const int w,const int h,const color clr,const uchar alpha,const bool update=true);

//--- Draw (1) checked and (2) unchecked RadioButton
   bool              CheckedRadioButton(const int x,const int y,const int w,const int h,const color clr,const uchar alpha,const bool update=true);
   bool              UncheckedRadioButton(const int x,const int y,const int w,const int h,const color clr,const uchar alpha,const bool update=true);

//--- Virtual methods of (1) comparing, (2) saving to file, (3) loading from file, (4) object type
   virtual int       Compare(const CObject *node,const int mode=0) const;
   virtual bool      Save(const int file_handle);
   virtual bool      Load(const int file_handle);
   virtual int       Type(void)                          const { return(ELEMENT_TYPE_IMAGE_PAINTER);  }

//--- Constructors/destructor
                     CImagePainter(void) : m_canvas(NULL)               { this.SetBound(1,1,DEF_BUTTON_H-2,DEF_BUTTON_H-2); this.SetName("Image Painter");  }
                     CImagePainter(CCanvas *canvas) : m_canvas(canvas)  { this.SetBound(1,1,DEF_BUTTON_H-2,DEF_BUTTON_H-2); this.SetName("Image Painter");  }
                     CImagePainter(CCanvas *canvas,const int id,const string name) : m_canvas(canvas)
                       {
                        this.m_id=id;
                        this.SetName(name);
                        this.SetBound(1,1,DEF_BUTTON_H-2,DEF_BUTTON_H-2);
                       }
                     CImagePainter(CCanvas *canvas,const int id,const int dx,const int dy,const int w,const int h,const string name) : m_canvas(canvas)
                       {
                        this.m_id=id;
                        this.SetName(name);
                        this.SetBound(dx,dy,w,h);
                       }
                    ~CImagePainter(void) {}
  };
Let us consider class methods.
A Method for Comparing Two Drawing Objects:
//+------------------------------------------------------------------+
//| CImagePainter::Compare two objects                               |
//+------------------------------------------------------------------+
int CImagePainter::Compare(const CObject *node,const int mode=0) const
  {
   const CImagePainter *obj=node;
   switch(mode)
     {
      case ELEMENT_SORT_BY_NAME  :  return(this.Name() >obj.Name()   ? 1 : this.Name() <obj.Name() ? -1 : 0);
      case ELEMENT_SORT_BY_ALPHA :  return(this.Alpha()>obj.Alpha()  ? 1 : this.Alpha()<obj.Alpha()? -1 : 0);
      default                    :  return(this.ID()   >obj.ID()     ? 1 : this.ID()   <obj.ID()   ? -1 : 0);
     }
  }
This method is necessary to find the required drawing object. By default, the search is performed by the object ID. The method will be required when objects of controls contain lists where drawing objects are stored. At the moment, one drawing object will be declared in each control. Such drawing object is intended for drawing the main icon of the element.
A Method That Verifies the Canvas Validity and the Correct Size of the Image Area:
//+------------------------------------------------------------------+
//|CImagePainter::Check the canvas validity and correct dimensions   |
//+------------------------------------------------------------------+
bool CImagePainter::CheckBound(void)
  {
   if(this.m_canvas==NULL)
     {
      ::PrintFormat("%s: Error. First you need to assign the canvas using the CanvasAssign() method",__FUNCTION__);
      return false;
     }
   if(this.Width()==0 || this.Height()==0)
     {
      ::PrintFormat("%s: Error. First you need to set the area size using the SetSize() or SetBound() methods",__FUNCTION__);
      return false;
     }
   return true;
  }
If a pointer to the canvas is not passed to the object, or the width and height of the image area are not set, the method returns false. Otherwise — true.
A Method That Clears the Image Area:
//+------------------------------------------------------------------+
//| CImagePainter::Clear the area                                    |
//+------------------------------------------------------------------+
bool CImagePainter::Clear(const int x,const int y,const int w,const int h,const bool update=true)
  {
//--- If the image area is not valid, return 'false'
   if(!this.CheckBound())
      return false;
//--- Clear the entire image area with transparent color
   this.m_canvas.FillRectangle(x,y,x+w-1,y+h-1,clrNULL);
//--- If specified, update the canvas
   if(update)
      this.m_canvas.Update(false);
//--- All is successful
   return true;
  }
The method completely clears the entire area of the image, filling it with a transparent color.
A Method That Draws a Shaded Up Arrow:
//+------------------------------------------------------------------+
//| CImagePainter::Draw a filled up arrow                            |
//+------------------------------------------------------------------+
bool CImagePainter::ArrowUp(const int x,const int y,const int w,const int h,const color clr,const uchar alpha,const bool update=true)
  {
//--- If the image area is not valid, return 'false'
   if(!this.CheckBound())
      return false;

//--- Calculate the coordinates of the arrow corners inside the image area
   int hw=(int)::floor(w/2);  // Half width
   if(hw==0)
      hw=1;

   int x1 = x + 1;            // X. Base (left point)
   int y1 = y + h - 4;        // Y. Left base point
   int x2 = x1 + hw;          // X. Vertex (central top point)
   int y2 = y + 3;            // Y. Vertex (highest point)
   int x3 = x1 + w - 1;       // X. Base (right point)
   int y3 = y1;               // Y. Base (right point)

//--- Draw a triangle
   this.m_canvas.FillTriangle(x1, y1, x2, y2, x3, y3, ::ColorToARGB(clr, alpha));
   if(update)
      this.m_canvas.Update(false);
   return true;
  }
A Method That Draws a Shaded Down Arrow:
//+------------------------------------------------------------------+
//| CImagePainter::Draw a filled down arrow                          |
//+------------------------------------------------------------------+
bool CImagePainter::ArrowDown(const int x,const int y,const int w,const int h,const color clr,const uchar alpha,const bool update=true)
  {
//--- If the image area is not valid, return 'false'
   if(!this.CheckBound())
      return false;

//--- Calculate the coordinates of the arrow corners inside the image area
   int hw=(int)::floor(w/2);  // Half width
   if(hw==0)
      hw=1;

   int x1=x+1;                // X. Base (left point)
   int y1=y+4;                // Y. Left base point
   int x2=x1+hw;              // X. Vertex (central bottom point)
   int y2=y+h-3;              // Y. Vertex (lowest point)
   int x3=x1+w-1;             // X. Base (right point)
   int y3=y1;                 // Y. Base (right point)

//--- Draw a triangle
   this.m_canvas.FillTriangle(x1, y1, x2, y2, x3, y3, ::ColorToARGB(clr, alpha));
   if(update)
      this.m_canvas.Update(false);
   return true;
  }
A Method That Draws a Shaded Left Arrow:
//+------------------------------------------------------------------+
//| CImagePainter::Draw a filled left arrow                          |
//+------------------------------------------------------------------+
bool CImagePainter::ArrowLeft(const int x,const int y,const int w,const int h,const color clr,const uchar alpha,const bool update=true)
  {
//--- If the image area is not valid, return 'false'
   if(!this.CheckBound())
      return false;

//--- Calculate the coordinates of the arrow corners inside the image area
   int hh=(int)::floor(h/2);  // Half height
   if(hh==0)
      hh=1;

   int x1=x+w-4;              // X. Base (right side)
   int y1=y+1;                // Y. Base upper corner
   int x2=x+3;                // X. Vertex (left center point)
   int y2=y1+hh;              // Y. Central point (vertex)
   int x3=x1;                 // X. Bottom base corner
   int y3=y1+h-1;             // Y. Bottom base corner

//--- Draw a triangle
   this.m_canvas.FillTriangle(x1, y1, x2, y2, x3, y3, ::ColorToARGB(clr, alpha));

   if(update)
      this.m_canvas.Update(false);
   return true;
  }
A Method That Draws a Shaded Right Arrow:
//+------------------------------------------------------------------+
//| CImagePainter::Draw a filled right arrow                         |
//+------------------------------------------------------------------+
bool CImagePainter::ArrowRight(const int x,const int y,const int w,const int h,const color clr,const uchar alpha,const bool update=true)
  {
//--- If the image area is not valid, return 'false'
   if(!this.CheckBound())
      return false;

//--- Calculate the coordinates of the arrow corners inside the image area
   int hh=(int)::floor(h/2);  // Half height
   if(hh==0)
      hh=1;

   int x1=x+4;                // X. Triangle base (left side)
   int y1=y+1;                // Y. Base upper corner
   int x2=x+w-3;              // X. Vertex (right center point)
   int y2=y1+hh;              // Y. Central point (vertex)
   int x3=x1;                 // X. Bottom base corner
   int y3=y1+h-1;             // Y. Bottom base corner

//--- Draw a triangle
   this.m_canvas.FillTriangle(x1, y1, x2, y2, x3, y3, ::ColorToARGB(clr, alpha));
   if(update)
      this.m_canvas.Update(false);
   return true;
  }
Inside the image area, an area for an arrow is defined with an indentation of one pixel on each side of the rectangular area, and a shaded arrow is drawn inside.
A Method That Draws a Checked CheckBox:
//+------------------------------------------------------------------+
//| CImagePainter::Draw a checked CheckBox                           |
//+------------------------------------------------------------------+
bool CImagePainter::CheckedBox(const int x,const int y,const int w,const int h,const color clr,const uchar alpha,const bool update=true)
  {
//--- If the image area is not valid, return 'false'
   if(!this.CheckBound())
      return false;

//--- Rectangle coordinates
   int x1=x+1;                // Upper left corner, X
   int y1=y+1;                // Upper left corner, Y
   int x2=x+w-2;              // Bottom right corner, X
   int y2=y+h-2;              // Bottom right corner, Y

//--- Draw a rectangle
   this.m_canvas.Rectangle(x1, y1, x2, y2, ::ColorToARGB(clr, alpha));

//--- Checkmark coordinates
   int arrx[3], arry[3];

   arrx[0]=x1+(x2-x1)/4;      // X. Left point
   arrx[1]=x1+w/3;            // X. Central point
   arrx[2]=x2-(x2-x1)/4;      // X. Right point

   arry[0]=y1+1+(y2-y1)/2;    // Y. Left point
   arry[1]=y2-(y2-y1)/3;      // Y. Central point
   arry[2]=y1+(y2-y1)/3;      // Y. Right point

//--- Draw a "tick" with a double-thickness line
   this.m_canvas.Polyline(arrx, arry, ::ColorToARGB(clr, alpha));
   arrx[0]++;
   arrx[1]++;
   arrx[2]++;
   this.m_canvas.Polyline(arrx, arry, ::ColorToARGB(clr, alpha));

   if(update)
      this.m_canvas.Update(false);
   return true;
  }
A Method That Draws an Unchecked CheckBox:
//+------------------------------------------------------------------+
//| CImagePainter::Draw unchecked CheckBox                           |
//+------------------------------------------------------------------+
bool CImagePainter::UncheckedBox(const int x,const int y,const int w,const int h,const color clr,const uchar alpha,const bool update=true)
  {
//--- If the image area is not valid, return 'false'
   if(!this.CheckBound())
      return false;

//--- Rectangle coordinates
   int x1=x+1;                // Upper left corner, X
   int y1=y+1;                // Upper left corner, Y
   int x2=x+w-2;              // Bottom right corner, X
   int y2=y+h-2;              // Bottom right corner, Y

//--- Draw a rectangle
   this.m_canvas.Rectangle(x1, y1, x2, y2, ::ColorToARGB(clr, alpha));

   if(update)
      this.m_canvas.Update(false);
   return true;
  }
A Method That Draws a Checked RadioButton:
//+------------------------------------------------------------------+
//| CImagePainter::Draw checked RadioButton                          |
//+------------------------------------------------------------------+
bool CImagePainter::CheckedRadioButton(const int x,const int y,const int w,const int h,const color clr,const uchar alpha,const bool update=true)
  {
//--- If the image area is not valid, return 'false'
   if(!this.CheckBound())
      return false;

//--- Circle coordinates and radius
   int x1=x+1;                // Circle region upper left corner, X
   int y1=y+1;                // Circle region upper left corner, Y
   int x2=x+w-2;              // Circle region lower right corner, X
   int y2=y+h-2;              // Circle region lower right corner, Y

//--- Circle coordinates and radius
   int d=::fmin(x2-x1,y2-y1); // Shorter side diameter (width or height)
   int r=d/2;                 // Radius
   int cx=x1+r;               // Center X coordinate
   int cy=y1+r;               // Center Y coordinate

//--- Draw a circle
   this.m_canvas.CircleWu(cx, cy, r, ::ColorToARGB(clr, alpha));

//--- Label radius
   r/=2;
   if(r<1)
      r=1;
//--- Draw a label
   this.m_canvas.FillCircle(cx, cy, r, ::ColorToARGB(clr, alpha));

   if(update)
      this.m_canvas.Update(false);
   return true;
  }
A Method That Draws an Unchecked RadioButton:
//+------------------------------------------------------------------+
//| CImagePainter::Draw unchecked RadioButton                        |
//+------------------------------------------------------------------+
bool CImagePainter::UncheckedRadioButton(const int x,const int y,const int w,const int h,const color clr,const uchar alpha,const bool update=true)
  {
//--- If the image area is not valid, return 'false'
   if(!this.CheckBound())
      return false;

//--- Circle coordinates and radius
   int x1=x+1;                // Circle region upper left corner, X
   int y1=y+1;                // Circle region upper left corner, Y
   int x2=x+w-2;              // Circle region lower right corner, X
   int y2=y+h-2;              // Circle region lower right corner, Y

//--- Circle coordinates and radius
   int d=::fmin(x2-x1,y2-y1); // Shorter side diameter (width or height)
   int r=d/2;                 // Radius
   int cx=x1+r;               // Center X coordinate
   int cy=y1+r;               // Center Y coordinate

//--- Draw a circle
   this.m_canvas.CircleWu(cx, cy, r, ::ColorToARGB(clr, alpha));

   if(update)
      this.m_canvas.Update(false);
   return true;
  }
These are simple methods that simply make it possible to draw the desired shapes without having to implement them yourself. Next, add other methods here that draw other icons for the design of graphical elements.
Methods For Saving a Drawing Area to a File and Uploading It From a File:
//+------------------------------------------------------------------+
//| CImagePainter::Save to file                                      |
//+------------------------------------------------------------------+
bool CImagePainter::Save(const int file_handle)
  {
//--- Save the parent object data
   if(!CBaseObj::Save(file_handle))
      return false;

//--- Save transparency
   if(::FileWriteInteger(file_handle,this.m_alpha,INT_VALUE)!=INT_VALUE)
      return false;
//--- Save area data
   if(!this.m_bound.Save(file_handle))
      return false;

//--- All is successful
   return true;
  }
//+------------------------------------------------------------------+
//| CImagePainter::Load from file                                    |
//+------------------------------------------------------------------+
bool CImagePainter::Load(const int file_handle)
  {
//--- Load parent object data
   if(!CBaseObj::Load(file_handle))
      return false;

//--- Load transparency
   this.m_alpha=(uchar)::FileReadInteger(file_handle,INT_VALUE);
//--- Load area data
   if(!this.m_bound.Load(file_handle))
      return false;

//--- All is successful
   return true;
  }
Now, we can start with the classes of simple controls. The minimum such object will be the text label class. Classes of other controls will be inherited from this element.
In the same Controls.mqh file, continue to write class codes.
The "Text Label" Control Class
This class will have a set of variables and methods that allow working with any control, setting and receiving object parameters, saving and loading its properties. The interactivity of all controls (the Controller component) has been added to the base class of all controls today. Now, discuss the text label class:
//+------------------------------------------------------------------+
//| Text label class                                                 |
//+------------------------------------------------------------------+
class CLabel : public CCanvasBase
  {
protected:
   CImagePainter     m_painter;                                // Drawing class
   ushort            m_text[];                                 // Text
   ushort            m_text_prev[];                            // Previous text
   int               m_text_x;                                 // Text X coordinate (offset relative to the object left border)
   int               m_text_y;                                 // Text Y coordinate (offset relative to the object upper border)

//--- (1) Set and (2) return the previous text
   void              SetTextPrev(const string text)            { ::StringToShortArray(text,this.m_text_prev);  }
   string            TextPrev(void)                      const { return ::ShortArrayToString(this.m_text_prev);}

//--- Delete the text
   void              ClearText(void);

public:
//--- Return the pointer to the drawing class
   CImagePainter    *Painter(void)                             { return &this.m_painter;           }

//--- (1) Set and (2) return the text
   void              SetText(const string text)                { ::StringToShortArray(text,this.m_text);       }
   string            Text(void)                          const { return ::ShortArrayToString(this.m_text);     }

//--- Return the text (1) X and (2) Y coordinate
   int               TextX(void)                         const { return this.m_text_x;                         }
   int               TextY(void)                         const { return this.m_text_y;                         }

//--- Set the text (1) X and (2) Y coordinate
   void              SetTextShiftH(const int x)                { this.m_text_x=x;                              }
   void              SetTextShiftV(const int y)                { this.m_text_y=y;                              }

//--- (1) Set the coordinates and (2) change the image area size
   void              SetImageXY(const int x,const int y)       { this.m_painter.SetXY(x,y);                    }
   void              SetImageSize(const int w,const int h)     { this.m_painter.SetSize(w,h);                  }
//--- Set the area coordinates and image area dimensions
   void              SetImageBound(const int x,const int y,const int w,const int h)
                       {
                        this.SetImageXY(x,y);
                        this.SetImageSize(w,h);
                       }
//--- Return the (1) X, (2) Y coordinate, (3) width, (4) height, (5) right, (6) bottom image area border
   int               ImageX(void)                        const { return this.m_painter.X();                    }
   int               ImageY(void)                        const { return this.m_painter.Y();                    }
   int               ImageWidth(void)                    const { return this.m_painter.Width();                }
   int               ImageHeight(void)                   const { return this.m_painter.Height();               }
   int               ImageRight(void)                    const { return this.m_painter.Right();                }
   int               ImageBottom(void)                   const { return this.m_painter.Bottom();               }

//--- Display the text
   void              DrawText(const int dx, const int dy, const string text, const bool chart_redraw);

//--- Draw the appearance
   virtual void      Draw(const bool chart_redraw);

//--- Virtual methods of (1) comparing, (2) saving to file, (3) loading from file, (4) object type
   virtual int       Compare(const CObject *node,const int mode=0) const;
   virtual bool      Save(const int file_handle);
   virtual bool      Load(const int file_handle);
   virtual int       Type(void)                          const { return(ELEMENT_TYPE_LABEL);                   }

//--- Constructors/destructor
                     CLabel(void);
                     CLabel(const string object_name, const string text, const int x, const int y, const int w, const int h);
                     CLabel(const string object_name, const string text, const int wnd, const int x, const int y, const int w, const int h);
                     CLabel(const string object_name, const long chart_id, const int wnd, const string text, const int x, const int y, const int w, const int h);
                    ~CLabel(void) {}
  };
The class defines two ushort arrays of characters for the current and past label texts. This allows you to have access to dimensions of the previous text when drawing, and to correctly erase the area covered by the text before displaying a new text on the canvas.
Consider the declared methods.
The class has four constructors that allow to create an object using different sets of parameters:
//+------------------------------------------------------------------+
//| CLabel::Default constructor. Build a label in the main window    |
//| of the current chart at coordinates 0,0 with default dimensions  |
//+------------------------------------------------------------------+
CLabel::CLabel(void) : CCanvasBase("Label",::ChartID(),0,0,0,DEF_LABEL_W,DEF_LABEL_H), m_text_x(0), m_text_y(0)
  {
//--- Assign the foreground canvas to the drawing object and
//--- reset the coordinates and dimensions, which makes it inactive
   this.m_painter.CanvasAssign(this.GetForeground());
   this.m_painter.SetXY(0,0);
   this.m_painter.SetSize(0,0);
//--- Set the current and previous text
   this.SetText("Label");
   this.SetTextPrev("");
//--- Background is transparent, foreground is not
   this.SetAlphaBG(0);
   this.SetAlphaFG(255);
  }
//+-----------------------------------------------------------------------------+
//| CLabel::Parametric constructor. Build a label in the main window            |
//| of the current chart with the specified text, coordinates and dimensions    |
//+-----------------------------------------------------------------------------+
CLabel::CLabel(const string object_name, const string text,const int x,const int y,const int w,const int h) :
   CCanvasBase(object_name,::ChartID(),0,x,y,w,h), m_text_x(0), m_text_y(0)
  {
//--- Assign the foreground canvas to the drawing object and
//--- reset the coordinates and dimensions, which makes it inactive
   this.m_painter.CanvasAssign(this.GetForeground());
   this.m_painter.SetXY(0,0);
   this.m_painter.SetSize(0,0);
//--- Set the current and previous text
   this.SetText(text);
   this.SetTextPrev("");
//--- Background is transparent, foreground is not
   this.SetAlphaBG(0);
   this.SetAlphaFG(255);
  }
//+-----------------------------------------------------------------------------+
//| CLabel::Parametric constructor. Builds a label in the specified window      |
//| of the current chart with the specified text, coordinates and dimensions    |
//+-----------------------------------------------------------------------------+
CLabel::CLabel(const string object_name, const string text,const int wnd,const int x,const int y,const int w,const int h) :
   CCanvasBase(object_name,::ChartID(),wnd,x,y,w,h), m_text_x(0), m_text_y(0)
  {
//--- Assign the foreground canvas to the drawing object and
//--- reset the coordinates and dimensions, which makes it inactive
   this.m_painter.CanvasAssign(this.GetForeground());
   this.m_painter.SetXY(0,0);
   this.m_painter.SetSize(0,0);
//--- Set the current and previous text
   this.SetText(text);
   this.SetTextPrev("");
//--- Background is transparent, foreground is not
   this.SetAlphaBG(0);
   this.SetAlphaFG(255);
  }
//+------------------------------------------------------------------------------+
//| CLabel::Parametric constructor. Builds a label in the specified window       |
//| of the specified chart with the specified text, coordinates and dimensions   |
//+------------------------------------------------------------------------------+
CLabel::CLabel(const string object_name,const long chart_id,const int wnd,const string text,const int x,const int y,const int w,const int h) :
   CCanvasBase(object_name,chart_id,wnd,x,y,w,h), m_text_x(0), m_text_y(0)
  {
//--- Assign the foreground canvas to the drawing object and
//--- reset the coordinates and dimensions, which makes it inactive
   this.m_painter.CanvasAssign(this.GetForeground());
   this.m_painter.SetXY(0,0);
   this.m_painter.SetSize(0,0);
//--- Set the current and previous text
   this.SetText(text);
   this.SetTextPrev("");
//--- Background is transparent, foreground is not
   this.SetAlphaBG(0);
   this.SetAlphaFG(255);
  }
The drawing (element icon) area is set to zero dimensions, which means that the element does not have an icon. The text of the element is set and full transparency is assigned for the background, while full opacity is assigned for the foreground.
A Method for Comparing Two Objects:
//+------------------------------------------------------------------+
//| CLabel::Compare two objects                                      |
//+------------------------------------------------------------------+
int CLabel::Compare(const CObject *node,const int mode=0) const
  {
   const CLabel *obj=node;
   switch(mode)
     {
      case ELEMENT_SORT_BY_NAME  :  return(this.Name()     >obj.Name()      ? 1 : this.Name()     <obj.Name()      ? -1 : 0);
      case ELEMENT_SORT_BY_TEXT  :  return(this.Text()     >obj.Text()      ? 1 : this.Text()     <obj.Text()      ? -1 : 0);
      case ELEMENT_SORT_BY_COLOR :  return(this.ForeColor()>obj.ForeColor() ? 1 : this.ForeColor()<obj.ForeColor() ? -1 : 0);
      case ELEMENT_SORT_BY_ALPHA :  return(this.AlphaFG()  >obj.AlphaFG()   ? 1 : this.AlphaFG()  <obj.AlphaFG()   ? -1 : 0);
      default                    :  return(this.ID()       >obj.ID()        ? 1 : this.ID()       <obj.ID()        ? -1 : 0);
     }
  }
Comparison is possible by object name, label text, color, transparency, and identifier. By default, objects are compared by the object ID, since when objects are in the same list, it is better to distinguish them by IDs for quick access to the required one.
A Method That Erases The Label Text:
//+------------------------------------------------------------------+
//| CLabel::Delete the text                                          |
//+------------------------------------------------------------------+
void CLabel::ClearText(void)
  {
   int w=0, h=0;
   string text=this.TextPrev();
//--- Get the dimensions of the previous text
   if(text!="")
      this.m_foreground.TextSize(text,w,h);
//--- If the dimensions are received, draw a transparent rectangle in place of the text erasing it
   if(w>0 && h>0)
      this.m_foreground.FillRectangle(this.AdjX(this.m_text_x),this.AdjY(this.m_text_y),this.AdjX(this.m_text_x+w),this.AdjY(this.m_text_y+h),clrNULL);
//--- Otherwise, clear the entire foreground
   else
      this.m_foreground.Erase(clrNULL);
  }
If the text was written earlier, then you can erase it by painting it over with a completely transparent rectangle according to the size of the text. If there was no text before, the entire canvas area of the object is erased.
A method for displaying text on canvas:
//+------------------------------------------------------------------+
//| CLabel::Display the text                                         |
//+------------------------------------------------------------------+
void CLabel::DrawText(const int dx,const int dy,const string text,const bool chart_redraw)
  {
//--- Clear the previous text and set the new one
   this.ClearText();
   this.SetText(text);
//--- Display the set text
   this.m_foreground.TextOut(this.AdjX(dx),this.AdjY(dy),this.Text(),::ColorToARGB(this.ForeColor(),this.AlphaFG()));

//--- If the text goes beyond the object right border
   if(this.Width()-dx<this.m_foreground.TextWidth(text))
     {
      //--- Get the dimensions of the "..." text
      int w=0,h=0;
      this.m_foreground.TextSize("... ",w,h);
      if(w>0 && h>0)
        {
         //--- Erase the text at the right edge of the object to the size of the "..." text and replace the end of the label text with "..."
         this.m_foreground.FillRectangle(this.AdjX(this.Width()-w),this.AdjY(this.m_text_y),this.AdjX(this.Width()),this.AdjY(this.m_text_y+h),clrNULL);
         this.m_foreground.TextOut(this.AdjX(this.Width()-w),this.AdjY(dy),"...",::ColorToARGB(this.ForeColor(),this.AlphaFG()));
        }
     }
//--- Update the foreground canvas and remember the new text coordinates
   this.m_foreground.Update(chart_redraw);
   this.m_text_x=dx;
   this.m_text_y=dy;
//--- Save the rendered text as the previous one
   this.SetTextPrev(text);
  }
Here, the previous text on the canvas is first erased, and then a new one is displayed. If the new text overruns the bounds of the object, then a colon is displayed on the right where it overruns the element, indicating that the text does not fit into the object area, something like this: “This text does not fit...".
A method that draws the appearance:
//+------------------------------------------------------------------+
//| CLabel::Draw the appearance                                      |
//+------------------------------------------------------------------+
void CLabel::Draw(const bool chart_redraw)
  {
   this.DrawText(this.m_text_x,this.m_text_y,this.Text(),chart_redraw);
  }
Here, the method for drawing a label text is simply called.
Methods of Manipulations With Files:
//+------------------------------------------------------------------+
//| CLabel::Save to file                                             |
//+------------------------------------------------------------------+
bool CLabel::Save(const int file_handle)
  {
//--- Save the parent object data
   if(!CCanvasBase::Save(file_handle))
      return false;

//--- Save the text
   if(::FileWriteArray(file_handle,this.m_text)!=sizeof(this.m_text))
      return false;
//--- Save the previous text
   if(::FileWriteArray(file_handle,this.m_text_prev)!=sizeof(this.m_text_prev))
      return false;
//--- Save the text X coordinate
   if(::FileWriteInteger(file_handle,this.m_text_x,INT_VALUE)!=INT_VALUE)
      return false;
//--- Save the text Y coordinate
   if(::FileWriteInteger(file_handle,this.m_text_y,INT_VALUE)!=INT_VALUE)
      return false;

//--- All is successful
   return true;
  }
//+------------------------------------------------------------------+
//| CLabel::Load from file                                           |
//+------------------------------------------------------------------+
bool CLabel::Load(const int file_handle)
  {
//--- Load parent object data
   if(!CCanvasBase::Load(file_handle))
      return false;

//--- Load the text
   if(::FileReadArray(file_handle,this.m_text)!=sizeof(this.m_text))
      return false;
//--- Load the previous text
   if(::FileReadArray(file_handle,this.m_text_prev)!=sizeof(this.m_text_prev))
      return false;
//--- Load the text X coordinate
   this.m_text_x=::FileReadInteger(file_handle,INT_VALUE);
//--- Load the text Y coordinate
   this.m_text_y=::FileReadInteger(file_handle,INT_VALUE);

//--- All is successful
   return true;
  }
Based on the considered class, create a simple button class.
The “Simple Button" Control Class
//+------------------------------------------------------------------+
//| Simple button class                                              |
//+------------------------------------------------------------------+
class CButton : public CLabel
  {
public:
//--- Draw the appearance
   virtual void      Draw(const bool chart_redraw);

//--- Virtual methods of (1) comparing, (2) saving to file, (3) loading from file, (4) object type
   virtual int       Compare(const CObject *node,const int mode=0) const;
   virtual bool      Save(const int file_handle)               { return CLabel::Save(file_handle); }
   virtual bool      Load(const int file_handle)               { return CLabel::Load(file_handle); }
   virtual int       Type(void)                          const { return(ELEMENT_TYPE_BUTTON);      }

//--- Constructors/destructor
                     CButton(void);
                     CButton(const string object_name, const string text, const int x, const int y, const int w, const int h);
                     CButton(const string object_name, const string text, const int wnd, const int x, const int y, const int w, const int h);
                     CButton(const string object_name, const long chart_id, const int wnd, const string text, const int x, const int y, const int w, const int h);
                    ~CButton (void) {}
  };
The simple button class differs from the text label class only by the method of drawing the appearance.
The class has four constructors that allow to create a button with specified parameters:
//+-------------------------------------------------------------------+
//| CButton::Default constructor. Builds a button in the main window  |
//| of the current chart at coordinates 0,0 with default dimensions   |
//+-------------------------------------------------------------------+
CButton::CButton(void) : CLabel("Button",::ChartID(),0,"Button",0,0,DEF_BUTTON_W,DEF_BUTTON_H)
  {
   this.SetState(ELEMENT_STATE_DEF);
   this.SetAlpha(255);
  }
//+-----------------------------------------------------------------------------+
//| CButton::Parametric constructor. Builds a button in the main window         |
//| of the current chart with the specified text, coordinates and dimensions    |
//+-----------------------------------------------------------------------------+
CButton::CButton(const string object_name,const string text,const int x,const int y,const int w,const int h) :
   CLabel(object_name,::ChartID(),0,text,x,y,w,h)
  {
   this.SetState(ELEMENT_STATE_DEF);
   this.SetAlpha(255);
  }
//+-------------------------------------------------------------------------------+
//| CButton::Parametric constructor. Builds a button in the specified window      |
//| of the current chart with the specified text, coordinates and dimensions      |
//+-------------------------------------------------------------------------------+
CButton::CButton(const string object_name,const string text,const int wnd,const int x,const int y,const int w,const int h) :
   CLabel(object_name,::ChartID(),wnd,text,x,y,w,h)
  {
   this.SetState(ELEMENT_STATE_DEF);
   this.SetAlpha(255);
  }
//+-------------------------------------------------------------------------------+
//| CButton::Parametric constructor. Builds a button in the specified window      |
//| of the specified chart with the specified text, coordinates and dimensions    |
//+-------------------------------------------------------------------------------+
CButton::CButton(const string object_name,const long chart_id,const int wnd,const string text,const int x,const int y,const int w,const int h) :
   CLabel(object_name,chart_id,wnd,text,x,y,w,h)
  {
   this.SetState(ELEMENT_STATE_DEF);
   this.SetAlpha(255);
  }
Set the "button not pressed" state and set full opacity for the background and foreground.
A method for comparing two objects:
//+------------------------------------------------------------------+
//| CButton::Compare two objects                                     |
//+------------------------------------------------------------------+
int CButton::Compare(const CObject *node,const int mode=0) const
  {
   const CButton *obj=node;
   switch(mode)
     {
      case ELEMENT_SORT_BY_NAME  :  return(this.Name()     >obj.Name()      ? 1 : this.Name()     <obj.Name()      ? -1 : 0);
      case ELEMENT_SORT_BY_TEXT  :  return(this.Text()     >obj.Text()      ? 1 : this.Text()     <obj.Text()      ? -1 : 0);
      case ELEMENT_SORT_BY_COLOR :  return(this.BackColor()>obj.BackColor() ? 1 : this.BackColor()<obj.BackColor() ? -1 : 0);
      case ELEMENT_SORT_BY_ALPHA :  return(this.AlphaBG()  >obj.AlphaBG()   ? 1 : this.AlphaBG()  <obj.AlphaBG()   ? -1 : 0);
      default                    :  return(this.ID()       >obj.ID()        ? 1 : this.ID()       <obj.ID()        ? -1 : 0);
     }
  }
The method is identical to that of the text label class. Most likely, if the buttons do not have any other properties, this method can be removed from the class, and the parent class method will be used.
A Method That Draws the Appearance of the Button:
//+------------------------------------------------------------------+
//| CButton::Draw the appearance                                     |
//+------------------------------------------------------------------+
void CButton::Draw(const bool chart_redraw)
  {
//--- Fill the button with the background color, draw the frame and update the background canvas
   this.Fill(this.BackColor(),false);
   this.m_background.Rectangle(this.AdjX(0),this.AdjY(0),this.AdjX(this.Width()-1),this.AdjY(this.Height()-1),::ColorToARGB(this.BorderColor(),this.AlphaBG()));
   this.m_background.Update(false);
//--- Display the button text
   CLabel::Draw(false);

//--- If specified, update the chart
   if(chart_redraw)
      ::ChartRedraw(this.m_chart_id);
  }
First, fill the background with the set color, then draw a border and display the text of the button.
Based on this class, create a two-position button class.
The “Two-Position Button" Control Class
//+------------------------------------------------------------------+
//| Toggle button class                                              |
//+------------------------------------------------------------------+
class CButtonTriggered : public CButton
  {
public:
//--- Draw the appearance
   virtual void      Draw(const bool chart_redraw);

//--- Mouse button click event handler (Press)
   virtual void      OnPressEvent(const int id, const long lparam, const double dparam, const string sparam);

//--- Virtual methods of (1) comparing, (2) saving to file, (3) loading from file, (4) object type
   virtual int       Compare(const CObject *node,const int mode=0) const;
   virtual bool      Save(const int file_handle)               { return CButton::Save(file_handle);      }
   virtual bool      Load(const int file_handle)               { return CButton::Load(file_handle);      }
   virtual int       Type(void)                          const { return(ELEMENT_TYPE_BUTTON_TRIGGERED);  }

//--- Initialize the object default colors
   virtual void      InitColors(void);

//--- Constructors/destructor
                     CButtonTriggered(void);
                     CButtonTriggered(const string object_name, const string text, const int x, const int y, const int w, const int h);
                     CButtonTriggered(const string object_name, const string text, const int wnd, const int x, const int y, const int w, const int h);
                     CButtonTriggered(const string object_name, const long chart_id, const int wnd, const string text, const int x, const int y, const int w, const int h);
                    ~CButtonTriggered (void) {}
  };
The object has four constructors that allow you to create a button with the specified parameters:
//+------------------------------------------------------------------+
//| CButtonTriggered::Default constructor.                           |
//| Builds a button in the main window of the current chart          |
//| at 0,0 coordinates with default dimensions                       |
//+------------------------------------------------------------------+
CButtonTriggered::CButtonTriggered(void) : CButton("Button",::ChartID(),0,"Button",0,0,DEF_BUTTON_W,DEF_BUTTON_H)
  {
   this.InitColors();
  }
//+------------------------------------------------------------------+
//| CButtonTriggered::Parametric constructor.                        |
//| Builds a button in the main window of the current chart          |
//| with the specified text, coordinates and dimensions              |
//+------------------------------------------------------------------+
CButtonTriggered::CButtonTriggered(const string object_name,const string text,const int x,const int y,const int w,const int h) :
   CButton(object_name,::ChartID(),0,text,x,y,w,h)
  {
   this.InitColors();
  }
//+------------------------------------------------------------------+
//| CButtonTriggered::Parametric constructor.                        |
//| Builds a button in the specified window of the current chart     |
//| with the specified text, coordinates and dimensions              |
//+------------------------------------------------------------------+
CButtonTriggered::CButtonTriggered(const string object_name,const string text,const int wnd,const int x,const int y,const int w,const int h) :
   CButton(object_name,::ChartID(),wnd,text,x,y,w,h)
  {
   this.InitColors();
  }
//+------------------------------------------------------------------+
//| CButtonTriggered::Parametric constructor.                        |
//| Builds a button in the specified window of the specified chart   |
//| with the specified text, coordinates and dimensions              |
//+------------------------------------------------------------------+
CButtonTriggered::CButtonTriggered(const string object_name,const long chart_id,const int wnd,const string text,const int x,const int y,const int w,const int h) :
   CButton(object_name,chart_id,wnd,text,x,y,w,h)
  {
   this.InitColors();
  }
The default color initialization method is called in each constructor:
//+------------------------------------------------------------------+
//| CButtonTriggered::Initialize the object default colors           |
//+------------------------------------------------------------------+
void CButtonTriggered::InitColors(void)
  {
//--- Initialize the background colors for the normal and activated states and make it the current background color
   this.InitBackColors(clrWhiteSmoke);
   this.InitBackColorsAct(clrLightBlue);
   this.BackColorToDefault();

//--- Initialize the foreground colors for the normal and activated states and make it the current text color
   this.InitForeColors(clrBlack);
   this.InitForeColorsAct(clrBlack);
   this.ForeColorToDefault();

//--- Initialize the border colors for the normal and activated states and make it the current border color
   this.InitBorderColors(clrDarkGray);
   this.InitBorderColorsAct(clrGreen);
   this.BorderColorToDefault();

//--- Initialize the border color and foreground color for the disabled element
   this.InitBorderColorBlocked(clrLightGray);
   this.InitForeColorBlocked(clrSilver);
  }
These are the default colors that are set for the newly created button. After creating an object, all the colors can be customized at your discretion.
The comparison methodhas been added with a comparison by the state of the button:
//+------------------------------------------------------------------+
//| CButtonTriggered::Compare two objects                            |
//+------------------------------------------------------------------+
int CButtonTriggered::Compare(const CObject *node,const int mode=0) const
  {
   const CButtonTriggered *obj=node;
   switch(mode)
     {
      case ELEMENT_SORT_BY_NAME  :  return(this.Name()     >obj.Name()      ? 1 : this.Name()     <obj.Name()      ? -1 : 0);
      case ELEMENT_SORT_BY_TEXT  :  return(this.Text()     >obj.Text()      ? 1 : this.Text()     <obj.Text()      ? -1 : 0);
      case ELEMENT_SORT_BY_COLOR :  return(this.BackColor()>obj.BackColor() ? 1 : this.BackColor()<obj.BackColor() ? -1 : 0);
      case ELEMENT_SORT_BY_ALPHA :  return(this.AlphaBG()  >obj.AlphaBG()   ? 1 : this.AlphaBG()  <obj.AlphaBG()   ? -1 : 0);
      case ELEMENT_SORT_BY_STATE :  return(this.State()    >obj.State()     ? 1 : this.State()    <obj.State()     ? -1 : 0);
      default                    :  return(this.ID()       >obj.ID()        ? 1 : this.ID()       <obj.ID()        ? -1 : 0);
     }
  }
A Method That Draws the Appearance of the Button:
//+------------------------------------------------------------------+
//| CButtonTriggered::Draw the appearance                            |
//+------------------------------------------------------------------+
void CButtonTriggered::Draw(const bool chart_redraw)
  {
//--- Fill the button with the background color, draw the frame and update the background canvas
   this.Fill(this.BackColor(),false);
   this.m_background.Rectangle(this.AdjX(0),this.AdjY(0),this.AdjX(this.Width()-1),this.AdjY(this.Height()-1),::ColorToARGB(this.BorderColor(),this.AlphaBG()));
   this.m_background.Update(false);
//--- Display the button text
   CLabel::Draw(false);

//--- If specified, update the chart
   if(chart_redraw)
      ::ChartRedraw(this.m_chart_id);
  }
The method is identical to that of the parent class, and if there are no further improvements to the class, then the method can be deleted — the drawing method from the parent class will be used.
The two-position button has two states:
- Pressed,
- Released.
To track and switch its states, the mouse click handler OnPressEvent of the parent class has been redefined here:
//+------------------------------------------------------------------+
//| CButtonTriggered::Mouse button click event handler (Press)       |
//+------------------------------------------------------------------+
void CButtonTriggered::OnPressEvent(const int id,const long lparam,const double dparam,const string sparam)
  {
//--- Set the button state to the opposite of the one already set
   ENUM_ELEMENT_STATE state=(this.State()==ELEMENT_STATE_DEF ? ELEMENT_STATE_ACT : ELEMENT_STATE_DEF);
   this.SetState(state);

//--- Call the parent object handler with the ID in lparam and the state in dparam
   CCanvasBase::OnPressEvent(id,this.m_id,this.m_state,sparam);
  }
Based on the CButton class, create four arrow buttons: up, down, left and right. The objects will use the image drawing class to draw arrows.
“Up Arrow Button” Control Class
//+------------------------------------------------------------------+
//| Up arrow button class                                            |
//+------------------------------------------------------------------+
class CButtonArrowUp : public CButton
  {
public:
//--- Draw the appearance
   virtual void      Draw(const bool chart_redraw);

//--- Virtual methods of (1) comparing, (2) saving to file, (3) loading from file, (4) object type
   virtual int       Compare(const CObject *node,const int mode=0) const;
   virtual bool      Save(const int file_handle)               { return CButton::Save(file_handle);   }
   virtual bool      Load(const int file_handle)               { return CButton::Load(file_handle);   }
   virtual int       Type(void)                          const { return(ELEMENT_TYPE_BUTTON_ARROW_UP);}

//--- Constructors/destructor
                     CButtonArrowUp(void);
                     CButtonArrowUp(const string object_name, const int x, const int y, const int w, const int h);
                     CButtonArrowUp(const string object_name, const int wnd, const int x, const int y, const int w, const int h);
                     CButtonArrowUp(const string object_name, const long chart_id, const int wnd, const int x, const int y, const int w, const int h);
                    ~CButtonArrowUp (void) {}
  };
Four constructors allow you to create an object with the specified parameters:
//+------------------------------------------------------------------+
//| CButtonArrowUp::Default constructor.                             |
//| Builds a button in the main window of the current chart          |
//| at 0,0 coordinates with default dimensions                       |
//+------------------------------------------------------------------+
CButtonArrowUp::CButtonArrowUp(void) : CButton("Arrow Up Button",::ChartID(),0,"",0,0,DEF_BUTTON_W,DEF_BUTTON_H)
  {
   this.InitColors();
   this.SetImageBound(1,1,this.Height()-2,this.Height()-2);
  }
//+------------------------------------------------------------------+
//| CButtonArrowUp::Parametric constructor.                          |
//| Builds a button in the main window of the current chart          |
//| with the specified text, coordinates and dimensions              |
//+------------------------------------------------------------------+
CButtonArrowUp::CButtonArrowUp(const string object_name,const int x,const int y,const int w,const int h) :
   CButton(object_name,::ChartID(),0,"",x,y,w,h)
  {
   this.InitColors();
   this.SetImageBound(1,1,this.Height()-2,this.Height()-2);
  }
//+------------------------------------------------------------------+
//| CButtonArrowUp::Parametric constructor.                          |
//| Builds a button in the specified window of the current chart     |
//| with the specified text, coordinates and dimensions              |
//+------------------------------------------------------------------+
CButtonArrowUp::CButtonArrowUp(const string object_name,const int wnd,const int x,const int y,const int w,const int h) :
   CButton(object_name,::ChartID(),wnd,"",x,y,w,h)
  {
   this.InitColors();
   this.SetImageBound(1,1,this.Height()-2,this.Height()-2);
  }
//+------------------------------------------------------------------+
//| CButtonArrowUp::Parametric constructor.                          |
//| Builds a button in the specified window of the specified chart   |
//| with the specified text, coordinates and dimensions              |
//+------------------------------------------------------------------+
CButtonArrowUp::CButtonArrowUp(const string object_name,const long chart_id,const int wnd,const int x,const int y,const int w,const int h) :
   CButton(object_name,chart_id,wnd,"",x,y,w,h)
  {
   this.InitColors();
   this.SetImageBound(1,1,this.Height()-2,this.Height()-2);
  }
Default colors are initialized in constructors and the coordinates as well as dimensions of the image area are set.
A Method That Draws the Appearance of the Button:
//+------------------------------------------------------------------+
//| CButtonArrowUp::Draw the appearance                              |
//+------------------------------------------------------------------+
void CButtonArrowUp::Draw(const bool chart_redraw)
  {
//--- Fill the button with the background color, draw the frame and update the background canvas
   this.Fill(this.BackColor(),false);
   this.m_background.Rectangle(this.AdjX(0),this.AdjY(0),this.AdjX(this.Width()-1),this.AdjY(this.Height()-1),::ColorToARGB(this.BorderColor(),this.AlphaBG()));
   this.m_background.Update(false);
//--- Display the button text
   CLabel::Draw(false);
//--- Clear the drawing area
   this.m_painter.Clear(this.AdjX(this.m_painter.X()),this.AdjY(this.m_painter.Y()),this.m_painter.Width(),this.m_painter.Height(),false);
//--- Set the arrow color for the normal and disabled states of the button and draw the up arrow
   color clr=(!this.IsBlocked() ? this.GetForeColorControl().NewColor(this.ForeColor(),90,90,90) : this.ForeColor());
   this.m_painter.ArrowUp(this.AdjX(this.m_painter.X()),this.AdjY(this.m_painter.Y()),this.m_painter.Width(),this.m_painter.Height(),clr,this.AlphaFG(),true);

//--- If specified, update the chart
   if(chart_redraw)
      ::ChartRedraw(this.m_chart_id);
  }
The method is similar to that of drawing a button, but additionally an up arrow is displayed using the ArrowUp method of the drawing object.
All other classes are identical to the one considered, but drawing methods use icons corresponding to the purpose of the button.
“Down Arrow Button” Control Class
//+------------------------------------------------------------------+
//| Down arrow button class                                          |
//+------------------------------------------------------------------+
class CButtonArrowDown : public CButton
  {
public:
//--- Draw the appearance
   virtual void      Draw(const bool chart_redraw);

//--- Virtual methods of (1) comparing, (2) saving to file, (3) loading from file, (4) object type
   virtual int       Compare(const CObject *node,const int mode=0) const;
   virtual bool      Save(const int file_handle)               { return CButton::Save(file_handle);      }
   virtual bool      Load(const int file_handle)               { return CButton::Load(file_handle);      }
   virtual int       Type(void)                          const { return(ELEMENT_TYPE_BUTTON_ARROW_DOWN); }

//--- Constructors/destructor
                     CButtonArrowDown(void);
                     CButtonArrowDown(const string object_name, const int x, const int y, const int w, const int h);
                     CButtonArrowDown(const string object_name, const int wnd, const int x, const int y, const int w, const int h);
                     CButtonArrowDown(const string object_name, const long chart_id, const int wnd, const int x, const int y, const int w, const int h);
                    ~CButtonArrowDown (void) {}
  };
//+------------------------------------------------------------------+
//| CButtonArrowDown::Default constructor.                           |
//| Builds a button in the main window of the current chart          |
//| at 0,0 coordinates with default dimensions                       |
//+------------------------------------------------------------------+
CButtonArrowDown::CButtonArrowDown(void) : CButton("Arrow Up Button",::ChartID(),0,"",0,0,DEF_BUTTON_W,DEF_BUTTON_H)
  {
   this.InitColors();
   this.SetImageBound(1,1,this.Height()-2,this.Height()-2);
  }
//+------------------------------------------------------------------+
//| CButtonArrowDown::Parametric constructor.                        |
//| Builds a button in the main window of the current chart          |
//| with the specified text, coordinates and dimensions              |
//+------------------------------------------------------------------+
CButtonArrowDown::CButtonArrowDown(const string object_name,const int x,const int y,const int w,const int h) :
   CButton(object_name,::ChartID(),0,"",x,y,w,h)
  {
   this.InitColors();
   this.SetImageBound(1,1,this.Height()-2,this.Height()-2);
  }
//+------------------------------------------------------------------+
//| CButtonArrowDown::Parametric constructor.                        |
//| Builds a button in the specified window of the current chart     |
//| with the specified text, coordinates and dimensions              |
//+------------------------------------------------------------------+
CButtonArrowDown::CButtonArrowDown(const string object_name,const int wnd,const int x,const int y,const int w,const int h) :
   CButton(object_name,::ChartID(),wnd,"",x,y,w,h)
  {
   this.InitColors();
   this.SetImageBound(1,1,this.Height()-2,this.Height()-2);
  }
//+------------------------------------------------------------------+
//| CButtonArrowDown::Parametric constructor.                        |
//| Builds a button in the specified window of the specified chart   |
//| with the specified text, coordinates and dimensions              |
//+------------------------------------------------------------------+
CButtonArrowDown::CButtonArrowDown(const string object_name,const long chart_id,const int wnd,const int x,const int y,const int w,const int h) :
   CButton(object_name,chart_id,wnd,"",x,y,w,h)
  {
   this.InitColors();
   this.SetImageBound(1,1,this.Height()-2,this.Height()-2);
  }
//+------------------------------------------------------------------+
//| CButtonArrowDown::Draw the appearance                            |
//+------------------------------------------------------------------+
void CButtonArrowDown::Draw(const bool chart_redraw)
  {
//--- Fill the button with the background color, draw the frame and update the background canvas
   this.Fill(this.BackColor(),false);
   this.m_background.Rectangle(this.AdjX(0),this.AdjY(0),this.AdjX(this.Width()-1),this.AdjY(this.Height()-1),::ColorToARGB(this.BorderColor(),this.AlphaBG()));
   this.m_background.Update(false);
//--- Display the button text
   CLabel::Draw(false);
//--- Clear the drawing area
   this.m_painter.Clear(this.AdjX(this.m_painter.X()),this.AdjY(this.m_painter.Y()),this.m_painter.Width(),this.m_painter.Height(),false);
//--- Set the arrow color for the normal and disabled states of the button and draw the down arrow
   color clr=(!this.IsBlocked() ? this.GetForeColorControl().NewColor(this.ForeColor(),90,90,90) : this.ForeColor());
   this.m_painter.ArrowDown(this.AdjX(this.m_painter.X()),this.AdjY(this.m_painter.Y()),this.m_painter.Width(),this.m_painter.Height(),clr,this.AlphaFG(),true);

//--- If specified, update the chart
   if(chart_redraw)
      ::ChartRedraw(this.m_chart_id);
  }
“Left Arrow Button” Control Class
//+------------------------------------------------------------------+
//| Left arrow button class                                          |
//+------------------------------------------------------------------+
class CButtonArrowLeft : public CButton
  {
public:
//--- Draw the appearance
   virtual void      Draw(const bool chart_redraw);

//--- Virtual methods of (1) comparing, (2) saving to file, (3) loading from file, (4) object type
   virtual int       Compare(const CObject *node,const int mode=0) const;
   virtual bool      Save(const int file_handle)               { return CButton::Save(file_handle);      }
   virtual bool      Load(const int file_handle)               { return CButton::Load(file_handle);      }
   virtual int       Type(void)                          const { return(ELEMENT_TYPE_BUTTON_ARROW_DOWN); }

//--- Constructors/destructor
                     CButtonArrowLeft(void);
                     CButtonArrowLeft(const string object_name, const int x, const int y, const int w, const int h);
                     CButtonArrowLeft(const string object_name, const int wnd, const int x, const int y, const int w, const int h);
                     CButtonArrowLeft(const string object_name, const long chart_id, const int wnd, const int x, const int y, const int w, const int h);
                    ~CButtonArrowLeft (void) {}
  };
//+------------------------------------------------------------------+
//| CButtonArrowLeft::Default constructor.                           |
//| Builds a button in the main window of the current chart          |
//| at 0,0 coordinates with default dimensions                       |
//+------------------------------------------------------------------+
CButtonArrowLeft::CButtonArrowLeft(void) : CButton("Arrow Up Button",::ChartID(),0,"",0,0,DEF_BUTTON_W,DEF_BUTTON_H)
  {
   this.InitColors();
   this.SetImageBound(1,1,this.Height()-2,this.Height()-2);
  }
//+------------------------------------------------------------------+
//| CButtonArrowLeft::Parametric constructor.                        |
//| Builds a button in the main window of the current chart          |
//| with the specified text, coordinates and dimensions              |
//+------------------------------------------------------------------+
CButtonArrowLeft::CButtonArrowLeft(const string object_name,const int x,const int y,const int w,const int h) :
   CButton(object_name,::ChartID(),0,"",x,y,w,h)
  {
   this.InitColors();
   this.SetImageBound(1,1,this.Height()-2,this.Height()-2);
  }
//+------------------------------------------------------------------+
//| CButtonArrowLeft::Parametric constructor.                        |
//| Builds a button in the specified window of the current chart     |
//| with the specified text, coordinates and dimensions              |
//+------------------------------------------------------------------+
CButtonArrowLeft::CButtonArrowLeft(const string object_name,const int wnd,const int x,const int y,const int w,const int h) :
   CButton(object_name,::ChartID(),wnd,"",x,y,w,h)
  {
   this.InitColors();
   this.SetImageBound(1,1,this.Height()-2,this.Height()-2);
  }
//+------------------------------------------------------------------+
//| CButtonArrowLeft::Parametric constructor.                        |
//| Builds a button in the specified window of the specified chart   |
//| with the specified text, coordinates and dimensions              |
//+------------------------------------------------------------------+
CButtonArrowLeft::CButtonArrowLeft(const string object_name,const long chart_id,const int wnd,const int x,const int y,const int w,const int h) :
   CButton(object_name,chart_id,wnd,"",x,y,w,h)
  {
   this.InitColors();
   this.SetImageBound(1,1,this.Height()-2,this.Height()-2);
  }
//+------------------------------------------------------------------+
//| CButtonArrowLeft::Draw the appearance                            |
//+------------------------------------------------------------------+
void CButtonArrowLeft::Draw(const bool chart_redraw)
  {
//--- Fill the button with the background color, draw the frame and update the background canvas
   this.Fill(this.BackColor(),false);
   this.m_background.Rectangle(this.AdjX(0),this.AdjY(0),this.AdjX(this.Width()-1),this.AdjY(this.Height()-1),::ColorToARGB(this.BorderColor(),this.AlphaBG()));
   this.m_background.Update(false);
//--- Display the button text
   CLabel::Draw(false);
//--- Clear the drawing area
   this.m_painter.Clear(this.AdjX(this.m_painter.X()),this.AdjY(this.m_painter.Y()),this.m_painter.Width(),this.m_painter.Height(),false);
//--- Set the arrow color for the normal and disabled states of the button and draw the left arrow
   color clr=(!this.IsBlocked() ? this.GetForeColorControl().NewColor(this.ForeColor(),90,90,90) : this.ForeColor());
   this.m_painter.ArrowLeft(this.AdjX(this.m_painter.X()),this.AdjY(this.m_painter.Y()),this.m_painter.Width(),this.m_painter.Height(),clr,this.AlphaFG(),true);

//--- If specified, update the chart
   if(chart_redraw)
      ::ChartRedraw(this.m_chart_id);
  }
“Right Arrow Button” Control Class
//+------------------------------------------------------------------+
//| Right arrow button class                                         |
//+------------------------------------------------------------------+
class CButtonArrowRight : public CButton
  {
public:
//--- Draw the appearance
   virtual void      Draw(const bool chart_redraw);

//--- Virtual methods of (1) comparing, (2) saving to file, (3) loading from file, (4) object type
   virtual int       Compare(const CObject *node,const int mode=0) const;
   virtual bool      Save(const int file_handle)               { return CButton::Save(file_handle);      }
   virtual bool      Load(const int file_handle)               { return CButton::Load(file_handle);      }
   virtual int       Type(void)                          const { return(ELEMENT_TYPE_BUTTON_ARROW_DOWN); }

//--- Constructors/destructor
                     CButtonArrowRight(void);
                     CButtonArrowRight(const string object_name, const int x, const int y, const int w, const int h);
                     CButtonArrowRight(const string object_name, const int wnd, const int x, const int y, const int w, const int h);
                     CButtonArrowRight(const string object_name, const long chart_id, const int wnd, const int x, const int y, const int w, const int h);
                    ~CButtonArrowRight (void) {}
  };
//+------------------------------------------------------------------+
//| CButtonArrowRight::Default constructor.                          |
//| Builds a button in the main window of the current chart          |
//| at 0,0 coordinates with default dimensions                       |
//+------------------------------------------------------------------+
CButtonArrowRight::CButtonArrowRight(void) : CButton("Arrow Up Button",::ChartID(),0,"",0,0,DEF_BUTTON_W,DEF_BUTTON_H)
  {
   this.InitColors();
   this.SetImageBound(1,1,this.Height()-2,this.Height()-2);
  }
//+------------------------------------------------------------------+
//| CButtonArrowRight::Parametric constructor.                       |
//| Builds a button in the main window of the current chart          |
//| with the specified text, coordinates and dimensions              |
//+------------------------------------------------------------------+
CButtonArrowRight::CButtonArrowRight(const string object_name,const int x,const int y,const int w,const int h) :
   CButton(object_name,::ChartID(),0,"",x,y,w,h)
  {
   this.InitColors();
   this.SetImageBound(1,1,this.Height()-2,this.Height()-2);
  }
//+------------------------------------------------------------------+
//| CButtonArrowRight::Parametric constructor.                       |
//| Builds a button in the specified window of the current chart     |
//| with the specified text, coordinates and dimensions              |
//+------------------------------------------------------------------+
CButtonArrowRight::CButtonArrowRight(const string object_name,const int wnd,const int x,const int y,const int w,const int h) :
   CButton(object_name,::ChartID(),wnd,"",x,y,w,h)
  {
   this.InitColors();
   this.SetImageBound(1,1,this.Height()-2,this.Height()-2);
  }
//+------------------------------------------------------------------+
//| CButtonArrowRight::Parametric constructor.                       |
//| Builds a button in the specified window of the specified chart   |
//| with the specified text, coordinates and dimensions              |
//+------------------------------------------------------------------+
CButtonArrowRight::CButtonArrowRight(const string object_name,const long chart_id,const int wnd,const int x,const int y,const int w,const int h) :
   CButton(object_name,chart_id,wnd,"",x,y,w,h)
  {
   this.InitColors();
   this.SetImageBound(1,1,this.Height()-2,this.Height()-2);
  }
//+------------------------------------------------------------------+
//| CButtonArrowRight::Draw the appearance                           |
//+------------------------------------------------------------------+
void CButtonArrowRight::Draw(const bool chart_redraw)
  {
//--- Fill the button with the background color, draw the frame and update the background canvas
   this.Fill(this.BackColor(),false);
   this.m_background.Rectangle(this.AdjX(0),this.AdjY(0),this.AdjX(this.Width()-1),this.AdjY(this.Height()-1),::ColorToARGB(this.BorderColor(),this.AlphaBG()));
   this.m_background.Update(false);
//--- Display the button text
   CLabel::Draw(false);
//--- Clear the drawing area
   this.m_painter.Clear(this.AdjX(this.m_painter.X()),this.AdjY(this.m_painter.Y()),this.m_painter.Width(),this.m_painter.Height(),false);
//--- Set the arrow color for the normal and disabled states of the button and draw the right arrow
   color clr=(!this.IsBlocked() ? this.GetForeColorControl().NewColor(this.ForeColor(),90,90,90) : this.ForeColor());
   this.m_painter.ArrowRight(this.AdjX(this.m_painter.X()),this.AdjY(this.m_painter.Y()),this.m_painter.Width(),this.m_painter.Height(),clr,this.AlphaFG(),true);

//--- If specified, update the chart
   if(chart_redraw)
      ::ChartRedraw(this.m_chart_id);
  }
The “Checkbox" Control Class
The "checkbox" control class is similar to the classes of arrow buttons. Here, the background will be completely transparent. I.e., only the text and the checkbox icon will be drawn. The checkbox has two states — checked and unchecked, which means it will be inherited from the two-position button class:
//+------------------------------------------------------------------+
//| Checkbox control class                                           |
//+------------------------------------------------------------------+
class CCheckBox : public CButtonTriggered
  {
public:
//--- Draw the appearance
   virtual void      Draw(const bool chart_redraw);

//--- Virtual methods of (1) comparing, (2) saving to file, (3) loading from file, (4) object type
   virtual int       Compare(const CObject *node,const int mode=0) const;
   virtual bool      Save(const int file_handle)               { return CButton::Save(file_handle);   }
   virtual bool      Load(const int file_handle)               { return CButton::Load(file_handle);   }
   virtual int       Type(void)                          const { return(ELEMENT_TYPE_CHECKBOX);       }

//--- Initialize the object default colors
   virtual void      InitColors(void);

//--- Constructors/destructor
                     CCheckBox(void);
                     CCheckBox(const string object_name, const string text, const int x, const int y, const int w, const int h);
                     CCheckBox(const string object_name, const string text, const int wnd, const int x, const int y, const int w, const int h);
                     CCheckBox(const string object_name, const long chart_id, const int wnd, const string text, const int x, const int y, const int w, const int h);
                    ~CCheckBox (void) {}
  };
All classes of controls have four constructors each:
//+------------------------------------------------------------------+
//| CCheckBox::Default constructor.                                  |
//| Builds a button in the main window of the current chart          |
//| at 0,0 coordinates with default dimensions                       |
//+------------------------------------------------------------------+
CCheckBox::CCheckBox(void) : CButtonTriggered("CheckBox",::ChartID(),0,"CheckBox",0,0,DEF_BUTTON_W,DEF_BUTTON_H)
  {
//--- Set default colors, background and foreground transparency,
//--- as well as coordinates and boundaries of the button icon image area
   this.InitColors();
   this.SetAlphaBG(0);
   this.SetAlphaFG(255);
   this.SetImageBound(1,1,this.Height()-2,this.Height()-2);
  }
//+------------------------------------------------------------------+
//| CCheckBox::Parametric constructor.                               |
//| Builds a button in the main window of the current chart          |
//| with the specified text, coordinates and dimensions              |
//+------------------------------------------------------------------+
CCheckBox::CCheckBox(const string object_name,const string text,const int x,const int y,const int w,const int h) :
   CButtonTriggered(object_name,::ChartID(),0,text,x,y,w,h)
  {
//--- Set default colors, background and foreground transparency,
//--- as well as coordinates and boundaries of the button icon image area
   this.InitColors();
   this.SetAlphaBG(0);
   this.SetAlphaFG(255);
   this.SetImageBound(1,1,this.Height()-2,this.Height()-2);
  }
//+------------------------------------------------------------------+
//| CCheckBox::Parametric constructor.                               |
//| Builds a button in the specified window of the current chart     |
//| with the specified text, coordinates and dimensions              |
//+------------------------------------------------------------------+
CCheckBox::CCheckBox(const string object_name,const string text,const int wnd,const int x,const int y,const int w,const int h) :
   CButtonTriggered(object_name,::ChartID(),wnd,text,x,y,w,h)
  {
//--- Set default colors, background and foreground transparency,
//--- as well as coordinates and boundaries of the button icon image area
   this.InitColors();
   this.SetAlphaBG(0);
   this.SetAlphaFG(255);
   this.SetImageBound(1,1,this.Height()-2,this.Height()-2);
  }
//+------------------------------------------------------------------+
//| CCheckBox::Parametric constructor.                               |
//| Builds a button in the specified window of the specified chart   |
//| with the specified text, coordinates and dimensions              |
//+------------------------------------------------------------------+
CCheckBox::CCheckBox(const string object_name,const long chart_id,const int wnd,const string text,const int x,const int y,const int w,const int h) :
   CButtonTriggered(object_name,chart_id,wnd,text,x,y,w,h)
  {
//--- Set default colors, background and foreground transparency,
//--- as well as coordinates and boundaries of the button icon image area
   this.InitColors();
   this.SetAlphaBG(0);
   this.SetAlphaFG(255);
   this.SetImageBound(1,1,this.Height()-2,this.Height()-2);
  }
Here, the default object colors are initialized, a fully transparent background and an opaque foreground are set. Then dimensions and coordinates of the image area are set.
The comparison method returns the result of calling the comparison method of the parent class:
//+------------------------------------------------------------------+
//| CCheckBox::Compare two objects                                   |
//+------------------------------------------------------------------+
int CCheckBox::Compare(const CObject *node,const int mode=0) const
  {
   return CButtonTriggered::Compare(node,mode);
  }
Default Object Color Initialization Method:
//+------------------------------------------------------------------+
//| CCheckBox::Initialize the object default colors                  |
//+------------------------------------------------------------------+
void CCheckBox::InitColors(void)
  {
//--- Initialize the background colors for the normal and activated states and make it the current background color
   this.InitBackColors(clrNULL);
   this.InitBackColorsAct(clrNULL);
   this.BackColorToDefault();

//--- Initialize the foreground colors for the normal and activated states and make it the current text color
   this.InitForeColors(clrBlack);
   this.InitForeColorsAct(clrBlack);
   this.InitForeColorFocused(clrNavy);
   this.InitForeColorActFocused(clrNavy);
   this.ForeColorToDefault();

//--- Initialize the border colors for the normal and activated states and make it the current border color
   this.InitBorderColors(clrNULL);
   this.InitBorderColorsAct(clrNULL);
   this.BorderColorToDefault();

//--- Initialize the border color and foreground color for the disabled element
   this.InitBorderColorBlocked(clrNULL);
   this.InitForeColorBlocked(clrSilver);
  }
The Method of Drawing the Checkbox Appearance:
//+------------------------------------------------------------------+
//| CCheckBox::Draw the appearance                                   |
//+------------------------------------------------------------------+
void CCheckBox::Draw(const bool chart_redraw)
  {
//--- Fill the button with the background color, draw the frame and update the background canvas
   this.Fill(this.BackColor(),false);
   this.m_background.Rectangle(this.AdjX(0),this.AdjY(0),this.AdjX(this.Width()-1),this.AdjY(this.Height()-1),::ColorToARGB(this.BorderColor(),this.AlphaBG()));
   this.m_background.Update(false);
//--- Display the button text
   CLabel::Draw(false);

//--- Clear the drawing area
   this.m_painter.Clear(this.AdjX(this.m_painter.X()),this.AdjY(this.m_painter.Y()),this.m_painter.Width(),this.m_painter.Height(),false);
//--- Draw the checked icon for the active state of the button,
   if(this.m_state)
      this.m_painter.CheckedBox(this.AdjX(this.m_painter.X()),this.AdjY(this.m_painter.Y()),this.m_painter.Width(),this.m_painter.Height(),this.ForeColor(),this.AlphaFG(),true);
//--- and unchecked - for inactive state
   else
      this.m_painter.UncheckedBox(this.AdjX(this.m_painter.X()),this.AdjY(this.m_painter.Y()),this.m_painter.Width(),this.m_painter.Height(),this.ForeColor(),this.AlphaFG(),true);

//--- If specified, update the chart
   if(chart_redraw)
      ::ChartRedraw(this.m_chart_id);
  }
Depending on the element state, either a square checked with a check mark or just an empty square is drawn.
Now, based on this object, create a “Radio button" control class.
The “Radio Button" Control Class
Since the radio button always works in a group — it can only be turned off when another group button is turned on, here we also should redefine the handler for clicking on an object of the parent class.
//+------------------------------------------------------------------+
//| Radio Button control class                                       |
//+------------------------------------------------------------------+
class CRadioButton : public CCheckBox
  {
public:
//--- Draw the appearance
   virtual void      Draw(const bool chart_redraw);

//--- Mouse button click event handler (Press)
   virtual void      OnPressEvent(const int id, const long lparam, const double dparam, const string sparam);

//--- Virtual methods of (1) comparing, (2) saving to file, (3) loading from file, (4) object type
   virtual int       Compare(const CObject *node,const int mode=0) const;
   virtual bool      Save(const int file_handle)               { return CButton::Save(file_handle);   }
   virtual bool      Load(const int file_handle)               { return CButton::Load(file_handle);   }
   virtual int       Type(void)                          const { return(ELEMENT_TYPE_RADIOBUTTON);    }

//--- Constructors/destructor
                     CRadioButton(void);
                     CRadioButton(const string object_name, const string text, const int x, const int y, const int w, const int h);
                     CRadioButton(const string object_name, const string text, const int wnd, const int x, const int y, const int w, const int h);
                     CRadioButton(const string object_name, const long chart_id, const int wnd, const string text, const int x, const int y, const int w, const int h);
                    ~CRadioButton (void) {}
  };
Constructors:
//+------------------------------------------------------------------+
//| CRadioButton::Default constructor.                               |
//| Builds a button in the main window of the current chart          |
//| at 0,0 coordinates with default dimensions                       |
//+------------------------------------------------------------------+
CRadioButton::CRadioButton(void) : CCheckBox("RadioButton",::ChartID(),0,"",0,0,DEF_BUTTON_H,DEF_BUTTON_H)
  {
  }
//+------------------------------------------------------------------+
//| CRadioButton::Parametric constructor.                            |
//| Builds a button in the main window of the current chart          |
//| with the specified text, coordinates and dimensions              |
//+------------------------------------------------------------------+
CRadioButton::CRadioButton(const string object_name,const string text,const int x,const int y,const int w,const int h) :
   CCheckBox(object_name,::ChartID(),0,text,x,y,w,h)
  {
  }
//+------------------------------------------------------------------+
//| CRadioButton::Parametric constructor.                            |
//| Builds a button in the specified window of the current chart     |
//| with the specified text, coordinates and dimensions              |
//+------------------------------------------------------------------+
CRadioButton::CRadioButton(const string object_name,const string text,const int wnd,const int x,const int y,const int w,const int h) :
   CCheckBox(object_name,::ChartID(),wnd,text,x,y,w,h)
  {
  }
//+------------------------------------------------------------------+
//| CRadioButton::Parametric constructor.                            |
//| Builds a button in the specified window of the specified chart   |
//| with the specified text, coordinates and dimensions              |
//+------------------------------------------------------------------+
CRadioButton::CRadioButton(const string object_name,const long chart_id,const int wnd,const string text,const int x,const int y,const int w,const int h) :
   CCheckBox(object_name,chart_id,wnd,text,x,y,w,h)
  {
  }
There is no need for any additional actions after calling the constructor of the parent class. Therefore, constructors have an empty body.
The comparison method returns the result of calling the comparison method of the parent class:
//+------------------------------------------------------------------+
//| CRadioButton::Compare two objects                                |
//+------------------------------------------------------------------+
int CRadioButton::Compare(const CObject *node,const int mode=0) const
  {
   return CCheckBox::Compare(node,mode);
  }
The Method of Drawing the Button Appearance:
//+------------------------------------------------------------------+
//| CRadioButton::Draw the appearance                                |
//+------------------------------------------------------------------+
void CRadioButton::Draw(const bool chart_redraw)
  {
//--- Fill the button with the background color, draw the frame and update the background canvas
   this.Fill(this.BackColor(),false);
   this.m_background.Rectangle(this.AdjX(0),this.AdjY(0),this.AdjX(this.Width()-1),this.AdjY(this.Height()-1),::ColorToARGB(this.BorderColor(),this.AlphaBG()));
   this.m_background.Update(false);
//--- Display the button text
   CLabel::Draw(false);

//--- Clear the drawing area
   this.m_painter.Clear(this.AdjX(this.m_painter.X()),this.AdjY(this.m_painter.Y()),this.m_painter.Width(),this.m_painter.Height(),false);
//--- Draw the checked icon for the active state of the button,
   if(this.m_state)
      this.m_painter.CheckedRadioButton(this.AdjX(this.m_painter.X()),this.AdjY(this.m_painter.Y()),this.m_painter.Width(),this.m_painter.Height(),this.ForeColor(),this.AlphaFG(),true);
//--- and unchecked - for inactive state
   else
      this.m_painter.UncheckedRadioButton(this.AdjX(this.m_painter.X()),this.AdjY(this.m_painter.Y()),this.m_painter.Width(),this.m_painter.Height(),this.ForeColor(),this.AlphaFG(),true);

//--- If specified, update the chart
   if(chart_redraw)
      ::ChartRedraw(this.m_chart_id);
  }
This method is identical to the method of the parent class, but the radio button icons are drawn here — selected and not selected.
Mouse Button Click Event Handler:
//+------------------------------------------------------------------+
//| CRadioButton::Mouse button click event handler (Press)           |
//+------------------------------------------------------------------+
void CRadioButton::OnPressEvent(const int id,const long lparam,const double dparam,const string sparam)
  {
//--- If the button is already checked, leave
   if(this.m_state)
      return;
//--- Set the button state to the opposite of the one already set
   ENUM_ELEMENT_STATE state=(this.State()==ELEMENT_STATE_DEF ? ELEMENT_STATE_ACT : ELEMENT_STATE_DEF);
   this.SetState(state);

//--- Call the parent object handler with the ID in lparam and the state in dparam
   CCanvasBase::OnPressEvent(id,this.m_id,this.m_state,sparam);
  }
Here, if the button already has an enabled state, then no actions should be performed — leave the handler. If the button is disabled, invert its state and call the handler of the parent class (the base object of all CCanvasBase controls).
For today, these are all the controls that were minimally necessary to implement complex controls.
Let's test what we get here.
Testing the Result
In \MQL5\Indicators\Tables\ folder reate a new indicator named iTestLabel.mq5.
Set the number of calculated buffers and graphical series of the indicator to zero — no charts need to be drawn. Connect the created library of graphical elements. In its own separate window the indicator will draw graphical elements, which, when created, will be saved to a list, the class file of which is connected to the indicator file:
//+------------------------------------------------------------------+
//|                                                   iTestLabel.mq5 |
//|                                  Copyright 2025, MetaQuotes Ltd. |
//|                                             https://www.mql5.com |
//+------------------------------------------------------------------+
#property copyright "Copyright 2025, MetaQuotes Ltd."
#property link      "https://www.mql5.com"
#property version   "1.00"
#property indicator_separate_window
#property indicator_buffers 0
#property indicator_plots   0

//+------------------------------------------------------------------+
//| Include libraries                                                |
//+------------------------------------------------------------------+
#include <Arrays\ArrayObj.mqh>
#include "Controls\Controls.mqh"

CArrayObj         list;             // List for storing tested objects
CCanvasBase      *base =NULL;       // Pointer to the base graphical element
CLabel           *label1=NULL;      // Pointer to the Label graphical element
CLabel           *label2=NULL;      // Pointer to the Label graphical element
CLabel           *label3=NULL;      // Pointer to the Label graphical element
CButton          *button1=NULL;     // Pointer to the Button graphical element
CButtonTriggered *button_t1=NULL;   // Pointer to the ButtonTriggered graphical element
CButtonTriggered *button_t2=NULL;   // Pointer to the ButtonTriggered graphical element
CButtonArrowUp   *button_up=NULL;   // Pointer to the CButtonArrowUp graphical element
CButtonArrowDown *button_dn=NULL;   // Pointer to the CButtonArrowDown graphical element
CButtonArrowLeft *button_lt=NULL;   // Pointer to the CButtonArrowLeft graphical element
CButtonArrowRight*button_rt=NULL;   // Pointer to the CButtonArrowRight graphical element
CCheckBox        *checkbox_lt=NULL; // Pointer to the CCheckBox graphical element
CCheckBox        *checkbox_rt=NULL; // Pointer to the CCheckBox graphical element
CRadioButton     *radio_bt_lt=NULL; // Pointer to the CRadioButton graphical element
CRadioButton     *radio_bt_rt=NULL; // Pointer to the CRadioButton graphical element

//+------------------------------------------------------------------+
//| Custom indicator initialization function                         |
//+------------------------------------------------------------------+
Here, for simplification, pointers to the created graphical elements are immediately created. After creating the element, we will use these pointers to work with objects.
Create all the objects indicator’s handler OnInit(). Let's do this: create one base object and color it so that it resembles a panel.
Inside this "substrate" implement all the graphical elements and specify this base object for them as a container.
In OnInit() implement such a code:
//+------------------------------------------------------------------+
//| Custom indicator initialization function                         |
//+------------------------------------------------------------------+
int OnInit()
  {
//--- Search for the chart subwindow
   int wnd=ChartWindowFind();
//--- Create a basic graphical element
   list.Add(base=new CCanvasBase("Rectangle",0,wnd,100,40,260,160));
   base.SetAlphaBG(250);      // Transparency
   base.SetBorderWidth(6);    // Border width

//--- Initialize the background color, specify the color for the blocked element
//--- and set the default background color of the element as the current color
   base.InitBackColors(clrWhiteSmoke);
   base.InitBackColorBlocked(clrLightGray);
   base.BackColorToDefault();

//--- Fill the background with color and draw a frame with an indent of one pixel from the set frame width
   base.Fill(base.BackColor(),false);
   uint wd=base.BorderWidth();
   base.GetBackground().Rectangle(0,0,base.Width()-1,base.Height()-1,ColorToARGB(clrDimGray));
   base.GetBackground().Rectangle(wd-2,wd-2,base.Width()-wd+1,base.Height()-wd+1,ColorToARGB(clrLightGray));
   base.Update(false);
//--- set the name and ID of the element and display its description in the journal
   base.SetName("Rectangle 1");
   base.SetID(1);
   base.Print();


//--- Create a text label inside the base object
//--- and specify the base element as a container for the label
   string text="Simple button:";
   int shift_x=20;
   int shift_y=8;
   int x=base.X()+shift_x-10;
   int y=base.Y()+shift_y+2;
   int w=base.GetForeground().TextWidth(text);
   int h=DEF_LABEL_H;
   list.Add(label1=new CLabel("Label 1",0,wnd,text,x,y,w,h));
   label1.SetContainerObj(base);
//--- Set the hover and click color to red
//--- (this is a change to the standard parameters of a text label after its creation).
   label1.InitForeColorFocused(clrRed);
   label1.InitForeColorPressed(clrRed);
//--- Set the element ID, draw the element
//--- and display its description to the journal.
   label1.SetID(2);
   label1.Draw(false);
   label1.Print();


//--- Create a simple button inside the base object
//--- and specify the base element as a button container
   x=label1.Right()+shift_x;
   y=label1.Y();
   w=DEF_BUTTON_W;
   h=DEF_BUTTON_H;
   list.Add(button1=new CButton("Simple Button",0,wnd,"Button 1",x,y,w,h));
   button1.SetContainerObj(base);
//--- Set the button text offset along the X axis
   button1.SetTextShiftH(2);
//--- Set the element ID, draw the element
//--- and display its description to the journal.
   button1.SetID(3);
   button1.Draw(false);
   button1.Print();


//--- Create a text label inside the base object
//--- and specify the base element as a container for the label
   text="Triggered button:";
   x=label1.X();
   y=label1.Bottom()+shift_y;
   w=base.GetForeground().TextWidth(text);
   h=DEF_LABEL_H;
   list.Add(label2=new CLabel("Label 2",0,wnd,text,x,y,w,h));
   label2.SetContainerObj(base);
//--- Set the hover and click color to red
//--- (this is a change to the standard parameters of a text label after its creation).
   label2.InitForeColorFocused(clrRed);
   label2.InitForeColorPressed(clrRed);
//--- Set the element ID, draw the element
//--- and display its description to the journal.
   label2.SetID(4);
   label2.Draw(false);
   label2.Print();


//--- Create the toggle button inside the base object
//--- and specify the base element as a button container
   x=button1.X();
   y=button1.Bottom()+shift_y;
   w=DEF_BUTTON_W;
   h=DEF_BUTTON_H;
   list.Add(button_t1=new CButtonTriggered("Triggered Button 1",0,wnd,"Button 2",x,y,w,h));
   button_t1.SetContainerObj(base);

//--- Set the button text offset along the X axis
   button_t1.SetTextShiftH(2);
//--- Set the ID and activated state of the element,
//--- draw the element and display its description to the journal.
   button_t1.SetID(5);
   button_t1.SetState(true);
   button_t1.Draw(false);
   button_t1.Print();


//--- Create the toggle button inside the base object
//--- and specify the base element as a button container
   x=button_t1.Right()+4;
   y=button_t1.Y();
   w=DEF_BUTTON_W;
   h=DEF_BUTTON_H;
   list.Add(button_t2=new CButtonTriggered("Triggered Button 2",0,wnd,"Button 3",x,y,w,h));
   button_t2.SetContainerObj(base);

//--- Set the button text offset along the X axis
   button_t2.SetTextShiftH(2);
//--- Set the element ID, draw the element
//--- and display its description to the journal.
   button_t2.SetID(6);
   button_t2.Draw(false);
   button_t2.Print();


//--- Create a text label inside the base object
//--- and specify the base element as a container for the label
   text="Arrowed buttons:";
   x=label1.X();
   y=label2.Bottom()+shift_y;
   w=base.GetForeground().TextWidth(text);
   h=DEF_LABEL_H;
   list.Add(label3=new CLabel("Label 3",0,wnd,text,x,y,w,h));
   label3.SetContainerObj(base);
//--- Set the hover and click color to red
//--- (this is a change to the standard parameters of a text label after its creation).
   label3.InitForeColorFocused(clrRed);
   label3.InitForeColorPressed(clrRed);
//--- Set the element ID, draw the element
//--- and display its description to the journal.
   label3.SetID(7);
   label3.Draw(false);
   label3.Print();


//--- Create the up arrow button inside the base object
//--- and specify the base element as a button container
   x=button1.X();
   y=button_t1.Bottom()+shift_y;
   w=DEF_BUTTON_H-1;
   h=DEF_BUTTON_H-1;
   list.Add(button_up=new CButtonArrowUp("Arrow Up Button",0,wnd,x,y,w,h));
   button_up.SetContainerObj(base);
//--- Set the image size and offset along the X axis
   button_up.SetImageBound(1,1,w-4,h-3);
//--- Here we can customize the appearance of the button, for example, remove the border
   //button_up.InitBorderColors(button_up.BackColor(),button_up.BackColorFocused(),button_up.BackColorPressed(),button_up.BackColorBlocked());
   //button_up.ColorsToDefault();
//--- Set the element ID, draw the element
//--- and display its description to the journal.
   button_up.SetID(8);
   button_up.Draw(false);
   button_up.Print();


//--- Create the down arrow button inside the base object
//--- and specify the base element as a button container
   x=button_up.Right()+4;
   y=button_up.Y();
   w=DEF_BUTTON_H-1;
   h=DEF_BUTTON_H-1;
   list.Add(button_dn=new CButtonArrowDown("Arrow Down Button",0,wnd,x,y,w,h));
   button_dn.SetContainerObj(base);
//--- Set the image size and offset along the X axis
   button_dn.SetImageBound(1,1,w-4,h-3);
//--- Set the element ID, draw the element
//--- and display its description to the journal.
   button_dn.SetID(9);
   button_dn.Draw(false);
   button_dn.Print();


//--- Create the left arrow button inside the base object
//--- and specify the base element as a button container
   x=button_dn.Right()+4;
   y=button_up.Y();
   w=DEF_BUTTON_H-1;
   h=DEF_BUTTON_H-1;
   list.Add(button_lt=new CButtonArrowLeft("Arrow Left Button",0,wnd,x,y,w,h));
   button_lt.SetContainerObj(base);
//--- Set the image size and offset along the X axis
   button_lt.SetImageBound(1,1,w-3,h-4);
//--- Set the element ID, draw the element
//--- and display its description to the journal.
   button_lt.SetID(10);
   button_lt.Draw(false);
   button_lt.Print();


//--- Create the right arrow button inside the base object
//--- and specify the base element as a button container
   x=button_lt.Right()+4;
   y=button_up.Y();
   w=DEF_BUTTON_H-1;
   h=DEF_BUTTON_H-1;
   list.Add(button_rt=new CButtonArrowRight("Arrow Right Button",0,wnd,x,y,w,h));
   button_rt.SetContainerObj(base);
//--- Set the image size and offset along the X axis
   button_rt.SetImageBound(1,1,w-3,h-4);
//--- Set the element ID, draw the element
//--- and display its description to the journal.
   button_rt.SetID(11);
   button_rt.Draw(false);
   button_rt.Print();


//--- Inside the base object, create a checkbox with a header on the right (left checkbox)
//--- and specify the base element as a button container
   x=label1.X();
   y=label3.Bottom()+shift_y;
   w=DEF_BUTTON_W+30;
   h=DEF_BUTTON_H;
   list.Add(checkbox_lt=new CCheckBox("CheckBoxL",0,wnd,"CheckBox L",x,y,w,h));
   checkbox_lt.SetContainerObj(base);
//--- Set the area coordinates and image area dimensions
   checkbox_lt.SetImageBound(2,1,h-2,h-2);
//--- Set the button text offset along the X axis
   checkbox_lt.SetTextShiftH(checkbox_lt.ImageRight()+2);
//--- Set the element ID, draw the element
//--- and display its description to the journal.
   checkbox_lt.SetID(12);
   checkbox_lt.Draw(false);
   checkbox_lt.Print();


//--- Inside the base object, create a checkbox with a header on the left (right checkbox)
//--- and specify the base element as a button container
   x=checkbox_lt.Right()+4;
   y=checkbox_lt.Y();
   w=DEF_BUTTON_W+30;
   h=DEF_BUTTON_H;
   list.Add(checkbox_rt=new CCheckBox("CheckBoxR",0,wnd,"CheckBox R",x,y,w,h));
   checkbox_rt.SetContainerObj(base);
//--- Set the area coordinates and image area dimensions
   checkbox_rt.SetTextShiftH(2);
//--- Set the button text offset along the X axis
   checkbox_rt.SetImageBound(checkbox_rt.Width()-h+2,1,h-2,h-2);
//--- Set the ID and activated state of the element,
//--- draw the element and display its description to the journal.
   checkbox_rt.SetID(13);
   checkbox_rt.SetState(true);
   checkbox_rt.Draw(false);
   checkbox_rt.Print();


//--- Inside the base object, create a radio button with a header on the right (left RadioButton)
//--- and specify the base element as a button container
   x=checkbox_lt.X();
   y=checkbox_lt.Bottom()+shift_y;
   w=DEF_BUTTON_W+46;
   h=DEF_BUTTON_H;
   list.Add(radio_bt_lt=new CRadioButton("RadioButtonL",0,wnd,"RadioButton L",x,y,w,h));
   radio_bt_lt.SetContainerObj(base);
//--- Set the area coordinates and image area dimensions
   radio_bt_lt.SetImageBound(2,1,h-2,h-2);
//--- Set the button text offset along the X axis
   radio_bt_lt.SetTextShiftH(radio_bt_lt.ImageRight()+2);
//--- Set the ID and activated state of the element,
//--- draw the element and display its description to the journal.
   radio_bt_lt.SetID(14);
   radio_bt_lt.SetState(true);
   radio_bt_lt.Draw(false);
   radio_bt_lt.Print();


//--- Inside the base object, create a radio button with a header on the left (right RadioButton)
//--- and specify the base element as a button container
   x=radio_bt_lt.Right()+4;
   y=radio_bt_lt.Y();
   w=DEF_BUTTON_W+46;
   h=DEF_BUTTON_H;
   list.Add(radio_bt_rt=new CRadioButton("RadioButtonR",0,wnd,"RadioButton R",x,y,w,h));
   radio_bt_rt.SetContainerObj(base);
//--- Set the button text offset along the X axis
   radio_bt_rt.SetTextShiftH(2);
//--- Set the area coordinates and image area dimensions
   radio_bt_rt.SetImageBound(radio_bt_rt.Width()-h+2,1,h-2,h-2);
//--- Set the element ID, draw the element
//--- and display its description to the journal.
   radio_bt_rt.SetID(15);
   radio_bt_rt.Draw(true);
   radio_bt_rt.Print();

//--- Successful initialization
   return(INIT_SUCCEEDED);
  }
Carefully study all the comments to the code. Here all the steps of creating objects are described in sufficient detail.
In indicator’s handler OnDeinit() destroy all the objects in the list:
//+------------------------------------------------------------------+
//| Custom deindicator initialization function                       |
//+------------------------------------------------------------------+
void OnDeinit(const int reason)
  {
   list.Clear();
  }
The OnCalculate() handler is empty — we are not calculating or displaying anything on the chart:
//+------------------------------------------------------------------+
//| Custom indicator iteration function                              |
//+------------------------------------------------------------------+
int OnCalculate(const int rates_total,
                const int prev_calculated,
                const datetime &time[],
                const double &open[],
                const double &high[],
                const double &low[],
                const double &close[],
                const long &tick_volume[],
                const long &volume[],
                const int &spread[])
  {
//--- return value of prev_calculated for the next call
   return(rates_total);
  }
To animate the created graphical elements, go through the list of created objects in the OnChartEvent() handler and call the similar handler for each element. Since radio buttons are not connected in groups in any way yet (this will be in the following articles), emulate toggling radio buttons, as it should be in a group of elements:
//+------------------------------------------------------------------+
//| ChartEvent function                                              |
//+------------------------------------------------------------------+
void OnChartEvent(const int id,
                  const long &lparam,
                  const double &dparam,
                  const string &sparam)
  {
//--- Call the event handler of each of the created objects
   for(int i=0;i<list.Total();i++)
     {
      CCanvasBase *obj=list.At(i);
      if(obj!=NULL)
         obj.OnChartEvent(id,lparam,dparam,sparam);
     }

//--- Emulate radio buttons in the group ---
//--- If a custom event is received
   if(id>=CHARTEVENT_CUSTOM)
     {
      //--- If the left radio button is clicked
      if(sparam==radio_bt_lt.NameBG())
        {
         //--- If the button state changed (was not selected)
         if(radio_bt_lt.State())
           {
            //--- make the right radio button unselected and redraw it
            radio_bt_rt.SetState(false);
            radio_bt_rt.Draw(true);
           }
        }
      //--- If the right radio button is clicked
      if(sparam==radio_bt_rt.NameBG())
        {
         //--- If the button state changed (was not selected)
         if(radio_bt_rt.State())
           {
            //--- make the left radio button unselected and redraw it
            radio_bt_lt.SetState(false);
            radio_bt_lt.Draw(true);
           }
        }
     }
  }
Let's compile the indicator and run it on the chart:
All controls respond to mouse interaction, and the radio buttons toggle as if they are grouped. Text labels were made so that they change color when the cursor is hovered over to visually represent that you can customize controls at your discretion. In the normal state, label texts are static.
But there is one omission here — when you hover the mouse cursor over a control, an unnecessary tooltip with the indicator name appears. To get rid of this behavior, it is necessary for each graphic object to enter "\n" value in its OBJPROP_TOOLTIP property. Fix it.
In the CCanvasBase class, in the Create method, enter two lines with the installation of tooltips for background and foreground graphic objects:
//+------------------------------------------------------------------+
//| CCanvasBase::Create background and foreground graphical objects  |
//+------------------------------------------------------------------+
bool CCanvasBase::Create(const long chart_id,const int wnd,const string object_name,const int x,const int y,const int w,const int h)
  {
//--- Get the adjusted chart ID
   long id=this.CorrectChartID(chart_id);
//--- Correct the passed object name
   string nm=object_name;
   ::StringReplace(nm," ","_");
//--- Create a graphical object name for the background and create a canvas
   string obj_name=nm+"_BG";
   if(!this.m_background.CreateBitmapLabel(id,(wnd<0 ? 0 : wnd),obj_name,x,y,(w>0 ? w : 1),(h>0 ? h : 1),COLOR_FORMAT_ARGB_NORMALIZE))
     {
      ::PrintFormat("%s: The CreateBitmapLabel() method of the CCanvas class returned an error creating a \"%s\" graphic object",__FUNCTION__,obj_name);
      return false;
     }
//--- Create a graphical object name for the foreground and create a canvas
   obj_name=nm+"_FG";
   if(!this.m_foreground.CreateBitmapLabel(id,(wnd<0 ? 0 : wnd),obj_name,x,y,(w>0 ? w : 1),(h>0 ? h : 1),COLOR_FORMAT_ARGB_NORMALIZE))
     {
      ::PrintFormat("%s: The CreateBitmapLabel() method of the CCanvas class returned an error creating a \"%s\" graphic object",__FUNCTION__,obj_name);
      return false;
     }
//--- If created successfully, enter the program name into the OBJPROP_TEXT property of the graphical object
   ::ObjectSetString(id,this.NameBG(),OBJPROP_TEXT,this.m_program_name);
   ::ObjectSetString(id,this.NameFG(),OBJPROP_TEXT,this.m_program_name);
   ::ObjectSetString(id,this.NameBG(),OBJPROP_TOOLTIP,"\n");
   ::ObjectSetString(id,this.NameFG(),OBJPROP_TOOLTIP,"\n");

//--- Set the dimensions of the rectangular area and return 'true'
   this.m_bound.SetXY(x,y);
   this.m_bound.Resize(w,h);
   return true;
  }
Recompile the indicator and check:
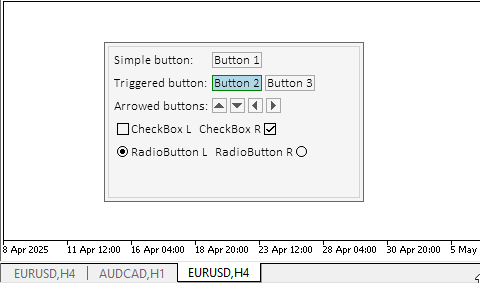
Now, everything is correct.
Conclusion
Today we have taken another step towards creating the Table Control. All complex controls will be assembled from such simple but highly functional objects.
Today, we have added the Controller component to all objects. This allows the user to interact with the controls, and the elements themselves can interact with each other.
In the next article, we will prepare the panel and container elements, which are the main components for placing other elements in them. At the same time, the container enables to scroll child elements inside itself.
Programs used in the article:
| # | Name | Type | Description |
|---|---|---|---|
| 1 | Base.mqh | Class Library | Classes for creating a base object of controls |
| 2 | Controls.mqh | Class Library | Control classes |
| 3 | iTestLabel.mq5 | Test indicator | Indicator for testing manipulations with classes of controls |
| 4 | MQL5.zip | Archive | An archive of the files above for unpacking into the MQL5 directory of the client terminal |
Classes within the Base.mqh library:
| # | Name | Description |
|---|---|---|
| 1 | CBaseObj | A base class for all the graphical objects |
| 2 | CColor | Color management class |
| 3 | CColorElement | A class for managing the colors of various states of a graphical element |
| 4 | CBound | Rectangular area control class |
| 5 | CCanvasBase | A base class for manipulating graphical elements on canvas |
Classes within the Controls.mqh library:
| # | Name | Description |
|---|---|---|
| 1 | CImagePainter | A class for drawing images in an area defined by coordinates and dimensions |
| 2 | CLabel | The "Text Label" Control Class |
| 3 | CButton | The “Simple Button" Control Class |
| 4 | CButtonTriggered | The “Two-Position Button" Control Class |
| 5 | CButtonArrowUp | “Up Arrow Button” Control Class |
| 6 | CButtonArrowDown | “Down Arrow Button” Control Class |
| 7 | CButtonArrowLeft | “Left Arrow Button” Control Class |
| 8 | CButtonArrowRight | “Right Arrow Button” Control Class |
| 9 | CCheckBox | The “Checkbox" Control Class |
| 10 | CRadioButton | The “Radio Button" Control Class |
All created files are attached to the article for self-study. The archive file can be unzipped to the terminal folder, and all files will be located in the desired folder: \MQL5\Indicators\Tables\.
Translated from Russian by MetaQuotes Ltd.
Original article: https://www.mql5.com/ru/articles/18221
Warning: All rights to these materials are reserved by MetaQuotes Ltd. Copying or reprinting of these materials in whole or in part is prohibited.
This article was written by a user of the site and reflects their personal views. MetaQuotes Ltd is not responsible for the accuracy of the information presented, nor for any consequences resulting from the use of the solutions, strategies or recommendations described.

- Free trading apps
- Over 8,000 signals for copying
- Economic news for exploring financial markets
You agree to website policy and terms of use