

Publish Your Article Code to MQL5 Algo Forge in 10 Minutes: A Step-by-Step Guide
 1 928
1 928
 5
5

Contents
- Introduction
- Preparing the environment
- Sign in
- Creating a project
- Project type
- Naming
- Project files
- Arranging folders
- README
- Encoding and compilation
- Committing and syncing with Git
- Public mode
- Multi-article projects
- Checklist
- Conclusion
Introduction
Is your article already published in MQL5? Then take the next step: turn the code from the article into a full-fledged project in MQL5 Algo Forge. Do not leave the source files only in an archive. Move them to the repository so that readers see the current version of the project, a clear file structure, a change history, and a clear description. Algo Forge is based on Git, but the main Git actions are already built into the MetaEditor interface, and README.md becomes the face of the project.

Preparing the environment
Prepare your MQL5 login, all files from the article, and a completed README.md. Do not postpone publishing your project until later. Create it now while you have all the code, settings, and supporting materials at your fingertips.
Take just a few simple steps to publish your project to the repository. Publishing your code will take no more than 10 minutes, and you will forget about messy archives, while your project will be stored and updated in the cloud.
Sign in
Open MetaEditor. Go to Tools -> Options -> Community and make sure you are logged in with your MQL5 account. Without this authentication, MetaEditor will not be able to work with MQL5 Algo Forge.
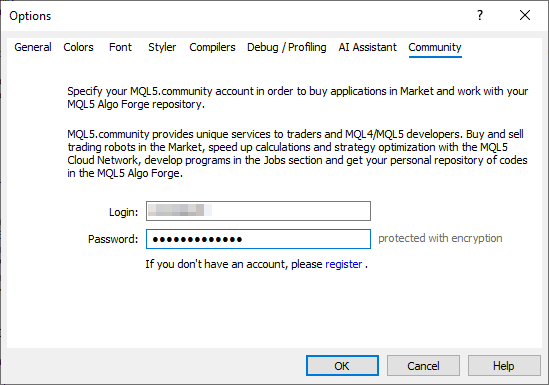
1. Log in to MetaEditor using your mql5.com username and password
Creating a project
Open the Navigator window. Find the Shared Projects folder. Right-click on it and select New Project. Create your project here: this is the correct entry point to Algo Forge from MetaEditor.
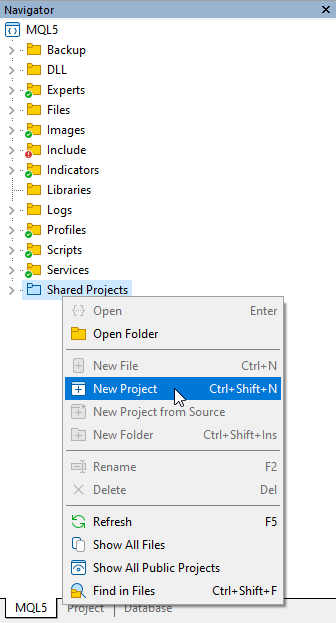
2. Create a new project in the code editor
Project type
Select a project type based on the article content:
- Expert Advisor — if you publish an EA;
- Custom Indicator — if you publish an indicator;
- Script — if you publish a script;
- Service — if you publish a service;
- Library — if you publish a library;
- Empty — if the article has many files that need to be compiled separately, and you need an empty template.
If in doubt, and the project has only one main compiled file, then choose the type that matches the main compiled file. This way, MetaEditor will immediately create a convenient project framework.
If an article contains a whole set of different files that need to be compiled separately, then such a project should initially be created as Empty and then filled with files independently.
If you create a non-empty project and place, for example, two or more scripts in it, then only one of them will be able to compile. When trying to compile other scripts, we get an error that a file of this type already exists in the project.
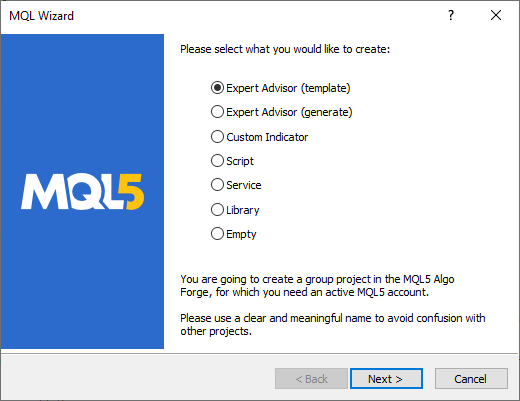
3. Select the type of project to be created according to the content of the article
Naming
Use the name we will send to you. If you do not have a name yet, use a clear naming pattern:
[Material type]-[article ID]-[Short topic]
For example: Article-21732-Code-Tears-And-Algo-Forge. This name immediately links the project to the article and simplifies navigation.
Project files
Include everything the reader needs to build, run, or test the code:
- main .mq5 file;
- .mqh files;
- libraries;
- .set presets;
- images;
- CSV, TXT and other data;
- additional resources that the project uses.
Do not limit yourself to a single main file. If the article relies on a module, resource, or settings set, please include it as well. A complete project is always more useful to the reader than an incomplete archive.
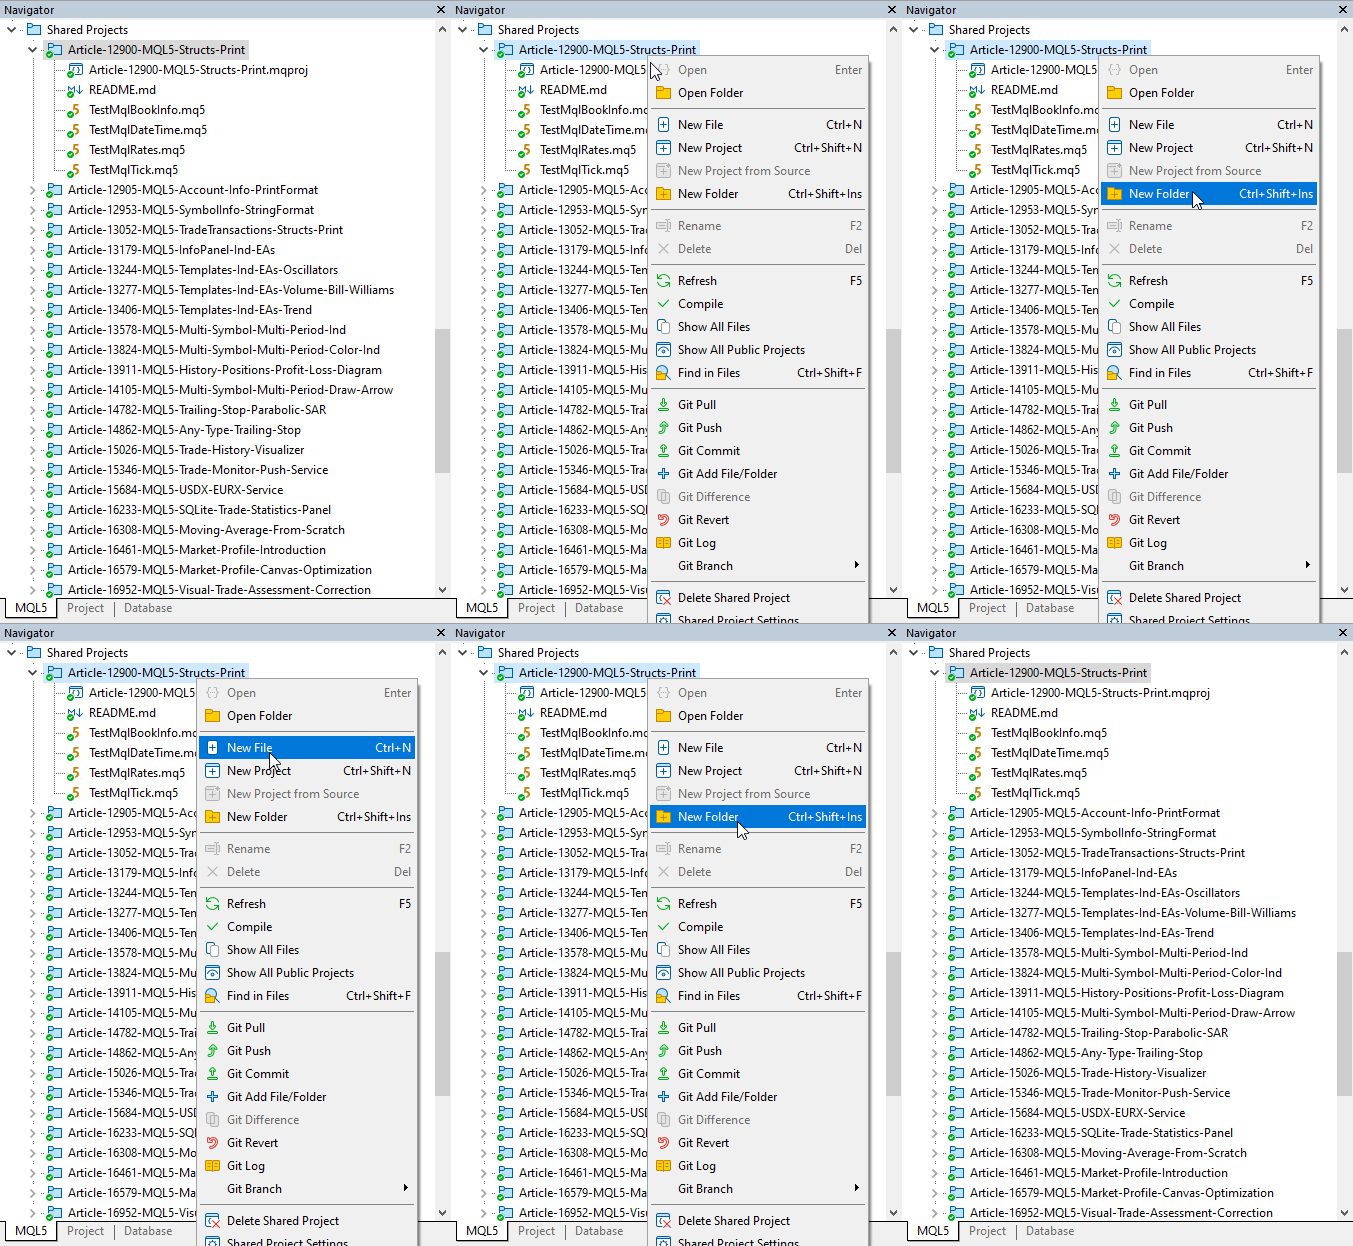
4. Fill the project with files from the article
Arranging folders
Do not lump everything together. Organize the project so that it is easy to navigate. In the Projects window, MetaEditor automatically displays files by logical sections: Sources, Headers, Resources, Settings and files, and displays dependencies separately. This order helps you immediately see the location of the main code, headers, resources, and service files.
If you are migrating an old archive, first gather all its files into a neat project folder, and then connect them to MetaEditor. This way you will not lose anything or get confused between versions.
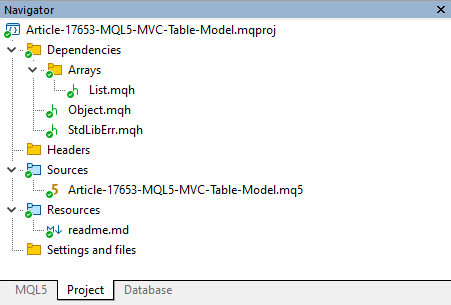
5. Organize files into their folders in the project
README
Take the ready-made README.md file we will send you and place it in the root of your project. Do not put it in subfolders. README is what introduces the project to the reader: it explains what the code is, what is included in the project, and where to start. Without it, the repository looks like a collection of unnamed files.
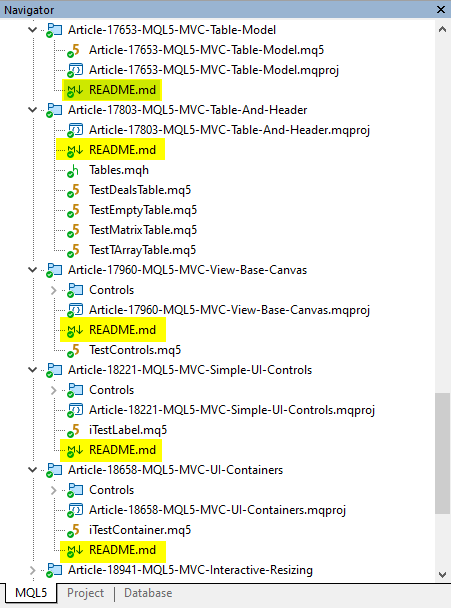
6. Place the README.md project description file in the project root folder
Encoding and compilation
Before submitting, take a minute to check your project:
- all files from the article have been added;
- the main .mq5 file is in place;
- README.md is located at the root;
- the project compiles without errors;
- old text files (if you transfer them from an archive) are saved in UTF-8.
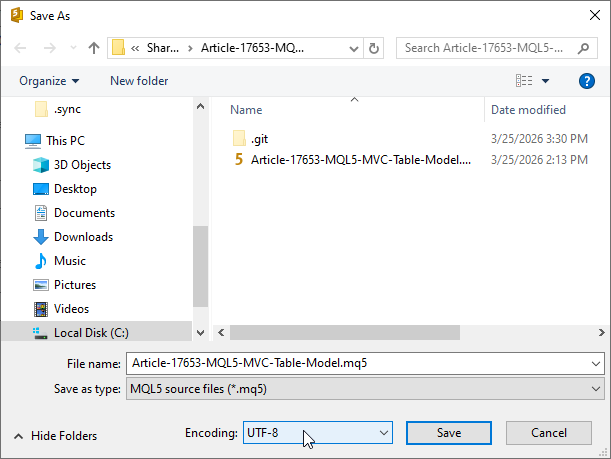
7. Save all project files in UTF-8 encoding
If the project consists of one main compiled file, then compilation can be performed by right-clicking in the Navigator window on the project name and selecting the Compile command from the context menu.
If the project contains multiple compiled files, then each one must be compiled separately, otherwise we will get a compilation error.
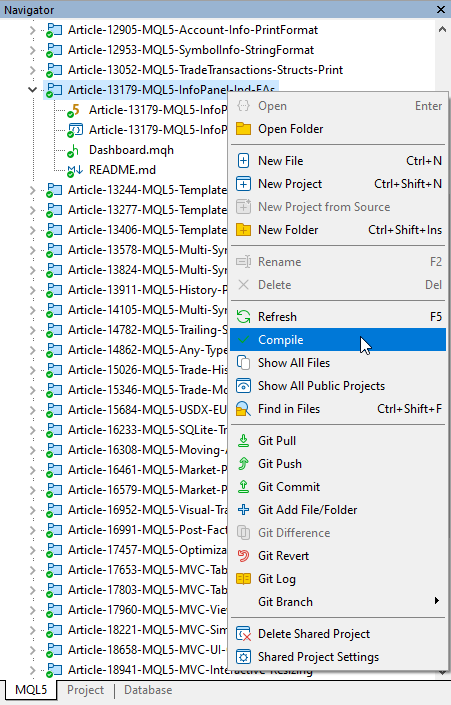
8.1 Check if the project was compiled successfully
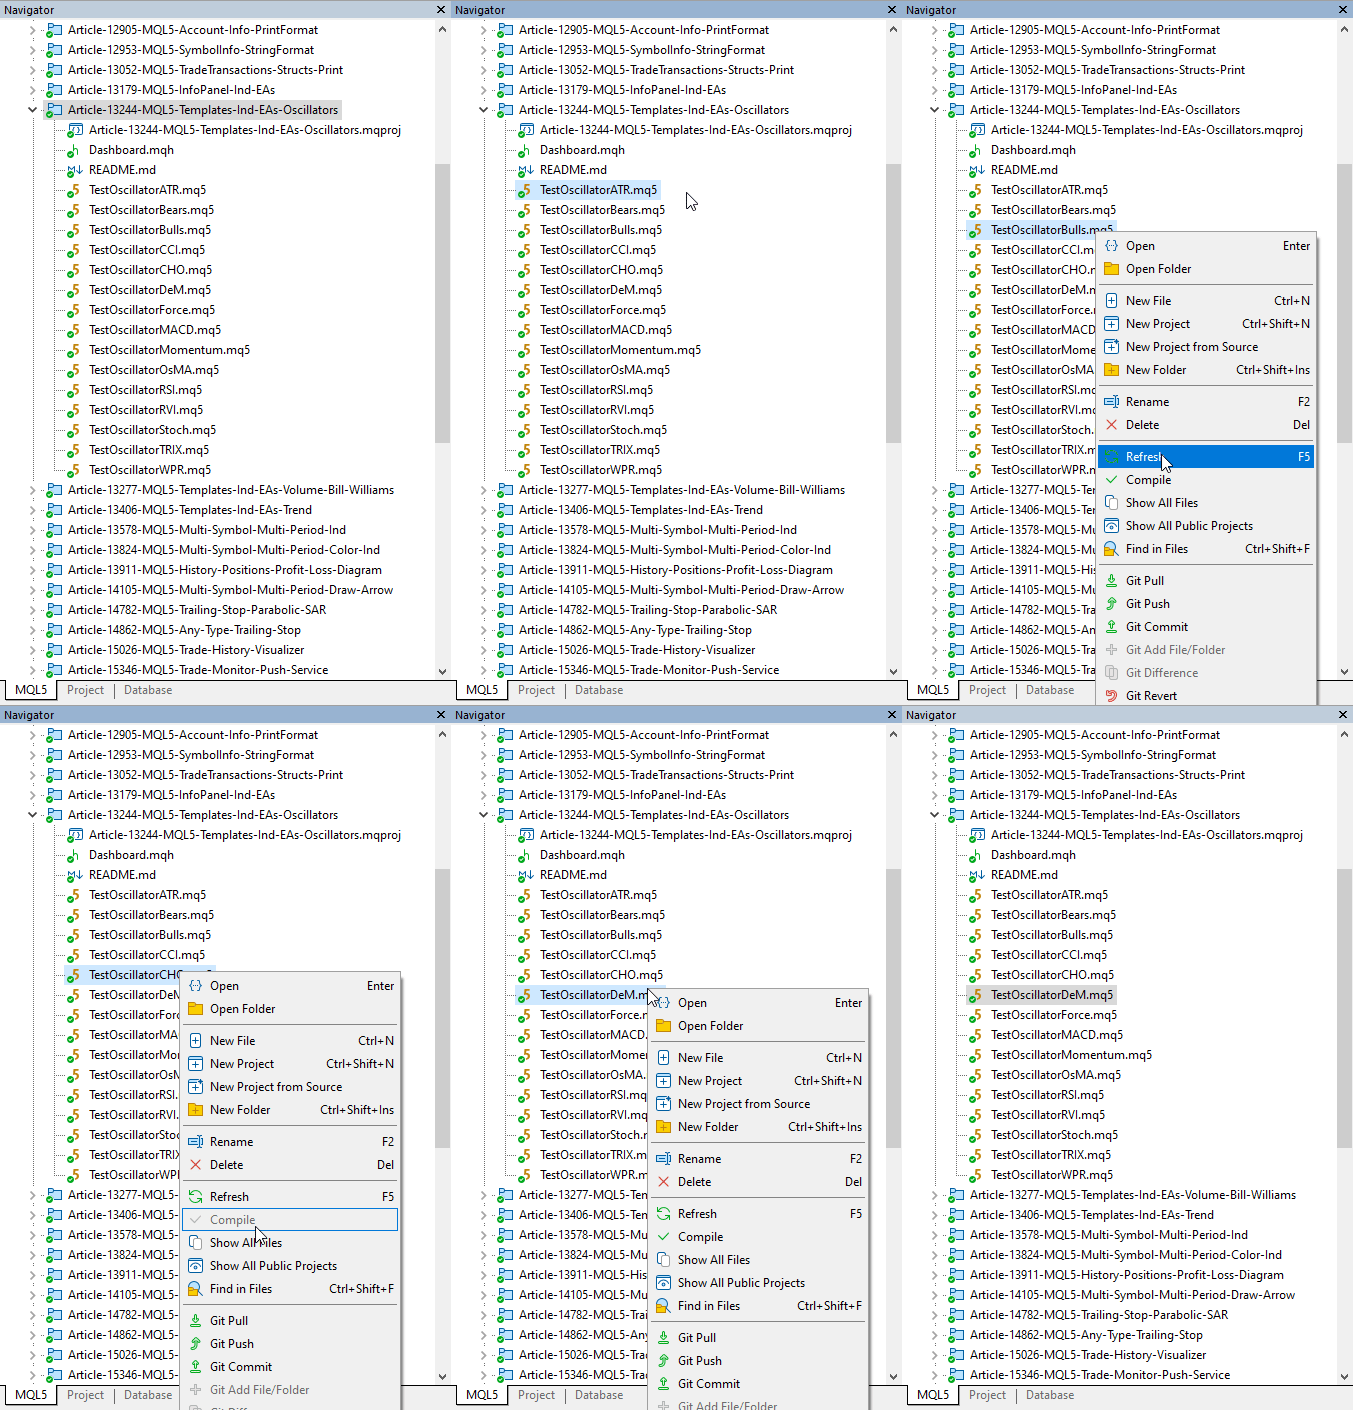
8.2 If there are many executable files to be compiled, compile them separately
Committing and syncing with Git
Add new files to Git using the Git Add File/Folder command, and then click Git Commit. Write a short and clear commit message stating what you added or updated. Do not leave this field blank. Good comments help both you and your readers later quickly understand the project history.
In a typical scenario, this step is sufficient: MetaEditor commits the current project state and pushes the changes to the cloud. If the project already exists and you are continuing to work on it, first perform Git Pull and then add your edits. This will help you avoid unnecessary conflicts between your local and cloud versions.
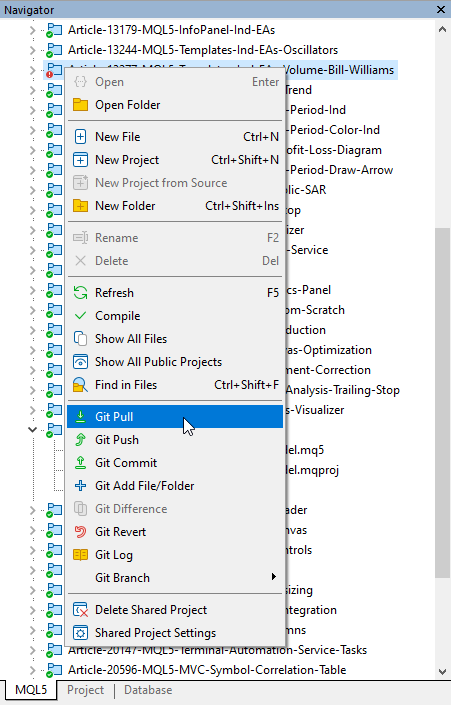
9.1 Before you start working on a project, pull changes from the repository
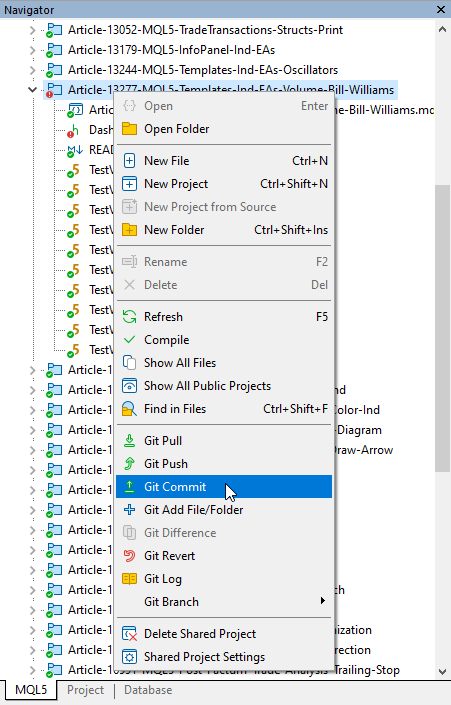
9.2 When you are finished, push your local changes to the repository
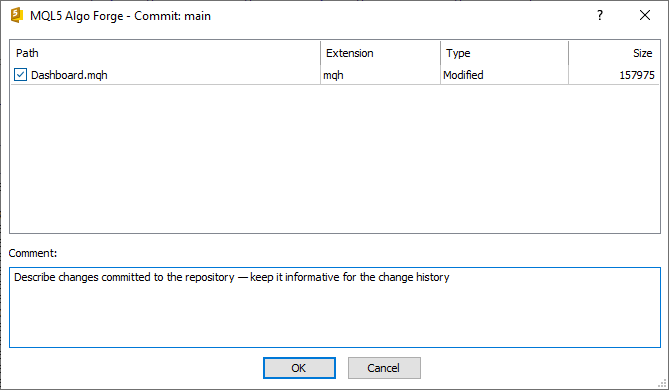
9.3 Be sure to provide a commit message for every commit
Public mode
Once the project is ready and synced, open its web version in Algo Forge and make it public. Until then, it may remain private. Publish your project once you are sure it has all the code, a README, and a working structure.
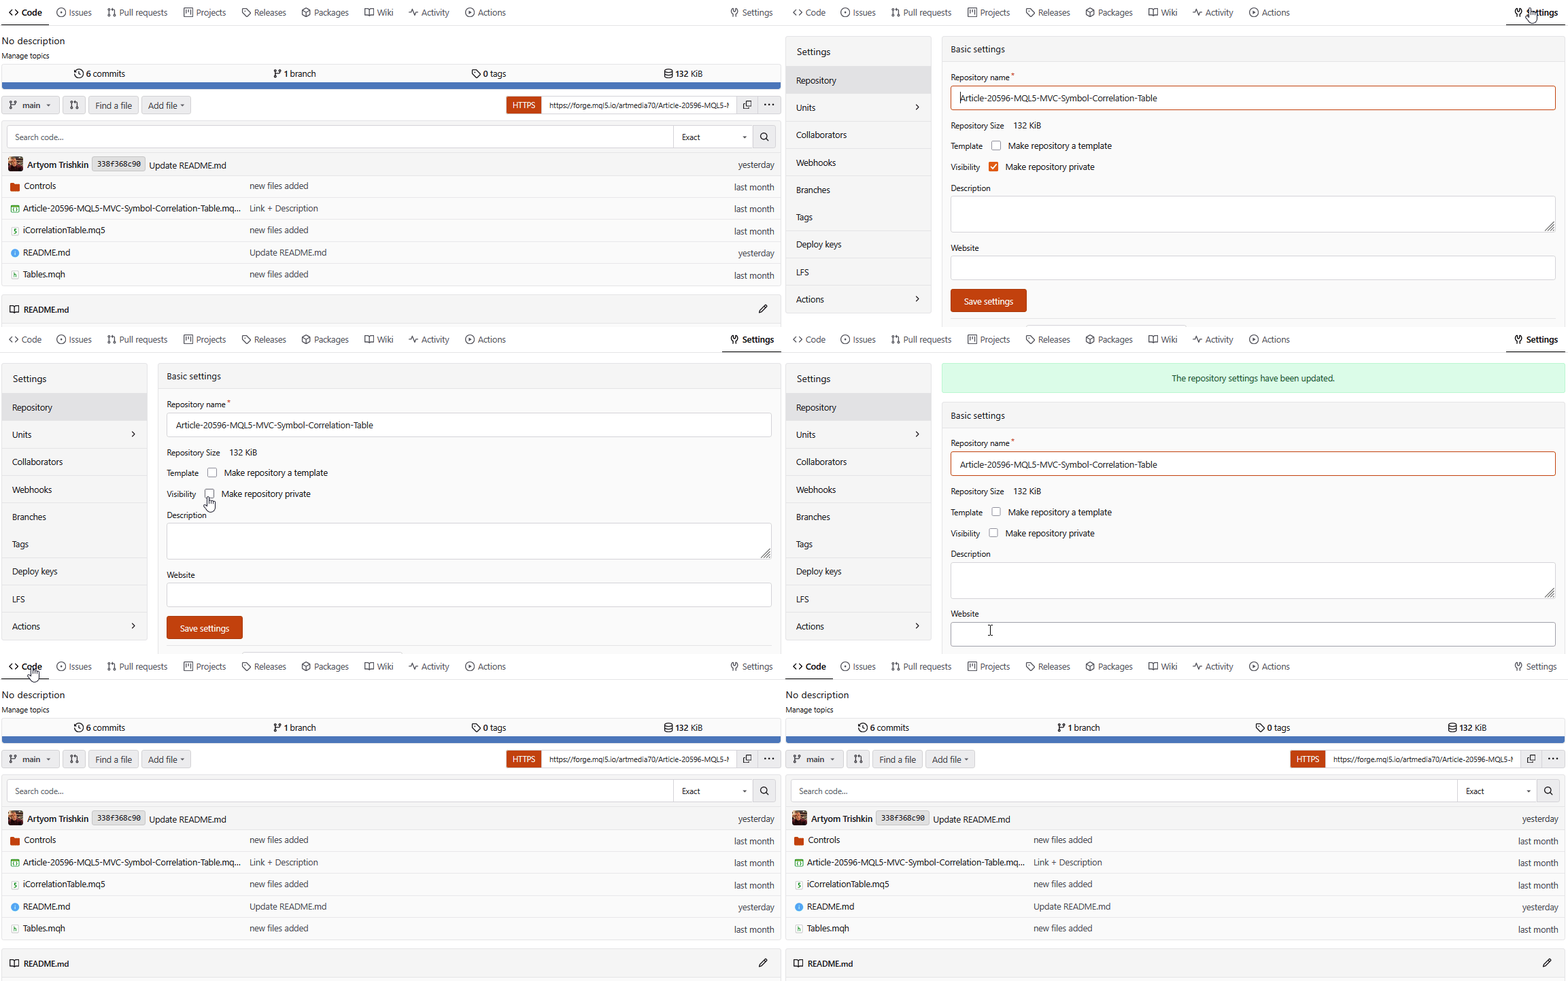
10. If the project should be public, uncheck the private project box
Multi-article projects
If you have a series of articles on a single library, indicator, or EA, do not just upload the latest version without context. Add versions sequentially from the first article to the last and, if necessary, create the corresponding releases in the Algo Forge web interface. This way, the reader will immediately see which version of the project relates to which article.
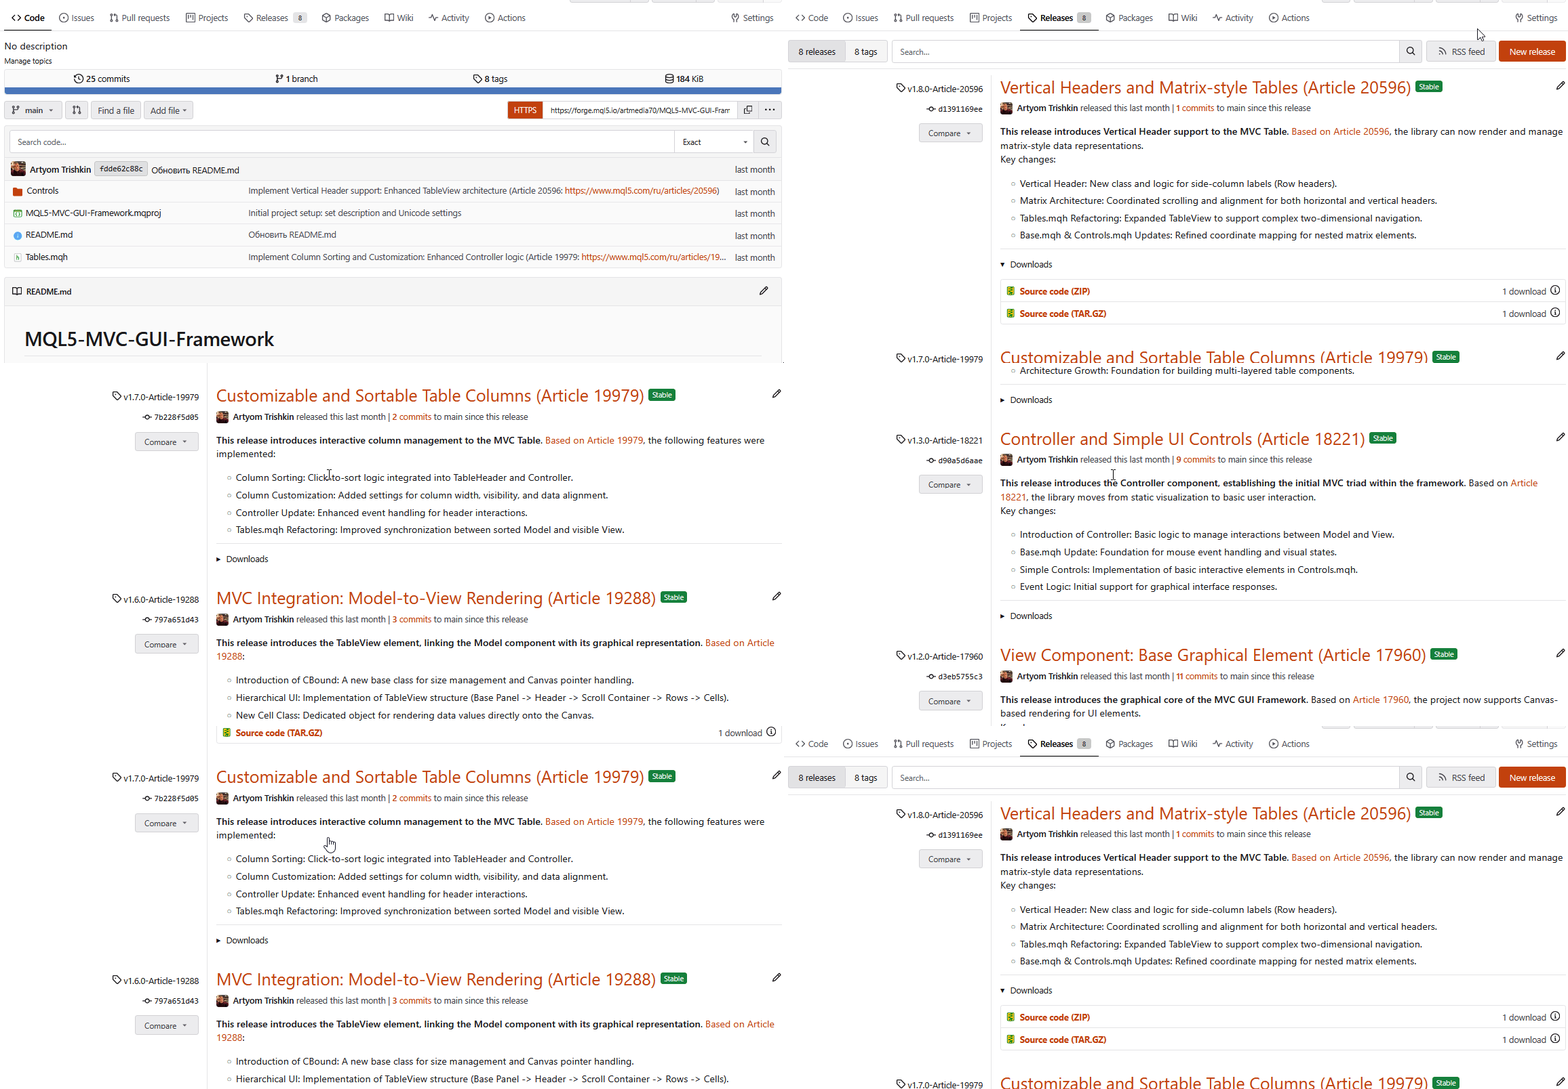
11. For each article in the series, create a new release version of the repository to preserve the history of the project development
Checklist
Before finishing, make sure that:
- the project has been created in Shared Projects;
- the project name is correct;
- all files from the article have been added;
- the project structure is readable and does not cause confusion;
- README.md is located at the root;
- the project is compiled;
- changes have been committed and sent to Algo Forge;
- if necessary, the project is open to public access.
Conclusion
Do not leave the article code as a simple appendix to the publication. Turn it into a project. This will make your content more useful, simplify maintenance, preserve your revision history, and give readers a convenient entry point into your work. The article explains the idea. The MQL5 Algo Forge project shows this idea in action.
Make sure to study the following sources for a detailed overview of the MQL5 Algo Forge:
- Getting Started with MQL5 Algo Forge — a basic guide for a quick start;
- Code, Tears, and Algo Forge — transition to Algo Forge with practical examples;
- "Moving to MQL5 Algo Forge" series:
Translated from Russian by MetaQuotes Ltd.
Original article: https://www.mql5.com/ru/articles/22699
Warning: All rights to these materials are reserved by MetaQuotes Ltd. Copying or reprinting of these materials in whole or in part is prohibited.

 Price Action Analysis Toolkit Development (Part 70): Turning Flag Pattern Signals into Automated Trade Execution
 MQL5 Wizard Techniques you should know (Part 91): Using Skip Lists and a Hopfield Network in a Custom Trailing Class
 Trading with the MQL5 Economic Calendar (Part 12): SQLite Storage and Deduplication
 Overcoming Accessibility Problems in MQL5 Trading Tools (Part IV): Remote voice trading

- Free trading apps
- Over 8,000 signals for copying
- Economic news for exploring financial markets
You agree to website policy and terms of use
Именование
Use the name we give you. If you don't have a name yet, stick to a clear pattern:
For example: Article-21732-Code-Tears-And-Algo-Forge. Such a name immediately links the project to the article and makes it easier to navigate.
Please do not make this a mandatory standard for people who have their own ideas about how to organise repositories.
My idea is like this. I have created an organisation where repositories related to one series of articles will be collected. It's like a "folder" that wraps related repositories, adds context, and allows you to give the repositories concise names. You open the organisation, and it neatly collects all the repositories related to a series of articles (and only them).
For example: Article-21732-Code-Tears-And-Algo-Forge. This name immediately links the project to the article and makes it easier to navigate.
My situation is like this:
So this scheme does not work for me at all.
The idea itself is good and will work fine for most authors (I think). But I ask for permission not to follow it, if a person can reasonably explain why it is not suitable for him/her.
Типизация
You can split them into several repositories (often).
As an idea for those who have enough enthusiasm and discipline to bother.
Thank you
Please don't make this a mandatory standard for people who have their own thoughts on repository organisation.