Moving to MQL5 Algo Forge (Part 1): Creating the Main Repository
Contents
- Introduction
- Tools Currently Available
- Starting the Transition
- Repository Management Tool
- Creating the Main Repository
- Cloning the Repository
- Configuring Ignored Files
- Committing Changes
- Creating an Archive Branch
- Preparing to Create Project Branches
- Conclusion
Introduction
When working on a medium- to large-sized project, the need inevitably arises to track changes in the code, group them by meaning, and be able to roll back to previous versions. Generally, this is handled by version control systems such as Git or Subversion (SVN).
Most development environments provide built-in tools for working with repositories of some version control system. MetaEditor is no exception - it supports its own repository MQL Storage based on SVN. As the documentation states:
MQL5 Storage is a personal online repository for MQL4/MQL5 source codes. It is integrated into MetaEditor: you can save and receive data from the storage directly in the editor.
The storage features the version control system. This means that you can always find out when and how the files were changed, as well as cancel any changes and go back to the previous version.
With MQL5 Storage, your source codes always remain secure. The data is stored on a protected server, and you are the only one having access to it. If your hard drive fails, all previously saved codes can be easily restored.
The storage allows you to easily share and synchronize chart templates and profiles, sets of parameters for testing MQL5 programs and sets of trading instruments between different platforms.
MQL5 Storage allows remote development of MQL5 applications in teams using shared projects.
However, the Git version control system has become far more popular - and rightfully so, in our opinion. Perhaps for this reason, back in mid 2024, MetaQuotes revealed its plans to adopt Git as the built-in version control system in MetaEditor, along with the launch of MQL5 Algo Forge, an in-house alternative to GitHub.
At the time this article is being written, the new repository is already available for use, but MetaEditor integration has not yet been completed. Thus, while MetaEditor remains the main development environment, developers are still limited to MQL Storage based on SVN.
In our work on various projects, we actively used the existing version control system. However, when writing the article series "Developing a Multi-Currency Expert Advisor", the lack of support for parallel code development in branches and their subsequent merging became especially noticeable. While SVN itself supports branching, MetaEditor does not provide an interface for it. External SVN clients could be used, but that would require restructuring the familiar workflow.
For this reason, the announcement of MQL5 Algo Forge was warmly received. We hoped MetaEditor would finally support branching. But seven months later, those expectations remain unfulfilled. Therefore, let us explore how we can improve the development process with the tools currently available.
For better understanding, at least basic knowledge of version control systems is required. If necessary, we recommend reviewing materials on the MQL5 website or elsewhere, such as Getting started with Git.
Tools Currently Available
Soon after MetaQuotes released the news about the launch of MQL5 Algo Forge, a repository named mql5 was created in it, which contained all the files from our current MQL Storage. However, they all had been added in a single commit under the user super.admin, meaning no commit history was preserved. This was expected. Migrating full histories between different version control systems is nearly impossible.
Later, some interface elements in MetaEditor began showing a new repository name. For example, the title of the version history dialog was changed to "MQL5 Algo Forge":
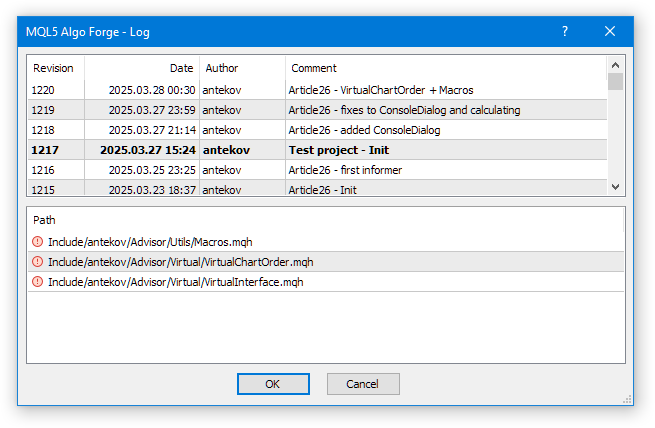
Yet the essence has not changed: all modifications still go into MQL Storage, not into Algo Forge. Thus, the files copied to Algo Forge seven months ago have not been updated since.
What has changed, however, is that we can now work with multiple repositories. Previously, there was only one repository. We had to create different projects in separate folders within the MQL5 data folder, which was always the repository root. This meant that when we created a new terminal instance for a new project and activated storage, we downloaded all projects from storage, even the unrelated ones. As their number grew, this became inconvenient.
Simply deleting irrelevant projects from the data folder was not an option, since every commit would then require manually excluding those deleted items from being sent to storage.
With a proper Git repository, we now have several options for structuring storage and managing different projects:
- Each project exists in its own repository.
- Each project exists in a separate branch of a single repository.
- A hybrid model: some projects are located in separate repositories, while others coexist as branches within one repository.
Each approach has pros and cons. For instance, if multiple projects share the same library, it is inconvenient to keep the library in a separate repository. Instead, it is better to maintain it in a dedicated branch, merging changes into project branches as needed. On the other hand, for self-contained projects, a separate repository is preferable as this avoids storing unrelated code from other projects.
Starting the Transition
When making changes, it is wise to preserve what already exists. Using the automatically created mql5 repository may not be the best idea, since MetaQuotes may perform additional actions there under super.admin. Therefore, first of all, we will create a new repository to store all our current projects. For this, we will adopt the model of storing different projects in different branches. To implement this separation, we define the following conventions:
- The main branch will either remain empty or contain only a minimal set of common code used by all projects.
- A separate archive branch will store all code available at the time of migration. From here, we can copy code into individual project branches.
- Other branches will be related to individual projects and will be named accordingly.
- A project may have multiple active branches, depending on the chosen branching strategy (for example, the approach described in "A Successful Git Branching Model").
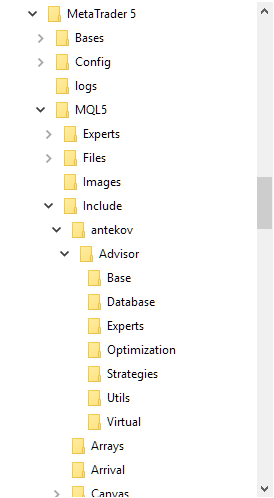
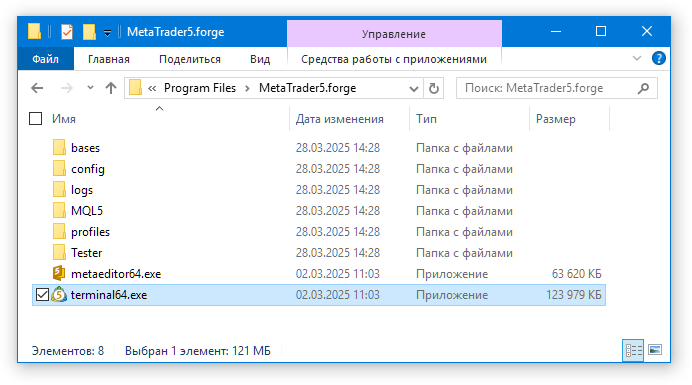
Let us assume we have a MetaTrader5 folder with an installed terminal and a connected MQL Storage. That is, the terminal's MetaTrader5/MQL5 data folder contains, along with standard files, the code of our projects.
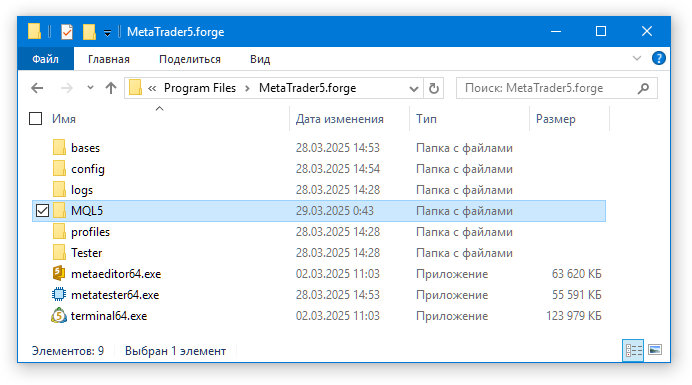
Create a new folder named MetaTrader5.forge and copy two executable files there:
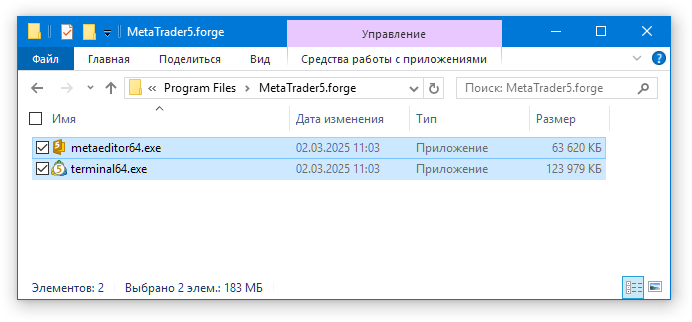
Launch the MetaTrader terminal from this folder in portable mode. On our system, it started in this mode upon a double click. Otherwise, you may need to explicitly specify the /portable key when running it from the command line or create a shortcut, adding this key to the application start command. There is no need to open a trading demo account or log in to MQL5.community at this stage.
An initial folder structure is created in the new folder, including an empty MQL5 data folder. It doesn't contain our files yet.
Launch MetaEditor from the terminal by pressing F4.
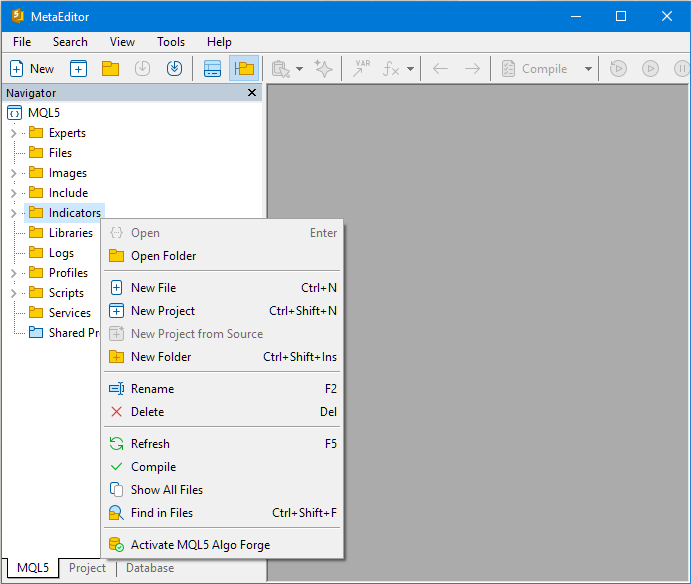
If you right-click a folder name, the context menu offers the option to activate MQL5 Algo Forge storage (although, in reality, this will activate the MQL Storage). Do not activate it yet, as we intend to migrate to the new repository type.
Then close both MetaTrader and MetaEditor, since we will not need them for a while and will need to perform some actions directly in the terminal folder.
Repository Management Tool
The next step is to choose a tool for working with the future repository. Later, this role may be taken over by MetaEditor itself, but for now we have to use something else. You can use any tool for working with a Git repository, for example, Visual Studio Code (VSCode) in combination with Git. The Windows version of Git can be downloaded from gitforwindows.org.
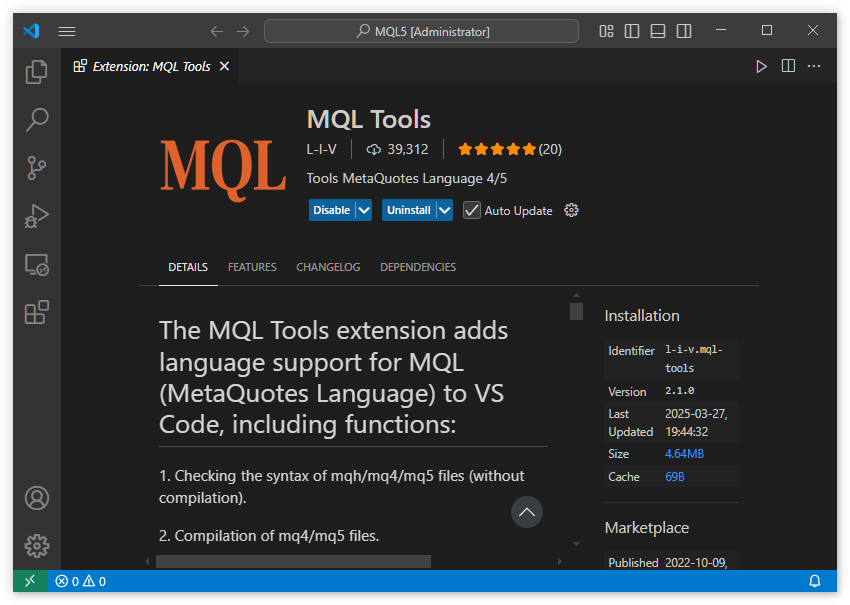
So, install Git and VSCode (or make sure they are already installed). In VSCode, install the MQL Tools extension for working with MQL5 files:
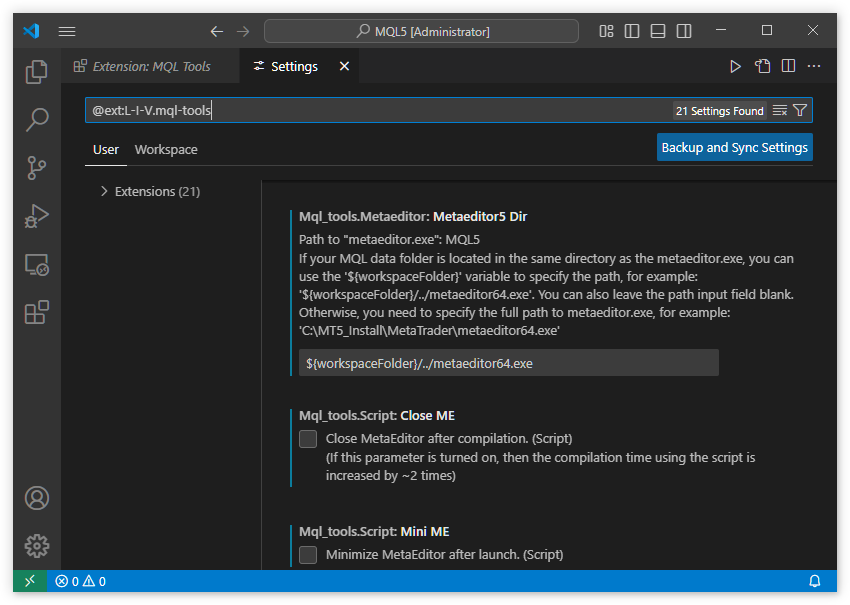
After installing the extension, specify the path to the MetaEditor executable in the 'Metaeditor5 Dir' parameter in settings. Since there is no need to work with MQL5 source files located outside the working folder of a terminal instance, you can follow the recommendation and provide the path relative to the currently opened folder in VSCode:
Further down in the extension settings, we strongly recommend enabling the "Portable MT5" option.
For syntax highlighting, you will need to install the C/C++ extension for Visual Studio Code.
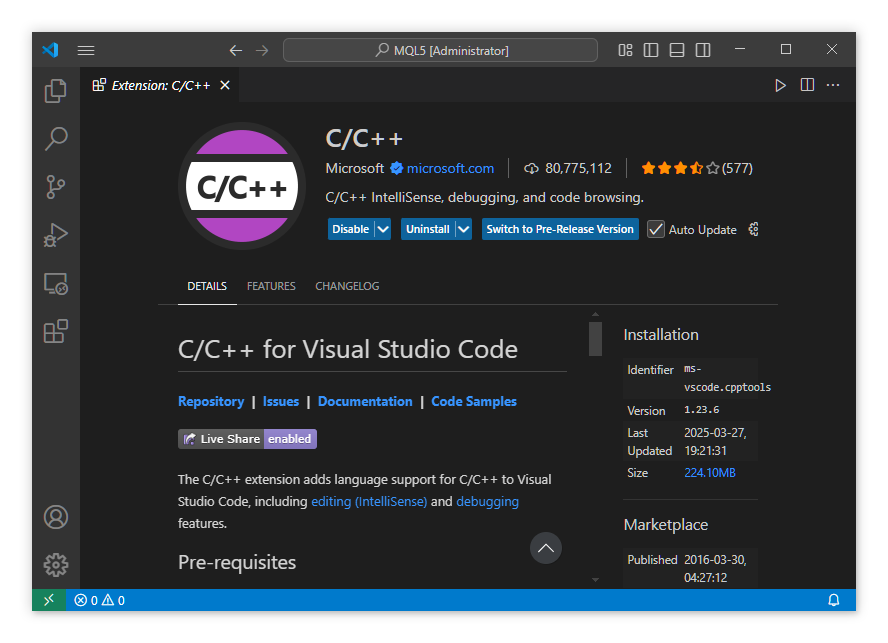
Unfortunately, while MQL5 is very similar to C++, it includes certain language constructs that are not used in standard C++. As a result, the extension may occasionally display syntax errors that are irrelevant in the context of MQL5.
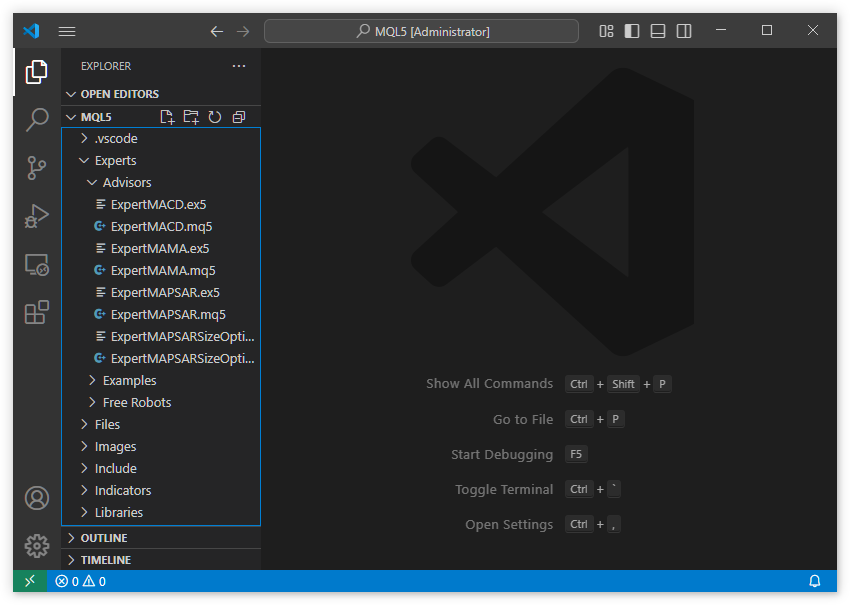
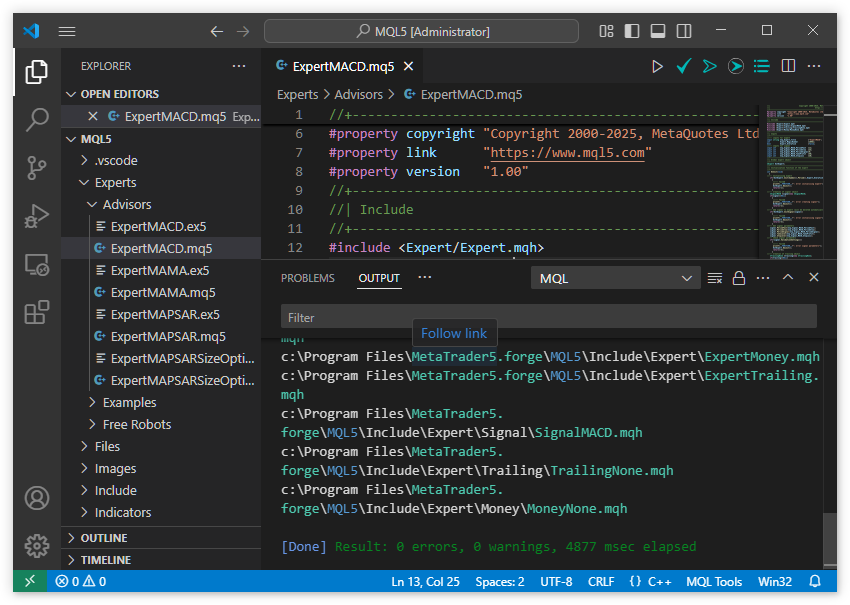
Now, open the MetaTrader5.forge/MQL5 data folder in VSCode:
Try opening any Expert Advisor file:
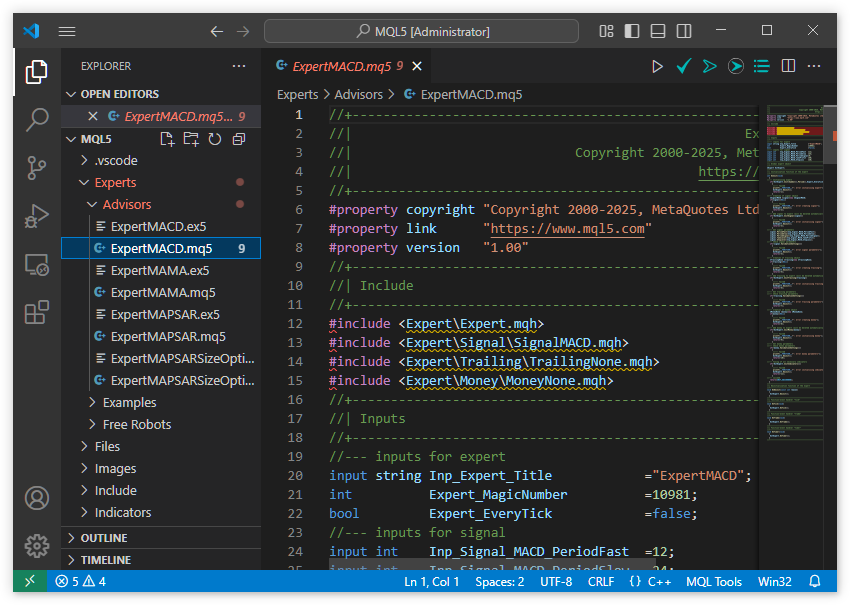
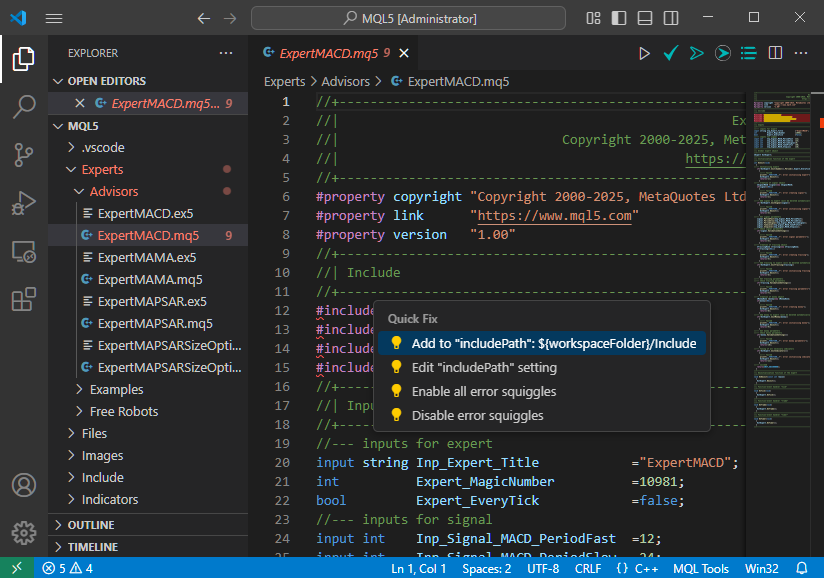
Syntax highlighting works correctly, and the top-right corner of the editor window now displays additional buttons for MQL5 syntax checking and compilation via MetaEditor. However, all #include directives generate error messages. This happens because MQL5 is not C++, and the location of standard library include files differs. To fix this, follow the suggested resolution: in the settings for the C/C++ extension for VSCode, add the path to MetaTrader5.forge/MQL5/Include.
Once this is done, the error messages disappear, and the Expert Advisor compiles successfully:
At this point, we will temporarily set VSCode aside, as the main player now takes the stage: MQL5 Algo Forge.
Creating the Main Repository
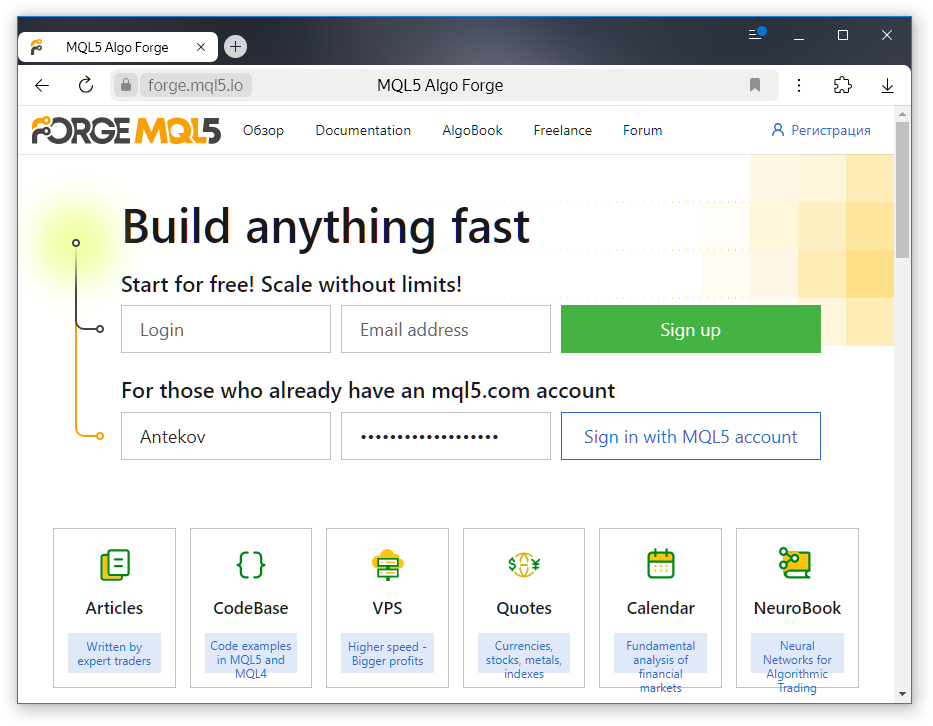
Go to https://forge.mql5.io/ and either register a new account or log in using your existing MQL5.community credentials:
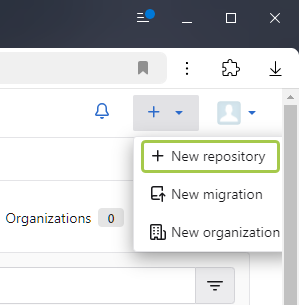
From the top-right menu, select "New repository".
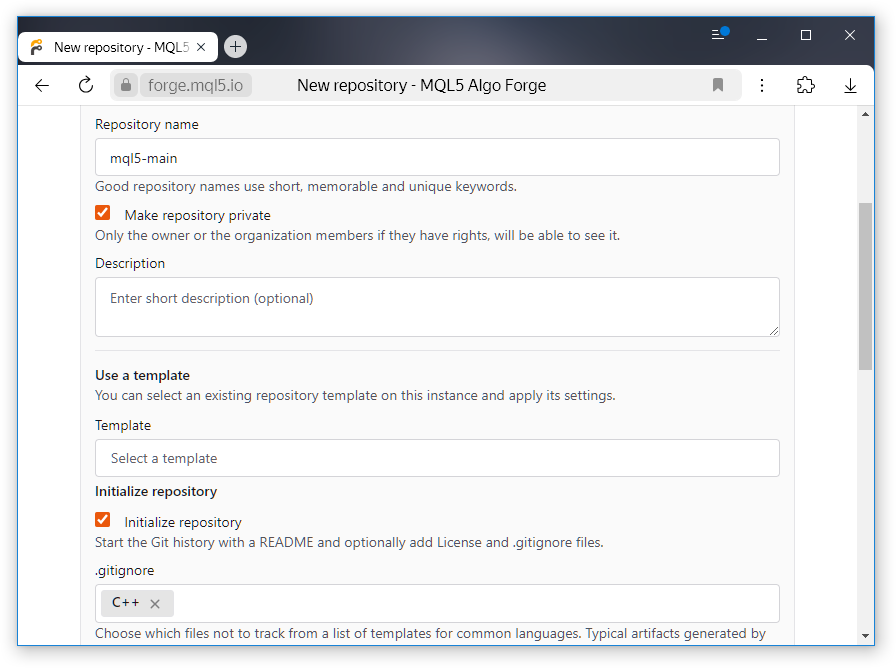
Choose a name for the repository (for example, mql5-main). When cloning the repository locally, you can specify any name for the root folder, so the repository name itself is not critical. During initialization, add both .gitignore and README.md files.
The repository is now created. The first commit is made automatically:
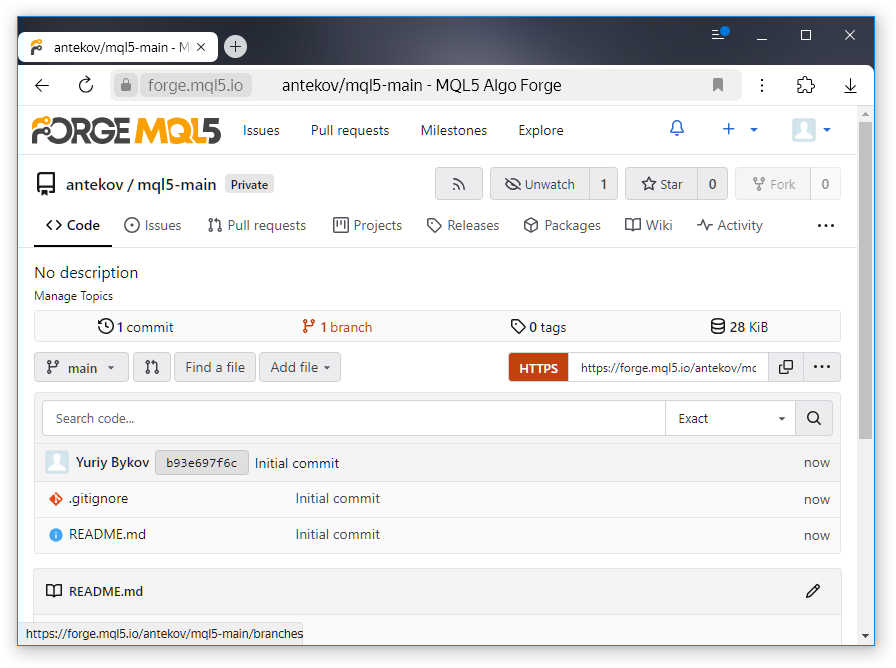
For the next steps, copy the repository URL. In our case, it is: https://forge.mql5.io/antekov/mql5-main.git. We can now return from the browser to VSCode, MetaEditor, and the MetaTrader 5 terminal.
Cloning the Repository
To clone the repository locally, we need an empty MQL5 folder in the terminal directory. Currently, it is already filled with files, so we must proceed as follows:
- Close VSCode, MetaEditor, and MetaTrader 5.
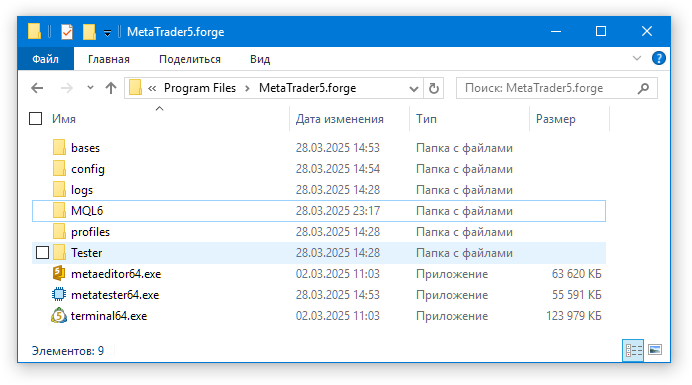
- Rename the existing MQL5 folder (for example, to MQL6).
Now there is no MQL5 folder in the MetaTrader5.forge directory:
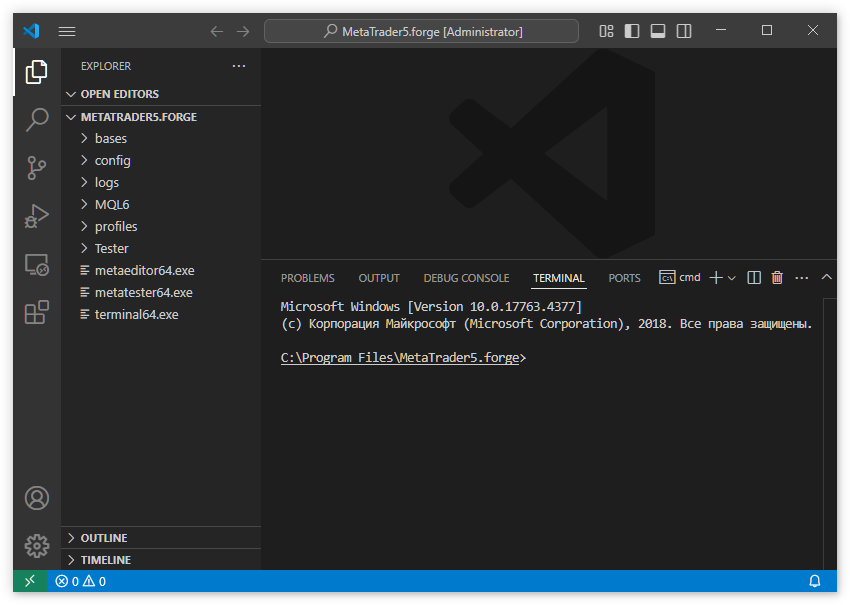
Open this folder in VSCode and launch the VSCode terminal by pressing [Ctrl + `].
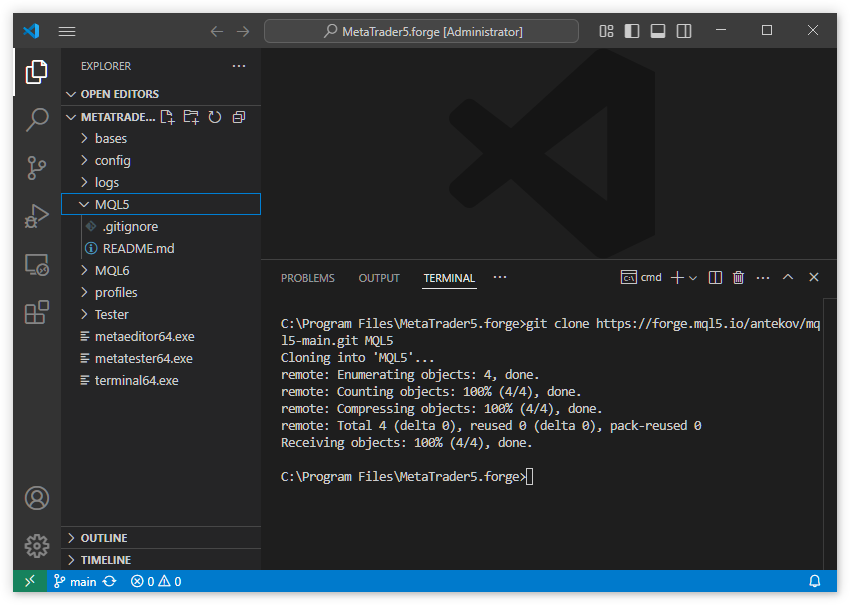
Copy the repository URL and execute the cloning command, specifying the local repository's root folder name after the URL (it should match MQL5):
git clone https://forge.mql5.io/antekov/mql5-main.git MQL5
If the repository is private and this is your first time cloning it, you will be prompted to enter your credentials. As a result, a new MQL5 subfolder will appear in the terminal directory, containing .gitignore and README.md.
Now move all files and folders from MetaTrader5.forge/MQL6 into MetaTrader5.forge/MQL5, then delete the old MetaTrader5.forge/MQL6 folder.
Open the MetaTrader5.forge/MQL5 folder in VSCode. On the left-hand Source Control panel, you will see that the repository folder has a large number of new files (in our case, 581):
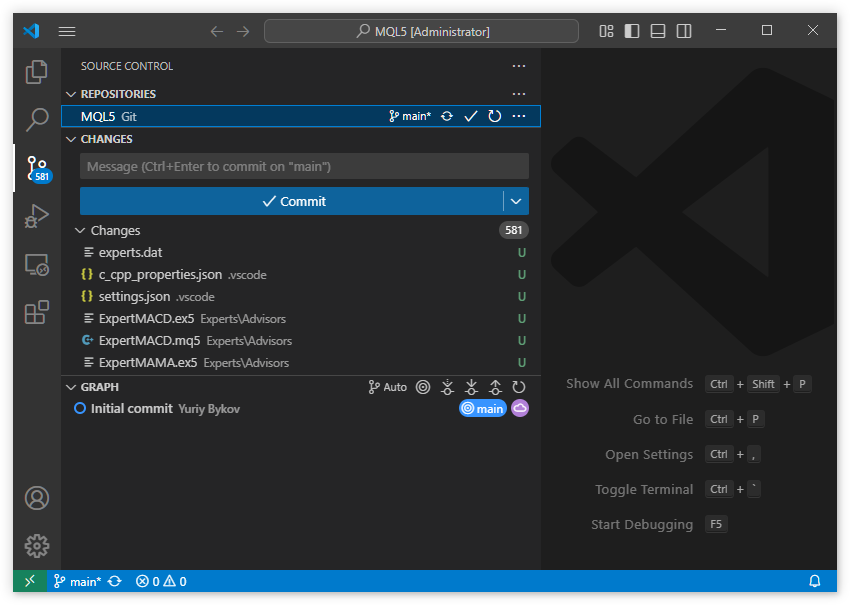
But most of these files should not be located in our repository since they belong to the standard MetaTrader 5 installation. In new versions, the contents and structure of these standard libraries and example projects may change. We cannot modify them without risking conflicts during the next update of the MetaTrader terminal or when switching to a new working folder. Therefore, there is no reason to include them in our repository.
Configuring Ignored Files
This is precisely where the .gitignore file becomes useful. Here we can specify which files and directories Git should ignore. This way, instead of hundreds of irrelevant changes, we will only see modifications in our own files. Since we have not yet added any custom files to the repository, all currently listed files should be ignored.
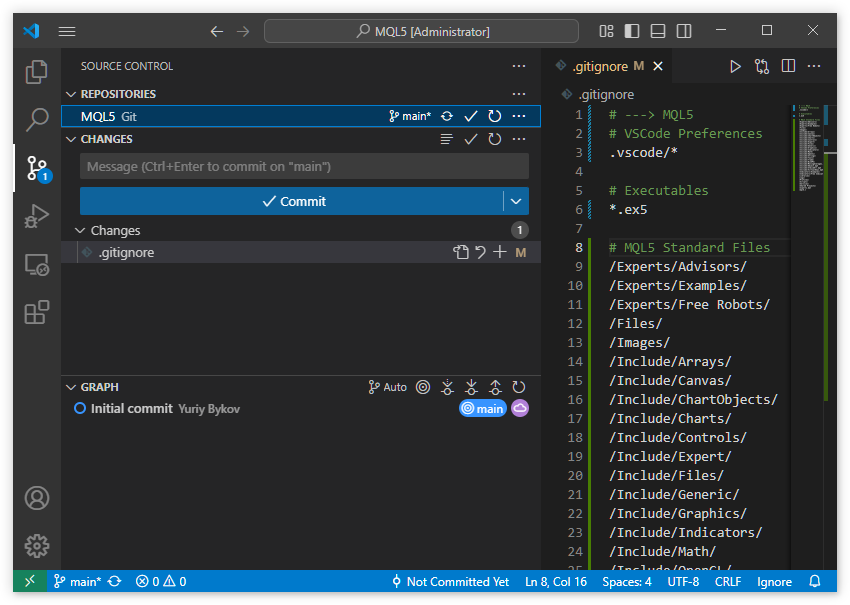
So, open .gitignore and replace its default content with something like this:
# ---> MQL5
# VSCode Preferences
.vscode/*

# Executables
*.ex5

# MQL5 Standard Files
/Experts/Advisors/
/Experts/Examples/
/Experts/Free Robots/
/Experts/Market/
/Files/
/Images/
/Include/Arrays/
/Include/Canvas/
/Include/ChartObjects/
/Include/Charts/
/Include/Controls/
/Include/Expert/
/Include/Files/
/Include/Generic/
/Include/Graphics/
/Include/Indicators/
/Include/Math/
/Include/OpenCL/
/Include/Strings/
/Include/Tools/
/Include/Trade/
/Include/WinAPI/
/Include/MovingAverages.mqh
/Include/Object.mqh
/Include/StdLibErr.mqh
/Include/VirtualKeys.mqh
/Indicators/Examples/
/Indicators/Free Indicators/
/Libraries/
/Logs/
/Profiles/
/Scripts/Examples/
/Scripts/UnitTests/
/Services/
/Shared Projects/
/experts.dat
/mql5.*
This way you instruct the version control system to exclude VSCode settings files, compiled Expert Advisor and indicator files (the repository usually only stores source code), and standard MetaTrader 5 files located in the listed folders. Only your own source code will be tracked.
Committing Changes
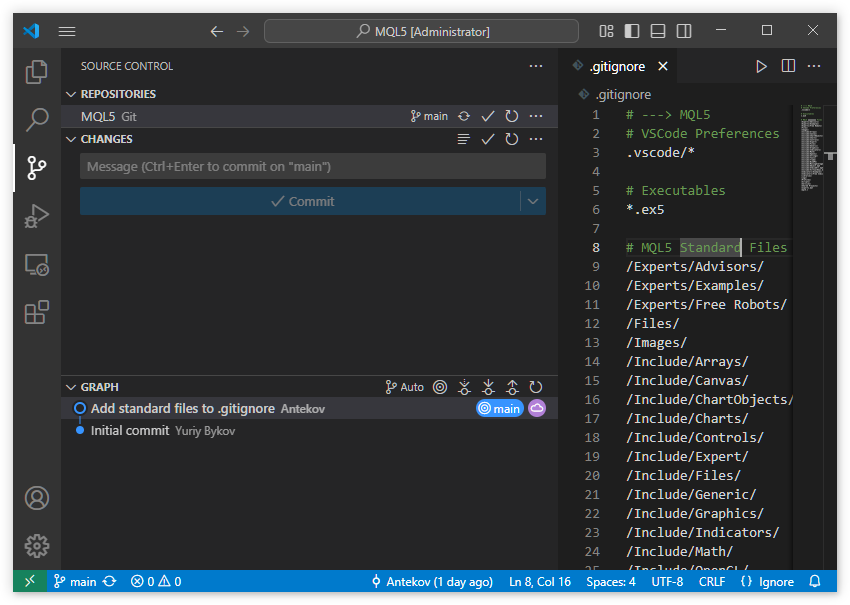
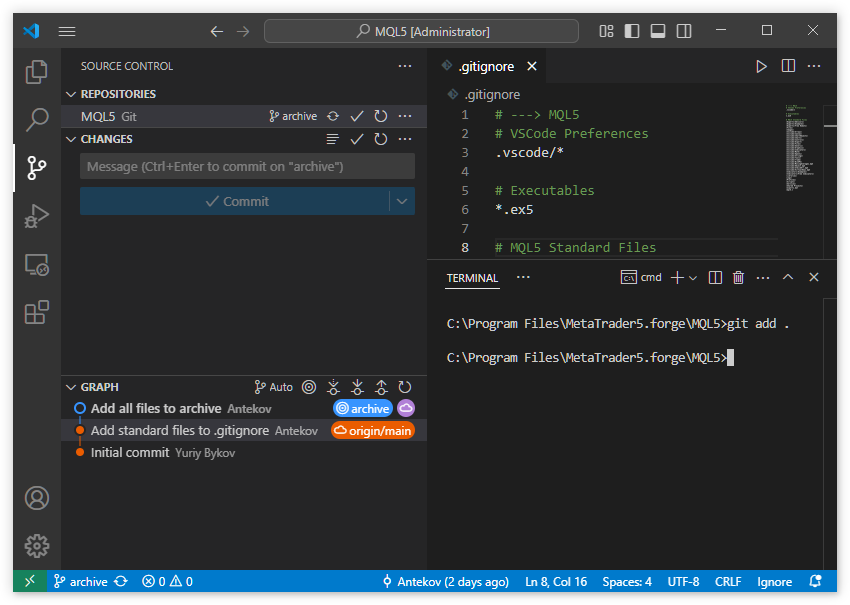
After saving .gitignore, VSCode shows just a single modified file - the .gitignore itself. All other files in the MQL5 folder, which is now the root folder of our mql5-main repository, although physically present, are now ignored:
Perform a commit in the local repository by adding a message such as: "Add standard files to .gitignore", and click "Commit".
At this point, the change exists only in the local repository. To push it to the remote repository, run the "Push" command. This can be done in different ways, for example, by clicking "Sync Changes" in VSCode, selecting "Push" from the overflow menu (...) next to CHANGES, or running the 'git push' command manually.
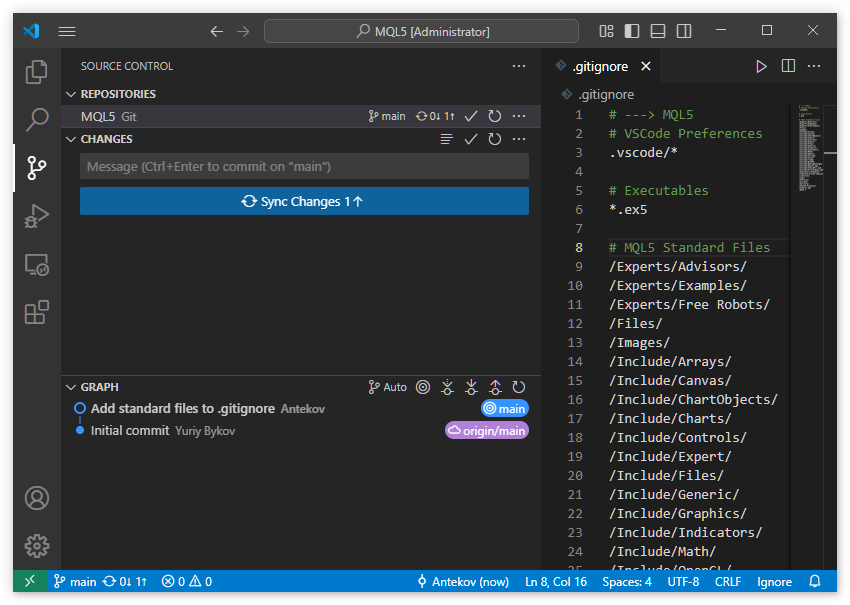
However, before pushing the last commit upstream, check the commit history in the GRAPH. You should see two commits: "Initial commit" and "Add standard files to .gitignore". The branch name is shown in color on the right, next to commits. The first commit is labeled as origin/main, and the second just main. Actually it's the same main branch. Here, origin is an alias of the remote repository, so the origin/ prefix means that this commit is the last one in the main branch in the upstream repository. The second commit appears without this prefix, so it exists and is the last one only in the local repository.
Press "Sync Changes":
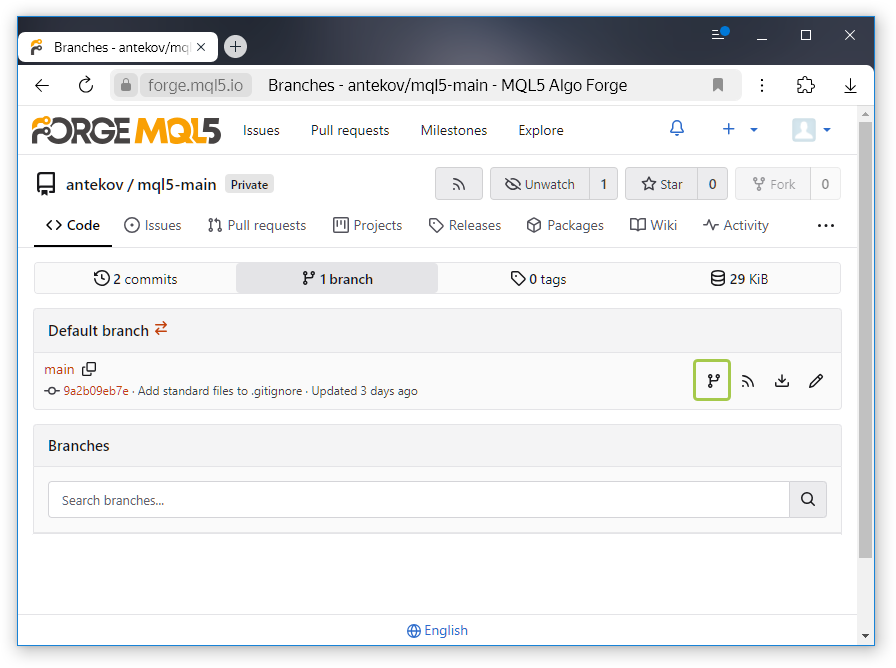
The changes now have been successfully pushed to the remote repository, and the purple "origin" label has moved to the second commit. You can confirm this by viewing the repository in the web interface:
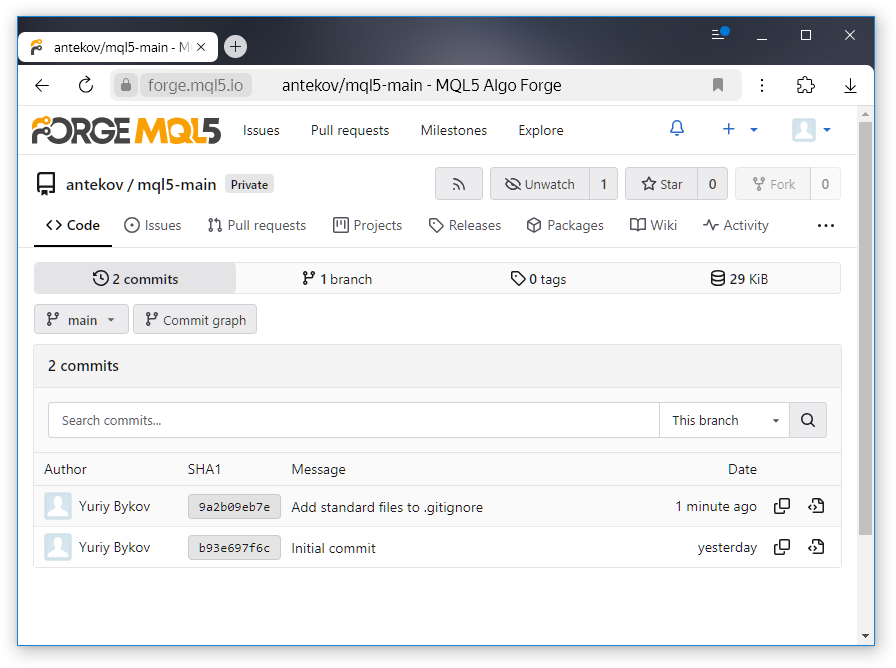
At this stage, we have prepared a nearly empty repository for our work. Its only branch named main contains two files that we have added. Any other files present in the data folder of this terminal instance are ignored by the version control system.
Creating an Archive Branch
As mentioned earlier, the first step is to place all our existing files into one branch so they fall under version control and can be pushed to the remote repository. This ensures we can later retrieve them on any other computer if needed.
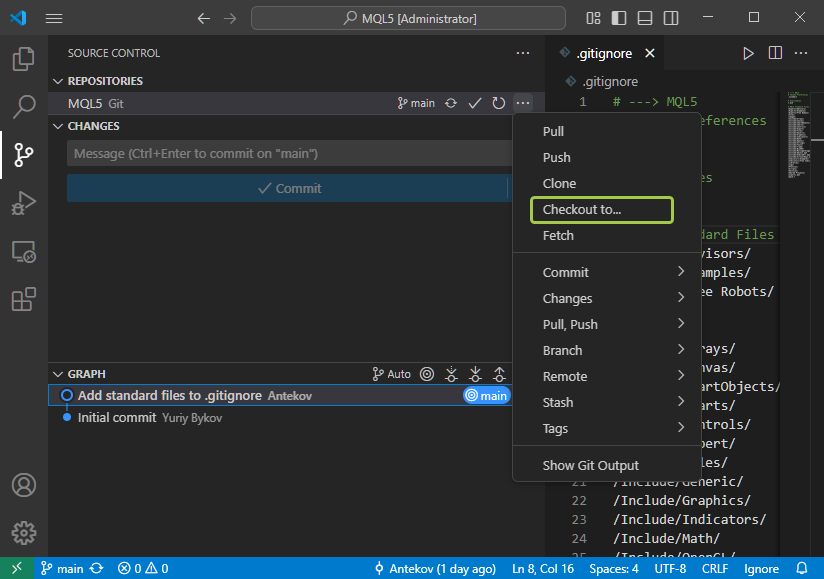
As any other operations in the version control system, branches can be created in different ways. From VSCode, open the repository menu (...). Then select "Checkout to…"
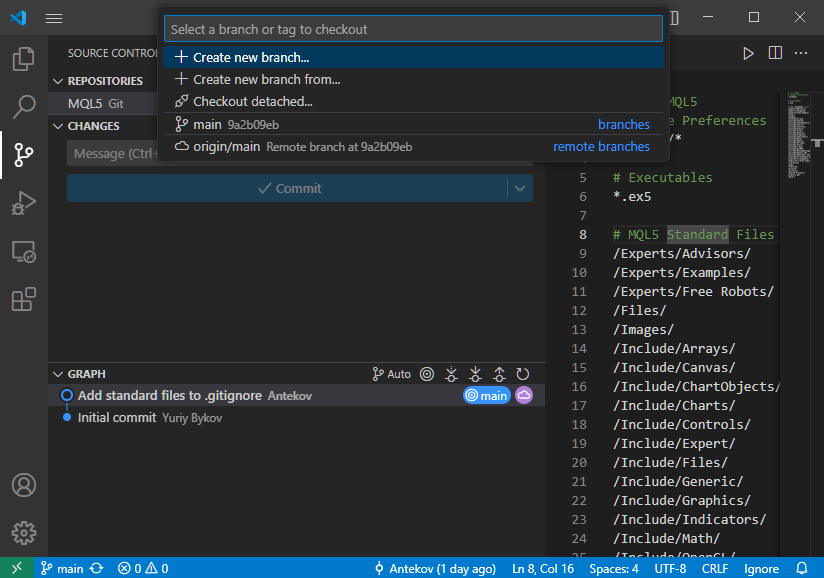
Next, in the list of actions, select "Create new branch…".
In the web interface, from the remote repository go to the branches tab and click a new branch creating button (highlighted with a green rectangle below):
There is one difference between these two methods. The first one creates a new branch on the local computer, and, until you push changes, the remote repository knows nothing about this branch. The second method creates a new branch in the remote repository, so the local repository does not know about the existence of this branch until you retrieve changes with the pull command. Either way, you just need to sync by running the pull or push commands).
The third way is to use the command line. To create a new branch named "archive" in your local repository, you can run, for example, the following command from the repository folder:
git checkout -b archive If you do this in the VSCode integrated terminal, you will see the following:
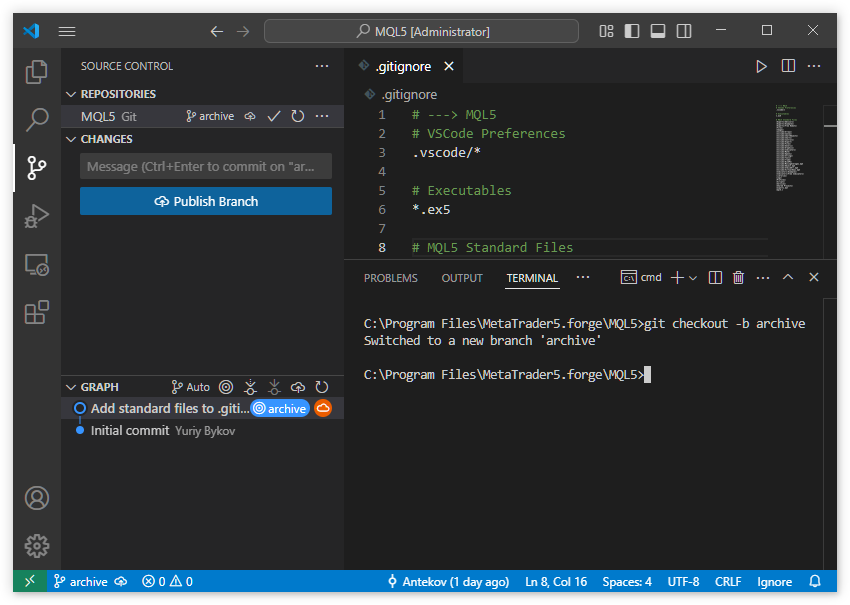
This terminal informs you that the repository has been switched to a newly created "archive" branch. In the commit list, the branch name main changed to archive. The changelog will prompt you to push a new branch to the remote repository. However, we will first add our files to this branch.
We had an initial folder with the MetaTrader terminal, which contained the MQL5 folder with all our files. The repository was created inside another terminal folder. Now, copy all files from the old original MetaTrader5/MQL5 folder to the new repository's folder:
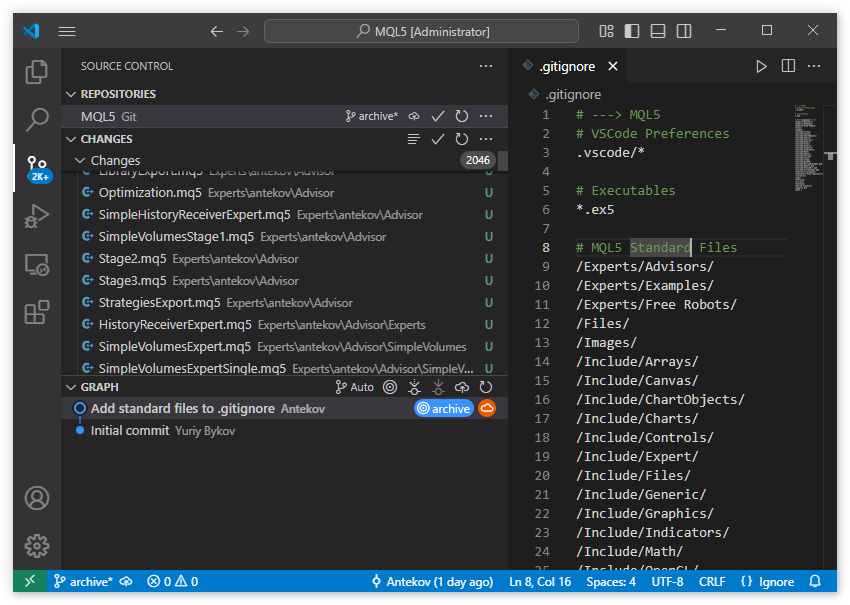
The version control system immediately detected new files in the repository folder, and certain actions became available for them. You need to add all new files to the index (to enable version control). This can be done either through the VSCode interface by selecting "+" (Stage All Changes) in the change list header, or by running the command
git add .
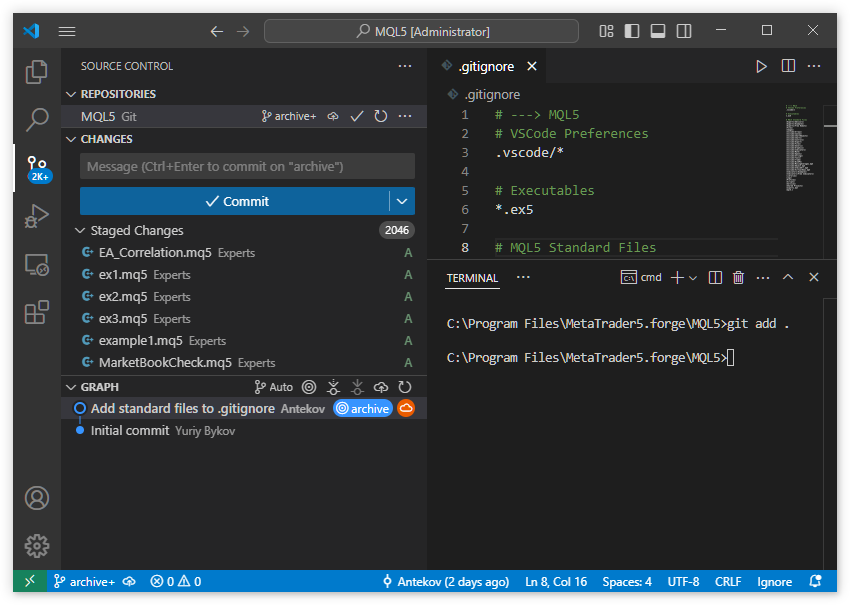
Now each file in the list of changes is labeled with A, meaning it's been indexed, instead of U. Next, commit and push changes to the remote repository:
As we can see, the last commit in the main branch is now the second commit, while the third commit has been made in the archive branch. Let's verify that the new branch has been pushed to the remote repository:
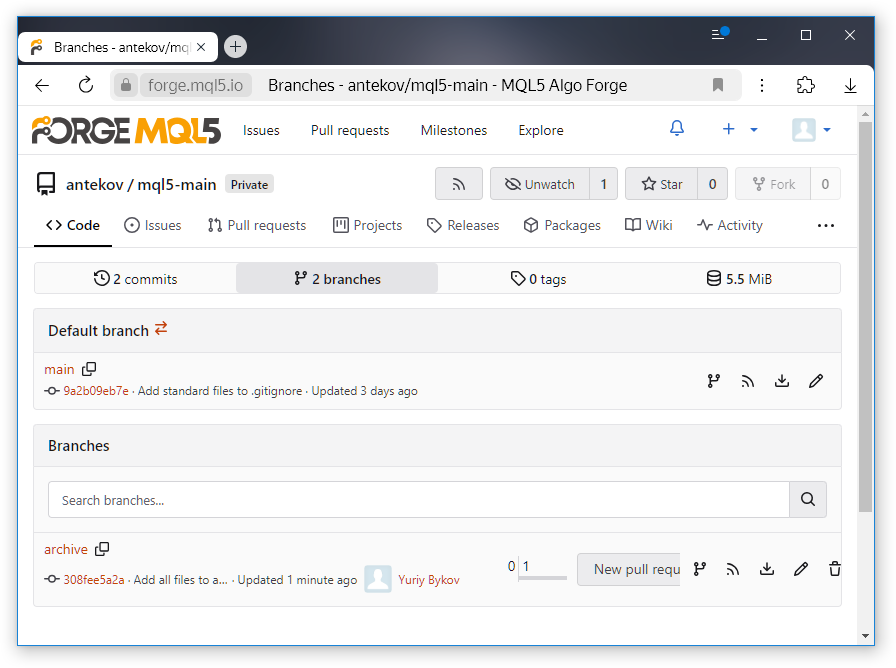
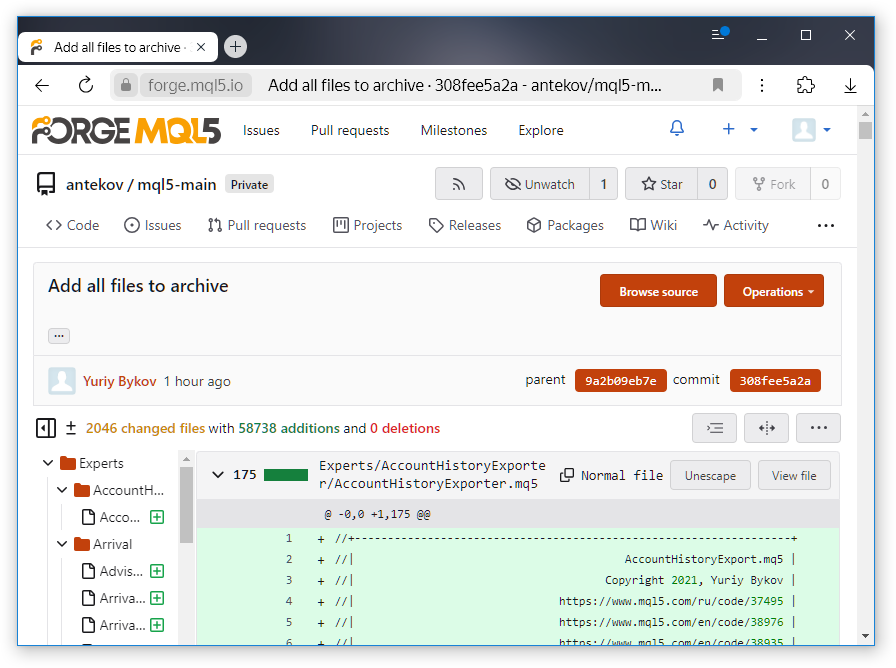
The latest commit is visible in the remote repository and belongs to the new archive branch. Click on it to see the specific changes included in this commit.
At this point, all files have been successfully added to the archive branch. Now, let's switch back to the main branch in our local repository.
Preparing to Create Project Branches
To switch to the main branch, execute the following command in the console
git checkout main
The local repository should return to the state it was in before we copied all the files. However, inspecting the contents of the MQL5 folder after switching, you may notice that many of our Expert Advisor folders remain.
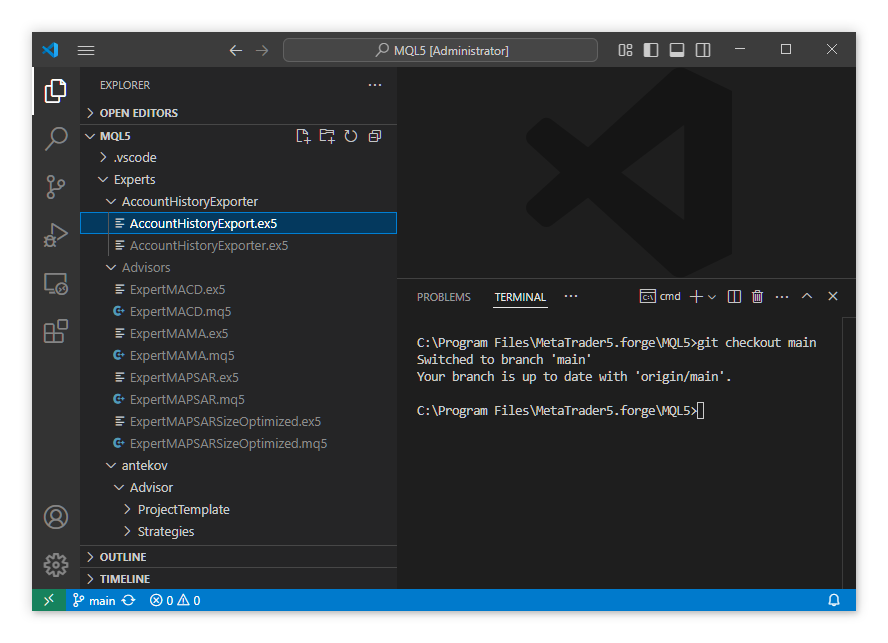
These folders still contain compiled .ex5 files. This happens because, having excluded them from version control, Git does not remove these files when switching from the archive branch back to main. Only the source files that were staged and committed to the repository have been removed from the folder.
This is not very convenient, so we need to remove the compiled files and any empty directories that remain after deleting them. Doing this manually would be time-consuming, especially since we might need to repeat it in the future. Therefore, it's more practical to write a simple script to handle this task automatically.
During the script development, it became clear that deleting files alone is insufficient to restore the root folder to its original state after switching branches. It is also necessary to remove directories that have become empty after .ex5 files are deleted. Some folders may be intentionally empty and should not be removed. These will be added to an exclusion list. This list will include all folders previously listed in .gitignore as well as the .git folder containing version control metadata.
Here is an example of such a script:
import os


def delete_ex5_files_and_empty_dirs(path, excluded=['.git', '.vscode']):
    # Exceptions
    excluded = {os.path.join(path, dir) for dir in excluded}

    # Check all folders and files in the directory tree
    for root, dirs, files in os.walk(path, topdown=False):
        is_excluded = False
        for ex in excluded:
            if root.startswith(ex):
                is_excluded = True
                break
        if is_excluded:
            continue

        # Delete all files with extension .ex5
        for file in files:
            if file.endswith('.ex5'):
                file_path = os.path.join(root, file)
                os.remove(file_path)
                print(f'File removed: {file_path}')

        # Delete all folders that have become empty after deleting files
        for dir in dirs:
            dir_path = os.path.join(root, dir)

            # IF the directory is empty after deleting files
            if dir_path not in excluded and not os.listdir(dir_path):
                try:
                    os.rmdir(dir_path)
                    print(f'Empty folder removed: {dir_path}')
                except OSError:
                    pass  # If error occurred, ignore


excluded = [
    '.git',
    '.vscode',
    'Experts\\Advisors',
    'Experts\\Examples',
    'Experts\\Free Robots',
    'Experts\\Market'
    'Files',
    'Images',
    'Include\\Arrays',
    'Include\\Canvas',
    'Include\\ChartObjects',
    'Include\\Charts',
    'Include\\Controls',
    'Include\\Expert',
    'Include\\Files',
    'Include\\Generic',
    'Include\\Graphics',
    'Include\\Indicators',
    'Include\\Math',
    'Include\\OpenCL',
    'Include\\Strings',
    'Include\\Tools',
    'Include\\Trade',
    'Include\\WinAPI',
    'Indicators\\Examples',
    'Indicators\\Free Indicators',
    'Libraries',
    'Logs',
    'Presets',
    'Profiles',
    'Scripts\\Examples',
    'Scripts\\UnitTests',
    'Services',
    'Shared Projects',
]

if __name__ == '__main__':
    current_dir = os.getcwd()  # Current working directory
    delete_ex5_files_and_empty_dirs(current_dir, excluded)
Save this script as clean.py in the repository root and add it to version control in the main branch. From now on, after switching from archive back to main, simply run this script to automatically clean up compiled files and empty folders.
Conclusion
Here we conclude our initial experiments with the new repository system. All our files have been successfully transferred into it. We have laid the groundwork for creating new project branches for new projects. Since the code is safely stored in the archive branch, we can gradually migrate projects into separate branches as needed.
An interesting next step will be to try creating a public repository for the source code of our article series "Developing a Multi-Currency Expert Advisor". It is still unclear how to structure the code across the different parts of the series, but we will address this in the near future.
Thank you for your attention! See you soon!
Archive contents
| # | Name | Version | Description |
|---|---|---|---|
| MQL5 | Repository root folder (Terminal Data Folder) | ||
| 1 | .gitignore | 1.00 | File listing folders and files to be ignored by the Git version control system |
| 2 | clean.py | 1.00 | Script to delete compiled files and empty directories when switching to the repository's main branch |
Translated from Russian by MetaQuotes Ltd.
Original article: https://www.mql5.com/ru/articles/17646
Warning: All rights to these materials are reserved by MetaQuotes Ltd. Copying or reprinting of these materials in whole or in part is prohibited.
This article was written by a user of the site and reflects their personal views. MetaQuotes Ltd is not responsible for the accuracy of the information presented, nor for any consequences resulting from the use of the solutions, strategies or recommendations described.
- Free trading apps
- Over 8,000 signals for copying
- Economic news for exploring financial markets
You agree to website policy and terms of use
I have no settings on the page with this project, for some reason.
This page opens if you click on the logo.
There is a button with settings if I go to my repository, I can delete it. But this left one, there is no possibility to delete it.
I didn't immediately notice that forks also go under their own username. So your fork would be called s22aa/ShareEA, not singwai/ShareEA.
It looks like this foreign repository got to you by mistake. It doesn't contain any activity from user @singwai, only automatic creations when converting the old repository to the new one. So not sure how to get rid of it unfortunately.
Could you please tell me how to delete some left repository?
Apparently, I added it once somehow, I don't remember when and why, and now I don't like it being there.
How to remove it?
You are among those following the repository.
Click the button again to exclude it:
You are among those following the repository.
Click the button again to exclude it:
Clicked, the counter was 2 became 1, the eye stopped being crossed out, now you are the only one left following this repository.
//---
But it didn't change anything on my page. It's still there.
//--