The first post in this series covered a simple routine for the London open: frame the Asian range, mark fresh H1 order blocks, wait for a sweep and a reaction. One detail in that routine deserves its own post, because it is the difference between a setup that works and one that quietly stops working while still looking identical on the chart — the word "fresh."
What "mitigated" actually means
An order block is the last opposite-colored candle before a strong, structure-breaking move — the last sellers trapped before a big push up, or the last buyers trapped before a big push down. That part is easy. The part that actually decides whether a setup works is what happens to that zone after price returns to it.
Most traders treat every order block the same: draw it, wait for price to come back, take the trade. But a zone is not a fixed object. It has a life cycle, and where it sits in that life cycle changes the odds of the trade before you have even entered.
The three states of a zone
Fresh. Price has not returned to the zone since it formed. Every order that was resting there is still resting there, untouched. This is the highest-quality state — and also the state most traders never wait for, because a fresh zone is often further from current price and it feels like you are missing something closer.
Mitigated. Price has wicked into the zone at least once and reacted, but has not closed through the far side. Some of the resting orders were filled on that first touch. The zone is still technically valid, but it has already done part of its job. A second or third touch of the same zone is asking orders that are partly spent to do the same work again.
Broken. Price has closed beyond the far edge of the zone. Whatever was resting there is gone, and continuing to watch the zone is just habit at that point. This is the state most people are slow to accept, because deleting the zone feels like admitting the level was wrong — but the level was not wrong, it just finished being useful.
Why a fresh zone reacts and a mitigated one often does not
The logic is not mystical, it is inventory. An order block marks a spot where a large participant was building or defending a position and did not finish the first time price was there — that is what the sharp opposite-colored candle and the impulse away from it represent. The first time price returns, whatever is left of that order gets to finish. After that touch, some of the size is gone. Trading the second or third return to the exact same zone means trading with less behind it than the level had the first time.
This is also why "fresh only" was one of the two quality checks in the London routine from the first post. It is not a preference, it is the mechanism the setup actually depends on.
A decay rule you can run by hand
You do not need software for this. On your H1 scan, next to each zone you mark, note one of three states: fresh, touched-once, or broken. Update it every session.
- Trade fresh zones at full conviction — this is where the setup from the London routine is designed to work.
- Treat a touched-once zone as lower-probability. Either skip it or reduce size; do not apply the same stop-and-target logic you would use on a fresh zone.
- Delete broken zones immediately. A dead zone left on the chart is a future bad entry waiting to happen — it looks identical to a live one until you remember it is not.
Do not let timeframes lie to you
One more trap: a zone can be mitigated on the timeframe you are watching and still be fresh on a higher one. An M15 demand zone might get tapped and faded three times in an afternoon while the H4 zone underneath it — the one that actually matters for the day — has not been touched at all. If you only track state on one timeframe, you will end up avoiding a level that is still loaded, or trusting one that a higher timeframe has already used up.
The fix is to track state per timeframe, not per price level. The same price can mean two different things on H1 and H4 at the same moment.
Automating the state tracking
Doing this by hand for a week is worth it — same as with the London routine, it builds the eye for what a spent zone looks like versus a live one. But tracking three states across every zone, every timeframe, every session, is exactly the kind of bookkeeping that is better handed to software.
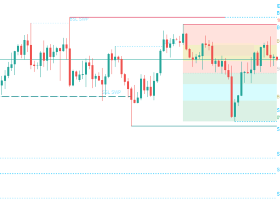
Order Block Zones (free) draws each zone and carries its state automatically: fresh zones stay bold with a bright edge, a zone fades to mitigated the moment price wicks into it, and a zone is deleted the moment price closes through the far side — no manual cleanup. The example below shows what that looks like on the chart: a bright, untouched supply zone above price, and a dimmed "Demand · mit" zone below it that has already been tapped once.

The panel keeps a running fresh/touched count and shows the nearest live zone in each direction with distance in points, so the state check from the hand-run version above takes one glance instead of a re-scan.

The Pro version extends the same state tracking across timeframes — so an H4 zone still shows as fresh even while the M15 zone at a similar price has already faded to mitigated — plus Fair Value Gaps and touch alerts, so you do not have to sit and watch the chart for the tap.

If you run the manual version for a week and your read of fresh versus mitigated ever disagrees with what the indicator draws, that is worth a comment on the product page — I read all of them.