Creating Graphical Panels Became Easy in MQL5

Introduction
MQL5 provides developers with a lot of helpful tools that can be used to ease the process of coding and get things done effectively with saving time and effort. An example of these helpful tools is that we have many libraries or classes in the MQL5 that can be used to code a lot of applications without building the code of these applications from scratch. From these libraries or classes, Panels and Dialogs for example. In this article we learn how we can use these classes and create an application using them, we will also learn after clarifying how useful using mql5 classes can be helpful when creating MetaTrader5 software as we will present two different methods to create the same application.
In addition to that, It can be good practical content to improve your coding skills as a beginner developer by creating the application from scratch to enhance and improve programming logic skills by coding ready-made things with your own code. It also can be used as a simple guide to creating something that can be used to save you from distractions while trading if you are a trader. If you are a beginner mql5 developer, it can be used as a helpful guide to learn how you can create graphical panels in MetaTrader 5 terminal. In this simple guide, we will try to simplify things to be able to create your simple graphical panel or to be able to dive more and more into this topic to create complex panels as a developer or even a trader.
We will try to cover topics through the following points:
- Graphical Panel Identification
- Panels and Dialogs Classes
- Simple Graphical Panel Application
- Conclusion
I recommend that you have knowledge about the topic of Object-Oriented programming in MQL5 because it will help in understanding the topic of this article, if you want to do that you can read my article about Understanding MQL5 Object-Oriented Programming (OOP)
Graphical Panel Identification
In this part, we will identify what the graphical Panel means and how it can be useful for us in the trading industry. The panel simply can be a graphical interface that has helpful functions or information like for example a panel that can be used to open and manage trades, provide information about the account or the trading day, etc. These panels can be very useful as it saves time when doing the thing or can be used to get what you need easily without doing it in its normal way and this can let us focus more on the trading and market analysis while trading.
According to that, we can create or have a customized panel depending on the objects on these panels and tasks or the nature of the interaction between the user and this panel, we can mention some of these objects the same as the following:
- Numbers,
- Strings,
- Shapes,
- Colors,
- Buttons,
- etc.
If you ask how we can develop or code these types of panels by ourselves, I can answer that there are two methods to create and develop these panels. The first method is the hard method as we will code everything from scratch and this method takes a lot of time and effort but if you are a developer you need to be able and understand how to do that as this will improve your coding skills even if you will not use it a method in your work but at least to be able to understand and do that task by yourself. The other method is the easiest and smoothest one as you will use ready-made classes or libraries to do your work quickly and effectively without consuming a lot of time and effort. In the rest of this article, we will learn more information about classes that can be used to create these panels. In addition to that, we will create a simple application using the two mentioned methods to be able to decide and confirm that using classes is a valuable matter.
Panels and Dialogs Classes
In this part, we will about classes that can help us to create the graphical panel easily, we will refer to the Panels and Dialogs classes and you can check the MQL5 reference for more information as we will only refer to some of them in this article.
Now, let us identify classes for creating control Panels and Dialogs, we can say that they are a library that has ready-made code to create or develop interactive panels or applications including indicators and expert advisors. It can be found in the terminal data folder in the Controls folder in the include folder. There are auxiliary, base, simple, and complex classes that can be used for different operations. Examples of these classes:
| Class | Include File Name (Controls Folder) | Description |
|---|---|---|
| CLabel | Label.mqh | It is a simple control class to create simple non-editable text labels |
| CButton | Button.mqh | It is a simple control class to create simple buttons |
| CEdit | Edit.mqh | It is a simple control class that enables the user to enter a text |
| CPanel | Panel.mqh | It is a simple control class to combine controls with other similar functions in a group |
| CCheckBox | CheckBox.mqh | It is a complex control class to display a check box and enables the user to choose if it is a true or false |
| CSpinEdit | SpinEdit.mqh | It is a complex control class to allow editing an integer value by increment and decrement field |
| CDialog | Dialog.mqh | It is a complex control class to combine controls with other different functions in a group |
As we can see through mentioned classes and others we can use them to do a lot of tasks that can take a lot of time and effort if we tried to do them through the normal code or without using classes and we can broaden the same view to other classes what can help to do other tasks except panels. If we want to see that through a simple example or application to see the difference, this is what we will do in the upcoming part.
Simple Graphical panel Application
In this part, we will learn how to create a simple trading panel that can be used to open buy and sell orders after determining lot size. We'll create this panel using two methods the first one create our own code without using classes and the second method by using classes to make sure and compare how much using classes will help us to achieve our objective smoothly and easily and learn from creating the panel through our own code without using classes as this will improve our programming logic and coding skill.
Graphical Panel Without Classes
The following steps for creating a simple order panel to open buy and sell orders after determining the lot size without using classes except using the "Trade" class because what we focus on in this article is to learn creating panels:
Using #include to include the Trade include file and creating an object under the name trade to be used for open orders
#include <Trade\Trade.mqh>
CTrade trade;
Create a boolean open trade function to set order type ENUM_ORDER_TYPE variable and lot size double variable of the trade these are the parameters of this function that we will create and the body of the function will be:
- Creating a double variable of price
- Set a condition to determine the price type (ask or bid) based on the order type using the if condition:
- If the order type is a buy, the price that will be used to open the order is the ask.
- If the order type is a sell, the price will be the bid.
- The return will be opening the position with the current symbol, order type, lot size, price type, zero value for stop loss and take profit, and empty comment.
bool openTrade(ENUM_ORDER_TYPE type, double vol)
  {
   double price;
   if(type==ORDER_TYPE_BUY)
   {
      price=SymbolInfoDouble(Symbol(),SYMBOL_ASK);
   }
   else price=SymbolInfoDouble(Symbol(),SYMBOL_BID);

   return trade.PositionOpen(Symbol(),type,vol,price,0,0,"");
  }
Setting the panel location by choosing the upper left corner after creating a const ENUM_BASE_CORNER panelLoc variable
const ENUM_BASE_CORNER panelLoc=CORNER_LEFT_UPPER;
Setting x and y margin after creating a const integer variables of x and y
const int xMargin=20;
const int yMargin=20;
Setting space between elements for x and y after creating another const integer variables
const int xSpace=10;
const int ySpace=10;
Setting the size of elements which are buttons and text after creating four const integer variables btnWidth for button width, btnHeight for button height, txtWidth for text width, and txtHeight for text height
const int btnWidth=50;
const int btnHeight=20;
const int txtWidth=(btnWidth*2)+xSpace;
const int txtHeight=20;
Setting locations of text and buttons, we have text x, text y, buy button x, buy button y, sell button x, and sell button y. We will declare const integer variables for all of them and assign values for each one
const int txtX=3;
const int txtY=yMargin+txtHeight;
const int buyX=3;
const int buyY=txtY+ySpace+btnHeight;
const int sellX=buyX+xSpace+btnWidth;
const int sellY=txtY+ySpace+btnHeight;
Assigning the name of the text, buy button, and sell button elements after creating const string variables for them
const string txtName="txttVol";
const string buyName="buyBtn";
const string sellName="sellBtn";
Creating a lot size double variable with an initial value
double lotSize=0.01;
In the OnInit() part, we will call the createPanel() function that we will create later
createPanel();
In the OnDeinit part, we will delete objects using their names
   ObjectDelete(0,txtName);
   ObjectDelete(0,buyName);
   ObjectDelete(0,sellName);
On the global scope, we will create the function that enables the interaction with the panel by following the below steps
Using OnChartEven function and its parameters are:
- const int id: for the event ID
- const long &lparam: for the parameter of long type event
- const double &dparam: for the parameter of double type event
- const string &sparam: for the parameter of string type event
Setting conditions of interacting with objects text (lot size), buy button, and sell button
//+------------------------------------------------------------------+
//| Interaction function                                             |
//+------------------------------------------------------------------+
void OnChartEvent(const int id, const long &lparam, const double &dparam, const string &sparam)
  {
//--- If the event id is equal to the end of text editing in the panel and the string type event is equal to the text name
   if(id==CHARTEVENT_OBJECT_ENDEDIT && sparam==txtName)
     {
      //--- lotTxt string variable will be equal to the returned property value by using the ObjectGetString function
      string lotTxt=ObjectGetString(0, txtName, OBJPROP_TEXT);
      //--- call setLot function that we will create later with the lotTxt value
      setLot(lotTxt);
      //Setting the property value by using the ObjectSetString
      ObjectSetString(0, txtName, OBJPROP_TEXT, string(lotSize));
      //--- Use return
      return;
     }
//--- If the event id is equal to the object click to check if we click the buy button
   else
      if(id==CHARTEVENT_OBJECT_CLICK)
        {
         //We will check if the string param is equal to buyname
         if(sparam==buyName)
           {
            //--- Setting the value of the property by using the ObjectSetInteger
            ObjectSetInteger(0, buyName, OBJPROP_STATE, false);
            //Calling the created openTrade to open a buy order.
            openTrade(ORDER_TYPE_BUY, lotSize);
            //--- Use return
            return;
           }
         //--- If the event id is equal to the object click to check if we click the sell button
         //--- We will check if the string param is equal to sellname
         else
            if(sparam==sellName)
              {
               //--- Setting the value of the property by using the ObjectSetInteger
               ObjectSetInteger(0, sellName, OBJPROP_STATE, false);
               //Calling the created openTrade to open a sell order
               openTrade(ORDER_TYPE_SELL, lotSize);
               //--- Use return
               return;
              }
        }
  }
Create the void createPanel function that we called it before in the OnInit() part through the following steps:
- Delete objects of txtName, buyName, and sellName
- Calling the EditCreate function.
- Calling the ButtonCreate function for buy button.
- Calling the ButtonCreate function for sell button.
//+------------------------------------------------------------------+
//|createPanel function                                              |
//+------------------------------------------------------------------+
void createPanel()
  {
//--- Delete objects of txtName, buyName, and sellName
   ObjectDelete(0, txtName);
   ObjectDelete(0, buyName);
   ObjectDelete(0, sellName);
//--- calling the EditCreate function
   EditCreate(             // Parameters:
      0,                   // const long (chart_ID): to specify the chart's ID, we will use (0).
      txtName,             // const string (name): to specify the button name,  we will use (txtName)
      0,                   // const int (sub_window): to specify the subwindow index, we will use (0) for the main window
      txtX,                // const int (x): to specify the X coordinate, we will use (txtX)
      txtY,                // const int (y): to specify the Y coordinate, we will use (txtY)
      txtWidth,            // const int (width):to specify the button width, we will use (txtWidth)
      txtHeight,           // const int (height): to specify the button height, we will use (txtHeight)
      string(lotSize),     // const string (text): to specify the text, we will use (lotSize)
      "Arial",             // const string (font): to specify the font, we will use "Arial"
      10,                  // const int (font_size): to specify the font size, we will use (10)
      ALIGN_LEFT,          // const ENUM_ALIGN_MODE (align_mode): to specify the position of text, we will use (ALIGN_LEFT)
      false,               // const bool (read_only=false): to specify the ability to edit, we will be (false)
      panelLoc,            // const ENUM_BASE_CORNER (corner): to specify the chart corner for anchoring, we will call panelLoc function
      clrBlack,            // const color (clr): to specify the text color, we will specify clrBlack
      clrWhite,            // const color (back_clr): to specify the background color, we will specify clrWhite
      clrBlack,            // const color (border_clr): to specify the border color, we will specify clrBlack
      false,               // const bool (back=false): in the background, we will set false
      false,               // const bool (selection=false): highlight to move, we will set false
      false,               // const bool (hidden): hidden in the object list, we will set false
      0);                  // const long (z_order=0): priority for a mouse click, we will use (0)
//--- calling the ButtonCreate function for the buy
   ButtonCreate(           // Parameters:
      0,                   // const long (chart_ID): to specify the chart's ID, we will use (0)
      buyName,             // const string (name): to specify the button name, we will use (buyName) for the buy button
      0,                   // const int (sub_window): to specify the subwindow index, we will use (0) for the main window
      buyX,                // const int (x): to specify the X coordinate, we will use (buyX) for buy
      buyY,                // const int (y): to specify the Y coordinate, we will use (buyY) for buy
      btnWidth,            // const int (width): to specify the button width, we will use (btnWidth) for buy
      btnHeight,           // const int (height): to specify the button height, we will use (btnHeight) for buy
      panelLoc,            // const ENUM_BASE_CORNER (corner): to specify the chart corner for anchoring, we will call panelLoc function for buy button
      "Buy",               // const string (text): to specify the text, we will use ("Buy") for the buy button
      "Arial",             // const string (font): to specify the font, we will use "Arial"
      10,                  // const int (font_size): to specify the font size, we will use (10)
      clrBlack,            // const color (clr): to specify the text color, we will specify clrBlack
      clrGreen,            // const color (back_clr): to specify the background color, we will specify clrGreen for the buy button
      clrBlack,            // const color (border_clr): to specify the border color, we will specify clrBlack
      false,               // const bool (state): to specify if the object is pressed or released, we will specify false
      false,               // const bool (back=false): in the background, we will set false
      false,               // const bool (selection=false): highlight to move, we will set false
      false,               // const bool (hidden): hidden in the object list, we will set false
      0);                  // const long (z_order=0): priority for mouse click, we will use (0) for buy button
//--- calling the ButtonCreate function for the sell
   ButtonCreate(          //Parameters:
      0,                   //const long (chart_ID): to specify the chart's ID, we will use (0)
      sellName,            //const string (name): to specify the button name, we will use (sellName) for the sell button
      0,                   //const int (sub_window): to specify the subwindow index, we will use (0) for the main window
      sellX,               //const int (x): to specify the X coordinate, we will use (sellX) for sell
      sellY,               //const int (y): to specify the Y coordinate, we will use (sellY)
      btnWidth,            //const int (width): to specify the button width, we will use (btnWidth) for sell
      btnHeight,           //const int (height): to specify the button height, we will use (btnHeight) for sell
      panelLoc,            //const ENUM_BASE_CORNER (corner): to specify the chart corner for anchoring, we will call panelLoc function for sell button
      "Sell",              //const string (text): to specify the text, we will use ("Sell") for the sell button
      "Arial",             //const string (font): to specify the font, we will use "Arial"
      10,                  //const int (font_size): to specify the font size, we will use (10)
      clrBlack,            //const color (clr): to specify the text color, we will specify clrBlack
      clrRed,              //const color (back_clr): to specify the background color, we will specify clrRed for the sell button
      clrBlack,            //const color (border_clr): to specify the border color, we will specify clrBlack
      false,               //const bool (state): to specify if the object is pressed or released, we will specify false
      false,               //const bool (back=false): in the background, we will set false
      false,               //const bool (selection=false): highlight to move, we will set false
      false,               //const bool (hidden): hidden in the object list, we will set false
      0);                  //const long (z_order=0): priority for mouse click, we will use (0) for sell button
  }
Creating the void setLot function with one parameter that is the lotTxt which is used for lotSize and the body of the function is the same as the following:
- Creating a double newLot variable and assigning it to the lotTxt after converting it to double from string by using the StringToDouble function.
- Checking if the newLot variable is less than 0, we need a print message "Invalid Volume Specified", then use return.
- Returning the newLot value to be the same as lotSize
void setLot(string lotTxt)
  {
   double newLot=StringToDouble(lotTxt);
   if(newLot<0)
     {
      Print("Invaid Volume Specified");
      return;
     }
   lotSize=newLot;
  }
Creation of the EditCreate function through the following steps:
//+------------------------------------------------------------------+
//|EditCreate function                                               |
//+------------------------------------------------------------------+
bool EditCreate(const long             chart_ID=0,
                const string           name="Edit",
                const int              sub_window=0,
                const int              x=0,
                const int              y=0,
                const int              width=50,
                const int              height=18,
                const string           text="Text",
                const string           font="Arial",
                const int              font_size=10,
                const ENUM_ALIGN_MODE  align=ALIGN_CENTER,
                const bool             read_only=false,
                const ENUM_BASE_CORNER corner=CORNER_LEFT_UPPER,
                const color            clr=clrBlack,
                const color            back_clr=clrWhite,
                const color            border_clr=clrNONE,
                const bool             back=false,
                const bool             selection=false,
                const bool             hidden=true,
                const long             z_order=0)
  {
//--- Reset the error value by using ResetLastError()
   ResetLastError();
//--- Create an edit field
   if(!ObjectCreate(chart_ID, name, OBJ_EDIT, sub_window, 0, 0))
     {
      Print(__FUNCTION__,
            ": failed to create \"Edit\" object! Error code = ", GetLastError());
      return(false);
     }
//--- Setting the object coordinates x and y by using the ObjectSetInteger
   ObjectSetInteger(chart_ID, name, OBJPROP_XDISTANCE, x);
   ObjectSetInteger(chart_ID, name, OBJPROP_YDISTANCE, y);
//--- Setting the object size by using the ObjectSetInteger function also
   ObjectSetInteger(chart_ID, name, OBJPROP_XSIZE, width);
   ObjectSetInteger(chart_ID, name, OBJPROP_YSIZE, height);
//--- Setting the text by using ObjectSetString function
   ObjectSetString(chart_ID, name, OBJPROP_TEXT, text);
//--- Setting the text font by using the ObjectSetString function also
   ObjectSetString(chart_ID, name, OBJPROP_FONT, font);
//--- Setting the font size by using the ObjectSetInteger function
   ObjectSetInteger(chart_ID, name, OBJPROP_FONTSIZE, font_size);
//--- Setting the type of text alignment in the object
   ObjectSetInteger(chart_ID, name, OBJPROP_ALIGN, align);
//--- Setting the ability to edit, enable if it is (true) or cancel (false) if you need a read-only mode
   ObjectSetInteger(chart_ID, name, OBJPROP_READONLY, read_only);
//--- Setting the chart's corner, relative to which object coordinates are defined to set the location of the object.
   ObjectSetInteger(chart_ID, name, OBJPROP_CORNER, corner);
//--- Setting the text color
   ObjectSetInteger(chart_ID, name, OBJPROP_COLOR, clr);
//--- Setting the background color
   ObjectSetInteger(chart_ID, name, OBJPROP_BGCOLOR, back_clr);
//--- Setting the border color of the object
   ObjectSetInteger(chart_ID, name, OBJPROP_BORDER_COLOR, border_clr);
//--- Displaying in the foreground by (false) or in the background by (true)
   ObjectSetInteger(chart_ID, name, OBJPROP_BACK, back);
//--- Setting (true) to enable or (false) to disable the mode of moving the label by mouse
   ObjectSetInteger(chart_ID, name, OBJPROP_SELECTABLE, selection);
   ObjectSetInteger(chart_ID, name, OBJPROP_SELECTED, selection);
//--- Setting (true) if you need hiding or (false) if you need the display of graphical object name in the object list
   ObjectSetInteger(chart_ID, name, OBJPROP_HIDDEN, hidden);
//--- Setting the priority for receiving the event of a mouse click in the chart
   ObjectSetInteger(chart_ID, name, OBJPROP_ZORDER, z_order);
//--- Returning (true) if successful execution
   return(true);
  }
Creation of the ButtonCreate function through the same as the previous parameters of the EditCreate function except for little difference
bool ButtonCreate(const long              chart_ID=0,
                  const string            name="Button",
                  const int               sub_window=0,
                  const int               x=0,
                  const int               y=0,
                  const int               width=50,
                  const int               height=18,
                  const ENUM_BASE_CORNER  corner=CORNER_LEFT_UPPER,
                  const string            text="Button",
                  const string            font="Arial",
                  const int               font_size=10,
                  const color             clr=clrBlack,
                  const color             back_clr=C'236,233,216',
                  const color             border_clr=clrNONE,
                  const bool              state=false,
                  const bool              back=false,
                  const bool              selection=false,
                  const bool              hidden=true,
                  const long              z_order=0)
  {
   ResetLastError();
   if(!ObjectCreate(chart_ID,name,OBJ_BUTTON,sub_window,0,0))
     {
      Print(__FUNCTION__,
            ": failed to create the button! Error code = ",GetLastError());
      return(false);
     }
   ObjectSetInteger(chart_ID,name,OBJPROP_XDISTANCE,x);
   ObjectSetInteger(chart_ID,name,OBJPROP_YDISTANCE,y);
   ObjectSetInteger(chart_ID,name,OBJPROP_XSIZE,width);
   ObjectSetInteger(chart_ID,name,OBJPROP_YSIZE,height);
   ObjectSetInteger(chart_ID,name,OBJPROP_CORNER,corner);
   ObjectSetString(chart_ID,name,OBJPROP_TEXT,text);
   ObjectSetString(chart_ID,name,OBJPROP_FONT,font);
   ObjectSetInteger(chart_ID,name,OBJPROP_FONTSIZE,font_size);
   ObjectSetInteger(chart_ID,name,OBJPROP_COLOR,clr);
   ObjectSetInteger(chart_ID,name,OBJPROP_BGCOLOR,back_clr);
   ObjectSetInteger(chart_ID,name,OBJPROP_BORDER_COLOR,border_clr);
   ObjectSetInteger(chart_ID,name,OBJPROP_BACK,back);
   ObjectSetInteger(chart_ID,name,OBJPROP_STATE,state);
   ObjectSetInteger(chart_ID,name,OBJPROP_SELECTABLE,selection);
   ObjectSetInteger(chart_ID,name,OBJPROP_SELECTED,selection);
   ObjectSetInteger(chart_ID,name,OBJPROP_HIDDEN,hidden);
   ObjectSetInteger(chart_ID,name,OBJPROP_ZORDER,z_order);
   return(true);
  }
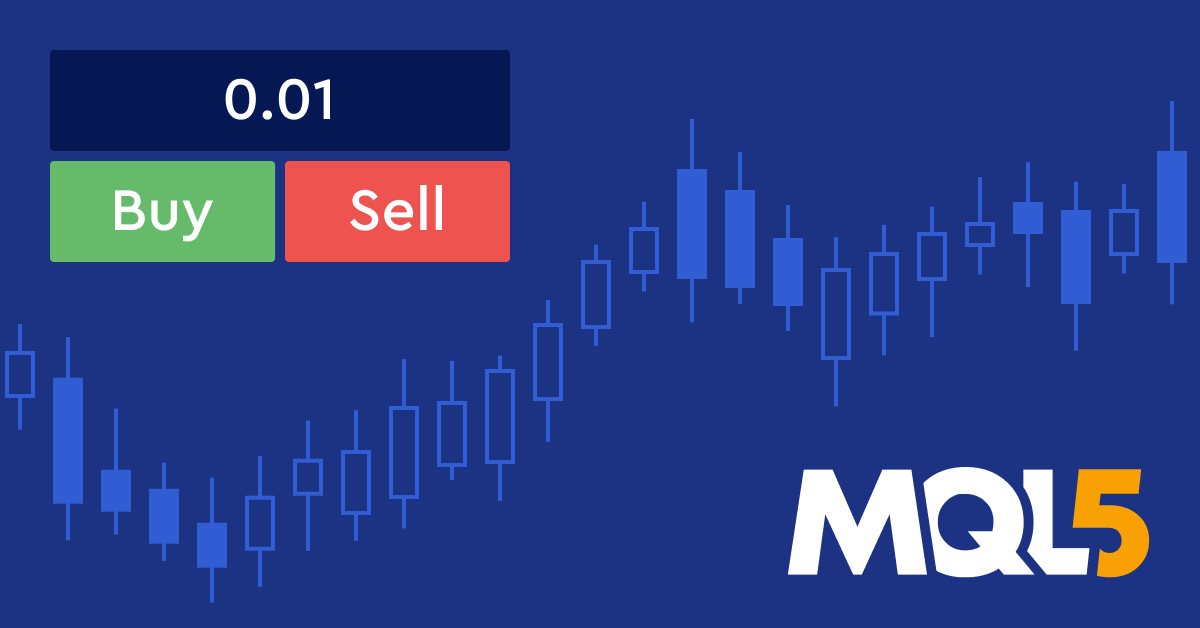
After compiling the code and executing it we can find the panel appeared the same as the following:

As we can see in the previous picture in the top left corner we have the panel with a place where we have the lotsize and two buttons buy and sell and we can specify the lotsize that we need and place an order by pressing buy or sell based on the type that we need. This is the first method that we said we will use to create this panel without using classes of Panels or Dialogs and as we find this method takes many lines of code, now, we need to create the same panel using Panels and Dialogs classes to evaluate and check the complexity or long code by comparing these two methods.
Graphical Panel Using Classes
Here is the second method to create the same panel using needed classes and the following are steps of creating the same panel.
Include files or classes that we need to use its components in our program and they are Dialog, Button, Edit, and Trade. This can be done as we know by using the #include command.
#include <Controls\Dialog.mqh>
#include <Controls\Button.mqh>
#include <Controls\Edit.mqh>
#include <Trade\Trade.mqh>
Using the #define macro substitution which is the preprocessor directives to assign mnemonic names to constants, these are the same as the following:
- PANEL_NAME "Order Panel"
- PANEL_WIDTH 116
- PANEL_HIEIGHT 100
- ROW_HEIGHT 20
- BUY_BTN_NAME "Buy BTN"
- SELL_BTN_NAME "Sell BTN"
- CLOSE_BTN_NAME "Close BTN"
- EDIT_NAME "Lot Size"
#define PANEL_NAME "Order Panel"
#define PANEL_WIDTH 116
#define PANEL_HIEIGHT 100
#define ROW_HEIGHT 20
#define BUY_BTN_NAME "Buy BTN"
#define SELL_BTN_NAME "Sell BTN"
#define CLOSE_BTN_NAME "Close BTN"
#define EDIT_NAME "Lot Size"
Creating objects from classes the same as the following
CAppDialog panel;
CButton buyBtn;
CButton sellBtn;
CButton closeBtn;
CEdit lotSize;
CTrade trade;
In the OnInit() part, we need to create our panel object by using our created object panel.Create and its parameters are:
- const long chart, we will use 0 to appear the panel on the main chart.
- const string name, we will use PANEL_NAME
- const int subwin, we will use 0
- const int x1, we will use 10
- const int y1, we will use 20
- const int x2, we will use 10+PANEL_WIDTH+8
- const int y2, we will use 20+PANEL_HIEIGHT
panel.Create(0,PANEL_NAME,0,10,20,10+PANEL_WIDTH+8,20+PANEL_HIEIGHT);
Create and set the buy and sell buttons the same as the following steps:
- Creating the objects by using object.Create.
- Setting the width of the buy and sell objects by using the object.Width
- Setting the height of the buy and sell objects by using the object.Height.
- Setting the background color of objects by using the object.ColorBackground.
- Setting the text of objects by using the object.Text.
- Setting the font of objects by using the object.Font.
- Setting the font size of objects by using the object.FontSize.
- Setting the color of objects by using the object.Color.
- Setting the color border of objects by using the object.ColorBorder.
- Placing the object of objects on the panel.
- Then run the panel
int OnInit()
  {
   //buy button
   panel.Create(0,PANEL_NAME,0,10,20,10+PANEL_WIDTH+8,20+PANEL_HIEIGHT);
   buyBtn.Create(0,BUY_BTN_NAME,0,3,40,0,0);
   buyBtn.Width(50);
   buyBtn.Height(ROW_HEIGHT);
   buyBtn.ColorBackground(clrGreen);
   buyBtn.Text("Buy");
   buyBtn.Font("Arial");
   buyBtn.FontSize(10);
   buyBtn.Color(clrBlack);
   buyBtn.ColorBorder(clrBlack);
   panel.Add(buyBtn);
   //sell button
   sellBtn.Create(0,SELL_BTN_NAME,0,63,40,0,0);
   sellBtn.Width(50);
   sellBtn.Height(ROW_HEIGHT);
   sellBtn.ColorBackground(clrRed);
   sellBtn.Text("Sell");
   sellBtn.Font("Arial");
   sellBtn.FontSize(10);
   sellBtn.Color(clrBlack);
   sellBtn.ColorBorder(clrBlack);
   panel.Add(sellBtn);
   //lotSize
   lotSize.Create(0,EDIT_NAME,0,4,10,0,0);
   lotSize.Width(108);
   lotSize.Height(ROW_HEIGHT);
   lotSize.Text("0.01");
   lotSize.Font("Arial");
   lotSize.FontSize(10);
   lotSize.ColorBackground(clrWhite);
   lotSize.Color(clrBlack);
   lotSize.ColorBorder(clrBlack);
   panel.Add(lotSize);
   //run the panel
   panel.Run();
   return(INIT_SUCCEEDED);
  }
In the OnDeinit(const int reason) part, we use Destroy the same as the following as a deinitialization function
void OnDeinit(const int reason)
  {
   panel.Destroy();
  }
Enabling the interaction with the panel by using the OnChartEvent function and setting conditions of the behavior of buy and sell buttons the same as the following:
- Creating OnChartEvent function
- The body of the function
- Using the object.ChartEvent with parameters of id for the event, lparam for the long type of event, dparam for double type, and sparam for string type.
- Checking if the id is equal to Chart Click
- Checking if sparam is equal to buyBtn or sellBtn as names
- Creating a double variable of the lot and assigning it to StringToDouble(lot size value)
- Open a buy or a sell order based on the type of event using the lot value
void  OnChartEvent(const int id, const long &lparam, const double &dparam, const string &sparam)
  {
   panel.ChartEvent(id,lparam,dparam,sparam);
   if(id==CHARTEVENT_OBJECT_CLICK)
     {
      if(sparam==buyBtn.Name())
        {
         double lot=StringToDouble(lotSize.Text());
         trade.Buy(lot);
        }
      else
         if(sparam==sellBtn.Name())
           {
            double lot=StringToDouble(lotSize.Text());
            trade.Sell(lot);
           }
     }
  }
After compiling the code and executing its executable file we can find the panel is attached to the chart the same as the following picture:

As we can see in the previous picture in the top left corner we have the panel with the lot size, buy, and sell objects and we can edit the lot size and open orders.
After learning and creating the same panel by two different methods, we can mention and notice that we created the panel by using classes easier and smoother than creating it without using classes. So, classes are very helpful and let us code easily and save a lot of time but my advice for you if you are the developer that you try to learn and understand how to create ready-made things like these classes or built-in functions in any programming language as this is a very good way to improve your coding and programming skills and logic and when you code you can classes as it will help you to code smoother and easier in addition to saving to your time to do repeated tasks.
It is good to mention here after learning how we can create this type of panel that this is a simple application as we said and you can develop it more and more by using more functions that can be done by it. Because the panel can be as simple as what we mentioned or very complex and have more tools and functionalities. The objective here is to understand how to use these classes after identifying their importance and value.
Conclusion
At the end of this article, we can conclude that using classes is a valuable and helpful thing in general and specifically when creating panels that can be used in the MetaTrader 5 which can be useful for traders as it helps them in a lot of things that allow them to focus on trading itself and the market without doing a lot of essential tasks far of using these panels. We learned also, what are panels and examples of their types, learned about panels and dialog classes that can be used to create these panels easily, and confirmed how much these classes can be useful by creating a simple panel as an application by two different methods by normal code without using Panels and Dialog classes and by using them to see how much time and effort can be consumed when not using classes.
I hope that you find this article useful for you and find provided information easy to be understood and realized. I hope also that you got more insights about how can you develop more mentioned applications or how you can develop and dive deep to create more useful panels that can be useful for your trading or if you are a beginner mql5 developer, I hope that you learned something new and got more insights about how you do by this important topic which is using classes.
If you want to understand and learn more about classes and objects I would recommend that you read my previous article Understanding the Object-Oriented Programming (OOP) in MQL5, it can help you to start mastering this topic. If you want to read about how to create trading systems using the most popular technical indicators you can read my previous articles through my publications section about that and I hope that you find them useful.
Warning: All rights to these materials are reserved by MetaQuotes Ltd. Copying or reprinting of these materials in whole or in part is prohibited.
This article was written by a user of the site and reflects their personal views. MetaQuotes Ltd is not responsible for the accuracy of the information presented, nor for any consequences resulting from the use of the solutions, strategies or recommendations described.

- Free trading apps
- Over 8,000 signals for copying
- Economic news for exploring financial markets
You agree to website policy and terms of use
Thanks a lot for your nice codework!
But I could not get it working in the "Debugging with historic data". -- do I missed some checkboxes?
find something:
You must check the button state in OnTick() because OnChartEvent() doesn't work for EA's in strategy tester.
https://www.mql5.com/en/forum/170896
Thanks for your comment.
The main objective in this article to clarify how it became easy to create a simple panel by using classes.
code:"buyBtn.ToolTip ("Click open buy order")"
unsuccessful
code:"buyBtn.ToolTip ("Click open buy order")"
unsuccessful