
Gráficos en la biblioteca DoEasy (Parte 76): Objeto de formulario y temas de color predeterminados

Contenido
- Concepto
- Mejorando las clases de la biblioteca
- Temas de color y tipos de formulario
- Clase de objeto "formulario"
- Simulación
- ¿Qué es lo próximo?
Concepto
En el último artículo, desarrollamos la clase del objeto de elemento gráfico básico, que supone la base para crear objetos gráficos de la biblioteca más complejos, y también creamos métodos para dibujar primitivas gráficas y textos. Usando como base este objeto de elemento gráfico, hoy crearemos su clase de objeto heredero: el objeto de formulario. El objeto de formulario ya puede constituir una unidad absolutamente independiente para el diseño y la presentación elementos de control y la visualización en los programas creados sobre la base de esta biblioteca.
Pero antes de crear un objeto de formulario, debemos hablar de la GUI y los métodos necesarios para su diseño. También tenemos que crear un conjunto inicial de temas de color y tipos de objetos gráficos.
Muchos programas que usan la representación gráfica de datos y ofrecen interacción con el mundo exterior gracias a su motor gráfico, nos permiten cambiar rápidamente la apariencia y el diseño de nuestros objetos gráficos. Para cambiar rápidamente la apariencia y el esquema de color, usaremos un conjunto de temas. Los parámetros de los temas creados se encontrarán en un archivo aparte de la biblioteca, en el que el usuario del programa o el programador podrá cambiar rápidamente varias configuraciones para la apariencia y el color de los objetos gráficos.
Hoy empezaremos a crear dos máscaras a las que iremos añadiendo gradualmente más parámetros diferentes con sus valores correspondientes a medida que desarrollemos nuevos objetos y funcionalidades en la biblioteca.
A la hora de crear nuestros propios objetos gráficos, no usaremos necesariamente los temas creados en la biblioteca, pero estos podrán servir como ejemplo sobre cómo crear exactamente este o aquel objeto para su uso posterior.
Mejorando las clases de la biblioteca
En primer lugar, y como venimos haciendo en cada ocasión, añadiremos al archivo \MQL5\Include\DoEasy\Data.mqh los índices de los nuevos mensajes:
   MSG_LIB_SYS_FAILED_ADD_SYM_OBJ,                    // Failed to add symbol
   MSG_LIB_SYS_FAILED_CREATE_ELM_OBJ,                 // Failed to create the graphical element object
   MSG_LIB_SYS_OBJ_ALREADY_IN_LIST,                   // Such an object is already present in the list
   MSG_LIB_SYS_FAILED_GET_DATA_GRAPH_RES,             // Failed to receive graphical resource data
...
   MSG_LIB_SYS_FAILED_ADD_BUFFER,                     // Failed to add buffer object to the list
   MSG_LIB_SYS_FAILED_CREATE_BUFFER_OBJ,              // Failed to create \"Indicator buffer\" object
   MSG_LIB_SYS_FAILED_OBJ_ADD_TO_LIST,                // Could not add object to the list
y los textos de los mensajes que se corresponden con los índices nuevamente añadidos:
   {"Не удалось добавить символ ","Failed to add "},
   {"Не удалось создать объект-графический элемент ","Failed to create graphic element object "},
   {"Такой объект уже есть в списке","Such an object is already in the list"},
   {"Не удалось получить данные графического ресурса","Failed to get graphic resource data"},
...
   {"Не удалось добавить объект-буфер в список","Failed to add buffer object to list"},
   {"Не удалось создать объект \"Индикаторный буфер\"","Failed to create object \"Indicator buffer\""},
   {"Не удалось добавить объект в список","Failed to add object to the list"},
Adelantándonos un poco, podemos decir que hoy, creando un objeto de formulario, generaremos un espacio en blanco para la posterior creación de las sombras que el formulario proyecta sobre los objetos que se encuentran por debajo del mismo. Aquí, para dibujar un formulario, necesitaremos crear a su alrededor un pequeño espacio en el que se dibujará la sombra. Para determinar el tamaño de este espacio, deberemos crear una macrosustitución que indicará en píxeles el tamaño del lado de este espacio. Si indicamos 5 píxeles, tendremos un espacio libre alrededor de la parte superior, inferior, izquierda y derecha de cinco píxeles a cada lado.
Y una cosa más: el análisis del trabajo con el objeto de elemento gráfico ha mostrado que no necesitamos algunas de las propiedades en su lista de propiedades; estas no se utilizarán para buscar y clasificar objetos. Por consiguiente, deberemos eliminarlas de la enumeración de propiedades de tipo entero del objeto de elemento: se encontrarán en las variables de miembro de clase protegidas ordinarias.
Abrimos el archivo \MQL5\Include\DoEasy\Defines.mqh y añadimos las mejoras:
En la lista de parámetros del lienzo, añadimos el margen por un lado para las sombras:
//--- Parameters of the DOM snapshot series
#define MBOOKSERIES_DEFAULT_DAYS_COUNT (1)                        // The default required number of days for DOM snapshots in the series
#define MBOOKSERIES_MAX_DATA_TOTAL     (200000)                   // Maximum number of stored DOM snapshots of a single symbol
//--- Canvas parameters
#define PAUSE_FOR_CANV_UPDATE          (16)                       // Canvas update frequency
#define NULL_COLOR                     (0x00FFFFFF)               // Zero for the canvas with the alpha channel
#define OUTER_AREA_SIZE                (5)                        // Size of one side of the outer area around the workspace
//+------------------------------------------------------------------+
//| Enumerations                                                     |
//+------------------------------------------------------------------+
Eliminamos las dos propiedades innecesarias de la lista de propiedades de tipo entero del elemento gráfico:
   CANV_ELEMENT_PROP_ACT_SHIFT_BOTTOM,                // Active area offset from the bottom edge of the element
   CANV_ELEMENT_PROP_OPACITY,                         // Element opacity
   CANV_ELEMENT_PROP_COLOR_BG,                        // Element background color
   CANV_ELEMENT_PROP_MOVABLE,                         // Element moveability flag
Ahora, la lista de propiedades de tipo entero tendrá el aspecto siguiente:
//+------------------------------------------------------------------+
//| Integer properties of the graphical element on the canvas        |
//+------------------------------------------------------------------+
enum ENUM_CANV_ELEMENT_PROP_INTEGER
  {
   CANV_ELEMENT_PROP_ID = 0,                          // Element ID
   CANV_ELEMENT_PROP_TYPE,                            // Graphical element type
   CANV_ELEMENT_PROP_NUM,                             // Element index in the list
   CANV_ELEMENT_PROP_CHART_ID,                        // Chart ID
   CANV_ELEMENT_PROP_WND_NUM,                         // Chart subwindow index
   CANV_ELEMENT_PROP_COORD_X,                         // Form's X coordinate on the chart
   CANV_ELEMENT_PROP_COORD_Y,                         // Form's Y coordinate on the chart
   CANV_ELEMENT_PROP_WIDTH,                           // Element width
   CANV_ELEMENT_PROP_HEIGHT,                          // Element height
   CANV_ELEMENT_PROP_RIGHT,                           // Element right border
   CANV_ELEMENT_PROP_BOTTOM,                          // Element bottom border
   CANV_ELEMENT_PROP_ACT_SHIFT_LEFT,                  // Active area offset from the left edge of the element
   CANV_ELEMENT_PROP_ACT_SHIFT_TOP,                   // Active area offset from the upper edge of the element
   CANV_ELEMENT_PROP_ACT_SHIFT_RIGHT,                 // Active area offset from the right edge of the element
   CANV_ELEMENT_PROP_ACT_SHIFT_BOTTOM,                // Active area offset from the bottom edge of the element
   CANV_ELEMENT_PROP_MOVABLE,                         // Element moveability flag
   CANV_ELEMENT_PROP_ACTIVE,                          // Element activity flag
   CANV_ELEMENT_PROP_COORD_ACT_X,                     // X coordinate of the element active area
   CANV_ELEMENT_PROP_COORD_ACT_Y,                     // Y coordinate of the element active area
   CANV_ELEMENT_PROP_ACT_RIGHT,                       // Right border of the element active area
   CANV_ELEMENT_PROP_ACT_BOTTOM,                      // Bottom border of the element active area
  };
#define CANV_ELEMENT_PROP_INTEGER_TOTAL (21)          // Total number of integer properties
#define CANV_ELEMENT_PROP_INTEGER_SKIP  (0)           // Number of integer properties not used in sorting
//+------------------------------------------------------------------+
Reducimos el número total de propiedades de tipo entero en 2: en lugar de 23, escribimos 21.
Por consiguiente, también eliminamos las dos constantes ya innecesarias de la enumeración de posibles criterios de clasificación de los elementos gráficos en el lienzo:
   SORT_BY_CANV_ELEMENT_ACT_SHIFT_BOTTOM,             // Sort by the active area offset from the bottom edge of the element
   SORT_BY_CANV_ELEMENT_OPACITY,                      // Sort by the element opacity
   SORT_BY_CANV_ELEMENT_COLOR_BG,                     // Sort by the element background color
   SORT_BY_CANV_ELEMENT_MOVABLE,                      // Sort by the element moveability flag
La lista completa tendrá ahora el siguiente aspecto:
//+------------------------------------------------------------------+
//| Possible sorting criteria of graphical elements on the canvas    |
//+------------------------------------------------------------------+
#define FIRST_CANV_ELEMENT_DBL_PROP  (CANV_ELEMENT_PROP_INTEGER_TOTAL-CANV_ELEMENT_PROP_INTEGER_SKIP)
#define FIRST_CANV_ELEMENT_STR_PROP  (CANV_ELEMENT_PROP_INTEGER_TOTAL-CANV_ELEMENT_PROP_INTEGER_SKIP+CANV_ELEMENT_PROP_DOUBLE_TOTAL-CANV_ELEMENT_PROP_DOUBLE_SKIP)
enum ENUM_SORT_CANV_ELEMENT_MODE
  {
//--- Sort by integer properties
   SORT_BY_CANV_ELEMENT_ID = 0,                       // Sort by element ID
   SORT_BY_CANV_ELEMENT_TYPE,                         // Sort by graphical element type
   SORT_BY_CANV_ELEMENT_NUM,                          // Sort by form index in the list
   SORT_BY_CANV_ELEMENT_CHART_ID,                     // Sort by chart ID
   SORT_BY_CANV_ELEMENT_WND_NUM,                      // Sort by chart window index
   SORT_BY_CANV_ELEMENT_COORD_X,                      // Sort by the element X coordinate on the chart
   SORT_BY_CANV_ELEMENT_COORD_Y,                      // Sort by the element Y coordinate on the chart
   SORT_BY_CANV_ELEMENT_WIDTH,                        // Sort by the element width
   SORT_BY_CANV_ELEMENT_HEIGHT,                       // Sort by the element height
   SORT_BY_CANV_ELEMENT_RIGHT,                        // Sort by the element right border
   SORT_BY_CANV_ELEMENT_BOTTOM,                       // Sort by the element bottom border
   SORT_BY_CANV_ELEMENT_ACT_SHIFT_LEFT,               // Sort by the active area offset from the left edge of the element
   SORT_BY_CANV_ELEMENT_ACT_SHIFT_TOP,                // Sort by the active area offset from the top edge of the element
   SORT_BY_CANV_ELEMENT_ACT_SHIFT_RIGHT,              // Sort by the active area offset from the right edge of the element
   SORT_BY_CANV_ELEMENT_ACT_SHIFT_BOTTOM,             // Sort by the active area offset from the bottom edge of the element
   SORT_BY_CANV_ELEMENT_MOVABLE,                      // Sort by the element moveability flag
   SORT_BY_CANV_ELEMENT_ACTIVE,                       // Sort by the element activity flag
   SORT_BY_CANV_ELEMENT_COORD_ACT_X,                  // Sort by X coordinate of the element active area
   SORT_BY_CANV_ELEMENT_COORD_ACT_Y,                  // Sort by Y coordinate of the element active area
   SORT_BY_CANV_ELEMENT_ACT_RIGHT,                    // Sort by the right border of the element active area
   SORT_BY_CANV_ELEMENT_ACT_BOTTOM,                   // Sort by the bottom border of the element active area
//--- Sort by real properties

//--- Sort by string properties
   SORT_BY_CANV_ELEMENT_NAME_OBJ = FIRST_CANV_ELEMENT_STR_PROP,// Sort by an element object name
   SORT_BY_CANV_ELEMENT_NAME_RES,                     // Sort by the graphical resource name
  };
//+------------------------------------------------------------------+
Todos nuestros objetos gráficos se crean a partir del objeto de elemento gráfico. Y, a su vez, este es el heredero del objeto básico de todos los objetos gráficos de la biblioteca (que a su vez se hereda de la clase básica de la biblioteca estándar CObject). Todas las propiedades de cada clase padre se transmiten "por herencia" a sus descendientes. Por consiguiente, si necesitamos alguna propiedad común a todos los objetos gráficos, deberemos ubicarla en los objetos básicos de todo el árbol de herencia. En nuestro caso, el objeto de este tipo para los objetos gráficos de la biblioteca será el objeto de clase CGBaseObj.
Necesitamos controlar la visibilidad de los objetos gráficos en el gráfico. Para conseguirlo, no necesitamos eliminar, ocultar o apartar de ninguna manera el objeto gráfico fuera de la vista; bastará con especificar las banderas necesarias para el objeto gráfico en su propiedad OBJPROP_TIMEFRAMES, y el objeto se ocultará del gráfico o se mostrará en el mismo. Además, se mostrará por encima de todos los demás. Así, podremos no solo controlar la visibilidad del objeto en el gráfico, sino también colocar el objeto requerido por encima de todos los demás: este será el objeto actual con el que trabajará el usuario del programa.
De todo el conjunto de banderas del objeto, necesitaremos las siguientes: OBJ_NO_PERIODS - para ocultar el objeto, y OBJ_ALL_PERIODS - para mostrar el objeto en el gráfico. Para mover un objeto al primer plano, solo necesitaremos ocultar y luego mostrar el objeto secuencialmente. Y el objeto se moverá al primer plano.
Vamos a añadir las nuevas propiedades y métodos al archivo del objeto básico \MQL5\Include\DoEasy\Objects\Graph\GBaseObj.mqh.
En la sección protegida de la clase, declaramos la variable necesaria para guardar la visibilidad del objeto:
//+------------------------------------------------------------------+
//| Class of the base object of the library graphical objects        |
//+------------------------------------------------------------------+
class CGBaseObj : public CObject
  {
private:

protected:
   string            m_name_prefix;                      // Object name prefix
   string            m_name;                             // Object name
   long              m_chart_id;                         // Chart ID
   int               m_subwindow;                        // Subwindow index
   int               m_shift_y;                          // Subwindow Y coordinate shift
   int               m_type;                             // Object type
   bool              m_visible;                          // Object visibility

//--- Create (1) the object structure and (2) the object from the structure
   virtual bool      ObjectToStruct(void)                      { return true; }
   virtual void      StructToObject(void){;}

public:
En la sección pública de la clase, escribimos el método para establecer la bandera de visibilidad del objeto, así como la configuración simultánea de la propiedad en sí para el objeto y el método para retornar la visibilidad del objeto en el gráfico:
public:
//--- Return the values of class variables
   string            Name(void)                          const { return this.m_name;      }
   long              ChartID(void)                       const { return this.m_chart_id;  }
   int               SubWindow(void)                     const { return this.m_subwindow; }
//--- (1) Set and (2) return the object visibility
   void              SetVisible(const bool flag)
                       {
                        long value=(flag ? OBJ_ALL_PERIODS : 0);
                        if(::ObjectSetInteger(this.m_chart_id,this.m_name,OBJPROP_TIMEFRAMES,value))
                           this.m_visible=flag;
                       }
   bool              IsVisible(void)                     const { return this.m_visible;   }

//--- The virtual method returning the object type
   virtual int       Type(void)                          const { return this.m_type;      }
El método que establece la visibilidad del objeto primero comprueba el valor de la bandera y, dependiendo del valor transmitido (true o false), envía una solicitud para asignar el valor al objeto: o bien OBJ_ALL_PERIODS para mostrar el objeto en el gráfico, o bien 0 para ocultarlo. Si la solicitud se coloca correctamente en la cola de eventos del gráfico, en la variable m_visible se escribe el valor de la bandera transmitido al método; dicho valor se puede encontrar usando el método IsVisible(), que retorna el valor de esta variable.
En la lista de inicialización del constructor de la clase, inicializamos una nueva variable con el valor false:
//+------------------------------------------------------------------+
//| Constructor                                                      |
//+------------------------------------------------------------------+
CGBaseObj::CGBaseObj() : m_shift_y(0), m_type(0),m_visible(false), m_name_prefix(::MQLInfoString(MQL_PROGRAM_NAME)+"_")
  {
  }
//+------------------------------------------------------------------+
Mejoramos la clase de objeto de elemento gráfico en el archivo \MQL5\Include\DoEasy\Objects\Graph\GCnvElement.mqh.
En la sección protegida de la clase, declaramos la variable de bandera en la que se indicará la presencia/ausencia de la sombra proyectada por el objeto, así como la variable para guardar el color de fondo del gráfico, que necesitaremos posteriormente al dibujar las sombras:
//+------------------------------------------------------------------+
//| Class of the base object of the library graphical objects        |
//+------------------------------------------------------------------+
class CGCnvElement : public CGBaseObj
  {
protected:
   CCanvas           m_canvas;                                 // CCanvas class object
   CPause            m_pause;                                  // Pause class object
   bool              m_shadow;                                 // Shadow presence
   color             m_chart_color_bg;                         // Chart background color
//--- Return the cursor position relative to the (1) entire element and (2) the element's active area
   bool              CursorInsideElement(const int x,const int y);
   bool              CursorInsideActiveArea(const int x,const int y);
//--- Create (1) the object structure and (2) the object from the structure
   virtual bool      ObjectToStruct(void);
   virtual void      StructToObject(void);

private:
Como ya hemos eliminado dos constantes de la enumeración de propiedades enteras del objeto, ahora deberemos guardarlas en las variables de la clase.
Vamos a declararlas en la sección privada:
   long              m_long_prop[ORDER_PROP_INTEGER_TOTAL];    // Integer properties
   double            m_double_prop[ORDER_PROP_DOUBLE_TOTAL];   // Real properties
   string            m_string_prop[ORDER_PROP_STRING_TOTAL];   // String properties

   ENUM_TEXT_ANCHOR  m_text_anchor;                            // Current text alignment
   color             m_color_bg;                               // Element background color
   uchar             m_opacity;                                // Element opacity

//--- Return the index of the array the order's (1) double and (2) string properties are located at
Ahora escribiremos las propiedades "color de fondo del elemento" y "opacidad del elemento" en estas variables.
Para conformar el aspecto externo de los objetos gráficos, necesitaremos un método que nos permita cambiar la claridad del color.
Este es uno de los componentes del modelo de color HSL:
HSL, HLS o HSI (del inglés, hue, saturation, lightness (intensity)) — es un modelo de color en el que las coordenadas de color son el tono, la saturación y la claridad. Debemos notar que HSV y HSL son dos modelos de color distintos (lightness indica la claridad, que se distingue del brillo).
Al dibujar las primitivas gráficas, necesitaremos aclarar las partes del dibujo iluminadas de forma condicional y oscurecer las partes ensombrecidas de forma condicional. En este caso, además, no deberemos tocar el color de la imagen. Para ello, aplicaremos un método que transforma el modelo de color ARGB en HSL, y también cambiaremos el brillo de los píxeles de la parte necesaria de la imagen.
Declaramos este método en la sección privada de la clase:
//--- Update the coordinates (shift the canvas)
   bool              Move(const int x,const int y,const bool redraw=false);

//--- Change the color lightness by the specified amount
   uint              ChangeColorLightness(const uint clr,const double change_value);

protected:
Como el objeto de elemento gráfico supondrá el objeto principal para crear otros objetos gráficos más complejos que serán sus herederos, entonces, teniendo en cuenta el concepto de construcción de los objetos de la biblioteca (según el cual la clase padre tiene un constructor protegido en el que se indican los parámetros del objeto heredado creado), necesitaremos crear un constructor paramétrico protegido para el objeto del elemento. A este se transmitirán los parámetros sobre el tipo de objeto heredero que se creará usando como base el elemento gráfico (hoy será un objeto de formulario).
Declaramos el nuevo constructor paramétrico protegido en la sección protegida de la clase:
protected:
//--- Protected constructor
                     CGCnvElement(const ENUM_GRAPH_ELEMENT_TYPE element_type,
                                  const long    chart_id,
                                  const int     wnd_num,
                                  const string  name,
                                  const int     x,
                                  const int     y,
                                  const int     w,
                                  const int     h);
public:
A este transmitiremos solo los parámetros básicos para crear el objeto. Estableceremos el resto de parámetros en el objeto después de que este se cree con éxito. Realizaremos esto en la clase de colección de objetos gráficos de la biblioteca, que aún no hemos comenzado a crear, pero que comenzaremos en el futuro.
En el constructor predeterminado (no paramétrico), en su lista de inicialización, escribimos la inicialización de la bandera sobre la existencia de sombra y color de fondo del gráfico:
public:
//--- Parametric constructor
                     CGCnvElement(const ENUM_GRAPH_ELEMENT_TYPE element_type,
                                  const int     element_id,
                                  const int     element_num,
                                  const long    chart_id,
                                  const int     wnd_num,
                                  const string  name,
                                  const int     x,
                                  const int     y,
                                  const int     w,
                                  const int     h,
                                  const color   colour,
                                  const uchar   opacity,
                                  const bool    movable=true,
                                  const bool    activity=true,
                                  const bool    redraw=false);
//--- Default constructor/Destructor
                     CGCnvElement() : m_shadow(false),m_chart_color_bg((color)::ChartGetInteger(::ChartID(),CHART_COLOR_BACKGROUND)) {;}
En el bloque de acceso simplificado a los parámetros del objeto, añadimos los nuevos métodos para establecer las propiedades del objeto:
//+------------------------------------------------------------------+
//| Methods of simplified access to object properties                |
//+------------------------------------------------------------------+
//--- Set the (1) X, (2) Y coordinates, (3) element width, (4) height, (5) right (6) and bottom edge,
   bool              SetCoordX(const int coord_x);
   bool              SetCoordY(const int coord_y);
   bool              SetWidth(const int width);
   bool              SetHeight(const int height);
   void              SetRightEdge(void)                        { this.SetProperty(CANV_ELEMENT_PROP_RIGHT,this.RightEdge());           }
   void              SetBottomEdge(void)                       { this.SetProperty(CANV_ELEMENT_PROP_BOTTOM,this.BottomEdge());         }
//--- Set the shift of the (1) left, (2) top, (3) right, (4) bottom edge of the active area relative to the element,
//--- (5) all shifts of the active area edges relative to the element, (6) the element background color and (7) the element opacity
   void              SetActiveAreaLeftShift(const int value)   { this.SetProperty(CANV_ELEMENT_PROP_ACT_SHIFT_LEFT,fabs(value));       }
   void              SetActiveAreaRightShift(const int value)  { this.SetProperty(CANV_ELEMENT_PROP_ACT_SHIFT_RIGHT,fabs(value));      }
   void              SetActiveAreaTopShift(const int value)    { this.SetProperty(CANV_ELEMENT_PROP_ACT_SHIFT_TOP,fabs(value));        }
   void              SetActiveAreaBottomShift(const int value) { this.SetProperty(CANV_ELEMENT_PROP_ACT_SHIFT_BOTTOM,fabs(value));     }
   void              SetActiveAreaShift(const int left_shift,const int bottom_shift,const int right_shift,const int top_shift);
   void              SetColorBackground(const color colour)    { this.m_color_bg=colour;                                               }
   void              SetOpacity(const uchar value,const bool redraw=false);

//--- Set the flag of (1) object moveability, (2) activity, (3) element ID, (4) element index in the list and (5) shadow presence
   void              SetMovable(const bool flag)               { this.SetProperty(CANV_ELEMENT_PROP_MOVABLE,flag);                     }
   void              SetActive(const bool flag)                { this.SetProperty(CANV_ELEMENT_PROP_ACTIVE,flag);                      }
   void              SetID(const int id)                       { this.SetProperty(CANV_ELEMENT_PROP_ID,id);                            }
   void              SetNumber(const int number)               { this.SetProperty(CANV_ELEMENT_PROP_NUM,number);                       }
   void              SetShadow(const bool flag);

//--- Return the shift (1) of the left, (2) right, (3) top and (4) bottom edge of the element active area
Los métodos encargados de retornar el color de fondo y la opacidad ahora devuelven los valores escritos en las nuevas variables declaradas:
//--- Return (1) the background color, (2) the opacity, coordinate (3) of the right and (4) bottom element edge
   color             ColorBackground(void)               const { return this.m_color_bg;                                               }
   uchar             Opacity(void)                       const { return this.m_opacity;                                                }
   int               RightEdge(void)                     const { return this.CoordX()+this.m_canvas.Width();                           }
   int               BottomEdge(void)                    const { return this.CoordY()+this.m_canvas.Height();                          }
//--- Return the (1) X, (2) Y coordinates, (3) element width and (4) height,
Al final de la lista, añadimos el método para retornar la bandera de dibujado de la sombra proyectada por el objeto, el método para retornar el color de fondo del gráfico,
y el método que desplaza el objeto al primer plano (por encima de todos los demás objetos gráficos en el gráfico):
//--- Return (1) the element ID, (2) element index in the list, (3) flag of the form shadow presence and (4) the chart background color
   int               ID(void)                            const { return (int)this.GetProperty(CANV_ELEMENT_PROP_ID);                   }
   int               Number(void)                        const { return (int)this.GetProperty(CANV_ELEMENT_PROP_NUM);                  }
   bool              IsShadow(void)                      const { return this.m_shadow;                                                 }
   color             ChartColorBackground(void)          const { return this.m_chart_color_bg;                                         }
//--- Set the object above all
   void              BringToTop(void)                          { CGBaseObj::SetVisible(false); CGBaseObj::SetVisible(true);            }
//+------------------------------------------------------------------+
Como podemos ver, para colocar un objeto por encima de todos los demás, bastará con ocultarlo y mostrarlo de nuevo inmediatamente con ayuda de los métodos de la clase padre que hemos analizado anteriormente.
Quitamos del constructor paramétrico las líneas que estabecen las propiedades ahora remotas:
      this.SetProperty(CANV_ELEMENT_PROP_ACT_SHIFT_BOTTOM,0);                    // Active area offset from the bottom edge of the element
      this.SetProperty(CANV_ELEMENT_PROP_OPACITY,opacity);                       // Element opacity
      this.SetProperty(CANV_ELEMENT_PROP_COLOR_BG,colour);                       // Element color
      this.SetProperty(CANV_ELEMENT_PROP_MOVABLE,movable);                       // Element moveability flag
Ahora, tanto estas propiedades como las nuevas se escribirán en las nuevas variables:
//+------------------------------------------------------------------+
//| Parametric constructor                                           |
//+------------------------------------------------------------------+
CGCnvElement::CGCnvElement(const ENUM_GRAPH_ELEMENT_TYPE element_type,
                           const int      element_id,
                           const int      element_num,
                           const long     chart_id,
                           const int      wnd_num,
                           const string   name,
                           const int      x,
                           const int      y,
                           const int      w,
                           const int      h,
                           const color    colour,
                           const uchar    opacity,
                           const bool     movable=true,
                           const bool     activity=true,
                           const bool     redraw=false) : m_shadow(false)

  {
   this.m_chart_color_bg=(color)::ChartGetInteger(chart_id,CHART_COLOR_BACKGROUND);
   this.m_name=this.m_name_prefix+name;
   this.m_chart_id=chart_id;
   this.m_subwindow=wnd_num;
   this.m_type=element_type;
   this.SetFont("Calibri",8);
   this.m_text_anchor=0;
   this.m_color_bg=colour;
   this.m_opacity=opacity;
   if(this.Create(chart_id,wnd_num,this.m_name,x,y,w,h,colour,opacity,redraw))
     {
      this.SetProperty(CANV_ELEMENT_PROP_NAME_RES,this.m_canvas.ResourceName()); // Graphical resource name
      this.SetProperty(CANV_ELEMENT_PROP_CHART_ID,CGBaseObj::ChartID());         // Chart ID
      this.SetProperty(CANV_ELEMENT_PROP_WND_NUM,CGBaseObj::SubWindow());        // Chart subwindow index
      this.SetProperty(CANV_ELEMENT_PROP_NAME_OBJ,CGBaseObj::Name());            // Element object name
      this.SetProperty(CANV_ELEMENT_PROP_TYPE,element_type);                     // Graphical element type
      this.SetProperty(CANV_ELEMENT_PROP_ID,element_id);                         // Element ID
      this.SetProperty(CANV_ELEMENT_PROP_NUM,element_num);                       // Element index in the list
      this.SetProperty(CANV_ELEMENT_PROP_COORD_X,x);                             // Element's X coordinate on the chart
      this.SetProperty(CANV_ELEMENT_PROP_COORD_Y,y);                             // Element's Y coordinate on the chart
      this.SetProperty(CANV_ELEMENT_PROP_WIDTH,w);                               // Element width
      this.SetProperty(CANV_ELEMENT_PROP_HEIGHT,h);                              // Element height
      this.SetProperty(CANV_ELEMENT_PROP_ACT_SHIFT_LEFT,0);                      // Active area offset from the left edge of the element
      this.SetProperty(CANV_ELEMENT_PROP_ACT_SHIFT_TOP,0);                       // Active area offset from the upper edge of the element
      this.SetProperty(CANV_ELEMENT_PROP_ACT_SHIFT_RIGHT,0);                     // Active area offset from the right edge of the element
      this.SetProperty(CANV_ELEMENT_PROP_ACT_SHIFT_BOTTOM,0);                    // Active area offset from the bottom edge of the element
      this.SetProperty(CANV_ELEMENT_PROP_MOVABLE,movable);                       // Element moveability flag
      this.SetProperty(CANV_ELEMENT_PROP_ACTIVE,activity);                       // Element activity flag
      this.SetProperty(CANV_ELEMENT_PROP_RIGHT,this.RightEdge());                // Element right border
      this.SetProperty(CANV_ELEMENT_PROP_BOTTOM,this.BottomEdge());              // Element bottom border
      this.SetProperty(CANV_ELEMENT_PROP_COORD_ACT_X,this.ActiveAreaLeft());     // X coordinate of the element active area
      this.SetProperty(CANV_ELEMENT_PROP_COORD_ACT_Y,this.ActiveAreaTop());      // Y coordinate of the element active area
      this.SetProperty(CANV_ELEMENT_PROP_ACT_RIGHT,this.ActiveAreaRight());      // Right border of the element active area
      this.SetProperty(CANV_ELEMENT_PROP_ACT_BOTTOM,this.ActiveAreaBottom());    // Bottom border of the element active area
     }
   else
     {
      ::Print(CMessage::Text(MSG_LIB_SYS_FAILED_CREATE_ELM_OBJ),this.m_name);
     }
  }
//+------------------------------------------------------------------+
El nuevo constructor paramétrico protegido prácticamente no se distingue del que hemos visto antes:
//+------------------------------------------------------------------+
//| Protected constructor                                            |
//+------------------------------------------------------------------+
CGCnvElement::CGCnvElement(const ENUM_GRAPH_ELEMENT_TYPE element_type,
                           const long    chart_id,
                           const int     wnd_num,
                           const string  name,
                           const int     x,
                           const int     y,
                           const int     w,
                           const int     h) : m_shadow(false)
  {
   this.m_chart_color_bg=(color)::ChartGetInteger(chart_id,CHART_COLOR_BACKGROUND);
   this.m_name=this.m_name_prefix+name;
   this.m_chart_id=chart_id;
   this.m_subwindow=wnd_num;
   this.m_type=element_type;
   this.SetFont("Calibri",8);
   this.m_text_anchor=0;
   this.m_color_bg=NULL_COLOR;
   this.m_opacity=0;
   if(this.Create(chart_id,wnd_num,this.m_name,x,y,w,h,this.m_color_bg,this.m_opacity,false))
     {
      this.SetProperty(CANV_ELEMENT_PROP_NAME_RES,this.m_canvas.ResourceName()); // Graphical resource name
      this.SetProperty(CANV_ELEMENT_PROP_CHART_ID,CGBaseObj::ChartID());         // Chart ID
      this.SetProperty(CANV_ELEMENT_PROP_WND_NUM,CGBaseObj::SubWindow());        // Chart subwindow index
      this.SetProperty(CANV_ELEMENT_PROP_NAME_OBJ,CGBaseObj::Name());            // Element object name
      this.SetProperty(CANV_ELEMENT_PROP_TYPE,element_type);                     // Graphical element type
      this.SetProperty(CANV_ELEMENT_PROP_ID,0);                                  // Element ID
      this.SetProperty(CANV_ELEMENT_PROP_NUM,0);                                 // Element index in the list
      this.SetProperty(CANV_ELEMENT_PROP_COORD_X,x);                             // Element's X coordinate on the chart
      this.SetProperty(CANV_ELEMENT_PROP_COORD_Y,y);                             // Element's Y coordinate on the chart
      this.SetProperty(CANV_ELEMENT_PROP_WIDTH,w);                               // Element width
      this.SetProperty(CANV_ELEMENT_PROP_HEIGHT,h);                              // Element height
      this.SetProperty(CANV_ELEMENT_PROP_ACT_SHIFT_LEFT,0);                      // Active area offset from the left edge of the element
      this.SetProperty(CANV_ELEMENT_PROP_ACT_SHIFT_TOP,0);                       // Active area offset from the upper edge of the element
      this.SetProperty(CANV_ELEMENT_PROP_ACT_SHIFT_RIGHT,0);                     // Active area offset from the right edge of the element
      this.SetProperty(CANV_ELEMENT_PROP_ACT_SHIFT_BOTTOM,0);                    // Active area offset from the bottom edge of the element
      this.SetProperty(CANV_ELEMENT_PROP_MOVABLE,false);                         // Element moveability flag
      this.SetProperty(CANV_ELEMENT_PROP_ACTIVE,false);                          // Element activity flag
      this.SetProperty(CANV_ELEMENT_PROP_RIGHT,this.RightEdge());                // Element right border
      this.SetProperty(CANV_ELEMENT_PROP_BOTTOM,this.BottomEdge());              // Element bottom border
      this.SetProperty(CANV_ELEMENT_PROP_COORD_ACT_X,this.ActiveAreaLeft());     // X coordinate of the element active area
      this.SetProperty(CANV_ELEMENT_PROP_COORD_ACT_Y,this.ActiveAreaTop());      // Y coordinate of the element active area
      this.SetProperty(CANV_ELEMENT_PROP_ACT_RIGHT,this.ActiveAreaRight());      // Right border of the element active area
      this.SetProperty(CANV_ELEMENT_PROP_ACT_BOTTOM,this.ActiveAreaBottom());    // Bottom border of the element active area
     }
   else
     {
      ::Print(CMessage::Text(MSG_LIB_SYS_FAILED_CREATE_ELM_OBJ),this.m_name);
     }
  }
//+------------------------------------------------------------------+
A este se transmiten menos valores, el color de fondo del elemento se establece como blanco transparente; asimismo, se indica la transparencia total del elemento.
Eliminamos las líneas del objeto ahora innecesarias del método para crear la estructura del objeto:
   this.m_struct_obj.act_shift_bottom=(int)this.GetProperty(CANV_ELEMENT_PROP_ACT_SHIFT_BOTTOM);// Active area offset from the bottom edge of the element
   this.m_struct_obj.opacity=(uchar)this.GetProperty(CANV_ELEMENT_PROP_OPACITY);                // Element opacity
   this.m_struct_obj.color_bg=(color)this.GetProperty(CANV_ELEMENT_PROP_COLOR_BG);              // Element background color
   this.m_struct_obj.movable=(bool)this.GetProperty(CANV_ELEMENT_PROP_MOVABLE);                 // Element moveability flag
y añadimos más abajo el almacenamiento de estos parámetros desde las variables nuevas:
//+------------------------------------------------------------------+
//| Create the object structure                                      |
//+------------------------------------------------------------------+
bool CGCnvElement::ObjectToStruct(void)
  {
//--- Save integer properties
   this.m_struct_obj.id=(int)this.GetProperty(CANV_ELEMENT_PROP_ID);                            // Element ID
   this.m_struct_obj.type=(int)this.GetProperty(CANV_ELEMENT_PROP_TYPE);                        // Graphical element type
   this.m_struct_obj.number=(int)this.GetProperty(CANV_ELEMENT_PROP_NUM);                       // Eleemnt ID in the list
   this.m_struct_obj.chart_id=this.GetProperty(CANV_ELEMENT_PROP_CHART_ID);                     // Chart ID
   this.m_struct_obj.subwindow=(int)this.GetProperty(CANV_ELEMENT_PROP_WND_NUM);                // Chart subwindow index
   this.m_struct_obj.coord_x=(int)this.GetProperty(CANV_ELEMENT_PROP_COORD_X);                  // Form's X coordinate on the chart
   this.m_struct_obj.coord_y=(int)this.GetProperty(CANV_ELEMENT_PROP_COORD_Y);                  // Form's Y coordinate on the chart
   this.m_struct_obj.width=(int)this.GetProperty(CANV_ELEMENT_PROP_WIDTH);                      // Element width
   this.m_struct_obj.height=(int)this.GetProperty(CANV_ELEMENT_PROP_HEIGHT);                    // Element height
   this.m_struct_obj.edge_right=(int)this.GetProperty(CANV_ELEMENT_PROP_RIGHT);                 // Element right edge
   this.m_struct_obj.edge_bottom=(int)this.GetProperty(CANV_ELEMENT_PROP_BOTTOM);               // Element bottom edge
   this.m_struct_obj.act_shift_left=(int)this.GetProperty(CANV_ELEMENT_PROP_ACT_SHIFT_LEFT);    // Active area offset from the left edge of the element
   this.m_struct_obj.act_shift_top=(int)this.GetProperty(CANV_ELEMENT_PROP_ACT_SHIFT_TOP);      // Active area offset from the top edge of the element
   this.m_struct_obj.act_shift_right=(int)this.GetProperty(CANV_ELEMENT_PROP_ACT_SHIFT_RIGHT);  // Active area offset from the right edge of the element
   this.m_struct_obj.act_shift_bottom=(int)this.GetProperty(CANV_ELEMENT_PROP_ACT_SHIFT_BOTTOM);// Active area offset from the bottom edge of the element


   this.m_struct_obj.movable=(bool)this.GetProperty(CANV_ELEMENT_PROP_MOVABLE);                 // Element moveability flag
   this.m_struct_obj.active=(bool)this.GetProperty(CANV_ELEMENT_PROP_ACTIVE);                   // Element activity flag
   this.m_struct_obj.coord_act_x=(int)this.GetProperty(CANV_ELEMENT_PROP_COORD_ACT_X);          // X coordinate of the element active area
   this.m_struct_obj.coord_act_y=(int)this.GetProperty(CANV_ELEMENT_PROP_COORD_ACT_Y);          // Y coordinate of the element active area
   this.m_struct_obj.coord_act_right=(int)this.GetProperty(CANV_ELEMENT_PROP_ACT_RIGHT);        // Right border of the element active area
   this.m_struct_obj.coord_act_bottom=(int)this.GetProperty(CANV_ELEMENT_PROP_ACT_BOTTOM);      // Bottom border of the element active area
   this.m_struct_obj.color_bg=this.m_color_bg;                                                  // Element background color
   this.m_struct_obj.opacity=this.m_opacity;                                                    // Element opacity
//--- Save real properties

//--- Save string properties
   ::StringToCharArray(this.GetProperty(CANV_ELEMENT_PROP_NAME_OBJ),this.m_struct_obj.name_obj);// Graphical element object name
   ::StringToCharArray(this.GetProperty(CANV_ELEMENT_PROP_NAME_RES),this.m_struct_obj.name_res);// Graphical resource name
   //--- Save the structure to the uchar array
   ::ResetLastError();
   if(!::StructToCharArray(this.m_struct_obj,this.m_uchar_array))
     {
      ::Print(DFUN,CMessage::Text(MSG_LIB_SYS_FAILED_SAVE_OBJ_STRUCT_TO_UARRAY),(string)::GetLastError());
      return false;
     }
   return true;
  }
//+------------------------------------------------------------------+
Lo mismo hacemos en el método de creación de un objeto desde la estructura:
//+------------------------------------------------------------------+
//| Create the object from the structure                             |
//+------------------------------------------------------------------+
void CGCnvElement::StructToObject(void)
  {
//--- Save integer properties
   this.SetProperty(CANV_ELEMENT_PROP_ID,this.m_struct_obj.id);                                 // Element ID
   this.SetProperty(CANV_ELEMENT_PROP_TYPE,this.m_struct_obj.type);                             // Graphical element type
   this.SetProperty(CANV_ELEMENT_PROP_NUM,this.m_struct_obj.number);                            // Element index in the list
   this.SetProperty(CANV_ELEMENT_PROP_CHART_ID,this.m_struct_obj.chart_id);                     // Chart ID
   this.SetProperty(CANV_ELEMENT_PROP_WND_NUM,this.m_struct_obj.subwindow);                     // Chart subwindow index
   this.SetProperty(CANV_ELEMENT_PROP_COORD_X,this.m_struct_obj.coord_x);                       // Form's X coordinate on the chart
   this.SetProperty(CANV_ELEMENT_PROP_COORD_Y,this.m_struct_obj.coord_y);                       // Form's Y coordinate on the chart
   this.SetProperty(CANV_ELEMENT_PROP_WIDTH,this.m_struct_obj.width);                           // Element width
   this.SetProperty(CANV_ELEMENT_PROP_HEIGHT,this.m_struct_obj.height);                         // Element height
   this.SetProperty(CANV_ELEMENT_PROP_RIGHT,this.m_struct_obj.edge_right);                      // Element right edge
   this.SetProperty(CANV_ELEMENT_PROP_BOTTOM,this.m_struct_obj.edge_bottom);                    // Element bottom edge
   this.SetProperty(CANV_ELEMENT_PROP_ACT_SHIFT_LEFT,this.m_struct_obj.act_shift_left);         // Active area offset from the left edge of the element
   this.SetProperty(CANV_ELEMENT_PROP_ACT_SHIFT_TOP,this.m_struct_obj.act_shift_top);           // Active area offset from the upper edge of the element
   this.SetProperty(CANV_ELEMENT_PROP_ACT_SHIFT_RIGHT,this.m_struct_obj.act_shift_right);       // Active area offset from the right edge of the element
   this.SetProperty(CANV_ELEMENT_PROP_ACT_SHIFT_BOTTOM,this.m_struct_obj.act_shift_bottom);     // Active area offset from the bottom edge of the element


   this.SetProperty(CANV_ELEMENT_PROP_MOVABLE,this.m_struct_obj.movable);                       // Element moveability flag
   this.SetProperty(CANV_ELEMENT_PROP_ACTIVE,this.m_struct_obj.active);                         // Element activity flag
   this.SetProperty(CANV_ELEMENT_PROP_COORD_ACT_X,this.m_struct_obj.coord_act_x);               // X coordinate of the element active area
   this.SetProperty(CANV_ELEMENT_PROP_COORD_ACT_Y,this.m_struct_obj.coord_act_y);               // Y coordinate of the element active area
   this.SetProperty(CANV_ELEMENT_PROP_ACT_RIGHT,this.m_struct_obj.coord_act_right);             // Right border of the element active area
   this.SetProperty(CANV_ELEMENT_PROP_ACT_BOTTOM,this.m_struct_obj.coord_act_bottom);           // Bottom border of the element active area
   this.m_color_bg=this.m_struct_obj.color_bg;                                                  // Element background color
   this.m_opacity=this.m_struct_obj.opacity;                                                    // Element opacity
//--- Save real properties

//--- Save string properties
   this.SetProperty(CANV_ELEMENT_PROP_NAME_OBJ,::CharArrayToString(this.m_struct_obj.name_obj));// Graphical element object name
   this.SetProperty(CANV_ELEMENT_PROP_NAME_RES,::CharArrayToString(this.m_struct_obj.name_res));// Graphical resource name
  }
//+------------------------------------------------------------------+
En el método que crea un objeto de elemento gráfico, ahora borraremos completamente el fondo del objeto, rellenándolo de blanco transparente:
//+------------------------------------------------------------------+
//| Create the graphical element object                              |
//+------------------------------------------------------------------+
bool CGCnvElement::Create(const long chart_id,     // Chart ID
                          const int wnd_num,       // Chart subwindow
                          const string name,       // Element name
                          const int x,             // X coordinate
                          const int y,             // Y coordinate
                          const int w,             // Width
                          const int h,             // Height
                          const color colour,      // Background color
                          const uchar opacity,     // Opacity
                          const bool redraw=false) // Flag indicating the need to redraw

  {
   if(this.m_canvas.CreateBitmapLabel(chart_id,wnd_num,name,x,y,w,h,COLOR_FORMAT_ARGB_NORMALIZE))
     {
      this.Erase(NULL_COLOR);
      this.m_canvas.Update(redraw);
      this.m_shift_y=(int)::ChartGetInteger(chart_id,CHART_WINDOW_YDISTANCE,wnd_num);
      return true;
     }
   return false;
  }
//+------------------------------------------------------------------+
En el método que establece la opacidad de un elemento, ahora, en lugar de escribir en la propiedad remota del objeto, añadiremos la opacidad en la variable:
//+------------------------------------------------------------------+
//| Set the element opacity                                          |
//+------------------------------------------------------------------+
void CGCnvElement::SetOpacity(const uchar value,const bool redraw=false)
  {
   this.m_canvas.TransparentLevelSet(value);
   this.m_opacity=value;
   this.m_canvas.Update(redraw);
  }
//+------------------------------------------------------------------+
Nuevo método que cambia la claridad del color en la magnitud indicada:
//+------------------------------------------------------------------+
//| Change the color lightness by the specified amount               |
//+------------------------------------------------------------------+
uint CGCnvElement::ChangeColorLightness(const uint clr,const double change_value)
  {
   if(change_value==0.0)
      return clr;
   double a=GETRGBA(clr);
   double r=GETRGBR(clr);
   double g=GETRGBG(clr);
   double b=GETRGBB(clr);
   double h=0,s=0,l=0;
   CColors::RGBtoHSL(r,g,b,h,s,l);
   double nl=l+change_value;
   if(nl>1.0) nl=1.0;
   if(nl<0.0) nl=0.0;
   CColors::HSLtoRGB(h,s,nl,r,g,b);
   return ARGB(a,r,g,b);
  }
//+------------------------------------------------------------------+
Aquí:
Comprobamos el valor transmitido al método (el valor que usamos para cambiar la luminosidad), y si se transmite cero, no será necesario cambiar nada: retornaremos el color sin cambios .
A continuación, obtenemos por separado cada uno de los componentes de color ARGB transmitidos al método y convertimos los componentes RGB al modelo de color HSL.
Después de la transformación, los valores de cada uno de los componentes del modelo HSL se escribirán en las variables correspondientes (necesitamos el 1-er componente).
Añadimos el valor transmitido al método (los valores de change_value pueden estar entre -1.0 y 1.0) y lo ajustamos cuando se superen los intervalos de valores permitidos .
Luego convertimos el modelo HSL de nuevo a RGB y retornamos el modelo ARGB obtenido de los nuevos componentes de color formados a partir de la conversión de HSL a RGB.
Temas de color y tipos de formulario
La biblioteca ofrecerá soporte a la creación de varios objetos: elementos gráficos, formas basadas en ellos, ventanas, etc. Cada formulario, cada ventana, cada imagen (marcos, separadores, listas desplegables, etc.) pueden tener estilos de visualización completamente distintos. Pero resultaría extraño tener en un mismo programa distintos objetos que contengan diferentes estilos de dibujado, colores y tipos de diseño.
Para facilitar la escritura de objetos idénticos en aspecto y diseño, y que además pertenezcan al mismo programa, introduciremos estilos de dibujado, tipos de objetos y esquemas de color. Esto permitirá al usuario final elegir el estilo necesario y el tema de color en los ajustes del programa, mientras que el programador no tendrá que hacerse demasiadas preguntas a este respecto: los temas y estilos seleccionados reconstruirán inmediatamente todos los objetos según un mismo criterio. Bastará con realizar los cambios y adiciones necesarios al archivo de configuración gráfica, que enumerará todos los colores y parámetros necesarios de los objetos y primitivas.
Ya hemos pasado por una práctica similar, al crear la clase de mensajes de la biblioteca: tenemos una lista de índices de mensajes y una matriz de textos que se corresponden con los índices de mensajes. En casi todos los artículos nuevos, lo primero que hacemos es ingresar los nuevos datos allí.
Entonces, el archivo de ajustes gráficos se organizará de la misma manera: tendremos una enumeración con los temas de color y los estilos de objetos, y las matrices correspondientes, en las que introduciremos gradualmente los nuevos parámetros y sus valores para cada propiedad recién añadida, o para cada tema y colores recién creados.
En la carpeta raíz de la biblioteca \MQL5\Include\DoEasy\, creamos el nuevo archivo de inclusión GraphINI.mqh e introducimos el número de temas de color en él:
//+------------------------------------------------------------------+
//|                                                     GraphINI.mqh |
//|                                  Copyright 2021, MetaQuotes Ltd. |
//|                             https://mql5.com/en/users/artmedia70 |
//+------------------------------------------------------------------+
#property copyright "Copyright 2021, MetaQuotes Ltd."
#property link      "https://mql5.com/en/users/artmedia70"
//+------------------------------------------------------------------+
//| Macro substitutions                                              |
//+------------------------------------------------------------------+
#define TOTAL_COLOR_THEMES             (2)      // Number of color schemes
//+------------------------------------------------------------------+
Como ejemplo de uso de este archivo de configuración, dos temas de color serán más que suficientes. Aumentaremos su número posteriormente.
A continuación, introducimos los índices de los temas de color y los índices de los parámetros de un tema; cada tema tendrá el mismo número de parámetros:
//+------------------------------------------------------------------+
//|                                                     GraphINI.mqh |
//|                                  Copyright 2021, MetaQuotes Ltd. |
//|                             https://mql5.com/en/users/artmedia70 |
//+------------------------------------------------------------------+
#property copyright "Copyright 2021, MetaQuotes Ltd."
#property link      "https://mql5.com/en/users/artmedia70"
//+------------------------------------------------------------------+
//| Macro substitutions                                              |
//+------------------------------------------------------------------+
#define TOTAL_COLOR_THEMES             (2)      // Number of color schemes
//+------------------------------------------------------------------+
//| Enumerations                                                     |
//+------------------------------------------------------------------+
//+------------------------------------------------------------------+
//| List of color scheme indices                                     |
//+------------------------------------------------------------------+
enum ENUM_COLOR_THEMES
  {
   COLOR_THEME_BLUE_STEEL,                      // Blue steel
   COLOR_THEME_LIGHT_CYAN_GRAY,                 // Light cyan gray
  };
//+------------------------------------------------------------------+
//| List of indices of color scheme parameters                       |
//+------------------------------------------------------------------+
enum ENUM_COLOR_THEME_COLORS
  {
   COLOR_THEME_COLOR_FORM_BG,                   // Form background color
   COLOR_THEME_COLOR_FORM_FRAME,                // Form frame color
   COLOR_THEME_COLOR_FORM_FRAME_OUTER,          // Form outer frame color
   COLOR_THEME_COLOR_FORM_SHADOW,               // Form shadow color
  };
#define TOTAL_COLOR_THEME_COLORS       (4)      // Number of parameters in the color theme
//+------------------------------------------------------------------+
Según los nombres de las constantes de estas enumeraciones, resultará conveniente recurrir a cada tema de color específico y su parámetro requerido.
Más abajo, escribimos una matriz bidimensional que contendrá los temas de color en la primera dimensión y los índices de los parámetros de color para representar varias propiedades de los objetos en la segunda dimensión:
//+------------------------------------------------------------------+
//|                                                     GraphINI.mqh |
//|                                  Copyright 2021, MetaQuotes Ltd. |
//|                             https://mql5.com/en/users/artmedia70 |
//+------------------------------------------------------------------+
#property copyright "Copyright 2021, MetaQuotes Ltd."
#property link      "https://mql5.com/en/users/artmedia70"
//+------------------------------------------------------------------+
//| Macro substitutions                                              |
//+------------------------------------------------------------------+
#define TOTAL_COLOR_THEMES             (2)      // Number of color schemes
//+------------------------------------------------------------------+
//| Enumerations                                                     |
//+------------------------------------------------------------------+
//+------------------------------------------------------------------+
//| List of color scheme indices                                     |
//+------------------------------------------------------------------+
enum ENUM_COLOR_THEMES
  {
   COLOR_THEME_BLUE_STEEL,                      // Blue steel
   COLOR_THEME_LIGHT_CYAN_GRAY,                 // Light cyan gray
  };
//+------------------------------------------------------------------+
//| List of indices of color scheme parameters                       |
//+------------------------------------------------------------------+
enum ENUM_COLOR_THEME_COLORS
  {
   COLOR_THEME_COLOR_FORM_BG,                   // Form background color
   COLOR_THEME_COLOR_FORM_FRAME,                // Form frame color
   COLOR_THEME_COLOR_FORM_FRAME_OUTER,          // Form outer frame color
   COLOR_THEME_COLOR_FORM_SHADOW,               // Form shadow color
  };
#define TOTAL_COLOR_THEME_COLORS       (4)      // Number of parameters in the color theme
//+------------------------------------------------------------------+
//| The array containing color schemes                               |
//+------------------------------------------------------------------+
color array_color_themes[TOTAL_COLOR_THEMES][TOTAL_COLOR_THEME_COLORS]=
  {
//--- Parameters of the "Blue steel" color scheme
   {
      C'134,160,181',                           // Form background color
      C'134,160,181',                           // Form frame color
      clrDimGray,                               // Form outer frame color
      C'46,85,117',                             // Form shadow color
   },
//--- Parameters of the "Light cyan gray" color scheme
   {
      C'181,196,196',                           // Form background color
      C'181,196,196',                           // Form frame color
      clrGray,                                  // Form outer frame color
      C'130,147,153',                           // Form shadow color
   },
  };
//+------------------------------------------------------------------+
En esta matriz iremos añadiendo gradualmente nuevos colores para cada parámetro recién agregado del objeto gráfico, cuyo color debe depender del esquema de color seleccionado.
A continuación, introducimos las enumeraciones de los tipos de suavizado al dibujar las primitivas, los estilos de marco, los tipos y estilos de formulario, y luego las propias enumeraciones de los índices con las propiedades de los estilos de formulario y sus parámetros, al igual que para los temas de color:
//+------------------------------------------------------------------+
//| Smoothing types                                                  |
//+------------------------------------------------------------------+
enum ENUM_SMOOTHING_TYPE
  {
   SMOOTHING_TYPE_NONE,                         // No smoothing
   SMOOTHING_TYPE_AA,                           // Anti-aliasing
   SMOOTHING_TYPE_WU,                           // Wu
   SMOOTHING_TYPE_THICK,                        // Thick
   SMOOTHING_TYPE_DUAL,                         // Dual
  };
//+------------------------------------------------------------------+
//| Frame styles                                                     |
//+------------------------------------------------------------------+
enum ENUM_FRAME_STYLE
  {
   FRAME_STYLE_SIMPLE,                          // Simple frame
   FRAME_STYLE_FLAT,                            // Flat frame
   FRAME_STYLE_BEVEL,                           // Embossed (convex)
   FRAME_STYLE_STAMP,                           // Embossed (concave)
  };
//+------------------------------------------------------------------+
//| Form types                                                       |
//+------------------------------------------------------------------+
enum ENUM_FORM_TYPE
  {
   FORM_TYPE_SQUARE,                            // Rectangular
  };
//+------------------------------------------------------------------+
//| Form styles                                                      |
//+------------------------------------------------------------------+
enum ENUM_FORM_STYLE
  {
   FORM_STYLE_FLAT,                             // Flat form
   FORM_STYLE_BEVEL,                            // Embossed form
  };
#define TOTAL_FORM_STYLES
//+------------------------------------------------------------------+
//| List of form style parameter indices                             |
//+------------------------------------------------------------------+
enum ENUM_FORM_STYLE_PARAMS
  {
   FORM_STYLE_FRAME_WIDTH_LEFT,                 // Form frame width to the left
   FORM_STYLE_FRAME_WIDTH_RIGHT,                // Form frame width to the right
   FORM_STYLE_FRAME_WIDTH_TOP,                  // Form frame width on top
   FORM_STYLE_FRAME_WIDTH_BOTTOM,               // Form frame width below
   FORM_STYLE_FRAME_SHADOW_OPACITY,             // Shadow opacity
  };
#define TOTAL_FORM_STYLE_PARAMS        (5)      // Number of form style parameters
//+------------------------------------------------------------------+
//| Array containing form style parameters                           |
//+------------------------------------------------------------------+
int array_form_style[TOTAL_FORM_STYLES][TOTAL_FORM_STYLE_PARAMS]=
  {
//--- "Flat form" style parameters
   {
      3,                                        // Form frame width to the left
      3,                                        // Form frame width to the right
      3,                                        // Form frame width on top
      3,                                        // Form frame width below
      80,                                       // Shadow opacity
   },
//--- "Embossed form" style parameters
   {
      4,                                        // Form frame width to the left
      4,                                        // Form frame width to the right
      4,                                        // Form frame width on top
      4,                                        // Form frame width below
      100,                                      // Shadow opacity
   },
  };
//+------------------------------------------------------------------+
En esta segunda matriz, cuya lógica de construcción resulta idéntica a la matriz de temas de color, también añadiremos gradualmente nuevos parámetros para construir elementos, formas, ventanas y otros objetos cuyos parámetros deben depender del estilo de construcción elegido para la apariencia de los objetos.
Para permitirnos elegir el estilo deseado de construcción de objetos y el tema de color en nuestros programas, introduciremos nuevas enumeraciones para los parámetros de entrada de los programas en el archivo \MQL5\Include\DoEasy\InpData.mqh. Al principio, añadimos el archivo GraphINI.mqh recién creado:
//+------------------------------------------------------------------+
//|                                                      InpData.mqh |
//|                        Copyright 2020, MetaQuotes Software Corp. |
//|                             https://mql5.com/en/users/artmedia70 |
//+------------------------------------------------------------------+
#property copyright "Copyright 2020, MetaQuotes Software Corp."
#property link      "https://mql5.com/en/users/artmedia70"
//+------------------------------------------------------------------+
//| Include files                                                    |
//+------------------------------------------------------------------+
#include "GraphINI.mqh"
//+------------------------------------------------------------------+
Y después, en el bloque de código para la compilación en inglés y ruso, añadimos las nuevas enumeraciones de los parámetros de entrada para seleccionar el tema de color:
//+------------------------------------------------------------------+
//|                                                      InpData.mqh |
//|                        Copyright 2020, MetaQuotes Software Corp. |
//|                             https://mql5.com/en/users/artmedia70 |
//+------------------------------------------------------------------+
#property copyright "Copyright 2020, MetaQuotes Software Corp."
#property link      "https://mql5.com/en/users/artmedia70"
//+------------------------------------------------------------------+
//| Include files                                                    |
//+------------------------------------------------------------------+
#include "GraphINI.mqh"
//+------------------------------------------------------------------+
//| Macro substitutions                                              |
//+------------------------------------------------------------------+
#define COMPILE_EN // Comment out the string for compilation in Russian
//+------------------------------------------------------------------+
//| Input enumerations                                               |
//+------------------------------------------------------------------+
//+------------------------------------------------------------------+
//| English language inputs                                          |
//+------------------------------------------------------------------+
#ifdef COMPILE_EN
//+------------------------------------------------------------------+
//| Modes of working with symbols                                    |
//+------------------------------------------------------------------+
enum ENUM_SYMBOLS_MODE
  {
   SYMBOLS_MODE_CURRENT,                              // Work only with the current Symbol
   SYMBOLS_MODE_DEFINES,                              // Work with a given list of Symbols
   SYMBOLS_MODE_MARKET_WATCH,                         // Working with Symbols from the "Market Watch" window
   SYMBOLS_MODE_ALL                                   // Work with a complete list of Symbols
  };
//+------------------------------------------------------------------+
//| Mode of working with timeframes                                  |
//+------------------------------------------------------------------+
enum ENUM_TIMEFRAMES_MODE
  {
   TIMEFRAMES_MODE_CURRENT,                           // Work only with the current timeframe
   TIMEFRAMES_MODE_LIST,                              // Work with a given list of timeframes
   TIMEFRAMES_MODE_ALL                                // Work with a complete list of timeframes
  };
//+------------------------------------------------------------------+
//| "Yes"/"No"                                                       |
//+------------------------------------------------------------------+
enum ENUM_INPUT_YES_NO
  {
   INPUT_NO  = 0,                                     // No
   INPUT_YES = 1                                      // Yes
  };
//+------------------------------------------------------------------+
//| Select color themes                                              |
//+------------------------------------------------------------------+
enum ENUM_INPUT_COLOR_THEME
  {
   INPUT_COLOR_THEME_BLUE_STEEL,                      // Blue steel
   INPUT_COLOR_THEME_LIGHT_CYAN_GRAY,                 // Light cyan gray
  };
//+------------------------------------------------------------------+
//+------------------------------------------------------------------+
//| Russian language inputs                                          |
//+------------------------------------------------------------------+
#else
//+------------------------------------------------------------------+
//| Modes of working with symbols                                    |
//+------------------------------------------------------------------+
enum ENUM_SYMBOLS_MODE
  {
   SYMBOLS_MODE_CURRENT,                              // Работа только с текущим символом
   SYMBOLS_MODE_DEFINES,                              // Работа с заданным списком символов
   SYMBOLS_MODE_MARKET_WATCH,                         // Работа с символами из окна "Обзор рынка"
   SYMBOLS_MODE_ALL                                   // Работа с полным списком символов
  };
//+------------------------------------------------------------------+
//| Mode of working with timeframes                                  |
//+------------------------------------------------------------------+
enum ENUM_TIMEFRAMES_MODE
  {
   TIMEFRAMES_MODE_CURRENT,                           // Работа только с текущим таймфреймом
   TIMEFRAMES_MODE_LIST,                              // Работа с заданным списком таймфреймов
   TIMEFRAMES_MODE_ALL                                // Работа с полным списком таймфреймов
  };
//+------------------------------------------------------------------+
//| "Да"/"Нет"                                                       |
//+------------------------------------------------------------------+
enum ENUM_INPUT_YES_NO
  {
   INPUT_NO  = 0,                                     // Нет
   INPUT_YES = 1                                      // Да
  };
//+------------------------------------------------------------------+
//| Select color themes                                              |
//+------------------------------------------------------------------+
enum ENUM_COLOR_THEME
  {
   COLOR_THEME_BLUE_STEEL,                            // Голубая сталь
   COLOR_THEME_LIGHT_CYAN_GRAY,                       // Светлый серо-циановый
  };
//+------------------------------------------------------------------+
#endif
//+------------------------------------------------------------------+
Esto nos permitirá elegir el esquema de color deseado al iniciar el programa. En el futuro, añadiremos aquí y la selección de los estilos para dibujar los objetos y sus tipos de construcción.
Clase de objeto "formulario"
Un objeto de formulario es una versión más avanzada de un objeto de elemento gráfico. El formulario nos permitirá dibujar marcos "con volumen" y otras primitivas, adjuntando para ello otros elementos. Naturalmente, podemos dibujar en el elemento lo que queramos "manualmente", pero el formulario nos permitirá automatizar este proceso.
En la carpeta E:\MetaQuotes\MetaTrader 5\MQL5\Include\DoEasy\Objects\Graph\, crearemos un nuevo archivo Form.mqh de la clase CForm. La clase debe heredarse del objeto del elemento gráfico de la forma correspondiente, y también debemos incluir el archivo del objeto de elemento:
//+------------------------------------------------------------------+
//|                                                         Form.mqh |
//|                                  Copyright 2021, MetaQuotes Ltd. |
//|                             https://mql5.com/en/users/artmedia70 |
//+------------------------------------------------------------------+
#property copyright "Copyright 2021, MetaQuotes Ltd."
#property link      "https://mql5.com/en/users/artmedia70"
#property version   "1.00"
#property strict    // Necessary for mql4
//+------------------------------------------------------------------+
//| Include files                                                    |
//+------------------------------------------------------------------+
#include "GCnvElement.mqh"
//+------------------------------------------------------------------+
//| Form object class                                                |
//+------------------------------------------------------------------+
class CForm : public CGCnvElement
  {
  }
En la sección privada de la clase, declararemos los objetos necesarios para la trabajar, las variables y los métodos auxiliares de la clase:
//+------------------------------------------------------------------+
//| Form object class                                                |
//+------------------------------------------------------------------+
class CForm : public CGCnvElement
  {
private:
   CArrayObj         m_list_elements;                          // List of attached elements
   CGCnvElement     *m_shadow_obj;                             // Pointer to the shadow object
   color             m_color_frame;                            // Form frame color
   color             m_color_shadow;                           // Form shadow color
   int               m_frame_width_left;                       // Form frame width to the left
   int               m_frame_width_right;                      // Form frame width to the right
   int               m_frame_width_top;                        // Form frame width at the top
   int               m_frame_width_bottom;                     // Form frame width at the bottom

//--- Initialize the variables
   void              Initialize(void);

//--- Create a new graphical object
   CGCnvElement     *CreateNewGObject(const ENUM_GRAPH_ELEMENT_TYPE type,
                                      const int element_num,
                                      const string name,
                                      const int x,
                                      const int y,
                                      const int w,
                                      const int h,
                                      const color colour,
                                      const uchar opacity,
                                      const bool movable,
                                      const bool activity);

public:
La sección pública de la clase contiene los métodos estándar para los objetos de la biblioteca, así como varios constructores: tanto por defecto como otros que permiten crear un objeto de formulario en el gráfico especificado y la subventana especificada, en la subventana especificada del gráfico actual y en el gráfico actual en la ventana principal:
public:
   //--- Constructors
                     CForm(const long chart_id,
                           const int subwindow,
                           const string name,
                           const int x,
                           const int y,
                           const int w,
                           const int h);
                     CForm(const int subwindow,
                           const string name,
                           const int x,
                           const int y,
                           const int w,
                           const int h);
                     CForm(const string name,
                           const int x,
                           const int y,
                           const int w,
                           const int h);
                     CForm() { this.Initialize(); }
//--- Destructor
                    ~CForm();

//--- Supported form properties (1) integer and (2) string ones
   virtual bool      SupportProperty(ENUM_CANV_ELEMENT_PROP_INTEGER property) { return true; }
   virtual bool      SupportProperty(ENUM_CANV_ELEMENT_PROP_STRING property)  { return true; }

//--- Return (1) the list of attached objects and (2) the shadow object
   CArrayObj        *GetList(void)                                            { return &this.m_list_elements;  }
   CGCnvElement     *GetShadowObj(void)                                       { return this.m_shadow_obj;      }
A continuación, declaramos los métodos para trabajar con el objeto de formulario:
//--- Set the form (1) color scheme and (2) style
   virtual void      SetColorTheme(const ENUM_COLOR_THEMES theme,const uchar opacity);
   virtual void      SetFormStyle(const ENUM_FORM_STYLE style,
                                  const ENUM_COLOR_THEMES theme,
                                  const uchar opacity,
                                  const bool shadow=false,
                                  const bool redraw=false);

//--- Create a new attached element
   bool              CreateNewElement(const int element_num,
                                      const string name,
                                      const int x,
                                      const int y,
                                      const int w,
                                      const int h,
                                      const color colour,
                                      const uchar opacity,
                                      const bool movable,
                                      const bool activity);

//--- Create a shadow object
   void              CreateShadow(const uchar opacity);
//--- Draw an object shadow
   void              DrawShadow(const uchar opacity);

//--- Draw the form frame
   void              DrawFormFrame(const int wd_top,                          // Frame upper segment width
                                   const int wd_bottom,                       // Frame lower segment width
                                   const int wd_left,                         // Frame left segment width
                                   const int wd_right,                        // Frame right segment width
                                   const color colour,                        // Frame color
                                   const uchar opacity,                       // Frame opacity
                                   const ENUM_FRAME_STYLE style);             // Frame style
//--- Draw a simple frame
   void              DrawFrameSimple(const int x,                             // X coordinate relative to the form
                                     const int y,                             // Y coordinate relative to the form
                                     const int width,                         // Frame width
                                     const int height,                        // Frame height
                                     const int wd_top,                        // Frame upper segment width
                                     const int wd_bottom,                     // Frame lower segment width
                                     const int wd_left,                       // Frame left segment width
                                     const int wd_right,                      // Frame right segment width
                                     const color colour,                      // Frame color
                                     const uchar opacity);                    // Frame opacity
//--- Draw a flat frame
   void              DrawFrameFlat(const int x,                               // X coordinate relative to the form
                                   const int y,                               // Y coordinate relative to the form
                                   const int width,                           // Frame width
                                   const int height,                          // Frame height
                                   const int wd_top,                          // Frame upper segment width
                                   const int wd_bottom,                       // Frame lower segment width
                                   const int wd_left,                         // Frame left segment width
                                   const int wd_right,                        // Frame right segment width
                                   const color colour,                        // Frame color
                                   const uchar opacity);                      // Frame opacity

//--- Draw an embossed (convex) frame
   void              DrawFrameBevel(const int x,                              // X coordinate relative to the form
                                    const int y,                              // Y coordinate relative to the form
                                    const int width,                          // Frame width
                                    const int height,                         // Frame height
                                    const int wd_top,                         // Frame upper segment width
                                    const int wd_bottom,                      // Frame lower segment width
                                    const int wd_left,                        // Frame left segment width
                                    const int wd_right,                       // Frame right segment width
                                    const color colour,                       // Frame color
                                    const uchar opacity);                     // Frame opacity

//--- Draw an embossed (concave) frame
   void              DrawFrameStamp(const int x,                              // X coordinate relative to the form
                                    const int y,                              // Y coordinate relative to the form
                                    const int width,                          // Frame width
                                    const int height,                         // Frame height
                                    const int wd_top,                         // Frame upper segment width
                                    const int wd_bottom,                      // Frame lower segment width
                                    const int wd_left,                        // Frame left segment width
                                    const int wd_right,                       // Frame right segment width
                                    const color colour,                       // Frame color
                                    const uchar opacity);                     // Frame opacity

//--- Draw a simple field
   void              DrawFieldFlat(const int x,                               // X coordinate relative to the form
                                   const int y,                               // Y coordinate relative to the form
                                   const int width,                           // Field width
                                   const int height,                          // Field height
                                   const color colour,                        // Field color
                                   const uchar opacity);                      // Field opacity

//--- Draw an embossed (convex) field
   void              DrawFieldBevel(const int x,                              // X coordinate relative to the form
                                    const int y,                              // Y coordinate relative to the form
                                    const int width,                          // Field width
                                    const int height,                         // Field height
                                    const color colour,                       // Field color
                                    const uchar opacity);                     // Field opacity

//--- Draw an embossed (concave) field
   void              DrawFieldStamp(const int x,                              // X coordinate relative to the form
                                    const int y,                              // Y coordinate relative to the form
                                    const int width,                          // Field width
                                    const int height,                         // Field height
                                    const color colour,                       // Field color
                                    const uchar opacity);                     // Field opacity

//+------------------------------------------------------------------+
//| Methods of simplified access to object properties                |
//+------------------------------------------------------------------+
//--- (1) Set and (2) get the form frame color
   void              SetColorFrame(const color colour)                        { this.m_color_frame=colour;  }
   color             ColorFrame(void)                                   const { return this.m_color_frame;  }
//--- (1) Set and (2) return the form shadow color
   void              SetColorShadow(const color colour)                       { this.m_color_shadow=colour; }
   color             ColorShadow(void)                                  const { return this.m_color_shadow; }

  };
//+------------------------------------------------------------------+
Vamos a analizar con más detalle los métodos declarados.
Constructor con indicación del identificador del gráfico y la subventana:
//+------------------------------------------------------------------+
//| Constructor indicating the chart and subwindow ID                |
//+------------------------------------------------------------------+
CForm::CForm(const long chart_id,
             const int subwindow,
             const string name,
             const int x,
             const int y,
             const int w,
             const int h) : CGCnvElement(GRAPH_ELEMENT_TYPE_FORM,chart_id,subwindow,name,x,y,w,h)
  {
   this.Initialize();
  }
//+------------------------------------------------------------------+
Transmitimos al constructor el identificador del gráfico, el número de la subventana en la que se debe crear el objeto de formulario, su nombre, las coordenadas de la esquina superior izquierda del formulario y sus dimensiones. En la lista de inicialización, llamamos al constructor de la clase del objeto de elemento, indicando el tipo de objeto "Formulario". En el cuerpo de la clase, llamamos al método de inicialización.
Constructor en el gráfico actual con indicación de la subventana:
//+------------------------------------------------------------------+
//| Current chart constructor specifying the subwindow               |
//+------------------------------------------------------------------+
CForm::CForm(const int subwindow,
             const string name,
             const int x,
             const int y,
             const int w,
             const int h) : CGCnvElement(GRAPH_ELEMENT_TYPE_FORM,::ChartID(),subwindow,name,x,y,w,h)
  {
   this.Initialize();
  }
//+------------------------------------------------------------------+
Transmitimos al constructor el número de la subventana en la que deseamos crear el objeto de formulario (el gráfico es el actual), el nombre del objeto de formulario, las coordenadas de la esquina superior izquierda del formulario y sus dimensiones. En la lista de inicialización, llamamos al constructor de la clase del objeto de elemento, indicando el tipo de objeto "Formulario" y el identificador del gráfico actual. En el cuerpo de la clase, llamamos al método de inicialización.
Constructor en el gráfico actual en la ventana principal del gráfico:
//+------------------------------------------------------------------+
//| Constructor on the current chart in the main chart window        |
//+------------------------------------------------------------------+
CForm::CForm(const string name,
             const int x,
             const int y,
             const int w,
             const int h) : CGCnvElement(GRAPH_ELEMENT_TYPE_FORM,::ChartID(),0,name,x,y,w,h)
  {
   this.Initialize();
  }
//+------------------------------------------------------------------+
Transmitimos al constructor el nombre del objeto de formulario, las coordenadas de la esquina superior izquierda del formulario y sus dimensiones. En la lista de inicialización, llamamos al constructor de la clase del objeto de elemento, indicando el tipo de objeto "Formulario", el identificador del gráfico actual y el número de la ventana principal (0). En el cuerpo de la clase, llamamos al método de inicialización.
En el destructor de la clase, verificamos la validez del puntero al objeto de sombra y borramos el objeto, si existe:
//+------------------------------------------------------------------+
//| Destructor                                                       |
//+------------------------------------------------------------------+
CForm::~CForm()
  {
   if(m_shadow_obj!=NULL)
      delete m_shadow_obj;
  }
//+------------------------------------------------------------------+
Método de inicialización de variables:
//+------------------------------------------------------------------+
//| Initialize the variables                                         |
//+------------------------------------------------------------------+
void CForm::Initialize(void)
  {
   this.m_list_elements.Clear();
   this.m_list_elements.Sort();
   this.m_shadow_obj=NULL;
   this.m_shadow=false;
   this.m_frame_width_right=2;
   this.m_frame_width_left=2;
   this.m_frame_width_top=2;
   this.m_frame_width_bottom=2;
  }
//+------------------------------------------------------------------+
Aquí, borramos la lista de elementos adjuntos al formulario, le asignamos la bandera de lista clasificada e indicamos los valores por defecto para el puntero al objeto de sombra (NULL), el indicador para dibujar la sombra (false) y el tamaño del marco del formulario (2 píxeles en cada lado).
Método privado que crea un nuevo objeto gráfico:
//+------------------------------------------------------------------+
//| Create a new graphical object                                    |
//+------------------------------------------------------------------+
CGCnvElement *CForm::CreateNewGObject(const ENUM_GRAPH_ELEMENT_TYPE type,
                                      const int obj_num,
                                      const string obj_name,
                                      const int x,
                                      const int y,
                                      const int w,
                                      const int h,
                                      const color colour,
                                      const uchar opacity,
                                      const bool movable,
                                      const bool activity)
  {
   int pos=::StringLen(::MQLInfoString(MQL_PROGRAM_NAME));
   string pref=::StringSubstr(NameObj(),pos+1);
   string name=pref+"_"+obj_name;
   CGCnvElement *element=new CGCnvElement(type,this.ID(),obj_num,this.ChartID(),this.SubWindow(),name,x,y,w,h,colour,opacity,movable,activity);
   if(element==NULL)
      ::Print(DFUN,CMessage::Text(MSG_LIB_SYS_FAILED_CREATE_ELM_OBJ),": ",name);
   return element;
  }
//+------------------------------------------------------------------+
Transmitimos al método todos los parámetros necesarios para crear un nuevo objeto: el tipo, el número en la lista de objetos adjuntos, el nombre, las coordenadas y las dimensiones, el color, la opacidad y las banderas de movilidad y actividad del objeto.
En el cuerpo de la clase, extraemos la terminación del nombre del objeto (el nombre consta del nombre del programa y el nombre del objeto al crear el mismo). Necesitamos extraer el nombre del objeto al crearse este y añadir el nombre transmitido al método.
Así, por ejemplo, de este nombre "Nombre_del_programa_Formulario01", extraemos la sublínea "Formulario01" y añadimos a esta línea el nombre transmitido al método. Si creamos un objeto de sombra y transmitimos el nombre "Sombra", entonces el nombre del objeto será "Formulario01_ Sombra", y el nombre final del objeto creado será así: "Nombre_del_programa_Formulario01_Sombra".
A continuación, creamos un nuevo objeto indicando su tipo y los parámetros del gráfico sobre el que crearemos el objeto de formulario actual, el nombre creado para él y el resto de parámetros transmitidos al método. Retorna al método el puntero al objeto creado, o NULL en caso de fallo.
Método que crea un nuevo elemento adjunto:
//+------------------------------------------------------------------+
//| Create a new attached element                                    |
//+------------------------------------------------------------------+
bool CForm::CreateNewElement(const int element_num,
                             const string element_name,
                             const int x,
                             const int y,
                             const int w,
                             const int h,
                             const color colour,
                             const uchar opacity,
                             const bool movable,
                             const bool activity)
  {
   CGCnvElement *obj=this.CreateNewGObject(GRAPH_ELEMENT_TYPE_ELEMENT,element_num,element_name,x,y,w,h,colour,opacity,movable,activity);
   if(obj==NULL)
      return false;
   this.m_list_elements.Sort(SORT_BY_CANV_ELEMENT_NAME_OBJ);
   int index=this.m_list_elements.Search(obj);
   if(index>WRONG_VALUE)
     {
      ::Print(DFUN,CMessage::Text(MSG_LIB_SYS_OBJ_ALREADY_IN_LIST),": ",obj.NameObj());
      delete obj;
      return false;
     }
   if(!this.m_list_elements.Add(obj))
     {
      ::Print(DFUN,CMessage::Text(MSG_LIB_SYS_FAILED_OBJ_ADD_TO_LIST),": ",obj.NameObj());
      delete obj;
      return false;
     }
   return true;
  }
//+------------------------------------------------------------------+
El método crea un nuevo objeto de elemento gráfico usando el método anterior y lo añade a la lista de objetos adjuntos al objeto de formulario. Si no hemos podido crear un nuevo objeto, o bien no hemos podido añadirlo a la lista de objetos adjuntos, se mostrará un mensaje de error y se retornará false. Tras crear con éxito un nuevo elemento y añadirlo a la lista, se retornará true.
Método que crea el objeto de sombra:
//+------------------------------------------------------------------+
//| Create the shadow object                                         |
//+------------------------------------------------------------------+
void CForm::CreateShadow(const uchar opacity)
  {
//--- If the shadow flag is disabled, exit
   if(!this.m_shadow)
      return;
//--- Calculate the shadow object coordinates according to the offset from the top and left
   int x=this.CoordX()-OUTER_AREA_SIZE;
   int y=this.CoordY()-OUTER_AREA_SIZE;
//--- Calculate the width and height in accordance with the top, bottom, left and right offsets
   int w=this.Width()+OUTER_AREA_SIZE*2;
   int h=this.Height()+OUTER_AREA_SIZE*2;
//--- Create a new element object and set the pointer to it in the variable
   this.m_shadow_obj=this.CreateNewGObject(GRAPH_ELEMENT_TYPE_ELEMENT,-1,"Shadow",x,y,w,h,this.m_chart_color_bg,opacity,Movable(),false);
   if(this.m_shadow_obj==NULL)
      return;
//--- Move the form object to the foreground
   this.BringToTop();
  }
//+------------------------------------------------------------------+
Comentamos la lógica del método en su listado. En resumen: como el objeto de elemento sobre el que deseamos dibujar la sombra debe ser más grande que el objeto de formulario para el que se ha creado (necesitamos espacio libre por arriba, por abajo, a la izquierda y a la derecha para dibujar la sombra), el tamaño del nuevo objeto se calculará según los valores de la macrosustitución OUTER_AREA_SIZE.
Después de crear correctamente el objeto, este se elevará automáticamente por encima del objeto de formulario en el que se ha creado. Por consiguiente, deberemos desplazar forzosamente el objeto de formulario al primer plano, lo cual haremos al final del método.
Método para dibujar la sombra:
//+------------------------------------------------------------------+
//| Draw the shadow                                                  |
//+------------------------------------------------------------------+
void CForm::DrawShadow(const uchar opacity)
  {
//--- If the shadow flag is disabled, exit
   if(!this.m_shadow)
      return;
//--- Calculate rectangle coordinates relative to the shadow object borders
   int x=OUTER_AREA_SIZE+1;
   int y=OUTER_AREA_SIZE+1;
//--- Draw a filled rectangle starting from the calculated coordinates and having the size of the current form object
   m_shadow_obj.DrawRectangleFill(x,y,x+Width(),y+Height(),this.ColorShadow(),opacity);
//--- Update the shadow object for displaying changes
   m_shadow_obj.Update();
   return;
  }
//+------------------------------------------------------------------+
Comentamos la lógica del método en su código. Este método supone actualmente solo una plantilla para crear un método completo para dibujar las sombras de los objetos. Actualmente, el método solo dibuja un rectángulo sencillo desplazado hacia la parte inferior derecha "por debajo" del objeto actual en el objeto de elemento creado para dibujar sombras.
Método que establece el esquema de color:
//+------------------------------------------------------------------+
//| Set a color scheme                                               |
//+------------------------------------------------------------------+
void CForm::SetColorTheme(const ENUM_COLOR_THEMES theme,const uchar opacity)
  {
   this.SetOpacity(opacity);
   this.SetColorBackground(array_color_themes[theme][COLOR_THEME_COLOR_FORM_BG]);
   this.SetColorFrame(array_color_themes[theme][COLOR_THEME_COLOR_FORM_FRAME]);
   this.SetColorShadow(array_color_themes[theme][COLOR_THEME_COLOR_FORM_SHADOW]);
  }
//+------------------------------------------------------------------+
El método se usa para establecer el tema de color indicado en el objeto. Transmitimos al método el tema necesario y el valor de opacidad del objeto de formulario. A continuación, establecemos el valor de opacidad del formulario, el color de fondo del formulario, el color del marco del formulario y el color de la sombra del formulario partiendo de los valores registrados en la matriz de temas de color que creamos anteriormente.
Método para configurar el estilo del formulario:
//+------------------------------------------------------------------+
//| Set the form style                                               |
//+------------------------------------------------------------------+
void CForm::SetFormStyle(const ENUM_FORM_STYLE style,
                         const ENUM_COLOR_THEMES theme,
                         const uchar opacity,
                         const bool shadow=false,
                         const bool redraw=false)
  {
//--- Set opacity parameters and the size of the form frame side
   this.m_shadow=shadow;
   this.m_frame_width_top=array_form_style[style][FORM_STYLE_FRAME_WIDTH_TOP];
   this.m_frame_width_bottom=array_form_style[style][FORM_STYLE_FRAME_WIDTH_BOTTOM];
   this.m_frame_width_left=array_form_style[style][FORM_STYLE_FRAME_WIDTH_LEFT];
   this.m_frame_width_right=array_form_style[style][FORM_STYLE_FRAME_WIDTH_RIGHT];
//--- Set a color scheme
   this.SetColorTheme(theme,opacity);
//--- Create the shadow object and draw a simple distinct shadow
   this.CreateShadow((uchar)array_form_style[style][FORM_STYLE_FRAME_SHADOW_OPACITY]);
   this.DrawShadow((uchar)array_form_style[style][FORM_STYLE_FRAME_SHADOW_OPACITY]);
//--- Fill in the form background with color and opacity
   this.Erase(this.ColorBackground(),this.Opacity());
//--- Depending on the selected form style, draw the corresponding form frame and the outer bounding frame
   switch(style)
     {
      case FORM_STYLE_BEVEL   :
        this.DrawFormFrame(this.m_frame_width_top,this.m_frame_width_bottom,this.m_frame_width_left,this.m_frame_width_right,this.ColorFrame(),this.Opacity(),FRAME_STYLE_BEVEL);
        this.DrawRectangle(0,0,Width()-1,Height()-1,array_color_themes[theme][COLOR_THEME_COLOR_FORM_FRAME_OUTER],this.Opacity());
        break;
      //---FORM_STYLE_FLAT
      default:
        this.DrawFormFrame(this.m_frame_width_top,this.m_frame_width_bottom,this.m_frame_width_left,this.m_frame_width_right,this.ColorFrame(),this.Opacity(),FRAME_STYLE_FLAT);
        this.DrawRectangle(0,0,Width()-1,Height()-1,array_color_themes[theme][COLOR_THEME_COLOR_FORM_FRAME_OUTER],this.Opacity());
        break;
     }
  }
//+------------------------------------------------------------------+
Comentamos la lógica del método en su listado.
En esencia, este método supone un ejemplo de cómo crear un objeto de formulario con los parámetros necesarios.
Método para dibujar el marco del formulario:
//+------------------------------------------------------------------+
//| Draw the form frame                                              |
//+------------------------------------------------------------------+
void CForm::DrawFormFrame(const int wd_top,              // Frame upper segment width
                          const int wd_bottom,           // Frame lower segment width
                          const int wd_left,             // Frame left segment width
                          const int wd_right,            // Frame right segment width
                          const color colour,            // Frame color
                          const uchar opacity,           // Frame opacity
                          const ENUM_FRAME_STYLE style)  // Frame style
  {
//--- Depending on the passed frame style
   switch(style)
     {
      //--- draw a dimensional (convex) frame
      case FRAME_STYLE_BEVEL :
         DrawFrameBevel(0,0,Width(),Height(),wd_top,wd_bottom,wd_left,wd_right,colour,opacity);
        break;
      //--- draw a dimensional (concave) frame
      case FRAME_STYLE_STAMP :
         DrawFrameStamp(0,0,Width(),Height(),wd_top,wd_bottom,wd_left,wd_right,colour,opacity);
        break;
      //--- draw a flat frame
      case FRAME_STYLE_FLAT :
         DrawFrameFlat(0,0,Width(),Height(),wd_top,wd_bottom,wd_left,wd_right,colour,opacity);
        break;
      //--- draw a simple frame
      default:
        //---FRAME_STYLE_SIMPLE
         DrawFrameSimple(0,0,Width(),Height(),wd_top,wd_bottom,wd_left,wd_right,colour,opacity);
        break;
     }
  }
//+------------------------------------------------------------------+
Dependiendo del estilo del marco, dibujamos el marco correspondiente del formulario.
Método que dibuja un marco simple:
//+------------------------------------------------------------------+
//| Draw a simple frame                                              |
//+------------------------------------------------------------------+
void CForm::DrawFrameSimple(const int x,           // X coordinate relative to the form
                            const int y,           // Y coordinate relative to the form
                            const int width,       // Frame width
                            const int height,      // Frame height
                            const int wd_top,      // Frame upper segment width
                            const int wd_bottom,   // Frame lower segment width
                            const int wd_left,     // Frame left segment width
                            const int wd_right,    // Frame right segment width
                            const color colour,    // Frame color
                            const uchar opacity)   // Frame opacity
  {
//--- Set rectangle coordinates
   int x1=x, y1=y;
   int x2=x1+width-1;
   int y2=y1+height-1;
//--- Draw the first rectangle
   CGCnvElement::DrawRectangle(x1,y1,x2,y2,colour,opacity);
//--- If the frame width exceeds 1 on all sides, draw the second rectangle
   if(wd_left>1 || wd_right>1 || wd_top>1 || wd_bottom>1)
      CGCnvElement::DrawRectangle(x1+wd_left-1,y1+wd_top-1,x2-wd_right+1,y2-wd_bottom+1,colour,opacity);
//--- Search for "voids" between the lines of two rectangles and fill them with color
   if(wd_left>2 && wd_right>2 && wd_top>2 && wd_bottom>2)
      this.Fill(x1+1,y1+1,colour,opacity);
   else if(wd_left>2 && wd_top>2)
      this.Fill(x1+1,y1+1,colour,opacity);
   else if(wd_right>2 && wd_bottom>2)
      this.Fill(x2-1,y2-1,colour,opacity);
   else if(wd_left<3 && wd_right<3)
     {
      if(wd_top>2)
         this.Fill(x1+1,y1+1,colour,opacity);
      if(wd_bottom>2)
         this.Fill(x1+1,y2-1,colour,opacity);
     }
   else if(wd_top<3 && wd_bottom<3)
     {
      if(wd_left>2)
         this.Fill(x1+1,y1+1,colour,opacity);
      if(wd_right>2)
         this.Fill(x2-1,y1+1,colour,opacity);
     }
  }
//+------------------------------------------------------------------+
Comentamos la lógica del método en el código. Resumiendo: dibuja dos rectángulos, uno dentro del otro. Si existen vacíos entre los rectángulos dibujados en los lugares que forman los lados del futuro marco (los lados de los rectángulos no se tocan), los rellenaremos con el mismo color en el que están dibujados los rectángulos.
Método para dibujar un marco plano:
//+------------------------------------------------------------------+
//| Draw the flat frame                                              |
//+------------------------------------------------------------------+
void CForm::DrawFrameFlat(const int x,
                          const int y,
                          const int width,
                          const int height,
                          const int wd_top,
                          const int wd_bottom,
                          const int wd_left,
                          const int wd_right,
                          const color colour,
                          const uchar opacity)
  {
//--- Draw a simple frame
   this.DrawFrameSimple(x,y,width,height,wd_top,wd_bottom,wd_left,wd_right,colour,opacity);
//--- If the width of the frame top and bottom exceeds one pixel
   if(wd_top>1 && wd_bottom>1)
     {
      //--- Darken the horizontal sides of the frame
      for(int i=0;i<width;i++)
        {
         this.m_canvas.PixelSet(x+i,y,CGCnvElement::ChangeColorLightness(this.GetPixel(x+i,y),-0.05));
         this.m_canvas.PixelSet(x+i,y+height-1,CGCnvElement::ChangeColorLightness(this.GetPixel(x+i,y+height-1),-0.07));
        }
     }
//--- If the width of the frame left and right sides exceeds one pixel
   if(wd_left>1 && wd_right>1)
     {
      //--- Darken the vertical sides of the frame
      for(int i=1;i<height-1;i++)
        {
         this.m_canvas.PixelSet(x,y+i,CGCnvElement::ChangeColorLightness(this.GetPixel(x,y+1),-0.01));
         this.m_canvas.PixelSet(x+width-1,y+i,CGCnvElement::ChangeColorLightness(this.GetPixel(x+width-1,y+1),-0.02));
        }
     }
  }
//+------------------------------------------------------------------+
Método para dibujar un marco con relieve (convexo):
//+------------------------------------------------------------------+
//| Draw an embossed (convex) frame                                  |
//+------------------------------------------------------------------+
void CForm::DrawFrameBevel(const int x,
                           const int y,
                           const int width,
                           const int height,
                           const int wd_top,
                           const int wd_bottom,
                           const int wd_left,
                           const int wd_right,
                           const color colour,
                           const uchar opacity)
  {
//--- Draw a simple frame
   this.DrawFrameSimple(x,y,width,height,wd_top,wd_bottom,wd_left,wd_right,colour,opacity);
//--- If the width of the frame top and bottom exceeds one pixel
   if(wd_top>1 && wd_bottom>1)
     {
      //--- Lighten and darken the required sides of the frame edges
      for(int i=0;i<width;i++)
        {
         this.m_canvas.PixelSet(x+i,y,CGCnvElement::ChangeColorLightness(this.GetPixel(x+i,y),0.25));
         this.m_canvas.PixelSet(x+i,y+height-1,CGCnvElement::ChangeColorLightness(this.GetPixel(x+i,y+height-1),-0.2));
        }
      for(int i=wd_left;i<width-wd_right;i++)
        {
         this.m_canvas.PixelSet(x+i,y+wd_top-1,CGCnvElement::ChangeColorLightness(this.GetPixel(x+i,y+wd_top-1),-0.2));
         this.m_canvas.PixelSet(x+i,y+height-wd_bottom,CGCnvElement::ChangeColorLightness(this.GetPixel(x+i,y+height-wd_bottom),0.1));
        }
     }
//--- If the width of the frame left and right sides exceeds one pixel
   if(wd_left>1 && wd_right>1)
     {
      //--- Lighten and darken the required sides of the frame edges
      for(int i=1;i<height-1;i++)
        {
         this.m_canvas.PixelSet(x,y+i,CGCnvElement::ChangeColorLightness(this.GetPixel(x,y+i),0.1));
         this.m_canvas.PixelSet(x+width-1,y+i,CGCnvElement::ChangeColorLightness(this.GetPixel(x+width-1,y+i),-0.1));
        }
      for(int i=wd_top;i<height-wd_bottom;i++)
        {
         this.m_canvas.PixelSet(x+wd_left-1,y+i,CGCnvElement::ChangeColorLightness(this.GetPixel(x+wd_left-1,y+i),-0.1));
         this.m_canvas.PixelSet(x+width-wd_right,y+i,CGCnvElement::ChangeColorLightness(this.GetPixel(x+width-wd_right,y+i),0.1));
        }
     }
  }
//+------------------------------------------------------------------+
Método para dibujar un marco con relieve (cóncavo):
//+------------------------------------------------------------------+
//| Draw an embossed (concave) frame                                 |
//+------------------------------------------------------------------+
void CForm::DrawFrameStamp(const int x,
                           const int y,
                           const int width,
                           const int height,
                           const int wd_top,
                           const int wd_bottom,
                           const int wd_left,
                           const int wd_right,
                           const color colour,
                           const uchar opacity)
  {
//--- Draw a simple frame
   this.DrawFrameSimple(x,y,width,height,wd_top,wd_bottom,wd_left,wd_right,colour,opacity);
//--- If the width of the frame top and bottom exceeds one pixel
   if(wd_top>1 && wd_bottom>1)
     {
      //--- Lighten and darken the required sides of the frame edges
      for(int i=0;i<width;i++)
        {
         this.m_canvas.PixelSet(x+i,y,CGCnvElement::ChangeColorLightness(this.GetPixel(x+i,y),-0.25));
         this.m_canvas.PixelSet(x+i,y+height-1,CGCnvElement::ChangeColorLightness(this.GetPixel(x+i,y+height-1),0.2));
        }
      for(int i=wd_left;i<width-wd_right;i++)
        {
         this.m_canvas.PixelSet(x+i,y+wd_top-1,CGCnvElement::ChangeColorLightness(this.GetPixel(x+i,y+wd_top-1),0.2));
         this.m_canvas.PixelSet(x+i,y+height-wd_bottom,CGCnvElement::ChangeColorLightness(this.GetPixel(x+i,y+height-wd_bottom),-0.25));
        }
     }
//--- If the width of the frame left and right sides exceeds one pixel
   if(wd_left>1 && wd_right>1)
     {
      //--- Lighten and darken the required sides of the frame edges
      for(int i=1;i<height-1;i++)
        {
         this.m_canvas.PixelSet(x,y+i,CGCnvElement::ChangeColorLightness(this.GetPixel(x,y+i),-0.1));
         this.m_canvas.PixelSet(x+width-1,y+i,CGCnvElement::ChangeColorLightness(this.GetPixel(x+width-1,y+i),0.2));
        }
      for(int i=wd_top;i<height-wd_bottom;i++)
        {
         this.m_canvas.PixelSet(x+wd_left-1,y+i,CGCnvElement::ChangeColorLightness(this.GetPixel(x+wd_left-1,y+i),0.2));
         this.m_canvas.PixelSet(x+width-wd_right,y+i,CGCnvElement::ChangeColorLightness(this.GetPixel(x+width-wd_right,y+i),-0.2));
        }
     }
  }
//+------------------------------------------------------------------+
Métodos que dibujan los campos (simple y con relieve):
//+------------------------------------------------------------------+
//| Draw a simple field                                              |
//+------------------------------------------------------------------+
void CForm::DrawFieldFlat(const int x,const int y,const int width,const int height,const color colour,const uchar opacity)
  {
//--- Draw a filled rectangle
   CGCnvElement::DrawRectangleFill(x,y,x+width-1,y+height-1,colour,opacity);
//--- Darken all its edges
   for(int i=0;i<width;i++)
     {
      this.m_canvas.PixelSet(x+i,y,CGCnvElement::ChangeColorLightness(this.GetPixel(x+i,y),-0.05));
      this.m_canvas.PixelSet(x+i,y+height-1,CGCnvElement::ChangeColorLightness(this.GetPixel(x+i,y+height-1),-0.05));
     }
   for(int i=1;i<height-1;i++)
     {
      this.m_canvas.PixelSet(x,y+i,CGCnvElement::ChangeColorLightness(this.GetPixel(x,y+1),-0.05));
      this.m_canvas.PixelSet(x+width-1,y+i,CGCnvElement::ChangeColorLightness(this.GetPixel(x+width-1,y+1),-0.05));
     }
  }
//+------------------------------------------------------------------+
//| Draw an embossed (convex) field                                  |
//+------------------------------------------------------------------+
void CForm::DrawFieldBevel(const int x,const int y,const int width,const int height,const color colour,const uchar opacity)
  {
//--- Draw a filled rectangle
   CGCnvElement::DrawRectangleFill(x,y,x+width-1,y+height-1,colour,opacity);
//--- Lighten its top and left and darken its bottom and right
   for(int i=0;i<width;i++)
     {
      this.m_canvas.PixelSet(x+i,y,CGCnvElement::ChangeColorLightness(this.GetPixel(x+i,y),0.1));
      this.m_canvas.PixelSet(x+i,y+height-1,CGCnvElement::ChangeColorLightness(this.GetPixel(x+i,y+height-1),-0.1));
     }
   for(int i=1;i<height-1;i++)
     {
      this.m_canvas.PixelSet(x,y+i,CGCnvElement::ChangeColorLightness(this.GetPixel(x,y+1),0.05));
      this.m_canvas.PixelSet(x+width-1,y+i,CGCnvElement::ChangeColorLightness(this.GetPixel(x+width-1,y+1),-0.05));
     }
  }
//+------------------------------------------------------------------+
//| Draw an embossed (concave) field                                 |
//+------------------------------------------------------------------+
void CForm::DrawFieldStamp(const int x,const int y,const int width,const int height,const color colour,const uchar opacity)
  {
//--- Draw a filled rectangle
   CGCnvElement::DrawRectangleFill(x,y,x+width-1,y+height-1,colour,opacity);
//--- Darken its top and left and lighten its bottom and right
   for(int i=0;i<width;i++)
     {
      this.m_canvas.PixelSet(x+i,y,CGCnvElement::ChangeColorLightness(this.GetPixel(x+i,y),-0.1));
      this.m_canvas.PixelSet(x+i,y+height-1,CGCnvElement::ChangeColorLightness(this.GetPixel(x+i,y+height-1),0.1));
     }
   for(int i=1;i<height-1;i++)
     {
      this.m_canvas.PixelSet(x,y+i,CGCnvElement::ChangeColorLightness(this.GetPixel(x,y+1),-0.05));
      this.m_canvas.PixelSet(x+width-1,y+i,CGCnvElement::ChangeColorLightness(this.GetPixel(x+width-1,y+1),0.05));
     }
  }
//+------------------------------------------------------------------+
La lógica de los métodos anteriormente mencionados es prácticamente idéntica, y la hemos comentado en el código de los métodos. Esperamos que no surjan dudas sobre ellos. En cualquier caso, el lector podrá plantear cualquier duda en los comentarios al artículo.
Con esto, podemos dar por finalizada la creación del objeto de formulario.
Simulación
Hoy no habrá pruebas "espectaculares" :) Simplemente crearemos dos formularios diferentes con estilos de construcción y temas de color distintos. Una vez creados los formularios, les añadiremos los campos. El formulario superior tendrá un campo cóncavo dimensional, mientras que el segundo formulario tendrá un campo cóncavo dimensional semitransparente.
Para la simulación, vamos a tomar el asesor del artículo anterior y guardarlo en la nueva carpeta \MQL5\Experts\TestDoEasy\Part76\ con el nuevo nombre TestDoEasyPart76.mq5.
Añadimos al asesor el archivo del objeto de formulario de la biblioteca y renombramos la lista de objetos de elemento como la lista de objetos de formulario:
//+------------------------------------------------------------------+
//|                                             TestDoEasyPart76.mq5 |
//|                                  Copyright 2021, MetaQuotes Ltd. |
//|                             https://mql5.com/en/users/artmedia70 |
//+------------------------------------------------------------------+
#property copyright "Copyright 2021, MetaQuotes Ltd."
#property link      "https://mql5.com/en/users/artmedia70"
#property version   "1.00"
//--- includes
#include <Arrays\ArrayObj.mqh>
#include <DoEasy\Services\Select.mqh>
#include <DoEasy\Objects\Graph\Form.mqh>
//--- defines
#define        FORMS_TOTAL (2)   // Number of created forms
//--- input parameters
sinput   bool  InpMovable  = true;  // Movable flag
//--- global variables
CArrayObj      list_forms;
//+------------------------------------------------------------------+
En el manejador OnInit(), creamos dos formularios y dibujamos campos cóncavos en ellos:
//+------------------------------------------------------------------+
//| Expert initialization function                                   |
//+------------------------------------------------------------------+
int OnInit()
  {
//--- Set the permissions to send cursor movement and mouse scroll events
   ChartSetInteger(ChartID(),CHART_EVENT_MOUSE_MOVE,true);
   ChartSetInteger(ChartID(),CHART_EVENT_MOUSE_WHEEL,true);
//--- Set EA global variables

//--- Create the specified number of form objects
   list_forms.Clear();
   int total=FORMS_TOTAL;
   for(int i=0;i<total;i++)
     {
      //--- When creating an object, pass all the required parameters to it
      CForm *form=new CForm("Form_0"+(string)(i+1),300,40+(i*80),100,70);
      if(form==NULL)
         continue;
      //--- Set activity and moveability flags for the form
      form.SetActive(true);
      form.SetMovable(false);
      //--- Set the form ID equal to the loop index and the index in the list of objects
      form.SetID(i);
      form.SetNumber(0);   // (0 - main form object) Auxiliary objects may be attached to the main one. The main object is able to manage them
      //--- Set the full opacity for the top form and the partial opacity for the bottom one
      uchar opacity=(i==0 ? 255 : 250);
      //--- Set the form style and its color theme depending on the loop index
      ENUM_FORM_STYLE style=(ENUM_FORM_STYLE)i;
      ENUM_COLOR_THEMES theme=(ENUM_COLOR_THEMES)i;
      //--- Set the form style and theme
      form.SetFormStyle(style,theme,opacity,true);
      //--- If this is the first (top) form
      if(i==0)
        {
         //--- Draw a concave field slightly shifted from the center of the form downwards
         form.DrawFieldStamp(3,10,form.Width()-6,form.Height()-13,form.ColorBackground(),form.Opacity());
         form.Update(true);
        }
      //--- If this is the second (bottom) form
      if(i==1)
        {
         //--- Draw a concave semi-transparent "tainted glass" field in the center
         form.DrawFieldStamp(10,10,form.Width()-20,form.Height()-20,clrWheat,200);
         form.Update(true);
        }
      //--- Add objects to the list
      if(!list_forms.Add(form))
        {
         delete form;
         continue;
        }
     }
//---
   return(INIT_SUCCEEDED);
  }
//+------------------------------------------------------------------+
A continuación, eliminamos del manejador OnChartEvent() el procesamiento completo de los clics del ratón sobre los objetos:
//+------------------------------------------------------------------+
//| ChartEvent function                                              |
//+------------------------------------------------------------------+
void OnChartEvent(const int id,
                  const long &lparam,
                  const double &dparam,
                  const string &sparam)
  {
//--- If clicking on an object
   if(id==CHARTEVENT_OBJECT_CLICK)
     {

     }
  }
//+------------------------------------------------------------------+
Compilamos el asesor y lo iniciamos en el gráfico:
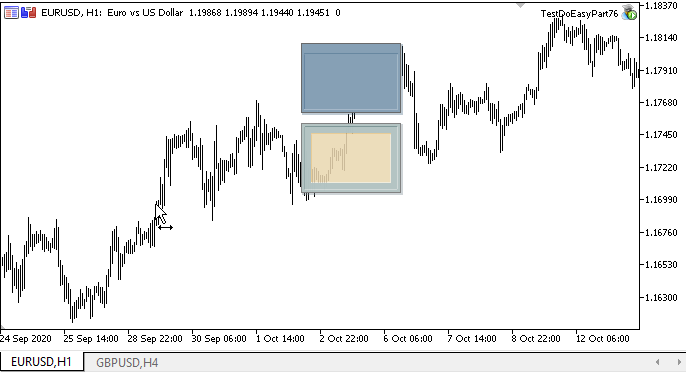
Como podemos ver, con solo indicar el estilo necesario y el tema de color, hemos creado dos formularios diferentes, con colores de componentes y estilo de dibujado distintos.
¿Qué es lo próximo?
En el próximo artículo, continuaremos desarrollando el objeto de formulario y completando su funcionalidad.
Más abajo se adjuntan todos los archivos de la versión actual de la biblioteca y el archivo del asesor de prueba para MQL5. Puede descargarlo todo y ponerlo a prueba por sí mismo.
Si tiene preguntas, observaciones o sugerencias, podrá concretarlas en los comentarios al artículo.
*Artículos de esta serie:
Gráficos en la biblioteca DoEasy (Parte 73): Objeto de formulario del elemento gráfico
Gráficos en la biblioteca DoEasy (Parte 74): Elemento gráfico básico sobre la clase CCanvas
Gráficos en la biblioteca DoEasy (Parte 75): Métodos de trabajo con primitivas y texto en el elemento gráfico básico
Traducción del ruso hecha por MetaQuotes Ltd.
Artículo original: https://www.mql5.com/ru/articles/9553
Advertencia: todos los derechos de estos materiales pertenecen a MetaQuotes Ltd. Queda totalmente prohibido el copiado total o parcial.
Este artículo ha sido escrito por un usuario del sitio web y refleja su punto de vista personal. MetaQuotes Ltd. no se responsabiliza de la exactitud de la información ofrecida, ni de las posibles consecuencias del uso de las soluciones, estrategias o recomendaciones descritas.

 Patrones con ejemplos (Parte I): Pico múltiple
- Aplicaciones de trading gratuitas
- 8 000+ señales para copiar
- Noticias económicas para analizar los mercados financieros
Usted acepta la política del sitio web y las condiciones de uso