SakuraYen
- Experts
-
Kun Jiao
 Senior Development Engineer. Available for custom development of various quantitative trading strategies and full-scale setup of automated trading research and backtesting environments.
- Version: 1.1
- Updated: 11 November 2026
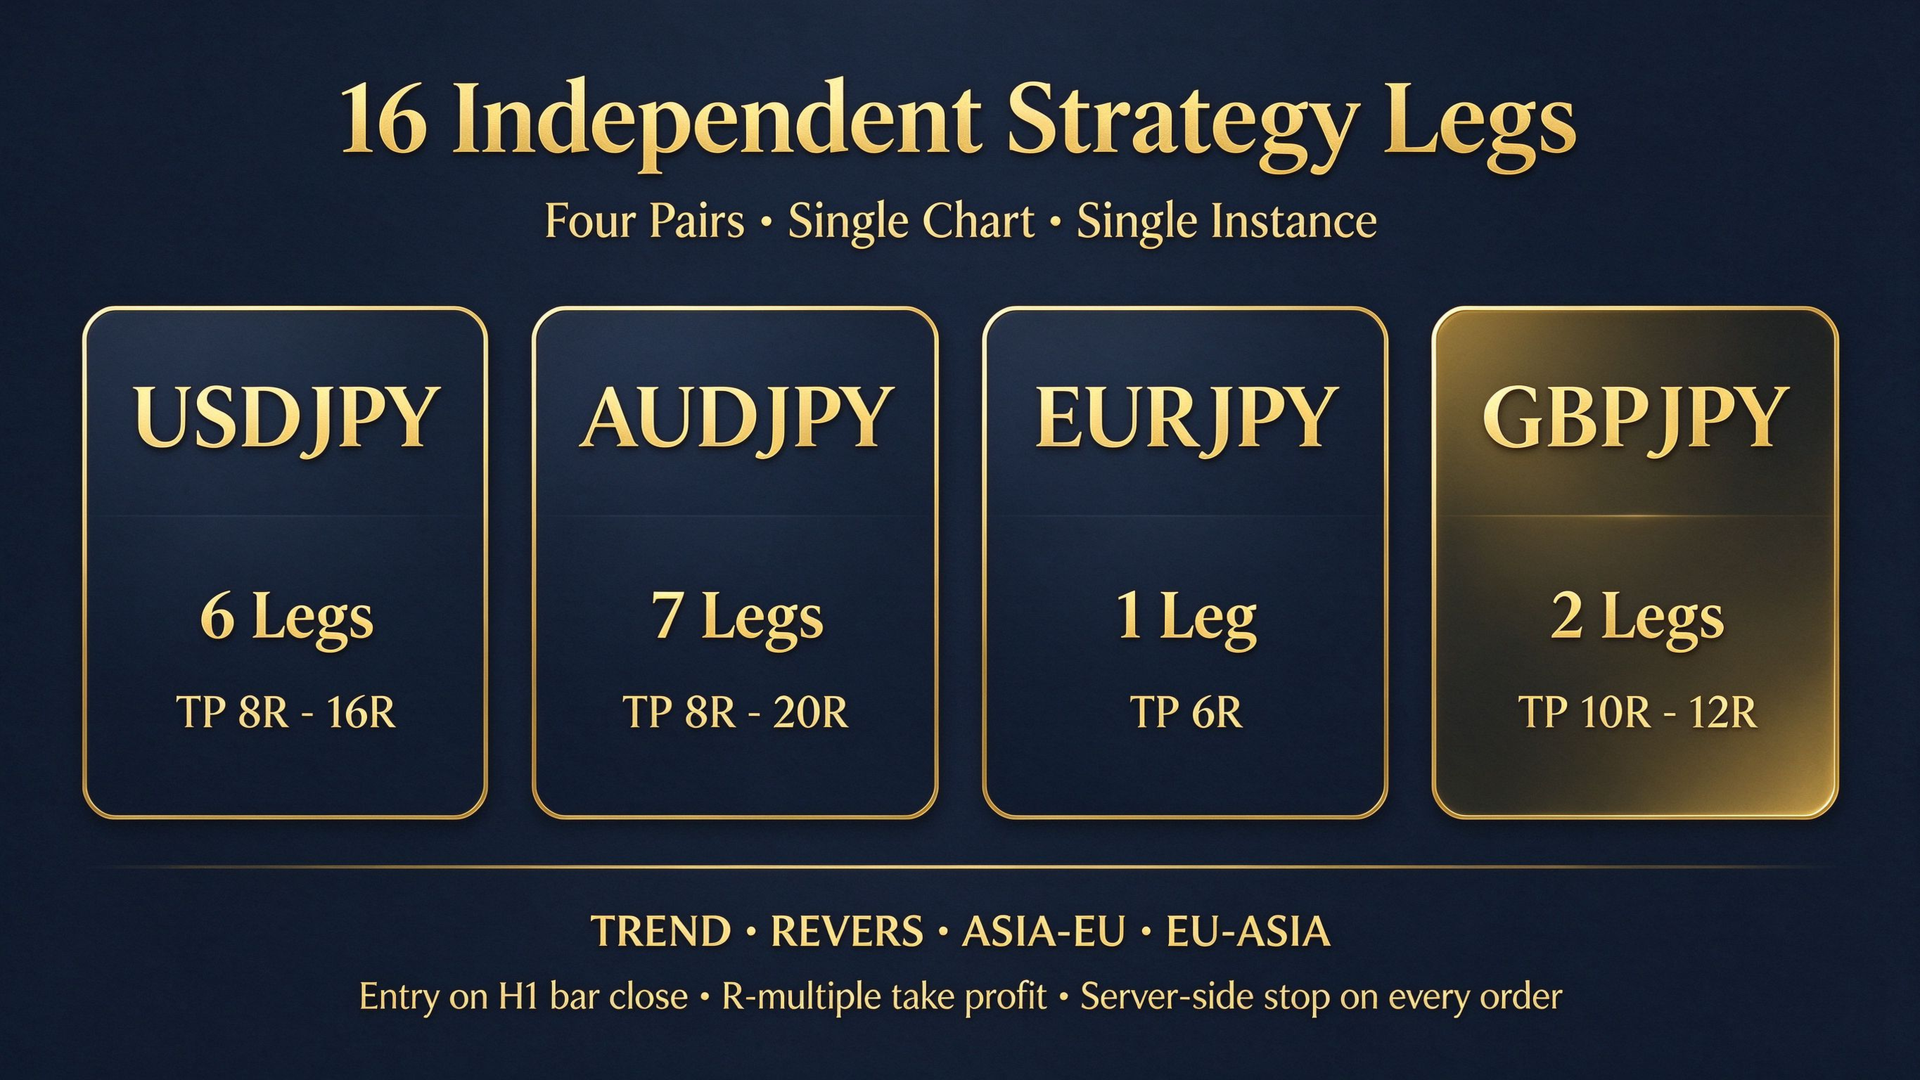
Sakura EA is a multi-strategy portfolio expert advisor for the Japanese yen crosses. It trades four pairs (USDJPY, AUDJPY, EURJPY, GBPJPY) from a single chart and a single instance on the H1 timeframe; the other three JPY pairs are used only as cross-section data sources. The portfolio is built from 16 independent sub-strategies ("legs"), each opening a position only when its own statistical edge appears.
Unlike grid or martingale systems, Sakura EA never adds to a losing position and never increases lot size after a loss. Every trade risks a fixed percentage of account equity; the lot size is derived from that risk amount and the stop distance, and each position carries a server-side stop loss and take profit from the moment it is opened.
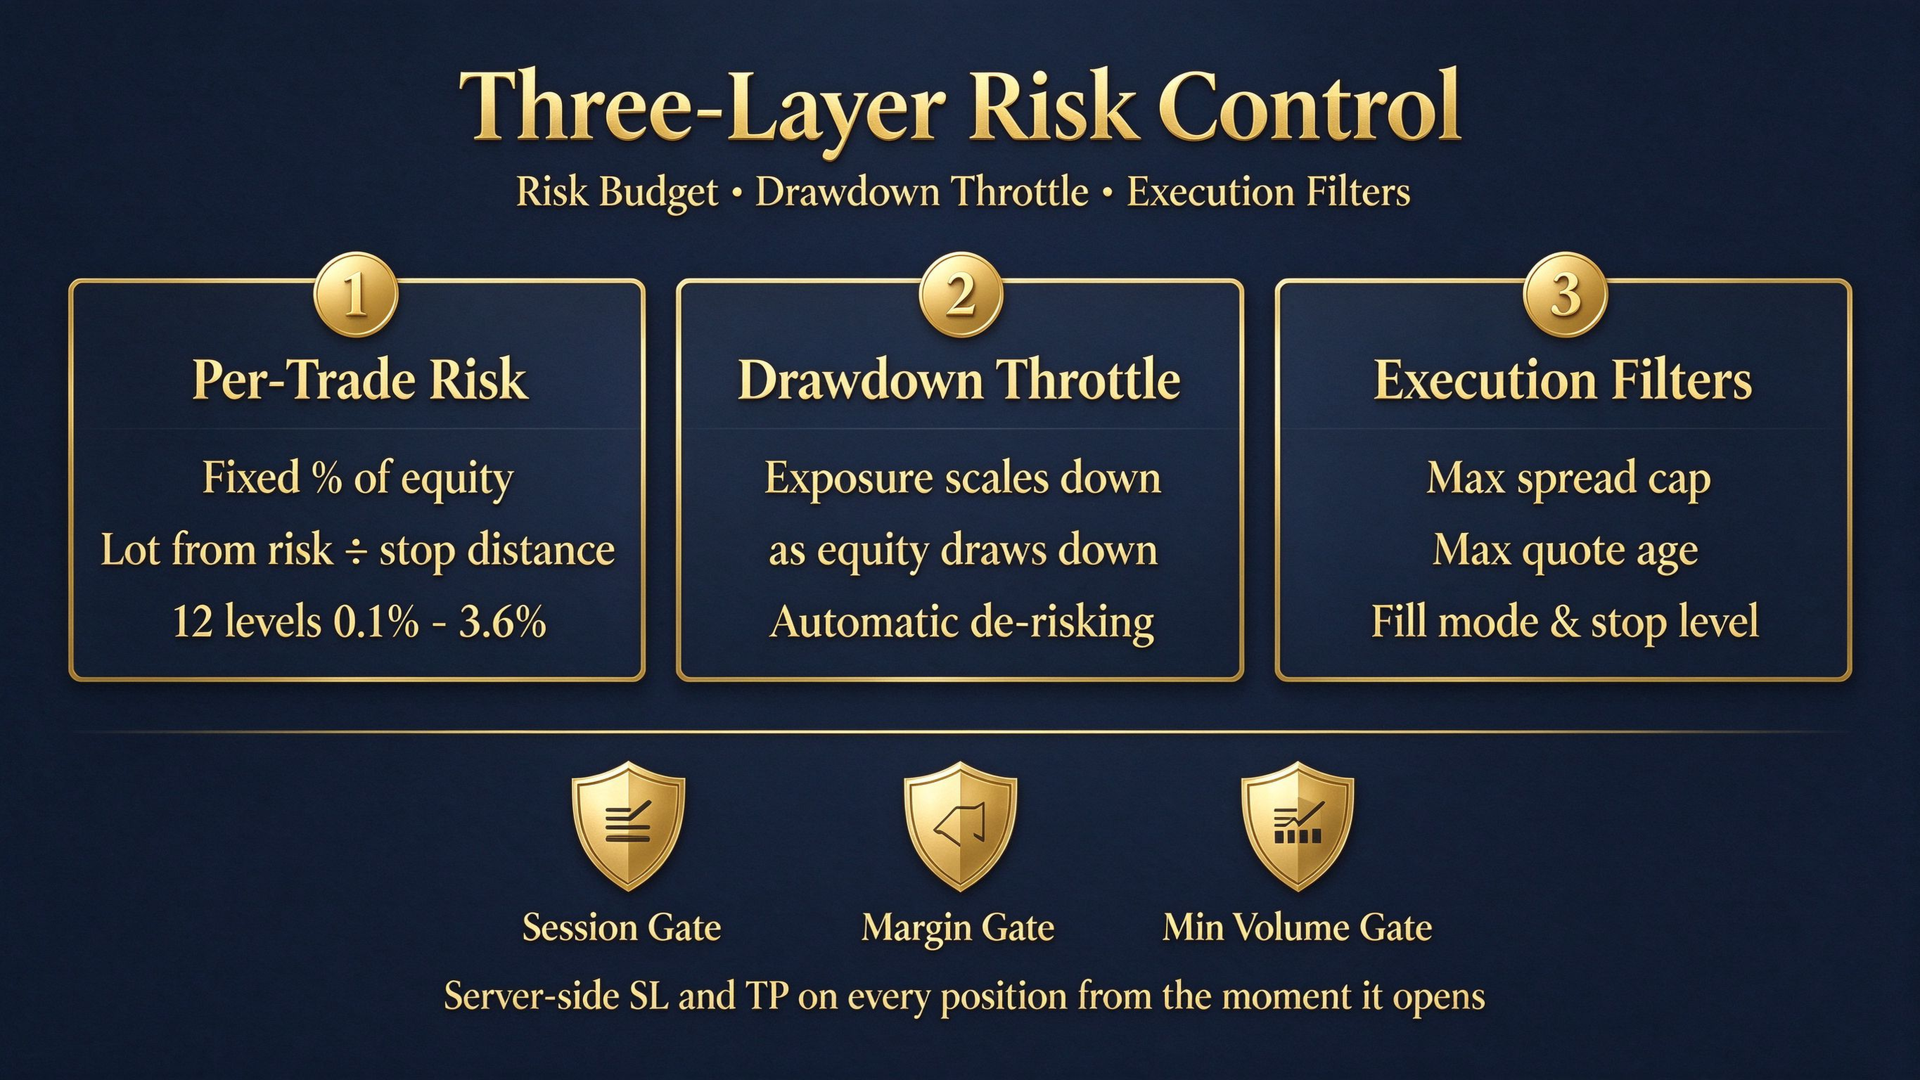
Risk control works on three layers - per-trade risk percentage, an equity-drawdown throttle that scales exposure down as the account draws down, and hard filters on maximum spread and maximum quote age - together with three gates at order level: no trading while the symbol's session is closed; if free margin is insufficient the lot size is downgraded to the largest affordable size instead of abandoning the trade, and the trade is skipped only when even the minimum volume cannot be covered; and no order is ever sent below the broker's minimum volume. Before sending, the EA reads the broker's fill mode and stop level and adjusts SL/TP to the compliant distance.
Position sizing offers two modes. The risk-level mode (default) derives the lot from the selected risk level and the stop distance, with 12 levels from 0.1% to 3.6% per trade (default 1.0%). The fixed-lot mode always uses the configured lot (default 0.01) and does not change with equity, risk level or drawdown. Both modes pass through the full volume validation chain; fixed lots never bypass risk control, and a fixed lot below the broker minimum is raised to the minimum tradable volume rather than skipped.
It runs on hedging and netting accounts alike, resolves symbol names with suffixes automatically, and works on cent accounts. No DLLs, no external files, no network calls: everything is computed inside the terminal and delivered as a single EX5 file.
To use it, attach SakuraEA_v1.ex5 to an H1 chart of USDJPY; it loads the other symbols itself. Choose the risk level that matches your capital - the remaining inputs normally need no adjustment.
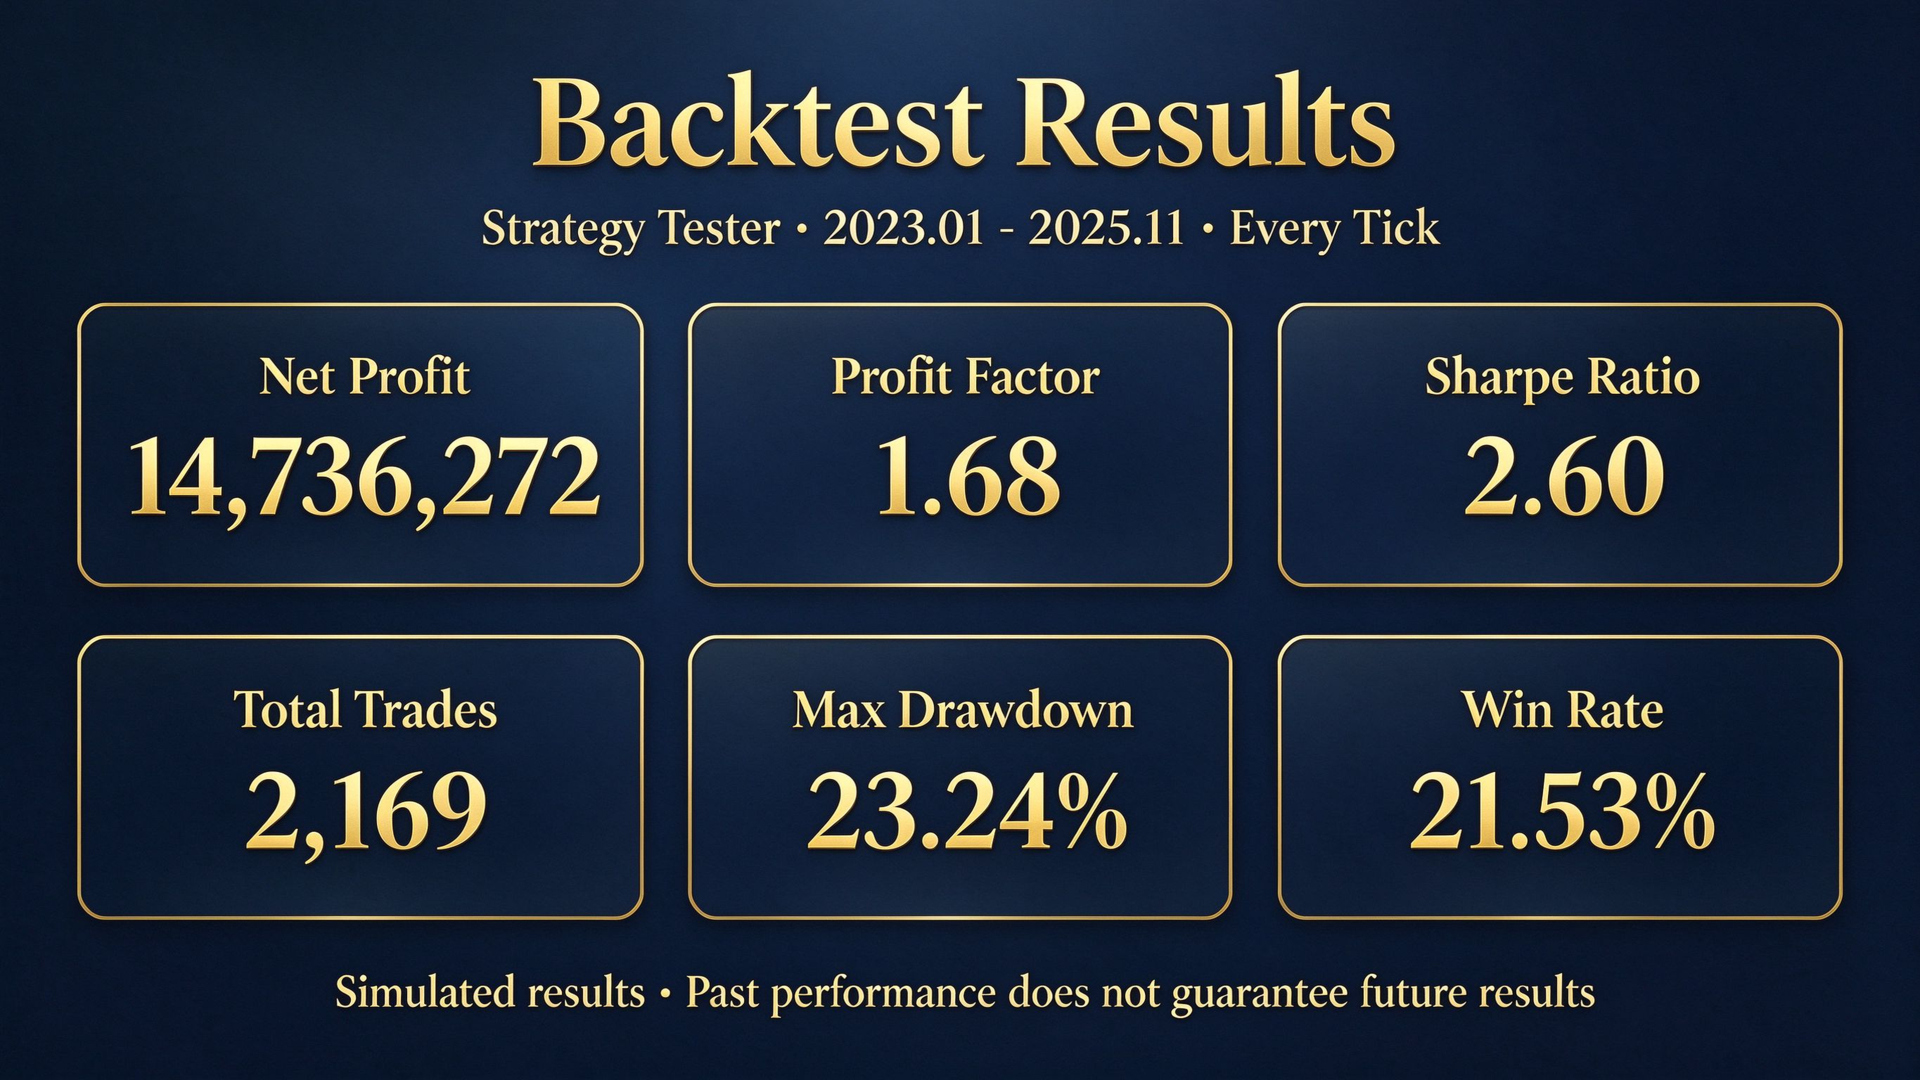
All data shown in the MetaTrader 5 Strategy Tester consists of simulated results based on historical prices. Simulated results do not represent future performance, and live conditions (spread, slippage, execution) will differ.
Risk warning: trading leveraged products such as forex and CFDs carries a high level of risk and may not be suitable for all investors; you may lose part or all of the capital invested. Trade only with money you can afford to lose, and test the expert on a demo account before going live. No representation is made that any account will achieve similar results.
—————
16 sub-strategies (legs): entries, exits and parameters
Entry (shared engine, all 16 legs): each leg monitors one statistical feature of its symbol and opens at the close of a bar when that feature crosses its high/low quantile band and the direction flips versus the previous H1 bar, so entries are not chased intrabar. Some legs add a volume filter; the trading direction follows the leg's session and trend/contrarian setting.
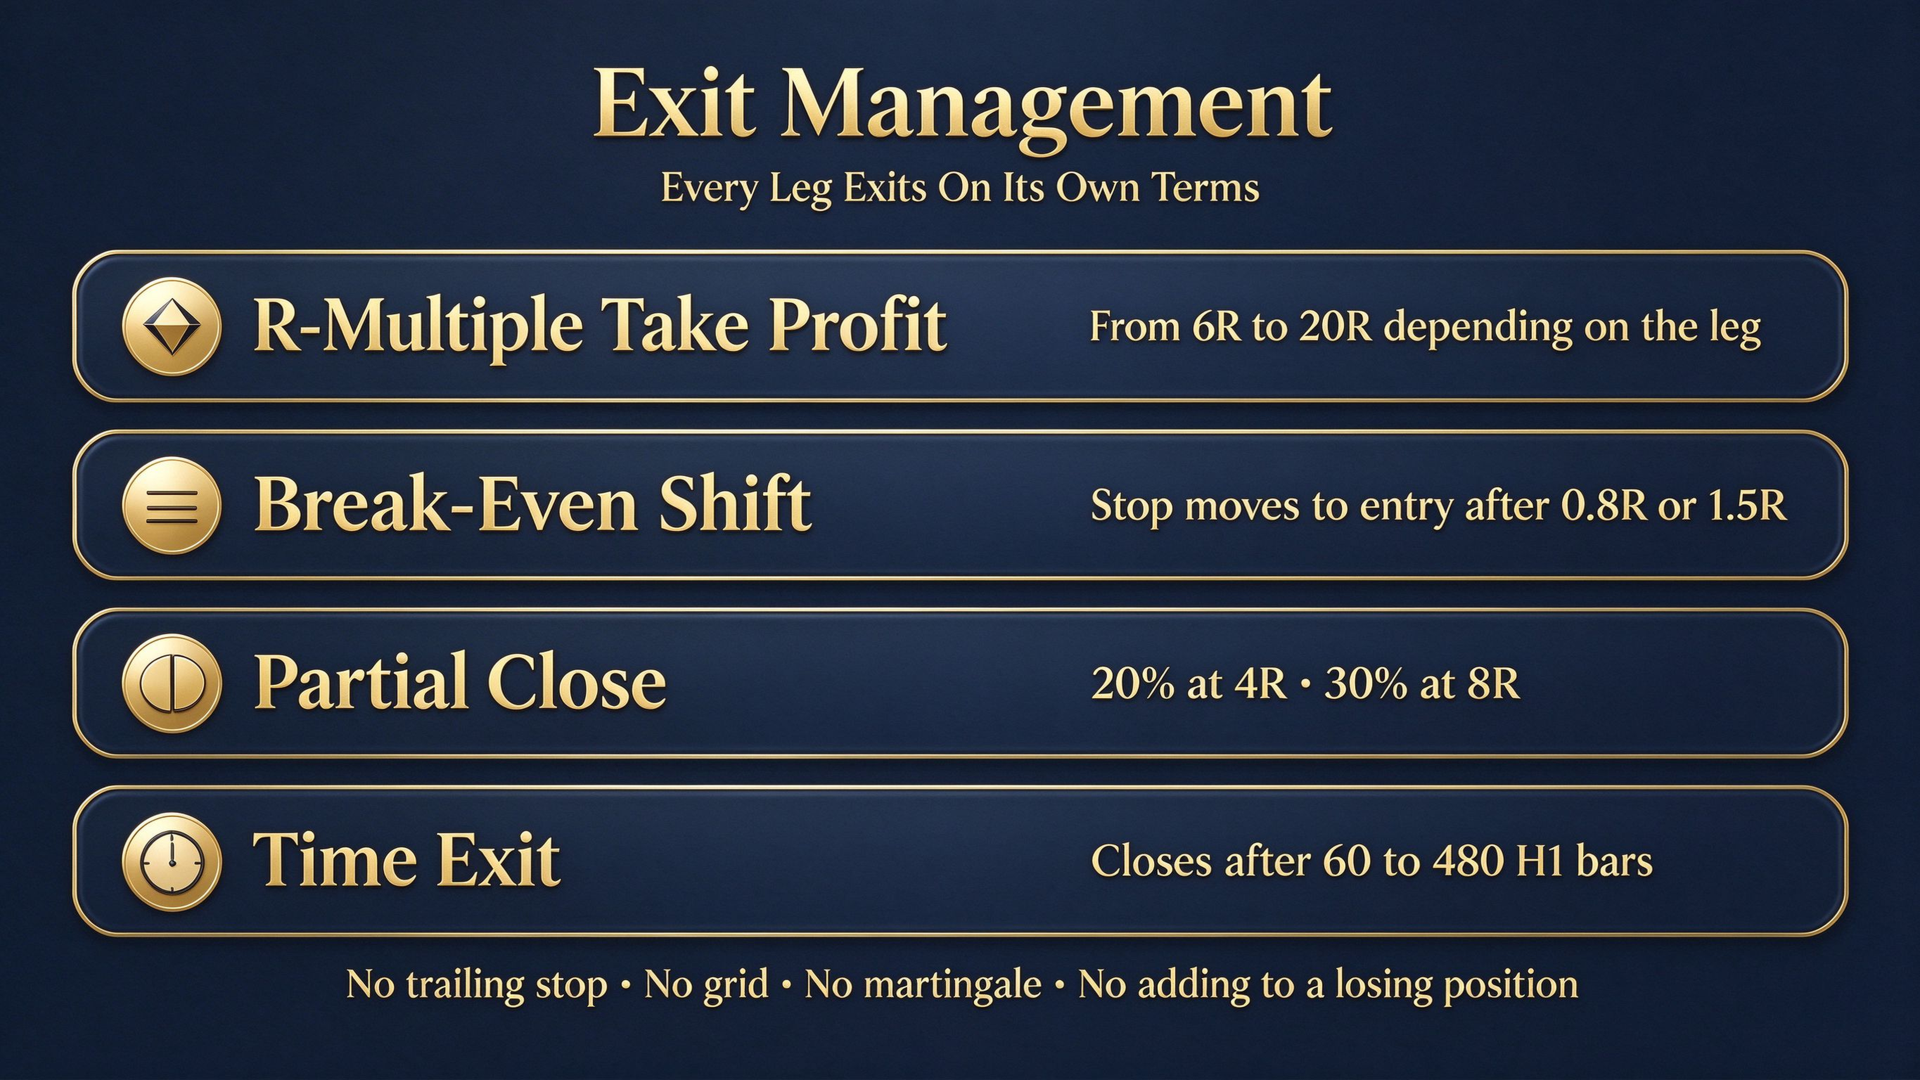
Exit: an R-multiple take profit plus a fixed stop loss; some legs additionally move the stop to break-even, take a partial profit, or close on a time limit. Stops and targets are server-side throughout; each leg opens independently, without averaging and without adding to positions.
# SYMBOL DIR VOL TP BE PARTIAL MAXH1
-- ------ ------- --- --- ---- ------- -----
1 AUDJPY ASIA-EU - 8R 0.8R - 480
2 GBPJPY ASIA-EU - 12R - - 0
3 AUDJPY REVERS - 20R - - 480
4 GBPJPY TREND - 10R - 20%@4R 60
5 EURJPY TREND - 6R - - 480
6 USDJPY REVERS - 12R - - 120
7 AUDJPY ASIA-EU Y 16R - - 120
8 AUDJPY ASIA-EU Y 16R 1.5R - 0
9 USDJPY EU-ASIA Y 16R - 30%@8R 120
10 AUDJPY ASIA-EU - 8R - 30%@8R 0
11 AUDJPY ASIA-EU - 10R - - 480
12 USDJPY TREND Y 16R 1.5R - 60
13 USDJPY TREND - 16R - 20%@4R 480
14 USDJPY ASIA-EU Y 8R 0.8R - 120
15 AUDJPY REVERS Y 12R - 30%@8R 120
16 USDJPY EU-ASIA - 12R 1.5R - 0
Column notes: # = leg number. SYMBOL = traded pair. DIR = direction rule: TREND = trend-following in both directions, REVERS = contrarian in both directions, ASIA-EU = Asia-to-Europe session switch, EU-ASIA = Europe-to-Asia session switch. VOL = volume filter (Y = applied). TP = take-profit multiple in R. BE = move the stop to break-even once the trade is up by that many R. PARTIAL = close that percentage of the position at that R multiple (20%@4R = close 20% when 4R is reached). MAXH1 = maximum holding time in H1 bars (0 = no limit; the position is closed when the limit is reached without a trigger). R = the stop distance of the trade.
—————
Sakura EA is a multi-strategy portfolio expert advisor for the Japanese yen crosses: four pairs on H1 from a single chart, 16 independent sub-strategies, server-side stops on every trade. It offers 12 risk levels plus a fixed-lot mode, three order-level gates (session, free margin, minimum volume), hedging and netting support, and ships as a single EX5 file. Test results are simulated.