DoEasy. Elementos de control (Parte 14): Nuevo algoritmo de denominación de los elementos gráficos. Continuamos trabajando con el objeto WinForms TabControl

Contenido
- Concepto
- Mejorando las clases de la biblioteca
- Clase TabHeader: encabezado de la pestaña del objeto TabControl
- Clase TabControl: continuamos el desarrollo
- Simulación
- ¿Qué es lo próximo?
Concepto
En el artículo anterior, al desarrollar el objeto WinForms TabControl, nos encontramos con una limitación en la longitud del nombre de los elementos gráficos que nos impedía trabajar al completo en la creación del objeto: el nombre de cada elemento gráfico hijo incluido en el elemento padre incluía una referencia a su elemento padre en la cadena de todos los controles gráficos vinculados, y el nombre de cada objeto posterior en la cadena era más largo que el nombre del anterior. Al final, terminamos con un límite de 63 caracteres para el nombre de un recurso gráfico. Hoy crearemos un algoritmo de denominación diferente para los elementos gráficos, libre del inconveniente antes descrito: cada nuevo objeto del mismo tipo contendrá en su nombre el nombre del programa, el nombre del tipo de elemento gráfico y el número de elementos existentes de este tipo creados en el programa al construir los elementos de la GUI.
Por ejemplo, al crear los elementos de la interfaz gráfica de usuario para el programa de prueba del presente artículo, obtuvimos la siguiente lista de elementos gráficos (solo es visible la primera parte de todos los elementos construidos, pero es suficiente para entender el concepto adoptado):
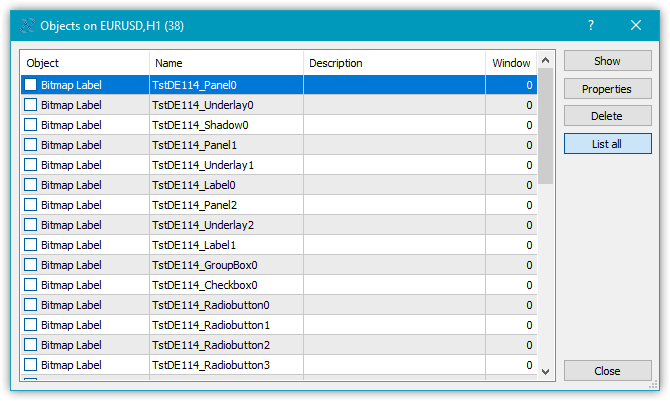
Así que ahora no tendremos ninguna restricción en cuanto al anidamiento de objetos al construir los controles: en lugar de mostrar una jerarquía en el nombre del elemento gráfico, simplemente usaremos el número de elemento con el nombre del programa y el tipo de control.
Sí, el nombre del elemento gráfico no nos permite entender su posición aproximada en la jerarquía de cadenas de objetos enlazados, pero al menos elimina las limitaciones en la longitud del nombre. Para entender de alguna manera qué tipo de objeto es, añadiremos otra propiedad a las propiedades de tipo string de los elementos gráficos: la descripción del elemento gráfico. Así entenderemos de una vez por todas el propósito del elemento gráfico y cómo podemos referirnos a él en nuestro programa. Por ejemplo, al crear un gráfico de botón de radio, pondremos en su descripción algo así como "botón de cambio de dirección comercial", y usando esta descripción podremos referirnos al control directamente en el programa, lo cual resulta mucho mejor que referirse a él mediante un nombre "difuso" como "MyProgram_Elm00_Elm01_Elm00", como hacíamos antes...
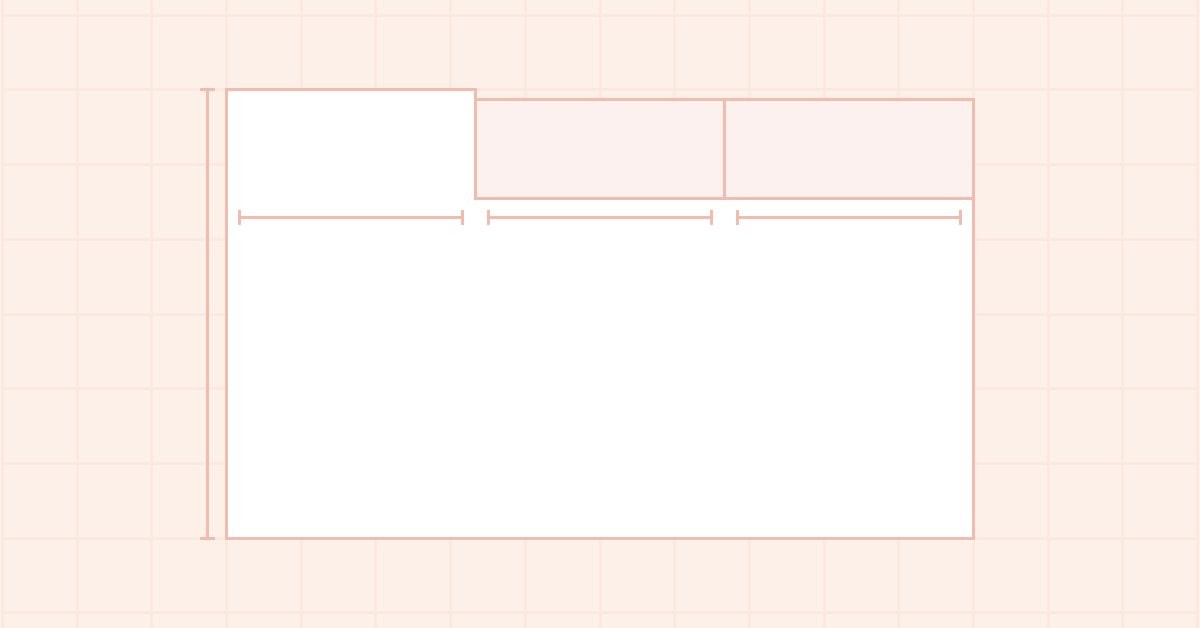
Además de crear un nuevo algoritmo de denominación para los elementos gráficos, hoy continuaremos desarrollando el control TabControl. Así, crearemos para él un objeto TabHeader que se encargará de describir el encabezado de la pestaña. Dicho objeto tendrá que trabajar en grupo con otros similares: los encabezados de otros objetos de pestaña. Al seleccionar el elemento, este deberá ser capaz de aumentar ligeramente su tamaño, y al hacerlo deberá tener en cuenta la posición del conjunto de encabezados de todas las pestañas del control TabControl: arriba, abajo, a la izquierda o a la derecha. Dependiendo de su posición, dibujará un marco solo en el lugar correcto del objeto. Por ejemplo, si el objeto de encabezado de la pestaña está en la parte superior de control TabControl, el marco que delimita el encabezado de la pestaña solo deberá dibujarse en tres lados: izquierda, arriba y derecha. Por otro lado, la parte inferior del encabezado de la pestaña estará en contacto con el campo de la pestaña en el que se colocarán los objetos de la misma, y el punto de contacto no deberá tener un borde dibujado, para que el encabezado de la pestaña y el campo de la misma sean una sola pieza sin separación visible.
Hoy vamos a implementar el procesamiento descrito de los límites del encabezado de la pestaña solo para los objetos de encabezado de las pestañas. Los límites de los campos de la pestaña y el posicionamiento de otros controles en ella los implementaremos en el próximo artículo.
Mejorando las clases de la biblioteca
Algunos controles usan los controles existentes para realizar su trabajo, por ejemplo, ListBox utiliza los controles Button para dibujar su colección (Items), pero con una ligera modificación de la funcionalidad. Para implementar esto, crearemos un nuevo objeto heredero del elemento Button y añadiremos la funcionalidad requerida. Esto objeto y algunos otros objetos similares deberían colocarse preferentemente en una categoría aparte de objetos auxiliares que no se ubicarán en las carpetas de categorías de los controles, sino en su directorio raíz.
En el archivo \MQL5\Include\DoEasy\Defines.mqh, añadiremos un nuevo tipo de objeto de contenedor TabControl, así como dos controles auxiliares ListBoxItem y TabHeader en una nueva categoría:
//+------------------------------------------------------------------+
//| The list of graphical element types                              |
//+------------------------------------------------------------------+
enum ENUM_GRAPH_ELEMENT_TYPE
  {
   GRAPH_ELEMENT_TYPE_STANDARD,                       // Standard graphical object
   GRAPH_ELEMENT_TYPE_STANDARD_EXTENDED,              // Extended standard graphical object
   GRAPH_ELEMENT_TYPE_SHADOW_OBJ,                     // Shadow object
   GRAPH_ELEMENT_TYPE_ELEMENT,                        // Element
   GRAPH_ELEMENT_TYPE_FORM,                           // Form
   GRAPH_ELEMENT_TYPE_WINDOW,                         // Window
   //--- WinForms
   GRAPH_ELEMENT_TYPE_WF_UNDERLAY,                    // Panel object underlay
   GRAPH_ELEMENT_TYPE_WF_BASE,                        // Windows Forms Base
   //--- 'Container' object types are to be set below
   GRAPH_ELEMENT_TYPE_WF_CONTAINER,                   // Windows Forms container base object
   GRAPH_ELEMENT_TYPE_WF_PANEL,                       // Windows Forms Panel
   GRAPH_ELEMENT_TYPE_WF_GROUPBOX,                    // Windows Forms GroupBox
   GRAPH_ELEMENT_TYPE_WF_TAB_CONTROL,                 // Windows Forms TabControl
   //--- 'Standard control' object types are to be set below
   GRAPH_ELEMENT_TYPE_WF_COMMON_BASE,                 // Windows Forms base standard control
   GRAPH_ELEMENT_TYPE_WF_LABEL,                       // Windows Forms Label
   GRAPH_ELEMENT_TYPE_WF_BUTTON,                      // Windows Forms Button
   GRAPH_ELEMENT_TYPE_WF_CHECKBOX,                    // Windows Forms CheckBox
   GRAPH_ELEMENT_TYPE_WF_RADIOBUTTON,                 // Windows Forms RadioButton
   GRAPH_ELEMENT_TYPE_WF_ELEMENTS_LIST_BOX,           // Base list object of Windows Forms elements
   GRAPH_ELEMENT_TYPE_WF_LIST_BOX,                    // Windows Forms ListBox
   GRAPH_ELEMENT_TYPE_WF_CHECKED_LIST_BOX,            // Windows Forms CheckedListBox
   GRAPH_ELEMENT_TYPE_WF_BUTTON_LIST_BOX,             // Windows Forms ButtonListBox
   //--- Auxiliary elements of WinForms objects
   GRAPH_ELEMENT_TYPE_WF_LIST_BOX_ITEM,               // Windows Forms ListBoxItem
   GRAPH_ELEMENT_TYPE_WF_TAB_HEADER,                  // Windows Forms TabHeader
  };
//+------------------------------------------------------------------+
En la lista de propiedades de tipo string del elemento gráfico en el lienzo, añadiremos la nueva propiedad «descripción del elemento gráfico» y aumentaremos el número total de propiedades de tipo string de 3 a 4:
//+------------------------------------------------------------------+
//| String properties of the graphical element on the canvas         |
//+------------------------------------------------------------------+
enum ENUM_CANV_ELEMENT_PROP_STRING
  {
   CANV_ELEMENT_PROP_NAME_OBJ = (CANV_ELEMENT_PROP_INTEGER_TOTAL+CANV_ELEMENT_PROP_DOUBLE_TOTAL), // Graphical element object name
   CANV_ELEMENT_PROP_NAME_RES,                        // Graphical resource name
   CANV_ELEMENT_PROP_TEXT,                            // Graphical element text
   CANV_ELEMENT_PROP_DESCRIPTION,                     // Graphical element description
  };
#define CANV_ELEMENT_PROP_STRING_TOTAL  (4)           // Total number of string properties
//+------------------------------------------------------------------+
En la lista de posibles criterios para clasificar los elementos gráficos en el lienzo, al final, añadiremos la clasificación según la nueva propiedad:
//+------------------------------------------------------------------+
//| Possible sorting criteria of graphical elements on the canvas    |
//+------------------------------------------------------------------+
#define FIRST_CANV_ELEMENT_DBL_PROP  (CANV_ELEMENT_PROP_INTEGER_TOTAL-CANV_ELEMENT_PROP_INTEGER_SKIP)
#define FIRST_CANV_ELEMENT_STR_PROP  (CANV_ELEMENT_PROP_INTEGER_TOTAL-CANV_ELEMENT_PROP_INTEGER_SKIP+CANV_ELEMENT_PROP_DOUBLE_TOTAL-CANV_ELEMENT_PROP_DOUBLE_SKIP)
enum ENUM_SORT_CANV_ELEMENT_MODE
  {
//--- Sort by integer properties
   SORT_BY_CANV_ELEMENT_ID = 0,                       // Sort by element ID
   SORT_BY_CANV_ELEMENT_TYPE,                         // Sort by graphical element type
   //---...
   //---...
   SORT_BY_CANV_ELEMENT_TAB_ALIGNMENT,                // Sort by the location of tabs inside the control
   SORT_BY_CANV_ELEMENT_ALIGNMENT,                    // Sort by the location of the object inside the control
//--- Sort by real properties

//--- Sort by string properties
   SORT_BY_CANV_ELEMENT_NAME_OBJ = FIRST_CANV_ELEMENT_STR_PROP,// Sort by an element object name
   SORT_BY_CANV_ELEMENT_NAME_RES,                     // Sort by the graphical resource name
   SORT_BY_CANV_ELEMENT_TEXT,                         // Sort by graphical element text
   SORT_BY_CANV_ELEMENT_DESCRIPTION,                  // Sort by graphical element description
  };
//+------------------------------------------------------------------+
Ahora podremos filtrar, clasificar y seleccionar todos los elementos gráficos según las nuevas propiedades.
En el archivo \MQL5\Include\DoEasy\Data.mqh, añadiremos los índices de los nuevos mensajes, borraremos los índices de los mensajes innecesarios:
//--- WinForms standard
   MSG_GRAPH_ELEMENT_TYPE_WF_COMMON_BASE,             // WinForms base standard control
   MSG_GRAPH_ELEMENT_TYPE_WF_LABEL,                   // Label control
   MSG_GRAPH_ELEMENT_TYPE_WF_CHECKBOX,                // CheckBox control
   MSG_GRAPH_ELEMENT_TYPE_WF_RADIOBUTTON,             // RadioButton control
   MSG_GRAPH_ELEMENT_TYPE_WF_BUTTON,                  // Button control
   MSG_GRAPH_ELEMENT_TYPE_WF_ELEMENTS_LIST_BOX,       // Base list object of Windows Forms elements
   MSG_GRAPH_ELEMENT_TYPE_WF_LIST_BOX,                // ListBox control
   MSG_GRAPH_ELEMENT_TYPE_WF_LIST_BOX_ITEM,           // ListBox control collection object
   MSG_GRAPH_ELEMENT_TYPE_WF_CHECKED_LIST_BOX,        // CheckedListBox control
   MSG_GRAPH_ELEMENT_TYPE_WF_BUTTON_LIST_BOX,         // ButtonListBox control
   MSG_GRAPH_ELEMENT_TYPE_WF_TAB_HEADER,              // Tab header
   MSG_GRAPH_ELEMENT_TYPE_WF_TAB_PAGE,                // TabPage control
   MSG_GRAPH_ELEMENT_TYPE_WF_TAB_CONTROL,             // TabControl
   MSG_GRAPH_OBJ_BELONG_PROGRAM,                      // Graphical object belongs to a program
   MSG_GRAPH_OBJ_BELONG_NO_PROGRAM,                   // Graphical object does not belong to a program
...
//--- String properties of graphical elements
   MSG_CANV_ELEMENT_PROP_NAME_OBJ,                    // Graphical element object name
   MSG_CANV_ELEMENT_PROP_NAME_RES,                    // Graphical resource name
   MSG_CANV_ELEMENT_PROP_TEXT,                        // Graphical element text
   MSG_CANV_ELEMENT_PROP_DESCRIPTION,                 // Graphical element description
  };
//+------------------------------------------------------------------+
y escribiremos los textos de los nuevos mensajes correspondientes a los nuevos índices añadidos. El texto del índice eliminado también se borrará en consecuencia:
//--- WinForms standard
   {"Базовый стандартный элемент управления WinForms","Basic Standard WinForms Control"},
   {"Элемент управления \"Label\"","Control element \"Label\""},
   {"Элемент управления \"CheckBox\"","Control element \"CheckBox\""},
   {"Элемент управления \"RadioButton\"","Control element \"RadioButton\""},
   {"Элемент управления \"Button\"","Control element \"Button\""},
   {"Базовый объект-список Windows Forms элементов","Basic Windows Forms List Object"},
   {"Элемент управления \"ListBox\"","Control element \"ListBox\""},
   {"Объект коллекции элемента управления ListBox","Collection object of the ListBox control"},
   {"Элемент управления \"CheckedListBox\"","Control element \"CheckedListBox\""},
   {"Элемент управления \"ButtonListBox\"","Control element \"ButtonListBox\""},
   {"Заголовок вкладки","Tab header"},

   {"Элемент управления \"TabControl\"","Control element \"TabControl\""},
   {"Графический объект принадлежит программе","The graphic object belongs to the program"},
   {"Графический объект не принадлежит программе","The graphic object does not belong to the program"},
...
//--- String properties of graphical elements
   {"Имя объекта-графического элемента","The name of the graphic element object"},
   {"Имя графического ресурса","Image resource name"},
   {"Текст графического элемента","Text of the graphic element"},
   {"Описание графического элемента","Description of the graphic element"},
  };
//+---------------------------------------------------------------------+
Para obtener la descripción del tipo de elemento gráfico de forma correcta para su posterior uso en la biblioteca, en el archivo \MQL5\Include\DoEasy\Services\DELib.mqh de funciones de servicio, crearemos una función que, a partir del nombre de la constante de enumeración del tipo de elemento gráfico, creará y retornará la descripción del tipo de elemento gráfico:
//+------------------------------------------------------------------+
//| Return the graphical object type as string                       |
//+------------------------------------------------------------------+
string TypeGraphElementAsString(const ENUM_GRAPH_ELEMENT_TYPE type)
  {
   ushort array[];
   int total=StringToShortArray(StringSubstr(::EnumToString(type),18),array);
   for(int i=0;i<total-1;i++)
     {
      if(array[i]==95)
        {
         i+=1;
         continue;
        }
      else
         array[i]+=0x20;
     }
   string txt=ShortArrayToString(array);
   StringReplace(txt,"_Wf_Base","WFBase");
   StringReplace(txt,"_Wf_","");
   StringReplace(txt,"_Obj","");
   StringReplace(txt,"_","");
   StringReplace(txt,"Groupbox","GroupBox");
   return txt;
  }
//+------------------------------------------------------------------+
El algoritmo será el siguiente: primero transmitiremos a la función el tipo de elemento gráfico requerido para la descripción y luego, en la línea
int total=StringToShortArray(StringSubstr(EnumToString(type),18),array);
obtendremos el número de caracteres de la subcadena resaltada a partir del nombre de la constante de enumeración del tipo.
Tomemos como ejemplo la constante GRAPH_ELEMENT_TYPE_WF_CHECKED_LIST_BOX.
Convertimos la constante de enumeración en el texto "GRAPH_ELEMENT_TYPE_WF_CHECKED_LIST_BOX":
EnumToString(type) Del texto resultante "GRAPH_ELEMENT_TYPE_WF_CHECKED_LIST_BOX", seleccionaremos la línea "_WF_CHECKED_LIST_BOX", a partir del carácter 18:
StringSubstr(EnumToString(type),18)
y la cadena resultante "_WF_CHECKED_LIST_BOX" la copiaremos por caracteres a un array ushort, obteniendo en este caso el número de caracteres copiados:
int total=StringToShortArray(StringSubstr(EnumToString(type),18),array);
Como resultado, en la matriz array[] tendremos los códigos para cada carácter de la cadena "_WF_CHECKED_LIST_BOX".
Ahora tendremos que dejar después de cada símbolo "_" una letra mayúscula, y hacer todas los demás minúsculas.
Esto se hace en un ciclo por un array de caracteres:
   for(int i=0;i<total-1;i++)
     {
      if(array[i]==95)
        {
         i+=1;
         continue;
        }
      else
         array[i]+=0x20;
     }
El primer carácter de la cadena, y por lo tanto también del array, será "_", y en cuanto encontremos el código de este carácter (95) en el array, tendremos que establecer el índice del ciclo en el siguiente carácter tras él.
En la línea "_WF_CHECKED_LIST_BOX", serán los caracteres destacados a color.
Después de establecer el índice del ciclo en el siguiente código de carácter en el array, pasaremos inmediatamente a la siguiente iteración, omitiendo así el carácter que vamos a dejar sin modificar. Y llegaremos al operador else, donde añadiremos el valor 32 al código del carácter en el array, lo que hará que ese carácter sea minúsculo.
Así, después de todo el ciclo, el array contendrá los códigos de los caracteres de la cadena "_Wf_Checked_List_Box" que convertiremos en la cadena:
string txt=ShortArrayToString(array);
Y luego simplemente reemplazamos las entradas especificadas de las cadenas en la cadena resultante por las cadenas que queremos y retornaremos la cadena final:
   StringReplace(txt,"_Wf_Base","WFBase");
   StringReplace(txt,"_Wf_","");
   StringReplace(txt,"_Obj","");
   StringReplace(txt,"_","");
   StringReplace(txt,"Groupbox","GroupBox");
   return txt;
Usaremos esta nueva función para obtener el nombre del archivo a partir del tipo de elemento gráfico.
En el archivo de objeto gráfico básico \MQL5\Include\DoEasy\Objects\Graph\GBaseObj.mqh, en el método que retorna la descripción del tipo de elemento gráfico, añadiremos el nuevo tipo y eliminaremos el no deseado:
//+------------------------------------------------------------------+
//| Return the description of the graphical element type             |
//+------------------------------------------------------------------+
string CGBaseObj::TypeElementDescription(const ENUM_GRAPH_ELEMENT_TYPE type)
  {
   return
     (
      type==GRAPH_ELEMENT_TYPE_STANDARD               ? CMessage::Text(MSG_GRAPH_ELEMENT_TYPE_STANDARD)              :
      type==GRAPH_ELEMENT_TYPE_STANDARD_EXTENDED      ? CMessage::Text(MSG_GRAPH_ELEMENT_TYPE_STANDARD_EXTENDED)     :
      type==GRAPH_ELEMENT_TYPE_ELEMENT                ? CMessage::Text(MSG_GRAPH_ELEMENT_TYPE_ELEMENT)               :
      type==GRAPH_ELEMENT_TYPE_SHADOW_OBJ             ? CMessage::Text(MSG_GRAPH_ELEMENT_TYPE_SHADOW_OBJ)            :
      type==GRAPH_ELEMENT_TYPE_FORM                   ? CMessage::Text(MSG_GRAPH_ELEMENT_TYPE_FORM)                  :
      type==GRAPH_ELEMENT_TYPE_WINDOW                 ? CMessage::Text(MSG_GRAPH_ELEMENT_TYPE_WINDOW)                :
      //--- WinForms
      type==GRAPH_ELEMENT_TYPE_WF_UNDERLAY            ? CMessage::Text(MSG_GRAPH_ELEMENT_TYPE_WF_UNDERLAY)           :
      type==GRAPH_ELEMENT_TYPE_WF_BASE                ? CMessage::Text(MSG_GRAPH_ELEMENT_TYPE_WF_BASE)               :
      //--- Containers
      type==GRAPH_ELEMENT_TYPE_WF_CONTAINER           ? CMessage::Text(MSG_GRAPH_ELEMENT_TYPE_WF_CONTAINER)          :
      type==GRAPH_ELEMENT_TYPE_WF_GROUPBOX            ? CMessage::Text(MSG_GRAPH_ELEMENT_TYPE_WF_GROUPBOX)           :
      type==GRAPH_ELEMENT_TYPE_WF_PANEL               ? CMessage::Text(MSG_GRAPH_ELEMENT_TYPE_WF_PANEL)              :
      type==GRAPH_ELEMENT_TYPE_WF_TAB_HEADER          ? CMessage::Text(MSG_GRAPH_ELEMENT_TYPE_WF_TAB_HEADER)         :
      type==GRAPH_ELEMENT_TYPE_WF_TAB_PAGE            ? CMessage::Text(MSG_GRAPH_ELEMENT_TYPE_WF_TAB_PAGE)           :
      type==GRAPH_ELEMENT_TYPE_WF_TAB_CONTROL         ? CMessage::Text(MSG_GRAPH_ELEMENT_TYPE_WF_TAB_CONTROL)        :
      //--- Standard controls
      type==GRAPH_ELEMENT_TYPE_WF_COMMON_BASE         ? CMessage::Text(MSG_GRAPH_ELEMENT_TYPE_WF_COMMON_BASE)        :
      type==GRAPH_ELEMENT_TYPE_WF_LABEL               ? CMessage::Text(MSG_GRAPH_ELEMENT_TYPE_WF_LABEL)              :
      type==GRAPH_ELEMENT_TYPE_WF_CHECKBOX            ? CMessage::Text(MSG_GRAPH_ELEMENT_TYPE_WF_CHECKBOX)           :
      type==GRAPH_ELEMENT_TYPE_WF_RADIOBUTTON         ? CMessage::Text(MSG_GRAPH_ELEMENT_TYPE_WF_RADIOBUTTON)        :
      type==GRAPH_ELEMENT_TYPE_WF_BUTTON              ? CMessage::Text(MSG_GRAPH_ELEMENT_TYPE_WF_BUTTON)             :
      type==GRAPH_ELEMENT_TYPE_WF_ELEMENTS_LIST_BOX   ? CMessage::Text(MSG_GRAPH_ELEMENT_TYPE_WF_ELEMENTS_LIST_BOX)  :
      type==GRAPH_ELEMENT_TYPE_WF_LIST_BOX            ? CMessage::Text(MSG_GRAPH_ELEMENT_TYPE_WF_LIST_BOX)           :
      type==GRAPH_ELEMENT_TYPE_WF_LIST_BOX_ITEM       ? CMessage::Text(MSG_GRAPH_ELEMENT_TYPE_WF_LIST_BOX_ITEM)      :
      type==GRAPH_ELEMENT_TYPE_WF_CHECKED_LIST_BOX    ? CMessage::Text(MSG_GRAPH_ELEMENT_TYPE_WF_CHECKED_LIST_BOX)   :
      type==GRAPH_ELEMENT_TYPE_WF_BUTTON_LIST_BOX     ? CMessage::Text(MSG_GRAPH_ELEMENT_TYPE_WF_BUTTON_LIST_BOX)    :
      "Unknown"
     );
  }
//+------------------------------------------------------------------+
Para obtener el nombre del objeto, necesitaremos la función anterior, que retornará el nombre del elemento gráfico a crear según su tipo. Sin embargo, esto no será suficiente para crear un nombre de objeto completo. A la cadena obtenida de la función deberemos añadir el número de elementos gráficos de este tipo ya existentes en el gráfico del símbolo y su subventana sobre los que se construye este objeto.
En el archivo de la clase de objeto de elemento gráfico \MQL5\Include\DoEasy\Objects\Graph\GCnvElement.mqh, en su sección protegida, declararemos dos métodos: uno que retorna el número de elementos gráficos según su tipo y otro que crea y retorna el nombre del elemento gráfico según su tipo:
//--- Create (1) the object structure and (2) the object from the structure
   virtual bool      ObjectToStruct(void);
   virtual void      StructToObject(void);
//--- Copy the color array to the specified background color array
   void              CopyArraysColors(color &array_dst[],const color &array_src[],const string source);

//--- Return the number of graphical elements by type
   int               GetNumGraphElements(const ENUM_GRAPH_ELEMENT_TYPE type) const;
//--- Create and return the graphical element name by its type
   string            CreateNameGraphElement(const ENUM_GRAPH_ELEMENT_TYPE type);

private:
Veremos la implementación de los métodos un poco más adelante.
En la sección privada, añadiremos los nuevos campos a la estructura del objeto:
private:
   int               m_shift_coord_x;                          // Offset of the X coordinate relative to the base object
   int               m_shift_coord_y;                          // Offset of the Y coordinate relative to the base object
   struct SData
     {
      //--- Object integer properties
      int            id;                                       // Element ID
      int            type;                                     // Graphical element type
      //---...
      //---...
      bool           button_toggle;                            // Toggle flag of the control featuring a button
      bool           button_state;                             // Status of the Toggle control featuring a button
      bool           button_group_flag;                        // Button group flag
      bool           multicolumn;                              // Horizontal display of columns in the ListBox control
      int            column_width;                             // Width of each ListBox control column
      bool           tab_multiline;                            // Several lines of tabs in TabControl
      int            tab_alignment;                            // Location of tabs inside the control
      int            alignment;                                // Location of the object inside the control
      //--- Object real properties

      //--- Object string properties
      uchar          name_obj[64];                             // Graphical element object name
      uchar          name_res[64];                             // Graphical resource name
      uchar          text[256];                                // Graphical element text
      uchar          descript[256];                            // Graphical element description
     };
   SData             m_struct_obj;                             // Object structure
   uchar             m_uchar_array[];                          // uchar array of the object structure
los necesitaremos para almacenar correctamente el objeto y leerlo desde el archivo. Estas son las nuevas propiedades del elemento gráfico que hemos añadido hoy, o bien antes, aunque hayamos olvidado especificarlo.
A continuación, eliminaremos de la declaración del método que crea el nuevo elemento gráfico el parámetro formal en el que se transmitía al método el nombre del objeto a crear:
//--- Create the element
   bool              Create(const long chart_id,
                            const int wnd_num,
                            const string name,
                            const int x,
                            const int y,
                            const int w,
                            const int h,
                            const bool redraw=false);
Ahora el nombre del objeto no se transmitirá al método, sino que se creará en el método, partiendo del tipo de objeto que se esté creando.
En absolutamente todas las clases de objetos de elementos gráficos que hemos escrito antes, las variables "name" ya han sido sustituidas por variables "descript" en los parámetros formales de todos sus constructores. Por ejemplo, aquí en este archivo, tenemos:
protected:
//--- Protected constructor
                     CGCnvElement(const ENUM_GRAPH_ELEMENT_TYPE element_type,
                                  const long    chart_id,
                                  const int     wnd_num,
                                  const string  descript,
                                  const int     x,
                                  const int     y,
                                  const int     w,
                                  const int     h);
public:
//--- (1) Set and (2) return the X coordinate shift relative to the base object
   void              SetCoordXRelative(const int value)                                { this.m_shift_coord_x=value;                }
   int               CoordXRelative(void)                                        const { return this.m_shift_coord_x;               }
//--- (1) Set and (2) return the Y coordinate shift relative to the base object
   void              SetCoordYRelative(const int value)                                { this.m_shift_coord_y=value;                }
   int               CoordYRelative(void)                                        const { return this.m_shift_coord_y;               }

//--- Event handler
   virtual void      OnChartEvent(const int id,const long& lparam,const double& dparam,const string& sparam);
//--- Parametric constructor
                     CGCnvElement(const ENUM_GRAPH_ELEMENT_TYPE element_type,
                                  const int     element_id,
                                  const int     element_num,
                                  const long    chart_id,
                                  const int     wnd_num,
                                  const string  descript,
                                  const int     x,
                                  const int     y,
                                  const int     w,
                                  const int     h,
                                  const color   colour,
                                  const uchar   opacity,
                                  const bool    movable=true,
                                  const bool    activity=true,
                                  const bool    redraw=false);
Ahora no transmitiremos al constructor de la clase el nombre del objeto a crear. La biblioteca creará un nuevo nombre para el nuevo objeto, basándose en su tipo. Por ello, en lugar de transmitir el nombre del objeto al constructor, transmitiremos una descripción del objeto que podremos asignar nosotros mismos, para poder referirnos al objeto creado en base a esta descripción. Todos estos cambios ya los hemos realizado en todas las clases de todos los objetos WinForms, por lo que no los repasaremos aquí: podrá encontrarlos en los archivos adjuntos al artículo.
Asimismo, hemos mejorado la configuración del tipo de elemento gráfico. Antes, escribíamos el tipo de elemento dos veces en cada constructor de cada clase de objeto WinForms: primero, el tipo se escribía en el objeto básico de elemento gráfico de la biblioteca (en su variable m_type_element):
void SetTypeElement(const ENUM_GRAPH_ELEMENT_TYPE type) { this.m_type_element=type; }
y luego, en la segunda cadena, escribiremos el mismo tipo en las propiedades del objeto.
Simplificaremos esto creando un método público para escribir(y retornar) el tipo de objeto en ambos valores: en la variable y en la propiedad:
//--- Set the shift of the (1) left, (2) top, (3) right, (4) bottom edge of the active area relative to the element,
//--- (5) all shifts of the active area edges relative to the element, (6) opacity
   void              SetActiveAreaLeftShift(const int value)   { this.SetProperty(CANV_ELEMENT_PROP_ACT_SHIFT_LEFT,fabs(value));       }
   void              SetActiveAreaRightShift(const int value)  { this.SetProperty(CANV_ELEMENT_PROP_ACT_SHIFT_RIGHT,fabs(value));      }
   void              SetActiveAreaTopShift(const int value)    { this.SetProperty(CANV_ELEMENT_PROP_ACT_SHIFT_TOP,fabs(value));        }
   void              SetActiveAreaBottomShift(const int value) { this.SetProperty(CANV_ELEMENT_PROP_ACT_SHIFT_BOTTOM,fabs(value));     }
   void              SetActiveAreaShift(const int left_shift,const int bottom_shift,const int right_shift,const int top_shift);
   void              SetOpacity(const uchar value,const bool redraw=false);

//--- (1) Set and (2) return the graphical element type
   void              SetTypeElement(const ENUM_GRAPH_ELEMENT_TYPE type)
                       {
                        CGBaseObj::SetTypeElement(type);
                        this.SetProperty(CANV_ELEMENT_PROP_TYPE,type);
                       }
   ENUM_GRAPH_ELEMENT_TYPE TypeGraphElement(void)  const { return (ENUM_GRAPH_ELEMENT_TYPE)this.GetProperty(CANV_ELEMENT_PROP_TYPE);   }

//--- Set the main background color
Ahora, en cada constructor de cada clase de objeto WinForms, en lugar de dos cadenas para establecer la misma propiedad en las diferentes clases padre, escribiremos una sola línea con una llamada a este método para establecer la propiedad: la escribirá en ambas clases padre.
A continuación, añadiremos dos métodos para devolver y establecer la descripción del elemento gráfico en sus propiedades:
//--- Graphical object group
   virtual int       Group(void)                         const { return (int)this.GetProperty(CANV_ELEMENT_PROP_GROUP);                }
   virtual void      SetGroup(const int value)
                       {
                        CGBaseObj::SetGroup(value);
                        this.SetProperty(CANV_ELEMENT_PROP_GROUP,value);
                       }
//--- Graphical element description
   string            Description(void)                   const { return this.GetProperty(CANV_ELEMENT_PROP_DESCRIPTION);               }
   void              SetDescription(const string descr)        { this.SetProperty(CANV_ELEMENT_PROP_DESCRIPTION,descr);                }

//+------------------------------------------------------------------+
//| The methods of receiving raster data                             |
//+------------------------------------------------------------------+
En ambos constructores de la clase, escribiremos un método para establecer el tipo de elemento gráfico, llamaremos al método para crear el nombre del elemento según su tipo y escribiremos la configuración de las nuevas propiedades del elemento gráfico:
//+------------------------------------------------------------------+
//| Parametric constructor                                           |
//+------------------------------------------------------------------+
CGCnvElement::CGCnvElement(const ENUM_GRAPH_ELEMENT_TYPE element_type,
                           const int      element_id,
                           const int      element_num,
                           const long     chart_id,
                           const int      wnd_num,
                           const string   descript,
                           const int      x,
                           const int      y,
                           const int      w,
                           const int      h,
                           const color    colour,
                           const uchar    opacity,
                           const bool     movable=true,
                           const bool     activity=true,
                           const bool     redraw=false) : m_shadow(false)
  {
   this.SetTypeElement(element_type);
   this.m_type=OBJECT_DE_TYPE_GELEMENT;
   this.m_element_main=NULL;
   this.m_element_base=NULL;
   this.m_chart_color_bg=(color)::ChartGetInteger((chart_id==NULL ? ::ChartID() : chart_id),CHART_COLOR_BACKGROUND);
   this.m_name=this.CreateNameGraphElement(element_type);
   this.m_chart_id=(chart_id==NULL || chart_id==0 ? ::ChartID() : chart_id);
   this.m_subwindow=wnd_num;
   this.SetFont(DEF_FONT,DEF_FONT_SIZE);
   this.m_text_anchor=0;
   this.m_text_x=0;
   this.m_text_y=0;
   this.SetBackgroundColor(colour,true);
   this.SetOpacity(opacity);
   this.m_shift_coord_x=0;
   this.m_shift_coord_y=0;
   if(::ArrayResize(this.m_array_colors_bg,1)==1)
      this.m_array_colors_bg[0]=this.BackgroundColor();
   if(::ArrayResize(this.m_array_colors_bg_dwn,1)==1)
      this.m_array_colors_bg_dwn[0]=this.BackgroundColor();
   if(::ArrayResize(this.m_array_colors_bg_ovr,1)==1)
      this.m_array_colors_bg_ovr[0]=this.BackgroundColor();
   if(this.Create(chart_id,wnd_num,x,y,w,h,redraw))
     {
      this.SetProperty(CANV_ELEMENT_PROP_NAME_RES,this.m_canvas.ResourceName()); // Graphical resource name
      this.SetProperty(CANV_ELEMENT_PROP_CHART_ID,CGBaseObj::ChartID());         // Chart ID

      //---...
      //---...

      this.SetProperty(CANV_ELEMENT_PROP_CHECK_STATE,CANV_ELEMENT_CHEK_STATE_UNCHECKED);  // Status of a control having a checkbox
      this.SetProperty(CANV_ELEMENT_PROP_AUTOCHECK,true);                        // Auto change flag status when it is selected

      //---...
      //---...

      this.SetProperty(CANV_ELEMENT_PROP_BUTTON_TOGGLE,false);                                        // Toggle flag of the control featuring a button
      this.SetProperty(CANV_ELEMENT_PROP_BUTTON_STATE,false);                                         // Status of the Toggle control featuring a button
      this.SetProperty(CANV_ELEMENT_PROP_BUTTON_GROUP,false);                                         // Button group flag
      this.SetProperty(CANV_ELEMENT_PROP_LIST_BOX_MULTI_COLUMN,false);                                // Horizontal display of columns in the ListBox control
      this.SetProperty(CANV_ELEMENT_PROP_LIST_BOX_COLUMN_WIDTH,0);                                    // Width of each ListBox control column
      this.SetProperty(CANV_ELEMENT_PROP_TAB_MULTILINE,false);                                        // Several lines of tabs in TabControl
      this.SetProperty(CANV_ELEMENT_PROP_TAB_ALIGNMENT,CANV_ELEMENT_ALIGNMENT_TOP);                   // Location of tabs inside the control
      this.SetProperty(CANV_ELEMENT_PROP_ALIGNMENT,CANV_ELEMENT_ALIGNMENT_TOP);                       // Location of an object inside the control
      this.SetProperty(CANV_ELEMENT_PROP_TEXT,"");                                                    // Graphical element text
      this.SetProperty(CANV_ELEMENT_PROP_DESCRIPTION,descript);                                       // Graphical element description
     }
   else
     {
      ::Print(DFUN,CMessage::Text(MSG_LIB_SYS_FAILED_CREATE_ELM_OBJ),"\"",this.TypeElementDescription(element_type),"\" ",this.NameObj());
     }
  }
//+------------------------------------------------------------------+
En el método que crea la estructura del objeto, escribiremos el almacenamiento de las nuevas propiedades en los campos de la estructura:
//+------------------------------------------------------------------+
//| Create the object structure                                      |
//+------------------------------------------------------------------+
bool CGCnvElement::ObjectToStruct(void)
  {
//--- Save integer properties
   this.m_struct_obj.id=(int)this.GetProperty(CANV_ELEMENT_PROP_ID);                               // Element ID
   this.m_struct_obj.type=(int)this.GetProperty(CANV_ELEMENT_PROP_TYPE);                           // Graphical element type

   //---...
   //---...

   this.m_struct_obj.button_toggle=(bool)this.GetProperty(CANV_ELEMENT_PROP_BUTTON_TOGGLE);                             // Toggle flag of the control featuring a button
   this.m_struct_obj.button_state=(bool)this.GetProperty(CANV_ELEMENT_PROP_BUTTON_STATE);                               // Status of the Toggle control featuring a button

   this.m_struct_obj.button_group_flag=(bool)this.GetProperty(CANV_ELEMENT_PROP_BUTTON_GROUP);                          // Button group flag
   this.m_struct_obj.multicolumn=(bool)this.GetProperty(CANV_ELEMENT_PROP_LIST_BOX_MULTI_COLUMN);                       // Horizontal display of columns in the ListBox control
   this.m_struct_obj.column_width=(int)this.GetProperty(CANV_ELEMENT_PROP_LIST_BOX_COLUMN_WIDTH);                       // Width of each ListBox control column
   this.m_struct_obj.tab_multiline=(bool)this.GetProperty(CANV_ELEMENT_PROP_TAB_MULTILINE);                             // Several lines of tabs in TabControl
   this.m_struct_obj.tab_alignment=(int)this.GetProperty(CANV_ELEMENT_PROP_TAB_ALIGNMENT);                              // Location of tabs inside the control
   this.m_struct_obj.alignment=(int)this.GetProperty(CANV_ELEMENT_PROP_ALIGNMENT);                                      // Location of an object inside the control
//--- Save real properties

//--- Save string properties
   ::StringToCharArray(this.GetProperty(CANV_ELEMENT_PROP_NAME_OBJ),this.m_struct_obj.name_obj);   // Graphical element object name
   ::StringToCharArray(this.GetProperty(CANV_ELEMENT_PROP_NAME_RES),this.m_struct_obj.name_res);   // Graphical resource name
   ::StringToCharArray(this.GetProperty(CANV_ELEMENT_PROP_TEXT),this.m_struct_obj.text);           // Graphical element text
   ::StringToCharArray(this.GetProperty(CANV_ELEMENT_PROP_DESCRIPTION),this.m_struct_obj.descript);// Graphical element description
   //--- Save the structure to the uchar array
   ::ResetLastError();
   if(!::StructToCharArray(this.m_struct_obj,this.m_uchar_array))
     {
      CMessage::ToLog(DFUN,MSG_LIB_SYS_FAILED_SAVE_OBJ_STRUCT_TO_UARRAY,true);
      return false;
     }
   return true;
  }
//+------------------------------------------------------------------+
En el método que crea un objeto a partir de una estructura, escribiremos los valores de los nuevos campos de la estructura en las propiedades del nuevo objeto:
//+------------------------------------------------------------------+
//| Create the object from the structure                             |
//+------------------------------------------------------------------+
void CGCnvElement::StructToObject(void)
  {
//--- Save integer properties
   this.SetProperty(CANV_ELEMENT_PROP_ID,this.m_struct_obj.id);                                    // Element ID
   this.SetProperty(CANV_ELEMENT_PROP_TYPE,this.m_struct_obj.type);                                // Graphical element type

   //---...
   //---...

   this.SetProperty(CANV_ELEMENT_PROP_BUTTON_TOGGLE,this.m_struct_obj.button_toggle);                             // Toggle flag of the control featuring a button
   this.SetProperty(CANV_ELEMENT_PROP_BUTTON_STATE,this.m_struct_obj.button_state);                               // Status of the Toggle control featuring a button

   this.SetProperty(CANV_ELEMENT_PROP_BUTTON_GROUP,this.m_struct_obj.button_group_flag);                          // Button group flag
   this.SetProperty(CANV_ELEMENT_PROP_LIST_BOX_MULTI_COLUMN,this.m_struct_obj.multicolumn);                       // Horizontal display of columns in the ListBox control
   this.SetProperty(CANV_ELEMENT_PROP_LIST_BOX_COLUMN_WIDTH,this.m_struct_obj.column_width);                      // Width of each ListBox control column
   this.SetProperty(CANV_ELEMENT_PROP_TAB_MULTILINE,this.m_struct_obj.tab_multiline);                             // Several lines of tabs in TabControl
   this.SetProperty(CANV_ELEMENT_PROP_TAB_ALIGNMENT,this.m_struct_obj.tab_alignment);                             // Location of tabs inside the control
   this.SetProperty(CANV_ELEMENT_PROP_ALIGNMENT,this.m_struct_obj.alignment);                                     // Location of an object inside the control
//--- Save real properties

//--- Save string properties
   this.SetProperty(CANV_ELEMENT_PROP_NAME_OBJ,::CharArrayToString(this.m_struct_obj.name_obj));   // Graphical element object name
   this.SetProperty(CANV_ELEMENT_PROP_NAME_RES,::CharArrayToString(this.m_struct_obj.name_res));   // Graphical resource name
   this.SetProperty(CANV_ELEMENT_PROP_TEXT,::CharArrayToString(this.m_struct_obj.text));           // Graphical element text
   this.SetProperty(CANV_ELEMENT_PROP_DESCRIPTION,::CharArrayToString(this.m_struct_obj.descript));// Graphical element description
  }
//+------------------------------------------------------------------+
En el método que crea un objeto gráfico, ya no transmitiremos el nombre del objeto que estamos creando, y que enviábamos como parámetro al método de creación de recursos gráficos vinculado al objeto del gráfico de la clase CCanvas; en lugar de ello, le transmitiremos el nombre del objeto anteriormente establecido:
//+------------------------------------------------------------------+
//| Create the graphical element object                              |
//+------------------------------------------------------------------+
bool CGCnvElement::Create(const long chart_id,     // Chart ID
                          const int wnd_num,       // Chart subwindow
                          const int x,             // X coordinate
                          const int y,             // Y coordinate
                          const int w,             // Width
                          const int h,             // Height
                          const bool redraw=false) // Flag indicating the need to redraw

  {
   ::ResetLastError();
   if(this.m_canvas.CreateBitmapLabel((chart_id==NULL ? ::ChartID() : chart_id),wnd_num,this.m_name,x,y,w,h,COLOR_FORMAT_ARGB_NORMALIZE))
     {
      this.Erase(CLR_CANV_NULL);
      this.m_canvas.Update(redraw);
      this.m_shift_y=(int)::ChartGetInteger((chart_id==NULL ? ::ChartID() : chart_id),CHART_WINDOW_YDISTANCE,wnd_num);
      return true;
     }
   CMessage::ToLog(DFUN_ERR_LINE,::GetLastError(),true);
   return false;
  }
//+------------------------------------------------------------------+
Método que retorna el número de elementos gráficos según el tipo:
//+------------------------------------------------------------------+
//| Return the number of graphical elements by type                  |
//+------------------------------------------------------------------+
int CGCnvElement::GetNumGraphElements(const ENUM_GRAPH_ELEMENT_TYPE type) const
  {
//--- Declare a variable with the number of graphical objects and
//--- get the total number of graphical objects on the chart and the subwindow where the graphical element is created
   int n=0, total=::ObjectsTotal(this.ChartID(),this.SubWindow());
//--- Create the name of a graphical object by its type
   string name=TypeGraphElementAsString(type);
//--- In the loop by all chart and subwindow objects,
   for(int i=0;i<total;i++)
     {
      //--- get the name of the next object
      string name_obj=::ObjectName(this.ChartID(),i,this.SubWindow());
      //--- if the object name does not contain the set prefix of the names of the library graphical objects, move on - this is not the object we are looking for
      if(::StringFind(name_obj,this.NamePrefix())==WRONG_VALUE)
         continue;
      //--- If the name of a graphical object selected in the loop has a substring with the created object name by its type,
      //--- then there is a graphical object of this type - increase the counter of objects of this type
      if(::StringFind(name_obj,name)>0)
         n++;
     }
//--- Return the number of found objects by their type
   return n;
  }
//+------------------------------------------------------------------+
Cada línea del método está comentada en detalle, así que la lógica del método deberá resultar clara. En resumen: necesitamos averiguar cuántos objetos gráficos del tipo especificado existen en el gráfico y en la subventana donde hay que crear otro elemento de ese tipo. Ya podemos crear un nombre según el tipo, pues hemos escrito una función para ello más arriba. Inmediatamente crearemos el nombre del objeto según su tipo, y luego, en un ciclo por todos los objetos gráficos en el gráfico y su subventana, buscaremos un objeto cuyo nombre incluya la subcadena con el nombre de objeto gráfico creado según su tipo. Si encontramos tal nombre, entonces ya existirá un objeto de este tipo y el contador deberá incrementarse. Como resultado, cuando el ciclo se haya completado, tendremos el número de objetos encontrados del tipo deseado, valor que retornaremos.
Método que crea y retorna el nombre de un elemento gráfico según su tipo:
//+------------------------------------------------------------------+
//| Create and return the graphical element name by its type         |
//+------------------------------------------------------------------+
string CGCnvElement::CreateNameGraphElement(const ENUM_GRAPH_ELEMENT_TYPE type)
  {
   return this.NamePrefix()+TypeGraphElementAsString(type)+(string)this.GetNumGraphElements(type);
  }
//+------------------------------------------------------------------+
El tipo de objeto para el que queremos crear el nombre será transmitido al método.
A continuación, añadiremos al prefijo de los objetos gráficos de la biblioteca ("Nombre_del_programa"+"_") el nombre del objeto según su tipo y el número de objetos de este tipo.
El resultado será retornado por el método.
Ambos métodos usan una llamada al método para recuperar el nombre de un objeto gráfico según su tipo. Esto significa que podremos optimizarlos eliminando la llamada a un método que sea llamado dos veces. Haremos esto en el próximo artículo (no olvidemos el principio clave: "de lo simple a lo complejo").
Para que podamos indicar correctamente el tipo de objeto a crear, necesitaremos entender cómo ese tipo "llega" a la clase CGCnvElement, que es una de las clases padre de los objetos WinForms, y dónde se crean esos objetos. Deberemos "comunicar" a esta clase el tipo de elemento gráfico que vamos a crear. Todos los constructores de las clases que heredan de ella ahora especifican explícitamente el tipo al que pertenece la clase heredera. De esta forma, siempre crearemos solo el tipo especificado en la clase siguiente en la jerarquía de herencia después de la clase CGCnvElement. Y esta será una clase de objeto de formulario.
Entonces, ¿cómo enviaremos un tipo de objeto creado que se encuentre en la jerarquía de herencia lejos de la clase CForm? La respuesta es obvia: cada una de esas clases deberá tener otro constructor que no indique explícitamente el tipo de objeto que se va a crear (como se hace ahora), sino que transmita este a la clase padre usando una variable del constructor en su lista de inicialización. Dicho constructor deberá estar protegido, de forma que solo pueda funcionar en las clases heredadas, y el acceso a él desde el exterior deberá estar prohibido. Estos constructores ya han sido creados para cada objeto WinForms, y al heredar unos de otros, el tipo de la clase hija se transmitirá a la clase padre. Y así sucederá por todo el camino a través de la jerarquía de objetos hasta el objeto CGCnvElement, donde el elemento gráfico requerido se creará con el tipo que ha "alcanzado" su objeto padre en la cadena de herencia.
No deberemos olvidar que en todos los archivos de las clases de objetos WInForms, las variables formales "name" ya han sido renombradas a "descript" en los constructores y los métodos de creación de elementos gráficos. Recordamos esto una vez más para no volver a este tema y no describir los mismos cambios ya realizados para cada objeto WinForms existente.
En el archivo de objetos de formulario \MQL5\Include\DoEasy\Objects\Graph\Form.mqh, eliminaremos la declaración del método encargado de devolver el nombre del objeto dependiente, ya innecesario (todos los nombres se crean ahora en la clase CGCnvElement de forma automática):
//--- Create a shadow object
   void              CreateShadowObj(const color colour,const uchar opacity);
//--- Return the name of the dependent object
   string            CreateNameDependentObject(const string base_name)  const
                       { return ::StringSubstr(this.NameObj(),::StringLen(::MQLInfoString(MQL_PROGRAM_NAME))+1)+"_"+base_name;   }
//--- Update coordinates of bound objects
   virtual bool      MoveDependentObj(const int x,const int y,const bool redraw=false);
También eliminaremos el código de implementación de este método del listado de la clase.
A continuación, antes de todos los constructores de la clase,declararemos un nuevo constructor protegido :
//--- Last mouse event handler
   virtual void      OnMouseEventPostProcessing(void);

protected:
//--- Protected constructor with object type, chart ID and subwindow
                     CForm(const ENUM_GRAPH_ELEMENT_TYPE type,
                           const long chart_id,
                           const int subwindow,
                           const string descript,
                           const int x,
                           const int y,
                           const int w,
                           const int h);
public:
//--- Constructors
A diferencia de otros constructores, este tendrá un parámetro formal que especificará el tipo de objeto que estamos creando.
Escribiremos su implementación fuera del cuerpo de la clase:
//+------------------------------------------------------------------+
//| Protected constructor with an object type,                       |
//| chart ID and subwindow                                           |
//+------------------------------------------------------------------+
CForm::CForm(const ENUM_GRAPH_ELEMENT_TYPE type,
             const long chart_id,
             const int subwindow,
             const string descript,
             const int x,
             const int y,
             const int w,
             const int h) : CGCnvElement(type,chart_id,subwindow,descript,x,y,w,h)
  {
   this.m_type=OBJECT_DE_TYPE_GFORM;
   this.Initialize();
   this.SetCoordXInit(x);
   this.SetCoordYInit(y);
   this.SetWidthInit(w);
   this.SetHeightInit(h);
  }
//+------------------------------------------------------------------+
La diferencia con los constructores públicos consiste en que en la lista de inicialización de este constructor, el tipo de objeto que creado se transmite a la clase padre en su constructor, que a su vez es transmitido a este constructor desde la clase heredada.
Así, creando para cada objeto WinForms un constructor protegido similar, crearemos una cadena por la cual se transmitirá su tipo desde cualquier clase heredera hasta a su clase padre CGCnvElement, en la que precisamente se creará el objeto con el tipo obtenido por toda la cadena de jerarquía de objetos heredados.
Del método que crea un nuevo objeto gráfico, eliminaremos la cadena que crea el nombre del objeto dependiente y al crear nuevos objetos, no transmitiremos el nombre, sino el parámetro "descript" que se transmite en los parámetros formales del método:
//+------------------------------------------------------------------+
//| Create a new graphical object                                    |
//+------------------------------------------------------------------+
CGCnvElement *CForm::CreateNewGObject(const ENUM_GRAPH_ELEMENT_TYPE type,
                                      const int obj_num,
                                      const string descript,
                                      const int x,
                                      const int y,
                                      const int w,
                                      const int h,
                                      const color colour,
                                      const uchar opacity,
                                      const bool movable,
                                      const bool activity)
  {
   string name=this.CreateNameDependentObject(obj_name);
   CGCnvElement *element=NULL;
   //--- Depending on the created object type,
   switch(type)
     {
      //--- create a graphical element object
      case GRAPH_ELEMENT_TYPE_ELEMENT :
         element=new CGCnvElement(type,this.ID(),obj_num,this.ChartID(),this.SubWindow(),descript,x,y,w,h,colour,opacity,movable,activity);
        break;
      //--- create a form object
      case GRAPH_ELEMENT_TYPE_FORM :
         element=new CForm(type,this.ChartID(),this.SubWindow(),descript,x,y,w,h);
        break;
      default:
        break;
     }
   if(element==NULL)
      ::Print(DFUN,CMessage::Text(MSG_LIB_SYS_FAILED_CREATE_ELM_OBJ),this.TypeElementDescription(type));
   element.SetMovable(movable);
   element.SetCoordXRelative(element.CoordX()-this.CoordX());
   element.SetCoordYRelative(element.CoordY()-this.CoordY());
   return element;
  }
//+------------------------------------------------------------------+
Estos cambios se realizan en todos los métodos similares de otras clases de objetos WinForms, así que no los discutiremos aquí: todo está en los archivos adjuntos al artículo.
En el método para crear un nuevo elemento vinculado y añadirlo a la lista de objetos vinculados, en lugar de las líneas para crear el nombre del objeto gráfico
//--- Create a graphical element name
   string ns=(::StringLen((string)num)<2 ? ::IntegerToString(num,2,'0') : (string)num);
   string name="Elm"+ns;
Escribimos la creación del texto de descripción del objeto por defecto, y transmitimos este texto al método encargado de crear un nuevo objeto gráfico:
//+------------------------------------------------------------------+
//| Create a new attached element                                    |
//| and add it to the list of bound objects                          |
//+------------------------------------------------------------------+
CGCnvElement *CForm::CreateAndAddNewElement(const ENUM_GRAPH_ELEMENT_TYPE element_type,
                                            const int x,
                                            const int y,
                                            const int w,
                                            const int h,
                                            const color colour,
                                            const uchar opacity,
                                            const bool activity)
  {
//--- If the type of a created graphical element is less than the "element", inform of that and return 'false'
   if(element_type<GRAPH_ELEMENT_TYPE_ELEMENT)
     {
      ::Print(DFUN,CMessage::Text(MSG_FORM_OBJECT_ERR_NOT_INTENDED),::StringSubstr(::EnumToString(element_type),19));
      return NULL;
     }
//--- Specify the element index in the list
   int num=this.m_list_elements.Total();
//--- Create a description of the default graphical element
   string descript=TypeGraphElementAsString(element_type);
//--- Get the screen coordinates of the object relative to the coordinate system of the base object
   int elm_x=x;
   int elm_y=y;
   this.GetCoords(elm_x,elm_y);
//--- Create a new graphical element
   CGCnvElement *obj=this.CreateNewGObject(element_type,num,descript,elm_x,elm_y,w,h,colour,opacity,false,activity);
   if(obj==NULL)
      return NULL;
//--- and add it to the list of bound graphical elements

//---...
//---...
//---...

   return obj;
  }
//+------------------------------------------------------------------+
En el método que crea el objeto de sombra, escribiremos su descripción por defecto en lugar del nombre del objeto:
//+------------------------------------------------------------------+
//| Create the shadow object                                         |
//+------------------------------------------------------------------+
void CForm::CreateShadowObj(const color colour,const uchar opacity)
  {
//--- If the shadow flag is disabled or the shadow object already exists, exit
   if(!this.m_shadow || this.m_shadow_obj!=NULL)
      return;

   //---...
   //---...
   //---...

//--- Create a new shadow object and set the pointer to it in the variable
   this.m_shadow_obj=new CShadowObj(this.ChartID(),this.SubWindow(),this.NameObj()+"Shadow",x,y,w,h);
   if(this.m_shadow_obj==NULL)
     {
      ::Print(DFUN,CMessage::Text(MSG_FORM_OBJECT_ERR_FAILED_CREATE_SHADOW_OBJ));
      return;
     }
   this.m_list_tmp.Add(this.m_shadow_obj);
//--- Set the properties for the created shadow object

   //---...
   //---...
   //---...

//--- Move the form object to the foreground
   this.BringToTop();
  }
//+------------------------------------------------------------------+
En todos los métodos en los que creamos automáticamente la descripción por defecto de un objeto, siempre podremos cambiar esta descripción desde nuestro programa usando el método SetDescription().
En el archivo de clase del objeto WinForms básico \MQL5\Include\DoEasy\Objects\Graph\WForms\WinFormBase.mqh, declararemos el constructor protegido y eliminaremos uno de los públicos, que no necesitamos aquí:
protected:
//--- Protected constructor with object type, chart ID and subwindow
                     CWinFormBase(const ENUM_GRAPH_ELEMENT_TYPE type,
                                  const long chart_id,
                                  const int subwindow,
                                  const string descript,
                                  const int x,
                                  const int y,
                                  const int w,
                                  const int h);
public:
//--- Constructors
                     CWinFormBase(const long chart_id,
                                  const int subwindow,
                                  const string descript,
                                  const int x,
                                  const int y,
                                  const int w,
                                  const int h);
                     CWinFormBase(const string name) : CForm(::ChartID(),0,name,0,0,0,0)
                       {
                        this.m_type=OBJECT_DE_TYPE_GWF_BASE;
                       }

//--- (1) Set and (2) return the default text color of all panel objects
La implementación del constructor protegido es casi idéntica a la del constructor paramétrico público:
//+------------------------------------------------------------------+
//| Protected constructor with an object type,                       |
//| chart ID and subwindow                                           |
//+------------------------------------------------------------------+
CWinFormBase::CWinFormBase(const ENUM_GRAPH_ELEMENT_TYPE type,
                           const long chart_id,
                           const int subwindow,
                           const string descript,
                           const int x,
                           const int y,
                           const int w,
                           const int h) : CForm(type,chart_id,subwindow,descript,x,y,w,h)
  {
//--- Set the specified graphical element type for the object and assign the library object type to the current object
   this.SetTypeElement(type);
   this.m_type=OBJECT_DE_TYPE_GWF_BASE;
//--- Initialize all variables
   this.SetText("");
   this.SetForeColor(CLR_DEF_FORE_COLOR,true);
   this.SetForeStateOnColor(this.ForeColor(),true);
   this.SetForeStateOnColorMouseDown(this.ForeColor());
   this.SetForeStateOnColorMouseOver(this.ForeColor());
   this.SetForeColorOpacity(CLR_DEF_FORE_COLOR_OPACITY);
   this.SetFontBoldType(FW_TYPE_NORMAL);
   this.SetMarginAll(0);
   this.SetPaddingAll(0);
   this.SetBorderSizeAll(0);
   this.SetDockMode(CANV_ELEMENT_DOCK_MODE_NONE,false);
   this.SetBorderStyle(FRAME_STYLE_NONE);
   this.SetAutoSize(false,false);
   CForm::SetCoordXInit(x);
   CForm::SetCoordYInit(y);
   CForm::SetWidthInit(w);
   CForm::SetHeightInit(h);
   this.m_shadow=false;
   this.m_gradient_v=true;
   this.m_gradient_c=false;
  }
//+------------------------------------------------------------------+
La única diferencia entre ellos es que aquí, en la lista de inicialización, transmitiremos al constructor de la clase padre el tipo indicado en los parámetros formales del constructor. La línea que escribe el tipo de objeto en las propiedades se ejecuta ahora llamando a un nuevo método, y la misma línea exacta se inserta ahora en el constructor público:
//--- Set the specified graphical element type for the object and assign the library object type to the current object
   this.SetTypeElement(type);
   this.m_type=OBJECT_DE_TYPE_GWF_BASE;
//--- Initialize all variables
en lugar de las dos escritas anteriormente en él y que hacían lo mismo:
//--- Set the graphical element and library object types as a base WinForms object
   CGBaseObj::SetTypeElement(GRAPH_ELEMENT_TYPE_WF_BASE);
   CGCnvElement::SetProperty(CANV_ELEMENT_PROP_TYPE,GRAPH_ELEMENT_TYPE_WF_BASE);
   this.m_type=OBJECT_DE_TYPE_GWF_BASE;
//--- Initialize all variables
Hemos realizado mejoras similares en todas las clases de objetos WinForms y no se discutirán más.
En el método que retorna la descripción de una propiedad de tipo string del elemento, escribiremos el retorno de la descripción de la nueva propiedad:
//+------------------------------------------------------------------+
//| Return the description of the control string property            |
//+------------------------------------------------------------------+
string CWinFormBase::GetPropertyDescription(ENUM_CANV_ELEMENT_PROP_STRING property,bool only_prop=false)
  {
   return
     (
      property==CANV_ELEMENT_PROP_NAME_OBJ      ?  CMessage::Text(MSG_CANV_ELEMENT_PROP_NAME_OBJ)+": \""+this.GetProperty(property)+"\""     :
      property==CANV_ELEMENT_PROP_NAME_RES      ?  CMessage::Text(MSG_CANV_ELEMENT_PROP_NAME_RES)+": \""+this.GetProperty(property)+"\""     :
      property==CANV_ELEMENT_PROP_TEXT          ?  CMessage::Text(MSG_CANV_ELEMENT_PROP_TEXT)+": \""+this.GetProperty(property)+"\""         :
      property==CANV_ELEMENT_PROP_DESCRIPTION   ?  CMessage::Text(MSG_CANV_ELEMENT_PROP_DESCRIPTION)+": \""+this.GetProperty(property)+"\""  :
      ""
     );
  }
//+------------------------------------------------------------------+
Todos los ajustes anteriores se realizarán en las clases de objetos WinForms de los archivos:
\MQL5\Include\DoEasy\Objects\Graph\WForms\Common Controls\CommonBase.mqh,
\MQL5\Include\DoEasy\Objects\Graph\WForms\Common Controls\Label.mqh,
\MQL5\Include\DoEasy\Objects\Graph\WForms\Common Controls\CheckBox.mqh,
\MQL5\Include\DoEasy\Objects\Graph\WForms\Common Controls\RadioButton.mqh,
\MQL5\Include\DoEasy\Objects\Graph\WForms\Common Controls\CheckedListBox.mqh,
\MQL5\Include\DoEasy\Objects\Graph\WForms\Common Controls\ButtonListBox.mqh,
En el archivo del objeto de botón \MQL5\Include\DoEasy\Objects\Graph\WForms\Common Controls\Button.mqh, además de las mismas mejoras comunes a todos los objetos WinForms, haremos virtual el método para establecer el estado, ya que deberá sobrescribirse en las clases herederas:
   bool              Toggle(void)                        const { return (bool)this.GetProperty(CANV_ELEMENT_PROP_BUTTON_TOGGLE);                               }
//--- (1) Set and (2) return the Toggle control status
   virtual void      SetState(const bool flag)
                       {
                        this.SetProperty(CANV_ELEMENT_PROP_BUTTON_STATE,flag);
                        if(this.State())
                          {
                           this.SetBackgroundColor(this.BackgroundStateOnColor(),false);
                           this.SetForeColor(this.ForeStateOnColor(),false);
                           this.UnpressOtherAll();
                          }
                        else
                          {
                           this.SetBackgroundColor(this.BackgroundColorInit(),false);
                           this.SetForeColor(this.ForeColorInit(),false);
                           this.SetBorderColor(this.BorderColorInit(),false);
                          }
                       }
   bool              State(void)                         const { return (bool)this.GetProperty(CANV_ELEMENT_PROP_BUTTON_STATE);                                }
En la clase de objetos ListBox, usaremos objetos de botón para mostrar las filas, pero para mostrar el texto en los botones (con la condición de que el texto esté siempre presionado hacia el borde izquierdo del botón cuando este se encuentre alineado a la izquierda), necesitaremos añadir un parámetro que indique en cuántos caracteres deberá desplazarse el texto hacia la derecha.
El objeto de botón no tiene esa propiedad. Por ello, crearemos un objeto auxiliar ListBoxItem.
En la carpeta de la biblioteca \MQL5\Include\DoEasy\Objects\Graph\WForms\, crearemos el nuevo archivo ListBoxItem.mqh de la clase CListBoxItem. La clase deberá heredar de la clase CCheckBox, y su archivo deberá estar incluido al archivo de la clase creada:
//+------------------------------------------------------------------+
//|                                                  ListBoxItem.mqh |
//|                                  Copyright 2022, MetaQuotes Ltd. |
//|                             https://mql5.com/en/users/artmedia70 |
//+------------------------------------------------------------------+
#property copyright "Copyright 2022, MetaQuotes Ltd."
#property link      "https://mql5.com/en/users/artmedia70"
#property version   "1.00"
#property strict    // Necessary for mql4
//+------------------------------------------------------------------+
//| Include files                                                    |
//+------------------------------------------------------------------+
#include "Common Controls\Button.mqh"
//+------------------------------------------------------------------+
//| Label object class of WForms controls                            |
//+------------------------------------------------------------------+
class CListBoxItem : public CButton
  {
  }
En la sección privada de la clase, declararemos una variable para almacenar el número de caracteres en el que el texto deberá ser desplazado, y una variable de tipo string que contendrá la línea de desplazamiento. A continuación, declararemos un constructor protegido en la sección protegida de la clase, y en la sección pública, declararemos los métodos para trabajar con las variables de la clase y un constructor paramétrico:
//+------------------------------------------------------------------+
//| Label object class of WForms controls                            |
//+------------------------------------------------------------------+
class CListBoxItem : public CButton
  {
private:
   uchar             m_text_shift;                          // Element text shift to the right from the left edge in characters
   string            m_shift_space;                         // Shift string
protected:
//--- Protected constructor with object type, chart ID and subwindow
                     CListBoxItem(const ENUM_GRAPH_ELEMENT_TYPE type,
                                  const long chart_id,
                                  const int subwindow,
                                  const string descript,
                                  const int x,
                                  const int y,
                                  const int w,
                                  const int h);
public:
//--- Return the element text shift to the right from the left edge in characters
   uchar             TextShift(void)                        const { return this.m_text_shift;   }
//--- (1) Create and (2) return the string consisting of the number of shift characters
   void              SetTextShiftSpace(const uchar value);
   string            GetTextShiftSpace(void)                const { return this.m_shift_space;  }
//--- Set the element text
   virtual void      SetText(const string text);
//--- Constructor
                     CListBoxItem(const long chart_id,
                                  const int subwindow,
                                  const string descript,
                                  const int x,
                                  const int y,
                                  const int w,
                                  const int h);
  };
//+------------------------------------------------------------------+
Constructores de clase:
//+------------------------------------------------------------------+
//| Protected constructor with an object type,                       |
//| chart ID and subwindow                                           |
//+------------------------------------------------------------------+
CListBoxItem::CListBoxItem(const ENUM_GRAPH_ELEMENT_TYPE type,
                           const long chart_id,
                           const int subwindow,
                           const string descript,
                           const int x,
                           const int y,
                           const int w,
                           const int h) : CButton(type,chart_id,subwindow,descript,x,y,w,h)
  {
//--- Set the specified graphical element type for the object and assign the library object type to the current object
   this.SetTypeElement(type);
   this.m_type=OBJECT_DE_TYPE_GWF_COMMON;
   this.SetTextAlign(ANCHOR_LEFT);
   this.SetTextShiftSpace(1);
  }
//+------------------------------------------------------------------+
//| Constructor                                                      |
//+------------------------------------------------------------------+
CListBoxItem::CListBoxItem(const long chart_id,
                           const int subwindow,
                           const string descript,
                           const int x,
                           const int y,
                           const int w,
                           const int h) : CButton(GRAPH_ELEMENT_TYPE_WF_LIST_BOX_ITEM,chart_id,subwindow,descript,x,y,w,h)
  {
   this.SetTypeElement(GRAPH_ELEMENT_TYPE_WF_LIST_BOX_ITEM);
   this.m_type=OBJECT_DE_TYPE_GWF_COMMON;
   this.SetTextAlign(ANCHOR_LEFT);
   this.SetTextShiftSpace(1);
  }
//+------------------------------------------------------------------+
Los dos constructores son casi idénticos, salvo que el protegido tiene un parámetro formal al que se le transmite el tipo de objeto, y este tipo se pasa al constructor de la clase padre, mientras que en el constructor paramétrico, el tipo de objeto se especifica exactamente como ListBoxItem. Esta es la forma en que hemos configurado ahora todos los objetos de la biblioteca WinForms. Cada constructor establece el desplazamiento del texto hacia la derecha en un carácter.
Método que crea una línea formada por el número de caracteres de desplazamiento:
//+------------------------------------------------------------------+
//| Create a string consisting of the number of shift characters     |
//+------------------------------------------------------------------+
void CListBoxItem::SetTextShiftSpace(const uchar value)
  {
   this.m_text_shift=value;
   this.m_shift_space="";
   switch(this.TextAlign())
     {
      case ANCHOR_LEFT        :
      case ANCHOR_LEFT_LOWER  :
      case ANCHOR_LEFT_UPPER  :
        for(int i=0;i<(int)this.m_text_shift;i++)
           this.m_shift_space+=" ";
        break;
      default:
        break;
     }
  }
//+------------------------------------------------------------------+
Al método se le transmite el número de caracteres en los que se debe desplazar la línea. A continuación, se establece el valor inicial de la línea de desplazamiento. Dependiendo de la alineación del texto, y si sucede desde el borde izquierdo, el ciclo añadirá un carácter de espacio a la línea de desplazamiento en cada iteración del ciclo, según el número de caracteres de desplazamiento transmitidos. Al final del ciclo, la línea contendrá el número necesario de caracteres de espacio.
Método que establece el texto de un elemento:
//+------------------------------------------------------------------+
//| Set the element text                                             |
//+------------------------------------------------------------------+
void CListBoxItem::SetText(const string text)
  {
   this.SetProperty(CANV_ELEMENT_PROP_TEXT,this.GetTextShiftSpace()+text);
  }
//+------------------------------------------------------------------+
Aquí, en la propiedad del objeto, se escribirá el texto del objeto con el número de espacios añadidos a la izquierda establecido por el método SetTextShiftSpace(), que comentamos anteriormente.
En la clase del objeto ListBox, en el archivo \MQL5\Include\DoEasy\Objects\Graph\WForms\Common Controls\ListBox.mqh, en su sección privada, añadiremos una variable para almacenar el desplazamiento del texto de los objetos de colección (de la clase de objeto ListBoxItem, comentada anteriormente); asimismo, en la sección pública, declararemos los métodos para trabajar con la nueva variable, y en la sección protegida, declararemos el constructor protegido:
//+------------------------------------------------------------------+
//| ListBox object class of the WForms controls                      |
//+------------------------------------------------------------------+
class CListBox : public CElementsListBox
  {
private:
   uchar             m_text_shift;                       // ListBoxItem elements text shift to the right from the left edge in characters
//--- Create a new graphical object
   virtual CGCnvElement *CreateNewGObject(const ENUM_GRAPH_ELEMENT_TYPE type,
                                          const int element_num,
                                          const string descript,
                                          const int x,
                                          const int y,
                                          const int w,
                                          const int h,
                                          const color colour,
                                          const uchar opacity,
                                          const bool movable,
                                          const bool activity);
public:
//--- (1) Set and (2) return the element text shift to the right from the left edge in characters
   void              SetTextShift(const uchar value);
   uchar             TextShift(void)                  const { return this.m_text_shift;   }
//--- Create a list from the specified number of rows (Label objects)
   void              CreateList(const int line_count,const int new_column_width=0,const bool autosize=true);

protected:
//--- Protected constructor with object type, chart ID and subwindow
                     CListBox(const ENUM_GRAPH_ELEMENT_TYPE type,
                              const long chart_id,
                              const int subwindow,
                              const string descript,
                              const int x,
                              const int y,
                              const int w,
                              const int h);
public:
//--- Constructor
                     CListBox(const long chart_id,
                              const int subwindow,
                              const string descript,
                              const int x,
                              const int y,
                              const int w,
                              const int h);
  };
//+------------------------------------------------------------------+
Hemos implementado y mejorado los constructores de forma idéntica a los demás objetos de las otras clases, así que no los repetiremos aquí.
Vamos a mejorar el método que crea una lista con un número determinado de líneas (ListBoxItem).
Ahora, en lugar del objeto de la clase CButton, trabajaremos con la nueva clase CListBoxItem, y, por consiguiente, crearemos un objeto de esta clase. Después de crear el objeto, estableceremos el desplazamiento de su texto y estableceremos el texto del elemento de la colección creado por defecto:
//+------------------------------------------------------------------+
//| Create the list from the specified number of rows (ListBoxItem)  |
//+------------------------------------------------------------------+
void CListBox::CreateList(const int count,const int new_column_width=0,const bool autosize=true)
  {
//--- Create the pointer to the CListBoxItem object
   CListBoxItem *obj=NULL;
//--- Calculate the width of the created object depending on the specified column width
   int width=(new_column_width>0 ? new_column_width : this.Width()-this.BorderSizeLeft()-this.BorderSizeRight());
//--- Create the specified number of ListBoxItem objects
   CElementsListBox::CreateElements(GRAPH_ELEMENT_TYPE_WF_LIST_BOX_ITEM,count,0,0,width,15,new_column_width,autosize);
//--- In the loop by the created number of objects
   for(int i=0;i<this.ElementsTotal();i++)
     {
      //--- Get the created object from the list by the loop index
      obj=this.GetElement(i);
      //--- If the object could not be obtained, send the appropriate message to the log and move on to the next one
      if(obj==NULL)
        {
         ::Print(DFUN,MSG_ELM_LIST_ERR_FAILED_GET_GRAPH_ELEMENT_OBJ,": ",this.TypeElementDescription(GRAPH_ELEMENT_TYPE_WF_LIST_BOX_ITEM));
         continue;
        }
      //--- Set left center text alignment
      obj.SetTextAlign(ANCHOR_LEFT);
      obj.SetTextShiftSpace(this.TextShift());
      //--- Set the object text
      obj.SetFontSize(8);
      obj.SetText(TypeGraphElementAsString(obj.TypeGraphElement())+string(i+1));
      //--- Set the background, text and frame color
      obj.SetBackgroundStateOnColor(clrDodgerBlue,true);
      obj.SetBackgroundStateOnColorMouseOver(obj.ChangeColorLightness(obj.BackgroundStateOnColor(),-5));
      obj.SetBackgroundStateOnColorMouseDown(obj.ChangeColorLightness(obj.BackgroundStateOnColor(),-10));
      obj.SetForeStateOnColor(this.BackgroundColor(),true);
      obj.SetForeStateOnColorMouseOver(obj.ChangeColorLightness(obj.ForeStateOnColor(),-5));
      obj.SetForeStateOnColorMouseDown(obj.ChangeColorLightness(obj.ForeStateOnColor(),-10));
      obj.SetBorderColor(obj.BackgroundColor(),true);
      obj.SetBorderColorMouseDown(obj.BackgroundColorMouseDown());
      obj.SetBorderColorMouseOver(obj.BackgroundColorMouseOver());
      //--- Set the flags of the toggle and group buttons
      obj.SetToggleFlag(true);
      obj.SetGroupButtonFlag(true);
     }
//--- If the flag of auto resizing the base object is passed to the method,
//--- set the auto resize mode to "increase and decrease"
   if(autosize)
      this.SetAutoSizeMode(CANV_ELEMENT_AUTO_SIZE_MODE_GROW_SHRINK,false);
  }
//+------------------------------------------------------------------+
Método que establece en caracteres el desplazamiento del texto del elemento a la derecha del borde izquierdo:
//+------------------------------------------------------------------+
//| Set the element text shift                                       |
//| to the right from the left edge in characters                    |
//+------------------------------------------------------------------+
void CListBox::SetTextShift(const uchar value)
  {
   this.m_text_shift=value;
   for(int i=0;i<this.ElementsTotal();i++)
     {
      CListBoxItem *obj=this.GetElement(i);
      if(obj==NULL || obj.TextShift()==value)
         continue;
      obj.SetTextShiftSpace(value);
      obj.SetText(obj.Text());
      obj.Update(false);
     }
  }
//+------------------------------------------------------------------+
Aquí, escribiremos en una variable el número de caracteres de desplazamiento transmitidos al método, luego haremos un ciclo por la lista de objetos vinculados para obtener el siguiente objeto y establecer el texto de desplazamiento para él usando el método del objeto SetText() que analizamos antes al hablar de los métodos de la clase CListBoxItem.
En la clase de objeto de contenedor básico, en el archivo MQL5Include\DoEasy\Objects\Graph\WForms\Containers\Container.mqh, eliminaremos el constructor innecesario:
                     CContainer(const string name) : CWinFormBase(::ChartID(),0,name,0,0,0,0)
                       {
                        CGBaseObj::SetTypeElement(GRAPH_ELEMENT_TYPE_WF_CONTAINER);
                        CGCnvElement::SetProperty(CANV_ELEMENT_PROP_TYPE,GRAPH_ELEMENT_TYPE_WF_CONTAINER);
                        this.m_type=OBJECT_DE_TYPE_GWF_CONTAINER;
                        this.SetForeColor(CLR_DEF_FORE_COLOR,true);
                        this.SetFontBoldType(FW_TYPE_NORMAL);
                        this.SetMarginAll(3);
                        this.SetPaddingAll(0);
                        this.SetDockMode(CANV_ELEMENT_DOCK_MODE_NONE,false);
                        this.SetBorderStyle(FRAME_STYLE_NONE);
                        this.SetAutoScroll(false,false);
                        this.SetAutoScrollMarginAll(0);
                        this.SetAutoSize(false,false);
                        this.SetAutoSizeMode(CANV_ELEMENT_AUTO_SIZE_MODE_GROW,false);
                        this.Initialize();
                       }
//--- Destructor
                    ~CContainer();
  };
//+------------------------------------------------------------------+
En la sección protegida, declararemos un constructor protegido:
protected:
//--- Protected constructor with object type, chart ID and subwindow
                     CContainer(const ENUM_GRAPH_ELEMENT_TYPE type,
                                const long chart_id,
                                const int subwindow,
                                const string descript,
                                const int x,
                                const int y,
                                const int w,
                                const int h);
public:
//--- Constructor
                     CContainer(const long chart_id,
                                const int subwindow,
                                const string descript,
                                const int x,
                                const int y,
                                const int w,
                                const int h);
La implementación del constructor protegido resulta idéntica a todos los constructores protegidos añadidos anteriormente en otras clases.
En el método que establece los parámetros del objeto vinculado,añadiremos el mismo procesamiento del objeto ListBoxItem que usado para los objetos Button y TabHeader:
      //--- For "Label", "CheckBox" and "RadioButton" WinForms objects
      case GRAPH_ELEMENT_TYPE_WF_LABEL             :
      case GRAPH_ELEMENT_TYPE_WF_CHECKBOX          :
      case GRAPH_ELEMENT_TYPE_WF_RADIOBUTTON       :
        //--- set the object text color depending on the one passed to the method:
        //--- either the container text color, or the one passed to the method.
        //--- The frame color is set equal to the text color
        //--- Set the background color to transparent
        obj.SetForeColor(colour==clrNONE ? this.ForeColor() : colour,true);
        obj.SetBorderColor(obj.ForeColor(),true);
        obj.SetBackgroundColor(CLR_CANV_NULL,true);
        obj.SetOpacity(0,false);
        break;
      //--- For the Button, TabHeader and ListBoxItem WinForms objects
      case GRAPH_ELEMENT_TYPE_WF_BUTTON            :
      case GRAPH_ELEMENT_TYPE_WF_TAB_HEADER        :
      case GRAPH_ELEMENT_TYPE_WF_LIST_BOX_ITEM     :
        //--- set the object text color as a container text color depending on the one passed to the method:
        //--- set the background color depending on the one passed to the method:
        //--- either the default standard control background color, or the one passed to the method.
        //--- The frame color is set equal to the text color
        obj.SetForeColor(this.ForeColor(),true);
        obj.SetBackgroundColor(colour==clrNONE ? CLR_DEF_CONTROL_STD_BACK_COLOR : colour,true);
        obj.SetBorderColor(obj.ForeColor(),true);
        obj.SetBorderStyle(FRAME_STYLE_SIMPLE);
        break;
      //--- For "ListBox", "CheckedListBox" and "ButtonListBox" WinForms object
      case GRAPH_ELEMENT_TYPE_WF_LIST_BOX          :
      case GRAPH_ELEMENT_TYPE_WF_CHECKED_LIST_BOX  :
      case GRAPH_ELEMENT_TYPE_WF_BUTTON_LIST_BOX   :
        //--- set the object text color as a container text color depending on the one passed to the method:
        //--- set the background color depending on the one passed to the method:
        //--- either the default standard control background color, or the one passed to the method.
        //--- The frame color is set equal to the text color
        obj.SetBackgroundColor(colour==clrNONE ? CLR_DEF_CONTROL_STD_BACK_COLOR : colour,true);
        obj.SetBorderColor(CLR_DEF_BORDER_COLOR,true);
        obj.SetForeColor(CLR_DEF_FORE_COLOR,true);
        break;
El procesamiento del objeto TabPage, ahora ausente, lo eliminaremos del método:
        break;
      case GRAPH_ELEMENT_TYPE_WF_TAB_PAGE          :
        //--- set the object text color as a container text color depending on the one passed to the method:
        //--- set the background color depending on the one passed to the method:
        //--- either the default standard control background color, or the one passed to the method.
        //--- The frame color is set equal to the text color
        obj.SetBackgroundColor(colour==clrNONE ? CLR_DEF_CONTROL_TAB_PAGE_BACK_COLOR : colour,true);
        obj.SetBackgroundColorMouseDown(CLR_DEF_CONTROL_TAB_PAGE_MOUSE_DOWN);
        obj.SetBackgroundColorMouseOver(CLR_DEF_CONTROL_TAB_PAGE_MOUSE_OVER);
        obj.SetBorderColor(CLR_DEF_CONTROL_TAB_PAGE_BORDER_COLOR,true);
        obj.SetBorderColorMouseDown(CLR_DEF_CONTROL_TAB_PAGE_BORDER_MOUSE_DOWN);
        obj.SetBorderColorMouseOver(CLR_DEF_CONTROL_TAB_PAGE_BORDER_MOUSE_OVER);
        obj.SetForeColor(CLR_DEF_FORE_COLOR,true);
        obj.SetOpacity(CLR_DEF_CONTROL_TAB_PAGE_OPACITY);
        obj.SetBorderSizeAll(1);
        obj.SetBorderStyle(FRAME_STYLE_NONE);
        break;
      case GRAPH_ELEMENT_TYPE_WF_TAB_CONTROL       :
Vamos a incluir en el archivo de clase del objeto básico de lista de controles \MQL5\Include\DoEasy\Objects\Graph\WForms\Common Controls\ElementsListBox.mqh el archivo de clase CListBoxItem:
//+------------------------------------------------------------------+
//| Include files                                                    |
//+------------------------------------------------------------------+
#include "..\Containers\Container.mqh"
#include "..\ListBoxItem.mqh"
//+------------------------------------------------------------------+
//| Class of the base object of the WForms control list              |
//+------------------------------------------------------------------+
La clase de colección de lista de controles estará ahora disponible en otros objetos de la biblioteca.
De la misma manera que sucede con los otros objetos, declararemos un constructor protegido:
protected:
//--- Create the specified number of specified WinForms objects
   void              CreateElements(ENUM_GRAPH_ELEMENT_TYPE element_type,
                                    const int count,
                                    const int x,
                                    const int y,
                                    const int w,
                                    const int h,
                                    uint new_column_width=0,
                                    const bool autosize=true);

//--- Protected constructor with object type, chart ID and subwindow
                     CElementsListBox(const ENUM_GRAPH_ELEMENT_TYPE type,
                                      const long chart_id,
                                      const int subwindow,
                                      const string descript,
                                      const int x,
                                      const int y,
                                      const int w,
                                      const int h);
public:
//--- Constructor
La implementación del constructor protegido y la mejora del constructor paramétrico son idénticas al resto de los objetos WinForms.
Clase TabHeader: encabezado de la pestaña del objeto TabControl
El encabezado de la pestaña TabControl se basará en el objeto botón. El encabezado de la pestaña, así como el botón de interruptor, deberán estar activados (pestaña seleccionada) o desactivados (otra pestaña seleccionada), y todos los encabezados deberán funcionar en grupo -al igual que los botones de grupo- si una pestaña está seleccionada, las demás no deberán estar seleccionadas. No es posible hacer que todas las pestañas no estén seleccionadas: al menos una deberá permanecer siempre seleccionada.
Los botones pueden hacer todo esto, pero no pueden cambiar su tamaño en función de su estado. Los encabezados de las pestañas deben hacerlo. La pestaña seleccionada tiene un encabezado ligeramente mayor que la no seleccionada. Otra cosa más: los encabezados de las pestañas se pueden colocar en el control en cuatro lados: arriba, abajo, izquierda y derecha. En consecuencia, el marco tampoco deberá dibujarse en el lado que está en contacto con el campo de la pestaña. Así que deberemos crear un nuevo método para redibujar el botón, en el que el borde se dibujará según la ubicación del encabezado en el control, y un nuevo método para manejar el clic, donde el botón se redimensionará y se desplazará a nuevas coordenadas para que siempre permanezca presionado contra el campo de la pestaña.
En la carpeta de la biblioteca \MQL5\Include\DoEasy\Objects\Graph\WForms\, crearemos el nuevo archivo TabHeader.mqh de la clase TabHeader. La clase deberá heredar de la clase de objeto de botón, mientras que su archivo deberá incluirse en el archivo de la clase creada:
//+------------------------------------------------------------------+
//|                                                    TabHeader.mqh |
//|                                  Copyright 2022, MetaQuotes Ltd. |
//|                             https://mql5.com/en/users/artmedia70 |
//+------------------------------------------------------------------+
#property copyright "Copyright 2022, MetaQuotes Ltd."
#property link      "https://mql5.com/en/users/artmedia70"
#property version   "1.00"
#property strict    // Necessary for mql4
//+------------------------------------------------------------------+
//| Include files                                                    |
//+------------------------------------------------------------------+
#include "Common Controls\Button.mqh"
//+------------------------------------------------------------------+
//| TabHeader object class of WForms TabControl                      |
//+------------------------------------------------------------------+
class CTabHeader : public CButton
  {
  }
En las secciones privada, protegida y pública de la clase, declararemos las variables y los métodos para que funcione la clase:
//+------------------------------------------------------------------+
//| TabHeader object class of WForms TabControl                      |
//+------------------------------------------------------------------+
class CTabHeader : public CButton
  {
private:
   int               m_width_off;                        // Object width in the released state
   int               m_height_off;                       // Object height in the released state
   int               m_width_on;                         // Object width in the selected state
   int               m_height_on;                        // Object height in the selected state
   int               m_col;                              // Header column index
   int               m_row;                              // Header row index
//--- Sets the width, height and shift of the element depending on the state
   void              SetWH(void);
//--- Adjust the size and location of the element depending on the state
   void              WHProcessStateOn(void);
   void              WHProcessStateOff(void);
//--- Draw the element frame depending on the location
   void              DrawFrame(void);

protected:
//--- 'The cursor is inside the active area, the left mouse button is clicked' event handler
   virtual void      MouseActiveAreaReleasedHandler(const int id,const long& lparam,const double& dparam,const string& sparam);

public:
//--- Set the control size in the (1) released and (2) selected state
   bool              SetSizeOff(void)  { return(CGCnvElement::SetWidth(this.m_width_off) && CGCnvElement::SetHeight(this.m_height_off) ? true : false);  }
   bool              SetSizeOn(void)   { return(CGCnvElement::SetWidth(this.m_width_on) && CGCnvElement::SetHeight(this.m_height_on)   ? true : false);  }
//--- Sets the size of the control element
   void              SetWidthOff(const int value)                                            { this.m_width_off=value;  }
   void              SetHeightOff(const int value)                                           { this.m_height_off=value; }
   void              SetWidthOn(const int value)                                             { this.m_width_on=value;   }
   void              SetHeightOn(const int value)                                            { this.m_height_on=value;  }
//--- Returns the control size
   int               WidthOff(void)                                                    const { return this.m_width_off; }
   int               HeightOff(void)                                                   const { return this.m_height_off;}
   int               WidthOn(void)                                                     const { return this.m_width_on;  }
   int               HeightOn(void)                                                    const { return this.m_height_on; }
//--- (1) Set and (2) return the index of the tab title row
   void              SetRow(const int value)                                                 { this.m_row=value;        }
   int               Row(void)                                                         const { return this.m_row;       }
//--- (1) Set and (2) return the index of the tab title column
   void              SetColumn(const int value)                                              { this.m_col=value;        }
   int               Column(void)                                                      const { return this.m_col;       }
//--- Set the tab location
   void              SetTabLocation(const int index,const int row,const int col)
                       {
                        this.SetRow(row);
                        this.SetColumn(col);
                       }
//--- (1) Sets and (2) return the location of the object on the control
   void              SetAlignment(const ENUM_CANV_ELEMENT_ALIGNMENT alignment)
                       {
                        this.SetProperty(CANV_ELEMENT_PROP_TAB_ALIGNMENT,alignment);
                        if(this.Alignment()==CANV_ELEMENT_ALIGNMENT_TOP)
                           this.SetBorderSize(1,1,1,0);
                        if(this.Alignment()==CANV_ELEMENT_ALIGNMENT_BOTTOM)
                           this.SetBorderSize(1,0,1,1);
                        if(this.Alignment()==CANV_ELEMENT_ALIGNMENT_LEFT)
                           this.SetBorderSize(1,1,0,1);
                        if(this.Alignment()==CANV_ELEMENT_ALIGNMENT_RIGHT)
                           this.SetBorderSize(0,1,1,1);
                       }
   ENUM_CANV_ELEMENT_ALIGNMENT Alignment(void)  const { return (ENUM_CANV_ELEMENT_ALIGNMENT)this.GetProperty(CANV_ELEMENT_PROP_TAB_ALIGNMENT);  }


//--- Sets the state of the control
   virtual void      SetState(const bool flag);

//--- Clear the element filling it with color and opacity
   virtual void      Erase(const color colour,const uchar opacity,const bool redraw=false);
//--- Clear the element with a gradient fill
   virtual void      Erase(color &colors[],const uchar opacity,const bool vgradient,const bool cycle,const bool redraw=false);

//--- Last mouse event handler
   virtual void      OnMouseEventPostProcessing(void);

protected:
//--- Protected constructor with object type, chart ID and subwindow
                     CTabHeader(const ENUM_GRAPH_ELEMENT_TYPE type,
                                const long chart_id,
                                const int subwindow,
                                const string descript,
                                const int x,
                                const int y,
                                const int w,
                                const int h);
public:
//--- Constructor
                     CTabHeader(const long chart_id,
                             const int subwindow,
                             const string descript,
                             const int x,
                             const int y,
                             const int w,
                             const int h);
  };
//+------------------------------------------------------------------+
Partiendo de las descripciones de las variables y sus métodos, su finalidad deberá quedar clara. Veamos las descripciones más de cerca.
Los constructores de la clase están protegidos y son paramétricos. La implementación resulta casi idéntica, y la lógica es exactamente la misma que en los demás objetos de la biblioteca: el constructor protegido transmitirá el tipo especificado al constructor de la clase padre, mientras que el constructor paramétrico transmitirá su propio tipo de objeto al padre:
//+------------------------------------------------------------------+
//| Protected constructor with an object type,                       |
//| chart ID and subwindow                                           |
//+------------------------------------------------------------------+
CTabHeader::CTabHeader(const ENUM_GRAPH_ELEMENT_TYPE type,
                       const long chart_id,
                       const int subwindow,
                       const string descript,
                       const int x,
                       const int y,
                       const int w,
                       const int h) : CButton(type,chart_id,subwindow,descript,x,y,w,h)
  {
   this.SetTypeElement(GRAPH_ELEMENT_TYPE_WF_TAB_HEADER);
   this.m_type=OBJECT_DE_TYPE_GWF_COMMON;
   this.SetAlignment(CANV_ELEMENT_ALIGNMENT_TOP);
   this.SetToggleFlag(true);
   this.SetGroupButtonFlag(true);
   this.SetText(TypeGraphElementAsString(this.TypeGraphElement()));
   this.SetForeColor(CLR_DEF_FORE_COLOR,true);
   this.SetOpacity(CLR_DEF_CONTROL_TAB_HEAD_OPACITY,true);
   this.SetBackgroundColor(CLR_DEF_CONTROL_TAB_HEAD_BACK_COLOR,true);
   this.SetBackgroundColorMouseDown(CLR_DEF_CONTROL_TAB_HEAD_MOUSE_DOWN);
   this.SetBackgroundColorMouseOver(CLR_DEF_CONTROL_TAB_HEAD_MOUSE_OVER);
   this.SetBackgroundStateOnColor(CLR_DEF_CONTROL_TAB_HEAD_BACK_COLOR_ON,true);
   this.SetBackgroundStateOnColorMouseDown(CLR_DEF_CONTROL_TAB_HEAD_BACK_DOWN_ON);
   this.SetBackgroundStateOnColorMouseOver(CLR_DEF_CONTROL_TAB_HEAD_BACK_OVER_ON);
   this.SetBorderStyle(FRAME_STYLE_SIMPLE);
   this.SetBorderColor(CLR_DEF_CONTROL_TAB_HEAD_BORDER_COLOR,true);
   this.SetBorderColorMouseDown(CLR_DEF_CONTROL_TAB_HEAD_BORDER_MOUSE_DOWN);
   this.SetBorderColorMouseOver(CLR_DEF_CONTROL_TAB_HEAD_BORDER_MOUSE_OVER);
   this.SetWidthOff(this.Width());
   this.SetHeightOff(this.Height());
   this.SetWidthOn(this.Width()+4);
   this.SetHeightOn(this.Height()+2);
   this.SetState(false);
  }
//+------------------------------------------------------------------+
//| Constructor                                                      |
//+------------------------------------------------------------------+
CTabHeader::CTabHeader(const long chart_id,
                       const int subwindow,
                       const string descript,
                       const int x,
                       const int y,
                       const int w,
                       const int h) : CButton(GRAPH_ELEMENT_TYPE_WF_TAB_HEADER,chart_id,subwindow,descript,x,y,w,h)
  {
   this.SetTypeElement(GRAPH_ELEMENT_TYPE_WF_TAB_HEADER);
   this.m_type=OBJECT_DE_TYPE_GWF_COMMON;
   this.SetAlignment(CANV_ELEMENT_ALIGNMENT_TOP);
   this.SetToggleFlag(true);
   this.SetGroupButtonFlag(true);
   this.SetText(TypeGraphElementAsString(this.TypeGraphElement()));
   this.SetForeColor(CLR_DEF_FORE_COLOR,true);
   this.SetOpacity(CLR_DEF_CONTROL_TAB_HEAD_OPACITY,true);
   this.SetBackgroundColor(CLR_DEF_CONTROL_TAB_HEAD_BACK_COLOR,true);
   this.SetBackgroundColorMouseDown(CLR_DEF_CONTROL_TAB_HEAD_MOUSE_DOWN);
   this.SetBackgroundColorMouseOver(CLR_DEF_CONTROL_TAB_HEAD_MOUSE_OVER);
   this.SetBackgroundStateOnColor(CLR_DEF_CONTROL_TAB_HEAD_BACK_COLOR_ON,true);
   this.SetBackgroundStateOnColorMouseDown(CLR_DEF_CONTROL_TAB_HEAD_BACK_DOWN_ON);
   this.SetBackgroundStateOnColorMouseOver(CLR_DEF_CONTROL_TAB_HEAD_BACK_OVER_ON);
   this.SetBorderStyle(FRAME_STYLE_SIMPLE);
   this.SetBorderColor(CLR_DEF_CONTROL_TAB_HEAD_BORDER_COLOR,true);
   this.SetBorderColorMouseDown(CLR_DEF_CONTROL_TAB_HEAD_BORDER_MOUSE_DOWN);
   this.SetBorderColorMouseOver(CLR_DEF_CONTROL_TAB_HEAD_BORDER_MOUSE_OVER);
   this.SetWidthOff(this.Width());
   this.SetHeightOff(this.Height());
   this.SetWidthOn(this.Width()+4);
   this.SetHeightOn(this.Height()+2);
   this.SetState(false);
  }
//+------------------------------------------------------------------+
El cuerpo del constructor establecerá los valores por defecto para los colores del objeto en los diferentes estados. Las banderas del botón de interruptor y del botón que opera en el grupo se establecerán inmediatamente. Para el estado pulsado, el tamaño del objeto se establecerá aumentado en cada lado, salvo en la pestaña adyacente al campo, en dos píxeles.
Método que establece el estado del control:
//+------------------------------------------------------------------+
//| Set the state of the control                                     |
//+------------------------------------------------------------------+
void CTabHeader::SetState(const bool flag)
  {
   bool state=this.State();
   CButton::SetState(flag);
   if(state!=flag)
      this.SetWH();
  }
//+------------------------------------------------------------------+
Primero guardaremos el estado actual, luego llamaremos al método de la clase padre para establecer el estado, y después, si el estado transmitido no era el necesario, llamaremos al método de cambio de tamaño del encabezado de la pestaña.
Método que establece la anchura, la altura y el desplazamiento de un elemento según su estado:
//+------------------------------------------------------------------+
//| Set the element width, height and shift                          |
//| depending on its state                                           |
//+------------------------------------------------------------------+
void CTabHeader::SetWH(void)
  {
   if(this.State())
      this.WHProcessStateOn();
   else
      this.WHProcessStateOff();
  }
//+------------------------------------------------------------------+
Si el estado es "activado", llamaremos al método de cambio de tamaño y posición para el estado "activado", de lo contrario, llamaremos al método de cambio de tamaño y posición para el estado "desactivado".
Método que ajusta el tamaño y la ubicación de un elemento en el estado "seleccionado" según su ubicación:
//+------------------------------------------------------------------+
//| Adjust the element size and location                             |
//| in the "selected" state depending on its location                |
//+------------------------------------------------------------------+
void CTabHeader::WHProcessStateOn(void)
  {
//--- If failed to get a new size, leave
   if(!this.SetSizeOn())
      return;
//--- Depending on the title location,
   switch(this.Alignment())
     {
      case CANV_ELEMENT_ALIGNMENT_TOP :
        //--- move it where necessary and set new relative coordinates
        if(this.Move(this.CoordX()-2,this.CoordY()-2))
          {
           this.SetCoordXRelative(this.CoordXRelative()-2);
           this.SetCoordYRelative(this.CoordYRelative()-2);
          }
        break;
      case CANV_ELEMENT_ALIGNMENT_BOTTOM :
        //--- move it where necessary and set new relative coordinates
        if(this.Move(this.CoordX()-2,this.CoordY()))
          {
           this.SetCoordXRelative(this.CoordXRelative()-2);
           this.SetCoordYRelative(this.CoordYRelative());
          }
        break;
      default:
        break;
     }
   this.Update(false);
  }
//+------------------------------------------------------------------+
La lógica del método está comentada en el código. Dependiendo de la posición del encabezado (hasta ahora solo se procesaban dos posiciones, la superior y la inferior), el encabezado se redimensionará y se desplazará a unas nuevas coordenadas, de forma que el borde que está en contacto con el campo de la pestaña permanecerá en su sitio. Visualmente, se trataría de una ampliación del objeto en dos píxeles por cada lado, salvo el lado adyacente al campo.
Método que ajusta el tamaño y la ubicación de un elemento en el estado "no seleccionado" según su ubicación:
//+------------------------------------------------------------------+
//| Adjust the element size and location                             |
//| in the "released" state depending on its location                |
//+------------------------------------------------------------------+
void CTabHeader::WHProcessStateOff(void)
  {
//--- If failed to get a new size, leave
   if(!this.SetSizeOff())
      return;
//--- Depending on the title location,
   switch(this.Alignment())
     {
      case CANV_ELEMENT_ALIGNMENT_TOP :
        //--- move it where necessary and set new relative coordinates
        if(this.Move(this.CoordX()+2,this.CoordY()+2))
          {
           this.SetCoordXRelative(this.CoordXRelative()+2);
           this.SetCoordYRelative(this.CoordYRelative()+2);
          }
        break;
      case CANV_ELEMENT_ALIGNMENT_BOTTOM :
        //--- move it where necessary and set new relative coordinates
        if(this.Move(this.CoordX()+2,this.CoordY()))
          {
           this.SetCoordXRelative(this.CoordXRelative()+2);
           this.SetCoordYRelative(this.CoordYRelative());
          }
        break;
      default:
        break;
     }
   this.Update(false);
  }
//+------------------------------------------------------------------+
Dependiendo de la posición del encabezado (actualmente solo se procesan dos posiciones, la superior y la inferior), el encabezado se redimensionará y se desplazará a las nuevas coordenadas, de forma que el borde que está en contacto con el campo de la pestaña permanezca en su lugar. Visualmente, esto reducirá el objeto en dos píxeles por cada lado, salvo en el lado adyacente al campo.
Método que dibuja el marco de un elemento según su ubicación:
//+------------------------------------------------------------------+
//| Draw the element frame depending on the location                 |
//+------------------------------------------------------------------+
void CTabHeader::DrawFrame(void)
  {
//--- Set initial coordinates
   int x1=0;
   int x2=this.Width()-1;
   int y1=0;
   int y2=this.Height()-1;
//--- Depending on the position of the header, draw a frame
//--- so that the edge of the drawn frame adjacent to the field goes beyond the object
//--- thus, visually the edge will not be drawn on the adjacent side
   switch(this.Alignment())
     {
      case CANV_ELEMENT_ALIGNMENT_TOP     :
        this.DrawRectangle(x1,y1,x2,y2+1,this.BorderColor(),this.Opacity());
        break;
      case CANV_ELEMENT_ALIGNMENT_BOTTOM  :
        this.DrawRectangle(x1,y1-1,x2,y2,this.BorderColor(),this.Opacity());
        break;
      case CANV_ELEMENT_ALIGNMENT_LEFT    :
        this.DrawRectangle(x1,y1,x2+1,y2,this.BorderColor(),this.Opacity());
        break;
      case CANV_ELEMENT_ALIGNMENT_RIGHT   :
        this.DrawRectangle(x1-1,y1,x2,y2,this.BorderColor(),this.Opacity());
        break;
      default:
        break;
     }
  }
//+------------------------------------------------------------------+
La lógica del método está comentada en el código. Si dibujamos un rectángulo en un objeto de forma que las coordenadas de uno de sus lados se extiendan más allá del objeto, no se dibujará nada en ese lado. Esto es lo que usaremos aquí: donde el encabezado debe ser adyacente al campo de la pestaña, especificaremos las coordenadas que ya sabemos de antemano fuera del objeto, y no se dibujará ningún marco en este lado.
Método que limpia un elemento con relleno de color y opacidad:
//+------------------------------------------------------------------+
//| Clear the element filling it with color and opacity              |
//+------------------------------------------------------------------+
void CTabHeader::Erase(const color colour,const uchar opacity,const bool redraw=false)
  {
//--- Fill the element having the specified color and the redrawing flag
   CGCnvElement::Erase(colour,opacity,redraw);
//--- If the object has a frame, draw it
   if(this.BorderStyle()!=FRAME_STYLE_NONE && redraw)
      this.DrawFrame();
//--- Update the element having the specified redrawing flag
   this.Update(redraw);
  }
//+------------------------------------------------------------------+
El método es virtual, y redefine el método del objeto padre donde se dibuja el marco dentro del objeto. Aquí llamamos al anterior método para dibujar un marco en solo tres lados del objeto.
Método que limpia el elemento con un relleno de gradiente:
//+------------------------------------------------------------------+
//| Clear the element with a gradient fill                           |
//+------------------------------------------------------------------+
void CTabHeader::Erase(color &colors[],const uchar opacity,const bool vgradient,const bool cycle,const bool redraw=false)
  {
//--- Fill the element having the specified color array and the redrawing flag
   CGCnvElement::Erase(colors,opacity,vgradient,cycle,redraw);
//--- If the object has a frame, draw it
   if(this.BorderStyle()!=FRAME_STYLE_NONE && redraw)
      this.DrawFrame();
//--- Update the element having the specified redrawing flag
   this.Update(redraw);
  }
//+------------------------------------------------------------------+
El método es idéntico al anterior, pero rellena el fondo con un color de gradiente del array de colores transmitido al método.
El manejador de eventos Cursor se encuentra dentro del área activa, el botón del ratón (izquierdo) está sin pulsar:
//+------------------------------------------------------------------+
//| 'The cursor is inside the active area,                           |
//| left mouse button released                                       |
//+------------------------------------------------------------------+
void CTabHeader::MouseActiveAreaReleasedHandler(const int id,const long& lparam,const double& dparam,const string& sparam)
  {
//--- The mouse button released outside the element means refusal to interact with the element
   if(lparam<this.CoordX() || lparam>this.RightEdge() || dparam<this.CoordY() || dparam>this.BottomEdge())
     {
      //--- If this is a simple button, set the initial background and text color
      if(!this.Toggle())
        {
         this.SetBackgroundColor(this.BackgroundColorInit(),false);
         this.SetForeColor(this.ForeColorInit(),false);
        }
      //--- If this is the toggle button, set the initial background and text color depending on whether the button is pressed or not
      else
        {
         this.SetBackgroundColor(!this.State() ? this.BackgroundColorInit() : this.BackgroundStateOnColorInit(),false);
         this.SetForeColor(!this.State() ? this.ForeColorInit() : this.ForeStateOnColorInit(),false);
        }
      //--- Set the initial frame color
      this.SetBorderColor(this.BorderColorInit(),false);
      //--- Send the test message to the journal
      Print(DFUN_ERR_LINE,TextByLanguage("Отмена","Cancel"));
     }
//--- The mouse button released within the element means a  click on the control
   else
     {
      //--- If this is a simple button, set the background and text color for "The cursor is over the active area" status
      if(!this.Toggle())
        {
         this.SetBackgroundColor(this.BackgroundColorMouseOver(),false);
         this.SetForeColor(this.ForeColorMouseOver(),false);
        }
      //--- If this is the toggle button,
      else
        {
         //--- if the button does not work in the group, set its state to the opposite,
         if(!this.GroupButtonFlag())
            this.SetState(!this.State());
         //--- if the button is not pressed yet, set it to the pressed state
         else if(!this.State())
            this.SetState(true);
         //--- set the background and text color for "The cursor is over the active area" status depending on whether the button is clicked or not
         this.SetBackgroundColor(this.State() ? this.BackgroundStateOnColorMouseOver() : this.BackgroundColorMouseOver(),false);
         this.SetForeColor(this.State() ? this.ForeStateOnColorMouseOver() : this.ForeColorMouseOver(),false);
        }
      //--- Send the test message to the journal
      Print(DFUN_ERR_LINE,TextByLanguage("Щелчок","Click"),", this.State()=",this.State(),", ID=",this.ID(),", Group=",this.Group());
      //--- Set the frame color for "The cursor is over the active area" status
      this.SetBorderColor(this.BorderColorMouseOver(),false);
     }
//--- Redraw the object
   this.Redraw(false);
  }
//+------------------------------------------------------------------+
Último manejador de eventos del ratón:
//+------------------------------------------------------------------+
//| Last mouse event handler                                         |
//+------------------------------------------------------------------+
void CTabHeader::OnMouseEventPostProcessing(void)
  {
   ENUM_MOUSE_FORM_STATE state=GetMouseState();
   switch(state)
     {
      //--- The cursor is outside the form, the mouse buttons are not clicked
      //--- The cursor is outside the form, any mouse button is clicked
      //--- The cursor is outside the form, the mouse wheel is being scrolled
      case MOUSE_FORM_STATE_OUTSIDE_FORM_NOT_PRESSED :
      case MOUSE_FORM_STATE_OUTSIDE_FORM_PRESSED     :
      case MOUSE_FORM_STATE_OUTSIDE_FORM_WHEEL       :
        if(this.MouseEventLast()==MOUSE_EVENT_INSIDE_ACTIVE_AREA_NOT_PRESSED || this.MouseEventLast()==MOUSE_EVENT_INSIDE_FORM_NOT_PRESSED)
          {
           this.SetBackgroundColor(this.State() ? this.BackgroundStateOnColor() : this.BackgroundColorInit(),false);
           this.SetForeColor(this.State() ? this.ForeStateOnColor() : this.ForeColorInit(),false);
           this.SetBorderColor(this.BorderColorInit(),false);
           this.m_mouse_event_last=ENUM_MOUSE_EVENT(state+MOUSE_EVENT_NO_EVENT);
           this.Redraw(false);
          }
        break;

      //--- The cursor is inside the form, the mouse buttons are not clicked
      //--- The cursor is inside the form, any mouse button is clicked
      //--- The cursor is inside the form, the mouse wheel is being scrolled
      //--- The cursor is inside the active area, the mouse buttons are not clicked
      //--- The cursor is inside the active area, any mouse button is clicked
      //--- The cursor is inside the active area, the mouse wheel is being scrolled
      //--- The cursor is inside the active area, left mouse button is released
      //--- The cursor is within the window scrolling area, the mouse buttons are not clicked
      //--- The cursor is within the window scrolling area, any mouse button is clicked
      //--- The cursor is within the window scrolling area, the mouse wheel is being scrolled
      case MOUSE_FORM_STATE_INSIDE_FORM_NOT_PRESSED :
      case MOUSE_FORM_STATE_INSIDE_FORM_PRESSED :
      case MOUSE_FORM_STATE_INSIDE_FORM_WHEEL :
      case MOUSE_FORM_STATE_INSIDE_ACTIVE_AREA_NOT_PRESSED :
      case MOUSE_FORM_STATE_INSIDE_ACTIVE_AREA_PRESSED :
      case MOUSE_FORM_STATE_INSIDE_ACTIVE_AREA_WHEEL :
      case MOUSE_FORM_STATE_INSIDE_ACTIVE_AREA_RELEASED :
      case MOUSE_FORM_STATE_INSIDE_SCROLL_AREA_NOT_PRESSED :
      case MOUSE_FORM_STATE_INSIDE_SCROLL_AREA_PRESSED :
      case MOUSE_FORM_STATE_INSIDE_SCROLL_AREA_WHEEL :
        break;
      //--- MOUSE_EVENT_NO_EVENT
      default:
        break;
     }
  }
//+------------------------------------------------------------------+
Ambos métodos son idénticos a los de la clase padre.
Los hemos transferido aquí para realizar una posible redefinición durante el desarrollo posterior del objeto TabControl.
Clase TabControl: continuamos el desarrollo
En el último artículo, comenzamos a desarrollar el control TabControl, pero nos encontramos con una limitación en la longitud de los nombres de los objetos gráficos creados. Después de crear un nuevo algoritmo para nombrar los elementos gráficos de la biblioteca, vamos a continuar con el archivo \MQL5\Include\DoEasy\Objects\Graph\WForms\Containers\TabControl.mqh.
Luego conectaremos el archivo de clase de objeto de encabezado de la pestaña al archivo de control:
//+------------------------------------------------------------------+
//| Include files                                                    |
//+------------------------------------------------------------------+
#include "Container.mqh"
#include "GroupBox.mqh"
#include "..\TabHeader.mqh"
//+------------------------------------------------------------------+
En la sección privada de la clase, declararemos dos métodos para establecer el estado de la pestaña indicada según el índice:
private:
   int                  m_item_width;                 // Fixed width of tab titles
   int                  m_item_height;                // Fixed height of tab titles
//--- Create a new graphical object
   virtual CGCnvElement *CreateNewGObject(const ENUM_GRAPH_ELEMENT_TYPE type,
                                          const int element_num,
                                          const string descript,
                                          const int x,
                                          const int y,
                                          const int w,
                                          const int h,
                                          const color colour,
                                          const uchar opacity,
                                          const bool movable,
                                          const bool activity);
//--- Set the tab as selected
   void              SetSelected(const int index);
//--- Set the tab as released
   void              SetUnselected(const int index);

public:
Después cambiaremos el nombre del método público CreateTabPage() por CreateTabPages(); lo haremos con el tipo retornado bool y un conjunto diferente de parámetros formales, y añadiremos dos métodos que retornarán los punteros al encabezado y al campo de la pestaña según índice:
public:
//--- Create the specified number of tabs
   bool              CreateTabPages(const int total,const int selected_page,const int tab_w=0,const int tab_h=0,const string header_text="");

//--- Return a pointer to the (1) title and (2) tab field
   CTabHeader       *GetHeader(const int index)          { return this.GetElementByType(GRAPH_ELEMENT_TYPE_WF_TAB_HEADER,index); }
   CContainer       *GetField(const int index)           { return this.GetElementByType(GRAPH_ELEMENT_TYPE_WF_CONTAINER,index);  }
Vamos a hacer que el método SetAlignment() no se limite a establecer un valor en la propiedad del objeto, sino que lo establezca para todos los encabezados de pestaña creados en el control:
//--- (1) Set and (2) return the location of tabs on the control
   void              SetAlignment(const ENUM_CANV_ELEMENT_ALIGNMENT alignment)
                       {
                        this.SetProperty(CANV_ELEMENT_PROP_TAB_ALIGNMENT,alignment);
                        CArrayObj *list=this.GetListElementsByType(GRAPH_ELEMENT_TYPE_WF_TAB_HEADER);
                        if(list==NULL)
                           return;
                        for(int i=0;i<list.Total();i++)
                          {
                           CTabHeader *header=list.At(i);
                           if(header==NULL)
                              continue;
                           header.SetAlignment(alignment);
                          }
                       }
Primero estableceremos el valor en las propiedades del objeto, luego obtendremos una lista con todos los encabezados de pestaña creados, y en un ciclo por la lista, estableceremos el mismo valor para cada objeto.
Vamos a declarar otros tres métodos públicos:
//--- Set a fixed tab size
   void              SetItemSize(const int w,const int h)
                       {
                        if(this.ItemWidth()!=w)
                           this.SetItemWidth(w);
                        if(this.ItemHeight()!=h)
                           this.SetItemHeight(h);
                       }
//--- Set the tab as selected/released
   void              Select(const int index,const bool flag);

//--- Set the title text (1) of the specified tab and (2) by index
   void              SetHeaderText(CTabHeader *header,const string text);
   void              SetHeaderText(const int index,const string text);

//--- Constructor
En el constructor de la clase, estableceremos todos los colores como transparentes, salvo el color del texto, y realizaremos los mismos cambios que hicimos con todos los objetos WinForms:
//+------------------------------------------------------------------+
//| Constructor indicating the chart and subwindow ID                |
//+------------------------------------------------------------------+
CTabControl::CTabControl(const long chart_id,
                   const int subwindow,
                   const string descript,
                   const int x,
                   const int y,
                   const int w,
                   const int h) : CContainer(GRAPH_ELEMENT_TYPE_WF_TAB_CONTROL,chart_id,subwindow,descript,x,y,w,h)
  {
   this.SetTypeElement(GRAPH_ELEMENT_TYPE_WF_TAB_CONTROL);
   this.m_type=OBJECT_DE_TYPE_GWF_CONTAINER;
   this.SetBorderSizeAll(0);
   this.SetBorderStyle(FRAME_STYLE_NONE);
   this.SetOpacity(0,true);
   this.SetBackgroundColor(CLR_CANV_NULL,true);
   this.SetBackgroundColorMouseDown(CLR_CANV_NULL);
   this.SetBackgroundColorMouseOver(CLR_CANV_NULL);
   this.SetBorderColor(CLR_CANV_NULL,true);
   this.SetBorderColorMouseDown(CLR_CANV_NULL);
   this.SetBorderColorMouseOver(CLR_CANV_NULL);
   this.SetForeColor(CLR_DEF_FORE_COLOR,true);
   this.SetAlignment(CANV_ELEMENT_ALIGNMENT_TOP);
   this.SetItemSize(58,18);
  }
//+------------------------------------------------------------------+
Este objeto está pensado para servir de contenedor y controlar las pestañas creadas en su interior, así que será completamente transparente, pero hemos dejado la capacidad de mostrar texto en él.
Método que crea el número especificado de pestañas:
//+------------------------------------------------------------------+
//| Create the specified number of tabs                              |
//+------------------------------------------------------------------+
bool CTabControl::CreateTabPages(const int total,const int selected_page,const int tab_w=0,const int tab_h=0,const string header_text="")
  {
//--- Calculate the size and initial coordinates of the tab title
   int w=(tab_w==0 ? this.ItemWidth()  : tab_w);
   int h=(tab_h==0 ? this.ItemHeight() : tab_h);

//--- In the loop by the number of tabs
   CTabHeader *header=NULL;
   for(int i=0;i<total;i++)
     {
      //--- Depending on the location of tab titles, set their initial coordinates
      int header_x=2;
      int header_y=0;
      if(this.Alignment()==CANV_ELEMENT_ALIGNMENT_TOP)
         header_y=0;
      if(this.Alignment()==CANV_ELEMENT_ALIGNMENT_BOTTOM)
         header_y=this.Height()-h;
      //--- Set the current X coordinate
      header_x=(header==NULL ? header_x : header.RightEdgeRelative());
      //--- Create the TabHeader object
      if(!this.CreateNewElement(GRAPH_ELEMENT_TYPE_WF_TAB_HEADER,header_x,header_y,w,h,clrNONE,255,this.Active(),false))
        {
         ::Print(DFUN,CMessage::Text(MSG_LIB_SYS_FAILED_CREATE_ELM_OBJ),this.TypeElementDescription(GRAPH_ELEMENT_TYPE_WF_TAB_HEADER),string(i+1));
         return false;
        }
      header=this.GetElementByType(GRAPH_ELEMENT_TYPE_WF_TAB_HEADER,i);
      if(header==NULL)
        {
         ::Print(DFUN,CMessage::Text(MSG_ELM_LIST_ERR_FAILED_GET_GRAPH_ELEMENT_OBJ),this.TypeElementDescription(GRAPH_ELEMENT_TYPE_WF_TAB_HEADER),string(i+1));
         return false;
        }
      header.SetBackgroundColor(CLR_DEF_CONTROL_TAB_HEAD_BACK_COLOR,true);
      header.SetBackgroundColorMouseDown(CLR_DEF_CONTROL_TAB_HEAD_MOUSE_DOWN);
      header.SetBackgroundColorMouseOver(CLR_DEF_CONTROL_TAB_HEAD_MOUSE_OVER);
      header.SetBackgroundStateOnColor(CLR_DEF_CONTROL_TAB_HEAD_BACK_COLOR_ON,true);
      header.SetBackgroundStateOnColorMouseDown(CLR_DEF_CONTROL_TAB_HEAD_BACK_DOWN_ON);
      header.SetBackgroundStateOnColorMouseOver(CLR_DEF_CONTROL_TAB_HEAD_BACK_OVER_ON);
      header.SetBorderStyle(FRAME_STYLE_SIMPLE);
      header.SetBorderColor(CLR_DEF_CONTROL_TAB_HEAD_BORDER_COLOR,true);
      header.SetBorderColorMouseDown(CLR_DEF_CONTROL_TAB_HEAD_BORDER_MOUSE_DOWN);
      header.SetBorderColorMouseOver(CLR_DEF_CONTROL_TAB_HEAD_BORDER_MOUSE_OVER);
      header.SetAlignment(this.Alignment());
      if(header_text!="" && header_text!=NULL)
         this.SetHeaderText(header,header_text+string(i+1));

      //--- Depending on the location of the tab headers, set the initial coordinates of the tab fields
      int field_x=0;
      int field_y=0;
      int field_h=this.Height()-header.Height();
      if(this.Alignment()==CANV_ELEMENT_ALIGNMENT_TOP)
         field_y=header.BottomEdgeRelative();
      if(this.Alignment()==CANV_ELEMENT_ALIGNMENT_BOTTOM)
         field_y=0;
      //--- Create the Container object (tab field)
      CContainer *field=NULL;
      if(!this.CreateNewElement(GRAPH_ELEMENT_TYPE_WF_CONTAINER,field_x,field_y,this.Width(),field_h,clrNONE,255,true,false))
        {
         ::Print(DFUN,CMessage::Text(MSG_LIB_SYS_FAILED_CREATE_ELM_OBJ),this.TypeElementDescription(GRAPH_ELEMENT_TYPE_WF_CONTAINER),string(i+1));
         return false;
        }
      field=this.GetElementByType(GRAPH_ELEMENT_TYPE_WF_CONTAINER,i);
      if(field==NULL)
        {
         ::Print(DFUN,CMessage::Text(MSG_ELM_LIST_ERR_FAILED_GET_GRAPH_ELEMENT_OBJ),this.TypeElementDescription(GRAPH_ELEMENT_TYPE_WF_CONTAINER),string(i+1));
         return false;
        }
      field.SetBorderSizeAll(1);
      field.SetBorderStyle(FRAME_STYLE_SIMPLE);
      field.SetOpacity(CLR_DEF_CONTROL_TAB_PAGE_OPACITY,true);
      field.SetBackgroundColor(CLR_DEF_CONTROL_TAB_PAGE_BACK_COLOR,true);
      field.SetBackgroundColorMouseDown(CLR_DEF_CONTROL_TAB_PAGE_MOUSE_DOWN);
      field.SetBackgroundColorMouseOver(CLR_DEF_CONTROL_TAB_PAGE_MOUSE_OVER);
      field.SetBorderColor(CLR_DEF_CONTROL_TAB_PAGE_BORDER_COLOR,true);
      field.SetBorderColorMouseDown(CLR_DEF_CONTROL_TAB_PAGE_BORDER_MOUSE_DOWN);
      field.SetBorderColorMouseOver(CLR_DEF_CONTROL_TAB_PAGE_BORDER_MOUSE_OVER);
      field.SetForeColor(CLR_DEF_FORE_COLOR,true);
      field.Hide();
   //---
     }
   this.Select(selected_page,true);
   return true;
  }
//+------------------------------------------------------------------+
Nuestras pestañas constan de dos objetos: un encabezado de pestaña y un campo de pestaña. El encabezado (botón) se usa para seleccionar la pestaña activa, mientras que el campo se utiliza para colocar otros controles en él. Los botones deberán mostrarse siempre y los campos de las pestañas deberán estar siempre ocultos, salvo la pestaña activa.
Aquí, primero crearemos los botones como encabezados de pestaña en el ciclo y estableceremos sus valores por defecto. En la misma iteración del ciclo, después de crear el botón, crearemos un contenedor para el campo de la pestaña y lo configuraremos también con los valores por defecto. Las coordenadas y dimensiones de los campos de la pestaña dependerán y se calcularán según la ubicación de los encabezados en el control. Al final del ciclo para crear el objeto de pestaña, haremos que la pestaña indicada en los parámetros de entrada sea la pestaña seleccionada.
Método que establece la pestaña como seleccionada:
//+------------------------------------------------------------------+
//| Set the tab as selected                                          |
//+------------------------------------------------------------------+
void CTabControl::SetSelected(const int index)
  {
   CTabHeader *header=this.GetElementByType(GRAPH_ELEMENT_TYPE_WF_TAB_HEADER,index);
   CContainer *field=this.GetElementByType(GRAPH_ELEMENT_TYPE_WF_CONTAINER,index);
   if(header==NULL || field==NULL)
      return;
   field.Show();
   field.BringToTop();
   header.SetState(true);
   header.BringToTop();
  }
//+------------------------------------------------------------------+
Primero, obtendremos los punteros al encabezado de la pestaña y al campo según índice.
Después representaremos el campo y lo llevaremos al primer plano.
Luego fijaremos el encabezado seleccionado y lo desplazaremos al primer plano.
Método que establece la pestaña como no seleccionada:
//+------------------------------------------------------------------+
//| Select the tab as released                                       |
//+------------------------------------------------------------------+
void CTabControl::SetUnselected(const int index)
  {
   CTabHeader *header=this.GetElementByType(GRAPH_ELEMENT_TYPE_WF_TAB_HEADER,index);
   CContainer *field=this.GetElementByType(GRAPH_ELEMENT_TYPE_WF_CONTAINER,index);
   if(header==NULL || field==NULL)
      return;
   field.Hide();
   header.SetState(false);
  }
//+------------------------------------------------------------------+
Primero obtendremos los punteros al encabezado de la pestaña y al campo según índice.
Después ocultaremos el campo yestableceremos el encabezado como no seleccionado.
Método que establece la pestaña como seleccionada/no seleccionada:
//+------------------------------------------------------------------+
//| Set the tab as selected/released                                 |
//+------------------------------------------------------------------+
void CTabControl::Select(const int index,const bool flag)
  {
   if(flag)
      this.SetSelected(index);
   else
      this.SetUnselected(index);
  }
//+------------------------------------------------------------------+
Al método se le transmiten un índice de pestaña y una bandera, y dependiendo del valor de la bandera, se llamará a uno de los dos métodos anteriores.
Método que establece el texto del encabezado de la pestaña indicada:
//+------------------------------------------------------------------+
//| Set the title text of the specified tab                          |
//+------------------------------------------------------------------+
void CTabControl::SetHeaderText(CTabHeader *header,const string text)
  {
   if(header==NULL)
      return;
   header.SetText(text);
  }
//+------------------------------------------------------------------+
Luego transmitiremos al método el puntero al objeto en el que se establece el texto transmitido al método.
Método que establece el texto del encabezado de la pestaña según el índice:
//+------------------------------------------------------------------+
//| Set the tab title text by index                                  |
//+------------------------------------------------------------------+
void CTabControl::SetHeaderText(const int index,const string text)
  {
   CTabHeader *header=this.GetElementByType(GRAPH_ELEMENT_TYPE_WF_TAB_HEADER,index);
   this.SetHeaderText(header,text);
  }
//+------------------------------------------------------------------+
El índice del encabezado de la pestaña en la que se debe establecer el texto será transmitido al método.
Usando el índice, obtendremos un objeto del tipo de encabezado de la pestaña y llamaremos al método anterior para establecer el texto en el objeto especificado.
En el método que crea un nuevo objeto gráfico, añadiremos la creación de un objeto ListBoxItem y eliminaremos el bloque de creación del objeto TabPage que ahora falta:
//+------------------------------------------------------------------+
//| Create a new graphical object                                    |
//+------------------------------------------------------------------+
CGCnvElement *CTabControl::CreateNewGObject(const ENUM_GRAPH_ELEMENT_TYPE type,
                                         const int obj_num,
                                         const string descript,
                                         const int x,
                                         const int y,
                                         const int w,
                                         const int h,
                                         const color colour,
                                         const uchar opacity,
                                         const bool movable,
                                         const bool activity)
  {

   CGCnvElement *element=NULL;
   switch(type)
     {
      case GRAPH_ELEMENT_TYPE_ELEMENT              :
         element=new CGCnvElement(type,this.ID(),obj_num,this.ChartID(),this.SubWindow(),descript,x,y,w,h,colour,opacity,movable,activity);
        break;
      case GRAPH_ELEMENT_TYPE_FORM                 :
         element=new CForm(this.ChartID(),this.SubWindow(),descript,x,y,w,h);
        break;
      case GRAPH_ELEMENT_TYPE_WF_CONTAINER         :
         element=new CContainer(this.ChartID(),this.SubWindow(),descript,x,y,w,h);
        break;
      case GRAPH_ELEMENT_TYPE_WF_GROUPBOX          :
         element=new CGroupBox(this.ChartID(),this.SubWindow(),descript,x,y,w,h);
        break;
      case GRAPH_ELEMENT_TYPE_WF_PANEL             :
         element=new CPanel(this.ChartID(),this.SubWindow(),descript,x,y,w,h);
        break;
      case GRAPH_ELEMENT_TYPE_WF_LABEL             :
         element=new CLabel(this.ChartID(),this.SubWindow(),descript,x,y,w,h);
        break;
      case GRAPH_ELEMENT_TYPE_WF_CHECKBOX          :
         element=new CCheckBox(this.ChartID(),this.SubWindow(),descript,x,y,w,h);
        break;
      case GRAPH_ELEMENT_TYPE_WF_RADIOBUTTON       :
         element=new CRadioButton(this.ChartID(),this.SubWindow(),descript,x,y,w,h);
        break;
      case GRAPH_ELEMENT_TYPE_WF_BUTTON            :
         element=new CButton(this.ChartID(),this.SubWindow(),descript,x,y,w,h);
        break;
      case GRAPH_ELEMENT_TYPE_WF_LIST_BOX          :
         element=new CListBox(this.ChartID(),this.SubWindow(),descript,x,y,w,h);
        break;
      case GRAPH_ELEMENT_TYPE_WF_LIST_BOX_ITEM     :
         element=new CListBoxItem(this.ChartID(),this.SubWindow(),descript,x,y,w,h);
        break;
      case GRAPH_ELEMENT_TYPE_WF_CHECKED_LIST_BOX  :
         element=new CCheckedListBox(this.ChartID(),this.SubWindow(),descript,x,y,w,h);
        break;
      case GRAPH_ELEMENT_TYPE_WF_BUTTON_LIST_BOX   :
         element=new CButtonListBox(this.ChartID(),this.SubWindow(),descript,x,y,w,h);
        break;
      case GRAPH_ELEMENT_TYPE_WF_TAB_HEADER        :
         element=new CTabHeader(this.ChartID(),this.SubWindow(),descript,x,y,w,h);
        break;


      case GRAPH_ELEMENT_TYPE_WF_TAB_CONTROL       :
         element=new CTabControl(this.ChartID(),this.SubWindow(),descript,x,y,w,h);
        break;
      default:
        break;
     }
   if(element==NULL)
      ::Print(DFUN,CMessage::Text(MSG_LIB_SYS_FAILED_CREATE_ELM_OBJ),this.TypeElementDescription(type));
   return element;
  }
//+------------------------------------------------------------------+
Ahora, en cada bloque de creación del objeto, transmitiremos al método la descripción del objeto, y no su nombre.
En las clases del objeto Panel, en el archivo \MQL5\Include\DoEasy\Objects\Graph\WForms\Containers\Panel.mqh y el objeto GroupBox, en el archivo \MQL5\Include\DoEasy\Objects\Graph\WForms\Containers\GroupBox.mqh, hemos realizado los mismos cambios que en los objetos WinForms: hemos añadido un nuevo constructor protegido, hemos eliminado el constructor paramétrico innecesario y hemos finalizado el método virtual CreateNewGObject(), tal y como hemos revisado antes.
Estas son todas las mejoras necesarias hasta el momento.
Simulación
Para la prueba, tomaremos el asesor experto del artículo anterior y lo guardaremos en la nueva carpeta \MQL5\Experts\TestDoEasy\Part114\ con el nuevo nombre TstDE114.mq5.
Para mostrar las descripciones de las constantes de enumeración en dos idiomas diferentes en la configuración del asesor, crearemos una enumeración adicional para los idiomas de compilación inglés y ruso, y añadiremos una nueva variable con el tipo de esta enumeración, que indicará en qué lado, arriba o abajo (derecha-izquierda no funcionan todavía) se colocarán los encabezados de las pestañas:
//--- enumerations by compilation language
#ifdef COMPILE_EN
enum ENUM_AUTO_SIZE_MODE
  {
   AUTO_SIZE_MODE_GROW=CANV_ELEMENT_AUTO_SIZE_MODE_GROW,                // Grow
   AUTO_SIZE_MODE_GROW_SHRINK=CANV_ELEMENT_AUTO_SIZE_MODE_GROW_SHRINK   // Grow and Shrink
  };
enum ENUM_BORDER_STYLE
  {
   BORDER_STYLE_NONE=FRAME_STYLE_NONE,                                  // None
   BORDER_STYLE_SIMPLE=FRAME_STYLE_SIMPLE,                              // Simple
   BORDER_STYLE_FLAT=FRAME_STYLE_FLAT,                                  // Flat
   BORDER_STYLE_BEVEL=FRAME_STYLE_BEVEL,                                // Embossed (bevel)
   BORDER_STYLE_STAMP=FRAME_STYLE_STAMP,                                // Embossed (stamp)
  };
enum ENUM_CHEK_STATE
  {
   CHEK_STATE_UNCHECKED=CANV_ELEMENT_CHEK_STATE_UNCHECKED,              // Unchecked
   CHEK_STATE_CHECKED=CANV_ELEMENT_CHEK_STATE_CHECKED,                  // Checked
   CHEK_STATE_INDETERMINATE=CANV_ELEMENT_CHEK_STATE_INDETERMINATE,      // Indeterminate
  };
enum ENUM_ELEMENT_ALIGNMENT
  {
   ELEMENT_ALIGNMENT_TOP=CANV_ELEMENT_ALIGNMENT_TOP,                    // Top
   ELEMENT_ALIGNMENT_BOTTOM=CANV_ELEMENT_ALIGNMENT_BOTTOM,              // Bottom
   ELEMENT_ALIGNMENT_LEFT=CANV_ELEMENT_ALIGNMENT_LEFT,                  // Left
   ELEMENT_ALIGNMENT_RIGHT=CANV_ELEMENT_ALIGNMENT_RIGHT,                // Right
  };
#else
enum ENUM_AUTO_SIZE_MODE
  {
   AUTO_SIZE_MODE_GROW=CANV_ELEMENT_AUTO_SIZE_MODE_GROW,                // Increase only
   AUTO_SIZE_MODE_GROW_SHRINK=CANV_ELEMENT_AUTO_SIZE_MODE_GROW_SHRINK   // Increase and decrease
  };
enum ENUM_BORDER_STYLE
  {
   BORDER_STYLE_NONE=FRAME_STYLE_NONE,                                  // No frame
   BORDER_STYLE_SIMPLE=FRAME_STYLE_SIMPLE,                              // Simple frame
   BORDER_STYLE_FLAT=FRAME_STYLE_FLAT,                                  // Flat frame
   BORDER_STYLE_BEVEL=FRAME_STYLE_BEVEL,                                // Embossed (convex)
   BORDER_STYLE_STAMP=FRAME_STYLE_STAMP,                                // Embossed (concave)
  };
enum ENUM_CHEK_STATE
  {
   CHEK_STATE_UNCHECKED=CANV_ELEMENT_CHEK_STATE_UNCHECKED,              // Unchecked
   CHEK_STATE_CHECKED=CANV_ELEMENT_CHEK_STATE_CHECKED,                  // Checked
   CHEK_STATE_INDETERMINATE=CANV_ELEMENT_CHEK_STATE_INDETERMINATE,      // Undefined
  };
enum ENUM_ELEMENT_ALIGNMENT
  {
   ELEMENT_ALIGNMENT_TOP=CANV_ELEMENT_ALIGNMENT_TOP,                    // Top
   ELEMENT_ALIGNMENT_BOTTOM=CANV_ELEMENT_ALIGNMENT_BOTTOM,              // Bottom
   ELEMENT_ALIGNMENT_LEFT=CANV_ELEMENT_ALIGNMENT_LEFT,                  // Left
   ELEMENT_ALIGNMENT_RIGHT=CANV_ELEMENT_ALIGNMENT_RIGHT,                // Right
  };
#endif
//--- input parameters
sinput   bool                          InpMovable           =  true;                   // Panel Movable flag
sinput   ENUM_INPUT_YES_NO             InpAutoSize          =  INPUT_YES;              // Panel Autosize
sinput   ENUM_AUTO_SIZE_MODE           InpAutoSizeMode      =  AUTO_SIZE_MODE_GROW;    // Panel Autosize mode
sinput   ENUM_BORDER_STYLE             InpFrameStyle        =  BORDER_STYLE_SIMPLE;    // Label border style
sinput   ENUM_ANCHOR_POINT             InpTextAlign         =  ANCHOR_CENTER;          // Label text align
sinput   ENUM_INPUT_YES_NO             InpTextAutoSize      =  INPUT_NO;               // Label autosize
sinput   ENUM_ANCHOR_POINT             InpCheckAlign        =  ANCHOR_LEFT;            // Check flag align
sinput   ENUM_ANCHOR_POINT             InpCheckTextAlign    =  ANCHOR_LEFT;            // Check label text align
sinput   ENUM_CHEK_STATE               InpCheckState        =  CHEK_STATE_UNCHECKED;   // Check flag state
sinput   ENUM_INPUT_YES_NO             InpCheckAutoSize     =  INPUT_YES;              // CheckBox autosize
sinput   ENUM_BORDER_STYLE             InpCheckFrameStyle   =  BORDER_STYLE_NONE;      // CheckBox border style
sinput   ENUM_ANCHOR_POINT             InpButtonTextAlign   =  ANCHOR_CENTER;          // Button text align
sinput   ENUM_INPUT_YES_NO             InpButtonAutoSize    =  INPUT_YES;              // Button autosize
sinput   ENUM_AUTO_SIZE_MODE           InpButtonAutoSizeMode=  AUTO_SIZE_MODE_GROW;    // Button Autosize mode
sinput   ENUM_BORDER_STYLE             InpButtonFrameStyle  =  BORDER_STYLE_NONE;      // Button border style
sinput   bool                          InpButtonToggle      =  false;                  // Button toggle flag
//sinput   bool                          InpListBoxMColumn    =  false;                  // ListBox MultiColumn flag
sinput   bool                          InpButtListMSelect   =  false;                  // ButtonListBox Button MultiSelect flag
sinput   ENUM_ELEMENT_ALIGNMENT        InpHeaderAlignment   =  ELEMENT_ALIGNMENT_TOP;  // TabHeader Alignment
//--- global variables
CEngine        engine;
color          array_clr[];
//+------------------------------------------------------------------+
En el manejador OnInit() del bloque de creación de objetos gráficos, comentaremos el bloque de creación del objeto TabControl del artículo anterior (lo colocaremos allí más adelante) y el código de creación del objeto ListBox (lo colocaremos en la pestaña del futuro objeto TabControl). Y después del bloque de código para crear el objeto ButtonListBox, colocaremos un bloque de código encargado de crear el objeto TabControl con tres pestañas, la primera de las cuales será seleccionada inicialmente:
      //--- If the attached GroupBox object is created
      if(pnl.CreateNewElement(GRAPH_ELEMENT_TYPE_WF_GROUPBOX,x,2,w,h,C'0x91,0xAA,0xAE',0,true,false))
        {
         //--- get the pointer to the GroupBox object by its index in the list of bound GroupBox type objects
         gbox2=pnl.GetElementByType(GRAPH_ELEMENT_TYPE_WF_GROUPBOX,1);
         if(gbox2!=NULL)
           {
            //--- set the "indented frame" type, the frame color matches the main panel background color,
            //--- while the text color is the background color of the last attached panel darkened by 1
            gbox2.SetBorderStyle(FRAME_STYLE_STAMP);
            gbox2.SetBorderColor(pnl.BackgroundColor(),true);
            gbox2.SetForeColor(gbox2.ChangeColorLightness(obj.BackgroundColor(),-1),true);
            gbox2.SetText("GroupBox2");

            //--- Create the TabControl object
//            gbox2.CreateNewElement(GRAPH_ELEMENT_TYPE_WF_TAB_CONTROL,4,12,gbox2.Width()-12,gbox2.Height()-20,clrNONE,255,true,false);
//            //--- get the pointer to the TabControl object by its index in the list of bound objects of the TabControl type
//            CTabControl *tctrl=gbox2.GetElementByType(GRAPH_ELEMENT_TYPE_WF_TAB_CONTROL,0);
//            if(tctrl!=NULL)
//              {
//               //--- get the pointer to the Container object by its index in the list of bound objects of the Container type
//               CContainer *page=tctrl.GetElementByType(GRAPH_ELEMENT_TYPE_WF_CONTAINER,0);
//               if(page!=NULL)
//                 {
//                  // Here we will create objects attached to the specified tab of the TabControl object
//                  // Unfortunately, in the current state of creating the names of graphical objects of the library,
//                  // their further creation is limited by the number of characters in the resource name in the CCanvas class
//                 }
//
//              }
            ///*
            //--- Create the CheckedListBox object
            gbox2.CreateNewElement(GRAPH_ELEMENT_TYPE_WF_CHECKED_LIST_BOX,4,12,160,20,clrNONE,255,true,false);
            //--- get the pointer to the CheckedListBox object by its index in the list of bound objects of the CheckBox type
            CCheckedListBox *clbox=gbox2.GetElementByType(GRAPH_ELEMENT_TYPE_WF_CHECKED_LIST_BOX,0);
            //--- If CheckedListBox is created and the pointer to it is received
            if(clbox!=NULL)
              {
               clbox.SetMultiColumn(true);
               clbox.SetColumnWidth(0);
               clbox.CreateCheckBox(4,66);
              }
            //--- Create the ButtonListBox object
            gbox2.CreateNewElement(GRAPH_ELEMENT_TYPE_WF_BUTTON_LIST_BOX,4,clbox.BottomEdgeRelative()+6,160,30,clrNONE,255,true,false);
            //--- get the pointer to the ButtonListBox object by its index in the list of attached objects of the Button type
            CButtonListBox *blbox=gbox2.GetElementByType(GRAPH_ELEMENT_TYPE_WF_BUTTON_LIST_BOX,0);
            //--- If ButtonListBox is created and the pointer to it is received
            if(blbox!=NULL)
              {
               blbox.SetMultiColumn(true);
               blbox.SetColumnWidth(0);
               blbox.CreateButton(4,66,16);
               blbox.SetMultiSelect(InpButtListMSelect);
               blbox.SetToggle(InpButtonToggle);
               for(int i=0;i<blbox.ElementsTotal();i++)
                 {
                  blbox.SetButtonGroup(i,(i % 2==0 ? blbox.Group()+1 : blbox.Group()+2));
                  blbox.SetButtonGroupFlag(i,(i % 2==0 ? true : false));
                 }
              }

            int lbx=6;
            int lby=blbox.BottomEdgeRelative()+6;
            int lbw=180;
            //--- Create the TabControl object
            gbox2.CreateNewElement(GRAPH_ELEMENT_TYPE_WF_TAB_CONTROL,lbx,lby,lbw,78,clrNONE,255,true,false);
            //--- get the pointer to the TabControl object by its index in the list of bound objects of the TabControl type
            CTabControl *tab_ctrl=gbox2.GetElementByType(GRAPH_ELEMENT_TYPE_WF_TAB_CONTROL,0);
            //--- If TabControl is created and the pointer to it is received
            if(tab_ctrl!=NULL)
              {
               //--- Set the location of the tab titles on the element and the tab text
               tab_ctrl.SetAlignment((ENUM_CANV_ELEMENT_ALIGNMENT)InpHeaderAlignment);
               tab_ctrl.CreateTabPages(3,0,56,16,TextByLanguage("Вкладка","TabPage"));
              }

            //--- Create the ListBox object
            //int lbx=4;
            //int lby=blbox.BottomEdgeRelative()+6;
            //int lbw=146;
            //if(!InpListBoxMColumn)
            //  {
            //   lbx=blbox.RightEdgeRelative()+6;
            //   lby=14;
            //   lbw=100;
            //  }
            //gbox2.CreateNewElement(GRAPH_ELEMENT_TYPE_WF_LIST_BOX,lbx,lby,lbw,60,clrNONE,255,true,false);
            ////--- get the pointer to the ListBox object by its index in the list of attached objects of ListBox type
            //CListBox *lbox=gbox2.GetElementByType(GRAPH_ELEMENT_TYPE_WF_LIST_BOX,0);
            ////--- If ListBox has been created and the pointer to it has been received
            //if(lbox!=NULL)
            //  {
            //   lbox.SetMultiColumn(true);
            //   lbox.CreateList(8,68);
            //  }
            //*/
           }
        }
Vamos a compilar el asesor y ejecutarlo en el gráfico:
Ahora las pestañas han cobrado vida en comparación con el asesor del último artículo. Los encabezados de las pestañas pueden colocarse tanto en la parte superior como en la inferior del contenedor, pero existe un fallo notable: mientras que los otros elementos se comportan bien al interactuar con el ratón, los encabezados de las pestañas "parpadean" visiblemente. Nos ocuparemos de eso. Una cosa más: hacia el final, he indicado con el cursor la línea entre el encabezado y el campo de la pestaña. Esta no debería encontrarse ahí, pero ya hemos hablado de esto en el artículo; en el próximo, haremos que la pestaña, el encabezado y el campo sean un todo.
¿Qué es lo próximo?
En el próximo artículo, continuaremos desarrollando el control TabControl.
*Artículos de esta serie:
DoEasy. Controles (Parte 1): Primeros pasos
DoEasy. Elementos de control (Parte 2): Continuamos trabajando con la clase CPanel
DoEasy. Elementos de control (Parte 3): Creando controles vinculados
DoEasy. Elementos de control (Parte 4): Elemento de control "Panel", parámetros Padding y Dock
DoEasy. Elementos de control (Parte 5): Objeto básico WinForms, control «Panel», parámetro AutoSize
DoEasy. Elementos de control (Parte 6): Control «Panel», cambio automático del tamaño del contenedor según el contenido interno
DoEasy. Elementos de control (Parte 7): Elemento de control «etiqueta de texto»
DoEasy. Elementos de control (Parte 8): Objetos básicos WinForms por categorías, controles "GroupBox" y "CheckBox
DoEasy. Elementos de control (Parte 9): Reorganizando los métodos de los objetos WinForms, los controles "RadioButton" y "Button"
DoEasy. Elementos de control (Parte 10): Objetos WinForms: dando vida a la interfaz
DoEasy. Elementos de control (Parte 11): Objetos WinForms: grupos, el objeto WinForms CheckedListBox
DoEasy. Elementos de control (Parte 12): Objeto de lista básico, objetos WinForms ListBox y ButtonListBox
DoEasy. Elementos de control (Parte 13): Optimizando la interacción de los objetos WinForms con el ratón. Comenzamos el desarrollo del objeto WinForms TabControl
Traducción del ruso hecha por MetaQuotes Ltd.
Artículo original: https://www.mql5.com/ru/articles/11288
 Aprendiendo a diseñar un sistema de trading con Bears Power Index
 Aprendizaje automático y Data Science - Redes neuronales (Parte 01): Análisis de redes neuronales con conexión directa
 Redes neuronales: así de sencillo (Parte 24): Mejorando la herramienta para el Transfer Learning
 Redes neuronales: así de sencillo (Parte 23): Creamos una herramienta para el Transfer Learning
- Aplicaciones de trading gratuitas
- 8 000+ señales para copiar
- Noticias económicas para analizar los mercados financieros
Usted acepta la política del sitio web y las condiciones de uso