How to Create an Interactive MQL5 Dashboard/Panel Using the Controls Class (Part 1): Setting Up the Panel

Introduction
This article will create an interactive dashboard using the MetaQuotes Language 5 (MQL5) Controls class. The layout structure will give the dashboard a look and basic functionality that will serve as the core framework for more complex panel operations. The essence of this design is to think through and consider what would make the trading experience cleaner, faster, and more intuitive for the trader. By the end of this article, you should have a foundational dashboard in your MetaTrader 5 chart that has a title, buttons for navigation, and buttons for respective actions—meaning you can make the dashboard work for you.
The primary navigation panel will have three buttons: Trade, Close, and Information. Each section will have its specialized controls for various commands. For instance, the Trade section will have buttons for trading volume, Price, Stop Loss (SL), Take Profit (TP), and marching orders like Buy, Sell, and Buy Stop. The Close section will have buttons for righting the panel with options like "Close All Profit" and "Close All Pending Orders" among others. The Information section will display vital trading data and status updates. We will divide the article into three key parts:
- Elements Illustration
- GUI Panel Assembly in MQL5
- Conclusion
On this journey, we will extensively use MetaQuotes Language 5 (MQL5) as our primary Integrated Development Environment (IDE) coding language in the MetaEditor, enabling us to create sophisticated trading applications and interfaces. We will execute our program directly within the MetaTrader 5 trading terminal, where we can monitor real-time market data and seamlessly interact with our trading program. Therefore, having the latest versions of both MQL5 and MetaTrader 5 installed is crucial to ensure compatibility and access to the full range of features available. With everything in place, let's get started on creating your interactive trading panel!
Elements Illustration
Here, we will illustrate the key components of our interactive GUI panel/dashboard designed for traders. The panel will consist of several essential elements, each serving a specific purpose to enhance trading efficiency. We will focus on three main navigation buttons: Trade, Close, and Information, each equipped with respective action buttons.
The Trade section will feature buttons for trading volume, Price, Stop Loss (SL), and Take Profit (TP), as well as execution buttons for Buy, Sell, and Buy stop among many others. The Close section will include functionalities such as "Close All Profit" and "Close All Pending Orders" among others, ensuring quick access to essential trade management tools. Finally, the Information section will display important trading data, such as account balance, margin levels, and real-time market updates.
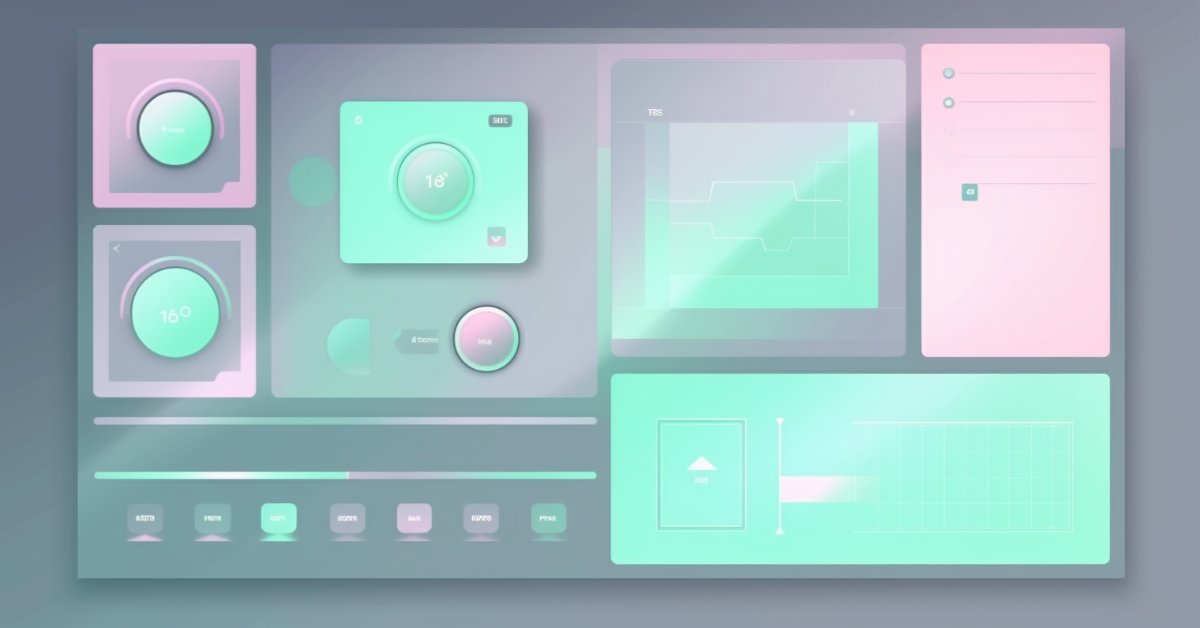
To visually represent these elements, we will provide a layout diagram that showcases how these components will be arranged within the panel. This illustration will serve as a roadmap for constructing our GUI in the subsequent sections of the article, guiding us in integrating these elements into a cohesive and user-friendly interface. Here is the complete illustration:

GUI Panel Assembly in MQL5
To create the panel, we will base it on an expert advisor. To create an expert advisor (EA), on your MetaTrader 5 terminal, click the Tools tab and check MetaQuotes Language Editor, or simply press F4 on your keyboard. Alternatively, you can click the IDE (Integrated Development Environment) icon on the tools bar. This will open the MetaQuotes Language Editor environment, which allows the writing of trading robots, technical indicators, scripts, and libraries of functions.

Once the MetaEditor is opened, on the tools bar, navigate to the File tab and check New File, or simply press CTRL + N, to create a new document. Alternatively, you can click on the New icon on the tools tab. This will result in a MQL Wizard pop-up.

On the Wizard that pops, check Expert Advisor (template) and click Next.

On the general properties of the Expert Advisor, under the name section, provide your expert's file name. Note that to specify or create a folder if it doesn't exist, you use the backslash before the name of the EA. For example, here we have "Experts\" by default. That means that our EA will be created in the Experts folder and we can find it there. The other sections are pretty much straightforward, but you can follow the link at the bottom of the Wizard to know how to precisely undertake the process.

After providing your desired Expert Advisor file name, click on Next, click Next, and then click Finish. After doing all that, we are ready to code and program our GUI panel.
On the new program's data set that appears by default is the metadata that shows the necessary properties linked to the file. When customized, we have the following metadata.
//+------------------------------------------------------------------+
//|                                         CONTROL PANEL PART 1.mq5 |
//|                           Copyright 2024, Allan Munene Mutiiria. |
//|                                     https://forexalgo-trader.com |
//+------------------------------------------------------------------+
#property copyright "Copyright 2024, Allan Munene Mutiiria." //--- Set copyright information
#property link      "https://forexalgo-trader.com"            //--- Link to the author's website
#property version   "1.00"                                    //--- Version of the script
From here, the first thing we need to do is get access to the default MQL5 custom library, which will enable us to create the panel or dashboard. It is already organized in classes and will make our panel creation easy. The files we will use are organized in the "Include" folder and "Controls" subfolder. To access them, just navigate to the specified folders and open them. Specifically, they are illustrated below.

After viewing the files, the first thing that we need to do is now include the files in the program so that we can get access to their properties and other utilities. The first thing we do is include the button files. We achieve this via the following logic.
#include <Controls/Button.mqh> //--- Include button control library
In this section, we utilize the "Button.mqh" library, which is part of the MQL5 standard libraries for graphical user interface (GUI) controls. With the "Button.mqh" library, we have access to the "CButton" class, which we can use for creating, configuring, and managing the button elements of our trading panel. By employing the "Button.mqh" library, we then can implement panel buttons that serve various purposes of interaction—e.g., navigation buttons, trading action buttons (like those for executing buy and sell orders), and other panel components that benefit from using buttons as GUI elements. When we compile the program, we should realize some extra file extensions in the program that are called as shown below.

We can confirm that the files are added correctly. From this, we can now create an object that will give us access to the class members and create the panel's main background holder's frame. We achieve this via the following logic.
CButton obj_Btn_MAIN; //--- Main button object
Here, we declare the "obj_Btn_MAIN" variable as an instance of the "CButton" class. This means that "obj_Btn_MAIN" will act as a button object in our program. By creating this button object, we are essentially reserving space in memory to represent and manipulate a main button element in our interface. The "CButton" class provides various methods and properties for creating, customizing, and managing button controls, such as setting the button’s label, size, and color, and handling click events. With that, we can now proceed to create the button when the expert is initialized, that is on the OnInit event handler.
//+------------------------------------------------------------------+
//| Expert initialization function                                   |
//+------------------------------------------------------------------+
int OnInit() {
   //--- Start of the initialization function

   //--- MAIN BUTTON
   obj_Btn_MAIN.Create(0, Btn_MAIN, 0, 30, 30, 0, 0); //--- Create the main button at specified coordinates


   //--- End of initialization function
   return(INIT_SUCCEEDED); //--- Return initialization success status
}
Here, on the OnInit event handler, a function that is called automatically when the EA is first attached to a chart or reinitialized, we create the main button of the dashboard. We call the object "obj_Btn_MAIN" and use the dot operator to get access to all the class members. With the dot operator, you should realize something like this:

Create is the member function that we choose and provide its necessary parameters. To clearly understand what everything means, let’s break down the parameters:
- The first parameter (0) specifies the chart ID. A value of 0 refers to the current chart where the EA is running.
- The second parameter ("Btn_MAIN") is a predefined string constant representing the name of this button. This name is used to reference the button in other parts of the program. For easier referencing, we defined it on the global scope as follows:
//--- Define button names for easier reference
#define Btn_MAIN "Btn_MAIN"                                   //--- Button name for the main button
- The third parameter (0) refers to the sub-window index. Here, 0 indicates that the button should be placed in the main chart window.
- The fourth (30) and fifth (30) parameters set the button’s X and Y coordinates, respectively. These determine the button’s position on the chart.
- The last two parameters (0 and 0) define the button's width and height. In this case, a value of 0 means that the button will use default dimensions. This is illustrated below:

When we run the program, we get the following output.

From the image, we can see that our first coordinates are set as 30 and 30 pixels, but the second coordinates are displayed as 0 since we leave them as 0. Thus, our second coordinates are mapped on the origin, (0,0). To set the second coordinates, we can use several ways. The first is directly defining them in the member function.
   //--- MAIN BUTTON
   obj_Btn_MAIN.Create(0, Btn_MAIN, 0, 30, 30, 310, 300); //--- Create the main button at specified coordinates
Here, we define the second coordinates of the button. We have them as 310 and 300 pixels for the x and y axis respectively. We have them highlighted in yellow color as well to increase clarity. Upon run, we have the following output.

We have the expected results. However, for one to use this method, one needs to be careful when defining the pixels, since the second coordinates are not in any way related to the first coordinates. Thus, deep mathematics needs to be done because all of the pixels, reference from the origin. For example, if our defined second coordinates are 10 and 10, the button will have second coordinates on both the y and x axis 10 pixels from the origin. Thus, our button will be mapped backward, with the size being (30-10 = 20) 20 pixels. Here is an illustration.

To avoid the stress of the mathematics involved with the first method, we can use the second method which involves defining the button's height and width, which is directly computed from the first coordinates. The following logic is used.
   //--- MAIN BUTTON
   obj_Btn_MAIN.Create(0, Btn_MAIN, 0, 30, 30, 0, 0); //--- Create the main button at specified coordinates
   obj_Btn_MAIN.Width(20); //---  Set width of the main button
   obj_Btn_MAIN.Height(20); //---  Set height of the main button
Here, we use the width and height member functions to set the size of the button. We have used a uniform size of 20 pixels so that we can see the difference. Upon compilation of the program, we have the following results.

From the illustration, we can see that we have the button mapped in the forward direction, which means that we do not have to stress the second coordinates upon defining our starting point. There is yet another third way of defining the points directly, which saves space by combining the width and height parameters. Its code snippet is as below:
   //--- MAIN BUTTON
   obj_Btn_MAIN.Create(0, Btn_MAIN, 0, 30, 30, 0, 0); //--- Create the main button at specified coordinates
   //obj_Btn_MAIN.Width(310); //--- (Commented out) Set width of the main button
   //obj_Btn_MAIN.Height(300); //--- (Commented out) Set height of the main button
   obj_Btn_MAIN.Size(310, 300); //--- Set size of the main button
Here, we set the button size directly. We however need to set the background color of the button and its border color.
   obj_Btn_MAIN.ColorBackground(C'070,070,070'); //--- Set background color of the main button
   obj_Btn_MAIN.ColorBorder(clrBlack); //--- Set border color of the main button
Here, we configure the visual appearance of our "obj_Btn_MAIN" button by setting its background and border colors. First, we call the "ColorBackground" method on the "obj_Btn_MAIN" object and pass the RGB values "C'070,070,070'" as the parameter. RGB stands for Red, Green, and Blue - the three primary colors used to generate a wide spectrum of colors on digital screens.
The RGB format takes three values representing the intensity of red, green, and blue in a range from 0 to 255, where "0" means no intensity and "255" is the maximum intensity. For example "C'070,070,070'" means:
- We set the red component to "70" (out of 255)
- We set the green component to "70"
- We set the blue component to "70"
When we set all three RGB values to be equal, the resulting color is a shade of grey. Since we use moderate values of 70 for all three, the button background becomes a medium-dark grey. This color is visually neutral, ensuring that other brightly colored elements that we will create stand out on the panel.
Next, we call the "ColorBorder" method and set the color using the "clrBlack" constant, which represents pure black. Here, each RGB value is 0 ("C'000,000,000'"), meaning no red, green, or blue components are present. By using black for the border, we create a strong visual outline, clearly defining the button’s boundaries against the darker grey background, making it look cleaner and more structured. This approach ensures that the button is easy to distinguish and provides a polished look to the overall graphical interface. Upon compilation, we have the following output.

There we have our main button. We finally need to refresh the chart so that the changes take effect automatically other than having to wait for a manual chart event that affects the refresh. Here is the logic adopted.
ChartRedraw(0); //--- Redraw the chart to update the panel
Here, we call the ChartRedraw function to refresh and visually update the chart interface. We do this to ensure that all newly added graphical elements—buttons, labels, or what have you—are properly displayed. The ChartRedraw function is indispensable any time we add to, alter, or remove chart elements since it forces the terminal to re-render the current chart. That is especially crucial when we're making interactive panels and want to ensure that the panel is showing the user the most recent state it can show.
The parameter 0 is used when calling the function. It is the chart ID. Every chart in MetaTrader 5 has a unique ID, and 0 refers to the current chart where the Expert Advisor is attached. To redraw a chart, we must pass the correct ID. We are ensuring the redraw operation applies to this specific chart. If we don't call the ChartRedraw function, we can end up with a graphical problem. Newly created graphical objects may fail to show up, or modified graphical objects may fail to show the modifications we've made to them; they'll still show their outdated properties. So we can ensure our panel and its contents are being shown correctly by calling the ChartRedraw function for that panel. The final initialization code responsible for the creation of the main button is as follows.
//+------------------------------------------------------------------+
//| Expert initialization function                                   |
//+------------------------------------------------------------------+
int OnInit() {
   //--- Start of the initialization function

   //--- MAIN BUTTON
   obj_Btn_MAIN.Create(0, Btn_MAIN, 0, 30, 30, 0, 0); //--- Create the main button at specified coordinates
   //obj_Btn_MAIN.Width(310); //--- (Commented out) Set width of the main button
   //obj_Btn_MAIN.Height(300); //--- (Commented out) Set height of the main button
   obj_Btn_MAIN.Size(310, 300); //--- Set size of the main button
   obj_Btn_MAIN.ColorBackground(C'070,070,070'); //--- Set background color of the main button
   obj_Btn_MAIN.ColorBorder(clrBlack); //--- Set border color of the main button


   ChartRedraw(0); //--- Redraw the chart to update the panel

   //--- End of initialization function
   return(INIT_SUCCEEDED); //--- Return initialization success status
}
Up to this point, we now have some background basics of whatever we'll be doing and the necessary things that we have to do. Thus, we can define the objects for all the buttons that we will need for the initial interface.
#include <Controls/Button.mqh>                                 //--- Include button control library
CButton obj_Btn_MAIN;                                       //--- Main button object
CButton obj_Btn_HEADER;                                     //--- Header button object
CButton obj_Btn_X;                                          //--- Close button (X) object
CButton obj_Btn_TRADE;                                     //--- Trade button object
CButton obj_Btn_CLOSE;                                      //--- Close button object
CButton obj_Btn_INFO;                                       //--- Information button object
CButton obj_Btn_RISK;                                       //--- Risk button object
CButton obj_Btn_POINTS;                                     //--- Points button object
CButton obj_Btn_SELL;                                       //--- Sell button object
CButton obj_Btn_ENTRY;                                      //--- Entry button object
CButton obj_Btn_BUY;                                        //--- Buy button object
CButton obj_Btn_SELLSTOP;                                   //--- Sell Stop button object
CButton obj_Btn_BUYSTOP;                                    //--- Buy Stop button object
CButton obj_Btn_SELLLIMIT;                                  //--- Sell Limit button object
CButton obj_Btn_BUYLIMIT;                                   //--- Buy Limit button object
CButton obj_Btn_FOOTER;                                     //--- Footer button object
Here, we define multiple of the rest button objects using the "CButton" class to represent various interactive elements of the panel. Each line instantiates a unique button object, setting up a foundational structure for different sections of the dashboard that we need to create. Let’s break down the purpose and role of each button:
- "obj_Btn_HEADER": This object will represent the header button of the panel. We could use it for displaying a title, or an icon, or serving as a visual separator for the panel’s top section.
- "obj_Btn_X": This button will act as a close button (often represented as ‘X’) to allow users to exit or hide the panel.
- "obj_Btn_TRADE": Represents the "Trade" button, which is a central control element. When pressed, this button will activate the trading functionalities, navigate to trading options, and open submenus specific to trade actions.
- "obj_Btn_CLOSE": The "Close" button here is a specialized button that will be used for managing the closing of trades. It will function as a switch to transition between the trading section and a closing section on the panel.
- "obj_Btn_INFO": This button will be used to present informational content to the user, such as trading metrics, account details, and panel descriptions.
For the trading functionality buttons, the objects will serve specific purposes within the trading context:
- "obj_Btn_RISK": Acts as a risk control button. It will allow the user to configure or adjust risk parameters like the percentage risked per trade.
- "obj_Btn_POINTS": This button will be used to set or switch to point-based trading options where certain levels, such as Stop Loss or Take Profit, are defined in points rather than price levels.
- "obj_Btn_SELL", "obj_Btn_ENTRY", and "obj_Btn_BUY": Represent direct trade action buttons. "obj_Btn_SELL" triggers a Sell trade, "obj_Btn_BUY" initiates a Buy trade, and "obj_Btn_ENTRY" will serve as a placeholder for market entries.
For Pending Orders, these buttons define the actions:
- "obj_Btn_SELLSTOP" and "obj_Btn_BUYSTOP": Control the placement of Sell Stop and Buy Stop pending orders, which are placed below or above the current price respectively.
- "obj_Btn_SELLLIMIT" and "obj_Btn_BUYLIMIT": Handle Sell Limit and Buy Limit pending orders, allowing users to place orders at specified levels in anticipation of price retracements.
Finally, we have the "obj_Btn_FOOTER", which we use to define the footer button of the panel. This button could act as a decorative element, a reset control, or a navigational button to switch to a summary view, but in our case, we will just use it to display the dashboard summary.
Similarly, we will need to define the edit and label fields respectively. The following logic applies.
#include <Controls/Edit.mqh>                                   //--- Include edit control library
CEdit obj_Edit_RISK;                                        //--- Risk edit field object
CEdit obj_Edit_PRICE;                                       //--- Price edit field object
CEdit obj_Edit_LOTS;                                        //--- Lots edit field object
CEdit obj_Edit_SL;                                          //--- Stop Loss edit field object
CEdit obj_Edit_TP;                                          //--- Take Profit edit field object

#include <Controls/Label.mqh>                                  //--- Include label control library
CLabel obj_Lbl_HEADER;                                      //--- Header label object
CLabel obj_Lbl_PRICE;                                       //--- Price label object
CLabel obj_Lbl_LOTS;                                        //--- Lots label object
CLabel obj_Lbl_SL;                                          //--- Stop Loss label object
CLabel obj_Lbl_TP;                                          //--- Take Profit label object
Here, we include the essential control libraries to govern user input and display text on the dashboard panel. First, we include the "Edit.mqh" library, which provides functionalities for editable input fields. Several objects of the "CEdit" class are defined, including "obj_Edit_RISK" as the risk edit field. The object "obj_Edit_PRICE" represents the price edit field, where the user can indicate the price at which they wish to execute trades. An object named "obj_Edit_LOTS" is designated for the lot size, which users can adjust to indicate the number of lots they wish to trade. "obj_Edit_SL" is the Stop Loss edit field. And lastly, "obj_Edit_TP" serves as the Take Profit edit field.
Next, we integrate the "Label.mqh" library. This library simplifies the process of creating static text labels on the panel, which is especially useful for providing a user-friendly interface. The library is designed specifically for our working environment, and it includes a class, "CLabel," which we have instantiated several times to create the different labels that we need on our panel. The first label that we instantiate is called "obj_Lbl_HEADER," and it is used to display the title or the most important information at the very top of the panel. The next label is called "obj_Lbl_PRICE," and it is used to indicate the current price of the asset we are working with. Next to the lot size input field, we have a label called "obj_Lbl_LOTS," which is used to indicate the lot size. Following this, we can define the respective panel fields as well as below:
//--- Define button names for easier reference
#define Btn_MAIN "Btn_MAIN"                                   //--- Button name for the main button
#define Btn_HEADER "Btn_HEADER"                               //--- Button name for the header button
#define Btn_X "Btn_X"                                        //--- Button name for the close button
#define Btn_TRADE "Btn_TRADE"                               //--- Button name for the trade button
#define Btn_CLOSE "Btn_CLOSE"                                //--- Button name for the close button
#define Btn_INFO "Btn_INFO"                                  //--- Button name for the info button

#define Btn_RISK "Btn_RISK"                                  //--- Button name for the risk button
#define Btn_POINTS "Btn_POINTS"                              //--- Button name for the points button
#define Btn_SELL "Btn_SELL"                                  //--- Button name for the sell button
#define Btn_ENTRY "Btn_ENTRY"                                //--- Button name for the entry button
#define Btn_BUY "Btn_BUY"                                    //--- Button name for the buy button
#define Btn_SELLSTOP "Btn_SELLSTOP"                          //--- Button name for the sell stop button
#define Btn_BUYSTOP "Btn_BUYSTOP"                            //--- Button name for the buy stop button
#define Btn_SELLLIMIT "Btn_SELLLIMIT"                        //--- Button name for the sell limit button
#define Btn_BUYLIMIT "Btn_BUYLIMIT"                          //--- Button name for the buy limit button
#define Btn_FOOTER "Btn_FOOTER"                              //--- Button name for the footer button

//---
//--- Define edit field names for easier reference
#define Edit_RISK "Edit_RISK"                                //--- Edit field name for risk input
#define Edit_PRICE "Edit_PRICE"                              //--- Edit field name for price input
#define Edit_LOTS "Edit_LOTS"                                //--- Edit field name for lots input
#define Edit_SL "Edit_SL"                                    //--- Edit field name for stop loss input
#define Edit_TP "Edit_TP"                                    //--- Edit field name for take profit input

//--- Define label names for easier reference
#define Lbl_HEADER "Lbl_HEADER"                              //--- Label name for the header
#define Lbl_PRICE "Lbl_PRICE"                                //--- Label name for the price
#define Lbl_LOTS "Lbl_LOTS"                                  //--- Label name for the lots
#define Lbl_SL "Lbl_SL"                                      //--- Label name for the stop loss
#define Lbl_TP "Lbl_TP"                                      //--- Label name for the take profit
After defining the key elements that we need on our initialization interface, we can proceed to give our panel a header, using the already defined utilities. The header logic adopted is as shown in the code snippet below:
   //--- HEADER BUTTON
   obj_Btn_HEADER.Create(0, Btn_HEADER, 0, 30, 30, 0, 0); //--- Create the header button at specified coordinates
   obj_Btn_HEADER.Size(310, 25); //--- Set size of the header button
   obj_Btn_HEADER.ColorBackground(clrLightBlue); //--- Set background color of the header button
   obj_Btn_HEADER.ColorBorder(clrBlack); //--- Set border color of the header button
Here, we create and customize the header button of the dashboard panel. We start by using the "Create" method on the "obj_Btn_HEADER" object to initialize the button with parameters that specify its chart ID, name ("Btn_HEADER"), and first coordinates (30, 30) along with its second coordinates (0, 0). Next, we set the size of the button to 310 pixels wide and 25 pixels high using the "Size" method, ensuring it fits well within the panel layout.
We then customize the background color of the header button with the "ColorBackground" method, setting it to "clrLightBlue" for visual appeal. Additionally, we specify the border color using the "ColorBorder" method and set it to "clrBlack", which enhances the button's visibility and definition against the panel's background. Upon compilation, we have the following output.

That was a success. We can now continue to make the header more lively by adding a label to it and a side closure button. Let us first add the closure button. Its logic is as shown below.
   //--- X BUTTON
   obj_Btn_X.Create(0, Btn_X, 0, 30 + 280, 30 + 1, 0, 0); //--- Create the close button (X) at specified coordinates
   obj_Btn_X.Size(30 - 1, 25 - 1 - 1); //--- Set size of the close button
   obj_Btn_X.ColorBackground(clrLightBlue); //--- Set background color of the close button
   obj_Btn_X.ColorBorder(clrLightBlue); //--- Set border color of the close button
   obj_Btn_X.Text(CharToString(255)); //--- Set the close button text to an "X" character
   obj_Btn_X.Color(clrBlack); //--- Set text color of the close button
   obj_Btn_X.Font("Wingdings"); //--- Set font of the close button to Wingdings
   obj_Btn_X.FontSize(17); //--- Set font size of the close button
Here, we create and configure the close button (X) for the dashboard panel. We start by initializing the button using the "Create" method on the "obj_Btn_X" object. The parameters we provide specify its chart ID, name ("Btn_X"), and position on the chart, calculated to place it at (30 + 280) for the x-coordinate and (30 + 1) for the y-coordinate, ensuring it is aligned properly within the panel layout.
Next, we set the size of the close button to 29 (30 -1) pixels wide and 23 (25 - 1 - 1) pixels high using the "Size" method, slightly reducing the default size to ensure it fits well in the UI. We play around with 1 pixel to take care of the border, so it does not override the header's border but come inside the header. We then customize the background color of the button to light blue using the "ColorBackground" method, creating a consistent look with the header button, which blends it within the header completely. The border color is also set to light blue with the "ColorBorder" method, giving the button a clean appearance without a contrasting border.
We proceed to set the button's text to an icon character using the CharToString function and 255 as its parameter, which allows the button to visually indicate its function as a close button. In MQL5, the character represents a Windows icon but could be anything else. The text color is set to black with the "Color" method, ensuring it stands out against the light background. Finally, we chose the font for the close button as Wingdings using the "Font" method, which is appropriate for displaying the windows symbol, and we set the font size to 17 using the "FontSize" method to enhance readability. Here is a representation of the possible symbol codes in MQL5.
![]()
We can see that there are a vast of options to choose from, but for us, we will just stick to the initial 255 code. We just need to set the header's title and we will be done with the header section.
   //--- HEADER LABEL
   obj_Lbl_HEADER.Create(0, Lbl_HEADER, 0, 40, 30, 0, 0); //--- Create the header label at specified coordinates
   obj_Lbl_HEADER.Text("Control Panel"); //--- Set text of the header label
   obj_Lbl_HEADER.Color(clrRed); //--- Set text color of the header label
   obj_Lbl_HEADER.Font("Cooper black"); //--- Set font of the header label to Cooper Black
   obj_Lbl_HEADER.FontSize(14); //--- Set font size of the header label
Here, we create and configure the header label for the trading dashboard. We start by initializing the label using the "Create" method on the "obj_Lbl_HEADER" object, providing the chart ID, label name ("Lbl_HEADER"), and its position on the chart at (40) for the x-coordinate and (30) for the y-coordinate. This positioning ensures the header label appears appropriately within the panel layout.
Next, we set the text of the header label to "Control Panel" using the "Text" method, clearly indicating the purpose of the dashboard. This of course could be anything else of your choosing. Do feel free to change it. We then customize the text color to red with the "Color" method, ensuring that it stands out against the background for improved visibility. The font of the header label is set to "Cooper black" using the "Font" method, giving the text a distinct and professional appearance. Finally, we specify the font size as 14 with the "FontSize" method, ensuring the header text is easily readable. Upon compilation, we get the following output.

That was a success. In a similar format, we can proceed to create the navigation buttons. We will create the trade operations view button at first using the following logic.
   //--- TRADE BUTTON
   obj_Btn_TRADE.Create(0, Btn_TRADE, 0, 40, 60, 0, 0); //--- Create the trade button at specified coordinates
   obj_Btn_TRADE.Size(90, 30); //--- Set size of the trade button
   obj_Btn_TRADE.ColorBackground(clrYellow); //--- Set background color of the trade button
   obj_Btn_TRADE.ColorBorder(clrYellow); //--- Set border color of the trade button
   obj_Btn_TRADE.Text("Trade"); //--- Set text of the trade button
   obj_Btn_TRADE.Color(clrBlack); //--- Set text color of the trade button
   obj_Btn_TRADE.Font("Arial Black"); //--- Set font of the trade button to Arial Black
   obj_Btn_TRADE.FontSize(13); //--- Set font size of the trade button
Here, we just change the size of the button as well as change the background color to yellow. Upon compilation, we have the following output.

That was a success. We set the button's color to be yellow to illustrate that the button is active. Thus, when we are defining the other navigation buttons, a similar logic will be maintained, but the color will be changed, to an inactive one. Here is the complete logic.
   //--- CLOSE BUTTON
   obj_Btn_CLOSE.Create(0, Btn_CLOSE, 0, 40 + obj_Btn_TRADE.Width() + 10, 60, 0, 0); //--- Create the close button at specified coordinates
   obj_Btn_CLOSE.Size(90, 30); //--- Set size of the close button
   obj_Btn_CLOSE.ColorBackground(clrSilver); //--- Set background color of the close button
   obj_Btn_CLOSE.ColorBorder(clrSilver); //--- Set border color of the close button
   obj_Btn_CLOSE.Text("Close"); //--- Set text of the close button
   obj_Btn_CLOSE.Color(clrBlack); //--- Set text color of the close button
   obj_Btn_CLOSE.Font("Arial Black"); //--- Set font of the close button to Arial Black
   obj_Btn_CLOSE.FontSize(13); //--- Set font size of the close button

   //--- INFO BUTTON
   obj_Btn_INFO.Create(0, Btn_INFO, 0, 40 + obj_Btn_TRADE.Width() + 10 + obj_Btn_CLOSE.Width() + 10, 60, 0, 0); //--- Create the info button at specified coordinates
   obj_Btn_INFO.Size(90, 30); //--- Set size of the info button
   obj_Btn_INFO.ColorBackground(clrSilver); //--- Set background color of the info button
   obj_Btn_INFO.ColorBorder(clrSilver); //--- Set border color of the info button
   obj_Btn_INFO.Text("Inform'n"); //--- Set text of the info button
   obj_Btn_INFO.Color(clrBlack); //--- Set text color of the info button
   obj_Btn_INFO.Font("Arial Black"); //--- Set font of the info button to Arial Black
   obj_Btn_INFO.FontSize(13); //--- Set font size of the info button
Here, we create the close and information buttons and set their background color to silver so that it indicates their initial inactive state. Here are the results.

After defining the navigation buttons, we can define the footer section before finalizing the initialization trading body. Its logic will be as shown in the code snippet below.
   //--- FOOTER BUTTON
   obj_Btn_FOOTER.Create(0, Btn_FOOTER, 0, 30 + 1, 305 - 1, 0, 0); //--- Create the footer button at specified coordinates
   obj_Btn_FOOTER.Size(310 - 1 - 1, 25); //--- Set size of the footer button
   obj_Btn_FOOTER.ColorBackground(C'070,070,070'); //--- Set background color of the footer button
   obj_Btn_FOOTER.ColorBorder(C'070,070,070'); //--- Set border color of the footer button
   obj_Btn_FOOTER.Text(ShortToString(0x23F0) + "https://t.me/Forex_Algo_Trader"); //--- Set text of the footer button with a link
   obj_Btn_FOOTER.Color(clrWhite); //--- Set text color of the footer button
   obj_Btn_FOOTER.Font("Calibri bold italic"); //--- Set font of the footer button to Calibri bold italic
   obj_Btn_FOOTER.FontSize(12); //--- Set font size of the footer button
Here, we create and configure the footer button for the trading dashboard by passing the normal parameters and placing it at the bottom of the panel. Next, we define the size of the footer button using the "Size" method, setting its dimensions to 310 - 1 - 1 for the width and 25 for the height. This ensures the button fits well within the footer area of the panel. We then customize the background color of the button to a dark gray using the "ColorBackground" method with the RGB values "C'070,070,070'", ensuring it is visually appealing and consistent with the overall design, basically blending it in the main button.
The border color is also set to the same dark gray using the "ColorBorder" method, giving the button a seamless look. For the button's text, we use the "Text" method to set it to a combination of an icon (represented by the Unicode character 0x23F0, which appears as a clock) and the link "https://t.me/Forex_Algo_Trader", encouraging users to access additional resources. We have the Unicode characters converted to an icon by use of the ShortToString function. The characters are in hexadecimal form as shown below, and that is the reason we need the function.

We set the text color to white using the "Color" method to enhance visibility against the dark background. Finally, we configure the font of the footer button to "Calibri bold italic" using the "Font" method, which adds a touch of professionalism, and set the font size to 12 using the "FontSize" method, ensuring the text remains readable. Upon compilation, we have the following milestone.

That was a success. We now need to finalize the body section and everything will be okay. Since we will have to constantly change the body view on every navigation button activation, we can have the body logic in a function and call it only when it is necessary.
   // BODY OF THE PANEL
   createSection_Trade(); //--- Call function to create the trade section
Here, we create a function called "createSection_Trade" within the body of the panel to set up the "Trade" section of the dashboard. This is typically calling the function had we defined it. This function is used to create and configure the interactive elements related to trading operations, such as buy, sell, and order type buttons. By using the function, we ensure that the code is modular and organized, allowing all elements related to trading to be handled within a separate function. This keeps the main panel setup cleaner, making it easier to maintain and expand the dashboard system as needed.
We then need to define the function. Since it is a simple function, we define it as a void function and pass no parameters to it.
void createSection_Trade(){

//---

}
To create the function functionalities, we use a similar creation logic as we have been doing throughout the code. The full function code snippet will be as follows.
//+------------------------------------------------------------------+
//|     FUNCTION TO CREATE THE TRADE SECTION                         |
//+------------------------------------------------------------------+
void createSection_Trade(){
   //--- RISK BUTTON
   obj_Btn_RISK.Create(0,Btn_RISK,0,40,100,0,0); //--- Create the risk button
   obj_Btn_RISK.Size(210,25); //--- Set the button size
   obj_Btn_RISK.ColorBackground(clrTurquoise); //--- Set the background color
   obj_Btn_RISK.ColorBorder(clrTurquoise); //--- Set the border color
   obj_Btn_RISK.Text("Risk based on Equity (%)"); //--- Set the button text
   obj_Btn_RISK.Color(clrBlack); //--- Set the text color
   obj_Btn_RISK.Font("Arial Black"); //--- Set the font style
   obj_Btn_RISK.FontSize(11); //--- Set the font size

   //--- RISK EDIT
   obj_Edit_RISK.Create(0,Edit_RISK,0,40+220,100,0,0); //--- Create the risk edit field
   obj_Edit_RISK.Size(70,25); //--- Set the edit field size
   obj_Edit_RISK.ColorBackground(clrWhite); //--- Set the background color
   obj_Edit_RISK.ColorBorder(clrBlack); //--- Set the border color
   obj_Edit_RISK.Text("78"); //--- Set the default text
   obj_Edit_RISK.Color(clrBlack); //--- Set the text color
   obj_Edit_RISK.Font("Times new roman bold"); //--- Set the font style
   obj_Edit_RISK.FontSize(15); //--- Set the font size

   //--- PRICE LABEL
   obj_Lbl_PRICE.Create(0,Lbl_PRICE,0,40,130,0,0); //--- Create the price label
   obj_Lbl_PRICE.Text("Price"); //--- Set the label text
   obj_Lbl_PRICE.Color(clrWhite); //--- Set the text color
   obj_Lbl_PRICE.Font("Arial black"); //--- Set the font style
   obj_Lbl_PRICE.FontSize(13); //--- Set the font size

   //--- PRICE EDIT
   obj_Edit_PRICE.Create(0,Edit_PRICE,0,40+60,130,0,0); //--- Create the price edit field
   obj_Edit_PRICE.Size(90,25); //--- Set the edit field size
   obj_Edit_PRICE.ColorBackground(clrWhite); //--- Set the background color
   obj_Edit_PRICE.ColorBorder(clrBlack); //--- Set the border color
   obj_Edit_PRICE.Text(DoubleToString(SymbolInfoDouble(_Symbol,SYMBOL_ASK),_Digits)); //--- Set the default text to current ask price
   obj_Edit_PRICE.Color(clrBlack); //--- Set the text color
   obj_Edit_PRICE.Font("Times new roman bold"); //--- Set the font style
   obj_Edit_PRICE.FontSize(13); //--- Set the font size

   //--- LOTS LABEL
   obj_Lbl_LOTS.Create(0,Lbl_LOTS,0,40+160,130,0,0); //--- Create the lot size label
   obj_Lbl_LOTS.Text("Lot size"); //--- Set the label text
   obj_Lbl_LOTS.Color(clrWhite); //--- Set the text color
   obj_Lbl_LOTS.Font("Arial black"); //--- Set the font style
   obj_Lbl_LOTS.FontSize(13); //--- Set the font size

   //--- LOTS EDIT
   obj_Edit_LOTS.Create(0,Edit_LOTS,0,40+60+180,130,0,0); //--- Create the lot size edit field
   obj_Edit_LOTS.Size(50,25); //--- Set the edit field size
   obj_Edit_LOTS.ColorBackground(clrWhite); //--- Set the background color
   obj_Edit_LOTS.ColorBorder(clrBlack); //--- Set the border color
   obj_Edit_LOTS.Text("0.01"); //--- Set the default text
   obj_Edit_LOTS.Color(clrBlack); //--- Set the text color
   obj_Edit_LOTS.Font("Times new roman bold"); //--- Set the font style
   obj_Edit_LOTS.FontSize(13); //--- Set the font size

   //--- SL LABEL
   obj_Lbl_SL.Create(0,Lbl_SL,0,40,160,0,0); //--- Create the stop loss label
   obj_Lbl_SL.Text("SL"); //--- Set the label text
   obj_Lbl_SL.Color(clrWhite); //--- Set the text color
   obj_Lbl_SL.Font("Arial black"); //--- Set the font style
   obj_Lbl_SL.FontSize(13); //--- Set the font size

   //--- SL EDIT
   obj_Edit_SL.Create(0,Edit_SL,0,40+30,160,0,0); //--- Create the stop loss edit field
   obj_Edit_SL.Size(70,25); //--- Set the edit field size
   obj_Edit_SL.ColorBackground(clrWhite); //--- Set the background color
   obj_Edit_SL.ColorBorder(clrBlack); //--- Set the border color
   obj_Edit_SL.Text("300"); //--- Set the default text
   obj_Edit_SL.Color(clrBlack); //--- Set the text color
   obj_Edit_SL.Font("Times new roman bold"); //--- Set the font style
   obj_Edit_SL.FontSize(13); //--- Set the font size

   //--- TP LABEL
   obj_Lbl_TP.Create(0,Lbl_TP,0,40+190,160,0,0); //--- Create the take profit label
   obj_Lbl_TP.Text("TP"); //--- Set the label text
   obj_Lbl_TP.Color(clrWhite); //--- Set the text color
   obj_Lbl_TP.Font("Arial black"); //--- Set the font style
   obj_Lbl_TP.FontSize(13); //--- Set the font size

   //--- TP EDIT
   obj_Edit_TP.Create(0,Edit_TP,0,40+30+190,160,0,0); //--- Create the take profit edit field
   obj_Edit_TP.Size(70,25); //--- Set the edit field size
   obj_Edit_TP.ColorBackground(clrWhite); //--- Set the background color
   obj_Edit_TP.ColorBorder(clrBlack); //--- Set the border color
   obj_Edit_TP.Text("750"); //--- Set the default text
   obj_Edit_TP.Color(clrBlack); //--- Set the text color
   obj_Edit_TP.Font("Times new roman bold"); //--- Set the font style
   obj_Edit_TP.FontSize(13); //--- Set the font size

   //--- POINTS BUTTON
   obj_Btn_POINTS.Create(0,Btn_POINTS,0,40+110,160,0,0); //--- Create the points button
   obj_Btn_POINTS.Size(70,25); //--- Set the button size
   obj_Btn_POINTS.ColorBackground(clrGoldenrod); //--- Set the background color
   obj_Btn_POINTS.ColorBorder(clrGoldenrod); //--- Set the border color
   obj_Btn_POINTS.Text("Points"); //--- Set the button text
   obj_Btn_POINTS.Color(clrBlack); //--- Set the text color
   obj_Btn_POINTS.Font("Calibri bold"); //--- Set the font style
   obj_Btn_POINTS.FontSize(14); //--- Set the font size

   //--- SELL BUTTON
   obj_Btn_SELL.Create(0,Btn_SELL,0,40,210,0,0); //--- Create the sell button
   obj_Btn_SELL.Size(100,25); //--- Set the button size
   obj_Btn_SELL.ColorBackground(clrOrangeRed); //--- Set the background color
   obj_Btn_SELL.ColorBorder(clrOrangeRed); //--- Set the border color
   obj_Btn_SELL.Text("Sell"); //--- Set the button text
   obj_Btn_SELL.Color(clrWhite); //--- Set the text color
   obj_Btn_SELL.Font("Calibri bold"); //--- Set the font style
   obj_Btn_SELL.FontSize(14); //--- Set the font size

   //--- ENTRY BUTTON
   obj_Btn_ENTRY.Create(0,Btn_ENTRY,0,150,210,0,0); //--- Create the entry button
   obj_Btn_ENTRY.Size(70,25); //--- Set the button size
   obj_Btn_ENTRY.ColorBackground(clrGoldenrod); //--- Set the background color
   obj_Btn_ENTRY.ColorBorder(clrGoldenrod); //--- Set the border color
   obj_Btn_ENTRY.Text("Entry"); //--- Set the button text
   obj_Btn_ENTRY.Color(clrBlack); //--- Set the text color
   obj_Btn_ENTRY.Font("Calibri bold"); //--- Set the font style
   obj_Btn_ENTRY.FontSize(14); //--- Set the font size

   //--- BUY BUTTON
   obj_Btn_BUY.Create(0,Btn_BUY,0,40+190,210,0,0); //--- Create the buy button
   obj_Btn_BUY.Size(100,25); //--- Set the button size
   obj_Btn_BUY.ColorBackground(clrLimeGreen); //--- Set the background color
   obj_Btn_BUY.ColorBorder(clrLimeGreen); //--- Set the border color
   obj_Btn_BUY.Text("Buy"); //--- Set the button text
   obj_Btn_BUY.Color(clrWhite); //--- Set the text color
   obj_Btn_BUY.Font("Calibri bold"); //--- Set the font style
   obj_Btn_BUY.FontSize(14); //--- Set the font size

   //--- SELL STOP BUTTON
   obj_Btn_SELLSTOP.Create(0,Btn_SELLSTOP,0,40,240,0,0); //--- Create the sell stop button
   obj_Btn_SELLSTOP.Size(140,25); //--- Set the button size
   obj_Btn_SELLSTOP.ColorBackground(clrOrangeRed); //--- Set the background color
   obj_Btn_SELLSTOP.ColorBorder(clrOrangeRed); //--- Set the border color
   obj_Btn_SELLSTOP.Text("Sell Stop"); //--- Set the button text
   obj_Btn_SELLSTOP.Color(clrWhite); //--- Set the text color
   obj_Btn_SELLSTOP.Font("Calibri bold"); //--- Set the font style
   obj_Btn_SELLSTOP.FontSize(14); //--- Set the font size

   //--- BUY STOP BUTTON
   obj_Btn_BUYSTOP.Create(0,Btn_BUYSTOP,0,40+190-40,240,0,0); //--- Create the buy stop button
   obj_Btn_BUYSTOP.Size(140,25); //--- Set the button size
   obj_Btn_BUYSTOP.ColorBackground(clrLimeGreen); //--- Set the background color
   obj_Btn_BUYSTOP.ColorBorder(clrLimeGreen); //--- Set the border color
   obj_Btn_BUYSTOP.Text("Buy Stop"); //--- Set the button text
   obj_Btn_BUYSTOP.Color(clrWhite); //--- Set the text color
   obj_Btn_BUYSTOP.Font("Calibri bold"); //--- Set the font style
   obj_Btn_BUYSTOP.FontSize(14); //--- Set the font size

   //--- SELL LIMIT BUTTON
   obj_Btn_SELLLIMIT.Create(0,Btn_SELLLIMIT,0,40,270,0,0); //--- Create the sell limit button
   obj_Btn_SELLLIMIT.Size(140,25); //--- Set the button size
   obj_Btn_SELLLIMIT.ColorBackground(clrOrangeRed); //--- Set the background color
   obj_Btn_SELLLIMIT.ColorBorder(clrOrangeRed); //--- Set the border color
   obj_Btn_SELLLIMIT.Text("Sell Limit"); //--- Set the button text
   obj_Btn_SELLLIMIT.Color(clrWhite); //--- Set the text color
   obj_Btn_SELLLIMIT.Font("Calibri bold"); //--- Set the font style
   obj_Btn_SELLLIMIT.FontSize(14); //--- Set the font size

   //--- BUY LIMIT BUTTON
   obj_Btn_BUYLIMIT.Create(0,Btn_BUYLIMIT,0,40+190-40,270,0,0); //--- Create the buy limit button
   obj_Btn_BUYLIMIT.Size(140,25); //--- Set the button size
   obj_Btn_BUYLIMIT.ColorBackground(clrLimeGreen); //--- Set the background color
   obj_Btn_BUYLIMIT.ColorBorder(clrLimeGreen); //--- Set the border color
   obj_Btn_BUYLIMIT.Text("Buy Limit"); //--- Set the button text
   obj_Btn_BUYLIMIT.Color(clrWhite); //--- Set the text color
   obj_Btn_BUYLIMIT.Font("Calibri bold"); //--- Set the font style
   obj_Btn_BUYLIMIT.FontSize(14); //--- Set the font size
}
Upon compilation, we have the following output.

That was a success. We now have the necessary appealing trade interface we wanted. We just need to proceed to craft the other navigation section views and that will be all. At first, we will create the closing interface and organize its logic in a function as well. However, before defining the function utilities, we'll need to define the respective names of the buttons alongside their object declarations. Here is the object declaration logic.
CButton obj_Btn_CLOSE_ALL;                                  //--- Close All button object
CButton obj_Btn_CLOSE_ALL_SELL;                             //--- Close All Sell button object
CButton obj_Btn_CLOSE_ALL_BUY;                              //--- Close All Buy button object
CButton obj_Btn_CLOSE_LOSS_SELL;                            //--- Close Loss Sell button object
CButton obj_Btn_CLOSE_LOSS_BUY;                             //--- Close Loss Buy button object
CButton obj_Btn_CLOSE_PROFIT_SELL;                          //--- Close Profit Sell button object
CButton obj_Btn_CLOSE_PROFIT_BUY;                           //--- Close Profit Buy button object
CButton obj_Btn_CLOSE_ALL_LOSS;                             //--- Close All Loss button object
CButton obj_Btn_CLOSE_ALL_PROFIT;                           //--- Close All Profit button object
CButton obj_Btn_CLOSE_PENDING;                              //--- Close Pending button object

//---

CButton obj_Btn_ACC_NUMBER;                                 //--- Account Number button object
CButton obj_Btn_ACC_NAME;                                   //--- Account Name button object
CButton obj_Btn_ACC_TYPE;                                   //--- Account Type button object
CButton obj_Btn_ACC_LEVERAGE;                               //--- Account Leverage button object

CButton obj_Btn_ACC_EQUITY;                                 //--- Account Equity button object
CButton obj_Btn_ACC_BALANCE;                                //--- Account Balance button object
CButton obj_Btn_TIME;                                       //--- Time button object


//---
CLabel obj_Lbl_ACC_NUMBER;                                  //--- Account Number label object
CLabel obj_Lbl_ACC_NAME;                                    //--- Account Name label object
CLabel obj_Lbl_ACC_TYPE;                                    //--- Account Type label object
CLabel obj_Lbl_ACC_LEVERAGE;                                //--- Account Leverage label object

CLabel obj_Lbl_ACC_EQUITY;                                  //--- Account Equity label object
CLabel obj_Lbl_ACC_BALANCE;                                 //--- Account Balance label object
CLabel obj_Lbl_TIME;                                        //--- Time label object
Here is the object defination logic.
#define Btn_CLOSE_ALL "Btn_CLOSE_ALL"                        //--- Button name for closing all trades
#define Btn_CLOSE_ALL_SELL "Btn_CLOSE_ALL_SELL"              //--- Button name for closing all sell trades
#define Btn_CLOSE_ALL_BUY "Btn_CLOSE_ALL_BUY"                //--- Button name for closing all buy trades
#define Btn_CLOSE_LOSS_SELL "Btn_CLOSE_LOSS_SELL"            //--- Button name for closing all loss sell trades
#define Btn_CLOSE_LOSS_BUY "Btn_CLOSE_LOSS_BUY"              //--- Button name for closing all loss buy trades
#define Btn_CLOSE_PROFIT_SELL "Btn_CLOSE_PROFIT_SELL"        //--- Button name for closing all profit sell trades
#define Btn_CLOSE_PROFIT_BUY "Btn_CLOSE_PROFIT_BUY"          //--- Button name for closing all profit buy trades
#define Btn_CLOSE_ALL_LOSS "Btn_CLOSE_ALL_LOSS"              //--- Button name for closing all loss trades
#define Btn_CLOSE_ALL_PROFIT "Btn_CLOSE_ALL_PROFIT"          //--- Button name for closing all profit trades
#define Btn_CLOSE_PENDING "Btn_CLOSE_PENDING"                //--- Button name for closing all pending trades

#define Btn_ACC_NUMBER "Btn_ACC_NUMBER"                      //--- Button name for the account number
#define Btn_ACC_NAME "Btn_ACC_NAME"                          //--- Button name for the account name
#define Btn_ACC_TYPE "Btn_ACC_TYPE"                          //--- Button name for the account type
#define Btn_ACC_LEVERAGE "Btn_ACC_LEVERAGE"                  //--- Button name for the account leverage

#define Btn_ACC_EQUITY "Btn_ACC_EQUITY"                      //--- Button name for the account equity
#define Btn_ACC_BALANCE "Btn_ACC_BALANCE"                    //--- Button name for the account balance
#define Btn_TIME "Btn_TIME"                                  //--- Button name for the time

//---
#define Lbl_ACC_NUMBER "Lbl_ACC_NUMBER"                      //--- Label name for the account number
#define Lbl_ACC_NAME "Lbl_ACC_NAME"                          //--- Label name for the account name
#define Lbl_ACC_TYPE "Lbl_ACC_TYPE"                          //--- Label name for the account type
#define Lbl_ACC_LEVERAGE "Lbl_ACC_LEVERAGE"                  //--- Label name for the account leverage

#define Lbl_ACC_EQUITY "Lbl_ACC_EQUITY"                      //--- Label name for the account equity
#define Lbl_ACC_BALANCE "Lbl_ACC_BALANCE"                    //--- Label name for the account balance
#define Lbl_TIME "Lbl_TIME"                                  //--- Label name for the time
After defining all the necessary parameters, we proceed to create the close function as follows.
//+------------------------------------------------------------------+
//|      FUNCTION TO CREATE THE CLOSE SECTION                        |
//+------------------------------------------------------------------+
void createSection_Close(){
   //--- CLOSE ALL BUTTON
   obj_Btn_CLOSE_ALL.Create(0, Btn_CLOSE_ALL, 0, 80, 120, 0, 0); //--- Create the close all button
   obj_Btn_CLOSE_ALL.Size(210, 25); //--- Set the button size
   obj_Btn_CLOSE_ALL.ColorBackground(clrPeru); //--- Set the background color
   obj_Btn_CLOSE_ALL.ColorBorder(clrWhite); //--- Set the border color
   obj_Btn_CLOSE_ALL.Text("Close All"); //--- Set the button text
   obj_Btn_CLOSE_ALL.Color(clrBlack); //--- Set the text color
   obj_Btn_CLOSE_ALL.Font("Calibri bold"); //--- Set the font style
   obj_Btn_CLOSE_ALL.FontSize(14); //--- Set the font size

   //--- CLOSE ALL SELL BUTTON
   obj_Btn_CLOSE_ALL_SELL.Create(0, Btn_CLOSE_ALL_SELL, 0, 40, 150, 0, 0); //--- Create the close all sell button
   obj_Btn_CLOSE_ALL_SELL.Size(140, 25); //--- Set the button size
   obj_Btn_CLOSE_ALL_SELL.ColorBackground(clrSalmon); //--- Set the background color
   obj_Btn_CLOSE_ALL_SELL.ColorBorder(clrWhite); //--- Set the border color
   obj_Btn_CLOSE_ALL_SELL.Text("Close All Sell"); //--- Set the button text
   obj_Btn_CLOSE_ALL_SELL.Color(clrBlack); //--- Set the text color
   obj_Btn_CLOSE_ALL_SELL.Font("Calibri bold"); //--- Set the font style
   obj_Btn_CLOSE_ALL_SELL.FontSize(14); //--- Set the font size

   //--- CLOSE ALL BUY BUTTON
   obj_Btn_CLOSE_ALL_BUY.Create(0, Btn_CLOSE_ALL_BUY, 0, 190, 150, 0, 0); //--- Create the close all buy button
   obj_Btn_CLOSE_ALL_BUY.Size(140, 25); //--- Set the button size
   obj_Btn_CLOSE_ALL_BUY.ColorBackground(clrMediumSeaGreen); //--- Set the background color
   obj_Btn_CLOSE_ALL_BUY.ColorBorder(clrWhite); //--- Set the border color
   obj_Btn_CLOSE_ALL_BUY.Text("Close All Buy"); //--- Set the button text
   obj_Btn_CLOSE_ALL_BUY.Color(clrBlack); //--- Set the text color
   obj_Btn_CLOSE_ALL_BUY.Font("Calibri bold"); //--- Set the font style
   obj_Btn_CLOSE_ALL_BUY.FontSize(14); //--- Set the font size

   //--- CLOSE LOSS SELL BUTTON
   obj_Btn_CLOSE_LOSS_SELL.Create(0, Btn_CLOSE_LOSS_SELL, 0, 40, 180, 0, 0); //--- Create the close loss sell button
   obj_Btn_CLOSE_LOSS_SELL.Size(140, 25); //--- Set the button size
   obj_Btn_CLOSE_LOSS_SELL.ColorBackground(clrSalmon); //--- Set the background color
   obj_Btn_CLOSE_LOSS_SELL.ColorBorder(clrWhite); //--- Set the border color
   obj_Btn_CLOSE_LOSS_SELL.Text("Close Loss Sell"); //--- Set the button text
   obj_Btn_CLOSE_LOSS_SELL.Color(clrBlack); //--- Set the text color
   obj_Btn_CLOSE_LOSS_SELL.Font("Calibri bold"); //--- Set the font style
   obj_Btn_CLOSE_LOSS_SELL.FontSize(14); //--- Set the font size

   //--- CLOSE LOSS BUY BUTTON
   obj_Btn_CLOSE_LOSS_BUY.Create(0, Btn_CLOSE_LOSS_BUY, 0, 190, 180, 0, 0); //--- Create the close loss buy button
   obj_Btn_CLOSE_LOSS_BUY.Size(140, 25); //--- Set the button size
   obj_Btn_CLOSE_LOSS_BUY.ColorBackground(clrMediumSeaGreen); //--- Set the background color
   obj_Btn_CLOSE_LOSS_BUY.ColorBorder(clrWhite); //--- Set the border color
   obj_Btn_CLOSE_LOSS_BUY.Text("Close Loss Buy"); //--- Set the button text
   obj_Btn_CLOSE_LOSS_BUY.Color(clrBlack); //--- Set the text color
   obj_Btn_CLOSE_LOSS_BUY.Font("Calibri bold"); //--- Set the font style
   obj_Btn_CLOSE_LOSS_BUY.FontSize(14); //--- Set the font size

   //--- CLOSE PROFIT SELL BUTTON
   obj_Btn_CLOSE_PROFIT_SELL.Create(0, Btn_CLOSE_PROFIT_SELL, 0, 40, 210, 0, 0); //--- Create the close profit sell button
   obj_Btn_CLOSE_PROFIT_SELL.Size(140, 25); //--- Set the button size
   obj_Btn_CLOSE_PROFIT_SELL.ColorBackground(clrSalmon); //--- Set the background color
   obj_Btn_CLOSE_PROFIT_SELL.ColorBorder(clrWhite); //--- Set the border color
   obj_Btn_CLOSE_PROFIT_SELL.Text("Close Profit Sell"); //--- Set the button text
   obj_Btn_CLOSE_PROFIT_SELL.Color(clrBlack); //--- Set the text color
   obj_Btn_CLOSE_PROFIT_SELL.Font("Calibri bold"); //--- Set the font style
   obj_Btn_CLOSE_PROFIT_SELL.FontSize(14); //--- Set the font size

   //--- CLOSE PROFIT BUY BUTTON
   obj_Btn_CLOSE_PROFIT_BUY.Create(0, Btn_CLOSE_PROFIT_BUY, 0, 190, 210, 0, 0); //--- Create the close profit buy button
   obj_Btn_CLOSE_PROFIT_BUY.Size(140, 25); //--- Set the button size
   obj_Btn_CLOSE_PROFIT_BUY.ColorBackground(clrMediumSeaGreen); //--- Set the background color
   obj_Btn_CLOSE_PROFIT_BUY.ColorBorder(clrWhite); //--- Set the border color
   obj_Btn_CLOSE_PROFIT_BUY.Text("Close Profit Buy"); //--- Set the button text
   obj_Btn_CLOSE_PROFIT_BUY.Color(clrBlack); //--- Set the text color
   obj_Btn_CLOSE_PROFIT_BUY.Font("Calibri bold"); //--- Set the font style
   obj_Btn_CLOSE_PROFIT_BUY.FontSize(14); //--- Set the font size

   //--- CLOSE ALL LOSS BUTTON
   obj_Btn_CLOSE_ALL_LOSS.Create(0, Btn_CLOSE_ALL_LOSS, 0, 40, 240, 0, 0); //--- Create the close all loss button
   obj_Btn_CLOSE_ALL_LOSS.Size(140, 25); //--- Set the button size
   obj_Btn_CLOSE_ALL_LOSS.ColorBackground(clrSalmon); //--- Set the background color
   obj_Btn_CLOSE_ALL_LOSS.ColorBorder(clrWhite); //--- Set the border color
   obj_Btn_CLOSE_ALL_LOSS.Text("CLOSE LOSS"); //--- Set the button text
   obj_Btn_CLOSE_ALL_LOSS.Color(clrBlack); //--- Set the text color
   obj_Btn_CLOSE_ALL_LOSS.Font("Calibri bold"); //--- Set the font style
   obj_Btn_CLOSE_ALL_LOSS.FontSize(14); //--- Set the font size

   //--- CLOSE ALL PROFIT BUTTON
   obj_Btn_CLOSE_ALL_PROFIT.Create(0, Btn_CLOSE_ALL_PROFIT, 0, 190, 240, 0, 0); //--- Create the close all profit button
   obj_Btn_CLOSE_ALL_PROFIT.Size(140, 25); //--- Set the button size
   obj_Btn_CLOSE_ALL_PROFIT.ColorBackground(clrMediumSeaGreen); //--- Set the background color
   obj_Btn_CLOSE_ALL_PROFIT.ColorBorder(clrWhite); //--- Set the border color
   obj_Btn_CLOSE_ALL_PROFIT.Text("CLOSE PROFIT"); //--- Set the button text
   obj_Btn_CLOSE_ALL_PROFIT.Color(clrBlack); //--- Set the text color
   obj_Btn_CLOSE_ALL_PROFIT.Font("Calibri bold"); //--- Set the font style
   obj_Btn_CLOSE_ALL_PROFIT.FontSize(14); //--- Set the font size

   //--- CLOSE ALL PENDING BUTTON
   obj_Btn_CLOSE_PENDING.Create(0, Btn_CLOSE_PENDING, 0, 80, 270, 0, 0); //--- Create the close all pending button
   obj_Btn_CLOSE_PENDING.Size(210, 25); //--- Set the button size
   obj_Btn_CLOSE_PENDING.ColorBackground(clrPeru); //--- Set the background color
   obj_Btn_CLOSE_PENDING.ColorBorder(clrWhite); //--- Set the border color
   obj_Btn_CLOSE_PENDING.Text("Close All Pending"); //--- Set the button text
   obj_Btn_CLOSE_PENDING.Color(clrBlack); //--- Set the text color
   obj_Btn_CLOSE_PENDING.Font("Calibri bold"); //--- Set the font style
   obj_Btn_CLOSE_PENDING.FontSize(14); //--- Set the font size
}
On the initialization event handler, we can comment out the function call logic for the trade section and effect the close section via the function call. We achieve this by commenting out the function rather than deleting it since we'll have to reuse it again later.
   // BODY OF THE PANEL
   //createSection_Trade(); //--- Call function to create the trade section
   createSection_Close(); //--- Call function to create the close section
Upon running the program, we have the following output.

That was a success. We now can proceed to create the last section which will display the information related to the trading account. For this, we also use a function.
//+------------------------------------------------------------------+
//|        FUNCTION TO CREATE THE INFO SECTION                       |
//+------------------------------------------------------------------+
void createSection_Information() {
   //--- Create Account Number Label
   obj_Lbl_ACC_NUMBER.Create(0, Lbl_ACC_NUMBER, 0, 40, 100, 0, 0); //--- Initialize label for Account Number
   obj_Lbl_ACC_NUMBER.Text("Account Number"); //--- Set label text to "Account Number"
   obj_Lbl_ACC_NUMBER.Color(clrWhite); //--- Set label color to white
   obj_Lbl_ACC_NUMBER.Font("Calibri bold"); //--- Set label font to Calibri bold
   obj_Lbl_ACC_NUMBER.FontSize(14); //--- Set label font size to 14

   //--- Create Account Number Button
   obj_Btn_ACC_NUMBER.Create(0, Btn_ACC_NUMBER, 0, 40 + 140, 100 + 2, 0, 0); //--- Initialize button for Account Number
   obj_Btn_ACC_NUMBER.Size(150, 20); //--- Set button size to 150x20
   obj_Btn_ACC_NUMBER.ColorBackground(clrGainsboro); //--- Set button background color to Gainsboro
   obj_Btn_ACC_NUMBER.ColorBorder(clrWhite); //--- Set button border color to white
   obj_Btn_ACC_NUMBER.Text(IntegerToString(AccountInfoInteger(ACCOUNT_LOGIN))); //--- Set button text with account number
   obj_Btn_ACC_NUMBER.Color(clrBlack); //--- Set button text color to black
   obj_Btn_ACC_NUMBER.Font("Calibri bold"); //--- Set button font to Calibri bold
   obj_Btn_ACC_NUMBER.FontSize(13); //--- Set button font size to 13

}
We again use a similar format in the creation of the information section. However, when setting the text, we use some extra functions that we would like to explain their essence. The line is highlighted in yellow color to increase clarity. We use a combination of the AccountInfoInteger and IntegerToString functions to set the text of the "obj_Btn_ACC_NUMBER" button to display the account number.
We use the AccountInfoInteger function to retrieve the specific account information based on the given parameter. In this case, the parameter is "ACCOUNT_LOGIN", which tells the function to obtain the account's login number from the MetaTrader terminal. This login number is returned as an integer value.
Next, the IntegerToString function is applied to convert this integer value into a string. This is necessary because the "Text" method of the button requires the value to be in a string format for proper display. Without this conversion, the button would not be able to render the account number correctly. In a similar format, we set the account name and type buttons.
   //--- Create Account Name Label
   obj_Lbl_ACC_NAME.Create(0, Lbl_ACC_NAME, 0, 40, 125, 0, 0); //--- Initialize label for Account Name
   obj_Lbl_ACC_NAME.Text("Account Name"); //--- Set label text to "Account Name"
   obj_Lbl_ACC_NAME.Color(clrWhite); //--- Set label color to white
   obj_Lbl_ACC_NAME.Font("Calibri bold"); //--- Set label font to Calibri bold
   obj_Lbl_ACC_NAME.FontSize(14); //--- Set label font size to 14

   //--- Create Account Name Button
   obj_Btn_ACC_NAME.Create(0, Btn_ACC_NAME, 0, 40 + 120, 125 + 2, 0, 0); //--- Initialize button for Account Name
   obj_Btn_ACC_NAME.Size(170, 20); //--- Set button size to 170x20
   obj_Btn_ACC_NAME.ColorBackground(clrGainsboro); //--- Set button background color to Gainsboro
   obj_Btn_ACC_NAME.ColorBorder(clrWhite); //--- Set button border color to white
   obj_Btn_ACC_NAME.Text(AccountInfoString(ACCOUNT_SERVER)); //--- Set button text with account server name
   obj_Btn_ACC_NAME.Color(clrBlack); //--- Set button text color to black
   obj_Btn_ACC_NAME.Font("Calibri bold"); //--- Set button font to Calibri bold
   obj_Btn_ACC_NAME.FontSize(13); //--- Set button font size to 13

   //--- Create Account Type Label
   obj_Lbl_ACC_TYPE.Create(0, Lbl_ACC_TYPE, 0, 40, 150, 0, 0); //--- Initialize label for Account Type
   obj_Lbl_ACC_TYPE.Text("Account Type"); //--- Set label text to "Account Type"
   obj_Lbl_ACC_TYPE.Color(clrWhite); //--- Set label color to white
   obj_Lbl_ACC_TYPE.Font("Calibri bold"); //--- Set label font to Calibri bold
   obj_Lbl_ACC_TYPE.FontSize(14); //--- Set label font size to 14

   //--- Create Account Type Button
   obj_Btn_ACC_TYPE.Create(0, Btn_ACC_TYPE, 0, 40 + 110, 150 + 2, 0, 0); //--- Initialize button for Account Type
   obj_Btn_ACC_TYPE.Size(180, 20); //--- Set button size to 180x20
   obj_Btn_ACC_TYPE.ColorBackground(clrGainsboro); //--- Set button background color to Gainsboro
   obj_Btn_ACC_TYPE.ColorBorder(clrWhite); //--- Set button border color to white
   ENUM_ACCOUNT_TRADE_MODE account_type = (ENUM_ACCOUNT_TRADE_MODE)AccountInfoInteger(ACCOUNT_TRADE_MODE); //--- Retrieve account type
   string trade_mode; //--- Initialize variable for trade mode description
   switch (account_type) { //--- Determine account type
      case ACCOUNT_TRADE_MODE_DEMO: trade_mode = "Demo Account"; break; //--- Set trade_mode for Demo account
      case ACCOUNT_TRADE_MODE_CONTEST: trade_mode = "Contest Account"; break; //--- Set trade_mode for Contest account
      default: trade_mode = "Real Account"; break; //--- Set trade_mode for Real account
   }
   obj_Btn_ACC_TYPE.Text(trade_mode); //--- Set button text to account type description
   obj_Btn_ACC_TYPE.Color(clrBlack); //--- Set button text color to black
   obj_Btn_ACC_TYPE.Font("Calibri bold"); //--- Set button font to Calibri bold
   obj_Btn_ACC_TYPE.FontSize(13); //--- Set button font size to 13
Here, we set the account name and type buttons. However, we use some more complex logic to acquire the account type since there is no direct method of acquiring the account type directly. The logic is again highlighted in yellow color for emphasis. We start by defining a variable named "account_type" of the enumeration type ENUM_ACCOUNT_TRADE_MODE. This is an enumerated data type specifically designed to hold various account trading modes, such as Demo, Contest, or Real account types. We then assign it a value using the "AccountInfoInteger" function, with the parameter ACCOUNT_TRADE_MODE. This function retrieves the current trading mode of the account as an enumerated integer.
Next, we declare a string variable named "trade_mode" to hold a descriptive label based on the type of account. We then use a switch statement to determine the account type by checking the value of "account_type". This switch statement has three cases:
- "ACCOUNT_TRADE_MODE_DEMO": If the account is a Demo account, "trade_mode" is set to "Demo Account".
- "ACCOUNT_TRADE_MODE_CONTEST": If the account is used in a Contest, "trade_mode" is set to "Contest Account".
- Default Case: For any other type (usually a Real account), "trade_mode" is set to "Real Account".
Finally, we call the "Text" method on the "obj_Btn_ACC_TYPE" button and pass the "trade_mode" string. This updates the button's text to display the descriptive account type. From here, the rest of the utilities are defined in a similar format as follows.
   //--- Create Account Leverage Label
   obj_Lbl_ACC_LEVERAGE.Create(0, Lbl_ACC_LEVERAGE, 0, 40, 175, 0, 0); //--- Initialize label for Account Leverage
   obj_Lbl_ACC_LEVERAGE.Text("Account Leverage"); //--- Set label text to "Account Leverage"
   obj_Lbl_ACC_LEVERAGE.Color(clrWhite); //--- Set label color to white
   obj_Lbl_ACC_LEVERAGE.Font("Calibri bold"); //--- Set label font to Calibri bold
   obj_Lbl_ACC_LEVERAGE.FontSize(14); //--- Set label font size to 14

   //--- Create Account Leverage Button
   obj_Btn_ACC_LEVERAGE.Create(0, Btn_ACC_LEVERAGE, 0, 40 + 150, 175 + 2, 0, 0); //--- Initialize button for Account Leverage
   obj_Btn_ACC_LEVERAGE.Size(140, 20); //--- Set button size to 140x20
   obj_Btn_ACC_LEVERAGE.ColorBackground(clrGainsboro); //--- Set button background color to Gainsboro
   obj_Btn_ACC_LEVERAGE.ColorBorder(clrWhite); //--- Set button border color to white
   obj_Btn_ACC_LEVERAGE.Text(IntegerToString(AccountInfoInteger(ACCOUNT_LEVERAGE))); //--- Set button text with account leverage
   obj_Btn_ACC_LEVERAGE.Color(clrBlack); //--- Set button text color to black
   obj_Btn_ACC_LEVERAGE.Font("Calibri bold"); //--- Set button font to Calibri bold
   obj_Btn_ACC_LEVERAGE.FontSize(13); //--- Set button font size to 13

   //--- Create Account Equity Label
   obj_Lbl_ACC_EQUITY.Create(0, Lbl_ACC_EQUITY, 0, 40, 220, 0, 0); //--- Initialize label for Account Equity
   obj_Lbl_ACC_EQUITY.Text("Account Equity"); //--- Set label text to "Account Equity"
   obj_Lbl_ACC_EQUITY.Color(clrAqua); //--- Set label color to Aqua
   obj_Lbl_ACC_EQUITY.Font("Cooper Black"); //--- Set label font to Cooper Black
   obj_Lbl_ACC_EQUITY.FontSize(14); //--- Set label font size to 14

   //--- Create Account Equity Button
   obj_Btn_ACC_EQUITY.Create(0, Btn_ACC_EQUITY, 0, 40 + 170, 220 + 2, 0, 0); //--- Initialize button for Account Equity
   obj_Btn_ACC_EQUITY.Size(120, 20); //--- Set button size to 120x20
   obj_Btn_ACC_EQUITY.ColorBackground(clrBlack); //--- Set button background color to black
   obj_Btn_ACC_EQUITY.ColorBorder(clrBlanchedAlmond); //--- Set button border color to Blanched Almond
   obj_Btn_ACC_EQUITY.Text(DoubleToString(AccountInfoDouble(ACCOUNT_EQUITY), 2)); //--- Set button text with account equity
   obj_Btn_ACC_EQUITY.Color(clrWhite); //--- Set button text color to white
   obj_Btn_ACC_EQUITY.Font("Times new roman bold"); //--- Set button font to Times New Roman bold
   obj_Btn_ACC_EQUITY.FontSize(13); //--- Set button font size to 13

   //--- Create Account Balance Label
   obj_Lbl_ACC_BALANCE.Create(0, Lbl_ACC_BALANCE, 0, 40, 245, 0, 0); //--- Initialize label for Account Balance
   obj_Lbl_ACC_BALANCE.Text("Account Balance"); //--- Set label text to "Account Balance"
   obj_Lbl_ACC_BALANCE.Color(clrAqua); //--- Set label color to Aqua
   obj_Lbl_ACC_BALANCE.Font("Cooper Black"); //--- Set label font to Cooper Black
   obj_Lbl_ACC_BALANCE.FontSize(14); //--- Set label font size to 14

   //--- Create Account Balance Button
   obj_Btn_ACC_BALANCE.Create(0, Btn_ACC_BALANCE, 0, 40 + 170, 245 + 2, 0, 0); //--- Initialize button for Account Balance
   obj_Btn_ACC_BALANCE.Size(120, 20); //--- Set button size to 120x20
   obj_Btn_ACC_BALANCE.ColorBackground(clrBlack); //--- Set button background color to black
   obj_Btn_ACC_BALANCE.ColorBorder(clrBlanchedAlmond); //--- Set button border color to Blanched Almond
   obj_Btn_ACC_BALANCE.Text(DoubleToString(AccountInfoDouble(ACCOUNT_BALANCE), 2)); //--- Set button text with account balance
   obj_Btn_ACC_BALANCE.Color(clrWhite); //--- Set button text color to white
   obj_Btn_ACC_BALANCE.Font("Times new roman bold"); //--- Set button font to Times New Roman bold
   obj_Btn_ACC_BALANCE.FontSize(13); //--- Set button font size to 13

   //--- Create Server Time Label
   obj_Lbl_TIME.Create(0, Lbl_TIME, 0, 40, 270, 0, 0); //--- Initialize label for Server Time
   obj_Lbl_TIME.Text("Server Time"); //--- Set label text to "Server Time"
   obj_Lbl_TIME.Color(clrLime); //--- Set label color to Lime
   obj_Lbl_TIME.Font("Cooper Black"); //--- Set label font to Cooper Black
   obj_Lbl_TIME.FontSize(14); //--- Set label font size to 14

   //--- Create Server Time Button
   obj_Btn_TIME.Create(0, Btn_TIME, 0, 40 + 120, 270 + 2, 0, 0); //--- Initialize button for Server Time
   obj_Btn_TIME.Size(170, 20); //--- Set button size to 170x20
   obj_Btn_TIME.ColorBackground(clrBlack); //--- Set button background color to black
   obj_Btn_TIME.ColorBorder(clrBlanchedAlmond); //--- Set button border color to Blanched Almond
   obj_Btn_TIME.Text(TimeToString(TimeTradeServer(), TIME_DATE | TIME_SECONDS)); //--- Set button text with server time
   obj_Btn_TIME.Color(clrWhite); //--- Set button text color to white
   obj_Btn_TIME.Font("Times new roman bold"); //--- Set button font to Times New Roman bold
   obj_Btn_TIME.FontSize(13); //--- Set button font size to 13
That is all. To check the effect of the change, we will need to call the function on the initialization stage and comment out on the other navigation function calls. This is as shown below.
   // BODY OF THE PANEL
   //createSection_Trade(); //--- Call function to create the trade section
   //createSection_Close(); //--- Call function to create the close section
   createSection_Information(); //--- Call function to create the information section
Upon compilation and run of the program, we have the following output.

We now have the complete panel utility components we wanted. We can now default back to the original interface for trading activities since it is the one whose button is active. We will thus comment out the close and information section functions, but we will need them later when necessary, that is when their respective view fields are needed. Thus, the final initialization code responsible for the creation of the panel interface is as follows:
//+------------------------------------------------------------------+
//| Expert initialization function                                   |
//+------------------------------------------------------------------+
int OnInit() {
   //--- Start of the initialization function

   //--- MAIN BUTTON
   obj_Btn_MAIN.Create(0, Btn_MAIN, 0, 30, 30, 0, 0); //--- Create the main button at specified coordinates
   //obj_Btn_MAIN.Width(310); //--- (Commented out) Set width of the main button
   //obj_Btn_MAIN.Height(300); //--- (Commented out) Set height of the main button
   obj_Btn_MAIN.Size(310, 300); //--- Set size of the main button
   obj_Btn_MAIN.ColorBackground(C'070,070,070'); //--- Set background color of the main button
   obj_Btn_MAIN.ColorBorder(clrBlack); //--- Set border color of the main button

   //--- HEADER BUTTON
   obj_Btn_HEADER.Create(0, Btn_HEADER, 0, 30, 30, 0, 0); //--- Create the header button at specified coordinates
   obj_Btn_HEADER.Size(310, 25); //--- Set size of the header button
   obj_Btn_HEADER.ColorBackground(clrLightBlue); //--- Set background color of the header button
   obj_Btn_HEADER.ColorBorder(clrBlack); //--- Set border color of the header button

   //--- X BUTTON
   obj_Btn_X.Create(0, Btn_X, 0, 30 + 280, 30 + 1, 0, 0); //--- Create the close button (X) at specified coordinates
   obj_Btn_X.Size(30 - 1, 25 - 1 - 1); //--- Set size of the close button
   obj_Btn_X.ColorBackground(clrLightBlue); //--- Set background color of the close button
   obj_Btn_X.ColorBorder(clrLightBlue); //--- Set border color of the close button
   obj_Btn_X.Text(CharToString(255)); //--- Set the close button text to an "X" character
   obj_Btn_X.Color(clrBlack); //--- Set text color of the close button
   obj_Btn_X.Font("Wingdings"); //--- Set font of the close button to Wingdings
   obj_Btn_X.FontSize(17); //--- Set font size of the close button

   //--- HEADER LABEL
   obj_Lbl_HEADER.Create(0, Lbl_HEADER, 0, 40, 30, 0, 0); //--- Create the header label at specified coordinates
   obj_Lbl_HEADER.Text("Control Panel"); //--- Set text of the header label
   obj_Lbl_HEADER.Color(clrRed); //--- Set text color of the header label
   obj_Lbl_HEADER.Font("Cooper black"); //--- Set font of the header label to Cooper Black
   obj_Lbl_HEADER.FontSize(14); //--- Set font size of the header label

   //--- TRADE BUTTON
   obj_Btn_TRADE.Create(0, Btn_TRADE, 0, 40, 60, 0, 0); //--- Create the trade button at specified coordinates
   obj_Btn_TRADE.Size(90, 30); //--- Set size of the trade button
   obj_Btn_TRADE.ColorBackground(clrYellow); //--- Set background color of the trade button
   obj_Btn_TRADE.ColorBorder(clrYellow); //--- Set border color of the trade button
   obj_Btn_TRADE.Text("Trade"); //--- Set text of the trade button
   obj_Btn_TRADE.Color(clrBlack); //--- Set text color of the trade button
   obj_Btn_TRADE.Font("Arial Black"); //--- Set font of the trade button to Arial Black
   obj_Btn_TRADE.FontSize(13); //--- Set font size of the trade button

   //--- CLOSE BUTTON
   obj_Btn_CLOSE.Create(0, Btn_CLOSE, 0, 40 + obj_Btn_TRADE.Width() + 10, 60, 0, 0); //--- Create the close button at specified coordinates
   obj_Btn_CLOSE.Size(90, 30); //--- Set size of the close button
   obj_Btn_CLOSE.ColorBackground(clrSilver); //--- Set background color of the close button
   obj_Btn_CLOSE.ColorBorder(clrSilver); //--- Set border color of the close button
   obj_Btn_CLOSE.Text("Close"); //--- Set text of the close button
   obj_Btn_CLOSE.Color(clrBlack); //--- Set text color of the close button
   obj_Btn_CLOSE.Font("Arial Black"); //--- Set font of the close button to Arial Black
   obj_Btn_CLOSE.FontSize(13); //--- Set font size of the close button

   //--- INFO BUTTON
   obj_Btn_INFO.Create(0, Btn_INFO, 0, 40 + obj_Btn_TRADE.Width() + 10 + obj_Btn_CLOSE.Width() + 10, 60, 0, 0); //--- Create the info button at specified coordinates
   obj_Btn_INFO.Size(90, 30); //--- Set size of the info button
   obj_Btn_INFO.ColorBackground(clrSilver); //--- Set background color of the info button
   obj_Btn_INFO.ColorBorder(clrSilver); //--- Set border color of the info button
   obj_Btn_INFO.Text("Inform'n"); //--- Set text of the info button
   obj_Btn_INFO.Color(clrBlack); //--- Set text color of the info button
   obj_Btn_INFO.Font("Arial Black"); //--- Set font of the info button to Arial Black
   obj_Btn_INFO.FontSize(13); //--- Set font size of the info button

   // BODY OF THE PANEL
   createSection_Trade(); //--- Call function to create the trade section
   //createSection_Close(); //--- (Commented out) Call function to create the close section
   //createSection_Information(); //--- (Commented out) Call function to create the information section

   //--- FOOTER BUTTON
   obj_Btn_FOOTER.Create(0, Btn_FOOTER, 0, 30 + 1, 305 - 1, 0, 0); //--- Create the footer button at specified coordinates
   obj_Btn_FOOTER.Size(310 - 1 - 1, 25); //--- Set size of the footer button
   obj_Btn_FOOTER.ColorBackground(C'070,070,070'); //--- Set background color of the footer button
   obj_Btn_FOOTER.ColorBorder(C'070,070,070'); //--- Set border color of the footer button
   obj_Btn_FOOTER.Text(ShortToString(0x23F0) + "https://t.me/Forex_Algo_Trader"); //--- Set text of the footer button with a link
   obj_Btn_FOOTER.Color(clrWhite); //--- Set text color of the footer button
   obj_Btn_FOOTER.Font("Calibri bold italic"); //--- Set font of the footer button to Calibri bold italic
   obj_Btn_FOOTER.FontSize(12); //--- Set font size of the footer button

   ChartRedraw(0); //--- Redraw the chart to update the panel

   //--- End of initialization function
   return(INIT_SUCCEEDED); //--- Return initialization success status
}
The final milestone output is as follows:

Though we have created the necessary components, we need to get rid of every component that we have created once we remove the program from the chart. The best way to effect this is by creating functions for every section that we have created so that they can be used to remove the sections simultaneously and be reused. We mean to be orderly. If we take an example of a building demolition, it makes sense to remove the cladding first, then the partitions, and then the upper floors before going to the foundation. Like yes, any could start, but it is more professional to do things professionally. We bet you agree. The functions are as follows:
//--- Function to destroy main panel objects
void destroySection_Main_Panel() {
   obj_Btn_MAIN.Destroy(); //--- Destroy the main button
   obj_Btn_HEADER.Destroy(); //--- Destroy the header button
   obj_Btn_X.Destroy(); //--- Destroy the close (X) button
   obj_Lbl_HEADER.Destroy(); //--- Destroy the header label
   obj_Btn_TRADE.Destroy(); //--- Destroy the trade section button
   obj_Btn_CLOSE.Destroy(); //--- Destroy the close section button
   obj_Btn_INFO.Destroy(); //--- Destroy the information section button
   obj_Btn_FOOTER.Destroy(); //--- Destroy the footer button
}

//--- Function to destroy trade section objects
void destroySection_Trade() {
   obj_Btn_RISK.Destroy(); //--- Destroy the risk button
   obj_Edit_RISK.Destroy(); //--- Destroy the risk input field
   obj_Lbl_PRICE.Destroy(); //--- Destroy the price label
   obj_Edit_PRICE.Destroy(); //--- Destroy the price input field
   obj_Lbl_LOTS.Destroy(); //--- Destroy the lot size label
   obj_Edit_LOTS.Destroy(); //--- Destroy the lot size input field
   obj_Lbl_SL.Destroy(); //--- Destroy the stop loss label
   obj_Edit_SL.Destroy(); //--- Destroy the stop loss input field
   obj_Lbl_TP.Destroy(); //--- Destroy the take profit label
   obj_Edit_TP.Destroy(); //--- Destroy the take profit input field
   obj_Btn_POINTS.Destroy(); //--- Destroy the points button
   obj_Btn_SELL.Destroy(); //--- Destroy the sell button
   obj_Btn_ENTRY.Destroy(); //--- Destroy the entry button
   obj_Btn_BUY.Destroy(); //--- Destroy the buy button
   obj_Btn_SELLSTOP.Destroy(); //--- Destroy the sell stop button
   obj_Btn_BUYSTOP.Destroy(); //--- Destroy the buy stop button
   obj_Btn_SELLLIMIT.Destroy(); //--- Destroy the sell limit button
   obj_Btn_BUYLIMIT.Destroy(); //--- Destroy the buy limit button
}

//--- Function to destroy close section objects
void destroySection_Close() {
   obj_Btn_CLOSE_ALL.Destroy(); //--- Destroy the button to close all positions
   obj_Btn_CLOSE_ALL_SELL.Destroy(); //--- Destroy the button to close all sell positions
   obj_Btn_CLOSE_ALL_BUY.Destroy(); //--- Destroy the button to close all buy positions
   obj_Btn_CLOSE_LOSS_SELL.Destroy(); //--- Destroy the button to close losing sell positions
   obj_Btn_CLOSE_LOSS_BUY.Destroy(); //--- Destroy the button to close losing buy positions
   obj_Btn_CLOSE_PROFIT_SELL.Destroy(); //--- Destroy the button to close profitable sell positions
   obj_Btn_CLOSE_PROFIT_BUY.Destroy(); //--- Destroy the button to close profitable buy positions
   obj_Btn_CLOSE_ALL_LOSS.Destroy(); //--- Destroy the button to close all losing positions
   obj_Btn_CLOSE_ALL_PROFIT.Destroy(); //--- Destroy the button to close all profitable positions
   obj_Btn_CLOSE_PENDING.Destroy(); //--- Destroy the button to close pending orders
}

//--- Function to destroy information section objects
void destroySection_Information() {
   obj_Lbl_ACC_NUMBER.Destroy(); //--- Destroy the account number label
   obj_Btn_ACC_NUMBER.Destroy(); //--- Destroy the account number button
   obj_Lbl_ACC_NAME.Destroy(); //--- Destroy the account name label
   obj_Btn_ACC_NAME.Destroy(); //--- Destroy the account name button
   obj_Lbl_ACC_TYPE.Destroy(); //--- Destroy the account type label
   obj_Btn_ACC_TYPE.Destroy(); //--- Destroy the account type button
   obj_Lbl_ACC_LEVERAGE.Destroy(); //--- Destroy the account leverage label
   obj_Btn_ACC_LEVERAGE.Destroy(); //--- Destroy the account leverage button
   obj_Lbl_ACC_EQUITY.Destroy(); //--- Destroy the account equity label
   obj_Btn_ACC_EQUITY.Destroy(); //--- Destroy the account equity button
   obj_Lbl_ACC_BALANCE.Destroy(); //--- Destroy the account balance label
   obj_Btn_ACC_BALANCE.Destroy(); //--- Destroy the account balance button
   obj_Lbl_TIME.Destroy(); //--- Destroy the server time label
   obj_Btn_TIME.Destroy(); //--- Destroy the server time button
}
Here, we just use the respective objects and call the "Destroy" method to get rid of the specific elements. After that, we then call the functions on the OnDeinit event handler.
//+------------------------------------------------------------------+
//| Expert deinitialization function                                 |
//+------------------------------------------------------------------+
void OnDeinit(const int reason) {
   //--- Start of the deinitialization function

   destroySection_Main_Panel(); //--- Call function to destroy the main panel section
   destroySection_Trade(); //--- Call function to destroy the trade section
   destroySection_Close(); //--- Call function to destroy the close section
   destroySection_Information(); //--- Call function to destroy the information section

   ChartRedraw(0);

   //--- End of deinitialization function
}
That was a success. We have created the panel that we wanted with the respective navigation buttons and body components. Thus, our objective of this first installment of the article series is complete. We now need to make the buttons live and responsive to clicks and automatic updates whenever necessary, which is to be taken care of in the subsequent installments.
Conclusion
In this article, we focused on setting up the foundational structure for creating an interactive MetaQuotes Language 5 (MQL5) dashboard panel using the "Controls" class. We have covered the step-by-step creation of essential components like buttons, labels, and edit fields while ensuring that each element is clearly defined and visually styled. Additionally, we have highlighted how to customize text, colors, and sizes to create a professional and cohesive look for the panel. Through this structured approach, we have built the core of a fully functional interface that can be expanded and adapted based on specific trading requirements.
In the next part, we will enhance this panel by adding responsiveness and interactivity, making it capable of reacting dynamically to user inputs and trading actions in MetaTrader 5. We will explore how to program button click events, manage real-time data updates, and implement feedback mechanisms to improve the panel’s usability. This upgrade will transform the current static interface into a powerful, real-time trading assistant that offers a seamless trading experience. Keep tuned.
Warning: All rights to these materials are reserved by MetaQuotes Ltd. Copying or reprinting of these materials in whole or in part is prohibited.
This article was written by a user of the site and reflects their personal views. MetaQuotes Ltd is not responsible for the accuracy of the information presented, nor for any consequences resulting from the use of the solutions, strategies or recommendations described.

 Body in Connexus (Part 4): Adding HTTP body support
- Free trading apps
- Over 8,000 signals for copying
- Economic news for exploring financial markets
You agree to website policy and terms of use
I have recently started learning MQL5 and faced all kinds of difficulties. This article is easy to understand for beginners. Everything is brief and clear. I would like to thank the author for his professionalism. During the study of the article, in addition to learning how to create the Panel, I got some more useful skills for mastering programming. Many thanks to the author! Looking forward to Part 2.
With respect to the author,
B.V. Dolgikh
Sure. Very much welcomed. Thanks.
"We now need to make the buttons live and responsive to clicks and automatic updates whenever necessary, which is to be taken care of in the subsequent installments."
The word, installments, alludes to Part 2 which doesn't exist and hasn't existed since Part 1's creation in October of 2024.
If you don't want to wait and you can't code click events, here's another coder's free trading panel:
Code Base
Simple Order Panel
Manuel Alejandro Cercos Perez, 2022.08.08 18:18
Source code of simple order panel"Now we need to make the buttons live, responsive to clicks and automatically update when needed, which we'll take care of in later parts."
The word "subsequent" hints at a second part, which does not exist and has not existed since the first part was created in October 2024.
If you don't want to wait and don't know how to code click events, here's another coder's free trading board:
Part 2
https://www.mql5.com/en/articles/16146
Part 2
https://www.mql5.com/en/articles/16146