Range Master Grid
- Эксперты
- Версия: 8.0
- Обновлено: 30 апреля 2026

Range Master Grid: The Adaptive Dual-Regime Strategy
Range Master Grid is a high-performance MetaTrader 5 Expert Advisor designed to solve the "Grid Paradox." While traditional grids fail when the market trends, Range Master Grid utilizes a sophisticated ADX-driven logic switch to dynamically adjust its behavior based on real-time market regimes.
Dual-Mode Intelligence
Unlike static bots, this EA constantly monitors market strength via ADX to switch between two distinct personalities:
- The Scalper (Ranging Mode): When volatility is low, the EA uses tight Bollinger Band entries and frequent, smaller Take Profit targets to capitalize on sideways movement.
- The Strategist (Trending Mode): Once a trend is detected, the EA automatically widens its grid steps and extends its profit targets, preventing the basket from becoming over-leveraged too quickly.
Advanced Recovery Logic
Equipped with a professional-grade recovery suite, the EA provides multiple layers of capital protection:
- EMA-Targeted Recovery: Uses a specialized algorithm to calculate the exact "Break-Even Lot" required to exit a basket at a specific Moving Average (EMA) target.
- Trend-Flip Exit: If a maximum grid count is reached and the trend officially flips (EMA 100/200 crossover), the EA can close at break-even to protect your account from a "black swan" move.
- Interactive GUI: Take full control with on-chart buttons. Enable "Wait for BE" to turn on a smart guard that closes your positions the moment they recover to zero profit.
Key Features
- Multi-Timeframe Filtering: Uses M1, M5, M15, and H1 EMA filters to ensure the "First Trade" is always aligned with the higher-timeframe momentum.
- Dynamic ATR Steps: All grid distances and Take Profits are calculated using the Average True Range (ATR), meaning the bot automatically adapts to the current volatility of any pair.
- Spread Protection: Includes a maximum spread filter to avoid poor executions during high-volatility news events.
- Full Time Control: Granular day-of-week and hourly filters to avoid the Sunday open or Friday close risks.
Input Parameter Definitions
1. EA Settings & Enablers
- Magic Number: A unique ID used by the EA to manage its own trades without interfering with other bots.
- First Trade Toggle: Enables or disables the initial market entry based on Bollinger Bands and Trend filters.
- Allow Buy / Allow Sell: Individual switches to restrict the EA to only one direction (e.g., for "Buy Only" trending markets).
- Continue Grid Toggle: Allows the EA to place additional grid orders if the market moves against the initial trade.
- BE Lot Toggle: Enables the automated recovery system that opens additional "Break-Even Lots" during drawdowns.
- First Trade Max Spread: Prevents the EA from opening the first trade if the market spread (in points) is too high.
2. Market Regime (ADX) Settings
- ADX Period: The number of candles used to calculate the Average Directional Index.
- ADX Trade: A safety filter; the EA will only open the first trade if the current ADX is below this value (prevents entering during extreme momentum).
- ADX Threshold: The critical level that separates "Ranging" and "Trending" behaviors. Values above this trigger the Trend Settings.
3. Dynamic Grid & Target Logic
- Grid ATR Multiplier (Trend/Range): Multiplies the current ATR to determine the distance between grid orders. Typically higher in "Trend" mode to avoid over-trading.
- BE ATR Multiplier (Trend/Range): Determines the minimum distance required before the EA can open a recovery (Break-Even) lot.
- Target ATR Multiplier (Trend/Range): Multiplies the ATR to set the dynamic Take Profit distance from the weighted average price.
4. Indicator & Entry Filters
- Use Bollinger Bands: Enables the BB filter for the first entry. Trades are taken when price touches the bands while following the trend.
- BB Deviation (Trend/Range): The standard deviation for the Bollinger Bands. Use a lower deviation for trends and a higher deviation for ranges.
5. Risk & Exit Management
- Lot Size: The initial volume for the first trade in the basket.
- Lot Multiplier: The coefficient used to increase lot sizes for subsequent grid orders (e.g., 1.5 or 2.0).
- Max Grid Trades: The maximum number of total positions allowed per basket.
- Trend Exit At Max: If the maximum grid count is reached, the EA monitors for a trend flip. If the trend reverses (EMA crossover), the EA exits at $0.00 profit to protect capital.
- BE Trigger EMA: The specific Moving Average target (e.g., M15 EMA 200) used to calculate where the "Break-Even" price should be.
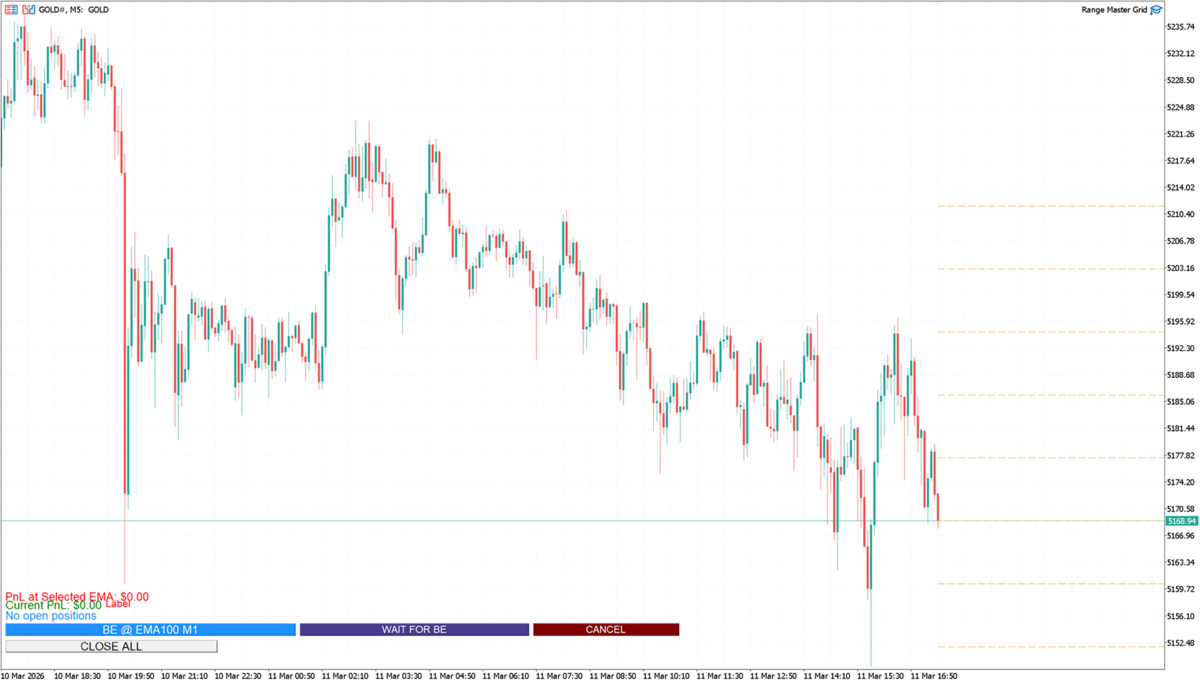
The user interface (UI) of the Range Master Grid is designed to provide real-time feedback and manual overrides directly on the chart. Below is a detailed breakdown of every interactive element and data label.
🔘 Interactive Buttons
CLOSE ALL
- Location: Bottom-left corner.
- Function: Immediately closes all open positions (Buy and Sell) associated with this EA's Magic Number.
- When to use: Use this during high-impact news events or if you want to exit the market manually regardless of the current profit/loss. It also resets the grid count and recovery flags.
BE @ EMA (Dynamic Label)
- Location: Bottom-left row.
- Function: Executes an instant "Break-Even" recovery trade.
- Logic: It calculates the projected profit or loss at the selected EMA target. If a loss is projected, it opens a "Recovery Lot" calculated to bring the basket to a $0.00 profit once the price hits that EMA.
WAIT FOR BE / GUARD ACTIVE
- Location: Bottom-left row, middle.
- Function: This is a toggle button that arms a "Break-Even Guard".
- States:
- WAIT FOR BE (Orange): When clicked while in loss, the EA will wait for the price to recover to the break-even point and then close all positions automatically.
- GUARD ACTIVE (Green): When clicked while in profit, it acts as a protector, closing the basket if the price retraces back to the break-even point to ensure no profit turns into a loss.
CANCEL
- Location: Bottom-left row, right.
- Function: Disarms the "Break-Even Guard" or "Recovery Mode".
- When to use: Use this if you decide to let the grid continue running or if you want to manually adjust the Take Profit levels instead of exiting at break-even.
📊 Information Labels
Current PnL
- Display: Current PnL: $ [Value].
- Color Logic: Green when the total basket is in profit; Red when in drawdown.
- Details: Shows the net profit/loss of all open positions for the current symbol and Magic Number.
PnL at Selected EMA
- Display: PnL at Selected EMA: $ [Value].
- Details: Shows the projected profit or loss if all current positions were closed at the EMA level selected in your settings (e.g., M15 EMA 200).
Market Mode & Dynamic Step
- Display: [MODE] (ADX: [Value]) | Grid: [Value] | BE: [Value] | TP: [Value].
- Logic: * TRENDING (Blue): Appears when ADX is above your threshold.
- RANGING (Black): Appears when ADX is below your threshold.
- Usefulness: This tells you exactly what ATR-based distances the EA is currently using for its grid spacing and Take Profit targets.
Required BE Lot (Live Calculator)
- Display: Req. BE Lot: [Lots] (Proj. Loss: [Value]).
- Details: If the current grid is in drawdown, this label tells you exactly how many lots you would need to open right now to reach break-even at the M1 EMA 100.
- Note: If the basket is already safe to reach the target, it will display Projected PnL: + [Value] (BE Safe).