
克服集成ONNX(Open Neural Network Exchange )的挑战

简介
ONNX (Open Neural Network Exchange) 彻底改变了我们开发复杂的基于AI的MQL5程序的方式。对于MetaTrader 5而言,这项新技术是迈向机器学习领域的康庄大道,因为它在这一领域展现出了前所未有的巨大潜力。然而,ONNX也带来了一些挑战,如果你不知道如何解决这些问题,它们可能会让你感到头疼。
如果你部署的是像前馈神经网络这样简单的AI技术,你可能会觉得部署过程并不那么棘手。但是,由于大多数实际项目要复杂得多,你可能需要做很多事情,比如提取时间序列数据、对大数据进行预处理和转换以降低其维度,更不用说当你在一个大项目中需要使用多个模型时,还要部署ONNX模型。在这种情况下,部署ONNX可能会变得复杂。
ONNX是一个仅具备存储AI模型能力的自给自足的工具。它并不包含运行另一端训练模型所需的所有内置组件,如何部署最终的ONNX模型需要您自己来决定。在本文中,我们将讨论三个挑战,即数据的缩放与归一化,向模型引入降维,以及克服在时间序列预测中部署ONNX模型的挑战。

这篇文章假设你对机器学习和人工智能理论有基本的了解,并且至少已经在mql5中尝试过使用ONNX模型一两次。
克服数据预处理挑战
在机器学习的背景下,数据预处理指的是将数据集中特征的值转换到特定范围的过程。这种转换旨在使数据对机器学习模型来说具有更一致的表示形式。缩放过程至关重要,原因有以下几点:
它提高了机器学习模型的性能:许多机器学习算法,尤其是基于距离的算法,如K最近邻(KNN)和支持向量机(SVM),依赖于计算数据点之间的距离。如果特征具有截然不同的尺度(例如,一个特征在数千范围内,另一个在十分之一范围内),那么具有较大尺度的特征将在距离计算中占主导地位,从而导致性能不佳。缩放将所有特征置于相似的范围内,使模型能够专注于数据点之间的实际关系。
加快了训练收敛速度:梯度下降等优化算法常用于神经网络和其他模型,它们根据损失函数的梯度向最优解逐步逼近。当特征具有不同的尺度时,梯度也可能具有截然不同的幅度,这使得优化器难以高效地找到最小值。缩放有助于使梯度具有更一致的范围,从而加快收敛速度。
确保了数值运算的稳定性:一些机器学习算法在特征尺度显著不同时可能会变得不稳定。缩放有助于防止这些数值问题,并确保模型能够准确地进行计算。对数据进行缩放有助于避免这些问题,并确保模型能够准确地进行计算。
常用缩放技术:
- 归一化(Min-Max缩放):此技术将特征值缩放到特定范围(通常为0到1或-1到1)。
- 标准化(Z-score归一化):此技术通过从每个特征中减去均值,然后除以标准差来进行数据居中并缩放。
尽管这个归一化过程至关重要,但网络上很少有资料能正确解释其操作方法。用于训练数据的缩放技术和参数必须同样应用于测试数据以及模型部署时。
使用相同的缩放器类比:假设你的训练数据中有一个代表“收入”的特征。在训练过程中,缩放器会学习“收入”的最小值和最大值(或对于标准化,学习均值和标准差)。如果你在测试数据上使用不同的缩放器,它可能会遇到训练期间未见过的“收入”值的范围。这可能导致意外的缩放,并在训练数据和测试数据之间引入不一致性。
使用相同的缩放参数:想象一把用于测量身高的尺子。如果你在训练和测试中使用标记有不同单位(英寸与厘米)的不同尺子,你的测量结果将不可比较。同样,在训练和测试数据上使用不同的缩放器会破坏模型在训练期间学习的参照框架。
简而言之,使用相同的缩放器可以确保模型在训练和测试期间始终如一地看到数据,从而获得更可靠且可解释的结果。
from sklearn.preprocessing import MinMaxScaler, StandardScaler
import numpy as np

# Example data
data = np.array([[1000, 2], [500, 1], [2000, 4], [800, 3]])

# Create a MinMaxScaler object
scaler_minmax = MinMaxScaler()

# Fit the scaler on the training data (learn min/max values)
scaler_minmax.fit(data)

# Transform the data using the fitted scaler
data_scaled_minmax = scaler_minmax.transform(data)

print("Original data:\n", data)
print("\nMin Max Scaled data:\n", data_scaled_minmax)
然而,一旦你希望在MQL5语言中使用训练好的模型,事情就会变得具有挑战性。尽管在Python中有多种方法可以保存缩放器(scaler),但在Meta编辑器中提取它将是一个挑战,因为Python有它独特的方式来存储对象,这使得该过程比其他编程语言更容易。最好的做法是在MQL5中预处理数据,保存缩放器,并将缩放后的数据保存到CSV文件中,然后我们将使用Python代码读取该文件。
以下是数据预处理的路线图:
- 从市场收集数据并进行缩放
- 保存缩放器
- 将缩放后的数据保存到CSV文件中
01:从市场收集数据并进行缩放
我们将从日线图收集1000根K线的开盘价、最高价、最低价和收盘价,然后通过判断价格是否收盘于开盘价之上来分配看涨模式(否则为看跌信号),从而创建一个模式识别问题。通过在这个模式上训练LSTM人工智能模型,我们试图让它理解这些模式是由什么构成的,以便在训练成熟后,它能够为我们提供交易信号。
在ONNX数据收集脚本中:
我们首先包含所需的库:
#include <MALE5\preprocessing.mqh> //This library contains the normalization techniques for machine learning
#include <MALE5\MatrixExtend.mqh>

StandardizationScaler scaler; //We want to use z-normalization/standardization technique for this project
让后我们需要收集价格信息。
input int data_size = 10000; //number of bars to collect for our dataset

MqlRates rates[];
//+------------------------------------------------------------------+
//| Script program start function                                    |
//+------------------------------------------------------------------+
void OnStart()
  {
//--- vector.CopyRates is lacking we are going to copy rates in normal way

   ArraySetAsSeries(rates, true);
   if (CopyRates(Symbol(), PERIOD_D1, 1, data_size, rates)<-1)
     {
       printf("Failed to collect data Err=%d",GetLastError());
       return;
     }


   matrix OHLC(data_size, 4);
   for (int i=0; i<data_size; i++) //Get OHLC values and save them to a matrix
     {
       OHLC[i][0] = rates[i].open;
       OHLC[i][1] = rates[i].high;
       OHLC[i][2] = rates[i].low;

        if (rates[i].close>rates[i].open)
          OHLC[i][3] = 1; //Buy signal
        else if (rates[i].close<rates[i].open)
          OHLC[i][3] = 0; //sell signal
     }

//---
  }
请记住!缩放是针对自变量进行的,这就是为什么我们将数据矩阵分别拆分为x矩阵(自变量矩阵)和y向量(因变量向量)的原因,以便我们能够获取到可以对其列进行缩放的x矩阵。
   matrix x;
   vector y;
   MatrixExtend::XandYSplitMatrices(OHLC, x, y);  //WE split the data into x and y | The last column in the matrix will be assigned to the y vector

//--- Standardize the data

   x = scaler.fit_transform(x);
02:保存缩放器
如前所述,我们需要保存缩放器以便后续使用。
   if (!scaler.save(Symbol()+"-SCALER"))
      return;
运行此代码段后,将创建一个包含二进制文件的文件夹。这两个文件包含标准化缩放器的参数。稍后我们将看到如何使用这些参数来加载保存的缩放器实例。

03:将缩放后的数据保存到CSV文件中
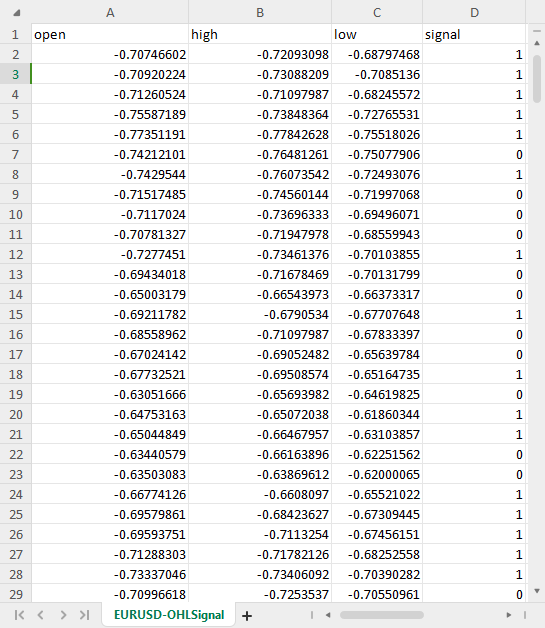
最后但同样重要的是,我们需要将缩放后的数据保存在CSV文件中,以便稍后在Python代码中使用。OHLC = MatrixExtend::concatenate(x, y); //We apped the y column to the scaled x matrix, this is the opposite of XandYsplitMatrices function if (!MatrixExtend::WriteCsv(Symbol()+"-OHLSignal.csv",OHLC,"open,high,low,signal",false,8)) { DebugBreak(); return; }
输出:
克服时间序列数据挑战
有一些研究表明,与其他模型相比,诸如GRU、LSTM和RNN这样的时间序列深度学习模型在股市预测方面表现更佳,这是因为它们能够理解一段时间内的模式。数据科学领域的大多数算法交易者(包括我自己)都倾向于使用这些特定模型。
事实证明,为了使用这些模型进行时间序列预测,你可能需要编写一些额外的代码来准备数据。
如果你曾经使用过时间序列模型,你可能已经见过类似这样的函数或代码:
def get_sequential_data(data, time_step):
    if dataset.empty is True:
      print("Failed to create sequences from an empty dataset")
      return

    Y = data.iloc[:, -1].to_numpy() # get the last column from the dataset and assign it to y numpy 1D array
    X = data.iloc[:, :-1].to_numpy() # Get all the columns from data array except the last column, assign them to x numpy 2D array

    X_reshaped = []
    Y_reshaped = []

    for i in range(len(Y) - time_step + 1):
        X_reshaped.append(X[i:i + time_step])
        Y_reshaped.append(Y[i + time_step - 1])

    return np.array(X_reshaped), np.array(Y_reshaped)
这个函数对于LSTM这样的时间序列模型来说至关重要,它通过以下方式进行数据准备:
- 将数据分割成固定大小(time_step)的序列。
- 将特征(过去的信息)与目标(预测值)分开。
- 将数据重塑为适合LSTM模型的格式。
这种数据准备有助于以结构化的方式向LSTM模型提供最相关的信息,从而加快训练速度、优化内存管理,并可能提高预测准确性。
虽然LSTM可以处理序列,但实时数据会引入连续的信息流。在做出预测时,你仍然需要为模型定义一个过去数据的时间窗口。使得这个函数不仅在训练和测试阶段必不可少,在实时预测中也同样重要。我们不需要y数组,但确实需要重组x数组的代码。我们将在MetaTrader 5中进行实时预测,不是吗?我们需要在mql5中编写一个类似这样的函数。
在此之前,让我们检查一下当时间步长值为7时,get_sequential_data函数返回的x和y NumPy数组的维度。
X_reshaped, Y_reshaped = get_sequential_data(dataset, step_size)

print(f"x_shape{X_reshaped.shape} y_shape{Y_reshaped.shape}")
输出:
x_shape(9994, 7, 3) y_shape(9994,)
返回的x数组是一个3D数组,也就是说它是一个张量,而返回的y数据是一个1D矩阵,也就是说它是一个向量。在mql5中编写类似函数时,我们需要考虑这一点。
现在,让我们创建一个名为CTSDataProcessor的简单类:
class CTSDataProcessor
  {
CTensors *tensor_memory[]; //Tensor objects may be hard to track in memory once we return them from a function, this keeps track of them
bool xandysplit;

public:
                     CTSDataProcessor (void);
                    ~CTSDataProcessor (void);

                     CTensors *extract_timeseries_data(const matrix<double> &x, const int time_step); //for real time predictions
                     CTensors *extract_timeseries_data(const matrix<double> &MATRIX, vector &y, const int time_step); //for training and testing purposes
  };
这两个名称相似的函数extract_timeseries_data执行类似的工作,但其中一个不返回y向量,它将被用于实时预测。
CTSDataProcessor ::CTSDataProcessor (void)
 {
   xandysplit = true; //by default obtain the y vector also
 }
//+------------------------------------------------------------------+
//|                                                                  |
//+------------------------------------------------------------------+
CTensors *CTSDataProcessor ::extract_timeseries_data(const matrix<double> &x,const int time_step)
 {
  CTensors *timeseries_tensor;
  timeseries_tensor = new CTensors(0);
  ArrayResize(tensor_memory, 1);
  tensor_memory[0] = timeseries_tensor;

  xandysplit = false; //In this function we do not obtain the y vector

  vector y;
  timeseries_tensor = extract_timeseries_data(x, y, time_step);

  xandysplit = true; //restore the original condition

  return timeseries_tensor;
 }
//+------------------------------------------------------------------+
//|                                                                  |
//+------------------------------------------------------------------+
CTensors *CTSDataProcessor ::extract_timeseries_data(const matrix &MATRIX, vector &y,const int time_step)
 {
  CTensors *timeseries_tensor;
  timeseries_tensor = new CTensors(0);
  ArrayResize(tensor_memory, 1);
  tensor_memory[0] = timeseries_tensor;

  matrix<double> time_series_data = {};
  matrix x = {}; //store the x variables converted to timeseries
  vector y_original = {};
  y.Init(0);

  if (xandysplit) //if we are required to obtain the y vector also split the given matrix into x and y
     if (!MatrixExtend::XandYSplitMatrices(MATRIX, x, y_original))
       {
         printf("%s failed to split the x and y matrices in order to make a tensor",__FUNCTION__);
         return timeseries_tensor;
       }

  x = xandysplit ? x : MATRIX;

  for (ulong sample=0; sample<x.Rows(); sample++) //Go throught all the samples
    {
      matrix<double> time_series_matrix = {};
      vector<double> timeseries_y(1);

      for (ulong time_step_index=0; time_step_index<(ulong)time_step; time_step_index++)
        {
            if (sample + time_step_index >= x.Rows())
                break;

             time_series_matrix = MatrixExtend::concatenate(time_series_matrix, x.Row(sample+time_step_index), 0);

             if (xandysplit)
               timeseries_y[0] = y_original[sample+time_step_index]; //The last value in the column is assumed to be a y value so it gets added to the y vector
        }

      if (time_series_matrix.Rows()<(ulong)time_step)
        continue;

        timeseries_tensor.Append(time_series_matrix);

        if (xandysplit)
         y = MatrixExtend::concatenate(y, timeseries_y);
    }

   return timeseries_tensor;
 }
现在,在名为“ONNX challenges”的EA中,让我们尝试使用这些函数来提取时间序列数据:
#include <Timeseries Deep Learning\tsdataprocessor.mqh>

input int time_step_ = 7;
//it is very important the time step value matches the one used during training in  a python script


CTSDataProcessor ts_dataprocessor;
CTensors *ts_data_tensor;
//+------------------------------------------------------------------+
//| Expert initialization function                                   |
//+------------------------------------------------------------------+
int OnInit()
  {
//---

   if (!onnx.Init(lstm_model))
     return INIT_FAILED;

   string headers;
   matrix data = MatrixExtend::ReadCsv("EURUSD-OHLSignal.csv",headers); //let us open the same data so that we don't get confused along the way

   matrix x;
   vector y;

   ts_data_tensor = ts_dataprocessor.extract_timeseries_data(data, y, time_step_);

   printf("x_shape %s y_shape (%d,)",ts_data_tensor.shape(),y.Size());
 }
输出:
GD      0       07:21:14.710    ONNX challenges EA (EURUSD,H1)  Warning: CTensors::shape assumes all matrices in the tensor have the same size
IG      0       07:21:14.710    ONNX challenges EA (EURUSD,H1)  x_shape (9994, 7, 3) y_shape (9994,)
太好了,我们得到了与Python代码中相同的维度。
ONNX(Open Neural Network Exchange)的目的是让用一种语言构建的机器学习模型能够在另一种语言中也能很好地工作,即使不是完全相同。这意味着,如果我在Python中构建一个模型并在那里运行它,它提供的准确度和精确度应该与在另一种语言(在这种情况下是MQL5语言)中使用相同数据(无需转换)时提供的准确度和精确度相近。
如果真是这样,那么在将ONNX模型用于MQL5之前,你需要通过在两个平台上对相同数据进行测试来检查一切是否正确,以查看它是否提供了相同的准确度。让我们来测试这个模型。
我构建了一个LSTM模型,该模型在网络中具有10个神经元的输入层和一个单隐藏层,我为学习过程分配了Adam优化器。
from keras.optimizers import Adam
from keras.callbacks import EarlyStopping

learning_rate = 1e-3
patience = 5 #if this number of epochs validation loss is unchanged stop the process


model = Sequential()

model.add(LSTM(units=10, input_shape=(step_size, dataset.shape[1]-1))) #Input layer
model.add(Dense(units=10, activation='relu', kernel_initializer='he_uniform'))
model.add(Dropout(0.3))
model.add(Dense(units=len(classes_in_data), activation = 'softmax')) #last layer outputs = classes in data

model.compile(optimizer=Adam(learning_rate=learning_rate), loss="binary_crossentropy", metrics=['accuracy'])
输出:
Model: "sequential"
_________________________________________________________________
 Layer (type)                Output Shape              Param #
=================================================================
 lstm (LSTM)                 (None, 10)                560

 dense (Dense)               (None, 10)                110

 dropout (Dropout)           (None, 10)                0

 dense_1 (Dense)             (None, 2)                 22

=================================================================
Total params: 692 (2.70 KB)
Trainable params: 692 (2.70 KB)
Non-trainable params: 0 (0.00 Byte)
_________________________________________________________________
我使用100个训练周期对模型进行了训练,其中patience设置为5个周期,batch_size设置为64。
from keras.utils import to_categorical

y_train = to_categorical(y_train, num_classes=len(classes_in_data)) #ONE-HOT encoding
y_test = to_categorical(y_test, num_classes=len(classes_in_data)) #ONE-HOT encoding

early_stopping = EarlyStopping(monitor='val_loss', patience = patience, restore_best_weights=True)

history = model.fit(x_train, y_train, epochs = 100 , validation_data = (x_test,y_test), callbacks=[early_stopping], batch_size=64, verbose=2)
LSTM模型在第77个训练周期时收敛,损失(loss)为0.3000,准确率(accuracy-score)为0.8876。
Epoch 75/100
110/110 - 1s - loss: 0.3076 - accuracy: 0.8856 - val_loss: 0.2702 - val_accuracy: 0.8983 - 628ms/epoch - 6ms/step
Epoch 76/100
110/110 - 1s - loss: 0.2968 - accuracy: 0.8856 - val_loss: 0.2611 - val_accuracy: 0.9060 - 651ms/epoch - 6ms/step
Epoch 77/100
110/110 - 1s - loss: 0.3000 - accuracy: 0.8876 - val_loss: 0.2634 - val_accuracy: 0.9063 - 714ms/epoch - 6ms/step

最后我在完整的数据集上测试模型;
X_reshaped, Y_reshaped = get_sequential_data(dataset, step_size)

predictions = model.predict(X_reshaped)

predictions = classes_in_data[np.argmax(predictions, axis=1)]  # Find class with highest probability | converting predicted probabilities to classes

from sklearn.metrics import accuracy_score

print("LSTM model accuracy: ", accuracy_score(Y_reshaped, predictions))
下面是输出结果:
313/313 [==============================] - 2s 3ms/step

LSTM model accuracy:  0.9179507704622774
当我们在MQL5中使用这个保存为<b0>ONNX</b0>格式的LSTM模型时,我们期望得到这个准确率值或接近这个值。
输入模型inp_model_name的名称是model.eurusd.D1.onnx。
output_path = inp_model_name
onnx_model = tf2onnx.convert.from_keras(model, output_path=output_path)
print(f"saved model to {output_path}")
让我们把这个模型引入到我们的EA中。
#include <Timeseries Deep Learning\onnx.mqh>
#include <Timeseries Deep Learning\tsdataprocessor.mqh>
#include <MALE5\metrics.mqh>

#resource "\\Files\\model.eurusd.D1.onnx" as uchar lstm_model[]

input int time_step_ = 7;
//it is very important the time step value matches the one used during training in  a python script

CONNX onnx;
CTSDataProcessor ts_dataprocessor;
CTensors *ts_data_tensor;
在 onnx.mqh 这个文件里,只有一个用于初始化 ONNX 模型并进行预测的 ONNX 类。
class CONNX { protected: bool initialized; long onnx_handle; void PrintTypeInfo(const long num,const string layer,const OnnxTypeInfo& type_info); long inputs[], outputs[]; void replace(long &arr[]) { for (uint i=0; i<arr.Size(); i++) if (arr[i] <= -1) arr[i] = UNDEFINED_REPLACE; } string ConvertTime(double seconds); public: CONNX(void); ~CONNX(void); bool Init(const uchar &onnx_buff[], ulong flags=ONNX_DEFAULT); //Initislized ONNX model from a resource uchar array with default flag bool Init(string onnx_filename, uint flags=ONNX_DEFAULT); //Initializes the ONNX model from a .onnx filename given virtual int predict_bin(const matrix &x, const vector &classes_in_data); //Returns the predictions for the current given matrix, this function is for real-time prediction virtual vector predict_bin(CTensors ×eries_tensor, const vector &classes_in_data); //gives out the vector for all the predictions | useful function for testing only virtual vector predict_proba(const matrix &x); //Gives out the predictions for the current given matrix | this function is for realtime predictions };
最后,我在ONNX challenges EA中加载并运行了一个LSTM模型。
int OnInit()
  {
   if (!onnx.Init(lstm_model))
     return INIT_FAILED;

   string headers;
   matrix data = MatrixExtend::ReadCsv("EURUSD-OHLSignal.csv",headers); //let us open the same data so that we don't get confused along the way

   matrix x;
   vector y;

   ts_data_tensor = ts_dataprocessor.extract_timeseries_data(data, y, time_step_);

   vector classes_in_data = MatrixExtend::Unique(y); //Get the classes in the data

   vector preds = onnx.predict_bin(ts_data_tensor, classes_in_data);

   Print("LSTM Model Accuracy: ",Metrics::accuracy_score(y, preds));

//---
   return(INIT_SUCCEEDED);
  }
下面是输出结果:
2024.04.14 07:44:16.667 ONNX challenges EA (EURUSD,H1) LSTM Model Accuracy: 0.9179507704622774
太棒了!我们得到了与Python代码中相同的精确度值。这告诉我们一切都做得正确。
现在,让我们在使用这个模型进行后续操作之前,先来进行实时预测:
在ONNX challenges REALTIME EA中;
由于我们将对实时数据集进行预测,这与我们之前使用包含归一化数据的CSV文件进行测试的情况不同,因此这次我们需要加载之前保存的缩放器,并在每次向ONNX格式的LSTM模型提供数据之前,都将其应用于新数据。
#resource "\\Files\\model.eurusd.D1.onnx" as uchar lstm_model[]
#resource "\\Files\\EURUSD-SCALER\\mean.bin" as double standardization_scaler_mean[];
#resource "\\Files\\EURUSD-SCALER\\std.bin" as double standardization_scaler_std[];
在将ONNX模型作为资源加载之后,我们需要包含之前保存的均值和标准差二进制文件。
这次,我们使用指针来调用标准化缩放器,因为我们将使用保存的缩放器值来实例化它。
#include <Timeseries Deep Learning\onnx.mqh>
#include <Timeseries Deep Learning\tsdataprocessor.mqh>
#include <MALE5\preprocessing.mqh>

#resource "\\Files\\model.eurusd.D1.onnx" as uchar lstm_model[]
#resource "\\Files\\EURUSD-SCALER\\mean.bin" as double standardization_scaler_mean[];
#resource "\\Files\\EURUSD-SCALER\\std.bin" as double standardization_scaler_std[];

input int time_step_ = 7;
//it is very important the time step value matches the one used during training in  a python script

CONNX onnx;
StandardizationScaler *scaler;
CTSDataProcessor ts_dataprocessor;
CTensors *ts_data_tensor;

MqlRates rates[];
vector classes_ = {0,1};
//+------------------------------------------------------------------+
//| Expert initialization function                                   |
//+------------------------------------------------------------------+
int OnInit()
  {
//---

   if (!onnx.Init(lstm_model))
     return INIT_FAILED;

   scaler = new StandardizationScaler(standardization_scaler_mean, standardization_scaler_std); //laoding the saved scaler

//---
   return(INIT_SUCCEEDED);
  }
以下是对新输入数据进行归一化的方法:
void OnTick()
  {
   if (CopyRates(Symbol(), PERIOD_D1, 1, time_step_, rates)<-1)
     {
       printf("Failed to collect data Err=%d",GetLastError());
       return;
     }

   matrix data(time_step_, 3);
   for (int i=0; i<time_step_; i++) //Get the independent values and save them to a matrix
     {
       data[i][0] = rates[i].open;
       data[i][1] = rates[i].high;
       data[i][2] = rates[i].low;
     }

   ts_data_tensor = ts_dataprocessor.extract_timeseries_data(data, time_step_);  //process the new data into timeseries

   data = ts_data_tensor.Get(0); //This tensor contains only one matrix for the recent latest bars thats why we find it at the index 0
   data = scaler.transform(data); //Transform the new data

   int signal = onnx.predict_bin(data, classes_);

   Comment("LSTM trade signal: ",signal);
  }
最后,我在策略测试器上运行了智能交易系统(EA),没有出现错误,预测结果成功地在图表上显示出来。

克服降维挑战
如前所述,在使用机器学习模型解决现实生活中的问题时,仅仅依靠人工智能模型代码是不足以完成任务的。数据科学家在其工具箱中通常会携带一些有用的工具,其中之一就是降维算法,例如主成分分析(PCA)、线性判别分析(LDA),非负矩阵分解(NMF)、截断奇异值分解(Truncated SVD)等等。尽管降维算法也有其缺点,但它们仍有许多优点,包括:
降维的优点:
提升模型性能:高维数据可能导致“维度灾难”,即由于特征空间过于庞大,模型难以有效学习。主成分分析(PCA)能够降低数据的复杂性,从而提高包括分类、回归和聚类在内的各种机器学习算法的性能。
加快训练和处理速度:在高维数据上训练机器学习模型可能需要大量的计算资源。PCA通过减少特征数量,可以缩短训练时间,并可能降低对计算资源的需求。
降低过拟合风险:高维数据可能增加过拟合的风险,即模型能够记住训练数据,但无法很好地泛化到未见过的数据。PCA通过关注最具信息量的特征,有助于降低这种风险。
就像缩放技术一样,使用Scikit-Learn提供的主成分分析(PCA) 等降维技术是很酷的。然而,在MQL5中(其中大部分工作都是基于你所构建的内容进行的,包括交易),你可能很难找到使用PCA的方法。
在ONNX收集数据的脚本中,我们需要添加PCA。
#include <MALE5\Dimensionality Reduction\PCA.mqh>

CPCA *pca;
我们希望在归一化过程开始之前,使用PCA技术对x变量进行归一化。
   MatrixExtend::XandYSplitMatrices(OHLC, x, y);  //WE split the data into x and y | The last column in the matrix will be assigned to the y vector

//--- Reduce data dimension

   pca = new CPCA(2); //reduce the data to have two columns
   x = pca.fit_transform(x);
   if (!pca.save(Symbol()+"-PCA"))
     return
在MQL5\Files目录下,系统将自动生成一个子文件夹,此子文件夹将专门用于存放包含主成分分析(PCA)信息的二进制文件。

根据PCA构造函数的指示,新的带有PCA的CSV数据集现在有两个自变量,这是从原始数据中提取的两个主成分。

为了避免混淆,我们可以创建一个判断条件来检查用户是否允许进行PCA,因为将PCA数据保存到csv文件的方式可能有所不同。此外,我们可能需要更改csv文件的名称,并在其中加入PCA字样,以便我们能够区分不同的数据集CSV文件。
ONNX数据收集脚本:
input bool use_pca = true;

MqlRates rates[];
//+------------------------------------------------------------------+
//| Script program start function                                    |
//+------------------------------------------------------------------+
void OnStart()
  {
//--- vector.CopyRates is lacking we are going to copy rates in normal way
... some code

//---

   matrix x;
   vector y;
   MatrixExtend::XandYSplitMatrices(OHLC, x, y);  //WE split the data into x and y | The last column in the matrix will be assigned to the y vector

//--- Reduce data dimension

     if (use_pca)
      {
         pca = new CPCA(2); //reduce the data to have two columns
         x = pca.fit_transform(x);
         if (!pca.save(Symbol()+"-PCA"))
           return;
      }

//--- Standardize the data
     ...rest of the code

   if (CheckPointer(pca)!=POINTER_INVALID)
      delete pca;
  }
我们还需要对名为ONNX challenges REALTIMEE的EA进行类似的修改。
//.... other imports

#include <MALE5\Dimensionality Reduction\PCA.mqh>

CPCA *pca;

#resource "\\Files\\model.eurusd.D1.onnx" as uchar lstm_model_data[]
#resource "\\Files\\model.eurusd.D1.PCA.onnx" as uchar lstm_model_pca[]

#resource "\\Files\\EURUSD-SCALER\\mean.bin" as double standardization_scaler_mean[];
#resource "\\Files\\EURUSD-SCALER\\std.bin" as double standardization_scaler_std[];

#resource "\\Files\\EURUSD-PCA-SCALER\\mean.bin" as double standardization_pca_scaler_mean[];
#resource "\\Files\\EURUSD-PCA-SCALER\\std.bin" as double standardization_pca_scaler_std[];

#resource "\\Files\\EURUSD-PCA\\components-matrix.bin" as double pca_comp_matrix[];
#resource "\\Files\\EURUSD-PCA\\mean.bin" as double pca_mean[];


input int time_step_ = 7;
input bool use_pca = true;

//it is very important the time step value matches the one used during training in  a python script

CONNX onnx;
StandardizationScaler *scaler;

// ......

MqlRates rates[];
vector classes_ = {0,1};
int prev_bars = 0;
MqlTick ticks;
double min_lot = 0;
//+------------------------------------------------------------------+
//| Expert initialization function                                   |
//+------------------------------------------------------------------+
int OnInit()
  {
//---

   if (use_pca)
    {
    if (!onnx.Init(lstm_model_pca))
      return INIT_FAILED;
    }
   else
     {
       if (!onnx.Init(lstm_model_data))
         return INIT_FAILED;
     }

   if (use_pca)
    {
      scaler = new StandardizationScaler(standardization_pca_scaler_mean, standardization_pca_scaler_std); //loading the saved scaler applied to PCA data
      pca = new CPCA(pca_mean, pca_comp_matrix);
    }
   else
      scaler = new StandardizationScaler(standardization_scaler_mean, standardization_scaler_std); //laoding the saved scaler

//---

   m_trade.SetExpertMagicNumber(MAGIC_NUMBER);
   m_trade.SetDeviationInPoints(100);
   m_trade.SetTypeFillingBySymbol(Symbol());
   m_trade.SetMarginMode();

   min_lot = SymbolInfoDouble(Symbol(), SYMBOL_VOLUME_MIN);

   return(INIT_SUCCEEDED);
  }
//+------------------------------------------------------------------+
//| Expert tick function                                             |
//+------------------------------------------------------------------+
void OnTick()
  {
//---
   // ... collecting data code
 ...

   ts_data_tensor = ts_dataprocessor.extract_timeseries_data(data, time_step_);  //process the new data into timeseries

   data = ts_data_tensor.Get(0); //This tensor contains only one matrix for the recent latest bars thats why we find it at the index 0

   if (use_pca)
    data = pca.transform(data);

   data = scaler.transform(data); //Transform the new data

   int signal = onnx.predict_bin(data, classes_);

   Comment("LSTM trade signal: ",signal);

  }
注意到变化没有?在EA中包含了两个模型,一个LSTM模型是在常规数据集上训练的,而另一个名称中包含“PCA”的模型是在应用了PCA的数据上训练的。由于经过PCA处理的数据可能与未经处理的数据(其维度始终与原始数据相似)具有不同的维度,因此这种差异使得为每个模型使用不同的缩放器变得很重要。
既然我们已经为使用PCA的新模型预留了位置,那么让我们回到Python脚本中并进行一些修改。只需要做几处修改:CSV文件的名称和最终的ONNX文件的名称:
csv_file = "EURUSD-OHLSignalPCA.csv"
step_size = 7
inp_model_name = "model.eurusd.D1.PCA.onnx"
这次模型在第17个训练周期时收敛了。
110/110 - 1s - loss: 0.6920 - accuracy: 0.5215 - val_loss: 0.6921 - val_accuracy: 0.5168 - 658ms/epoch - 6ms/step
Epoch 15/100
110/110 - 1s - loss: 0.6918 - accuracy: 0.5197 - val_loss: 0.6921 - val_accuracy: 0.5175 - 656ms/epoch - 6ms/step
Epoch 16/100
110/110 - 1s - loss: 0.6919 - accuracy: 0.5167 - val_loss: 0.6921 - val_accuracy: 0.5178 - 627ms/epoch - 6ms/step
Epoch 17/100
110/110 - 1s - loss: 0.6919 - accuracy: 0.5248 - val_loss: 0.6920 - val_accuracy: 0.5222 - 596ms/epoch - 5ms/step
模型收敛时达到的准确率是52.48%,这是一个相对合理的准确率,但并不接近我们未使用PCA时得到的89%。现在,我们来制定一个简单的策略,根据给出的信号来开立交易:
交易逻辑很简单。首先检查是否没有在某一方向上开仓,如果有信号指示,就在该方向上开立一个仓位,同时跟踪信号的变化。如果收到新的信号,就平掉同类型的仓位以及相反方向的仓位。
void OnTick()
  {
//---

   if (!MQLInfoInteger(MQL_TESTER)) //if we are live trading consider new bar event
      if (!isnewBar(PERIOD_CURRENT))
        return;

//.... 收集数据的代码
...

   data = scaler.transform(data); //Transform the new data

   int signal = onnx.predict_bin(data, classes_);

   Comment("LSTM trade signal: ",signal);

//--- Open trades based on Signals

   SymbolInfoTick(Symbol(), ticks);
   if (signal==1)
    {
      if (!PosExists(POSITION_TYPE_BUY))
        m_trade.Buy(min_lot,Symbol(), ticks.ask);
      else
       {
         PosClose(POSITION_TYPE_BUY);
         PosClose(POSITION_TYPE_SELL);
       }
    }
   else
     {
      if (!PosExists(POSITION_TYPE_SELL))
        m_trade.Sell(min_lot,Symbol(), ticks.bid);
      else
       {
          PosClose(POSITION_TYPE_SELL);
          PosClose(POSITION_TYPE_BUY);
       }
     }
  }
我对12小时时间框架内的开盘价模型进行了测试,因为日时间框架会产生大量市场关闭导致的错误。以下是应用带有主成分分析(PCA)技术的长短期记忆(LSTM)模型时的测试结果:

不带PCA:

最后的思考
ONNX是一个很棒的工具,但我们需要在使用它时开始跳出思维定势。它使我们能够在不同平台之间共享机器学习代码,节省了许多工作和麻烦,这些麻烦可能在决定使用MQL5语言实现复杂的深度学习和AI模型时产生。然而,您仍然需要付出一些努力,以最终得到一个可靠且有效的程序。
祝好。
有关本帖中包含的所有文件和更多信息,请查看此 GitHub库。
附件:
| 文件 | 说明和用法 |
|---|---|
| MatrixExtend.mqh | 具有额外的矩阵操作功能。 |
| metrics.mqh | 包含用于衡量 ML 模型性能的函数和代码。 |
| preprocessing.mqh | 预处理原始输入数据的函数库,令其适合机器学习模型的用法。 |
| plots.mqh | 用于绘制向量和矩阵的库。 |
| Timeseries Deep Learning\onnx.mqh | 该库包含ONNX类,负责读取.onnx文件并使用加载的文件进行预测。 |
| Tensors.mqh | 一个包含Tensor(代数3D矩阵对象)库,以纯MQL5语言编程。 |
| Timeseries Deep Learning\tsdataprocessor.mqh | 一个包含函数的类库,用于将原始数据转换为适合时间序列预测的数据。 |
| Dimensionality Reduction\base.mqh | 一个包含降维任务所需功能的文件。 |
| Dimensionality Reduction\PCA.mqh | 主成分分析(PCA)库。 |
| Python\onnx_timeseries.ipynb | 一个包含本帖中使用的所有Python代码的Jupyter Notebook。 |
| Python\requirements.txt | 一个文本文件,列出运行Python代码所需的所有依赖项。 |
本文由MetaQuotes Ltd译自英文
原文地址: https://www.mql5.com/en/articles/14703
注意: MetaQuotes Ltd.将保留所有关于这些材料的权利。全部或部分复制或者转载这些材料将被禁止。
本文由网站的一位用户撰写,反映了他们的个人观点。MetaQuotes Ltd 不对所提供信息的准确性负责,也不对因使用所述解决方案、策略或建议而产生的任何后果负责。

您好、
感谢您提供这篇内容丰富的文章!
在重现您的结果时,我遇到了一个问题。
当我执行脚本 "ONNX collect data.mq5"(将其附加到欧元兑美元日线图上)时,出现了以下错误 :
2024.07.23 15:58:35.344 ONNX collect data (EURUSD,D1) 'ONNX collect data.mq5' 中的数组超出范围(39,27)
我做错了什么吗?
谨致问候、
Gino.
我做错了什么吗?
谨致问候、
Gino.
这是编程中常见的错误。这可能与数组为空或数组的大小小于访问的索引有关。检查程序中的矩阵和向量大小,看看它们是否包含所需的信息。