DoEasy. 控件 (第 27 部分): 继续致力 ProgressBar(进度条)WinForms 对象

内容
概述
在本文中,我将继续开发我在上一篇文章中开始实现的进度条控件。 此元素由两个组件组成 — 底图和进度条。 在将来,还可以将其它设计元素放置在进度条的附加底图上 — 文本、图像、等等。 此刻,此控件是一个静态 WinForms 对象。 今天,我将开发可编程控制进度条对象的功能。 由此,我们就可以在我们的程序中用它来指示任何需要大量雷同操作的进度。
如果我们曾留意 Windows 环境中的类似进度条,我们会注意到进度条在填充时会有沿进度条移动的眩光,或其它一些视觉效果。 它们除了能令程序界面更具吸引力之外,进度条上的视觉效果还拥有附加指示过程完成的功能。 如果由进度条显示的操作数足够大,则进度条不会在每次操作完成时填充,而是在完成一定数量的操作之后再填充。 因此,即使进度条已满格,操作仍然可以继续。 在这种状况下,如果视觉效果在进度条上继续显示,则表示这个过程尚未完成。 该过程完成后,进度条将不再显示视觉效果。
通常,当进程结束时,进度条控件亦会隐藏,因此上述指示不可见。 但如果在单独的窗口中创建进度条,则可以通过进度条上的视觉效果来观察进程完成/未完成的指示,且在所有操作完成后应手工关闭该窗口。 替代备案,如果同时有若干个进度条,所示的一个进程被切分为子进程,那么会显示已完成流程的进度条,直至整个过程完成。 在显示子进程的 ProgressBar 控件上,我们还可以观察到双重指示 — 如果进度条已完全填充,但在其上视觉效果继续显示,则此子进程尚未彻底完成。
实现 ProgressBar 控件的视觉效果功能,将令我们拥有在函数库其它控件中使用该控件的能力。 每个具有视觉效果的对象,均应放置在活动元素列表之中。 函数库将查看此列表,并依次调用放置在此列表中的每个对象的计时器事件处理程序。 必要的功能将在对象本身中实现,即在其计时器处理程序中实现。
此外,我将稍微优化预定义图标的绘制。 在上一篇文章中,我提到了使用透明度绘制抗锯齿线条时的新奇行为。 实际上,如果设置为透明,则使用标准库的平滑方法绘制的所有图形基元都不能正常绘制。 这意味着,我们无法实现这些线条的平滑外观,或令其消失。 但我们可利用以下技巧:如果将线条的颜色不透明度设置为某个值,例如从 128 到 255,那么我们需要使用抗锯齿方法进行绘制。 如果不透明度从 127 设置到 0,那么我们使用通常的方法绘制这条线,且无平滑。 这种方式将为绘制的图形基元提供平滑外观/消失的视觉效果,半透明将隐藏绘制线条的“粗糙度”,且无抗锯齿。
改进库类
在上一篇文章中,当创建眩光对象时,我假设它是在阴影对象基础上而创建 — 它将从阴影对象派生,以便利用该类中提供的模糊方法。 然而,正如实践所展现的那样,这种方式并未能自证其合理性 — 为任意物体添加视觉效果时,除了它的实际复杂度之外,作为阴影对象的继承者,使用眩光限制了它在已创建概念框架内的应用。
故此,我们执行以下操作:眩光对象将派生自 CWinFormBase 库的所有 WinForms 对象的基准对象类,并将位于辅助对象列表之中。 然后,我在应该用到它的类中,只需一行代码即可轻松添加它。 我已经为活动对象实现了处理程序。 这种方式将令我们免于往不同的库类里添加与阴影对象的相同处理功能。 我们简单地利用现成的方法来添加绑定对象,并处理它们。
在 \MQL5\Include\DoEasy\Defines.mqh 中,把眩光对象 ID 字符串从图形对象的部分移动到辅助函数库控件部分:
//+-----------------------------------------------+
//| The list of graphical element types           |
//+-----------------------------------------------+
enum ENUM_GRAPH_ELEMENT_TYPE
  {
   GRAPH_ELEMENT_TYPE_STANDARD,                       // Standard graphical object
   GRAPH_ELEMENT_TYPE_STANDARD_EXTENDED,              // Extended standard graphical object
   GRAPH_ELEMENT_TYPE_SHADOW_OBJ,                     // Shadow object

   GRAPH_ELEMENT_TYPE_ELEMENT,                        // Element
   GRAPH_ELEMENT_TYPE_FORM,                           // Form
   GRAPH_ELEMENT_TYPE_WINDOW,                         // Window
   //--- WinForms
   GRAPH_ELEMENT_TYPE_WF_UNDERLAY,                    // Panel object underlay
   GRAPH_ELEMENT_TYPE_WF_BASE,                        // Windows Forms Base
   //--- 'Container' object types are to be set below
   GRAPH_ELEMENT_TYPE_WF_CONTAINER,                   // Windows Forms container base object
   GRAPH_ELEMENT_TYPE_WF_PANEL,                       // Windows Forms Panel
   GRAPH_ELEMENT_TYPE_WF_GROUPBOX,                    // Windows Forms GroupBox
   GRAPH_ELEMENT_TYPE_WF_TAB_CONTROL,                 // Windows Forms TabControl
   GRAPH_ELEMENT_TYPE_WF_SPLIT_CONTAINER,             // Windows Forms SplitContainer
   //--- 'Standard control' object types are to be set below
   GRAPH_ELEMENT_TYPE_WF_COMMON_BASE,                 // Windows Forms base standard control
   GRAPH_ELEMENT_TYPE_WF_LABEL,                       // Windows Forms Label
   GRAPH_ELEMENT_TYPE_WF_BUTTON,                      // Windows Forms Button
   GRAPH_ELEMENT_TYPE_WF_CHECKBOX,                    // Windows Forms CheckBox
   GRAPH_ELEMENT_TYPE_WF_RADIOBUTTON,                 // Windows Forms RadioButton
   GRAPH_ELEMENT_TYPE_WF_ELEMENTS_LIST_BOX,           // Base list object of Windows Forms elements
   GRAPH_ELEMENT_TYPE_WF_LIST_BOX,                    // Windows Forms ListBox
   GRAPH_ELEMENT_TYPE_WF_CHECKED_LIST_BOX,            // Windows Forms CheckedListBox
   GRAPH_ELEMENT_TYPE_WF_BUTTON_LIST_BOX,             // Windows Forms ButtonListBox
   GRAPH_ELEMENT_TYPE_WF_TOOLTIP,                     // Windows Forms ToolTip
   GRAPH_ELEMENT_TYPE_WF_PROGRESS_BAR,                // Windows Forms ProgressBar
   //--- Auxiliary elements of WinForms objects
   GRAPH_ELEMENT_TYPE_WF_LIST_BOX_ITEM,               // Windows Forms ListBoxItem
   GRAPH_ELEMENT_TYPE_WF_TAB_HEADER,                  // Windows Forms TabHeader
   GRAPH_ELEMENT_TYPE_WF_TAB_FIELD,                   // Windows Forms TabField
   GRAPH_ELEMENT_TYPE_WF_SPLIT_CONTAINER_PANEL,       // Windows Forms SplitContainerPanel
   GRAPH_ELEMENT_TYPE_WF_ARROW_BUTTON,                // Windows Forms ArrowButton
   GRAPH_ELEMENT_TYPE_WF_ARROW_BUTTON_UP,             // Windows Forms UpArrowButton
   GRAPH_ELEMENT_TYPE_WF_ARROW_BUTTON_DOWN,           // Windows Forms DownArrowButton
   GRAPH_ELEMENT_TYPE_WF_ARROW_BUTTON_LEFT,           // Windows Forms LeftArrowButton
   GRAPH_ELEMENT_TYPE_WF_ARROW_BUTTON_RIGHT,          // Windows Forms RightArrowButton
   GRAPH_ELEMENT_TYPE_WF_ARROW_BUTTONS_UD_BOX,        // Windows Forms UpDownArrowButtonsBox
   GRAPH_ELEMENT_TYPE_WF_ARROW_BUTTONS_LR_BOX,        // Windows Forms LeftRightArrowButtonsBox
   GRAPH_ELEMENT_TYPE_WF_SPLITTER,                    // Windows Forms Splitter
   GRAPH_ELEMENT_TYPE_WF_HINT_BASE,                   // Windows Forms HintBase
   GRAPH_ELEMENT_TYPE_WF_HINT_MOVE_LEFT,              // Windows Forms HintMoveLeft
   GRAPH_ELEMENT_TYPE_WF_HINT_MOVE_RIGHT,             // Windows Forms HintMoveRight
   GRAPH_ELEMENT_TYPE_WF_HINT_MOVE_UP,                // Windows Forms HintMoveUp
   GRAPH_ELEMENT_TYPE_WF_HINT_MOVE_DOWN,              // Windows Forms HintMoveDown
   GRAPH_ELEMENT_TYPE_WF_BAR_PROGRESS_BAR,            // Windows Forms BarProgressBar
   GRAPH_ELEMENT_TYPE_WF_GLARE_OBJ,                   // Glare object
  };
//+------------------------------------------------------------------+
为了绘制视觉效果(在本例中为眩光),我们需要设置一个视觉效果样式列表:
//+-----------------------------------------------+
//| List of visual effect styles                  |
//+-----------------------------------------------+
enum ENUM_CANV_ELEMENT_VISUAL_EFF_STYLE
  {
   CANV_ELEMENT_VISUAL_EFF_STYLE_RECTANGLE,           // Rectangle
   CANV_ELEMENT_VISUAL_EFF_STYLE_PARALLELOGRAMM,      // Parallelogram
  };
//+------------------------------------------------------------------+
对于目前,我们只制作两种类型的眩光 — 常规矩形,和平行四边形。 接下来,您可以绘制任意数量的预定义眩光形状,并利用它们来设计视觉效果。 它们不必是图形基元。 它们可以是任何可叠加在对象上作为效果的图像,尤其是因为这些图像可以动画化,我将在后面作为示例进行演示。
在 \MQL5\Include\DoEasy\Data.mqh 中,加入新的消息函数索引:
//--- CForm
   MSG_FORM_OBJECT_TEXT_NO_SHADOW_OBJ_FIRST_CREATE_IT,// No shadow object. Create it using the CreateShadowObj() method
   MSG_FORM_OBJECT_TEXT_NO_GLARE_OBJ_FIRST_CREATE_IT, // No glare object. We must first create it using the CreateGlareObj() method
   MSG_FORM_OBJECT_ERR_FAILED_CREATE_SHADOW_OBJ,      // Failed to create new shadow object
   MSG_FORM_OBJECT_ERR_FAILED_CREATE_GLARE_OBJ,       // Failed to create new glare object
   MSG_FORM_OBJECT_ERR_FAILED_CREATE_PC_OBJ,          // Failed to create new pixel copier object
   MSG_FORM_OBJECT_PC_OBJ_ALREADY_IN_LIST,            // Pixel copier object with ID already present in the list
以及与新添加的索引对应的文本消息:
//--- CForm
   {"Отсутствует объект тени. Необходимо сначала его создать при помощи метода CreateShadowObj()","There is no shadow object. You must first create it using the CreateShadowObj() method"},
   {"Отсутствует объект блика. Необходимо сначала его создать при помощи метода CreateGlareObj()","There is no glare object. You must first create it using the CreateGlareObj() method"},
   {"Не удалось создать новый объект для тени","Failed to create new object for shadow"},
   {"Не удалось создать новый объект для блика","Failed to create new object for glare"},
   {"Не удалось создать новый объект-копировщик пикселей","Failed to create new pixel copier object"},
   {"В списке уже есть объект-копировщик пикселей с идентификатором ","There is already a pixel copier object in the list with ID "},
将“眩光对象”消息索引移动到标准 WinForms 对象组:
   MSG_GRAPH_ELEMENT_TYPE_ELEMENT,                    // Element
   MSG_GRAPH_ELEMENT_TYPE_SHADOW_OBJ,                 // Shadow object

   MSG_GRAPH_ELEMENT_TYPE_FORM,                       // Form
   MSG_GRAPH_ELEMENT_TYPE_WINDOW,                     // Window

   MSG_GRAPH_ELEMENT_TYPE_WF_BAR_PROGRESS_BAR,        // BarProgressBar control
   MSG_GRAPH_ELEMENT_TYPE_WF_PROGRESS_BAR,            // ProgressBar control
   MSG_GRAPH_ELEMENT_TYPE_WF_GLARE_OBJ,               // Glare object
//---
   MSG_GRAPH_ELEMENT_TYPE_WF_WRONG_TYPE_PASSED,       // Incorrect control type
以相同的方式移动消息文本:
   {"Элемент","Element"},
   {"Объект тени","Shadow object"},

   {"Форма","Form"},
   {"Окно","Window"},

   {"Элемент управления BarProgressBar","Control element \"BarProgressBar\""},
   {"Элемент управления ProgressBar","Control element \"ProgressBar\""},
   {"Объект блика","Glare object"},

   {"Передан не правильный тип элемента управления","Wrong control type passed"},
在 \MQL5\Include\DoEasy\GraphINI.mqh 中,其中设置了各种配色方案参数,添加指定眩光不透明度值的属性。 将属性总数增加到 12:
//+-----------------------------------------------+
//| List of form style parameter indices          |
//+-----------------------------------------------+
enum ENUM_FORM_STYLE_PARAMS
  {
   //--- CForm
   FORM_STYLE_FRAME_GLARE_OPACITY,              // Glare opacity
   FORM_STYLE_FRAME_SHADOW_OPACITY,             // Shadow opacity
   FORM_STYLE_FRAME_SHADOW_BLUR,                // Shadow blur
   FORM_STYLE_DARKENING_COLOR_FOR_SHADOW,       // Form shadow color darkening
   FORM_STYLE_FRAME_SHADOW_X_SHIFT,             // Shadow X axis shift
   FORM_STYLE_FRAME_SHADOW_Y_SHIFT,             // Shadow Y axis shift
   FORM_STYLE_GRADIENT_V,                       // Vertical gradient filling flag
   FORM_STYLE_GRADIENT_C,                       // Cyclic gradient filling flag
   //--- CPanel
   FORM_STYLE_FRAME_WIDTH_LEFT,                 // Panel frame width to the left
   FORM_STYLE_FRAME_WIDTH_RIGHT,                // Panel frame width to the right
   FORM_STYLE_FRAME_WIDTH_TOP,                  // Panel frame width on top
   FORM_STYLE_FRAME_WIDTH_BOTTOM,               // Panel frame width below
  };
#define TOTAL_FORM_STYLE_PARAMS        (12)     // Number of form style parameters
//+------------------------------------------------------------------+
在函数库中当前存在的两个配色方案的属性数组中设置眩光不透明度的默认值:
//+-----------------------------------------------+
//| Array containing form style parameters        |
//+-----------------------------------------------+
int array_form_style[TOTAL_FORM_STYLES][TOTAL_FORM_STYLE_PARAMS]=
  {
//--- "Flat form" style parameters
   {
      //--- CForm
      40,                                       // Glare opacity
      80,                                       // Shadow opacity
      4,                                        // Shadow blur
      80,                                       // Form shadow color darkening
      2,                                        // Shadow X axis shift
      2,                                        // Shadow Y axis shift
      false,                                    // Vertical gradient filling flag
      false,                                    // Cyclic gradient filling flag
      //--- CPanel
      3,                                        // Panel frame width to the left
      3,                                        // Panel frame width to the right
      3,                                        // Panel frame width on top
      3,                                        // Panel frame width below
   },
//--- "Embossed form" style parameters
   {
      //--- CForm
      40,                                       // Glare opacity
      80,                                       // Shadow opacity
      4,                                        // Shadow blur
      80,                                       // Form shadow color darkening
      2,                                        // Shadow X axis shift
      2,                                        // Shadow Y axis shift
      true,                                     // Vertical gradient filling flag
      false,                                    // Cyclic gradient filling flag
      //--- CPanel
      3,                                        // Panel frame width to the left
      3,                                        // Panel frame width to the right
      3,                                        // Panel frame width on top
      3,                                        // Panel frame width below
   },
  };
//+------------------------------------------------------------------+
将来,当我开始实现这些属性值时,我将从根本上更改和补充这些属性值的组成,从而适应不同的配色方案。
由于我已经修改了眩光图形元素的类别,在 \MQL5\Include\DoEasy\Objects\Graph\GBaseObj.mqh 中所有函数库图形对象的基准对象类里,即在其返回图形元素类型描述的方法中,将传递给该方法的 “眩光对象” 类型的处理,从其先前的位置移动到相应的位置:
//+------------------------------------------------------------------+
//| Return the description of the graphical element type             |
//+------------------------------------------------------------------+
string CGBaseObj::TypeElementDescription(const ENUM_GRAPH_ELEMENT_TYPE type)
  {
   return
     (
      type==GRAPH_ELEMENT_TYPE_STANDARD                  ? CMessage::Text(MSG_GRAPH_ELEMENT_TYPE_STANDARD)                 :
      type==GRAPH_ELEMENT_TYPE_STANDARD_EXTENDED         ? CMessage::Text(MSG_GRAPH_ELEMENT_TYPE_STANDARD_EXTENDED)        :
      type==GRAPH_ELEMENT_TYPE_ELEMENT                   ? CMessage::Text(MSG_GRAPH_ELEMENT_TYPE_ELEMENT)                  :
      type==GRAPH_ELEMENT_TYPE_SHADOW_OBJ                ? CMessage::Text(MSG_GRAPH_ELEMENT_TYPE_SHADOW_OBJ)               :

      type==GRAPH_ELEMENT_TYPE_FORM                      ? CMessage::Text(MSG_GRAPH_ELEMENT_TYPE_FORM)                     :
      type==GRAPH_ELEMENT_TYPE_WINDOW                    ? CMessage::Text(MSG_GRAPH_ELEMENT_TYPE_WINDOW)                   :
      //--- WinForms
      type==GRAPH_ELEMENT_TYPE_WF_UNDERLAY               ? CMessage::Text(MSG_GRAPH_ELEMENT_TYPE_WF_UNDERLAY)              :
      type==GRAPH_ELEMENT_TYPE_WF_BASE                   ? CMessage::Text(MSG_GRAPH_ELEMENT_TYPE_WF_BASE)                  :
      //--- Containers
      type==GRAPH_ELEMENT_TYPE_WF_CONTAINER              ? CMessage::Text(MSG_GRAPH_ELEMENT_TYPE_WF_CONTAINER)             :
      type==GRAPH_ELEMENT_TYPE_WF_GROUPBOX               ? CMessage::Text(MSG_GRAPH_ELEMENT_TYPE_WF_GROUPBOX)              :
      type==GRAPH_ELEMENT_TYPE_WF_PANEL                  ? CMessage::Text(MSG_GRAPH_ELEMENT_TYPE_WF_PANEL)                 :
      type==GRAPH_ELEMENT_TYPE_WF_TAB_CONTROL            ? CMessage::Text(MSG_GRAPH_ELEMENT_TYPE_WF_TAB_CONTROL)           :
      type==GRAPH_ELEMENT_TYPE_WF_SPLIT_CONTAINER        ? CMessage::Text(MSG_GRAPH_ELEMENT_TYPE_WF_SPLIT_CONTAINER)       :
      //--- Standard controls
      type==GRAPH_ELEMENT_TYPE_WF_COMMON_BASE            ? CMessage::Text(MSG_GRAPH_ELEMENT_TYPE_WF_COMMON_BASE)           :
      type==GRAPH_ELEMENT_TYPE_WF_LABEL                  ? CMessage::Text(MSG_GRAPH_ELEMENT_TYPE_WF_LABEL)                 :
      type==GRAPH_ELEMENT_TYPE_WF_CHECKBOX               ? CMessage::Text(MSG_GRAPH_ELEMENT_TYPE_WF_CHECKBOX)              :
      type==GRAPH_ELEMENT_TYPE_WF_RADIOBUTTON            ? CMessage::Text(MSG_GRAPH_ELEMENT_TYPE_WF_RADIOBUTTON)           :
      type==GRAPH_ELEMENT_TYPE_WF_BUTTON                 ? CMessage::Text(MSG_GRAPH_ELEMENT_TYPE_WF_BUTTON)                :
      type==GRAPH_ELEMENT_TYPE_WF_ELEMENTS_LIST_BOX      ? CMessage::Text(MSG_GRAPH_ELEMENT_TYPE_WF_ELEMENTS_LIST_BOX)     :
      type==GRAPH_ELEMENT_TYPE_WF_LIST_BOX               ? CMessage::Text(MSG_GRAPH_ELEMENT_TYPE_WF_LIST_BOX)              :
      type==GRAPH_ELEMENT_TYPE_WF_LIST_BOX_ITEM          ? CMessage::Text(MSG_GRAPH_ELEMENT_TYPE_WF_LIST_BOX_ITEM)         :
      type==GRAPH_ELEMENT_TYPE_WF_CHECKED_LIST_BOX       ? CMessage::Text(MSG_GRAPH_ELEMENT_TYPE_WF_CHECKED_LIST_BOX)      :
      type==GRAPH_ELEMENT_TYPE_WF_BUTTON_LIST_BOX        ? CMessage::Text(MSG_GRAPH_ELEMENT_TYPE_WF_BUTTON_LIST_BOX)       :
      type==GRAPH_ELEMENT_TYPE_WF_TOOLTIP                ? CMessage::Text(MSG_GRAPH_ELEMENT_TYPE_WF_TOOLTIP)               :
      type==GRAPH_ELEMENT_TYPE_WF_PROGRESS_BAR           ? CMessage::Text(MSG_GRAPH_ELEMENT_TYPE_WF_PROGRESS_BAR)          :
      //--- Auxiliary control objects
      type==GRAPH_ELEMENT_TYPE_WF_TAB_HEADER             ? CMessage::Text(MSG_GRAPH_ELEMENT_TYPE_WF_TAB_HEADER)            :
      type==GRAPH_ELEMENT_TYPE_WF_TAB_FIELD              ? CMessage::Text(MSG_GRAPH_ELEMENT_TYPE_WF_TAB_FIELD)             :
      type==GRAPH_ELEMENT_TYPE_WF_ARROW_BUTTON           ? CMessage::Text(MSG_GRAPH_ELEMENT_TYPE_WF_ARROW_BUTTON)          :
      type==GRAPH_ELEMENT_TYPE_WF_ARROW_BUTTON_UP        ? CMessage::Text(MSG_GRAPH_ELEMENT_TYPE_WF_ARROW_BUTTON_UP)       :
      type==GRAPH_ELEMENT_TYPE_WF_ARROW_BUTTON_DOWN      ? CMessage::Text(MSG_GRAPH_ELEMENT_TYPE_WF_ARROW_BUTTON_DOWN)     :
      type==GRAPH_ELEMENT_TYPE_WF_ARROW_BUTTON_LEFT      ? CMessage::Text(MSG_GRAPH_ELEMENT_TYPE_WF_ARROW_BUTTON_LEFT)     :
      type==GRAPH_ELEMENT_TYPE_WF_ARROW_BUTTON_RIGHT     ? CMessage::Text(MSG_GRAPH_ELEMENT_TYPE_WF_ARROW_BUTTON_RIGHT)    :
      type==GRAPH_ELEMENT_TYPE_WF_ARROW_BUTTONS_UD_BOX   ? CMessage::Text(MSG_GRAPH_ELEMENT_TYPE_WF_ARROW_BUTTONS_UD_BOX)  :
      type==GRAPH_ELEMENT_TYPE_WF_ARROW_BUTTONS_LR_BOX   ? CMessage::Text(MSG_GRAPH_ELEMENT_TYPE_WF_ARROW_BUTTONS_LR_BOX)  :
      type==GRAPH_ELEMENT_TYPE_WF_SPLIT_CONTAINER_PANEL  ? CMessage::Text(MSG_GRAPH_ELEMENT_TYPE_WF_SPLIT_CONTAINER_PANEL) :
      type==GRAPH_ELEMENT_TYPE_WF_SPLITTER               ? CMessage::Text(MSG_GRAPH_ELEMENT_TYPE_WF_SPLITTER)              :
      type==GRAPH_ELEMENT_TYPE_WF_HINT_BASE              ? CMessage::Text(MSG_GRAPH_ELEMENT_TYPE_WF_HINT_BASE)             :
      type==GRAPH_ELEMENT_TYPE_WF_HINT_MOVE_LEFT         ? CMessage::Text(MSG_GRAPH_ELEMENT_TYPE_WF_HINT_MOVE_LEFT)        :
      type==GRAPH_ELEMENT_TYPE_WF_HINT_MOVE_RIGHT        ? CMessage::Text(MSG_GRAPH_ELEMENT_TYPE_WF_HINT_MOVE_RIGHT)       :
      type==GRAPH_ELEMENT_TYPE_WF_HINT_MOVE_UP           ? CMessage::Text(MSG_GRAPH_ELEMENT_TYPE_WF_HINT_MOVE_UP)          :
      type==GRAPH_ELEMENT_TYPE_WF_HINT_MOVE_DOWN         ? CMessage::Text(MSG_GRAPH_ELEMENT_TYPE_WF_HINT_MOVE_DOWN)        :
      type==GRAPH_ELEMENT_TYPE_WF_BAR_PROGRESS_BAR       ? CMessage::Text(MSG_GRAPH_ELEMENT_TYPE_WF_BAR_PROGRESS_BAR)      :
      type==GRAPH_ELEMENT_TYPE_WF_GLARE_OBJ              ? CMessage::Text(MSG_GRAPH_ELEMENT_TYPE_WF_GLARE_OBJ)             :
      "Unknown"
     );
  }
//+------------------------------------------------------------------+
从技术上讲,检查顺序没有区别,但出于惯例,我们将其移动到“正确”的位置。 当然,访问速度存在差异,由于 if-else 检查是在这里组织的,如果某种类型的检查频率高于其它类型,但又位于检查清单末尾附近,那么访问时间将增加,至少理论,会在 CPU 周期的框架内。 不过,为了访问任何元素的时间相同,我们需要在函数库方法中利用 switch 运算符进行所有此类检查,这将在稍后完成 — 在函数库创建的最后。
它是以前的计划(并已在上一篇文章中完成),高亮显示对象将派生自阴影对象。 原因是阴影对象方法中存在高斯(Gaussian)模糊方法。 现在我已经放弃了这个念头,因为我不需要用模糊来实现眩光。 此外,若阴影对象作为眩光对象的父对象,那将其作为附加部分添加到其它图形元素的擦偶哦将大大复杂化。 因此,眩光对象将作为一个独立的辅助 WinForms 对象。 但是为了能够在必要的对象(不仅仅是阴影对象)中使用模糊,我将模糊方法从阴影对象移到图形元素对象。 从那里,这些方法均可由函数库的所有图形元素调用。
从 \MQL5\Include\DoEasy\Objects\Graph\ShadowObj.mqh 文件里,删除包含的 AlgLib 库,删除模糊方法的声明,并删除这两个方法的实现代码:
//+------------------------------------------------------------------+
//|                                                    ShadowObj.mqh |
//|                                  Copyright 2021, MetaQuotes Ltd. |
//|                             https://mql5.com/en/users/artmedia70 |
//+------------------------------------------------------------------+
#property copyright "Copyright 2021, MetaQuotes Ltd."
#property link      "https://mql5.com/en/users/artmedia70"
#property version   "1.00"
#property strict    // Necessary for mql4
//+-----------------------------------------------+
//| Include files                                 |
//+-----------------------------------------------+
#include "GCnvElement.mqh"
#include <Math\Alglib\alglib.mqh>
//+-----------------------------------------------+
//| Shadows object class                          |
//+-----------------------------------------------+
class CShadowObj : public CGCnvElement
  {
private:
   color             m_color;                         // Shadow color
   uchar             m_opacity;                       // Shadow opacity
   uchar             m_blur;                          // Blur
//--- Draw the object shadow form
   void              DrawShadowFigureRect(const int w,const int h);
protected:
//--- Gaussian blur
   bool              GaussianBlur(const uint radius);
//--- Return the array of weight ratios
   bool              GetQuadratureWeights(const double mu0,const int n,double &weights[]);
//--- Protected constructor with object type, chart ID and subwindow
                     CShadowObj(const ENUM_GRAPH_ELEMENT_TYPE type,
                                CGCnvElement *main_obj,CGCnvElement *base_obj,
                                const long chart_id,
                                const int subwindow,
                                const string descript,
                                const int x,
                                const int y,
                                const int w,
                                const int h);
public:
在 \MQL5\Include\DoEasy\Objects\Graph\GCnvElement.mqh 中,设置包含 AlgLib 库,并在受保护部分声明模糊实现的方法:
//+------------------------------------------------------------------+
//|                                                  GCnvElement.mqh |
//|                                  Copyright 2021, MetaQuotes Ltd. |
//|                             https://mql5.com/en/users/artmedia70 |
//+------------------------------------------------------------------+
#property copyright "Copyright 2021, MetaQuotes Ltd."
#property link      "https://mql5.com/en/users/artmedia70"
#property version   "1.00"
#property strict    // Necessary for mql4
//+-----------------------------------------------+
//| Include files                                 |
//+-----------------------------------------------+
#include "GBaseObj.mqh"
#include <Math\Alglib\alglib.mqh>
//+-----------------------------------------------+
//| Class of the graphical element object         |
//+-----------------------------------------------+
class CGCnvElement : public CGBaseObj
  {
protected:
   CGCnvElement     *m_element_main;                           // Pointer to the initial parent element within all the groups of bound objects
   CGCnvElement     *m_element_base;                           // Pointer to the parent element within related objects of the current group
   CCanvas           m_canvas;                                 // CCanvas class object
   CPause            m_pause;                                  // Pause class object
   bool              m_shadow;                                 // Shadow presence
   color             m_chart_color_bg;                         // Chart background color
   uint              m_duplicate_res[];                        // Array for storing resource data copy
   color             m_array_colors_bg[];                      // Array of element background colors
   color             m_array_colors_bg_dwn[];                  // Array of control background colors when clicking on the control
   color             m_array_colors_bg_ovr[];                  // Array of control background colors when hovering the mouse over the control
   bool              m_gradient_v;                             // Vertical gradient filling flag
   bool              m_gradient_c;                             // Cyclic gradient filling flag
   int               m_init_relative_x;                        // Initial relative X coordinate
   int               m_init_relative_y;                        // Initial relative Y coordinate
   color             m_array_colors_bg_init[];                 // Array of element background colors (initial color)

//--- Create (1) the object structure and (2) the object from the structure
   virtual bool      ObjectToStruct(void);
   virtual void      StructToObject(void);
//--- Copy the color array to the specified background color array
   void              CopyArraysColors(color &array_dst[],const color &array_src[],const string source);

//--- Return the number of graphical elements (1) by type, (2) by name and type
   int               GetNumGraphElements(const ENUM_GRAPH_ELEMENT_TYPE type) const;
   int               GetNumGraphElements(const string name,const ENUM_GRAPH_ELEMENT_TYPE type) const;
//--- Create and return the graphical element name by its type
   string            CreateNameGraphElement(const ENUM_GRAPH_ELEMENT_TYPE type);

//--- Gaussian blur
   bool              GaussianBlur(const uint radius);
//--- Return the array of weight ratios
   bool              GetQuadratureWeights(const double mu0,const int n,double &weights[]);

private:
在类主体之外,添加从 CShadowObj 类中删除的模糊方法的实现:
//+-----------------------------------------------+
//| Gaussian blur                                 |
//| https://www.mql5.com/en/articles/1612#chapter4|
//+-----------------------------------------------+
bool CGCnvElement::GaussianBlur(const uint radius)
  {
//---
   int n_nodes=(int)radius*2+1;
//--- Read graphical resource data. If failed, return false
   if(!CGCnvElement::ResourceStamp(DFUN))
      return false;
//--- Check the blur amount. If the blur radius exceeds half of the width or height, return 'false'
   if((int)radius>=this.Width()/2 || (int)radius>=this.Height()/2)
     {
      ::Print(DFUN,CMessage::Text(MSG_SHADOW_OBJ_IMG_SMALL_BLUR_LARGE));
      return false;
     }

//--- Decompose image data from the resource into a, r, g, b color components
   int  size=::ArraySize(this.m_duplicate_res);
//--- arrays for storing A, R, G and B color components
//--- for horizontal and vertical blur
   uchar a_h_data[],r_h_data[],g_h_data[],b_h_data[];
   uchar a_v_data[],r_v_data[],g_v_data[],b_v_data[];

//--- Change the size of component arrays according to the array size of the graphical resource data
   if(::ArrayResize(a_h_data,size)==-1)
     {
      CMessage::ToLog(DFUN,MSG_LIB_SYS_FAILED_ARRAY_RESIZE);
      ::Print(DFUN_ERR_LINE,": \"a_h_data\"");
      return false;
     }
   if(::ArrayResize(r_h_data,size)==-1)
     {
      CMessage::ToLog(DFUN,MSG_LIB_SYS_FAILED_ARRAY_RESIZE);
      ::Print(DFUN_ERR_LINE,": \"r_h_data\"");
      return false;
     }
   if(::ArrayResize(g_h_data,size)==-1)
     {
      CMessage::ToLog(DFUN,MSG_LIB_SYS_FAILED_ARRAY_RESIZE);
      ::Print(DFUN_ERR_LINE,": \"g_h_data\"");
      return false;
     }
   if(ArrayResize(b_h_data,size)==-1)
     {
      CMessage::ToLog(DFUN,MSG_LIB_SYS_FAILED_ARRAY_RESIZE);
      ::Print(DFUN_ERR_LINE,": \"b_h_data\"");
      return false;
     }
   if(::ArrayResize(a_v_data,size)==-1)
     {
      CMessage::ToLog(DFUN,MSG_LIB_SYS_FAILED_ARRAY_RESIZE);
      ::Print(DFUN_ERR_LINE,": \"a_v_data\"");
      return false;
     }
   if(::ArrayResize(r_v_data,size)==-1)
     {
      CMessage::ToLog(DFUN,MSG_LIB_SYS_FAILED_ARRAY_RESIZE);
      ::Print(DFUN_ERR_LINE,": \"r_v_data\"");
      return false;
     }
   if(::ArrayResize(g_v_data,size)==-1)
     {
      CMessage::ToLog(DFUN,MSG_LIB_SYS_FAILED_ARRAY_RESIZE);
      ::Print(DFUN_ERR_LINE,": \"g_v_data\"");
      return false;
     }
   if(::ArrayResize(b_v_data,size)==-1)
     {
      CMessage::ToLog(DFUN,MSG_LIB_SYS_FAILED_ARRAY_RESIZE);
      ::Print(DFUN_ERR_LINE,": \"b_v_data\"");
      return false;
     }
//--- Declare the array for storing blur weight ratios and,
//--- if failed to get the array of weight ratios, return 'false'
   double weights[];
   if(!this.GetQuadratureWeights(1,n_nodes,weights))
      return false;

//--- Set components of each image pixel to the color component arrays
   for(int i=0;i<size;i++)
     {
      a_h_data[i]=GETRGBA(this.m_duplicate_res[i]);
      r_h_data[i]=GETRGBR(this.m_duplicate_res[i]);
      g_h_data[i]=GETRGBG(this.m_duplicate_res[i]);
      b_h_data[i]=GETRGBB(this.m_duplicate_res[i]);
     }

//--- Blur the image horizontally (along the X axis)
   uint XY; // Pixel coordinate in the array
   double a_temp=0.0,r_temp=0.0,g_temp=0.0,b_temp=0.0;
   int coef=0;
   int j=(int)radius;
   //--- Loop by the image width
   for(int Y=0;Y<this.Height();Y++)
     {
      //--- Loop by the image height
      for(uint X=radius;X<this.Width()-radius;X++)
        {
         XY=Y*this.Width()+X;
         a_temp=0.0; r_temp=0.0; g_temp=0.0; b_temp=0.0;
         coef=0;
         //--- Multiply each color component by the weight ratio corresponding to the current image pixel
         for(int i=-1*j;i<j+1;i=i+1)
           {
            a_temp+=a_h_data[XY+i]*weights[coef];
            r_temp+=r_h_data[XY+i]*weights[coef];
            g_temp+=g_h_data[XY+i]*weights[coef];
            b_temp+=b_h_data[XY+i]*weights[coef];
            coef++;
           }
         //--- Save each rounded color component calculated according to the ratios to the component arrays
         a_h_data[XY]=(uchar)::round(a_temp);
         r_h_data[XY]=(uchar)::round(r_temp);
         g_h_data[XY]=(uchar)::round(g_temp);
         b_h_data[XY]=(uchar)::round(b_temp);
        }
      //--- Remove blur artifacts to the left by copying adjacent pixels
      for(uint x=0;x<radius;x++)
        {
         XY=Y*this.Width()+x;
         a_h_data[XY]=a_h_data[Y*this.Width()+radius];
         r_h_data[XY]=r_h_data[Y*this.Width()+radius];
         g_h_data[XY]=g_h_data[Y*this.Width()+radius];
         b_h_data[XY]=b_h_data[Y*this.Width()+radius];
        }
      //--- Remove blur artifacts to the right by copying adjacent pixels
      for(int x=int(this.Width()-radius);x<this.Width();x++)
        {
         XY=Y*this.Width()+x;
         a_h_data[XY]=a_h_data[(Y+1)*this.Width()-radius-1];
         r_h_data[XY]=r_h_data[(Y+1)*this.Width()-radius-1];
         g_h_data[XY]=g_h_data[(Y+1)*this.Width()-radius-1];
         b_h_data[XY]=b_h_data[(Y+1)*this.Width()-radius-1];
        }
     }

//--- Blur vertically (along the Y axis) the image already blurred horizontally
   int dxdy=0;
   //--- Loop by the image height
   for(int X=0;X<this.Width();X++)
     {
      //--- Loop by the image width
      for(uint Y=radius;Y<this.Height()-radius;Y++)
        {
         XY=Y*this.Width()+X;
         a_temp=0.0; r_temp=0.0; g_temp=0.0; b_temp=0.0;
         coef=0;
         //--- Multiply each color component by the weight ratio corresponding to the current image pixel
         for(int i=-1*j;i<j+1;i=i+1)
           {
            dxdy=i*(int)this.Width();
            a_temp+=a_h_data[XY+dxdy]*weights[coef];
            r_temp+=r_h_data[XY+dxdy]*weights[coef];
            g_temp+=g_h_data[XY+dxdy]*weights[coef];
            b_temp+=b_h_data[XY+dxdy]*weights[coef];
            coef++;
           }
         //--- Save each rounded color component calculated according to the ratios to the component arrays
         a_v_data[XY]=(uchar)::round(a_temp);
         r_v_data[XY]=(uchar)::round(r_temp);
         g_v_data[XY]=(uchar)::round(g_temp);
         b_v_data[XY]=(uchar)::round(b_temp);
        }
      //--- Remove blur artifacts at the top by copying adjacent pixels
      for(uint y=0;y<radius;y++)
        {
         XY=y*this.Width()+X;
         a_v_data[XY]=a_v_data[X+radius*this.Width()];
         r_v_data[XY]=r_v_data[X+radius*this.Width()];
         g_v_data[XY]=g_v_data[X+radius*this.Width()];
         b_v_data[XY]=b_v_data[X+radius*this.Width()];
        }
      //--- Remove blur artifacts at the bottom by copying adjacent pixels
      for(int y=int(this.Height()-radius);y<this.Height();y++)
        {
         XY=y*this.Width()+X;
         a_v_data[XY]=a_v_data[X+(this.Height()-1-radius)*this.Width()];
         r_v_data[XY]=r_v_data[X+(this.Height()-1-radius)*this.Width()];
         g_v_data[XY]=g_v_data[X+(this.Height()-1-radius)*this.Width()];
         b_v_data[XY]=b_v_data[X+(this.Height()-1-radius)*this.Width()];
        }
     }

//--- Set the twice blurred (horizontally and vertically) image pixels to the graphical resource data array
   for(int i=0;i<size;i++)
      this.m_duplicate_res[i]=ARGB(a_v_data[i],r_v_data[i],g_v_data[i],b_v_data[i]);
//--- Display the image pixels on the canvas in a loop by the image height and width from the graphical resource data array
   for(int X=0;X<this.Width();X++)
     {
      for(uint Y=radius;Y<this.Height()-radius;Y++)
        {
         XY=Y*this.Width()+X;
         this.m_canvas.PixelSet(X,Y,this.m_duplicate_res[XY]);
        }
     }
//--- Done
   return true;
  }
//+------------------------------------------------------------------+
//| Return the array of weight ratios                                |
//| https://www.mql5.com/en/articles/1612#chapter3_2                 |
//+------------------------------------------------------------------+
bool CGCnvElement::GetQuadratureWeights(const double mu0,const int n,double &weights[])
  {
   CAlglib alglib;
   double  alp[];
   double  bet[];
   ::ArrayResize(alp,n);
   ::ArrayResize(bet,n);
   ::ArrayInitialize(alp,1.0);
   ::ArrayInitialize(bet,1.0);
//---
   double out_x[];
   int    info=0;
   alglib.GQGenerateRec(alp,bet,mu0,n,info,out_x,weights);
   if(info!=1)
     {
      string txt=(info==-3 ? "internal eigenproblem solver hasn't converged" : info==-2 ? "Beta[i]<=0" : "incorrect N was passed");
      ::Print("Call error in CGaussQ::GQGenerateRec: ",txt);
      return false;
     }
   return true;
  }
//+------------------------------------------------------------------+
这些方法只是从一个类移到另一个类。
我在上面已经提到,绘制预定义图形基元和图像的方法有改进的必要。 由于在绘制半透明线条时,抗锯齿绘制基元的方法效果不佳,因此如果线条的透明度超过设定的阈值,我需要用无平滑的基元替换绘制平滑基元 — 完全不透明度值的一半。
我们来看看改进的方法。 如果绘制的图形基元的不透明度值超过 127,则用具有抗锯齿的方法绘制基元。 否则,调用无平抗锯齿方法绘制:
//+-----------------------------------------------+
//| Draw the Info icon                            |
//+-----------------------------------------------+
void CGCnvElement::DrawIconInfo(const int coord_x,const int coord_y,const uchar opacity)
  {
   int x=coord_x+8;
   int y=coord_y+8;
   this.DrawCircleFill(x,y,7,C'0x00,0x77,0xD7',opacity);
   if(opacity>127)
      this.DrawCircleWu(x,y,7.5,C'0x00,0x3D,0x8C',opacity);
   else
      this.DrawCircle(x,y,8,C'0x00,0x3D,0x8C',opacity);
   this.DrawRectangle(x,y-5,x+1,y-4, C'0xFF,0xFF,0xFF',opacity);
   this.DrawRectangle(x,y-2,x+1,y+4,C'0xFF,0xFF,0xFF',opacity);
  }
//+-----------------------------------------------+
//| Draw the Warning icon                         |
//+-----------------------------------------------+
void CGCnvElement::DrawIconWarning(const int coord_x,const int coord_y,const uchar opacity)
  {
   int x=coord_x+8;
   int y=coord_y+1;
   this.DrawTriangleFill(x,y,x+8,y+14,x-8,y+14,C'0xFC,0xE1,0x00',opacity);
   if(opacity>127)
      this.DrawTriangleWu(x,y,x+8,y+14,x-7,y+14,C'0xFF,0xB9,0x00',opacity);
   else
      this.DrawTriangle(x,y,x+8,y+14,x-7,y+14,C'0xFF,0xB9,0x00',opacity);
   this.DrawRectangle(x,y+5,x+1,y+9,  C'0x00,0x00,0x00',opacity);
   this.DrawRectangle(x,y+11,x+1,y+12,C'0x00,0x00,0x00',opacity);
  }
//+-----------------------------------------------+
//| Draw the Error icon                           |
//+-----------------------------------------------+
void CGCnvElement::DrawIconError(const int coord_x,const int coord_y,const uchar opacity)
  {
   int x=coord_x+8;
   int y=coord_y+8;
   this.DrawCircleFill(x,y,7,C'0xF0,0x39,0x16',opacity);
   if(opacity>127)
     {
      this.DrawCircleWu(x,y,7.5,C'0xA5,0x25,0x12',opacity);
      this.DrawLineWu(x-3,y-3,x+3,y+3,C'0xFF,0xFF,0xFF',opacity);
      this.DrawLineWu(x+3,y-3,x-3,y+3,C'0xFF,0xFF,0xFF',opacity);
     }
   else
     {
      this.DrawCircle(x,y,8,C'0xA5,0x25,0x12',opacity);
      this.DrawLine(x-3,y-3,x+3,y+3,C'0xFF,0xFF,0xFF',opacity);
      this.DrawLine(x+3,y-3,x-3,y+3,C'0xFF,0xFF,0xFF',opacity);
     }
  }
//+------------------------------------------------------------------+
当然,我只是在掩盖问题,但这是有道理的:当不透明度从 255 降低到 128 时,平滑线条看起来或多或少是正常的,然后它开始断裂,并溃散成像素,而不是变得更加透明。 以无抗锯齿绘图代替绘制线条,在此完全不可见的 — 线条已经是半透明的,在这种状态下,它的像素化外观并不明显,如果我们绘制一条完全不透明的无平滑线条,情况并非如此。
此类中其余预定义的形状绘制方法也使用抗锯齿绘制方法。 但我还没有测试更改透明度时的外观。 如果这些方法中也有视觉伪影,那么我亦会按完全相同的方式优化它们。
由于现在眩光对象不是单独的单独类型(如同阴影对象),而是属于辅助 WinForms 对象的列表,因此现在需要在面板对象的类文件中完成此对象类文件的包含。 此对象是所有 WinForms 函数库对象的文件都连接到的容器对象。
从 \MQL5\Include\DoEasy\Objects\Graph\WForms\WinFormBase.mqh 文件中,删除眩光对象类的连接代码:
//+------------------------------------------------------------------+
//|                                                  WinFormBase.mqh |
//|                                  Copyright 2022, MetaQuotes Ltd. |
//|                             https://mql5.com/en/users/artmedia70 |
//+------------------------------------------------------------------+
#property copyright "Copyright 2022, MetaQuotes Ltd."
#property link      "https://mql5.com/en/users/artmedia70"
#property version   "1.00"
#property strict    // Necessary for mql4
//+-----------------------------------------------+
//| Include files                                 |
//+-----------------------------------------------+
#include "GlareObj.mqh"
#include "..\Form.mqh"
#include "..\..\..\Services\Select.mqh"
//+------------------------------------------------------------------+
并将眩光对象类文件包含在 \MQL5\Include\DoEasy\Objects\Graph\WForms\Containers\Panel.mqh 面板对象类之中:
//+------------------------------------------------------------------+
//|                                                        Panel.mqh |
//|                                  Copyright 2022, MetaQuotes Ltd. |
//|                             https://mql5.com/en/users/artmedia70 |
//+------------------------------------------------------------------+
#property copyright "Copyright 2022, MetaQuotes Ltd."
#property link      "https://mql5.com/en/users/artmedia70"
#property version   "1.00"
#property strict    // Necessary for mql4
//+-----------------------------------------------+
//| Include files                                 |
//+-----------------------------------------------+
#include "Container.mqh"
#include "..\Helpers\TabField.mqh"
#include "..\Helpers\ArrowUpButton.mqh"
#include "..\Helpers\ArrowDownButton.mqh"
#include "..\Helpers\ArrowLeftButton.mqh"
#include "..\Helpers\ArrowRightButton.mqh"
#include "..\Helpers\ArrowUpDownBox.mqh"
#include "..\Helpers\ArrowLeftRightBox.mqh"
#include "..\Helpers\HintMoveLeft.mqh"
#include "..\Helpers\HintMoveRight.mqh"
#include "..\Helpers\HintMoveUp.mqh"
#include "..\Helpers\HintMoveDown.mqh"
#include "GroupBox.mqh"
#include "TabControl.mqh"
#include "SplitContainer.mqh"
#include "..\..\WForms\Common Controls\ListBox.mqh"
#include "..\..\WForms\Common Controls\CheckedListBox.mqh"
#include "..\..\WForms\Common Controls\ButtonListBox.mqh"
#include "..\..\WForms\Common Controls\ToolTip.mqh"
#include "..\..\WForms\Common Controls\ProgressBar.mqh"
#include "..\..\WForms\GlareObj.mqh"
//+-----------------------------------------------+
//| Panel object class of WForms controls         |
//+-----------------------------------------------+
class CPanel : public CContainer
现在,眩光对象将在所有容器对象中可用,从中可以创建它,并将其包含在函数库的任何其它图形元素中的附着对象列表之中。 鉴于任何独立的 GUI 窗口都是先验的容器,我们可以向附着于该窗口的任何控件添加一个眩光对象(并随后添加一个视觉效果对象)。
在 \MQL5\Include\DoEasy\Objects\Graph\WForms\Containers\Container.mqh 容器对象类的文件中,在其设置绑定对象参数的方法中,在末尾添加一个代码模块为新创建的眩光对象设置参数:
//+-----------------------------------------------+
//| Set parameters for the attached object        |
//+-----------------------------------------------+
void CContainer::SetObjParams(CWinFormBase *obj,const color colour)
  {
//--- Set the text color of the object to be the same as that of the base container
   obj.SetForeColor(this.ForeColor(),true);
//--- If the created object is not a container, set the same group for it as the one for its base object
   if(obj.TypeGraphElement()<GRAPH_ELEMENT_TYPE_WF_CONTAINER || obj.TypeGraphElement()>GRAPH_ELEMENT_TYPE_WF_SPLIT_CONTAINER)
      obj.SetGroup(this.Group());
//--- Depending on the object type
   switch(obj.TypeGraphElement())
     {
      //--- For the Container, Panel and GroupBox WinForms objects
      case GRAPH_ELEMENT_TYPE_WF_CONTAINER            :
      case GRAPH_ELEMENT_TYPE_WF_PANEL                :
      case GRAPH_ELEMENT_TYPE_WF_GROUPBOX             :
        obj.SetBorderColor(obj.BackgroundColor(),true);
        break;
      //--- For "Label", "CheckBox" and "RadioButton" WinForms objects

      //---...
      //---...

      //--- For ProgressBar WinForms object
      case GRAPH_ELEMENT_TYPE_WF_PROGRESS_BAR         :
        obj.SetBackgroundColor(CLR_DEF_CONTROL_PROGRESS_BAR_BACK_COLOR,true);
        obj.SetBorderColor(CLR_DEF_CONTROL_PROGRESS_BAR_BORDER_COLOR,true);
        obj.SetForeColor(CLR_DEF_CONTROL_PROGRESS_BAR_FORE_COLOR,true);
        obj.SetBorderStyle(FRAME_STYLE_SIMPLE);
        break;
      //--- For "GlareObj" WinForms object
      case GRAPH_ELEMENT_TYPE_WF_GLARE_OBJ            :
        obj.SetBackgroundColor(CLR_CANV_NULL,true);
        obj.SetBorderColor(CLR_CANV_NULL,true);
        obj.SetForeColor(CLR_CANV_NULL,true);
        obj.SetBorderStyle(FRAME_STYLE_NONE);
        break;
      default:
        break;
     }
   obj.Crop();
  }
//+------------------------------------------------------------------+
创建附着于容器的任何图形控件后,均调用此方法,该方法为对象设置最小属性,从而令其正常运行。
我们在 \MQL5\Include\DoEasy\Objects\Graph\WForms\GlareObj.mqh 中完成眩光对象类。
现在,该类将派生自基准 WinForms 对象类。将其文件包含在眩光对象类文件中,并修改父类:
//+------------------------------------------------------------------+
//|                                                     GlareObj.mqh |
//|                                  Copyright 2022, MetaQuotes Ltd. |
//|                             https://mql5.com/en/users/artmedia70 |
//+------------------------------------------------------------------+
#property copyright "Copyright 2022, MetaQuotes Ltd."
#property link      "https://mql5.com/en/users/artmedia70"
#property version   "1.00"
#property strict    // Necessary for mql4
//+-----------------------------------------------+
//| Include files                                 |
//+-----------------------------------------------+
#include "WinFormBase.mqh"
//+-----------------------------------------------+
//| Glare object class                            |
//+-----------------------------------------------+
class CGlareObj : public CWinFormBase
  {
   //---...
在私密部分中,声明存储眩光样式的变量,并声明另一个方法来更改眩光绘制方法:
class CGlareObj : public CWinFormBase
  {
private:
   ENUM_CANV_ELEMENT_VISUAL_EFF_STYLE m_style;        // Glare style
   color             m_color;                         // Glare color
   uchar             m_opacity;                       // Glare opacity
   uchar             m_blur;                          // Blur
//--- Draw the object glare form
   void              DrawGlareFigure(void);
   void              DrawFigureRectangle(void);
   void              DrawFigureParallelogram(void);
protected:
眩光样式将判定应调用哪个方法来绘制它。 DrawGlareFigure() 方法将调用与指定样式对应的绘图方法。 眩光绘制方法中没有正式参数 — 对于在预定义大小的图形元素上正确渲染图像,尚无需指定的内容。 所绘制眩光的颜色和不透明度则通过相应的方法预先设置。 模糊尚未启用。
在类的公开部分中,声明绘制眩光、重绘眩光、设置不透明度、和初始化属性的方法,以及实现设置和获取某些对象属性的方法:
public:
//--- Constructor indicating the main and base objects, chart ID and subwindow
                     CGlareObj(CGCnvElement *main_obj,CGCnvElement *base_obj,
                               const long chart_id,
                               const int subwindow,
                               const string descript,
                               const int x,
                               const int y,
                               const int w,
                               const int h);

//--- Supported object properties (1) integer, (2) real and (3) string ones
   virtual bool      SupportProperty(ENUM_CANV_ELEMENT_PROP_INTEGER property) { return true; }
   virtual bool      SupportProperty(ENUM_CANV_ELEMENT_PROP_DOUBLE property)  { return true; }
   virtual bool      SupportProperty(ENUM_CANV_ELEMENT_PROP_STRING property)  { return true; }

//--- Draw the object glare
   void              Draw(void);
//--- Redraw the object
   virtual void      Redraw(bool redraw);
//--- Set the element opacity
   virtual void      SetOpacity(const uchar value,const bool redraw=false);
//--- Initialize the properties
   void              Initialize(void);

//+------------------------------------------------------------------+
//| Methods of simplified access to object properties                |
//+------------------------------------------------------------------+
//--- (1) Set and (2) return the glare color
   void              SetColor(const color colour)                             { this.m_color=colour;     }
   color             Color(void)                                        const { return this.m_color;     }
//--- (1) Set and (2) return the opacity of the drawn glare
   void              SetOpacityDraw(const uchar opacity)                      { this.m_opacity=opacity;  }
   uchar             OpacityDraw(void)                                  const { return this.m_opacity;   }
//--- (1) Set and (2) return the glare blur
   void              SetBlur(const uchar blur)                                { this.m_blur=blur;        }
   uchar             Blur(void)                                         const { return this.m_blur;      }
//--- (1) Set and (2) return the glare visual effect
   void              SetVisualEffectStyle(const ENUM_CANV_ELEMENT_VISUAL_EFF_STYLE style)
                       { this.m_style=style;                                                             }
   ENUM_CANV_ELEMENT_VISUAL_EFF_STYLE VisualEffectStyle(void)           const { return this.m_style;     }
//--- Set the glare visual effect style as (1) rectangle and (2) parallelogram
   void              SetStyleRectangle(void)
                       { this.SetVisualEffectStyle(CANV_ELEMENT_VISUAL_EFF_STYLE_RECTANGLE);             }
   void              SetStyleParallelogramm(void)
                       { this.SetVisualEffectStyle(CANV_ELEMENT_VISUAL_EFF_STYLE_PARALLELOGRAMM);        }
  };
//+------------------------------------------------------------------+
简化访问对象属性的方法模块具有这些方法,其中传递给方法的值是为私密变量设置的,并返回来自这些变量的数值。
在类构造函数中,把 CShadowObj 父类初始化替换为 CWinFormBase,并添加调用变量初始化方法:
//+-----------------------------------------------+
//| Protected constructor with an object type,    |
//| chart ID and subwindow                        |
//+-----------------------------------------------+
CGlareObj::CGlareObj(const ENUM_GRAPH_ELEMENT_TYPE type,
                     CGCnvElement *main_obj,CGCnvElement *base_obj,
                     const long chart_id,
                     const int subwindow,
                     const string descript,
                     const int x,
                     const int y,
                     const int w,
                     const int h) : CWinFormBase(type,main_obj,base_obj,chart_id,subwindow,descript,x-OUTER_AREA_SIZE,y-OUTER_AREA_SIZE,w+OUTER_AREA_SIZE*2,h+OUTER_AREA_SIZE*2)
  {
//--- Set the specified graphical element type for the object and assign the library object type to the current object
   this.SetTypeElement(type);
   this.m_type=OBJECT_DE_TYPE_GGLARE;
   this.Initialize();
  }
//+------------------------------------------------------------------+
//| Constructor indicating the main and base objects,                |
//| chart ID and subwindow                                           |
//+------------------------------------------------------------------+
CGlareObj::CGlareObj(CGCnvElement *main_obj,CGCnvElement *base_obj,
                     const long chart_id,
                     const int subwindow,
                     const string descript,
                     const int x,
                     const int y,
                     const int w,
                     const int h) : CWinFormBase(GRAPH_ELEMENT_TYPE_WF_GLARE_OBJ,main_obj,base_obj,chart_id,subwindow,descript,x,y,w,h)
  {
   this.m_type=OBJECT_DE_TYPE_GGLARE;
   this.Initialize();
  }
//+------------------------------------------------------------------+
现在,我们不必在每个构造函数中为每个变量编写初始化代码(两个构造函数相同),而是简单地调用对象属性初始化方法来替代:
//+-----------------------------------------------+
//| Initialize the properties                     |
//+-----------------------------------------------+
void CGlareObj::Initialize(void)
  {
   CGCnvElement::SetBackgroundColor(CLR_CANV_NULL,true);
   CGCnvElement::SetActive(false);
   this.SetBlur(4);
   this.SetColor(clrWhite);
   this.SetOpacity(127);
   this.m_shadow=false;
   this.SetVisibleFlag(false,false);
   this.SetVisualEffectStyle(CANV_ELEMENT_VISUAL_EFF_STYLE_RECTANGLE);
   this.SetDisplayState(CANV_ELEMENT_DISPLAY_STATE_NORMAL);
   this.SetDisplayed(false);
  }
//+------------------------------------------------------------------+
该方法设置对象属性的默认值。 模糊设置为 4,模糊颜色为白色。 不透明度设置为 127 — 半透明度的一个对象,没有阴影。 设置物体隐形标志,视觉效果类型为矩形眩光。 显示状态正常(对象隐藏),而显示标志被重置 — 对象不应在显示的父对象上出现。
该方法该置元素不透明度:
//+-----------------------------------------------+
//| Set the element opacity                       |
//+-----------------------------------------------+
void CGlareObj::SetOpacity(const uchar value,const bool redraw=false)
  {
   CGCnvElement::SetOpacity(0,false);
   this.SetOpacityDraw(value>(uchar)CLR_DEF_SHADOW_OPACITY ? (uchar)CLR_DEF_SHADOW_OPACITY : value);
   this.m_canvas.Update(redraw);
  }
//+------------------------------------------------------------------+
该方法与同名的阴影对象方法雷同。 此处,为绘制眩光的底图设置完全透明度,而传递给方法的值是为眩光设置的颜色。 如果传递给该方法的不透明度值大于默认阴影不透明度值,则使用默认值。 否则,则采用传递给该方法的数值。 这样做是为了令对象永远不会完全不透明。 我采用阴影的默认值,因为它非常适合这些目的。
眩光绘制方法:
//+-----------------------------------------------+
//| Draw the object glare                         |
//+-----------------------------------------------+
void CGlareObj::Draw(void)
  {
   if(!this.IsVisible())
      return;
//--- Draw the glare
   this.DrawGlareFigure();
  }
//+------------------------------------------------------------------+
如果对象处于隐藏状态,则不应绘制任何内容。 离开该方法。
接下来,调用设置的绘图方法:
//+-----------------------------------------------+
//| Draw the object glare form                    |
//+-----------------------------------------------+
void CGlareObj::DrawGlareFigure()
  {
   switch(this.VisualEffectStyle())
     {
      case CANV_ELEMENT_VISUAL_EFF_STYLE_RECTANGLE       : this.DrawFigureRectangle();       break;
      case CANV_ELEMENT_VISUAL_EFF_STYLE_PARALLELOGRAMM  : this.DrawFigureParallelogram();   break;
      default:
        break;
     }
  }
//+------------------------------------------------------------------+
根据所绘制的眩光类型,我们调用相应的方法,该方法会实际绘制眩光形状。
绘制对象眩光矩形的方法:
//+-----------------------------------------------+
//| Draw the rectangle object glare form          |
//+-----------------------------------------------+
void CGlareObj::DrawFigureRectangle(void)
  {
   CGCnvElement::DrawRectangleFill(0,0,this.Width()-1,this.Height()-1,this.m_color,this.OpacityDraw());
   CGCnvElement::Update();
  }
//+------------------------------------------------------------------+
此处在对象的整个大小上绘制一个填充矩形,并设置对象颜色,及绘制不透明度。
为对象绘制平行四边形眩光的方法:
//+------------------------------------------------------------------+
//| Draw the shape of the object glare as a parallelogram            |
//+------------------------------------------------------------------+
void CGlareObj::DrawFigureParallelogram(void)
  {
   int array_x[]={6,this.Width()-1,this.Width()-1-6,0};
   int array_y[]={0,0,this.Height()-1,this.Height()-1};
   CGCnvElement::DrawPolygonFill(array_x,array_y,this.m_color,this.OpacityDraw());
   CGCnvElement::Update();
  }
//+------------------------------------------------------------------+
这里绘制了一个“倾斜”三角形。 首先,声明多边形顶点的 X 和 Y 坐标数组,然后用数组中指定的顶点,以倾斜矩形的形式绘制填充多边形 — 按照为对象设置的颜色和不透明度绘制平行四边形。
如果我简单地一次绘制一个对象,然后移动它,那么当所移动对象超出进度条的边界时,眩光对象仍然可见(即,在这种情况下,对象依然沿着它移动)。 从视觉上看,它看起来像是眩光“跳”出了进度条,并绘制在进度栏控件所附着于的面板上。 为了避免这种情况,我们需要裁剪超出其容器的部分,并重新绘制对象。 为此,我们需要对象重绘方法。
该方法重绘对象:
//+-----------------------------------------------+
//| Redraw the object                             |
//+-----------------------------------------------+
void CGlareObj::Redraw(bool redraw)
  {
   CGCnvElement::Erase(false);
   this.Draw();
   this.Crop();
   this.Update(redraw);
  }
//+------------------------------------------------------------------+
在此,我们首先完全清除对象,并以颜色和不透明度填充它。 由于透明色设置为背景色,而不透明度值为零,因此对象将变为完全透明。 接下来,调用前面讨论的已实现绘制眩光形状的方法,裁剪超出对象容器之外的区域,并更新画布。
现在我们只需要在沿进度条移动对象时调用该方法,眩光就不会超出其容器。
我们来开发进度条对象的功能。
为了显示某个进程的进度,我们需要增加进度条的步长额度来增加 BarProgressBar 对象的宽度。 通常,所有进度条宽度值都是相对的 — 作为进度条对象宽度的百分比,和进度条 Value 参数最大值的百分比。 进度条可以在最小值和最大值参数中设置的限制范围内更改其值。 但这些值不应以像素为单位设置,而应设置为对象宽度的百分比。 然后,当进度条宽度相同时,Value 100 将为 100 像素宽,但当进度条宽度为 200 像素时,Value 将为 200。 在这种情况下,如果 Value 为 50,那么这对应于上述对象宽度值的 50 和 100 像素值。
为了让我们控制进度条的值更简单,我们需要在显示对象的循环开始之前,设置极限的最小值和最大值,并设置步长,据其增加进度条宽度值。 在所跟踪循环中的下一个动作完成后,我们只需要调用进度条对象的 PerformStep() 方法,进度条的宽度就会按照指定的步长增加。 因此,我们应该始终这样做:知道跟踪循环的迭代次数,我们为进度条对象设置必要的数值,在循环内部,当下一次迭代完成时,我们调用 PerformStep() 方法,这将导致进度条逐步变化。
在 \MQL5\Include\DoEasy\Objects\Graph\WForms\Common Controls\ProgressBar.mqh 中,即在其私密部分中,声明存储进度条数值的变量,和计算进度条宽度的方法:
//+------------------------------------------------------------------+
//| ArrowLeftRightBox object class of WForms controls                |
//+------------------------------------------------------------------+
class CProgressBar : public CContainer
  {
private:
   int               m_progress_bar_max;  // Maximum progress bar width
   int               m_value_by_max;      // Value relative to Maximum
   int               m_steps_skipped;     // Number of skipped steps of increasing the width of the progress bar
//--- Create a new graphical object
   virtual CGCnvElement *CreateNewGObject(const ENUM_GRAPH_ELEMENT_TYPE type,
                                          const int element_num,
                                          const string descript,
                                          const int x,
                                          const int y,
                                          const int w,
                                          const int h,
                                          const color colour,
                                          const uchar opacity,
                                          const bool movable,
                                          const bool activity);
//--- Create the progress bar object
   void              CreateProgressBar(void);
//--- Calculate the progress bar width
   int               CalculateProgressBarWidth(void);
//--- Initialize the element properties
   void              Initialize(void);

protected:
将 SetValue()公开方法的实现移到类主体之外,只在主体中保留其声明:
//--- (1) Set and (2) return the progress bar increment to redraw it
   void              SetStep(const int value)
                       {
                        this.SetProperty(CANV_ELEMENT_PROP_PROGRESS_BAR_STEP,value);
                        CBarProgressBar *bar=this.GetProgressBar();
                        if(bar!=NULL)
                           bar.SetStep(value);
                       }
   int               Step(void)                          const { return (int)this.GetProperty(CANV_ELEMENT_PROP_PROGRESS_BAR_STEP);    }

//--- (1) Set and (2) return the current value of the progress bar in the range from Min to Max
   void              SetValue(const int value);
   int               Value(void)                         const { return (int)this.GetProperty(CANV_ELEMENT_PROP_PROGRESS_BAR_VALUE);   }

//--- (1) Set and (2) return the upper bound of the ProgressBar operating range
   void              SetMaximum(const int value)               { this.SetProperty(CANV_ELEMENT_PROP_PROGRESS_BAR_MAXIMUM,value);       }
   int               Maximum(void)                       const { return (int)this.GetProperty(CANV_ELEMENT_PROP_PROGRESS_BAR_MAXIMUM); }
声明更多方法:
//--- Return the pointer to the progress bar object
   CBarProgressBar  *GetProgressBar(void)                { return this.GetElementByType(GRAPH_ELEMENT_TYPE_WF_BAR_PROGRESS_BAR,0);     }

//--- Resets the progress bar values to the set minimum
   void              ResetProgressBar(void)              { this.SetValue(this.Minimum());    }
//--- Set the element width
   virtual bool      SetWidth(const int width);
//--- Initialize values for handling in PerformStep
   void              SetValuesForProcessing(const int minimum,const int maximum,const int step,const int steps_skipped);
//--- Increase the current position of the progress bar by the step value
   void              PerformStep();

//--- Supported object properties (1) integer, (2) real and (3) string ones
   virtual bool      SupportProperty(ENUM_CANV_ELEMENT_PROP_INTEGER property) { return true; }
   virtual bool      SupportProperty(ENUM_CANV_ELEMENT_PROP_DOUBLE property)  { return true; }
   virtual bool      SupportProperty(ENUM_CANV_ELEMENT_PROP_STRING property)  { return true; }
ResetProgressBar() 方法直接在类的主体中实现,并将进度条的数值设置为 Minimum 属性中的值。 这允许我们将进度条返回到其原始状态。
在默认值初始化方法中,将进度条的数值设置为对象宽度的 50%,并计算 BarProgressBar 对象的最大宽度(以像素为单位),并以对象宽度的百分比计算该值:
//+-----------------------------------------------+
//| Initialize the element properties             |
//+-----------------------------------------------+
void CProgressBar::Initialize(void)
  {
   this.SetBorderSizeAll(1);
   this.SetBorderStyle(FRAME_STYLE_SIMPLE);
   this.SetBackgroundColor(CLR_DEF_CONTROL_PROGRESS_BAR_BACK_COLOR,true);
   this.SetBorderColor(CLR_DEF_CONTROL_PROGRESS_BAR_BORDER_COLOR,true);
   this.SetForeColor(CLR_DEF_CONTROL_PROGRESS_BAR_FORE_COLOR,true);
   this.SetMarqueeAnimationSpeed(10);
   this.SetMaximum(100);
   this.SetMinimum(0);
   this.SetValue(50);
   this.SetStep(10);
   this.SetStyle(CANV_ELEMENT_PROGRESS_BAR_STYLE_CONTINUOUS);
   this.m_progress_bar_max=this.Width()-this.BorderSizeLeft()-this.BorderSizeRight();
   this.m_value_by_max=this.Value()*100/this.Maximum();
   this.m_steps_skipped=0;
  }
//+------------------------------------------------------------------+
进度条对象的最大宽度不应大于背景宽度减去其左右边框的大小,从而进度条可以适配在背景上绘制的边框,而不会超出它。
在创建进度条对象的方法中,根据 CalculateProgressBarWidth() 方法计算的数值,为所创建对象设置宽度,并添加眩光对象的创建:
//+-----------------------------------------------+
//| Create the progress bar object                |
//+-----------------------------------------------+
void CProgressBar::CreateProgressBar(void)
  {
//--- Set the length of the progress bar equal to the object Value()
//--- The height of the progress bar is equal to the height of the object minus the top and bottom frame sizes
   int w=this.CalculateProgressBarWidth();
   int h=this.Height()-this.BorderSizeTop()-this.BorderSizeBottom();
//--- Create the progress bar object
   this.CreateNewElement(GRAPH_ELEMENT_TYPE_WF_BAR_PROGRESS_BAR,0,0,w,h,clrNONE,255,false,false);
//--- Create the glare object
   this.CreateNewElement(GRAPH_ELEMENT_TYPE_WF_GLARE_OBJ,0,0,w,h,CLR_CANV_NULL,0,true,false);
//--- Add the current CProgressBar object to the list of active elements of the collection
   this.AddObjToListActiveElements();
  }
//+------------------------------------------------------------------+
方法逻辑已在代码注释中讲述。 这里的一切都很简单:我们计算进度条的宽度,并依据计算的宽度创建一个对象。 默认值为进度条对象宽度的 50%。 然后我们创建一个眩光对象,并将当前对象添加到活动对象列表之中。 活动元素列表中的所有对象都在含糊库计时器中进行处理,且可执行在这些对象的计时器处理程序中实现的一些独立操作。 对于此控件,计时器将处理出现在进度条上的眩光外观。
该方法初始化要在 PerformStep 中处理的数值:
//+-----------------------------------------------+
//| Initialize values for handling in PerformStep |
//+-----------------------------------------------+
void CProgressBar::SetValuesForProcessing(const int minimum,const int maximum,const int step,const int steps_skipped)
  {
   this.SetMinimum(minimum<0 ? 0 : minimum);
   this.SetMaximum(maximum<this.Minimum() ? this.Minimum() : maximum);
   this.SetStep(step<0 ? 0 : step);
   this.m_steps_skipped=steps_skipped;
  }
//+------------------------------------------------------------------+
于此:把最小和最大极限值传递给方法,其中 Value、变化步长、和跳过的步长数值可以更改。 接下来,检查最小值、最大值、和步长值是否正确,并在变量中设置跳过步长的数值。 由于进度条的 Value 是按进度条对象宽度的百分比计算出的,因此很可能不会用到跳过步长的数值 — 在准备就绪后,这会在一系列对象测试中搞清楚。 在当前实现中,该数值不会在任何地方用到。
该方法为进度条设置当前值:
//+-----------------------------------------------+
//| Set the current value of the progress bar     |
//+-----------------------------------------------+
void CProgressBar::SetValue(const int value)
  {
//--- Correct the value passed to the method and set it to the object property
   int v=(value<this.Minimum() ? this.Minimum() : value>this.Maximum() ? this.Maximum() : value);
   this.SetProperty(CANV_ELEMENT_PROP_PROGRESS_BAR_VALUE,v);
//--- Get the progress bar object
   CBarProgressBar *bar=this.GetProgressBar();
   if(bar!=NULL)
     {
      //--- Set 'value' for the progress bar
      bar.SetValue(v);
      //--- Calculate the width of the progress bar object
      int w=this.CalculateProgressBarWidth();
      //--- If the calculated width is greater than the maximum possible value, set the maximum width
      if(w>this.m_progress_bar_max)
         w=this.m_progress_bar_max;
      //--- If the width is less than 1, then
      if(w<1)
        {
         //--- hide the progress bar and redraw the chart to display changes immediately
         bar.Hide();
         ::ChartRedraw(bar.ChartID());
        }
      //--- If the width value is not less than 1
      else
        {
         //--- If the progress bar is hidden, display it and
         if(!bar.IsVisible())
            bar.Show();
         //--- change its size according to the received width
         bar.Resize(w,bar.Height(),true);
        }
     }
  }
//+------------------------------------------------------------------+
代码注释中完整描述了方法逻辑。 如果在计算对象的宽度时,其宽度小于一个像素,则无法为对象设置这样的值。 故此,它会赋予一个像素的宽度,且对象被隐藏,从而模拟零宽度进度条。
该方法按步长值增加进度条当前位置:
//+----------------------------------------------------------------------+
//| Increase the current position of the progress bar by the step value  |
//+----------------------------------------------------------------------+
void CProgressBar::PerformStep(void)
  {
   this.SetValue(this.Value()+this.Step());
  }
//+------------------------------------------------------------------+
此处,我们简单地将对象的 Value 属性设置为其过去的值加上先前指定的增量值。 因此,随着每次调用此方法,Value 值将随之按 Step 中记录的增量增加。
该方法计算进度条宽度:
//+-----------------------------------------------+
//| Calculate the width of the progress bar       |
//+-----------------------------------------------+
int CProgressBar::CalculateProgressBarWidth(void)

  {
   this.m_value_by_max=this.Value()*100/this.Maximum();
   return this.m_progress_bar_max*this.m_value_by_max/100;
  }
//+------------------------------------------------------------------+
在此,我们首先计算 Value 的最大可能百分比值,然后返回进度条最大宽度的相对宽度,作为上面计算的值的百分比。
该方法设置新对象的宽度:
//+-----------------------------------------------+
//| Set a new width                               |
//+-----------------------------------------------+
bool CProgressBar::SetWidth(const int width)
  {
   if(!CGCnvElement::SetWidth(width))
      return false;
   this.m_progress_bar_max=this.Width()-this.BorderSizeLeft()-this.BorderSizeRight();
   CBarProgressBar *bar=this.GetProgressBar();
   if(bar==NULL)
      return false;
   int w=this.CalculateProgressBarWidth();
   bar.SetWidth(w);
   return true;
  }
//+------------------------------------------------------------------+
此处,我们首先设置新的底图宽度,然后计算进度条的最大宽度(以像素为单位)。
接下来,获取进度条的相对宽度(以 % 为单位),并将其设置给 CBarProgressBar 对象。
进度条上显示的所有视觉效果都应在 BarProgressBar 对象的计时器中进行处理。 眩光应该在一段时间停顿后,沿着进度条运动:暂停 - 眩光 - 暂停 - 眩光,等等。 为了实现此行为,我们需要为已有的对象属性设置一些值。 我们设置此类属性以实现前面文章中工具提示的平滑外观/消失。 这些属性也适用于眩光对象。
对于 \MQL5\Include\DoEasy\Objects\Graph\WForms\Helpers\BarProgressBar.mqh 进度条对象类文件,包含眩光对象文件。 在其私密部分中,编写设置/返回延迟的方法,并声明初始化对象属性的方法:
//+------------------------------------------------------------------+
//|                                               BarProgressBar.mqh |
//|                                  Copyright 2022, MetaQuotes Ltd. |
//|                             https://mql5.com/en/users/artmedia70 |
//+------------------------------------------------------------------+
#property copyright "Copyright 2022, MetaQuotes Ltd."
#property link      "https://mql5.com/en/users/artmedia70"
#property version   "1.00"
#property strict    // Necessary for mql4
//+-----------------------------------------------+
//| Include files                                 |
//+-----------------------------------------------+
#include "..\WinFormBase.mqh"
#include "..\GlareObj.mqh"
//+------------------------------------------------------------------+
//| BarProgressBar object class of the ProgressBar control           |
//+------------------------------------------------------------------+
class CBarProgressBar : public CWinFormBase
  {
private:
//--- (1) Set and (2) return a pause before displaying the effect
   void              SetShowDelay(const long delay)               { this.SetProperty(CANV_ELEMENT_PROP_TOOLTIP_RESHOW_DELAY,delay);             }
   ulong             ShowDelay(void)                              { return this.GetProperty(CANV_ELEMENT_PROP_TOOLTIP_RESHOW_DELAY);            }
//--- Initialize the properties
   void              Initialize(void);
protected:
在这两个类构造函数中,实现调用设置属性的方法,替代类似的属性设置代码:
//+------------------------------------------------------------------+
//| Protected constructor with an object type,                       |
//| chart ID and subwindow                                           |
//+------------------------------------------------------------------+
CBarProgressBar::CBarProgressBar(const ENUM_GRAPH_ELEMENT_TYPE type,
                                 CGCnvElement *main_obj,CGCnvElement *base_obj,
                                 const long chart_id,
                                 const int subwindow,
                                 const string descript,
                                 const int x,
                                 const int y,
                                 const int w,
                                 const int h) : CWinFormBase(type,main_obj,base_obj,chart_id,subwindow,descript,x,y,w,h)
  {
//--- Set the specified graphical element type for the object and assign the library object type to the current object
   this.SetTypeElement(type);
   this.m_type=OBJECT_DE_TYPE_GWF_HELPER;
   this.Initialize();
  }
//+------------------------------------------------------------------+
//| Constructor indicating the main and base objects,                |
//| chart ID and subwindow                                           |
//+------------------------------------------------------------------+
CBarProgressBar::CBarProgressBar(CGCnvElement *main_obj,CGCnvElement *base_obj,
                                 const long chart_id,
                                 const int subwindow,
                                 const string descript,
                                 const int x,
                                 const int y,
                                 const int w,
                                 const int h) : CWinFormBase(GRAPH_ELEMENT_TYPE_WF_BAR_PROGRESS_BAR,main_obj,base_obj,chart_id,subwindow,descript,x,y,w,h)
  {
   this.SetTypeElement(GRAPH_ELEMENT_TYPE_WF_BAR_PROGRESS_BAR);
   this.m_type=OBJECT_DE_TYPE_GWF_HELPER;
   this.Initialize();
  }
//+------------------------------------------------------------------+
从构造函数中删除属性初始化代码,并移到初始化方法:
//+-----------------------------------------------+
//| Initialize the properties                     |
//+-----------------------------------------------+
void CBarProgressBar::Initialize(void)
  {
   this.SetPaddingAll(0);
   this.SetMarginAll(0);
   this.SetBorderSizeAll(0);
   this.SetBackgroundColor(CLR_DEF_CONTROL_PROGRESS_BAR_BAR_COLOR,true);
   this.SetBorderColor(CLR_DEF_CONTROL_PROGRESS_BAR_BAR_COLOR,true);
   this.SetForeColor(CLR_DEF_CONTROL_PROGRESS_BAR_FORE_COLOR,true);
   this.SetShowDelay(2000);
  }
//+------------------------------------------------------------------+
除了移动代码之外,此处我还添加了进度条上眩光之间两秒钟停顿的实现。
以前,在对象计时器中,我们简单地将来自 GetTickCount() 函数的值发送到图表的注释中。
现在,我们来编写一个齐全的处理程序。
计时器事件处理程序:
//+-----------------------------------------------+
//| Timer                                         |
//+-----------------------------------------------+
void CBarProgressBar::OnTimer(void)
  {
   CWinFormBase *base=this.GetBase();
   if(base==NULL)
      return;
   CWinFormBase *glare=base.GetElementByType(GRAPH_ELEMENT_TYPE_WF_GLARE_OBJ,0);
   if(glare==NULL)
      return;

//--- If the object is in the normal state (hidden)
   if(glare.DisplayState()==CANV_ELEMENT_DISPLAY_STATE_NORMAL)
     {
      //--- set the state of waiting for fading in to the object (in our case, waiting for a shift along the progress bar),
      //--- set the waiting duration and set the countdown time
      glare.SetDisplayState(CANV_ELEMENT_DISPLAY_STATE_WAITING_FADE_IN);
      this.m_pause.SetWaitingMSC(this.ShowDelay());
      this.m_pause.SetTimeBegin();
      //--- If the right edge of the glare object is to the right of the left edge of the progress bar object
      if(glare.RightEdge()>=this.CoordX())
        {
         //--- Hide the glare object and move it beyond the right edge of the progress bar
         glare.Hide();
         if(glare.Move(this.CoordX()-glare.Width(),this.CoordY()))
           {
            //--- Set the relative coordinates of the glare object
            glare.SetCoordXRelative(glare.CoordX()-this.CoordX());
            glare.SetCoordYRelative(glare.CoordY()-this.CoordY());
            //--- and its visibility scope equal to the entire object
            glare.SetVisibleArea(0,0,glare.Width(),glare.Height());
           }
        }
      return;
     }
//--- If the object is in the state of waiting for fading in (in our case, waiting for a shift along the progress bar)
   if(glare.DisplayState()==CANV_ELEMENT_DISPLAY_STATE_WAITING_FADE_IN)
     {
      //--- If the waiting time has not yet passed, leave
      if(this.m_pause.Passed()<this.ShowDelay())
         return;
      //--- Set the state of the object being in the process of shifting along the progress bar and
      //---  set the process start countdown time
      glare.SetDisplayState(CANV_ELEMENT_DISPLAY_STATE_PROCESS_FADE_IN);
      this.m_pause.SetTimeBegin();
      return;
     }
//--- If the object is in the state of a shift along the progress bar
   if(glare.DisplayState()==CANV_ELEMENT_DISPLAY_STATE_PROCESS_FADE_IN)
     {
      //--- If the glare object X coordinate still has not gone beyond the right edge of the progress bar
      if(glare.CoordX()<=this.RightEdge())
        {
         //--- set the display flag and show the object
         if(!glare.Displayed())
            glare.SetDisplayed(true);
         if(!glare.IsVisible())
            glare.Show();
         //--- bring the highlight object to the foreground
         glare.BringToTop();
         //--- Shift the highlight by 16 pixels to the right
         if(glare.Move(glare.CoordX()+16,this.CoordY()))
           {
            //--- Set the relative coordinates of the highlight object and redraw it
            glare.SetCoordXRelative(glare.CoordX()-this.CoordX());
            glare.SetCoordYRelative(glare.CoordY()-this.CoordY());
            glare.Redraw(true);
           }
         return;
        }
      //--- Set the completion state of the shift along the progress bar
      glare.SetDisplayState(CANV_ELEMENT_DISPLAY_STATE_COMPLETED_FADE_IN);
     }
//--- If the object is in the state of completion of shifting along the progress bar
   if(glare.DisplayState()==CANV_ELEMENT_DISPLAY_STATE_COMPLETED_FADE_IN)
     {
      //--- set the object to its normal state (invisible),
      //--- hide the object and set its invisibility flag
      glare.SetDisplayState(CANV_ELEMENT_DISPLAY_STATE_NORMAL);
      glare.Hide();
      glare.SetDisplayed(false);
      return;
     }
  }
//+------------------------------------------------------------------+
该方法的逻辑在代码的注释中进行了完整讲述,并且与我在上一篇文章中为工具提示对象实现的计时器事件处理程序雷同。 这只是一个更精简的版本。 在工具提示对象中,我们等待对象开始出现(这里也是),然后对象淡入(这里它会沿进度条运动),然后等待它淡出和淡出(不是在当前情况下)。 这就是全部区别。 但是,为了令眩光出现,并沿着进度条运动,我们采用与工具提示对象中相同的 ENUM_CANV_ELEMENT_DISPLAY_STATE 枚举值:
//+-----------------------------------------------+
//| List of control display states                |
//+-----------------------------------------------+
enum ENUM_CANV_ELEMENT_DISPLAY_STATE
  {
   CANV_ELEMENT_DISPLAY_STATE_NORMAL,                 // Normal
   CANV_ELEMENT_DISPLAY_STATE_WAITING_FADE_IN,        // Wait for fading in
   CANV_ELEMENT_DISPLAY_STATE_PROCESS_FADE_IN,        // Fading in
   CANV_ELEMENT_DISPLAY_STATE_COMPLETED_FADE_IN,      // Fading in end
   CANV_ELEMENT_DISPLAY_STATE_WAITING_FADE_OUT,       // Wait for fading out
   CANV_ELEMENT_DISPLAY_STATE_PROCESS_FADE_OUT,       // Fading out
   CANV_ELEMENT_DISPLAY_STATE_COMPLETED_FADE_OUT,     // Fading out end
   CANV_ELEMENT_DISPLAY_STATE_COMPLETED,              // Complete processing
  };
//+------------------------------------------------------------------+
此枚举的常量通用性足够,可用于处理不同对象中的不同事件。 如有必要,可以将更多常量添加到此列表中,描述一些可能的未来事件。
一切都准备好,可以进行测试了。
测试
为了执行测试,我将沿用来自上一篇文章中的 EA,并将其保存在 \MQL5\Experts\TestDoEasy\Part127\,命名为 TestDoEasy127.mq5。
我们之前已在 SplitContainer 控件的第二个栏上创建了一个静态进度条对象,该栏位于 TabControl 的第一个选项卡上。 现在,我们需要获取指向 ProgressBar 对象的指针,并首先在循环中增加其大小,以便直观地查看这如何更改进度条的相对大小,直至设置到 ProgressBar 宽度的 50%。 然后,再次在循环中,调用 PerformStep 方法增加进度条的值。 为了令该方法起作用,请提前设置必要的参数:minimum = 0,maximum = 350,step = 1。 在两个循环完成后,我们得到一个指向眩光对象的指针,并为其设置显示参数。
为了实现所有这些,请在 OnInit() 处理程序的末尾,编写以下代码模块:
//--- Display and redraw all created panels
   for(int i=0;i<FORMS_TOTAL;i++)
     {
      //--- Get the panel object
      pnl=engine.GetWFPanel("WinForms Panel"+(string)i);
      if(pnl!=NULL)
        {
         //--- display and redraw the panel
         pnl.Show();
         pnl.Redraw(true);
         //--- Get the TabControl object from the panel
         CTabControl *tc=pnl.GetElementByType(GRAPH_ELEMENT_TYPE_WF_TAB_CONTROL,0);
         //--- Get the SplitContainer object from the first tab of the TabControl object
         CSplitContainer *sc=tc.GetTabElementByType(0,GRAPH_ELEMENT_TYPE_WF_SPLIT_CONTAINER,0);
         //--- Get the second panel from the SplitContainer object
         CSplitContainerPanel *scp=sc.GetPanel(1);
         //--- Get the ProgressBar object from the received panel
         CProgressBar *pb=scp.GetElementByType(GRAPH_ELEMENT_TYPE_WF_PROGRESS_BAR,0);
         //--- Wait for 1/10 of a second
         Sleep(100);
         //--- Get the width of the ProgressBar object
         int w=pb.Width();
         //--- In the loop, increase the width of the ProgressBar by 180 pixels with a delay of 1/50
         for(int n=0;n<180;n++)
           {
            Sleep(20);
            pb.Resize(w+n,pb.Height(),true);
           }
         //--- Set the values for PerformStep of the ProgressBar object
         pb.SetValuesForProcessing(0,350,1,0);
         //--- Reset ProgressBar to minimum
         pb.ResetProgressBar();
         //--- Wait for 1/5 second
         Sleep(200);
         //--- In the loop from the minimum to the maximum value of ProgressBar
         for(int n=0;n<=pb.Maximum();n++)
           {
            //--- call the method for increasing the progress bar by a given step with a wait of 1/5 second
            pb.PerformStep();
            Sleep(20);
           }
         //--- Get the glare object
         CGlareObj *gl=pb.GetElementByType(GRAPH_ELEMENT_TYPE_WF_GLARE_OBJ,0);
         if(gl!=NULL)
           {
            //--- Set the glare type - rectangle, opacity 40, color - white
            gl.SetStyleRectangle();
            gl.SetOpacity(40);
            gl.SetColor(clrWhite);
           }
        }
     }

//---
   return(INIT_SUCCEEDED);
  }
//+------------------------------------------------------------------+
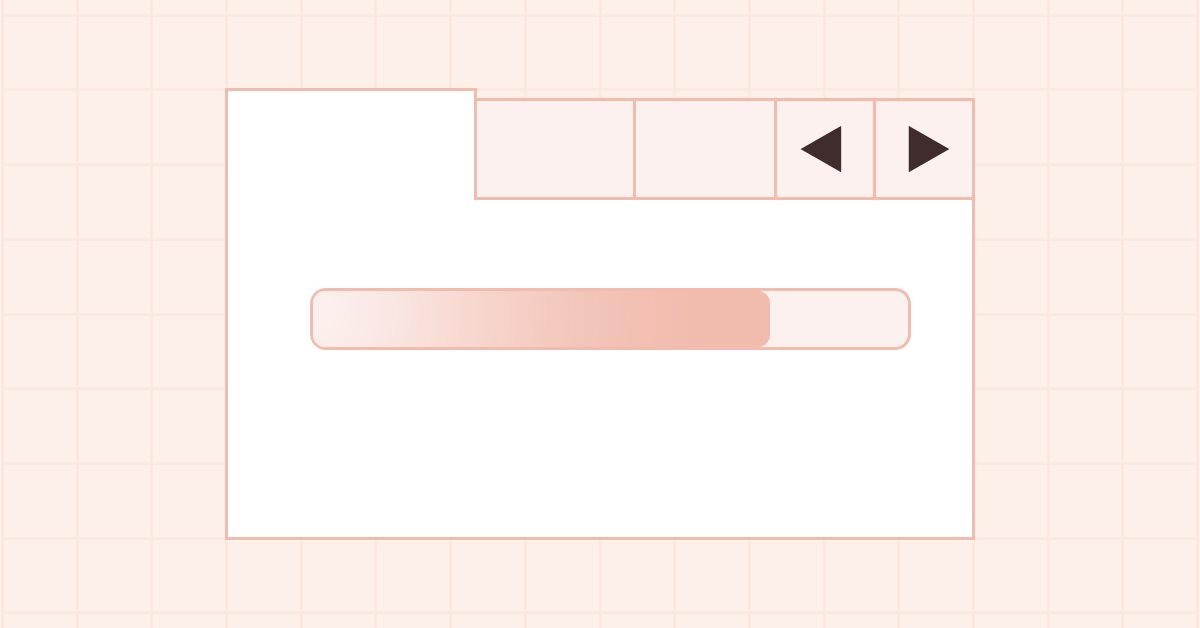
编译,并在图表上启动 EA:
在第一个循环中,我们看到进度条对象的宽度如何增加,进度条的宽度也成比例增加。 与此同时,Value 最初设置为 50,且会保留如此,因为进度条的宽度是以相对值设置的。
在第二个循环中,我们每次调用 PerformStep 方法,该方法每次将(相对)Value 值按增量步长值递增。 尽管有 350 个增量,但我们可以看到进度条一次增长超过 1 个像素。 这是因为所有数值都是相对的,并且按进度条宽度的百分比计算。 这是正确的,因为不可能每一步都只增加一个像素。 如果进度条宽度为 100 像素,且有 1000 步,则每像素对应 10 次增量步长。 计算相对值时会跳过它们。
当进度条增量循环完成时,我们看到每两秒钟就会有一道眩光掠过它。 对于演示这已足够了。 然而,对于正常外观来说这还不够。 首先,眩光应该沿着进度条运动,而不仅沿着已完成的进度条运动,其次,这个“效果”太简单了。 我会逐渐改善这一切。
工具提示对象的图标现在正常淡出。
下一步是什么?
在下一篇文章中,我将继续针对 WinForms 函数库对象和进度条对象工作。
*该系列的前几篇文章:
DoEasy. 控件 (第 20 部分): SplitContainer WinForms 对象
DoEasy. 控件 (第 21 部分): SplitContainer 控件 面板隔板
DoEasy. 控件 (第 22 部分): SplitContainer。 修改已创建对象的属性
DoEasy. 控件 (第 23 部分): 改进 TabControl 和 SplitContainer WinForms 对象
DoEasy. 控件 (第 24 部分): 提示(Hint)辅助 WinForms 对象
DoEasy. 控件 (第 25 部分): 工具提示(Tooltip) WinForms 对象
DoEasy. 控件 (第 26 部分): 完成 ToolTip(工具提示)WinForms 对象,并转移至 ProgressBar(进度条)开发
本文由MetaQuotes Ltd译自俄文
原文地址: https://www.mql5.com/ru/articles/11764
注意: MetaQuotes Ltd.将保留所有关于这些材料的权利。全部或部分复制或者转载这些材料将被禁止。
本文由网站的一位用户撰写,反映了他们的个人观点。MetaQuotes Ltd 不对所提供信息的准确性负责,也不对因使用所述解决方案、策略或建议而产生的任何后果负责。
