
MQL5のインタラクティブGUIで取引チャートを改善する(第3回):シンプルで移動可能な取引GUI
はじめに
こんにちは、「MQL5でインタラクティブGUIを使った取引チャートの改善」の第3回へようこそ。
新たな領域に踏み込む前に、第1回と第2回で取り上げたことを簡単に振り返りましょう。
1.第1回では、チャートイベントの概念を理解することから始め、そこから同じチャート上に2つのシンプルな移動可能なダッシュボードを作成しました。
2.第2回では、さらに一歩踏み込みました。.mqhファイル内のクラスを利用して、コードをより効率的で汎用性のあるものにし、本格的なEA/インジケーターと統合できるようにしました。
そして今、第3回の準備が整いました。この部分では、ダッシュボードにGUIを統合することで、ダッシュボードを強化することに焦点を当てます。GUIがなければ、ダッシュボードは本来の目的を果たせないからです。
この記事で取り上げる内容を簡単に紹介しましょう。
- 何を作成しているのか
- シンプルな静的ダッシュボードの作成
- 静的ダッシュボードをその中のすべての要素とともに動かすためのアプローチについての説明
- 静的なダッシュボードを移動可能にするための、説明されたアプローチの使用
- 結論
何を作成しているのか
私たちはGUIを備えた移動可能なダッシュボードを作成することを目指しており、そのために何を作成するかを決める必要があります。シンプルなEA、具体的にはシンプル取引EAをベースとして選びました。
まず、この静的ダッシュボード、つまりシンプル取引EAを構築する必要があります。本格的なEAを作成するので、効率的に行うことが重要です。つまり、単にファイルを開いてそこにすべてのコードを書き込むことはできません。その代わりに、よく整理された複数の.mqhファイルにわたって最低限のコードを書くことができるような、よく考えられた計画が必要です。最も重要なことは、移動可能なダッシュボードに必要な静的GUIを作成するために、同じコードを繰り返し複製することを避けなければならないということです。
次が、今回作成する基本的な静的ダッシュボードです。
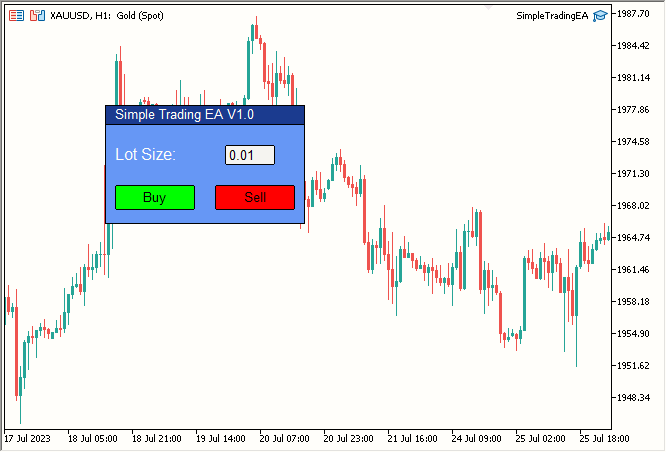
図1:シンプルな静的ダッシュボード
内容は次のとおりです。
| 要素 | 説明 |
|---|---|
| Label 1 | タイトルテキスト(Simple Trading EA V1.0) |
| Label 2 | ロットサイズ |
| Edit 1 | 上の画像にある、0.01と書かれた白の編集ボックス |
| Button 1 | 緑のBuyボタン |
| Button 2 | 赤のSellボタン |
| Rectangle Label 1 | タイトルバー(紺色のバーに「Simple Trading EA V1.0」) |
| Rectangle Label 2 | ダッシュボードのメインエリア、水色のダッシュボード |
ダッシュボードはこれら7つのコンポーネントの組み合わせで構成されています。私に言わせれば、この7つの要素を組み合わせただけで、かなり見栄えのするダッシュボードができたと言えます。
では、このダッシュボードのコーディングを始めましょう。
シンプルな静的ダッシュボードの作成
どんなクラスを書くのか考えてみましょう。
Labelが2つ、Buttonが2つ、Editが1つ、Rectangle Labelが2つ必要です。それぞれに1つずつ、4つの.mqhファイルを作ってみましょう。次がプロジェクトのフォルダ構成です。
- Simple Trading EA/
- SimpleTradingEA.mq5
- Button.mqh
- Label.mqh
- Edit.mqh
- RectangleLabel.mqh
これらのファイルにコードを書いていきます。では、最初のファイル「SimpleTradingEA.mq5」を作成しましょう。これはメインのEAファイルです。
OnTick()関数はこのプロジェクトでは必要ないので削除しました。現時点でのファイルはこんな感じです。
//+------------------------------------------------------------------+
//| Expert initialization function                                   |
//+------------------------------------------------------------------+
int OnInit()
   {
    return(INIT_SUCCEEDED);
   }

//+------------------------------------------------------------------+
//| Expert deinitialization function                                 |
//+------------------------------------------------------------------+
void OnDeinit(const int reason)
   {
   }
//+------------------------------------------------------------------+
今から計画を立てましょう。静的ダッシュボードを以下の順序で構築します。
- タイトルバー
- ダッシュボード本体
- タイトルテキスト
- 「Lot Size:」 テキスト
- 編集ボックス
- 売買ボタン
- 必要な仕上げ
これは合理的な順序のように思えます。始めましょう。
- タイトルバー
タイトルバーを作るには、Rectangle Labelオブジェクトを使う必要があります。Rectangle Labelオブジェクトに関連するすべてを処理するクラスを作りましょう。.mqhファイルを作成します。シンプルにするため、ファイル名を「RectangleLabel.mqh」とし、クラス名を「RectangleLabel」とします。
これが作成した空のクラスです。
//+------------------------------------------------------------------+
//| Class Definition: RectangleLabel                                 |
//+------------------------------------------------------------------+
class RectangleLabel
   {
public:
                     RectangleLabel(void);
                    ~RectangleLabel(void);
   };

//+------------------------------------------------------------------+
//| Constructor: RectangleLabel                                      |
//+------------------------------------------------------------------+
RectangleLabel::RectangleLabel(void)
   {
   }

//+------------------------------------------------------------------+
//| Destructor: RectangleLabel                                       |
//+------------------------------------------------------------------+
RectangleLabel::~RectangleLabel(void)
   {
   }
//+------------------------------------------------------------------+
いくつかの関数が必要になるでしょう。
- Create -> 長方形ラベルを作成する
- Destroy -> ダッシュボードを破棄する
- SetBorderType -> 境界タイプを設定する
- SetBGColor -> 背景色を設定する
上記の関数をメンバー関数リストで宣言してみます。クラスは次のようになります。
//+------------------------------------------------------------------+
//| Class Definition: RectangleLabel                                 |
//+------------------------------------------------------------------+
class RectangleLabel
   {
public:
                     RectangleLabel(void); // Constructor
                    ~RectangleLabel(void); // Destructor
    void             Create(string name, int xDis, int yDis, int xSize, int ySize); //Creates a Rectangle Label with the given parameters
    void             Destroy(); // Destroys the Rectangle Label
    void             SetBorderType(ENUM_BORDER_TYPE borderType); // Sets the border type of the Rectangle Label
    void             SetBGColor(color col); // Sets the background color of the Rectangle Label
   };
//+------------------------------------------------------------------+
基本的な作成関数を書きましょう。
//+------------------------------------------------------------------+
//| RectangleLabel Class - Create Method                             |
//+------------------------------------------------------------------+
void RectangleLabel::Create(string name, int xDis, int yDis, int xSize, int ySize)
   {
    ObjectCreate(0, name, OBJ_RECTANGLE_LABEL, 0, 0, 0); // Create the Rectangle Label object
    ObjectSetInteger(0, name, OBJPROP_XDISTANCE, xDis); // Set the X-axis distance
    ObjectSetInteger(0, name, OBJPROP_YDISTANCE, yDis); // Set the Y-axis distance
    ObjectSetInteger(0, name, OBJPROP_XSIZE, xSize); // Set the X size
    ObjectSetInteger(0, name, OBJPROP_YSIZE, ySize); // Set the Y size
   }
//+------------------------------------------------------------------+
Destroy、SetBorderType、SetBGColorは1行で済むので、同じ行で作成します。次が最新のクラスです。
//+------------------------------------------------------------------+
//| Class Definition for the Rectangle Label                         |
//+------------------------------------------------------------------+
class RectangleLabel
   {
private:
    string           _name; // Name of the rectangle label
public:
                     RectangleLabel(void); // Constructor
                    ~RectangleLabel(void); // Destructor

    void             Create(string name, int xDis, int yDis, int xSize, int ySize); // Method to create a rectangle label with given dimensions

    void             Destroy() {ObjectDelete(0, _name);} // Method to delete the object using the object's name

    void             SetBorderType(ENUM_BORDER_TYPE borderType) {ObjectSetInteger(0, _name, OBJPROP_BORDER_TYPE, borderType);} // Method to set the border type for the rectangle label

    void             SetBGColor(color col) {ObjectSetInteger(0, _name, OBJPROP_BGCOLOR, col);} // Method to set the background color for the rectangle label
   };
//+------------------------------------------------------------------+
また、ObjectDeleteには名前が必要なので、「_name」というprivate変数を追加し、Create関数で「_name」を設定すると、次のようになります。
//+------------------------------------------------------------------+
//| Rectangle Label Creation Method                                  |
//+------------------------------------------------------------------+
void RectangleLabel::Create(string name, int xDis, int yDis, int xSize, int ySize)
   {
    ObjectCreate(0, name, OBJ_RECTANGLE_LABEL, 0, 0, 0); // Create rectangle label object
    ObjectSetInteger(0, name, OBJPROP_XDISTANCE, xDis); // Set X distance
    ObjectSetInteger(0, name, OBJPROP_YDISTANCE, yDis); // Set Y distance
    ObjectSetInteger(0, name, OBJPROP_XSIZE, xSize); // Set X size
    ObjectSetInteger(0, name, OBJPROP_YSIZE, ySize); // Set Y size
    _name = name; // Assign the name to the member variable
   }
//+------------------------------------------------------------------+
最後の行に「_name = name;」を追加し、変数_nameにRectangle Label作成時の名前を設定しました。
移動可能にするコードはどこにあるのか疑問に思われているなら、物事をシンプルに保つために、今のところその点はシンプルな静的ダッシュボードを作るまでは無視しています。
次に、このクラスをメインファイル(SimpleTradingEA.mq5)で使って結果を見てみましょう。
まず、#includeを使用して RectangleLabel.mqhファイルをインクルードし、TitleBarという名前のクラスのインスタンスを作成しました。RectangleLabelクラスのこのインスタンスでダッシュボードのタイトルバーを作成しているため、これをメインダッシュボード本体に再度使用します。そしてこのインスタンスを使って、チャート上に(100,100)座標で200x20のRectangle Labelを作成しました。それから、境界をフラット(BORDER_FLAT)に設定します。私に言わせれば、そのほうが良いように思えます。が、好みに応じて変更してください。そして、ChartRedraw(0)関数を使ってチャートを再描画します。こうすることで、ダッシュボードがチャート上に即座に作成されます。さもなければ、次の価格更新、つまりティックを待つかもしれません。
これはすべてOnInit()内です。つまり、ダッシュボードを作成してチャートに表示するために一度だけ実行します。
最後に、OnDeinit()で、つまり、EAがチャートから削除されたとき、作成したDestroy()関数を使って、ダッシュボードを破棄します。
結果:
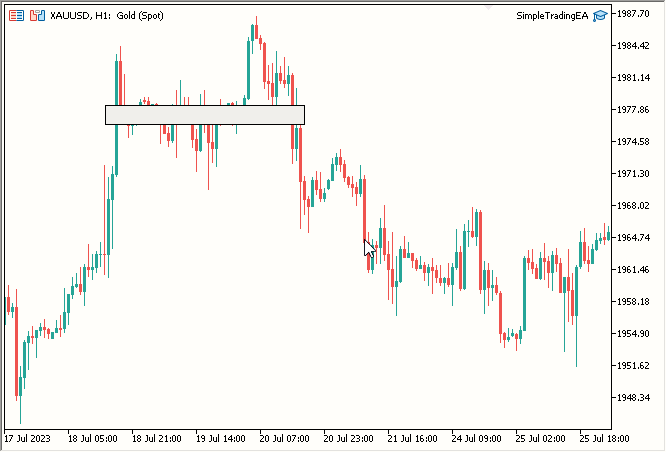
図2:タイトルバー
- ダッシュボード本体
再びRectangleLabelクラスを使って本体を作ってみましょう。簡単です。MainDashboardBodyという名前を付けて、OnInit()にタイトルバーを作成した後で以下の簡単なコードを追加し、最後にOnDeinit()にMainDashboardBody.Destroy()を追加するだけです。
// Creating a rectangle label called "MainDashboardBody" with specific dimensions
MainDashboardBody.Create("MainDashboardBody", 100, 119, 200, 100);
// Setting the border type of the "MainDashboardBody" rectangle label to be flat
MainDashboardBody.SetBorderType(BORDER_FLAT);
その後、コードは次のようになります。
#include "RectangleLabel.mqh" // Including the RectangleLabel class definition
RectangleLabel TitleBar; // Declaration of a TitleBar object
RectangleLabel MainDashboardBody; // Declaration of a MainDashboardBody object

//+------------------------------------------------------------------+
//| Expert initialization function                                   |
//+------------------------------------------------------------------+
int OnInit()
   {
    TitleBar.Create("TitleBar", 100, 100, 200, 20); // Creating the TitleBar with specified dimensions
    TitleBar.SetBorderType(BORDER_FLAT); // Setting the border type of TitleBar to be flat

    MainDashboardBody.Create("MainDashboardBody", 100, 119, 200, 100); // Creating the MainDashboardBody with specified dimensions
    MainDashboardBody.SetBorderType(BORDER_FLAT); // Setting the border type of MainDashboardBody to be flat

    ChartRedraw(0); // Redrawing the chart to reflect changes
    return(INIT_SUCCEEDED); // Indicating successful initialization
   }

//+------------------------------------------------------------------+
//| Expert deinitialization function                                 |
//+------------------------------------------------------------------+
void OnDeinit(const int reason)
   {
    MainDashboardBody.Destroy(); // Destroying the MainDashboardBody object
    TitleBar.Destroy(); // Destroying the TitleBar object
   }
//+------------------------------------------------------------------+
これで結果はかなり良くなります。
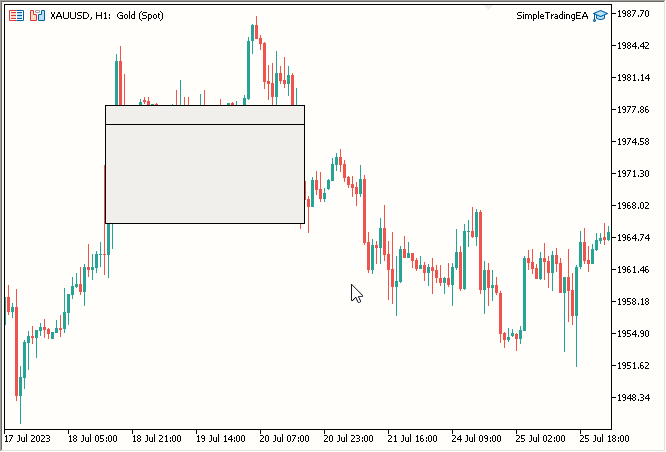
図3:ダッシュボード本体の追加
- タイトルテキスト
タイトルテキストを追加するには、RectangleLabel に似たクラスを作成する必要がありますが、テキストを追加できるようにラベル専用のクラスを作成する必要があります。以下はLabelという新しいクラスのコードです。
//+------------------------------------------------------------------+
//| Label class definition                                           |
//+------------------------------------------------------------------+
class Label
   {
private:
    string           _name; // Name of the label
public:
                     Label(void); // Constructor
                    ~Label(void); // Destructor

    void             Create(string name, int xDis, int yDis); // Method to create a label
    void             Destroy() {ObjectDelete(0, _name);} // Method to destroy a label
    void             SetTextColor(color col) {ObjectSetInteger(0, _name, OBJPROP_COLOR, col);} // Method to set the text color
    void             SetText(string text) {ObjectSetString(0, _name, OBJPROP_TEXT, text);} // Method to set the text content
    string           GetText() {return ObjectGetString(0, _name, OBJPROP_TEXT);} // Method to retrieve the text content
    void             SetFontSize(int fontSize) {ObjectSetInteger(0, _name, OBJPROP_FONTSIZE, fontSize);} // Method to set the font size
    void             SetFont(string fontName) {ObjectSetString(0, _name, OBJPROP_FONT, fontName);} // Method to set the font name
   };

//+------------------------------------------------------------------+
//| Constructor                                                      |
//+------------------------------------------------------------------+
Label::Label(void)
   {

   }

//+------------------------------------------------------------------+
//| Destructor                                                       |
//+------------------------------------------------------------------+
Label::~Label(void)
   {

   }

//+------------------------------------------------------------------+
//| Method to create a label object                                  |
//+------------------------------------------------------------------+
void Label::Create(string name, int xDis, int yDis)
   {
    // Code to create label object, set its position, and assign its name
    ObjectCreate(0, name, OBJ_LABEL, 0, 0, 0);
    ObjectSetInteger(0, name, OBJPROP_XDISTANCE, xDis);
    ObjectSetInteger(0, name, OBJPROP_YDISTANCE, yDis);
    _name = name;
   }
//+------------------------------------------------------------------+
- 新しい.mqhファイル「Label.mqh」にクラス「Label」を作成しました。
- 名前を非公開で格納するための、private変数「name」を宣言しました。
- 3つのパラメータname、xDis、yDisを持つCreate関数を作成しました。Labelオブジェクトにはサイズは関係ありません。文字サイズを変更するには、フォントサイズを変更します。
- Labelを破棄するためのDestroy関数を作成しました。
- テキストの色を設定するためのSetTextColor関数を作成しました。
- Labelオブジェクトのテキストを設定する関数を作成しました。
- Labelオブジェクトのテキストを取得するためのGetText関数を作成しました。
- フォントサイズを設定するためのSetFontSize関数を作成しました。
- フォントを設定するために、文字列でフォントの名前を必要とする関数を作成しました。もちろんフォントは、オペレーティングシステムで利用可能/インストールされている必要があります。
Labelについては以上です。次に、これを使ってチャートに2つのLabelオブジェクトを作成してみましょう。
SimpleTradingEA.mq5は次のようになります。
#include "RectangleLabel.mqh" // Including the RectangleLabel class definition
RectangleLabel TitleBar; // Declaration of a TitleBar object
RectangleLabel MainDashboardBody; // Declaration of a MainDashboardBody object

#include "Label.mqh" // Including the Label class definition
Label TitleText; // Declaration of a Label object

//+------------------------------------------------------------------+
//| Expert initialization function                                   |
//+------------------------------------------------------------------+
int OnInit()
   {
    TitleBar.Create("TitleBar", 100, 100, 200, 20); // Creating the TitleBar with specified dimensions
    TitleBar.SetBorderType(BORDER_FLAT); // Setting the border type of TitleBar to be flat

    MainDashboardBody.Create("MainDashboardBody", 100, 119, 200, 100); // Creating the MainDashboardBody with specified dimensions
    MainDashboardBody.SetBorderType(BORDER_FLAT); // Setting the border type of MainDashboardBody to be flat

    TitleText.Create("TitleText", 110, 101); // Creating the TitleText at (110,101)
    TitleText.SetText("Simple Trading EA V1.0"); // Setting its text to "Simple Trading EA V1.0"
    TitleText.SetFontSize(10); // Setting its font size to 10
    TitleText.SetTextColor(clrBlack); // Setting its text color to clrBlack

    ChartRedraw(0); // Redrawing the chart to reflect changes
    return(INIT_SUCCEEDED); // Indicating successful initialization
   }

//+------------------------------------------------------------------+
//| Expert deinitialization function                                 |
//+------------------------------------------------------------------+
void OnDeinit(const int reason)
   {
    MainDashboardBody.Destroy(); // Destroying the MainDashboardBody object
    TitleBar.Destroy(); // Destroying the TitleBar object
    TitleText.Destroy(); // Destroying the TitleText object
   }
//+------------------------------------------------------------------+
- Labelのインスタンス「TitleText」を作成しました。
- TitleText.Createを使用してTitleTextを作成しました。
- TitleText.SetTextを使用して、TitleTextを「Simple Trading EA V1.0」に設定しました。
- TitleText.SetFontSizeを使用してFontSizeを10に設定しました。
- TitleText.SetTextColorを使用して色を黒に設定しました。
- OnDeinitでTitleText.Destroyを使用してTitleTextオブジェクトを破棄しました。
結果:
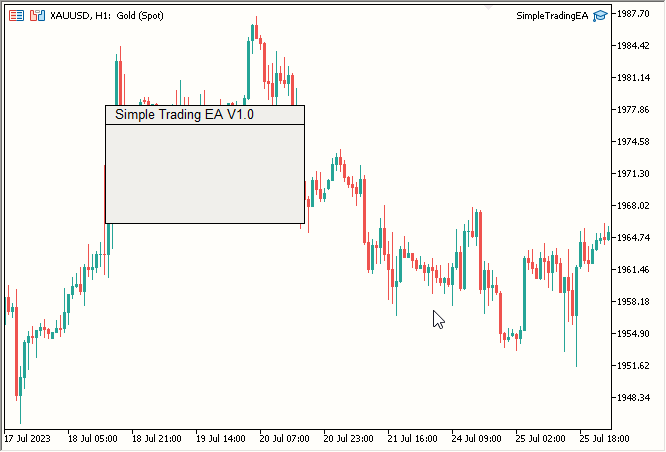
図4:追加されたタイトルテキスト
- 「Lot Size:」 テキスト
「Lot Size:」のテキストについては、タイトルテキストと同じような手順を踏みます。最終的なコードは以下の通りです。
#include "RectangleLabel.mqh" // Including the RectangleLabel class definition
RectangleLabel TitleBar; // Declaration of a TitleBar object
RectangleLabel MainDashboardBody; // Declaration of a MainDashboardBody object

#include "Label.mqh" // Including the Label class definition
Label TitleText; // Declaration of a Label object
Label LotSizeText; // Declaration of a LotSizeText object

//+------------------------------------------------------------------+
//| Expert initialization function                                   |
//+------------------------------------------------------------------+
int OnInit()
   {
    TitleBar.Create("TitleBar", 100, 100, 200, 20); // Creating the TitleBar with specified dimensions
    TitleBar.SetBorderType(BORDER_FLAT); // Setting the border type of TitleBar to be flat

    MainDashboardBody.Create("MainDashboardBody", 100, 119, 200, 100); // Creating the MainDashboardBody with specified dimensions
    MainDashboardBody.SetBorderType(BORDER_FLAT); // Setting the border type of MainDashboardBody to be flat

    TitleText.Create("TitleText", 110, 101); // Creating the TitleText at (110,101)
    TitleText.SetText("Simple Trading EA V1.0"); // Setting its text to "Simple Trading EA V1.0"
    TitleText.SetFontSize(10); // Setting its font size to 10
    TitleText.SetTextColor(clrBlack); // Setting its text color to clrBlack

    LotSizeText.Create("LotSizeText", 110, 140); // Creating the LotSizeText at (110,140)
    LotSizeText.SetText("Lot Size:"); // Setting its text to "Lot Size:"
    LotSizeText.SetFontSize(12); // Setting its font size to 12
    LotSizeText.SetTextColor(clrBlack); // Setting its text color to clrBlack

    ChartRedraw(0); // Redrawing the chart to reflect changes
    return(INIT_SUCCEEDED); // Indicating successful initialization
   }

//+------------------------------------------------------------------+
//| Expert deinitialization function                                 |
//+------------------------------------------------------------------+
void OnDeinit(const int reason)
   {
    MainDashboardBody.Destroy(); // Destroying the MainDashboardBody object
    TitleBar.Destroy(); // Destroying the TitleBar object
    TitleText.Destroy(); // Destroying the TitleText object
    LotSizeText.Destroy(); // Destroying the LotSizeText object
   }
//+------------------------------------------------------------------+
- Labelのインスタンス「LotSizeText」を作成しました。
- LotSizeText.Createを使用してロットサイズテキストを作成しました。
- LotSizeText.SetTextを使用して、テキストを「Lot Size:」に設定しました。
- LotSizeText.SetFontSizeを使用してフォントサイズを12に設定しました。
- LotSizeText.SetTextColorを使用して色を黒に設定しました。
- OnDeinitでLabelオブジェクトを破棄するために LotSizeText.Destroyを使用しました。
- 編集ボックス
編集ボックスには、Labelクラスとよく似たクラスを作ります。以下は、Editという名前の新しいクラスのコードです。
//+------------------------------------------------------------------+
//| Edit class definition                                            |
//+------------------------------------------------------------------+
class Edit
   {
private:
    string           _name; // Name of the edit control
public:
                     Edit(void); // Constructor
                    ~Edit(void); // Destructor

    void             Create(string name, int xDis, int yDis, int xSize, int ySize); // Method to create an edit control
    void             Destroy() {ObjectDelete(0, _name);} // Method to destroy an edit control
    void             SetBorderColor(color col) {ObjectSetInteger(0, _name, OBJPROP_BORDER_COLOR, col);} // Method to set the border color
    void             SetBGColor(color col) {ObjectSetInteger(0, _name, OBJPROP_BGCOLOR, col);} // Method to set the background color
    void             SetTextColor(color col) {ObjectSetInteger(0, _name, OBJPROP_COLOR, col);} // Method to set the text color
    void             SetText(string text) {ObjectSetString(0, _name, OBJPROP_TEXT, text);} // Method to set the text content
    string           GetText() {return ObjectGetString(0, _name, OBJPROP_TEXT);} // Method to retrieve the text content
   };

//+------------------------------------------------------------------+
//| Constructor                                                      |
//+------------------------------------------------------------------+
Edit::Edit(void)
   {

   }

//+------------------------------------------------------------------+
//| Destructor                                                       |
//+------------------------------------------------------------------+
Edit::~Edit(void)
   {

   }

//+------------------------------------------------------------------+
//| Method to create an edit control object                          |
//+------------------------------------------------------------------+
void Edit::Create(string name, int xDis, int yDis, int xSize, int ySize)
   {
    // Code to create edit control object, set its position, size, and assign its name
    ObjectCreate(0, name, OBJ_EDIT, 0, 0, 0);
    ObjectSetInteger(0, name, OBJPROP_XDISTANCE, xDis);
    ObjectSetInteger(0, name, OBJPROP_YDISTANCE, yDis);
    ObjectSetInteger(0, name, OBJPROP_XSIZE, xSize);
    ObjectSetInteger(0, name, OBJPROP_YSIZE, ySize);
    _name = name;
   }
//+------------------------------------------------------------------+
- Edit.mqhという名前の新しい.mqhファイルにEditクラスを作成しました。
- 名前を非公開で格納するための、private変数「name」を宣言しました。
- Name、xDis、yDis、xSize、ySizeの5つのパラメータを持つ関数Createを作成しました。
- Editオブジェクトを破棄するためのDestroy関数を作成しました。
- 境界色を設定するためのSetBorderColor関数を作成しました。
- 背景色をWhiteSmokeに設定するためのSetBGColor関数を作成しました。
- エディットボックス内のテキストの色を設定するためのSetTextColor関数を作成しました。
- テキストを設定するためのSetText関数を作成しました。
- テキストを取得するためのGetText関数を作成しました。
以下のように、SimpleTradingEAでEditクラスを使えるようになりました。
#include "RectangleLabel.mqh" // Including the RectangleLabel class definition
RectangleLabel TitleBar; // Declaration of a TitleBar object
RectangleLabel MainDashboardBody; // Declaration of a MainDashboardBody object

#include "Label.mqh" // Including the Label class definition
Label TitleText; // Declaration of a Label object
Label LotSizeText; // Declaration of a LotSizeText object

#include "Edit.mqh" // Including the Edit class definition
Edit LotSize; // Declaration of a LotSize object

//+------------------------------------------------------------------+
//| Expert initialization function                                   |
//+------------------------------------------------------------------+
int OnInit()
   {
    TitleBar.Create("TitleBar", 100, 100, 200, 20); // Creating the TitleBar with specified dimensions
    TitleBar.SetBorderType(BORDER_FLAT); // Setting the border type of TitleBar to be flat

    MainDashboardBody.Create("MainDashboardBody", 100, 119, 200, 100); // Creating the MainDashboardBody with specified dimensions
    MainDashboardBody.SetBorderType(BORDER_FLAT); // Setting the border type of MainDashboardBody to be flat

    TitleText.Create("TitleText", 110, 101); // Creating the TitleText at (110,101)
    TitleText.SetText("Simple Trading EA V1.0"); // Setting its text to "Simple Trading EA V1.0"
    TitleText.SetFontSize(10); // Setting its font size to 10
    TitleText.SetTextColor(clrBlack); // Setting its text color to clrBlack

    LotSizeText.Create("LotSizeText", 110, 140); // Creating the LotSizeText at (110,140)
    LotSizeText.SetText("Lot Size:"); // Setting its text to "Lot Size:"
    LotSizeText.SetFontSize(12); // Setting its font size to 12
    LotSizeText.SetTextColor(clrBlack); // Setting its text color to clrBlack

    LotSize.Create("LotSize", 220, 140, 50, 20); // Creating the LotSize with specified dimensions
    LotSize.SetBorderColor(clrBlack); // Setting its Border Color to clrBlack
    LotSize.SetBGColor(clrWhiteSmoke); // Setting its BG Color to clrWhiteSmoke
    LotSize.SetText("0.01"); // Setting its text to 0.01
    LotSize.SetTextColor(clrBlack); // Setting its text color to clrBlack

    ChartRedraw(0); // Redrawing the chart to reflect changes
    return(INIT_SUCCEEDED); // Indicating successful initialization
   }

//+------------------------------------------------------------------+
//| Expert deinitialization function                                 |
//+------------------------------------------------------------------+
void OnDeinit(const int reason)
   {
    MainDashboardBody.Destroy(); // Destroying the MainDashboardBody object
    TitleBar.Destroy(); // Destroying the TitleBar object
    TitleText.Destroy(); // Destroying the TitleText object
    LotSizeText.Destroy(); // Destroying the LotSizeText object
    LotSize.Destroy(); // Destroying the LotSize object
   }
//+------------------------------------------------------------------+
- Editのインスタンス「LotSize」を作成しました。
- LotSize.Createを使用してEditオブジェクトを作成しました。
- LotSize.SetBorderColorを使用して境界色を黒に設定しました。
- LotSize.SetBGColorを使用して背景色をWhiteSmokeに設定しました。
- LotSize.SetTextを使用して、ロットサイズを表すテキストを0.01に設定しました。
- LotSize.SetTextColorを使用して、編集ボックス内のテキスト色を黒に設定しました。
- OnDeinitでLotSize.Destroyを使用してEditオブジェクトを破棄しました。
- 売買ボタン
最後にボタンです。他のクラスと同じように、ボタン用のクラスも作ってみましょう。
//+------------------------------------------------------------------+
//| Button class definition                                          |
//+------------------------------------------------------------------+
class Button
   {
private:
    string           _name; // Name of the button control

public:
                     Button(void); // Constructor
                    ~Button(void); // Destructor

    void             Create(string name, int xDis, int yDis, int xSize, int ySize); // Method to create a button control
    void             SetBorderColor(color col) {ObjectSetInteger(0, _name, OBJPROP_BORDER_COLOR, col);} // Method to set the border color
    void             SetBGColor(color col) {ObjectSetInteger(0, _name, OBJPROP_BGCOLOR, col);} // Method to set the background color
    void             SetText(string text) {ObjectSetString(0, _name, OBJPROP_TEXT, text);} // Method to set the text content
    void             Destroy() {ObjectDelete(0, _name);} // Method to destroy a button control
   };

//+------------------------------------------------------------------+
//| Constructor                                                      |
//+------------------------------------------------------------------+
Button::Button(void)
   {

   }

//+------------------------------------------------------------------+
//| Destructor                                                       |
//+------------------------------------------------------------------+
Button::~Button(void)
   {

   }

//+------------------------------------------------------------------+
//| Method to create a button control object                         |
//+------------------------------------------------------------------+
void Button::Create(string name, int xDis = 0, int yDis = 0, int xSize = 0, int ySize = 0)
   {
    // Code to create button control object, set its position, size, and assign its name
    ObjectCreate(0, name, OBJ_BUTTON, 0, 0, 0);
    ObjectSetInteger(0, name, OBJPROP_XDISTANCE, xDis);
    ObjectSetInteger(0, name, OBJPROP_YDISTANCE, yDis);
    ObjectSetInteger(0, name, OBJPROP_XSIZE, xSize);
    ObjectSetInteger(0, name, OBJPROP_YSIZE, ySize);
    _name = name;
   }
//+------------------------------------------------------------------+
Button.mqhという新しい.mqhファイルに、Buttonクラスを作成しました。名前を非公開で格納するためのprivate変数「name」を宣言しました。また、以下のような関数も作成しました。
- Name、xDis、yDis、xSize、ySizeの5つのパラメータを持つ関数Create
- Buttonオブジェクトを破棄するためのDestroy関数
- 境界色を設定するためのSetBorderColor関数
- 背景色をWhiteSmokeに設定するためのSetBGColor関数
- テキストを設定するためのSetText関数
ボタンを追加した後のメインのSimpleTradingEA.mq5ファイルを見てみましょう。RectangleLabel、Label、Edit、BuyButton、SellButtonのインスタンスが含まれていることがわかります。
#include "RectangleLabel.mqh" // Including the RectangleLabel class definition
RectangleLabel TitleBar; // Declaration of a TitleBar object
RectangleLabel MainDashboardBody; // Declaration of a MainDashboardBody object

#include "Label.mqh" // Including the Label class definition
Label TitleText; // Declaration of a Label object
Label LotSizeText; // Declaration of a LotSizeText object

#include "Edit.mqh" // Including the Edit class definition
Edit LotSize; // Declaration of a LotSize object

#include "Button.mqh" // Including the Button class definition
Button BuyButton; // Declaration of a BuyButton object
Button SellButton; // Declaration of a SellButton object

//+------------------------------------------------------------------+
//| Expert initialization function                                   |
//+------------------------------------------------------------------+
int OnInit()
   {
    TitleBar.Create("TitleBar", 100, 100, 200, 20); // Creating the TitleBar with specified dimensions
    TitleBar.SetBorderType(BORDER_FLAT); // Setting the border type of TitleBar to be flat

    MainDashboardBody.Create("MainDashboardBody", 100, 119, 200, 100); // Creating the MainDashboardBody with specified dimensions
    MainDashboardBody.SetBorderType(BORDER_FLAT); // Setting the border type of MainDashboardBody to be flat

    TitleText.Create("TitleText", 110, 101); // Creating the TitleText at (110,101)
    TitleText.SetText("Simple Trading EA V1.0"); // Setting its text to "Simple Trading EA V1.0"
    TitleText.SetFontSize(10); // Setting its font size to 10
    TitleText.SetTextColor(clrBlack); // Setting its text color to clrBlack

    LotSizeText.Create("LotSizeText", 110, 140); // Creating the LotSizeText at (110,140)
    LotSizeText.SetText("Lot Size:"); // Setting its text to "Lot Size:"
    LotSizeText.SetFontSize(12); // Setting its font size to 12
    LotSizeText.SetTextColor(clrBlack); // Setting its text color to clrBlack

    LotSize.Create("LotSize", 220, 140, 50, 20); // Creating the LotSize with specified dimensions
    LotSize.SetBorderColor(clrBlack); // Setting its Border Color to clrBlack
    LotSize.SetBGColor(clrWhiteSmoke); // Setting its BG Color to clrWhiteSmoke
    LotSize.SetText("0.01"); // Setting its text to 0.01
    LotSize.SetTextColor(clrBlack); // Setting its text color to clrBlack

    BuyButton.Create("BuyButton", 110, 180, 80, 25); // Creating the BuyButton with specified dimensions
    BuyButton.SetBorderColor(clrBlack); // Setting its Border Color to clrBlack
    BuyButton.SetText("Buy"); // Setting its text to "Buy"
    BuyButton.SetBGColor(clrLime); // Setting its BG Color to clrLime

    SellButton.Create("SellButton", 210, 180, 80, 25); // Creating the SellButton with specified dimensions
    SellButton.SetBorderColor(clrBlack); // Setting its Border Color to clrBlack
    SellButton.SetText("Sell"); // Setting its text to "Sell"
    SellButton.SetBGColor(clrRed); // Setting its BG Color to clrRed

    ChartRedraw(0); // Redrawing the chart to reflect changes
    return(INIT_SUCCEEDED); // Indicating successful initialization
   }

//+------------------------------------------------------------------+
//| Expert deinitialization function                                 |
//+------------------------------------------------------------------+
void OnDeinit(const int reason)
   {
    MainDashboardBody.Destroy(); // Destroying the MainDashboardBody object
    TitleBar.Destroy(); // Destroying the TitleBar object
    TitleText.Destroy(); // Destroying the TitleText object
    LotSizeText.Destroy(); // Destroying the LotSizeText object
    LotSize.Destroy(); // Destroying the LotSize object
    BuyButton.Destroy(); // Destroying the BuyButton object
    SellButton.Destroy(); // Destroying the SellButton object
   }
//+------------------------------------------------------------------+
- Buttonのインスタンス「BuyButton」を作成しました。
- BuyButton.Create関数を使用してEditオブジェクトを作成しました。
- BuyButton.SetBorderColorを使用して境界色を黒に設定しました。
- BuyButton.SetBGColorを使って背景色をライムに設定しました。
- BuyButton.SetTextを使用してテキストBuyを設定しました。
- OnDeinitでBuyButton.Destroyを使用してButtonオブジェクトを破棄しました。
次はSellボタンです。
- Buttonのインスタンス「SellButton」を作成しました。
- SellButton.Create関数を使用してButtonオブジェクトを作成しました。
- SellButton.SetBorderColorを使用して、境界色を黒に設定しました。
- SellButton.SetBGColorを使用して背景色を赤に設定しました。
- SellButton.SetTextを使用してテキストをSellに設定しました。
- OnDeinitでSellButton.Destroyを使用してButtonオブジェクトを破棄しました。
結果:
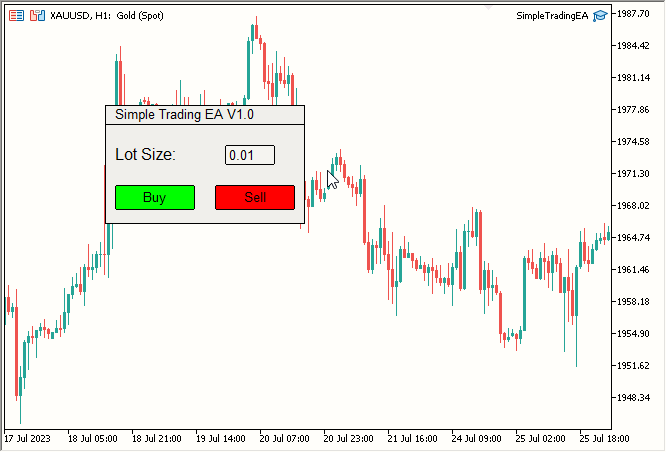
図6:売買ボタンの追加 - 仕上げ
- タイトルバーの色をダークブルーに変更
- ダッシュボード本体の色をライトブルーに変更
- タイトルの文字色を黒から白に変更
- ロットサイズの文字色を黒から白に変更
- 売買機能を追加
-
色の修正:
- TitleBar.SetBGColor(C'27,59,146')でタイトルバーの背景色を紺色に変更
- MainDashboardBody.SetBGColor(C'102,152,250')でダッシュボード本体の色を水色に更新
- TitleText.SetTextColor(clrWhite) でタイトルテキストの色を白に変更
- LotSizeText.SetTextColor(clrWhite) を使用して、ロットサイズテキストの色を白に調整
-
取引ライブラリーを含めて:
- 取引ライブラリを統合し、以下のコードでtradeというインスタンスを作成
#include <Trade/Trade.mqh> CTrade trade;
- 取引ライブラリを統合し、以下のコードでtradeというインスタンスを作成
-
OnChartEvent関数の作成
OnChartEvent関数を実装し、買いボタンまたは売りボタンのいずれかがクリックされると、対応する注文を即座に実行します。コードは次のとおりです。
//+------------------------------------------------------------------+ //| Chart event handling function | //+------------------------------------------------------------------+ void OnChartEvent(const int id, const long& lparam, const double& dparam, const string& sparam) { if(id == CHARTEVENT_OBJECT_CLICK) { double ask = SymbolInfoDouble(_Symbol, SYMBOL_ASK); double bid = SymbolInfoDouble(_Symbol, SYMBOL_BID); if(sparam == "BuyButton") { trade.PositionOpen(_Symbol, ORDER_TYPE_BUY, (double)LotSize.GetText(), ask, 0, 0); } if(sparam == "SellButton") { trade.PositionOpen(_Symbol, ORDER_TYPE_SELL, (double)LotSize.GetText(), bid, 0, 0); } } } //+------------------------------------------------------------------+
イベント IDがCHARTEVENT_OBJECT_CLICKと等しい場合、この関数はオブジェクトのクリックを検出し、 sparamを使ってクリックされたオブジェクトの名前を取得し、オブジェクト名がBuyButtonSellButtonかを確認し、Tradeライブラリを使用してそれぞれの取引を発注します。
以上です。結果:
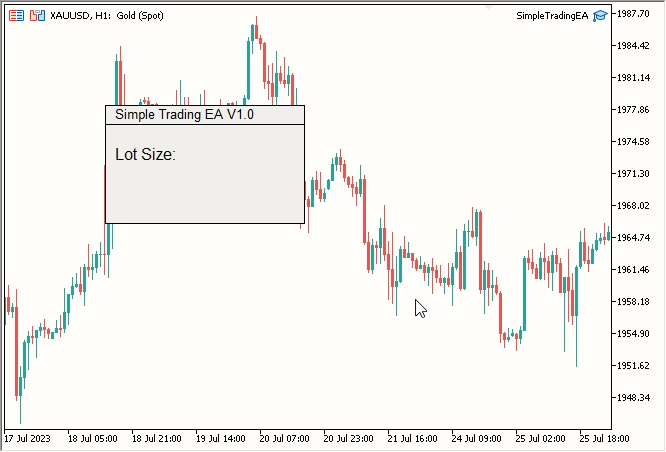
図5:「Lot Size:」 テキストの追加
さて、仕上げはカラフルにしましょう。以下の変更を加えます。
次のようにしましょう。最終的なSimpleTradingEA.mq5コードは色の変更を含み、取引ライブラリを含みます。また、OnChartEvent関数を作成し、買いまたは売りボタンがクリックされると、対応する注文が即座に発注されるようにします。
#include "RectangleLabel.mqh" // Including the RectangleLabel class definition
RectangleLabel TitleBar; // Declaration of a TitleBar object
RectangleLabel MainDashboardBody; // Declaration of a MainDashboardBody object

#include "Label.mqh" // Including the Label class definition
Label TitleText; // Declaration of a Label object
Label LotSizeText; // Declaration of a LotSizeText object

#include "Edit.mqh" // Including the Edit class definition
Edit LotSize; // Declaration of a LotSize object

#include "Button.mqh" // Including the Button class definition
Button BuyButton; // Declaration of a BuyButton object
Button SellButton; // Declaration of a SellButton object

//+------------------------------------------------------------------+
//| Expert initialization function                                   |
//+------------------------------------------------------------------+
int OnInit()
   {
    TitleBar.Create("TitleBar", 100, 100, 200, 20); // Creating the TitleBar with specified dimensions
    TitleBar.SetBorderType(BORDER_FLAT); // Setting the border type of TitleBar to be flat
    TitleBar.SetBGColor(C'27, 59, 146'); // Setting the color to RGB code: C'27, 59, 146'

    MainDashboardBody.Create("MainDashboardBody", 100, 119, 200, 100); // Creating the MainDashboardBody with specified dimensions
    MainDashboardBody.SetBorderType(BORDER_FLAT); // Setting the border type of MainDashboardBody to be flat
    MainDashboardBody.SetBGColor(C'102, 152, 250'); // Setting the color to RGB code: C'102, 152, 250'

    TitleText.Create("TitleText", 110, 101); // Creating the TitleBar at (110,101)
    TitleText.SetText("Simple Trading EA V1.0"); // Setting its text to "Simple Trading EA V1.0"
    TitleText.SetFontSize(10); // Setting its font size to 10
    TitleText.SetTextColor(clrWhite); // Setting its text color to clrWhite

    LotSizeText.Create("LotSizeText", 110, 140); // Creating the LotSizeText at (110,140)
    LotSizeText.SetText("Lot Size:"); // Setting its text to "Lot Size:"
    LotSizeText.SetFontSize(12); // Setting its font size to 12
    LotSizeText.SetTextColor(clrWhite); // Setting its text color to clrWhite

    LotSize.Create("LotSize", 220, 140, 50, 20); // Creating the LotSize with specified dimensions
    LotSize.SetBorderColor(clrBlack); // Setting its Border Color to clrBlack
    LotSize.SetBGColor(clrWhiteSmoke); // Setting its BG Color to clrWhiteSmoke
    LotSize.SetText("0.01"); // Setting its text to 0.01
    LotSize.SetTextColor(clrBlack); // Setting its text color to clrBlack

    BuyButton.Create("BuyButton", 110, 180, 80, 25); // Creating the BuyButton with specified dimensions
    BuyButton.SetBorderColor(clrBlack); // Setting its Border Color to clrBlack
    BuyButton.SetText("Buy"); // Setting its text to "Buy"
    BuyButton.SetBGColor(clrLime); // Setting its BG Color to clrLime

    SellButton.Create("SellButton", 210, 180, 80, 25); // Creating the SellButton with specified dimensions
    SellButton.SetBorderColor(clrBlack); // Setting its Border Color to clrBlack
    SellButton.SetText("Sell"); // Setting its text to "Sell"
    SellButton.SetBGColor(clrRed); // Setting its BG Color to clrRed

    ChartRedraw(0); // Redrawing the chart to reflect changes
    return(INIT_SUCCEEDED); // Indicating successful initialization
   }

//+------------------------------------------------------------------+
//| Expert deinitialization function                                 |
//+------------------------------------------------------------------+
void OnDeinit(const int reason)
   {
    MainDashboardBody.Destroy(); // Destroying the MainDashboardBody object
    TitleBar.Destroy(); // Destroying the TitleBar object
    TitleText.Destroy(); // Destroying the TitleText object
    LotSizeText.Destroy(); // Destroying the LotSizeText object
    LotSize.Destroy(); // Destroying the LotSize object
    BuyButton.Destroy(); // Destroying the BuyButton object
    SellButton.Destroy(); // Destroying the SellButton object
   }

//+------------------------------------------------------------------+
//| Chart event handling function                                    |
//+------------------------------------------------------------------+
void OnChartEvent(const int id, const long& lparam, const double& dparam, const string& sparam)
   {
    // Handles click events for Buy and Sell buttons and opens corresponding positions
    if(id == CHARTEVENT_OBJECT_CLICK) {
        double ask = SymbolInfoDouble(_Symbol, SYMBOL_ASK);
        double bid = SymbolInfoDouble(_Symbol, SYMBOL_BID);
        if(sparam == "BuyButton") {
            trade.PositionOpen(_Symbol, ORDER_TYPE_BUY, (double)LotSize.GetText(), ask, 0, 0);
        }
        if(sparam == "SellButton") {
            trade.PositionOpen(_Symbol, ORDER_TYPE_SELL, (double)LotSize.GetText(), bid, 0, 0);
        }
    }
   }
//+------------------------------------------------------------------+
変更:
最終結果
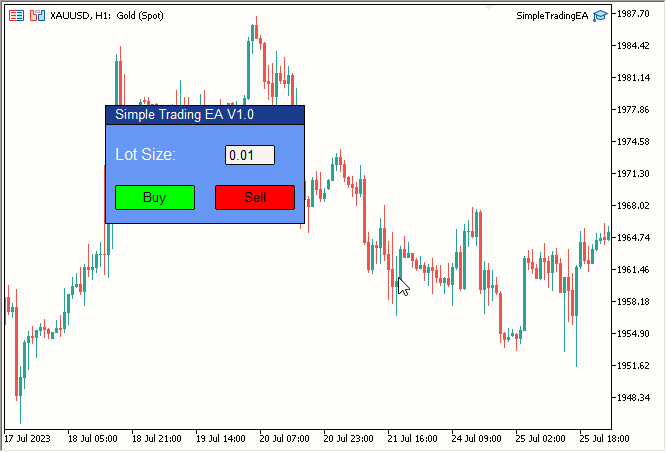
図7:完成したシンプルな取引EA(静的)
このセクションはこれで完成です。
静的ダッシュボードをその中のすべての要素とともに動かすためのアプローチについての説明
これからが本番です。どうやってすべてを移動可能にするのかを、考えてみましょう。
現時点では、どの要素も動かすことができますが、必要なのはすべての要素を動かすことです。1つの要素を動かして、他の要素をそれに従わせるのです。CustomChartEventを使えば、他の要素を文字通りメイン要素に従わせることができますが、残念ながらこの方法は時間がかかり、効率が悪くなります。私が見つけた最も効率的なアプローチは、(他のすべての要素が移動することになる)メイン要素を移動させ、同時に他の要素も移動させるというものです。理論としてはそうですが、実際にどう適用するのでしょうか。
メイン要素を中心要素と呼び、タイトルバーを中心要素にしましょう。次に、他のすべての要素をその周りに移動させます。
これまでは、OnEventクラスで定義された関数を使用して、1つの要素を動かしていました。この関数を修正して、1つの要素を移動させて他のすべての要素をまったく同じ量だけ移動させるようにします。
これが現在のOnEvent関数です。
//+------------------------------------------------------------------+
//|                                                                  |
//+------------------------------------------------------------------+
void RectangleLabel::OnEvent(int id, long lparam, double dparam, string sparam)
  {
   //Verify the event that triggered the OnChartEvent was CHARTEVENT_MOUSE_MOVE because we only want to execute out code when that is the case
   if(id == CHARTEVENT_MOUSE_MOVE)
     {
      //define X, Y, XDistance, YDistance, XSize, YSize
      int X = (int)lparam;
      int Y = (int)dparam;
      int MouseState = (int)sparam;

      string name = Name;
      int XDistance = (int)ObjectGetInteger(0, name, OBJPROP_XDISTANCE); //Should be 100 initially as we set it in OnInit()
      int YDistance = (int)ObjectGetInteger(0, name, OBJPROP_YDISTANCE); //Should be 100 initially as we set it in OnInit()
      int XSize = (int)ObjectGetInteger(0, name, OBJPROP_XSIZE); //Should be 200 initially as we set it in OnInit()
      int YSize = (int)ObjectGetInteger(0, name, OBJPROP_YSIZE); //Should be 200 initially as we set it in OnInit()

      if(previousMouseState == 0 && MouseState == 1) //Check if this was the MLB first click
        {
         mlbDownX = X; //Set mlbDownX (Variable that stores the initial MLB X location) equal to the current X
         mlbDownY = Y; //Set mlbDownY (Variable that stores the initial MLB Y location) equal to the current Y
         mlbDownXDistance = XDistance; //Set mlbDownXDistance (Variable that stores the initial XDistance i.e. Width of the dashboard) equal to the current XDistance
         mlbDownYDistance = YDistance; //Set mlbDownYDistance (Variable that stores the initial YDistance i.e. Height of the dashboard) equal to the current YDistance

         if(X >= XDistance && X <= XDistance + XSize && Y >= YDistance && Y <= YDistance + YSize) //Check if the click was on the dashboard
           {
            movingState = true; //If yes the set movingState to True
           }

        }

      if(movingState)//if movingState is true, Update the Dashboard position
        {
         ChartSetInteger(0, CHART_MOUSE_SCROLL, false);//Restrict Chart to be moved by Mouse
         ObjectSetInteger(0, name, OBJPROP_XDISTANCE, mlbDownXDistance + X - mlbDownX);//Update XDistance to: mlbDownXDistance + (X - mlbDownX)
         ObjectSetInteger(0, name, OBJPROP_YDISTANCE, mlbDownYDistance + Y - mlbDownY);//Update YDistance to: mlbDownYDistance + (Y - mlbDownY)
         ChartRedraw(0); //Redraw Chart
        }

      if(MouseState == 0)//Check if MLB is not pressed
        {
         movingState = false;//set movingState again to false
         ChartSetInteger(0, CHART_MOUSE_SCROLL, true);//allow the cahrt to be moved again
        }

      previousMouseState = MouseState;//update the previousMouseState at the end so that we can use it next time and copare it with new value
     }
  }
//+------------------------------------------------------------------+
この関数をまだRectangleLabelクラスに追加していないことはわかっています。
オブジェクトを動かすには何が必要でしょうか。名前です。
これからやることはとてもシンプルです。これらの名前をループして、中心要素を動かしたのと同じ量だけオブジェクトを動かします。ただし、ここには見えにくい大きな欠点があります。
マウスが動くたびに、中心要素のXDisとYDisをこのように設定します。
ObjectSetInteger(0, name, OBJPROP_XDISTANCE, mlbDownXDistance + X - mlbDownX);//Update XDistance to: mlbDownXDistance + (X - mlbDownX)
ObjectSetInteger(0, name, OBJPROP_YDISTANCE, mlbDownYDistance + Y - mlbDownY);//Update YDistance to: mlbDownYDistance + (Y - mlbDownY)
ここでは、マウスMLBが押されたときの中心要素のXDisとYDisがわかります。よって、他の要素についてもその情報を知る必要があります。しかし、これでは関数が非常に複雑になったり、非効率になったりするので、もっと良い方法が必要です。
よく観察してみると、より良いアプローチが目の前にあります。単に「中心要素と他の要素間のX距離とY距離」を維持すればいいのです。 そう、それほど簡単なことなのです。
「中心要素と他の要素とのX距離とY距離」を記録して維持するのですが、距離をどうやって記録するのでしょうか。さて、ある時点で中心要素に他の要素を追加することになりますが、その時点で「中心要素と他の要素間のX距離とY距離」を記録します。
繰り返しになりますが、ある時点で他の要素の名前を使って中心要素に追加し、その時点で「中心要素と他の要素間のX距離とY距離」を保存します。 そして、他の要素と中央の要素との間のこの距離を維持します。中心要素の位置を更新した後に、この距離を更新します。
それがこのタスクへの取り組み方です。さあ、実行に移しましょう。
静的なダッシュボードを移動可能にするための、説明されたアプローチの使用
「名前」、中心要素と他の要素との間の「X距離」と「Y距離」をどこに格納するかについて説明します。私たちが保存する必要がある情報は、この2つのカテゴリーだけです。
RectangleLabelクラスにAdd関数を作成します。その関数を使って、次の2つを保存します。
- 名前(addedNames配列)
- 中心要素とその他の要素間のX距離(addedXDisDifference)とY距離(addedYDisDifference)
命名規則についてですが、「added」はその変数が中心要素に追加された別の要素に関連していることを意味します。「XDis」と「YDis」は極めて単純です。「Difference」は、その変数が差に関係するものであることを示唆しているので、意味が通ります。変数名を議論する理由は、混乱を避けるためであり、正しい変数名であれば誤解を最小限に抑えることができるからです。
これらの変数を宣言しましょう。
string           addedNamed[];
int              addedXDisDiffrence[], addedYDisDiffrence[];
publicにする必要はないので、privateと宣言しています。また、これらはすべて配列です。
では、Add関数を作成してみましょう。
//+------------------------------------------------------------------+
//| Method to add an object by name to the rectangle label           |
//+------------------------------------------------------------------+
void RectangleLabel::Add(string name)
   {
    ArrayResize(addedNames, ArraySize(addedNames) + 1);
    ArrayResize(addedXDisDiffrence, ArraySize(addedXDisDiffrence) + 1);
    ArrayResize(addedYDisDiffrence, ArraySize(addedYDisDiffrence) + 1);

    addedNames[ArraySize(addedNames) - 1] = name;
    addedXDisDiffrence[ArraySize(addedXDisDiffrence) - 1] = ObjectGetInteger(0, _name, OBJPROP_XDISTANCE) - ObjectGetInteger(0, name, OBJPROP_XDISTANCE);
    addedYDisDiffrence[ArraySize(addedYDisDiffrence) - 1] = ObjectGetInteger(0, _name, OBJPROP_YDISTANCE) - ObjectGetInteger(0, name, OBJPROP_YDISTANCE);
   }
//+------------------------------------------------------------------+
この関数はRectangleLabelクラスで宣言されています。TitleBarは中心要素であり、基本的にRECTANGLE_LABELオブジェクトです。変数を同じクラスで宣言するのは、この関数で使うためです。
この関数が行うのは、名前をパラメータとして受け取り、3つの配列のサイズを1つ増やすことです。最後のインデックスに、対応するデータを格納します。Nameについては、単純に名前を保存します。距離の差(XとY)については、中央要素(この場合はTitleBar)と、パラメータとして指定された名前の要素との差を格納します。次がAdd関数です。
次に、OnEvent関数を修正する必要があります。addedNames配列を繰り返し処理するループを作成し、TitleBarと名前付き要素の間の距離を維持し、新しいTitleBarのX/Y距離からそれぞれの配列で指定された差分値を引いた値に等しくなるように設定します。
for(int i = 0; i < ArraySize(addedNames); i++)
   {
    ObjectSetInteger(0, addedNames[i], OBJPROP_XDISTANCE, mlbDownXDistance + X - mlbDownX - addedXDisDiffrence[i]);
    ObjectSetInteger(0, addedNames[i], OBJPROP_YDISTANCE, mlbDownYDistance + Y - mlbDownY - addedYDisDiffrence[i]);
   }
下線部がタイトルバー(中心要素)の新しいX/Y距離であり、それぞれの配列で指定された差分値(中心要素とその他の要素間のX距離とY距離の差を指す)を差し引きます。
このループをどこに配置したかといえば、中心要素が更新された直後にです。
次が新しいOnEvent関数です。
//+------------------------------------------------------------------+
//| Event handling for mouse movements                               |
//+------------------------------------------------------------------+
void RectangleLabel::OnEvent(int id, long lparam, double dparam, string sparam)
   {
    // Handle mouse movement events for dragging the rectangle label
    if(id == CHARTEVENT_MOUSE_MOVE)
       {
        int X = (int)lparam;
        int Y = (int)dparam;
        int MouseState = (int)sparam;

        string name = _name;
        int XDistance = (int)ObjectGetInteger(0, name, OBJPROP_XDISTANCE);
        int YDistance = (int)ObjectGetInteger(0, name, OBJPROP_YDISTANCE);
        int XSize = (int)ObjectGetInteger(0, name, OBJPROP_XSIZE);
        int YSize = (int)ObjectGetInteger(0, name, OBJPROP_YSIZE);

        if(previousMouseState == 0 && MouseState == 1)
           {
            mlbDownX = X;
            mlbDownY = Y;
            mlbDownXDistance = XDistance;
            mlbDownYDistance = YDistance;

            if(X >= XDistance && X <= XDistance + XSize && Y >= YDistance && Y <= YDistance + YSize)
               {
                movingState = true;
               }

           }

        if(movingState)
           {
            ChartSetInteger(0, CHART_MOUSE_SCROLL, false);
            ObjectSetInteger(0, name, OBJPROP_XDISTANCE, mlbDownXDistance + X - mlbDownX);
            ObjectSetInteger(0, name, OBJPROP_YDISTANCE, mlbDownYDistance + Y - mlbDownY);
            for(int i = 0; i < ArraySize(addedNames); i++)
               {
                ObjectSetInteger(0, addedNames[i], OBJPROP_XDISTANCE, mlbDownXDistance + X - mlbDownX - addedXDisDiffrence[i]);
                ObjectSetInteger(0, addedNames[i], OBJPROP_YDISTANCE, mlbDownYDistance + Y - mlbDownY - addedYDisDiffrence[i]);
               }
            ChartRedraw(0);
           }

        if(MouseState == 0)
           {
            movingState = false;
            ChartSetInteger(0, CHART_MOUSE_SCROLL, true);
           }

        previousMouseState = MouseState;
       }
   }
ハイライトされた部分が新しいループです。
後は、TitleBarを選んだように、Add関数を使用して中心要素に要素を接続するだけです。TitleBarインスタンス(「TitleBar」)からAdd関数を使用します。
TitleBarインスタンスのAdd関数を使用して、他のすべての要素をTitleBarに追加してみましょう。
// Add the other elements to the Central Element i.e. TitleBar object in this case
TitleBar.Add("MainDashboardBody");
TitleBar.Add("TitleText");
TitleBar.Add("LotSizeText");
TitleBar.Add("LotSize");
TitleBar.Add("BuyButton");
TitleBar.Add("SellButton");
これにより、これらすべての要素の名前がaddedNames配列に追加され、移動できるようになります。また、TitleBarからの距離も記録されているので、その距離も維持されます。
では、OnEvent関数を使用してみましょう。それがなければ、すべてが無駄になります。
// Passes events to the TitleBar object
TitleBar.OnEvent(id, lparam, dparam, sparam);
これをOnChartEvent()に追加して、ようやく完了です。長くなってしまいましたが、最終的な結果は努力に値するはずです。 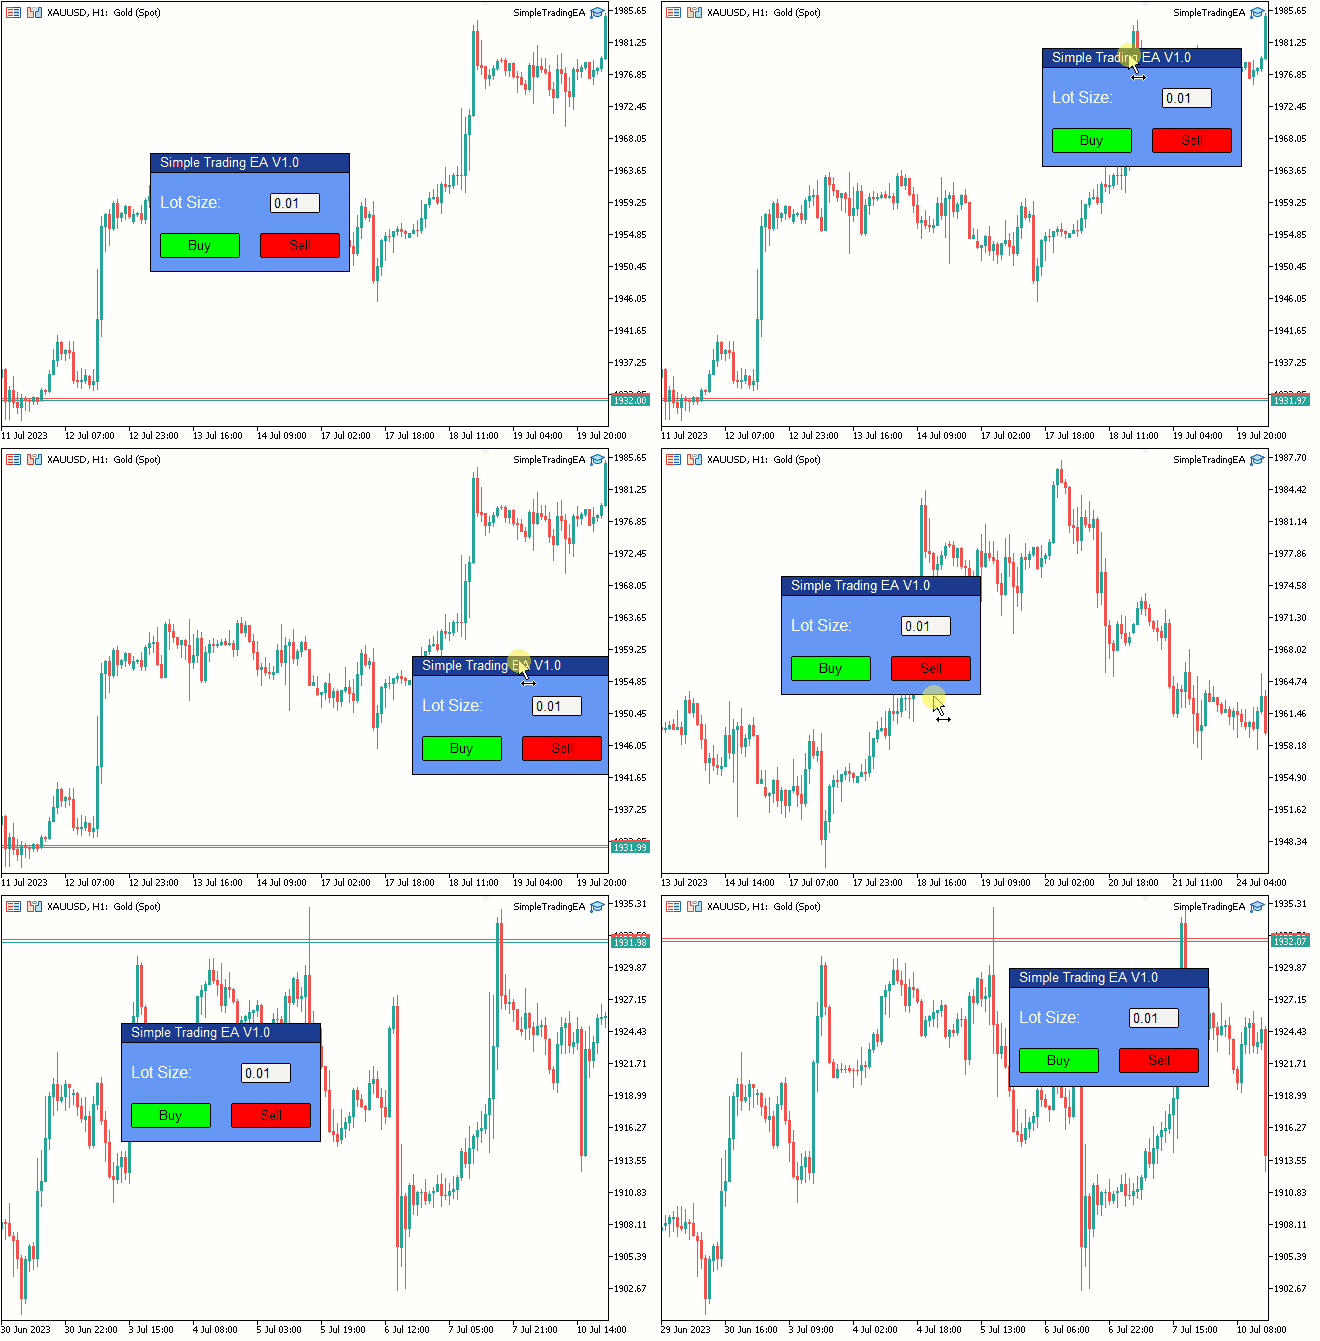
図8:最終結果
結論
これで、この記事は終わりです。この作品の旅を通して、私たちは多くのことを成し遂げ、「MQL5のインタラクティブGUIで取引チャートを改善する」第3回の完成に至りました。
「移動可能なGUI」連載(第1回、第2回)で掲げた目標を見事に達成し、ダイナミックでユーザーフレンドリーなチャートインターフェイスを実現しました。私の記事を読んでくださってありがとうございます。これらの情報が、読者の努力に役立ち、有益なものであることを願っています。
私の次回作について何かアイデアや提案がありましたら、ご遠慮なく共有してください。
ハッピーコーディング!ハッピートレード!
MetaQuotes Ltdにより英語から翻訳されました。
元の記事: https://www.mql5.com/en/articles/12923
警告: これらの資料についてのすべての権利はMetaQuotes Ltd.が保有しています。これらの資料の全部または一部の複製や再プリントは禁じられています。
この記事はサイトのユーザーによって執筆されたものであり、著者の個人的な見解を反映しています。MetaQuotes Ltdは、提示された情報の正確性や、記載されているソリューション、戦略、または推奨事項の使用によって生じたいかなる結果についても責任を負いません。
 初めてのMetaTrader VPS:ステップバイステップ
- 無料取引アプリ
- 8千を超えるシグナルをコピー
- 金融ニュースで金融マーケットを探索
最も実用的で普遍的な選択肢は、レイアウトコードをまったく気にすることなく、視覚的にフォームをデザインすることです。可能な解決策の1つが記事に ありました。
スタニスラフ、初心者向けの記事の下に上級者向けの記事へのリンクがありますね :)
私のプログラミングのレベルは、そこに書かれていることを理解するのに必要なレベルよりもずっと低いので、私はそれを読みました。
理解できないことはできるだけ使わないようにしている。最近のある状況は、このことをさらに強く私に根付かせた。
おそらく「エラー、バグ、質問」というトピックを読んでいるのだろう。そこで私は、閉じた位置からの矢印を連動グラフ上に表示し、その間に出入り口-線を表示するという仕事をした。
自分で書くのではなく、サイバーの既成コードを使うことにしました。その結果、半日を無駄にした。サイバーは最終的にコードを修正してくれたが、私は時間を失った。
そして、もし私があなたの記事からコードを引用し、何かを微調整する必要があったとしても、まあ、あなたは理解しているはずだ。
私には、あなたが記事を書くときに設定したよりも簡単な仕事がある。子供がレゴで家を建てるように、出来合いのコードから次のパネルを作れるようにするだけだ。
この目的のためにOOPはまったく必要ないと私は思う。私はそれを知らないので、好きではない。
MVCの原則は、私が正しく理解していれば、私の目的にはかなり適している))))))
一般的に、私はすでにそれがどのようにあるべきかのイメージを持っています。
ところで、プログラムから継承クラスの関数にアクセスしたときに、基底クラスの関数が表示されないようにする方法を教えてもらえませんか?可能ならね。
を思い浮かべた。)
市場向けではなく、多かれ少なかれ複雑だが美しいものが欲しい、そしてDLLを書くのは面倒だという人のために、GtkServerhttps://sourceforge.net/projects/gtk-server/ と Glade form designer があります。
方法: GtkServerはtcpリスナーとして起動し、SocketOpen/SocketSendを使用してアドバイザーが "load form "というテキストを送信し(またはgtkウィジェットのステップフォームでそれ自身)、その結果を読み取ります。
あなたも)
tcpリスナー、 SocketOpen/SocketSendといった 言葉は冒涜的 で、 ググらないと意味すらわからない。
皆さん、良心を持ってください、あなたの専門用語で人々を怖がらせるのはやめてください))))
スタニスラフ、ヨーヨーヨーヨー、初心者向けの記事の下に上級者向けの記事へのリンクがあるよ。)
僕のプログラミングのレベルは、そこに書かれていることを理解するのに必要なレベルよりもずっと低いから。
理解できないことはできるだけ使わないようにしている。最近のある状況は、このことをさらに強く私に根付かせている。
残念ながら、ソフトウェアの状況は、すべてを自分で理解することは不可能なのだ。この論理に従えば、オペレーティング・システムはカスタマイズされるべきなのだ(一部のLinux擁護者はそうしている)。
だからこそ、現代のアプローチは、(多かれ少なかれ必要なことをする)既製のレンガを手に入れ、(実装に深入りすることなく)ドッキングさせることなのだ。
私は、どうすればもっと普遍的なことができるかという質問に答えただけだ。私の記事が複雑であることに異論はないだろうが、要は、コントローラやウィンドウのドラッグ、リサイズなどを得るために囲いを差し込むだけで、プログラミングなしで必要なGUIをテンプレートとして記述できるということだ。
ファンタスティック!
自分では理解できなかった、
回読みました。
ありがとう!
フィリップ