DoEasy. Elementos de control (Parte 25): El objeto WinForms «Tooltip»

Contenido
- Concepto
- Mejorando las clases de la biblioteca
- La clase de objeto WinForms Tooltip
- Simulación
- ¿Qué es lo próximo?
Concepto
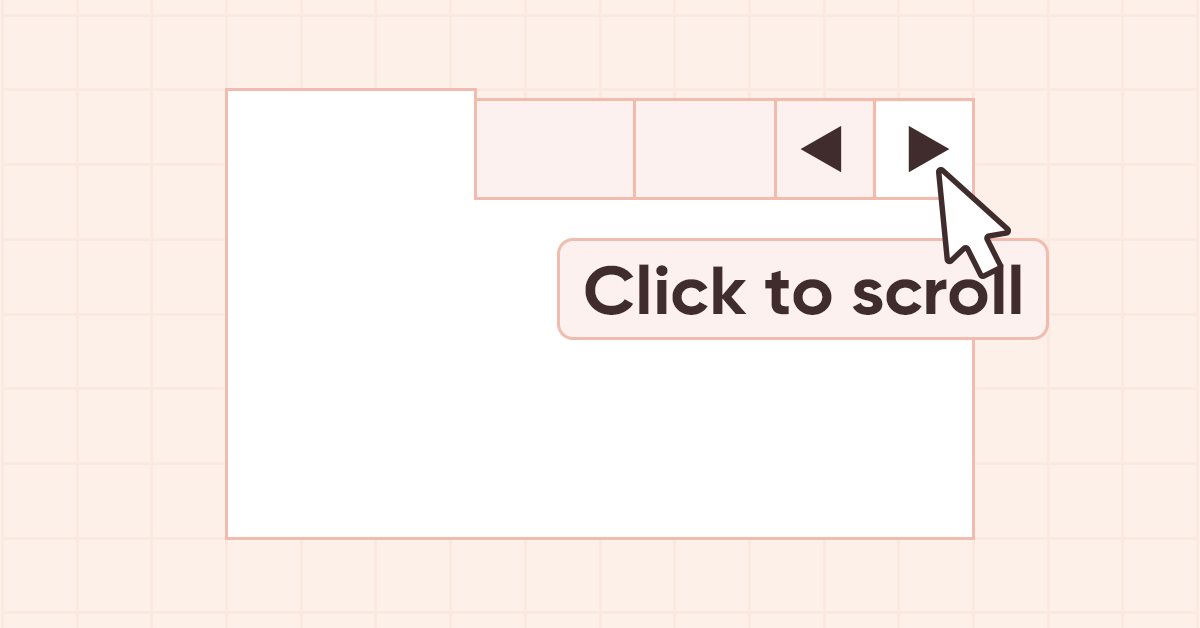
Al desplazar el cursor sobre un control, después de un cierto tiempo, aparecerá una pista emergente. Obviamente, no todos los elementos tendrán sugerencias emergentes, pero cada objeto gráfico poseerá la capacidad de configurarla. Crearemos tal posibilidad para los elementos gráficos de la biblioteca.
No todos los elementos gráficos de la biblioteca «conocen» la existencia de otros elementos gráficos, pero todos estos objetos pueden adjuntar a sí mismos elementos controlados. Los objetos adjuntos a un elemento gráfico pueden incluir objetos de los que el elemento principal no sabe nada. Como la gestión de los elementos vinculados se realiza en la clase de colección de elementos gráficos, no existirán problemas con la visibilidad de los diversos tipos de controles: la clase de colección sabe todo sobre ellos.
Además, si recurrimos a MS Visual Studio para ver un ejemplo, el objeto Tooltip creado será visible en el objeto de formulario y se podrá asignar a los objetos vinculados a este formulario. Lo haremos de la forma que sigue: aquellos objetos que verán la clase de objeto de pista emergente podrán crearlo, y todos los demás objetos podrán vincular a sí mismos el objeto creado previamente. Para ello, no deberán «conocerlo» obligatoriamente, dado que en la lista ArrayObj podemos añadir cualquier objeto derivado de la clase básica de la Biblioteca Estándar.
En otras palabras: en los objetos contenedores (que tienen la capacidad de crear y adjuntar otros objetos gráficos a sí mismos), podremos crear controles de «pista emergente» e indicar a qué elemento de su composición asignar esta información emergente. Asimismo, escribiremos en el elemento el puntero al objeto Tooltip, mientras que en el objeto de pista emergente, escribiremos como básico el objeto para el que se ha asignado esta pista.
Por lo general, las pistas aparecen después de que el cursor se haya desplazado sobre el control durante algún tiempo, con un pequeño retardo. Si asignamos varias pistas a un objeto y la primera ya ha aparecido, al mover el cursor sobre dichos objetos, las pistas restantes aparecerán casi sin demora. No implementaremos este comportamiento hoy; estos son temas para artículos posteriores. Hoy solo crearemos el control ToolTip y permitiremos asignarlo a elementos gráficos.
Además de comenzar a desarrollar un nuevo control, hoy añadiremos la capacidad de dibujar nuevas primitivas gráficas, como iconos estándar, flechas derecha-izquierda, arriba-abajo... En general, poco a poco comenzaremos a añadir a la biblioteca la capacidad de trazar dibujos predefinidos, con la capacidad de usarlos "tal cual". Dichos íconos se podrán usar en los controles ToolTip que crearemos hoy y en otros elementos que ya hemos creado antes. Conforme desarrollemos posteriormente la biblioteca, añadiremos la capacidad de usar nuevas primitivas gráficas en todos los elementos gráficos de la misma.
Mejorando las clases de la biblioteca
En el archivo \MQL5\Include\DoEasy\Defines.mqh, añadiremos el nuevo tipo de elemento gráfico a la lista de tipos de elementos gráficos:
//+------------------------------------------------------------------+
//| The list of graphical element types                              |
//+------------------------------------------------------------------+
enum ENUM_GRAPH_ELEMENT_TYPE
  {
   GRAPH_ELEMENT_TYPE_STANDARD,                       // Standard graphical object
   GRAPH_ELEMENT_TYPE_STANDARD_EXTENDED,              // Extended standard graphical object
   GRAPH_ELEMENT_TYPE_SHADOW_OBJ,                     // Shadow object
   GRAPH_ELEMENT_TYPE_ELEMENT,                        // Element
   GRAPH_ELEMENT_TYPE_FORM,                           // Form
   GRAPH_ELEMENT_TYPE_WINDOW,                         // Window
   //--- WinForms
   GRAPH_ELEMENT_TYPE_WF_UNDERLAY,                    // Panel object underlay
   GRAPH_ELEMENT_TYPE_WF_BASE,                        // Windows Forms Base
   //--- 'Container' object types are to be set below
   GRAPH_ELEMENT_TYPE_WF_CONTAINER,                   // Windows Forms container base object
   GRAPH_ELEMENT_TYPE_WF_PANEL,                       // Windows Forms Panel
   GRAPH_ELEMENT_TYPE_WF_GROUPBOX,                    // Windows Forms GroupBox
   GRAPH_ELEMENT_TYPE_WF_TAB_CONTROL,                 // Windows Forms TabControl
   GRAPH_ELEMENT_TYPE_WF_SPLIT_CONTAINER,             // Windows Forms SplitContainer
   //--- 'Standard control' object types are to be set below
   GRAPH_ELEMENT_TYPE_WF_COMMON_BASE,                 // Windows Forms base standard control
   GRAPH_ELEMENT_TYPE_WF_LABEL,                       // Windows Forms Label
   GRAPH_ELEMENT_TYPE_WF_BUTTON,                      // Windows Forms Button
   GRAPH_ELEMENT_TYPE_WF_CHECKBOX,                    // Windows Forms CheckBox
   GRAPH_ELEMENT_TYPE_WF_RADIOBUTTON,                 // Windows Forms RadioButton
   GRAPH_ELEMENT_TYPE_WF_ELEMENTS_LIST_BOX,           // Base list object of Windows Forms elements
   GRAPH_ELEMENT_TYPE_WF_LIST_BOX,                    // Windows Forms ListBox
   GRAPH_ELEMENT_TYPE_WF_CHECKED_LIST_BOX,            // Windows Forms CheckedListBox
   GRAPH_ELEMENT_TYPE_WF_BUTTON_LIST_BOX,             // Windows Forms ButtonListBox
   GRAPH_ELEMENT_TYPE_WF_TOOLTIP,                     // Windows Forms ToolTip
   //--- Auxiliary elements of WinForms objects
   GRAPH_ELEMENT_TYPE_WF_LIST_BOX_ITEM,               // Windows Forms ListBoxItem
   GRAPH_ELEMENT_TYPE_WF_TAB_HEADER,                  // Windows Forms TabHeader
   GRAPH_ELEMENT_TYPE_WF_TAB_FIELD,                   // Windows Forms TabField
   GRAPH_ELEMENT_TYPE_WF_SPLIT_CONTAINER_PANEL,       // Windows Forms SplitContainerPanel
   GRAPH_ELEMENT_TYPE_WF_ARROW_BUTTON,                // Windows Forms ArrowButton
   GRAPH_ELEMENT_TYPE_WF_ARROW_BUTTON_UP,             // Windows Forms UpArrowButton
   GRAPH_ELEMENT_TYPE_WF_ARROW_BUTTON_DOWN,           // Windows Forms DownArrowButton
   GRAPH_ELEMENT_TYPE_WF_ARROW_BUTTON_LEFT,           // Windows Forms LeftArrowButton
   GRAPH_ELEMENT_TYPE_WF_ARROW_BUTTON_RIGHT,          // Windows Forms RightArrowButton
   GRAPH_ELEMENT_TYPE_WF_ARROW_BUTTONS_UD_BOX,        // Windows Forms UpDownArrowButtonsBox
   GRAPH_ELEMENT_TYPE_WF_ARROW_BUTTONS_LR_BOX,        // Windows Forms LeftRightArrowButtonsBox
   GRAPH_ELEMENT_TYPE_WF_SPLITTER,                    // Windows Forms Splitter
   GRAPH_ELEMENT_TYPE_WF_HINT_BASE,                   // Windows Forms HintBase
   GRAPH_ELEMENT_TYPE_WF_HINT_MOVE_LEFT,              // Windows Forms HintMoveLeft
   GRAPH_ELEMENT_TYPE_WF_HINT_MOVE_RIGHT,             // Windows Forms HintMoveRight
   GRAPH_ELEMENT_TYPE_WF_HINT_MOVE_UP,                // Windows Forms HintMoveUp
   GRAPH_ELEMENT_TYPE_WF_HINT_MOVE_DOWN,              // Windows Forms HintMoveDown
  };
//+------------------------------------------------------------------+
Para poder dibujar algunas imágenes estándar, tales como Info", "Warning", "Error", etcétera, crearemos una enumeración con los tipos de dichos iconos:
//+------------------------------------------------------------------+
//| Separator location in Split Container                            |
//+------------------------------------------------------------------+
enum ENUM_CANV_ELEMENT_SPLITTER_ORIENTATION
  {
   CANV_ELEMENT_SPLITTER_ORIENTATION_VERTICAL,        // Vertical
   CANV_ELEMENT_SPLITTER_ORIENTATION_HORISONTAL,      // Horizontal
  };
//+------------------------------------------------------------------+
//| The list of predefined icons                                     |
//+------------------------------------------------------------------+
enum ENUM_CANV_ELEMENT_TOOLTIP_ICON
  {
   CANV_ELEMENT_TOOLTIP_ICON_NONE,                    // None
   CANV_ELEMENT_TOOLTIP_ICON_INFO,                    // Info
   CANV_ELEMENT_TOOLTIP_ICON_WARNING,                 // Warning
   CANV_ELEMENT_TOOLTIP_ICON_ERROR,                   // Error
   CANV_ELEMENT_TOOLTIP_ICON_USER,                    // User
  };
//+------------------------------------------------------------------+
//| Integer properties of the graphical element on the canvas        |
//+------------------------------------------------------------------+
Aquí introduciremos los nombres de los nuevos iconos que crearemos en la biblioteca. Luego podremos simplemente seleccionar de la lista el tipo de icono que queremos dibujar en el control. A continuación, crearemos los métodos para dibujar cada tipo específico de icono de esta lista.
El nuevo control que crearemos requerirá nuevas propiedades.
Ahora, añadiremos las nuevas propiedades a la lista de propiedades enteras del elemento gráfico y aumentaremos su número total de 122 a 129:
//+------------------------------------------------------------------+
//| Integer properties of the graphical element on the canvas        |
//+------------------------------------------------------------------+
enum ENUM_CANV_ELEMENT_PROP_INTEGER
  {
   CANV_ELEMENT_PROP_ID = 0,                          // Element ID
   CANV_ELEMENT_PROP_TYPE,                            // Graphical element type

   //---...
   //---...

   CANV_ELEMENT_PROP_SPLIT_CONTAINER_PANEL2_COLLAPSED,// Flag for collapsed panel 2
   CANV_ELEMENT_PROP_SPLIT_CONTAINER_PANEL2_MIN_SIZE, // Panel 2 minimum size
   CANV_ELEMENT_PROP_TOOLTIP_INITIAL_DELAY,           // Tooltip display delay
   CANV_ELEMENT_PROP_TOOLTIP_AUTO_POP_DELAY,          // Tooltip display duration
   CANV_ELEMENT_PROP_TOOLTIP_RESHOW_DELAY,            // One element new tooltip display delay
   CANV_ELEMENT_PROP_TOOLTIP_SHOW_ALWAYS,             // Display a tooltip in inactive window
   CANV_ELEMENT_PROP_TOOLTIP_ICON,                    // Icon displayed in tooltip
   CANV_ELEMENT_PROP_TOOLTIP_IS_BALLOON,              // Tooltip in the form of a "cloud"
   CANV_ELEMENT_PROP_TOOLTIP_USE_FADING,              // Fade when showing/hiding a tooltip
  };
#define CANV_ELEMENT_PROP_INTEGER_TOTAL (129)         // Total number of integer properties
#define CANV_ELEMENT_PROP_INTEGER_SKIP  (0)           // Number of integer properties not used in sorting
//+------------------------------------------------------------------+
Asimismo, añadiremos dos nuevas propiedades a la lista de propiedades string y aumentaremos su número total a 6:
//+------------------------------------------------------------------+
//| String properties of the graphical element on the canvas         |
//+------------------------------------------------------------------+
enum ENUM_CANV_ELEMENT_PROP_STRING
  {
   CANV_ELEMENT_PROP_NAME_OBJ = (CANV_ELEMENT_PROP_INTEGER_TOTAL+CANV_ELEMENT_PROP_DOUBLE_TOTAL), // Graphical element object name
   CANV_ELEMENT_PROP_NAME_RES,                        // Graphical resource name
   CANV_ELEMENT_PROP_TEXT,                            // Graphical element text
   CANV_ELEMENT_PROP_DESCRIPTION,                     // Graphical element description
   CANV_ELEMENT_PROP_TOOLTIP_TITLE,                   // Element tooltip title
   CANV_ELEMENT_PROP_TOOLTIP_TEXT,                    // Element tooltip text
  };
#define CANV_ELEMENT_PROP_STRING_TOTAL  (6)           // Total number of string properties
//+------------------------------------------------------------------+
Además, añadiremos a la lista de posibles criterios para clasificar los elementos gráficos en el lienzo las nuevas propiedades:
//+------------------------------------------------------------------+
//| Possible sorting criteria of graphical elements on the canvas    |
//+------------------------------------------------------------------+
#define FIRST_CANV_ELEMENT_DBL_PROP  (CANV_ELEMENT_PROP_INTEGER_TOTAL-CANV_ELEMENT_PROP_INTEGER_SKIP)
#define FIRST_CANV_ELEMENT_STR_PROP  (CANV_ELEMENT_PROP_INTEGER_TOTAL-CANV_ELEMENT_PROP_INTEGER_SKIP+CANV_ELEMENT_PROP_DOUBLE_TOTAL-CANV_ELEMENT_PROP_DOUBLE_SKIP)
enum ENUM_SORT_CANV_ELEMENT_MODE
  {
//--- Sort by integer properties
   SORT_BY_CANV_ELEMENT_ID = 0,                       // Sort by element ID
   SORT_BY_CANV_ELEMENT_TYPE,                         // Sort by graphical element type

   //---...
   //---...

   SORT_BY_CANV_ELEMENT_SPLIT_CONTAINER_PANEL2_COLLAPSED,// Sort by flag for collapsed panel 2
   SORT_BY_CANV_ELEMENT_SPLIT_CONTAINER_PANEL2_MIN_SIZE, // Sort by panel 2 minimum size
   SORT_BY_CANV_ELEMENT_TOOLTIP_INITIAL_DELAY,        // Sort by tooltip display delay
   SORT_BY_CANV_ELEMENT_TOOLTIP_AUTO_POP_DELAY,       // Sort by tooltip display duration
   SORT_BY_CANV_ELEMENT_TOOLTIP_RESHOW_DELAY,         // Sort by one element new tooltip display delay
   SORT_BY_CANV_ELEMENT_TOOLTIP_SHOW_ALWAYS,          // Sort by a tooltip in inactive window
   SORT_BY_CANV_ELEMENT_TOOLTIP_ICON,                 // Sort by icon displayed in a tooltip
   SORT_BY_CANV_ELEMENT_TOOLTIP_IS_BALLOON,           // Sort by a cloud tooltip flag
   SORT_BY_CANV_ELEMENT_TOOLTIP_USE_FADING,           // Sort by the flag of fading when showing/hiding a tooltip
//--- Sort by real properties

//--- Sort by string properties
   SORT_BY_CANV_ELEMENT_NAME_OBJ = FIRST_CANV_ELEMENT_STR_PROP,// Sort by an element object name
   SORT_BY_CANV_ELEMENT_NAME_RES,                     // Sort by the graphical resource name
   SORT_BY_CANV_ELEMENT_TEXT,                         // Sort by graphical element text
   SORT_BY_CANV_ELEMENT_DESCRIPTION,                  // Sort by graphical element description
   SORT_BY_CANV_ELEMENT_TOOLTIP_HEADER,               // Sort by ToolTip header for an element
   SORT_BY_CANV_ELEMENT_TOOLTIP_TEXT,                 // Sort by ToolTip text for an element
  };
//+------------------------------------------------------------------+
Ahora podremos filtrar, clasificar y seleccionar todos los elementos gráficos según las nuevas propiedades.
En el archivo \MQL5\Include\DoEasy\Data.mqh, añadiremos los índices de los nuevos mensajes:
//--- CForm
   MSG_FORM_OBJECT_TEXT_NO_SHADOW_OBJ_FIRST_CREATE_IT,// No shadow object. Create it using the CreateShadowObj() method
   MSG_FORM_OBJECT_ERR_FAILED_CREATE_SHADOW_OBJ,      // Failed to create new shadow object
   MSG_FORM_OBJECT_ERR_FAILED_CREATE_PC_OBJ,          // Failed to create new pixel copier object
   MSG_FORM_OBJECT_PC_OBJ_ALREADY_IN_LIST,            // Pixel copier object with ID already present in the list
   MSG_FORM_OBJECT_PC_OBJ_NOT_EXIST_LIST,             // No pixel copier object with ID in the list
   MSG_FORM_OBJECT_ERR_NOT_INTENDED,                  // The method is not meant for creating such an object:
   MSG_FORM_TOOLTIP_OBJ_ALREADY_EXISTS,               // ToolTip object already exists

//--- CFrame
...
   MSG_GRAPH_ELEMENT_TYPE_WF_HINT_MOVE_UP,            // HintMoveLeft control
   MSG_GRAPH_ELEMENT_TYPE_WF_HINT_MOVE_DOWN,          // HintMoveLeft control
   MSG_GRAPH_ELEMENT_TYPE_WF_TOOLTIP,                 // ToolTip control
   MSG_GRAPH_OBJ_BELONG_PROGRAM,                      // Graphical object belongs to a program
   MSG_GRAPH_OBJ_BELONG_NO_PROGRAM,                   // Graphical object does not belong to a program
...
   MSG_CANV_ELEMENT_PROP_SPLIT_CONTAINER_PANEL2_COLLAPSED,  // Flag for collapsed panel 1
   MSG_CANV_ELEMENT_PROP_SPLIT_CONTAINER_PANEL2_MIN_SIZE,   // Panel 2 minimum size
   MSG_CANV_ELEMENT_PROP_TOOLTIP_INITIAL_DELAY,       // Tooltip display delay
   MSG_CANV_ELEMENT_PROP_TOOLTIP_AUTO_POP_DELAY,      // Tooltip display duration
   MSG_CANV_ELEMENT_PROP_TOOLTIP_RESHOW_DELAY,        // One element new tooltip display delay
   MSG_CANV_ELEMENT_PROP_TOOLTIP_SHOW_ALWAYS,         // Display a tooltip in inactive window
   MSG_CANV_ELEMENT_PROP_TOOLTIP_ICON,                // Icon displayed in a tooltip
   MSG_CANV_ELEMENT_PROP_TOOLTIP_IS_BALLOON,          // Tooltip in the form of a "cloud"
   MSG_CANV_ELEMENT_PROP_TOOLTIP_USE_FADING,          // Fade when showing/hiding a tooltip

//--- Real properties of graphical elements

//--- String properties of graphical elements
   MSG_CANV_ELEMENT_PROP_NAME_OBJ,                    // Graphical element object name
   MSG_CANV_ELEMENT_PROP_NAME_RES,                    // Graphical resource name
   MSG_CANV_ELEMENT_PROP_TEXT,                        // Graphical element text
   MSG_CANV_ELEMENT_PROP_DESCRIPTION,                 // Graphical element description
   MSG_CANV_ELEMENT_PROP_TOOLTIP_TITLE,               // Element tooltip title
   MSG_CANV_ELEMENT_PROP_TOOLTIP_TEXT,                // Element tooltip text
  };
//+------------------------------------------------------------------+
y los mensajes de texto correspondientes a los nuevos índices añadidos:
//--- CForm
   {"Отсутствует объект тени. Необходимо сначала его создать при помощи метода CreateShadowObj()","There is no shadow object. You must first create it using the CreateShadowObj () method"},
   {"Не удалось создать новый объект для тени","Failed to create new object for shadow"},
   {"Не удалось создать новый объект-копировщик пикселей","Failed to create new pixel copier object"},
   {"В списке уже есть объект-копировщик пикселей с идентификатором ","There is already a pixel copier object in the list with ID "},
   {"В списке нет объекта-копировщика пикселей с идентификатором ","No pixel copier object with ID "},
   {"Метод не предназначен для создания такого объекта: ","The method is not intended to create such an object: "},
   {"Объект ToolTip уже существует","ToolTip object already exists"},

//--- CFrame
...
   {"Элемент управления \"HintMoveUp\"","Control element \"HintMoveUp\""},
   {"Элемент управления \"HintMoveDown\"","Control element \"HintMoveDown\""},
   {"Элемент управления \"ToolTip\"","Control element \"ToolTip\""},
   {"Графический объект принадлежит программе","The graphic object belongs to the program"},
   {"Графический объект не принадлежит программе","The graphic object does not belong to the program"},
...
   {"Флаг свёрнутости панели 2","Flag to indicate that panel 2 is collapsed"},
   {"Минимальный размер панели 2","Min size of Panel 2"},
   {"Задержка отображения подсказки","Tooltip initial delay"},
   {"Длительность отображения подсказки","Tooltip autopoop delay"},
   {"Задержка отображения новой подсказки одного элемента","Tooltip reshow delay"},
   {"Отображать подсказку в неактивном окне","Tooltip show always"},
   {"Значок, отображаемый в подсказке","Tooltip icon"},
   {"Подсказка в форме \"облачка\"","Tooltip as \"Balloon\""},
   {"Угасание при отображении и скрытии подсказки","Tooltip uses fading"},

//--- String properties of graphical elements
   {"Имя объекта-графического элемента","The name of the graphic element object"},
   {"Имя графического ресурса","Image resource name"},
   {"Текст графического элемента","Text of the graphic element"},
   {"Описание графического элемента","Description of the graphic element"},
   {"Заголовок подсказки элемента","Element tooltip header"},
   {"Текст подсказки элемента","Element tooltip title"},
  };
//+---------------------------------------------------------------------+
Para que podamos obtener la descripción de un elemento gráfico, el archivo \MQL5\Include\DoEasy\Objects\Graph\GBaseObj.mqh del objeto gráfico básico de la biblioteca contiene el método TypeElementDescription(). Vamos a escribir en este el retorno de la descripción del nuevo control:
//+------------------------------------------------------------------+
//| Return the description of the graphical element type             |
//+------------------------------------------------------------------+
string CGBaseObj::TypeElementDescription(const ENUM_GRAPH_ELEMENT_TYPE type)
  {
   return
     (
      type==GRAPH_ELEMENT_TYPE_STANDARD                  ? CMessage::Text(MSG_GRAPH_ELEMENT_TYPE_STANDARD)                 :
      type==GRAPH_ELEMENT_TYPE_STANDARD_EXTENDED         ? CMessage::Text(MSG_GRAPH_ELEMENT_TYPE_STANDARD_EXTENDED)        :
      type==GRAPH_ELEMENT_TYPE_ELEMENT                   ? CMessage::Text(MSG_GRAPH_ELEMENT_TYPE_ELEMENT)                  :
      type==GRAPH_ELEMENT_TYPE_SHADOW_OBJ                ? CMessage::Text(MSG_GRAPH_ELEMENT_TYPE_SHADOW_OBJ)               :
      type==GRAPH_ELEMENT_TYPE_FORM                      ? CMessage::Text(MSG_GRAPH_ELEMENT_TYPE_FORM)                     :
      type==GRAPH_ELEMENT_TYPE_WINDOW                    ? CMessage::Text(MSG_GRAPH_ELEMENT_TYPE_WINDOW)                   :
      //--- WinForms
      type==GRAPH_ELEMENT_TYPE_WF_UNDERLAY               ? CMessage::Text(MSG_GRAPH_ELEMENT_TYPE_WF_UNDERLAY)              :
      type==GRAPH_ELEMENT_TYPE_WF_BASE                   ? CMessage::Text(MSG_GRAPH_ELEMENT_TYPE_WF_BASE)                  :
      //--- Containers
      type==GRAPH_ELEMENT_TYPE_WF_CONTAINER              ? CMessage::Text(MSG_GRAPH_ELEMENT_TYPE_WF_CONTAINER)             :
      type==GRAPH_ELEMENT_TYPE_WF_GROUPBOX               ? CMessage::Text(MSG_GRAPH_ELEMENT_TYPE_WF_GROUPBOX)              :
      type==GRAPH_ELEMENT_TYPE_WF_PANEL                  ? CMessage::Text(MSG_GRAPH_ELEMENT_TYPE_WF_PANEL)                 :
      type==GRAPH_ELEMENT_TYPE_WF_TAB_CONTROL            ? CMessage::Text(MSG_GRAPH_ELEMENT_TYPE_WF_TAB_CONTROL)           :
      type==GRAPH_ELEMENT_TYPE_WF_SPLIT_CONTAINER        ? CMessage::Text(MSG_GRAPH_ELEMENT_TYPE_WF_SPLIT_CONTAINER)       :
      //--- Standard controls
      type==GRAPH_ELEMENT_TYPE_WF_COMMON_BASE            ? CMessage::Text(MSG_GRAPH_ELEMENT_TYPE_WF_COMMON_BASE)           :
      type==GRAPH_ELEMENT_TYPE_WF_LABEL                  ? CMessage::Text(MSG_GRAPH_ELEMENT_TYPE_WF_LABEL)                 :
      type==GRAPH_ELEMENT_TYPE_WF_CHECKBOX               ? CMessage::Text(MSG_GRAPH_ELEMENT_TYPE_WF_CHECKBOX)              :
      type==GRAPH_ELEMENT_TYPE_WF_RADIOBUTTON            ? CMessage::Text(MSG_GRAPH_ELEMENT_TYPE_WF_RADIOBUTTON)           :
      type==GRAPH_ELEMENT_TYPE_WF_BUTTON                 ? CMessage::Text(MSG_GRAPH_ELEMENT_TYPE_WF_BUTTON)                :
      type==GRAPH_ELEMENT_TYPE_WF_ELEMENTS_LIST_BOX      ? CMessage::Text(MSG_GRAPH_ELEMENT_TYPE_WF_ELEMENTS_LIST_BOX)     :
      type==GRAPH_ELEMENT_TYPE_WF_LIST_BOX               ? CMessage::Text(MSG_GRAPH_ELEMENT_TYPE_WF_LIST_BOX)              :
      type==GRAPH_ELEMENT_TYPE_WF_LIST_BOX_ITEM          ? CMessage::Text(MSG_GRAPH_ELEMENT_TYPE_WF_LIST_BOX_ITEM)         :
      type==GRAPH_ELEMENT_TYPE_WF_CHECKED_LIST_BOX       ? CMessage::Text(MSG_GRAPH_ELEMENT_TYPE_WF_CHECKED_LIST_BOX)      :
      type==GRAPH_ELEMENT_TYPE_WF_BUTTON_LIST_BOX        ? CMessage::Text(MSG_GRAPH_ELEMENT_TYPE_WF_BUTTON_LIST_BOX)       :
      type==GRAPH_ELEMENT_TYPE_WF_TOOLTIP                ? CMessage::Text(MSG_GRAPH_ELEMENT_TYPE_WF_TOOLTIP)               :
      //--- Auxiliary control objects
      type==GRAPH_ELEMENT_TYPE_WF_TAB_HEADER             ? CMessage::Text(MSG_GRAPH_ELEMENT_TYPE_WF_TAB_HEADER)            :
      type==GRAPH_ELEMENT_TYPE_WF_TAB_FIELD              ? CMessage::Text(MSG_GRAPH_ELEMENT_TYPE_WF_TAB_FIELD)             :
      type==GRAPH_ELEMENT_TYPE_WF_ARROW_BUTTON           ? CMessage::Text(MSG_GRAPH_ELEMENT_TYPE_WF_ARROW_BUTTON)          :
      type==GRAPH_ELEMENT_TYPE_WF_ARROW_BUTTON_UP        ? CMessage::Text(MSG_GRAPH_ELEMENT_TYPE_WF_ARROW_BUTTON_UP)       :
      type==GRAPH_ELEMENT_TYPE_WF_ARROW_BUTTON_DOWN      ? CMessage::Text(MSG_GRAPH_ELEMENT_TYPE_WF_ARROW_BUTTON_DOWN)     :
      type==GRAPH_ELEMENT_TYPE_WF_ARROW_BUTTON_LEFT      ? CMessage::Text(MSG_GRAPH_ELEMENT_TYPE_WF_ARROW_BUTTON_LEFT)     :
      type==GRAPH_ELEMENT_TYPE_WF_ARROW_BUTTON_RIGHT     ? CMessage::Text(MSG_GRAPH_ELEMENT_TYPE_WF_ARROW_BUTTON_RIGHT)    :
      type==GRAPH_ELEMENT_TYPE_WF_ARROW_BUTTONS_UD_BOX   ? CMessage::Text(MSG_GRAPH_ELEMENT_TYPE_WF_ARROW_BUTTONS_UD_BOX)  :
      type==GRAPH_ELEMENT_TYPE_WF_ARROW_BUTTONS_LR_BOX   ? CMessage::Text(MSG_GRAPH_ELEMENT_TYPE_WF_ARROW_BUTTONS_LR_BOX)  :
      type==GRAPH_ELEMENT_TYPE_WF_SPLIT_CONTAINER_PANEL  ? CMessage::Text(MSG_GRAPH_ELEMENT_TYPE_WF_SPLIT_CONTAINER_PANEL) :
      type==GRAPH_ELEMENT_TYPE_WF_SPLITTER               ? CMessage::Text(MSG_GRAPH_ELEMENT_TYPE_WF_SPLITTER)              :
      type==GRAPH_ELEMENT_TYPE_WF_HINT_BASE              ? CMessage::Text(MSG_GRAPH_ELEMENT_TYPE_WF_HINT_BASE)             :
      type==GRAPH_ELEMENT_TYPE_WF_HINT_MOVE_LEFT         ? CMessage::Text(MSG_GRAPH_ELEMENT_TYPE_WF_HINT_MOVE_LEFT)        :
      type==GRAPH_ELEMENT_TYPE_WF_HINT_MOVE_RIGHT        ? CMessage::Text(MSG_GRAPH_ELEMENT_TYPE_WF_HINT_MOVE_RIGHT)       :
      type==GRAPH_ELEMENT_TYPE_WF_HINT_MOVE_UP           ? CMessage::Text(MSG_GRAPH_ELEMENT_TYPE_WF_HINT_MOVE_UP)          :
      type==GRAPH_ELEMENT_TYPE_WF_HINT_MOVE_DOWN         ? CMessage::Text(MSG_GRAPH_ELEMENT_TYPE_WF_HINT_MOVE_DOWN)        :
      "Unknown"
     );
  }
//+------------------------------------------------------------------+
A continuación, trasmitiremos al método el tipo de objeto cuya descripción queremos obtener y, dependiendo del tipo transmitido, mostraremos una descripción de texto según el índice del mensaje que hemos añadido arriba al archivo Data.mqh.
Antes, especificábamos manualmente el objeto básico para un elemento gráfico al crear un elemento gráfico adjunto.
Ahora (en el último artículo), hemos eliminado la necesidad de hacer esto y hemos eliminado los métodos para escribir los punteros a los objetos principal y básico en el objeto. Pero, como ha demostrado la práctica, todavía necesitamos dichos métodos. Para escribir en el nuevo elemento de pista emergente el elemento para el que se ha creado esta pista, necesitaremos un método para escribir el puntero al objeto básico.
En el archivo \MQL5\Include\DoEasy\Objects\Graph\GCnvElement.mqh, en su sección pública, escribiremos nuevamente el siguiente método:
public:
//--- (1) Set and (2) return the X coordinate shift relative to the base object
   void              SetCoordXRelative(const int value)                                { this.m_shift_coord_x=value;                }
   int               CoordXRelative(void)                                        const { return this.m_shift_coord_x;               }
//--- (1) Set and (2) return the Y coordinate shift relative to the base object
   void              SetCoordYRelative(const int value)                                { this.m_shift_coord_y=value;                }
   int               CoordYRelative(void)                                        const { return this.m_shift_coord_y;               }
//--- Set the pointer to the parent element within related objects of the current group
   void              SetBase(CGCnvElement *base)                                       { this.m_element_base=base;                  }

//--- Event handler
   virtual void      OnChartEvent(const int id,const long& lparam,const double& dparam,const string& sparam);
Luego transmitiremos al método el puntero al objeto básico, que se asignará a la variable m_element_base. Por consiguiente, para indicar el objeto para el que se ha creado una pista emergente, escribiremos para el objeto de pista emergente el puntero al elemento que debería mostrar la pista emergente al pasar el ratón sobre él.
Vamos a hacer que los métodos para configurar el valor de opacidad del elemento y configurar la bandera de visualización del elemento sean virtuales, ya que necesitaremos redefinirlos más adelante en las clases heredadas. Asimismo, añadiremos los métodos para configurar y retornar el texto en la pista:
//--- Set the shift of the (1) left, (2) top, (3) right, (4) bottom edge of the active area relative to the element,
//--- (5) all shifts of the active area edges relative to the element, (6) opacity
   void              SetActiveAreaLeftShift(const int value)   { this.SetProperty(CANV_ELEMENT_PROP_ACT_SHIFT_LEFT,fabs(value));       }
   void              SetActiveAreaRightShift(const int value)  { this.SetProperty(CANV_ELEMENT_PROP_ACT_SHIFT_RIGHT,fabs(value));      }
   void              SetActiveAreaTopShift(const int value)    { this.SetProperty(CANV_ELEMENT_PROP_ACT_SHIFT_TOP,fabs(value));        }
   void              SetActiveAreaBottomShift(const int value) { this.SetProperty(CANV_ELEMENT_PROP_ACT_SHIFT_BOTTOM,fabs(value));     }
   void              SetActiveAreaShift(const int left_shift,const int bottom_shift,const int right_shift,const int top_shift);
   virtual void      SetOpacity(const uchar value,const bool redraw=false);

//--- (1) Set and (2) return the Tooltip text
   virtual void      SetTooltipText(const string text)         { this.SetProperty(CANV_ELEMENT_PROP_TOOLTIP_TEXT,text);                }
   virtual string    TooltipText(void)                         { return this.GetProperty(CANV_ELEMENT_PROP_TOOLTIP_TEXT);              }

//--- (1) Set and (2) return the flag for displaying a non-hidden control
   virtual void      SetDisplayed(const bool flag)             { this.SetProperty(CANV_ELEMENT_PROP_DISPLAYED,flag);                   }
   bool              Displayed(void)                     const { return (bool)this.GetProperty(CANV_ELEMENT_PROP_DISPLAYED);           }
En el cuerpo del constructor, tendremos una lista de métodos para dibujar varias primitivas gráficas. Al final de la lista, declararemos los nuevos métodos para dibujar imágenes "estándar" predefinidas:
//--- Return coordinate offsets relative to the rectangle anchor point by size
   void              GetShiftXYbySize(const int width,               // Rectangle size by width
                                      const int height,              //Rectangle size by height
                                      const ENUM_FRAME_ANCHOR anchor,// Rectangle anchor point, relative to which the offsets are calculated
                                      int &shift_x,                  // X coordinate of the rectangle upper left corner
                                      int &shift_y);                 // Y coordinate of the rectangle upper left corner

//+------------------------------------------------------------------+
//| Methods for drawing predefined standard images                   |
//+------------------------------------------------------------------+
//--- Draw the Info icon
   void              DrawIconInfo(const int coord_x,const int coord_y,const uchar opacity);
//--- Draw the Warning icon
   void              DrawIconWarning(const int coord_x,const int coord_y,const uchar opacity);
//--- Draw the Error icon
   void              DrawIconError(const int coord_x,const int coord_y,const uchar opacity);
//--- Draw the left arrow
   void              DrawArrowLeft(const int coord_x,const int coord_y,const color clr,const uchar opacity);
//--- Draw the right arrow
   void              DrawArrowRight(const int coord_x,const int coord_y,const color clr,const uchar opacity);
//--- Draw the up arrow
   void              DrawArrowUp(const int coord_x,const int coord_y,const color clr,const uchar opacity);
//--- Draw the down arrow
   void              DrawArrowDown(const int coord_x,const int coord_y,const color clr,const uchar opacity);
  };
//+------------------------------------------------------------------+
En ambos constructores de la clase, estableceremos los valores predeterminados para las nuevas propiedades del elemento gráfico:
//+------------------------------------------------------------------+
//| Parametric constructor                                           |
//+------------------------------------------------------------------+
CGCnvElement::CGCnvElement(const ENUM_GRAPH_ELEMENT_TYPE element_type,
                           CGCnvElement *main_obj,CGCnvElement *base_obj,
                           const int      element_id,
                           const int      element_num,
                           const long     chart_id,
                           const int      wnd_num,
                           const string   descript,
                           const int      x,
                           const int      y,
                           const int      w,
                           const int      h,
                           const color    colour,
                           const uchar    opacity,
                           const bool     movable=true,
                           const bool     activity=true,
                           const bool     redraw=false) : m_shadow(false)
  {
   this.SetTypeElement(element_type);
   this.m_type=OBJECT_DE_TYPE_GELEMENT;
   this.m_element_main=main_obj;
   this.m_element_base=base_obj;
   this.m_chart_color_bg=(color)::ChartGetInteger((chart_id==NULL ? ::ChartID() : chart_id),CHART_COLOR_BACKGROUND);
   this.m_name=this.CreateNameGraphElement(element_type);
   this.m_chart_id=(chart_id==NULL || chart_id==0 ? ::ChartID() : chart_id);
   this.m_subwindow=wnd_num;
   this.SetFont(DEF_FONT,DEF_FONT_SIZE);
   this.m_text_anchor=0;
   this.m_text_x=0;
   this.m_text_y=0;
   this.SetBackgroundColor(colour,true);
   this.SetOpacity(opacity);
   this.m_shift_coord_x=0;
   this.m_shift_coord_y=0;
   if(::ArrayResize(this.m_array_colors_bg,1)==1)
      this.m_array_colors_bg[0]=this.BackgroundColor();
   if(::ArrayResize(this.m_array_colors_bg_dwn,1)==1)
      this.m_array_colors_bg_dwn[0]=this.BackgroundColor();
   if(::ArrayResize(this.m_array_colors_bg_ovr,1)==1)
      this.m_array_colors_bg_ovr[0]=this.BackgroundColor();
   if(this.Create(chart_id,wnd_num,x,y,w,h,redraw))
     {
      this.SetProperty(CANV_ELEMENT_PROP_NAME_RES,this.m_canvas.ResourceName()); // Graphical resource name
      this.SetProperty(CANV_ELEMENT_PROP_CHART_ID,CGBaseObj::ChartID());         // Chart ID

      //---...
      //---...

      this.SetProperty(CANV_ELEMENT_PROP_SPLIT_CONTAINER_PANEL2_COLLAPSED,false);                     // Flag for collapsed panel 1
      this.SetProperty(CANV_ELEMENT_PROP_SPLIT_CONTAINER_PANEL2_MIN_SIZE,25);                         // Panel 2 minimum size
      this.SetProperty(CANV_ELEMENT_PROP_TOOLTIP_INITIAL_DELAY,500);                                  // Tooltip display delay
      this.SetProperty(CANV_ELEMENT_PROP_TOOLTIP_AUTO_POP_DELAY,5000);                                // Tooltip display duration
      this.SetProperty(CANV_ELEMENT_PROP_TOOLTIP_RESHOW_DELAY,100);                                   // One element new tooltip display delay
      this.SetProperty(CANV_ELEMENT_PROP_TOOLTIP_SHOW_ALWAYS,false);                                  // Display a tooltip in inactive window
      this.SetProperty(CANV_ELEMENT_PROP_TOOLTIP_ICON,CANV_ELEMENT_TOOLTIP_ICON_NONE);                // Icon displayed in a tooltip
      this.SetProperty(CANV_ELEMENT_PROP_TOOLTIP_IS_BALLOON,false);                                   // Tooltip in the form of a "cloud"
      this.SetProperty(CANV_ELEMENT_PROP_TOOLTIP_USE_FADING,true);                                    // Fade when showing/hiding a tooltip
      this.SetProperty(CANV_ELEMENT_PROP_TOOLTIP_TITLE,"");                                           // Tooltip title for the element
      this.SetProperty(CANV_ELEMENT_PROP_TOOLTIP_TEXT,"");                                            // Tooltip text for the element
      this.SetVisibleFlag(false,false);
     }
   else
     {
      ::Print(DFUN,CMessage::Text(MSG_LIB_SYS_FAILED_CREATE_ELM_OBJ),"\"",this.TypeElementDescription(element_type),"\" ",this.NameObj());
     }
  }
//+------------------------------------------------------------------+
//| Protected constructor                                            |
//+------------------------------------------------------------------+
CGCnvElement::CGCnvElement(const ENUM_GRAPH_ELEMENT_TYPE element_type,
                           CGCnvElement *main_obj,CGCnvElement *base_obj,
                           const long    chart_id,
                           const int     wnd_num,
                           const string  descript,
                           const int     x,
                           const int     y,
                           const int     w,
                           const int     h) : m_shadow(false)
  {
   this.m_type=OBJECT_DE_TYPE_GELEMENT;
   this.m_element_main=main_obj;
   this.m_element_base=base_obj;
   this.m_chart_color_bg=(color)::ChartGetInteger((chart_id==NULL ? ::ChartID() : chart_id),CHART_COLOR_BACKGROUND);
   this.m_name=this.CreateNameGraphElement(element_type);
   this.m_chart_id=(chart_id==NULL || chart_id==0 ? ::ChartID() : chart_id);
   this.m_subwindow=wnd_num;
   this.m_type_element=element_type;
   this.SetFont(DEF_FONT,DEF_FONT_SIZE);
   this.m_text_anchor=0;
   this.m_text_x=0;
   this.m_text_y=0;
   this.SetBackgroundColor(CLR_CANV_NULL,true);
   this.SetOpacity(0);
   this.m_shift_coord_x=0;
   this.m_shift_coord_y=0;
   if(::ArrayResize(this.m_array_colors_bg,1)==1)
      this.m_array_colors_bg[0]=this.BackgroundColor();
   if(::ArrayResize(this.m_array_colors_bg_dwn,1)==1)
      this.m_array_colors_bg_dwn[0]=this.BackgroundColor();
   if(::ArrayResize(this.m_array_colors_bg_ovr,1)==1)
      this.m_array_colors_bg_ovr[0]=this.BackgroundColor();
   if(this.Create(chart_id,wnd_num,x,y,w,h,false))
     {
      this.SetProperty(CANV_ELEMENT_PROP_NAME_RES,this.m_canvas.ResourceName()); // Graphical resource name
      this.SetProperty(CANV_ELEMENT_PROP_CHART_ID,CGBaseObj::ChartID());         // Chart ID

      //---...
      //---...

      this.SetProperty(CANV_ELEMENT_PROP_SPLIT_CONTAINER_PANEL1_MIN_SIZE,25);                         // Panel 1 minimum size
      this.SetProperty(CANV_ELEMENT_PROP_SPLIT_CONTAINER_PANEL2_COLLAPSED,false);                     // Flag for collapsed panel 1
      this.SetProperty(CANV_ELEMENT_PROP_SPLIT_CONTAINER_PANEL2_MIN_SIZE,25);                         // Panel 2 minimum size
      this.SetProperty(CANV_ELEMENT_PROP_TOOLTIP_INITIAL_DELAY,500);                                  // Tooltip display delay
      this.SetProperty(CANV_ELEMENT_PROP_TOOLTIP_AUTO_POP_DELAY,5000);                                // Tooltip display duration
      this.SetProperty(CANV_ELEMENT_PROP_TOOLTIP_RESHOW_DELAY,100);                                   // One element new tooltip display delay
      this.SetProperty(CANV_ELEMENT_PROP_TOOLTIP_SHOW_ALWAYS,false);                                  // Display a tooltip in inactive window
      this.SetProperty(CANV_ELEMENT_PROP_TOOLTIP_ICON,CANV_ELEMENT_TOOLTIP_ICON_NONE);                // Icon displayed in a tooltip
      this.SetProperty(CANV_ELEMENT_PROP_TOOLTIP_IS_BALLOON,false);                                   // Tooltip in the form of a "cloud"
      this.SetProperty(CANV_ELEMENT_PROP_TOOLTIP_USE_FADING,true);                                    // Fade when showing/hiding a tooltip
      this.SetProperty(CANV_ELEMENT_PROP_TOOLTIP_TITLE,"");                                           // Tooltip title for the element
      this.SetProperty(CANV_ELEMENT_PROP_TOOLTIP_TEXT,"");                                            // Tooltip text for the element
      this.SetVisibleFlag(false,false);
     }
   else
     {
      ::Print(DFUN,CMessage::Text(MSG_LIB_SYS_FAILED_CREATE_ELM_OBJ),"\"",this.TypeElementDescription(element_type),"\" ",this.NameObj());
     }
  }
//+------------------------------------------------------------------+
Fuera del cuerpo de la clase, escribiremos los métodos para dibujar imágenes por defecto.
Método que dibuja el icono Info:
//+------------------------------------------------------------------+
//| Draw the Info icon                                               |
//+------------------------------------------------------------------+
void CGCnvElement::DrawIconInfo(const int coord_x,const int coord_y,const uchar opacity)
  {
   int x=coord_x+8;
   int y=coord_y+8;
   this.DrawCircleFill(x,y,7,C'0x00,0x77,0xD7',opacity);
   this.DrawCircleWu(x,y,7.5,C'0x00,0x3D,0x8C',opacity);
   this.DrawRectangle(x,y-5,x+1,y-4, C'0xFF,0xFF,0xFF',opacity);
   this.DrawRectangle(x,y-2,x+1,y+4,C'0xFF,0xFF,0xFF',opacity);
  }
//+------------------------------------------------------------------+
Primero, transmitiremos al método las coordenadas de la esquina superior izquierda del rectángulo que delimita la imagen. A continuación, se calcularán las coordenadas del punto central del círculo, se dibujará un círculo relleno y, en la parte superior, un círculo suavizado con el método Wu. Después de dibujar los círculos, se dibujará un icono "i", que constará de dos rectángulos, de forma que el primero dibuje un punto de 2x2 y el segundo dibuje una línea vertical de 2x6. Por desgracia, no es posible dibujar líneas suavizadas con un grosor determinado (LineThick), debido al extraño algoritmo de suavizado utilizado al dibujar dicha línea, lo cual genera un resultado no muy bonito. Por ello, para trazar líneas de dos píxeles de grosor, simplemente dibujaremos un rectángulo de dos píxeles de anchura y la altura deseada. En el método, todos los colores estarán predefinidos para que la imagen se vea estándar, como en MS Visual Studio.
Método que dibuja el icono Warning:
//+------------------------------------------------------------------+
//| Draw the Warning icon                                            |
//+------------------------------------------------------------------+
void CGCnvElement::DrawIconWarning(const int coord_x,const int coord_y,const uchar opacity)
  {
   int x=coord_x+8;
   int y=coord_y+1;
   this.DrawTriangleFill(x,y,x+8,y+14,x-8,y+14,C'0xFC,0xE1,0x00',opacity);
   this.DrawTriangleWu(x,y,x+8,y+14,x-7,y+14,C'0xFF,0xB9,0x00',opacity);
   this.DrawRectangle(x,y+5,x+1,y+9,  C'0x00,0x00,0x00',opacity);
   this.DrawRectangle(x,y+11,x+1,y+12,C'0x00,0x00,0x00',opacity);
  }
//+------------------------------------------------------------------+
Primero, transmitiremos al método las coordenadas de la esquina superior izquierda del rectángulo que delimita la imagen. A continuación, se calcularán las coordenadas del punto superior del triángulo, se dibujará un triángulo relleno y en la parte superior se dibujará un triángulo suavizado con el método Wu. El segundo triángulo tendrá la coordenada X de su vértice desplazada un píxel a la derecha en comparación con el primer triángulo relleno. Esto se hace así para que el vértice resulte visualmente más grueso, ya que el icono dentro de los triángulos deberá tener dos píxeles de anchura y no se podrá colocar exactamente en el centro del triángulo. Por lo tanto, "difuminaremos" la parte superior del triángulo con dos píxeles, lo cual hará que la ubicación del icono en el interior quede visualmente centrada. Tras dibujar los triángulos, se dibujará un icono "!", que constará de dos rectángulos, de forma que el primero dibuje una línea vertical de 2x6 y el segundo dibuje un punto de 2x2.
Método que dibuja el icono Error:
//+------------------------------------------------------------------+
//| Draw the Error icon                                              |
//+------------------------------------------------------------------+
void CGCnvElement::DrawIconError(const int coord_x,const int coord_y,const uchar opacity)
  {
   int x=coord_x+8;
   int y=coord_y+8;
   this.DrawCircleFill(x,y,7,C'0xF0,0x39,0x16',opacity);
   this.DrawCircleWu(x,y,7.5,C'0xA5,0x25,0x12',opacity);
   this.DrawLineWu(x-3,y-3,x+3,y+3,C'0xFF,0xFF,0xFF',opacity);
   this.DrawLineWu(x+3,y-3,x-3,y+3,C'0xFF,0xFF,0xFF',opacity);
  }
//+------------------------------------------------------------------+
El método dibujará dos círculos: uno relleno de color y otro suavizado que trazará su contorno; asimismo, trazará en el centro dos líneas suavizadas que formarán el icono "X". Los colores, así como en otros iconos, estarán predefinidos para coincidir con MS Visual Studio.
Métodos que dibujan las flechas izquierda, derecha, arriba y abajo:
//+------------------------------------------------------------------+
//| Draw the left arrow                                              |
//+------------------------------------------------------------------+
void CGCnvElement::DrawArrowLeft(const int coord_x,const int coord_y,const color clr,const uchar opacity)
  {
   int x=coord_x;
   int y=coord_y+5;
   this.DrawTriangleFill(x,y,x+3,y-3,x+3,y+3,clr,opacity);
   this.DrawTriangleWu(x,y,x+3,y-3,x+3,y+3,clr,opacity);
  }
//+------------------------------------------------------------------+
//| Draw the right arrow                                             |
//+------------------------------------------------------------------+
void CGCnvElement::DrawArrowRight(const int coord_x,const int coord_y,const color clr,const uchar opacity)
  {
   int x=coord_x;
   int y=coord_y+5;
   this.DrawTriangleFill(x+3,y,x,y+3,x,y-3,clr,opacity);
   this.DrawTriangleWu(x+3,y,x,y+3,x,y-3,clr,opacity);
  }
//+------------------------------------------------------------------+
//| Draw the up arrow                                                |
//+------------------------------------------------------------------+
void CGCnvElement::DrawArrowUp(const int coord_x,const int coord_y,const color clr,const uchar opacity)
  {
   int x=coord_x+5;
   int y=coord_y;
   this.DrawTriangleFill(x,y,x+3,y+3,x-3,y+3,clr,opacity);
   this.DrawTriangleWu(x,y,x+3,y+3,x-3,y+3,clr,opacity);
  }
//+------------------------------------------------------------------+
//| Draw the down arrow                                              |
//+------------------------------------------------------------------+
void CGCnvElement::DrawArrowDown(const int coord_x,const int coord_y,const color clr,const uchar opacity)
  {
   int x=coord_x+5;
   int y=coord_y+3;
   this.DrawTriangleFill(x,y,x+3,y-3,x-3,y-3,clr,opacity);
   this.DrawTriangleWu(x,y,x+3,y-3,x-3,y-3,clr,opacity);
  }
//+------------------------------------------------------------------+
A todos los métodos se les transmitirán las coordenadas de la esquina superior izquierda del rectángulo de contorno, así como el color y la opacidad de las flechas dibujadas. A continuación, se calcularán las coordenadas del vértice inicial del triángulo y se dibujará un triángulo relleno, y encima, otro suavizado con el método Wu. Para cada vértice subsiguiente del triángulo dibujado, las coordenadas se calcularán desplazadas respecto a su primer vértice. El color y la opacidad se especificarán para que el aspecto de los triángulos dibujados se pueda cambiar según el estado del elemento gráfico sobre el que se dibuja la flecha. Por ejemplo, para un elemento inactivo, la flecha deberá ser gris. En general, aquí tenemos unas pocas opciones más que para los iconos.
Un objeto de sombra siempre existirá en conjunción con otro objeto. La opacidad del fondo sobre el que se dibujará la sombra siempre deberá ser cero, y el objeto siempre deberá ser transparente. Al mismo tiempo, la sombra dibujada sobre este sustrato también deberá tener algún grado de transparencia, ya que la sombra se vería extraña si cubriera completamente los objetos sobre los que se proyecta. Por ello, para el objeto de sombra, introduciremos el concepto de opacidad de la sombra dibujada, y este será el valor que deberá cambiar cuando se llame al método SetOpacity(), dejando el fondo siempre transparente. Pero para el mate, el mismo método también funcionará y establecerá exactamente su valor de opacidad. Entonces, añadiremos un nuevo método SetOpacityDraw: la opacidad de la sombra dibujada y combinaremos estos dos métodos. Cuando se les llama, la opacidad del fondo siempre se establecerá en cero, y para el color de la sombra dibujada, se establecerá el valor indicado en el método.
En el archivo \MQL5\Include\DoEasy\Objects\Graph\ShadowObj.mqh, cambiaremos el nombre de los métodos SetOpacity() y Opacity() y declararemos el método virtual SetOpacity():
//--- Draw an object shadow
   void              Draw(const int shift_x,const int shift_y,const uchar blur_value,const bool redraw);
//--- Set the element opacity
   virtual void      SetOpacity(const uchar value,const bool redraw=false);

//+------------------------------------------------------------------+
//| Methods of simplified access to object properties                |
//+------------------------------------------------------------------+
//--- (1) Set and (2) return the shadow color
   void              SetColor(const color colour)                             { this.m_color=colour;     }
   color             Color(void)                                        const { return this.m_color;     }
//--- (1) Set and (2) return the drawn shadow opacity
   void              SetOpacityDraw(const uchar opacity)                      { this.m_opacity=opacity;  }
   uchar             OpacityDraw(void)                                  const { return this.m_opacity;   }
//--- (1) Set and (2) return the shadow blur
   void              SetBlur(const uchar blur)                                { this.m_blur=blur;        }
   uchar             Blur(void)                                         const { return this.m_blur;      }
  };
//+------------------------------------------------------------------+
En el constructor de clases, estableceremos los valores predeterminados para la opacidad de la sombra dibujada y su desenfoque:
//+------------------------------------------------------------------+
//| Protected constructor with an object type,                       |
//| chart ID and subwindow                                           |
//+------------------------------------------------------------------+
CShadowObj::CShadowObj(CGCnvElement *main_obj,CGCnvElement *base_obj,
                       const long chart_id,
                       const int subwindow,
                       const string name,
                       const int x,
                       const int y,
                       const int w,
                       const int h) : CGCnvElement(GRAPH_ELEMENT_TYPE_SHADOW_OBJ,main_obj,base_obj,chart_id,subwindow,name,x,y,w,h)
  {
   this.m_type=OBJECT_DE_TYPE_GSHADOW;
   CGCnvElement::SetBackgroundColor(clrNONE,true);
   CGCnvElement::SetOpacity(0);
   CGCnvElement::SetActive(false);
   this.SetOpacityDraw(CLR_DEF_SHADOW_OPACITY);
   this.SetBlur(DEF_SHADOW_BLUR);
   color gray=CGCnvElement::ChangeColorSaturation(this.ChartBackgroundColor(),-100);
   this.m_color=CGCnvElement::ChangeColorLightness(gray,-50);
   this.m_shadow=false;
   this.SetVisibleFlag(false,false);
   CGCnvElement::Erase();
  }
//+------------------------------------------------------------------+
En el método que dibuja la forma de la sombra del objeto, usaremos el valor establecido para la opacidad de la sombra dibujada para especificar la opacidad:
//+------------------------------------------------------------------+
//| Draw the object shadow form                                      |
//+------------------------------------------------------------------+
void CShadowObj::DrawShadowFigureRect(const int w,const int h)
  {
   CGCnvElement::DrawRectangleFill(OUTER_AREA_SIZE,OUTER_AREA_SIZE,OUTER_AREA_SIZE+w-1,OUTER_AREA_SIZE+h-1,this.m_color,this.OpacityDraw());
   CGCnvElement::Update();
  }
//+------------------------------------------------------------------+
Vamos a escribir un nuevo método virtual que establezca la opacidad de un elemento:
//+------------------------------------------------------------------+
//| Set the element opacity                                          |
//+------------------------------------------------------------------+
void CShadowObj::SetOpacity(const uchar value,const bool redraw=false)
  {
   CGCnvElement::SetOpacity(0,false);
   this.SetOpacityDraw(value>(uchar)CLR_DEF_SHADOW_OPACITY ? (uchar)CLR_DEF_SHADOW_OPACITY : value);
   this.m_canvas.Update(redraw);
  }
//+------------------------------------------------------------------+
Al llamar a este método, primero se establecerá la transparencia completa para el fondoen el que se dibuja la sombra y, luego, para la sombra dibujada, se establecerá el valor de opacidad transmitido al método. En este caso, si el valor supera el valor predeterminado de opacidad de la sombra establecido para la biblioteca, se utilizará. Esto se hace para evitar la aparición de sombras opacas que cubran completamente los objetos subyacentes.
En el archivo \MQL5\Include\DoEasy\Objects\Graph\WForms\WinFormBase.mqh, cambiaremos la lógica del método que redibuja el objeto. Antes, la sombra de un objeto siempre se dibujaba cuando estaba presente. En este caso, si la bandera de redibujado se había reseteado, la sombra simplemente se borraba. Esto provocaba que las sombras de los objetos pudieran desaparecer. Vamos a implementar todo dentro de la verificación de la bandera de redibujado:
//+------------------------------------------------------------------+
//| Redraw the object                                                |
//+------------------------------------------------------------------+
void CWinFormBase::Redraw(bool redraw)
  {
//--- If the object type is less than the "Base WinForms object" or the object is not to be displayed, exit
   if(this.TypeGraphElement()<GRAPH_ELEMENT_TYPE_WF_BASE || !this.Displayed())
      return;
//--- Get the "Shadow" object
   CShadowObj *shadow=this.GetShadowObj();
//--- If the redraw flag is set,
   if(redraw)
     {
      //--- completely redraw the object and save its new initial look
      this.Erase(this.m_array_colors_bg,this.Opacity(),this.m_gradient_v,this.m_gradient_c,redraw);
      this.Done();
      //--- If the object has a shadow and the "Shadow" object exists, redraw it
      if(this.IsShadow() && shadow!=NULL)
        {
         //--- remove the previously drawn shadow,
         shadow.Erase();
         //--- save the relative shadow coordinates,
         int x=shadow.CoordXRelative();
         int y=shadow.CoordYRelative();
         //--- redraw the shadow,
         shadow.Draw(0,0,shadow.Blur(),redraw);
         //--- restore relative shadow coordinates
         shadow.SetCoordXRelative(x);
         shadow.SetCoordYRelative(y);
        }
     }
//--- otherwise, remove the object
   else
      this.Erase();
//--- Redraw all bound objects with the redraw flag
   for(int i=0;i<this.ElementsTotal();i++)
     {
      CWinFormBase *element=this.GetElement(i);
      if(element==NULL)
         continue;
      if(redraw)
         element.Redraw(redraw);
     }
//--- If the redraw flag is set and if this is the main object the rest are bound to,
//--- redraw the chart to display changes immediately
   if(this.IsMain() && redraw)
      ::ChartRedraw(this.ChartID());
  }
//+------------------------------------------------------------------+
En el método que retorna la descripción de la propiedad entera de un elemento, añadiremos un bloque de código para retornar las descripciones de nuevas propiedades:
//+------------------------------------------------------------------+
//| Return the description of the control integer property           |
//+------------------------------------------------------------------+
string CWinFormBase::GetPropertyDescription(ENUM_CANV_ELEMENT_PROP_INTEGER property,bool only_prop=false)
  {
   return
     (
      property==CANV_ELEMENT_PROP_ID                           ?  CMessage::Text(MSG_CANV_ELEMENT_PROP_ID)+
         (only_prop ? "" : !this.SupportProperty(property)     ?  ": "+CMessage::Text(MSG_LIB_PROP_NOT_SUPPORTED) :
          ": "+(string)this.GetProperty(property)
         )  :

      //---...
      //---...

      property==CANV_ELEMENT_PROP_SPLIT_CONTAINER_PANEL2_MIN_SIZE ?  CMessage::Text(MSG_CANV_ELEMENT_PROP_SPLIT_CONTAINER_PANEL2_MIN_SIZE)+
         (only_prop ? "" : !this.SupportProperty(property)     ?  ": "+CMessage::Text(MSG_LIB_PROP_NOT_SUPPORTED) :
          ": "+(string)this.GetProperty(property)
         )  :
      property==CANV_ELEMENT_PROP_TOOLTIP_INITIAL_DELAY ?  CMessage::Text(MSG_CANV_ELEMENT_PROP_TOOLTIP_INITIAL_DELAY)+
         (only_prop ? "" : !this.SupportProperty(property)     ?  ": "+CMessage::Text(MSG_LIB_PROP_NOT_SUPPORTED) :
          ": "+(string)this.GetProperty(property)
         )  :
      property==CANV_ELEMENT_PROP_TOOLTIP_AUTO_POP_DELAY ?  CMessage::Text(MSG_CANV_ELEMENT_PROP_TOOLTIP_AUTO_POP_DELAY)+
         (only_prop ? "" : !this.SupportProperty(property)     ?  ": "+CMessage::Text(MSG_LIB_PROP_NOT_SUPPORTED) :
          ": "+(string)this.GetProperty(property)
         )  :
      property==CANV_ELEMENT_PROP_TOOLTIP_RESHOW_DELAY ?  CMessage::Text(MSG_CANV_ELEMENT_PROP_TOOLTIP_RESHOW_DELAY)+
         (only_prop ? "" : !this.SupportProperty(property)     ?  ": "+CMessage::Text(MSG_LIB_PROP_NOT_SUPPORTED) :
          ": "+(string)this.GetProperty(property)
         )  :
      property==CANV_ELEMENT_PROP_TOOLTIP_SHOW_ALWAYS ?  CMessage::Text(MSG_CANV_ELEMENT_PROP_TOOLTIP_SHOW_ALWAYS)+
         (only_prop ? "" : !this.SupportProperty(property)     ?  ": "+CMessage::Text(MSG_LIB_PROP_NOT_SUPPORTED) :
          ": "+(string)this.GetProperty(property)
         )  :
      property==CANV_ELEMENT_PROP_TOOLTIP_ICON ?  CMessage::Text(MSG_CANV_ELEMENT_PROP_TOOLTIP_ICON)+
         (only_prop ? "" : !this.SupportProperty(property)     ?  ": "+CMessage::Text(MSG_LIB_PROP_NOT_SUPPORTED) :
          ": "+(string)this.GetProperty(property)
         )  :
      property==CANV_ELEMENT_PROP_TOOLTIP_IS_BALLOON ?  CMessage::Text(MSG_CANV_ELEMENT_PROP_TOOLTIP_IS_BALLOON)+
         (only_prop ? "" : !this.SupportProperty(property)     ?  ": "+CMessage::Text(MSG_LIB_PROP_NOT_SUPPORTED) :
          ": "+(string)this.GetProperty(property)
         )  :
      property==CANV_ELEMENT_PROP_TOOLTIP_USE_FADING ?  CMessage::Text(MSG_CANV_ELEMENT_PROP_TOOLTIP_USE_FADING)+
         (only_prop ? "" : !this.SupportProperty(property)     ?  ": "+CMessage::Text(MSG_LIB_PROP_NOT_SUPPORTED) :
          ": "+(string)this.GetProperty(property)
         )  :
      ""
     );
  }
//+------------------------------------------------------------------+
En el método que retorna la descripción de una propiedad de tipo string del elemento, también añadiremos el retorno de las descripciones de las nuevas propiedades de tipo string:
//+------------------------------------------------------------------+
//| Return the description of the control string property            |
//+------------------------------------------------------------------+
string CWinFormBase::GetPropertyDescription(ENUM_CANV_ELEMENT_PROP_STRING property,bool only_prop=false)
  {
   return
     (
      property==CANV_ELEMENT_PROP_NAME_OBJ         ?  CMessage::Text(MSG_CANV_ELEMENT_PROP_NAME_OBJ)+": \""+this.GetProperty(property)+"\""        :
      property==CANV_ELEMENT_PROP_NAME_RES         ?  CMessage::Text(MSG_CANV_ELEMENT_PROP_NAME_RES)+": \""+this.GetProperty(property)+"\""        :
      property==CANV_ELEMENT_PROP_TEXT             ?  CMessage::Text(MSG_CANV_ELEMENT_PROP_TEXT)+": \""+this.GetProperty(property)+"\""            :
      property==CANV_ELEMENT_PROP_DESCRIPTION      ?  CMessage::Text(MSG_CANV_ELEMENT_PROP_DESCRIPTION)+": \""+this.GetProperty(property)+"\""     :
      property==CANV_ELEMENT_PROP_TOOLTIP_TITLE    ?  CMessage::Text(MSG_CANV_ELEMENT_PROP_TOOLTIP_TITLE)+": \""+this.GetProperty(property)+"\""   :
      property==CANV_ELEMENT_PROP_TOOLTIP_TEXT     ?  CMessage::Text(MSG_CANV_ELEMENT_PROP_TOOLTIP_TEXT)+": \""+this.GetProperty(property)+"\""    :
      ""
     );
  }
//+------------------------------------------------------------------+
Como ahora tendremos métodos para dibujar flechas estándar, añadiremos su llamada a los métodos DrawArrow() para dibujar flechas en las clases de objeto de botón con flechas.
En el archivo \MQL5\Include\DoEasy\Objects\Graph\WForms\Helpers\ArrowLeftButton.mqh:
//+------------------------------------------------------------------+
//| Draw the arrow                                                   |
//+------------------------------------------------------------------+
void CArrowLeftButton::DrawArrow(void)
  {
   CGCnvElement::DrawArrowLeft(5,2,this.ArrowColor(),this.Opacity());
  }
//+------------------------------------------------------------------+
En el archivo \MQL5\Include\DoEasy\Objects\Graph\WForms\Helpers\ArrowRightButton.mqh:
//+------------------------------------------------------------------+
//| Draw the arrow                                                   |
//+------------------------------------------------------------------+
void CArrowRightButton::DrawArrow(void)
  {
   CGCnvElement::DrawArrowRight(6,2,this.ArrowColor(),this.Opacity());
  }
//+------------------------------------------------------------------+
En el archivo \MQL5\Include\DoEasy\Objects\Graph\WForms\Helpers\ArrowUpButton.mqh:
//+------------------------------------------------------------------+
//| Draw the arrow                                                   |
//+------------------------------------------------------------------+
void CArrowUpButton::DrawArrow(void)
  {
   CGCnvElement::DrawArrowUp(2,5,this.ArrowColor(),this.Opacity());
  }
//+------------------------------------------------------------------+
En el archivo \MQL5\Include\DoEasy\Objects\Graph\WForms\Helpers\ArrowDownButton.mqh:
//+------------------------------------------------------------------+
//| Draw the arrow                                                   |
//+------------------------------------------------------------------+
void CArrowDownButton::DrawArrow(void)
  {
   CGCnvElement::DrawArrowDown(2,6,this.ArrowColor(),this.Opacity());
  }
//+------------------------------------------------------------------+
Como podemos ver, en cada clase, simplemente llamaremos al método para dibujar la flecha deseada de la clase del elemento gráfico básico correspondiente al propósito del objeto de la clase. Si la clase crea un botón de flecha izquierda, se llamará al método de dibujado de la flecha izquierda, para un botón de flecha derecha, se llamará al método de dibujado de flecha derecha, y así sucesivamente.
Vamos a comenzar a crear un objeto de pista emergente.
La clase de objeto WinForms Tooltip
En la carpeta de la biblioteca \MQL5\Include\DoEasy\Objects\Graph\WForms\Common Controls\, crearemos un nuevo archivo ToolTip.mqh de la clase CToolTip . La clase se deberá heredar de la clase del objeto de pista emergente básico, y su archivo se deberá incluir en el archivo de la clase generada:
//+------------------------------------------------------------------+
//|                                                      ToolTip.mqh |
//|                                  Copyright 2022, MetaQuotes Ltd. |
//|                             https://mql5.com/en/users/artmedia70 |
//+------------------------------------------------------------------+
#property copyright "Copyright 2022, MetaQuotes Ltd."
#property link      "https://mql5.com/en/users/artmedia70"
#property version   "1.00"
#property strict    // Necessary for mql4
//+------------------------------------------------------------------+
//| Include files                                                    |
//+------------------------------------------------------------------+
#include "..\Helpers\HintBase.mqh"
//+------------------------------------------------------------------+
//| Class of the base Hint object of the WForms controls             |
//+------------------------------------------------------------------+
class CToolTip : public CHintBase
  {
  }
En la sección privada de la clase, declararemos un método que ajustará el tamaño de la pista según los textos establecidos para ella. En la sección protegida de la clase, escribiremos los métodos que dibujan iconos de diferentes tipos y declararemos un constructor de clase protegida:
class CToolTip : public CHintBase
  {
private:
//--- Adjust a tooltip size according to a text size
   void              CorrectSizeByTexts(void);
protected:
   //--- Draw (1) tooltip, (2) icon, (3) Info, (4) Warning, (5) Error and (6) User
   virtual void      DrawHint(const int shift);
   void              DrawIcon(void);
   void              DrawIconInfo(void)                  { CGCnvElement::DrawIconInfo(3,1,this.Opacity());                       }
   void              DrawIconWarning(void)               { CGCnvElement::DrawIconWarning(3,1,this.Opacity());                    }
   void              DrawIconError(void)                 { CGCnvElement::DrawIconError(3,1,this.Opacity());                      }
   virtual void      DrawIconUser(void)                  { return; }
//--- Protected constructor with object type, chart ID and subwindow
                     CToolTip(const ENUM_GRAPH_ELEMENT_TYPE type,
                              CGCnvElement *main_obj,CGCnvElement *base_obj,
                              const long chart_id,
                              const int subwindow,
                              const string descript,
                              const int x,
                              const int y,
                              const int w,
                              const int h);
public:
Los métodos que dibujan los iconos Infor, Warning y Error simplemente llamarán a los métodos correspondientes de la clase de elemento gráfico básico que escribimos anteriormente, mientras que el método virtual que dibuja un icono personalizado no hará nada; deberá redefinirse en las clases heredadas en caso de que necesitemos cambiar de forma independiente la funcionalidad de este objeto.
En la sección pública de la clase, escribiremos los métodos para establecer y retornar las propiedades que añadiremos hoy para este objeto. Además, declararemos un constructor paramétrico de clases, así como los métodos de muestra, redibujado, borrado, dibujado de un marco e inicialización de un objeto:
public:
//--- (1) Set and (2) return the tooltip display delay
   void              SetInitialDelay(const long delay)   { this.SetProperty(CANV_ELEMENT_PROP_TOOLTIP_INITIAL_DELAY,delay);      }
   long              InitialDelay(void)                  { return this.GetProperty(CANV_ELEMENT_PROP_TOOLTIP_INITIAL_DELAY);     }

//--- (1) Set and (2) return the tooltip display duration
   void              SetAutoPopDelay(const long delay)   { this.SetProperty(CANV_ELEMENT_PROP_TOOLTIP_AUTO_POP_DELAY,delay);     }
   long              AutoPopDelay(void)                  { return this.GetProperty(CANV_ELEMENT_PROP_TOOLTIP_AUTO_POP_DELAY);    }

//--- (1) Set and (2) return the delay in a display of a new tooltip of one element
   void              SetReshowDelay(const long delay)    { this.SetProperty(CANV_ELEMENT_PROP_TOOLTIP_RESHOW_DELAY,delay);       }
   long              ReshowDelay(void)                   { return this.GetProperty(CANV_ELEMENT_PROP_TOOLTIP_RESHOW_DELAY);      }

//--- (1) Set and (2) return the flag for displaying a tooltip in an inactive window
   void              SetShowAlways(const bool flag)      { this.SetProperty(CANV_ELEMENT_PROP_TOOLTIP_SHOW_ALWAYS,flag);         }
   bool              ShowAlways(void)                    { return (bool)this.GetProperty(CANV_ELEMENT_PROP_TOOLTIP_SHOW_ALWAYS); }

//--- (1) Set and (2) return the type of the icon displayed in a tooltip
   void              SetIcon(const ENUM_CANV_ELEMENT_TOOLTIP_ICON ico)
                       { this.SetProperty(CANV_ELEMENT_PROP_TOOLTIP_ICON,ico);   }
   ENUM_CANV_ELEMENT_TOOLTIP_ICON Icon(void)
                       { return (ENUM_CANV_ELEMENT_TOOLTIP_ICON)this.GetProperty(CANV_ELEMENT_PROP_TOOLTIP_ICON); }

//--- (1) Set and (2) return the cloud tooltip flag
   void              SetBalloon(const bool flag)         { this.SetProperty(CANV_ELEMENT_PROP_TOOLTIP_IS_BALLOON,flag);          }
   bool              Balloon(void)                       { return (bool)this.GetProperty(CANV_ELEMENT_PROP_TOOLTIP_IS_BALLOON);  }

//--- (1) Set and (2) return the flag of fading when showing/hiding a tooltip
   void              SetUseFading(const bool flag)       { this.SetProperty(CANV_ELEMENT_PROP_TOOLTIP_USE_FADING,flag);          }
   bool              UseFading(void)                     { return (bool)this.GetProperty(CANV_ELEMENT_PROP_TOOLTIP_USE_FADING);  }

//--- (1) Set and (2) return the Tooltip title
   void              SetTitle(const string header);
   string            Title(void)                         { return this.GetProperty(CANV_ELEMENT_PROP_TOOLTIP_TITLE);             }

//--- (1,2) Set the Tooltip text
   virtual void      SetTooltipText(const string text);
   virtual void      SetText(const string text)          { this.SetTooltipText(text);                                            }

//--- Constructor
                     CToolTip(CGCnvElement *main_obj,CGCnvElement *base_obj,
                              const long chart_id,
                              const int subwindow,
                              const string descript,
                              const int x,
                              const int y,
                              const int w,
                              const int h);
//--- Display the element
   virtual void      Show(void);
//--- Redraw the object
   virtual void      Redraw(bool redraw);
//--- Clear the element filling it with color and opacity
   virtual void      Erase(const color colour,const uchar opacity,const bool redraw=false);
//--- Clear the element with a gradient fill
   virtual void      Erase(color &colors[],const uchar opacity,const bool vgradient,const bool cycle,const bool redraw=false);
//--- Draw the hint frame
   virtual void      DrawFrame(void);
//--- Initialize the variables
   virtual void      Initialize(void);
  };
//+------------------------------------------------------------------+
Vamos a echar un vistazo más de cerca a los métodos de clase declarados.
Constructor protegido con indicación del tipo de objeto, el identificador del gráfico y la subventana:
//+------------------------------------------------------------------+
//| Protected constructor with an object type,                       |
//| chart ID and subwindow                                           |
//+------------------------------------------------------------------+
CToolTip::CToolTip(const ENUM_GRAPH_ELEMENT_TYPE type,
                   CGCnvElement *main_obj,CGCnvElement *base_obj,
                   const long chart_id,
                   const int subwindow,
                   const string descript,
                   const int x,
                   const int y,
                   const int w,
                   const int h) : CHintBase(type,main_obj,base_obj,chart_id,subwindow,descript,x,y,w,h)
  {
//--- Set the specified graphical element type for the object and assign the library object type to the current object
   this.SetTypeElement(type);
   this.m_type=OBJECT_DE_TYPE_GWF_COMMON;
   this.Initialize();
  }
//+------------------------------------------------------------------+
Al constructor se transmitirán el tipo del elemento gráfico creado y otros parámetros del objeto que se establecerán en la línea de inicialización de la clase principal. En el cuerpo de la clase, estableceremos el tipo del elemento gráfico transmitido al método y el tipo del objeto gráfico de la biblioteca, y llamaremos al método para establecer todos los parámetros predeterminados del objeto.
Constructor paramétrico:
//+------------------------------------------------------------------+
//| Constructor indicating the main and base objects,                |
//| chart ID and subwindow                                           |
//+------------------------------------------------------------------+
CToolTip::CToolTip(CGCnvElement *main_obj,CGCnvElement *base_obj,
                   const long chart_id,
                   const int subwindow,
                   const string descript,
                   const int x,
                   const int y,
                   const int w,
                   const int h) : CHintBase(GRAPH_ELEMENT_TYPE_WF_TOOLTIP,main_obj,base_obj,chart_id,subwindow,descript,x,y,w,h)
  {
   this.SetTypeElement(GRAPH_ELEMENT_TYPE_WF_TOOLTIP);
   this.m_type=OBJECT_DE_TYPE_GWF_COMMON;
   this.Initialize();
  }
//+------------------------------------------------------------------+
Aquí todo será exactamente igual que en el constructor protegido, pero el tipo de elemento gráfico estará codificado como Tooltip.
Método de inicialización de variables:
//+------------------------------------------------------------------+
//| Initialize the variables                                         |
//+------------------------------------------------------------------+
void CToolTip::Initialize(void)
  {
   this.SetBackgroundColor(CLR_DEF_CONTROL_HINT_BACK_COLOR,true);
   this.SetBorderColor(CLR_DEF_CONTROL_HINT_BORDER_COLOR,true);
   this.SetForeColor(CLR_DEF_CONTROL_HINT_FORE_COLOR,true);
   this.SetDisplayed(false);
   this.SetBorderSizeAll(1);
   this.SetBorderStyle(FRAME_STYLE_SIMPLE);
   this.SetShadow(true);
   this.DrawShadow(2,2,CLR_DEF_SHADOW_COLOR,CLR_DEF_SHADOW_OPACITY,DEF_SHADOW_BLUR);
   this.SetOpacity(255,false);
   this.SetTitle("");
   this.SetTooltipText("");
   this.SetInitialDelay(500);
   this.SetAutoPopDelay(5000);
   this.SetReshowDelay(100);
   this.SetShowAlways(false);
   this.SetIcon(CANV_ELEMENT_TOOLTIP_ICON_NONE);
   this.SetBalloon(false);
   this.SetUseFading(true);
   this.SetTextAlign(ANCHOR_LEFT_UPPER);
   this.SetTextAnchor(FRAME_ANCHOR_LEFT_TOP);
   this.SetFont(DEF_FONT,DEF_FONT_SIZE,FW_NORMAL);
   this.SetDisplayed(false);
   this.Hide();
  }
//+------------------------------------------------------------------+
Aquí se establecerán todas las propiedades del objeto de pista emergente que este debería tener inmediatamente después de su creación.
Método virtual que redibuja un objeto:
//+------------------------------------------------------------------+
//| Redraw the object                                                |
//+------------------------------------------------------------------+
void CToolTip::Redraw(bool redraw)
  {
//--- If the element should not be displayed (hidden inside another control), leave
   if(!this.Displayed() || this.Text()=="")
      return;
//--- Get the "Shadow" object
   CShadowObj *shadow=this.GetShadowObj();
//--- If the redraw flag is set,
   if(redraw)
     {
      //--- completely redraw the object and save its new initial look
      this.Erase(this.m_array_colors_bg,this.Opacity(),this.m_gradient_v,this.m_gradient_c,true);
      this.Done();
      //--- If the object has a shadow and the "Shadow" object exists, redraw it
      if(this.IsShadow() && shadow!=NULL)
        {
         //--- remove the previously drawn shadow,
         shadow.Erase();
         //--- save the relative shadow coordinates,
         int x=shadow.CoordXRelative();
         int y=shadow.CoordYRelative();
         //--- redraw the shadow,
         shadow.Draw(0,0,shadow.Blur(),true);
         //--- restore relative shadow coordinates
         shadow.SetCoordXRelative(x);
         shadow.SetCoordYRelative(y);
        }
     }
//--- otherwise, erase the object and its shadow
   else
     {
      CGCnvElement::Erase();
      if(this.IsShadow() && shadow!=NULL)
         shadow.Erase();
     }
  }
//+------------------------------------------------------------------+
La lógica del método se explica con detalle en los comentarios al código. Aquí, casi todo resultará exactamente igual que en el método homónimo en la clase del objeto básico WinForms CWinFormBase, salvo por el redibujado de los objetos vinculados y el gráfico.
Métodos para borrar un elemento pintándolo con un color de fondo:
//+------------------------------------------------------------------+
//| Clear the element filling it with color and opacity              |
//+------------------------------------------------------------------+
void CToolTip::Erase(const color colour,const uchar opacity,const bool redraw=false)
  {
//--- Fill the element having the specified color and the redrawing flag
   CGCnvElement::EraseNoCrop(colour,opacity,false);
//--- If the object has a frame, draw it
   if(this.BorderStyle()!=FRAME_STYLE_NONE)
      this.DrawFrame();
//--- Draw a hint
   this.DrawHint(0);
//--- Update the element having the specified redrawing flag
   this.Update(redraw);
  }
//+------------------------------------------------------------------+
//| Clear the element with a gradient fill                           |
//+------------------------------------------------------------------+
void CToolTip::Erase(color &colors[],const uchar opacity,const bool vgradient,const bool cycle,const bool redraw=false)
  {
//--- Fill the element having the specified color array and the redrawing flag
   CGCnvElement::EraseNoCrop(colors,opacity,vgradient,cycle,false);
//--- If the object has a frame, draw it
   if(this.BorderStyle()!=FRAME_STYLE_NONE)
      this.DrawFrame();
//--- Draw a hint
   this.DrawHint(0);
//--- Update the element having the specified redrawing flag
   this.Update(redraw);
  }
//+------------------------------------------------------------------+
Los métodos resultarán idénticos a los métodos homónimos de otros elementos gráficos de la biblioteca y, en concreto, a los métodos del objeto padre. Si en lo sucesivo no resulta necesario realizar más cambios aquí, se eliminarán de la clase.
Método que dibuja el marco de un elemento:
//+------------------------------------------------------------------+
//| Draw the element border                                          |
//+------------------------------------------------------------------+
void CToolTip::DrawFrame(void)
  {
//--- If the element should not be displayed (hidden inside another control), leave
   if(!this.Displayed() || this.Text()=="")
      return;
//--- Draw a rectangle along the object edges
   this.DrawRectangle(0,0,this.Width()-1,this.Height()-1,this.BorderColor(),this.Opacity());
  }
//+------------------------------------------------------------------+
La lógica del método se comenta con todo detalle en el código. La diferencia con el método de la clase principal aquí consistirá solo en verificar la necesidad de mostrar este elemento.
Método que representa el elemento:
//+------------------------------------------------------------------+
//| Show the element                                                 |
//+------------------------------------------------------------------+
void CToolTip::Show(void)
  {
//--- If the element should not be displayed (hidden inside another control), leave
   if(!this.Displayed() || this.TooltipText()=="")
      return;
//--- Display the object
   CGCnvElement::Show();
//--- Get the "Shadow" object
   CShadowObj *shadow=this.GetShadowObj();
//--- If the object has a shadow and the "Shadow" object exists, display the shadow
   if(this.IsShadow() && shadow!=NULL)
     {
      shadow.Show();
      this.BringToTop();
     }
//--- Redraw the object
   this.Redraw(true);
  }
//+------------------------------------------------------------------+
El método verificará si el objeto tiene una sombra y, si la hay, también deberá mostrarse. Al mismo tiempo, después de mostrarse la sombra, el objeto en sí deberá moverse al primer plano, ya que después de que se muestre la sombra, el objeto se encontrará debajo.
Método que establece el texto para Tooltip:
//+------------------------------------------------------------------+
//| Set the Tooltip text                                             |
//+------------------------------------------------------------------+
void CToolTip::SetTooltipText(const string text)
  {
   CGCnvElement::SetTooltipText(text);
   CWinFormBase::SetText(text);
   this.CorrectSizeByTexts();
  }
//+------------------------------------------------------------------+
Aquí primero estableceremos el texto de la pista en la nueva propiedad del objeto, y luego estableceremos el mismo texto en la propiedad "texto del objeto", ya que estas propiedades pueden considerarse idénticas para el objeto de pista. A continuación, se llamará al método para ajustar el tamaño del objeto según los textos del encabezado y de la pista establecidos para él, que consideraremos a continuación.
Método que establece el texto del encabezado para Tooltip:
//+------------------------------------------------------------------+
//| Set the title text for Tooltip                                   |
//+------------------------------------------------------------------+
void CToolTip::SetTitle(const string header)
  {
   this.SetProperty(CANV_ELEMENT_PROP_TOOLTIP_TITLE,header);
   this.CorrectSizeByTexts();
  }
//+------------------------------------------------------------------+
Aquí, primero estableceremos el texto transmitido al método en una nueva propiedad de tipo string del objeto y luego llamaremos al método de ajuste de tamaño del objeto.
Método que ajusta el tamaño de la pista según el tamaño de los textos:
//+------------------------------------------------------------------+
//| Adjust tooltip size to fit texts                                 |
//+------------------------------------------------------------------+
void CToolTip::CorrectSizeByTexts(void)
  {
//--- If the tooltip text is not set for the object, leave
   if(this.TooltipText()=="" || this.TooltipText()==NULL)
      return;
//--- Declare variables for the width and height of the object
   int w=this.Width();
   int h=this.Height();
//--- Declare variables for the width and height of the title and tooltip texts
   int w1=0;
   int h1=0;
   int w2=w;
   int h2=h;
//--- If the header text is set, get and adjust its size
   if(this.Title()!="" && this.Title()!=NULL)
     {
      this.TextSize(this.Title(),w1,h1);
      if(w1<6)
         w1=6;
      if(h1<19)
         h1=19;
     }
//--- If the tooltip text is set, get and adjust its size
   this.TextSize(this.Text(),w2,h2);
   if(w2<6)
      w2=6;
   if(h2<19)
      h2=19;
//--- Calculate the total size of the tooltip
   w=fmax(w1,w2);
   h=h1+h2;
//--- Set the size of the object in accordance with the calculated ones
   this.Resize(w+12+(this.Icon()>CANV_ELEMENT_TOOLTIP_ICON_NONE && this.Icon()<=CANV_ELEMENT_TOOLTIP_ICON_USER ? 16 : 0),h,false);
  }
//+------------------------------------------------------------------+
La lógica del método se explica con detalle en los comentarios al código. En resumen, si no se establece ningún texto de pista para un objeto, no se mostrará ninguna pista, independientemente de si se ha establecido un texto de encabezado para el objeto o no. Y si la pista no se muestra, entonces no será necesario cambiar su tamaño. Por consiguiente, en tal situación, simplemente saldremos del método, y luego, si el texto de la pista está configurado, necesitaremos obtener los tamaños del texto del encabezado y el texto de la pista. Si la anchura del texto resultante es inferior a 6, entonces la anchura del objeto será igual a 6, si la altura es inferior a 19, entonces la altura del objeto debería ser 19. A continuación, determinaremos la mayor anchura de los dos textos y la usaremos como la anchura del objeto. Y la altura del objeto será igual a la suma de las alturas de los dos textos. Al cambiar el tamaño, tendremos en cuenta una separación del texto de seis píxeles respecto al borde izquierdo. En consecuencia, la separación respecto a la derecha también deberá ser igual a seis píxeles. Por ello, añadiremos 12 píxeles a la anchura calculada y verificaremos la condición para la presencia del icono. Si debemos dibujar un icono, añadiremos una anchura de icono de 16 píxeles a la anchura del objeto. Como resultado, obtendremos el tamaño correcto del objeto, es decir, los textos para el encabezado, la descripción y el icono (si está disponible), se verán armoniosos.
Método que dibuja la pista:
//+------------------------------------------------------------------+
//| Draw a hint                                                      |
//+------------------------------------------------------------------+
void CToolTip::DrawHint(const int shift)
  {
   int y=3;
   int x=6+(this.Icon()>CANV_ELEMENT_TOOLTIP_ICON_NONE ? 16 : 0);
   this.DrawIcon();
   if(this.Title()!="" && this.Title()!=NULL)
     {
      this.SetFont(DEF_FONT,DEF_FONT_SIZE,FW_BLACK);
      this.Text(x,y,this.Title(),this.ForeColor(),this.Opacity(),this.TextAnchor());
      this.SetFont(DEF_FONT,DEF_FONT_SIZE,FW_NORMAL);
      y+=this.TextHeight(this.Title())+4;
     }
   this.Text(x,y,this.Text(),this.ForeColor(),this.Opacity(),this.TextAnchor());
  }
//+------------------------------------------------------------------+
Para comenzar, estableceremos una separación vertical del texto de tres píxeles, y una horizontal de seis píxeles. Si debemos dibujar un icono, añadiremos los 16 píxeles de su anchura a la separación horizontal. Si la pista debe tener un encabezado, ajustaremos la fuente en "negrita", mostraremos el texto del encabezado, restableceremos el grosor de la fuente al normal y añadiremos la altura del texto del encabezado más 4 píxeles a la coordenada vertical. Cuando hayamos terminado, mostraremos el texto de la pista. Si no hay encabezado, el texto de la pista se mostrará en la coordenada Y inicial, y si hay un encabezado, en la calculada.
Método para dibujar iconos:
//+------------------------------------------------------------------+
//| Draw an icon                                                     |
//+------------------------------------------------------------------+
void CToolTip::DrawIcon(void)
  {
   switch(this.Icon())
     {
      case CANV_ELEMENT_TOOLTIP_ICON_INFO    :  this.DrawIconInfo();    break;
      case CANV_ELEMENT_TOOLTIP_ICON_WARNING :  this.DrawIconWarning(); break;
      case CANV_ELEMENT_TOOLTIP_ICON_ERROR   :  this.DrawIconError();   break;
      case CANV_ELEMENT_TOOLTIP_ICON_USER    :  this.DrawIconUser();    break;
      //--- Icon None
      default: break;
     }
  }
//+------------------------------------------------------------------+
Dependiendo del tipo de icono establecido para el objeto, llamaremos al método para dibujar la imagen correspondiente.
Por ahora, esto es todo lo que necesitaremos para que esta clase funcione. A continuación, modificaremos la clase para obtener los resultados requeridos de su trabajo.
Asimismo, mejoraremos el resto de las clases de la biblioteca para poder trabajar con el nuevo objeto.
En el archivo \MQL5\Include\DoEasy\Objects\Graph\Form.mqh de la clase de objeto de formulario, en la sección pública, declararemos los métodos virtuales necesarios para configurar la bandera de muestra de un control no oculto y para configurar la opacidad del elemento:
//--- Update the coordinates (shift the canvas)
   virtual bool      Move(const int x,const int y,const bool redraw=false);
//--- Set the priority of a graphical object for receiving the event of clicking on a chart
   virtual bool      SetZorder(const long value,const bool only_prop);
//--- Set the object above all
   virtual void      BringToTop(void);
//--- Set the flag for displaying a non-hidden control
   virtual void      SetDisplayed(const bool flag);
//--- Set the element opacity
   virtual void      SetOpacity(const uchar value,const bool redraw=false);

//--- Event handler
   virtual void      OnChartEvent(const int id,const long& lparam,const double& dparam,const string& sparam);
En el mismo lugar, en la sección pública, declararemos los métodos para trabajar con el objeto de pista adjunto y para configurar su texto:
//--- Add a new attached element
   bool              AddNewElement(CGCnvElement *obj,const int x,const int y);

//--- (1) Attach, return (2) the attached ToolTip object, (3) by description
   bool              AddTooltip(CForm *tooltip);
   CForm            *GetTooltip(void);
   CForm            *GetTooltipByDescription(const string descript);
//--- Set the text for Tooltip
   virtual void      SetTooltipText(const string text);

//--- Draw an object shadow
   void              DrawShadow(const int shift_x,const int shift_y,const color colour,const uchar opacity=127,const uchar blur=DEF_SHADOW_BLUR);
Vamos a corregir el método que crea un nuevo objeto gráfico:
//+------------------------------------------------------------------+
//| Create a new graphical object                                    |
//+------------------------------------------------------------------+
CGCnvElement *CForm::CreateNewGObject(const ENUM_GRAPH_ELEMENT_TYPE type,
                                      const int obj_num,
                                      const string descript,
                                      const int x,
                                      const int y,
                                      const int w,
                                      const int h,
                                      const color colour,
                                      const uchar opacity,
                                      const bool movable,
                                      const bool activity)
  {
   CGCnvElement *element=NULL;
   //--- Depending on the created object type,
   switch(type)
     {
      //--- create a graphical element object
      case GRAPH_ELEMENT_TYPE_ELEMENT  :
         element=new CGCnvElement(type,this.GetMain(),this.GetObject(),this.ID(),obj_num,this.ChartID(),this.SubWindow(),descript,x,y,w,h,colour,opacity,movable,activity);
        break;
      //--- create a form object
      case GRAPH_ELEMENT_TYPE_FORM     :
         element=new CForm(type,this.GetMain(),this.GetObject(),this.ChartID(),this.SubWindow(),descript,x,y,w,h);
        break;
      default:
        break;
     }
   if(element==NULL)
      ::Print(DFUN,CMessage::Text(MSG_LIB_SYS_FAILED_CREATE_ELM_OBJ),this.TypeElementDescription(type));
   else
     {
      element.SetMovable(movable);
      element.SetCoordXRelative(element.CoordX()-this.CoordX());
      element.SetCoordYRelative(element.CoordY()-this.CoordY());
     }
   return element;
  }
//+------------------------------------------------------------------+
Si el objeto no se crea, se mostrará una entrada al respecto en el diario de registro. Y luego venía una llamada al puntero del objeto no creado, lo que podía provocar un error crítico. Esta es la razón por la que el bloque para configurar los parámetros del objeto creado se incluirá en else {}.
Cada objeto WinForms deberá poder adjuntarse a sí mismo un puntero al objeto de pista creado previamente. Para que el objeto "entienda" que ya se le ha adjuntado una pista de este tipo, deberá distinguir entre ellas según la descripción registrada en el objeto de pista. Por lo tanto, podremos crear varios objetos de pista emergente en el objeto contenedor, estableciendo una descripción única para cada uno de ellos. Entonces podremos obtener un puntero a cualquier otro objeto adjunto en el que se han creado las pistas y asignar la pista deseada a este objeto según su descripción. Para hacer esto, cada objeto WinForms deberá tener métodos que le permitan adjuntar un objeto con el tipo CForm y sus descendientes desde el exterior. Ya hemos declarado tales métodos en la clase de objeto de formulario. Vamos a analizar su aplicación.
Método que crea un objeto ToolTip vinculado:
//+------------------------------------------------------------------+
//| Create the attached ToolTip object                               |
//+------------------------------------------------------------------+
bool CForm::AddTooltip(CForm *tooltip)
  {
//--- If the pointer to an empty object is passed or the object type is not equal to Tooltip, report an error and return 'false'
   if(tooltip==NULL || tooltip.TypeGraphElement()!=GRAPH_ELEMENT_TYPE_WF_TOOLTIP)
     {
      CMessage::ToLog(DFUN,MSG_GRAPH_ELM_COLLECTION_ERR_EMPTY_OBJECT);
      return false;
     }
//--- If the list of attached objects already contains the Tooltip object with the same description as the object passed to the method -
//--- inform of that in the journal and return 'false'
   if(this.GetTooltipByDescription(tooltip.Description())!=NULL)
     {
      ::Print(DFUN,this.TypeElementDescription()+": ",CMessage::Text(MSG_FORM_TOOLTIP_OBJ_ALREADY_EXISTS),": ",tooltip.Name(),", Description: \"",tooltip.Description(),"\"");
      return false;
     }
//--- If it was not possible to add the Tooltip object to the list of attached objects, report an error and return 'false'
   if(!this.m_list_elements.Add(tooltip))
     {
      ::Print(DFUN,CMessage::Text(MSG_LIB_SYS_FAILED_OBJ_ADD_TO_LIST),": ",tooltip.NameObj());
      return false;
     }
//--- If the coordinates of the object added to the list are changed, set the Tooltip relative coordinates
   if(tooltip.Move(this.CoordX()+1,this.CoordY()+1))
     {
      tooltip.SetCoordXRelative(tooltip.CoordX()-this.CoordX());
      tooltip.SetCoordYRelative(tooltip.CoordY()-this.CoordY());
     }
//--- Set this object as the base object for the Tooltip object and return 'true'
   tooltip.SetBase(this.GetObject());
   return true;
  }
//+------------------------------------------------------------------+
La lógica del método se detalla en los comentarios al código. El puntero al objeto de pista se transmitirá al método. Si un objeto de este tipo con exactamente la misma descripción ya está adjunto al objeto, entonces consideraremos que se trata de la misma pista. Reportaremos un error y retornaremos false. A continuación, adjuntaremos a la lista de objetos adjuntos el puntero al objeto de pista transmitido al método. En este caso, podría ser que el objeto en sí no sepa nada sobre el tipo CToolTip, pero, como este tipo es heredero de la clase CForm, será correcto transmitirlo al método con el tipo CForm. Y luego, en la clase de colección donde se procesan los objetos emergentes, podremos obtener este objeto de la lista y trabajar con él como con un objeto CToolTip. Al final del método, escribiremos un puntero al objeto actual en el objeto de pista para que se convierta en básico para el objeto de pista. Como los objetos de pista se pueden crear en otros objetos y luego adjuntarse a terceros, entonces, a la hora de determinar a qué objeto se asigna como pista nos ayudará la entrada sobre el objeto básico. El objeto básico es el objeto al que se asigna esta pista.
Método que retorna el objeto ToolTip adjunto:
//+------------------------------------------------------------------+
//| Return the attached ToolTip object                               |
//+------------------------------------------------------------------+
CForm *CForm::GetTooltip(void)
  {
   CForm *obj=NULL;
   for(int i=this.ElementsTotal()-1;i>WRONG_VALUE;i--)
     {
      obj=this.GetElement(i);
      if(obj!=NULL && obj.TypeGraphElement()==GRAPH_ELEMENT_TYPE_WF_TOOLTIP)
         break;
     }
   return obj;
  }
//+------------------------------------------------------------------+
Aquí, en un ciclo por los objetos adjuntos, obtendremos el siguiente objeto según el índice del ciclo. Si este objeto no está vacío y tiene el tipo CToolTip, interrumpiremos el ciclo. Al final del mismo, retornaremos el puntero almacenado en la variable obj.
Es posible que a un objeto se le asignen varias pistas con diferentes descripciones. Para obtener el puntero al objeto de pista requerido, hemos creado un método que retorna el objeto de pista adjunto según la descripción:
//+------------------------------------------------------------------+
//| Return the attached ToolTip object by description                |
//+------------------------------------------------------------------+
CForm *CForm::GetTooltipByDescription(const string descript)
  {
   CForm *obj=NULL;
   for(int i=this.ElementsTotal()-1;i>WRONG_VALUE;i--)
     {
      obj=this.GetElement(i);
      if(obj!=NULL && obj.TypeGraphElement()==GRAPH_ELEMENT_TYPE_WF_TOOLTIP && obj.Description()==descript)
         break;
     }
   return obj;
  }
//+------------------------------------------------------------------+
El texto de descripción es transmitido al método, por lo que deberemos encontrar el objeto de pista. En un ciclo por la lista de objetos adjuntos, obtendremos el siguiente objeto y, si no está vacío, su tipo será CToolTip y la descripción será igual a la buscada, romperemos el ciclo. Al final del ciclo, retornaremos el puntero al objeto encontrado (o vacío).
Método que establece el texto para Tooltip:
//+------------------------------------------------------------------+
//| Set the Tooltip text                                             |
//+------------------------------------------------------------------+
void CForm::SetTooltipText(const string text)
  {
   CGCnvElement::SetTooltipText(text);
   CForm *tooltip=this.GetTooltip();
   if(tooltip!=NULL)
      tooltip.SetTooltipText(text);
  }
//+------------------------------------------------------------------+
Primero, configuraremos el texto de la pista para este objeto en sí. Luego obtendremos el puntero al objeto de pista adjunto y estableceremos el texto de pista transmitido al método para él. Si el objeto tiene solo una pista, el método establecerá el mismo texto tanto para este objeto como para la pista asignada a él.
Método virtual que establece la bandera para mostrar un control no oculto:
//+------------------------------------------------------------------+
//| Set the flag for displaying a non-hidden control                 |
//+------------------------------------------------------------------+
void CForm::SetDisplayed(const bool flag)
  {
//--- Set the display flag for the object
   CGCnvElement::SetDisplayed(flag);
//--- If the shadow use flag is set and the shadow object has been created,
//--- set the display flag for the shadow object
   if(this.m_shadow && this.m_shadow_obj!=NULL)
      this.m_shadow_obj.SetDisplayed(flag);
  }
//+------------------------------------------------------------------+
Para un objeto que puede tener una sombra proyectada sobre otros objetos, deberemos configurar la bandera de visualización no solo para el objeto en sí, sino también para el objeto de sombra. De lo contrario, la sombra "vivirá su propia vida" independiente del objeto. Por lo tanto, aquí primero estableceremos la bandera de visualización para el objeto en sí y luego, si tiene una sombra, para ella.
Método virtual que establece la opacidad de un elemento:
//+------------------------------------------------------------------+
//| Set the element opacity                                          |
//+------------------------------------------------------------------+
void CForm::SetOpacity(const uchar value,const bool redraw=false)
  {
//--- Set the object opacity value
   CGCnvElement::SetOpacity(value,redraw);
//--- If the shadow use flag is set and the shadow object has been created,
//--- set the opacity value for the shadow object
   if(this.m_shadow && this.m_shadow_obj!=NULL)
      this.m_shadow_obj.SetOpacity(value,redraw);
  }
//+------------------------------------------------------------------+
Exactamente lo mismo sucederá aquí: primero estableceremos el valor de opacidad para el objeto en sí y luego, si tiene un objeto de sombra, estableceremos dicho valor para ella.
Para trabajar con el nuevo control, necesitaremos conectar el archivo de este al archivo de clase del objeto de formulario.
En el archivo \MQL5\Include\DoEasy\Objects\Graph\WForms\Containers\Panel.mqhб añadiremos la conexión del archivo de clase CToolTip:
//+------------------------------------------------------------------+
//| Include files                                                    |
//+------------------------------------------------------------------+
#include "Container.mqh"
#include "..\Helpers\TabField.mqh"
#include "..\Helpers\ArrowUpButton.mqh"
#include "..\Helpers\ArrowDownButton.mqh"
#include "..\Helpers\ArrowLeftButton.mqh"
#include "..\Helpers\ArrowRightButton.mqh"
#include "..\Helpers\ArrowUpDownBox.mqh"
#include "..\Helpers\ArrowLeftRightBox.mqh"
#include "..\Helpers\HintMoveLeft.mqh"
#include "..\Helpers\HintMoveRight.mqh"
#include "..\Helpers\HintMoveUp.mqh"
#include "..\Helpers\HintMoveDown.mqh"
#include "GroupBox.mqh"
#include "TabControl.mqh"
#include "SplitContainer.mqh"
#include "..\..\WForms\Common Controls\ListBox.mqh"
#include "..\..\WForms\Common Controls\CheckedListBox.mqh"
#include "..\..\WForms\Common Controls\ButtonListBox.mqh"
#include "..\..\WForms\Common Controls\ToolTip.mqh"
//+------------------------------------------------------------------+
//| Panel object class of WForms controls                            |
//+------------------------------------------------------------------+
En el método que crea un nuevo objeto gráfico, introduciremos una línea para crear un nuevo objeto de pista emergente:
//+------------------------------------------------------------------+
//| Create a new graphical object                                    |
//+------------------------------------------------------------------+
CGCnvElement *CPanel::CreateNewGObject(const ENUM_GRAPH_ELEMENT_TYPE type,
                                       const int obj_num,
                                       const string descript,
                                       const int x,
                                       const int y,
                                       const int w,
                                       const int h,
                                       const color colour,
                                       const uchar opacity,
                                       const bool movable,
                                       const bool activity)
  {
   CGCnvElement *element=NULL;
   switch(type)
     {
      case GRAPH_ELEMENT_TYPE_ELEMENT                 : element=new CGCnvElement(type,this.GetMain(),this.GetObject(),this.ID(),obj_num,this.ChartID(),this.SubWindow(),descript,x,y,w,h,colour,opacity,movable,activity); break;
      case GRAPH_ELEMENT_TYPE_FORM                    : element=new CForm(this.GetMain(),this.GetObject(),this.ChartID(),this.SubWindow(),descript,x,y,w,h);               break;
      case GRAPH_ELEMENT_TYPE_WF_CONTAINER            : element=new CContainer(this.GetMain(),this.GetObject(),this.ChartID(),this.SubWindow(),descript,x,y,w,h);          break;
      case GRAPH_ELEMENT_TYPE_WF_GROUPBOX             : element=new CGroupBox(this.GetMain(),this.GetObject(),this.ChartID(),this.SubWindow(),descript,x,y,w,h);           break;
      case GRAPH_ELEMENT_TYPE_WF_PANEL                : element=new CPanel(this.GetMain(),this.GetObject(),this.ChartID(),this.SubWindow(),descript,x,y,w,h);              break;
      case GRAPH_ELEMENT_TYPE_WF_LABEL                : element=new CLabel(this.GetMain(),this.GetObject(),this.ChartID(),this.SubWindow(),descript,x,y,w,h);              break;
      case GRAPH_ELEMENT_TYPE_WF_CHECKBOX             : element=new CCheckBox(this.GetMain(),this.GetObject(),this.ChartID(),this.SubWindow(),descript,x,y,w,h);           break;
      case GRAPH_ELEMENT_TYPE_WF_RADIOBUTTON          : element=new CRadioButton(this.GetMain(),this.GetObject(),this.ChartID(),this.SubWindow(),descript,x,y,w,h);        break;
      case GRAPH_ELEMENT_TYPE_WF_BUTTON               : element=new CButton(this.GetMain(),this.GetObject(),this.ChartID(),this.SubWindow(),descript,x,y,w,h);             break;
      case GRAPH_ELEMENT_TYPE_WF_LIST_BOX             : element=new CListBox(this.GetMain(),this.GetObject(),this.ChartID(),this.SubWindow(),descript,x,y,w,h);            break;
      case GRAPH_ELEMENT_TYPE_WF_LIST_BOX_ITEM        : element=new CListBoxItem(this.GetMain(),this.GetObject(),this.ChartID(),this.SubWindow(),descript,x,y,w,h);        break;
      case GRAPH_ELEMENT_TYPE_WF_CHECKED_LIST_BOX     : element=new CCheckedListBox(this.GetMain(),this.GetObject(),this.ChartID(),this.SubWindow(),descript,x,y,w,h);     break;
      case GRAPH_ELEMENT_TYPE_WF_BUTTON_LIST_BOX      : element=new CButtonListBox(this.GetMain(),this.GetObject(),this.ChartID(),this.SubWindow(),descript,x,y,w,h);      break;
      case GRAPH_ELEMENT_TYPE_WF_TAB_HEADER           : element=new CTabHeader(this.GetMain(),this.GetObject(),this.ChartID(),this.SubWindow(),descript,x,y,w,h);          break;
      case GRAPH_ELEMENT_TYPE_WF_TAB_FIELD            : element=new CTabField(this.GetMain(),this.GetObject(),this.ChartID(),this.SubWindow(),descript,x,y,w,h);           break;
      case GRAPH_ELEMENT_TYPE_WF_TAB_CONTROL          : element=new CTabControl(this.GetMain(),this.GetObject(),this.ChartID(),this.SubWindow(),descript,x,y,w,h);         break;
      case GRAPH_ELEMENT_TYPE_WF_ARROW_BUTTON         : element=new CArrowButton(this.GetMain(),this.GetObject(),this.ChartID(),this.SubWindow(),descript,x,y,w,h);        break;
      case GRAPH_ELEMENT_TYPE_WF_ARROW_BUTTON_UP      : element=new CArrowUpButton(this.GetMain(),this.GetObject(),this.ChartID(),this.SubWindow(),descript,x,y,w,h);      break;
      case GRAPH_ELEMENT_TYPE_WF_ARROW_BUTTON_DOWN    : element=new CArrowDownButton(this.GetMain(),this.GetObject(),this.ChartID(),this.SubWindow(),descript,x,y,w,h);    break;
      case GRAPH_ELEMENT_TYPE_WF_ARROW_BUTTON_LEFT    : element=new CArrowLeftButton(this.GetMain(),this.GetObject(),this.ChartID(),this.SubWindow(),descript,x,y,w,h);    break;
      case GRAPH_ELEMENT_TYPE_WF_ARROW_BUTTON_RIGHT   : element=new CArrowRightButton(this.GetMain(),this.GetObject(),this.ChartID(),this.SubWindow(),descript,x,y,w,h);   break;
      case GRAPH_ELEMENT_TYPE_WF_ARROW_BUTTONS_UD_BOX : element=new CArrowUpDownBox(this.GetMain(),this.GetObject(),this.ChartID(),this.SubWindow(),descript,x,y,w,h);     break;
      case GRAPH_ELEMENT_TYPE_WF_ARROW_BUTTONS_LR_BOX : element=new CArrowLeftRightBox(this.GetMain(),this.GetObject(),this.ChartID(),this.SubWindow(),descript,x,y,w,h);  break;
      case GRAPH_ELEMENT_TYPE_WF_SPLIT_CONTAINER      : element=new CSplitContainer(this.GetMain(),this.GetObject(),this.ChartID(),this.SubWindow(),descript,x,y,w,h);     break;
      case GRAPH_ELEMENT_TYPE_WF_SPLITTER             : element=new CSplitter(this.GetMain(),this.GetObject(),this.ChartID(),this.SubWindow(),descript,x,y,w,h);           break;
      case GRAPH_ELEMENT_TYPE_WF_HINT_BASE            : element=new CHintBase(this.GetMain(),this.GetObject(),this.ChartID(),this.SubWindow(),descript,x,y,w,h);           break;
      case GRAPH_ELEMENT_TYPE_WF_HINT_MOVE_LEFT       : element=new CHintMoveLeft(this.GetMain(),this.GetObject(),this.ChartID(),this.SubWindow(),descript,x,y,w,h);       break;
      case GRAPH_ELEMENT_TYPE_WF_HINT_MOVE_RIGHT      : element=new CHintMoveRight(this.GetMain(),this.GetObject(),this.ChartID(),this.SubWindow(),descript,x,y,w,h);      break;
      case GRAPH_ELEMENT_TYPE_WF_HINT_MOVE_UP         : element=new CHintMoveUp(this.GetMain(),this.GetObject(),this.ChartID(),this.SubWindow(),descript,x,y,w,h);         break;
      case GRAPH_ELEMENT_TYPE_WF_HINT_MOVE_DOWN       : element=new CHintMoveDown(this.GetMain(),this.GetObject(),this.ChartID(),this.SubWindow(),descript,x,y,w,h);       break;
      case GRAPH_ELEMENT_TYPE_WF_TOOLTIP              : element=new CToolTip(this.GetMain(),this.GetObject(),this.ChartID(),this.SubWindow(),descript,x,y,w,h);            break;
      default  : break;
     }
   if(element==NULL)
      ::Print(DFUN,CMessage::Text(MSG_LIB_SYS_FAILED_CREATE_ELM_OBJ),this.TypeElementDescription(type));
   return element;
  }
//+------------------------------------------------------------------+
En el archivo \MQL5\Include\DoEasy\Objects\Graph\WForms\Containers\Container.mqh, en el método que establece los parámetros del objeto adjunto, escribiremos un bloque de código para configurar los parámetros del objeto de pista emergente recién creado:
//+------------------------------------------------------------------+
//| Set parameters for the attached object                           |
//+------------------------------------------------------------------+
void CContainer::SetObjParams(CWinFormBase *obj,const color colour)
  {
//--- Set the text color of the object to be the same as that of the base container
   obj.SetForeColor(this.ForeColor(),true);
//--- If the created object is not a container, set the same group for it as the one for its base object
   if(obj.TypeGraphElement()<GRAPH_ELEMENT_TYPE_WF_CONTAINER || obj.TypeGraphElement()>GRAPH_ELEMENT_TYPE_WF_SPLIT_CONTAINER)
      obj.SetGroup(this.Group());
//--- Depending on the object type
   switch(obj.TypeGraphElement())
     {
      //--- For the Container, Panel and GroupBox WinForms objects

      //---...
      //---...

      //--- For ToolTip WinForms object
      case GRAPH_ELEMENT_TYPE_WF_TOOLTIP              :
        obj.SetBackgroundColor(CLR_DEF_CONTROL_HINT_BACK_COLOR,true);
        obj.SetBorderColor(CLR_DEF_CONTROL_HINT_BORDER_COLOR,true);
        obj.SetForeColor(CLR_DEF_CONTROL_HINT_FORE_COLOR,true);
        obj.SetBorderStyle(FRAME_STYLE_SIMPLE);
        obj.SetOpacity(0,false);
        obj.SetDisplayed(false);
        obj.Hide();
        break;
      default:
        break;
     }
   obj.Crop();
  }
//+------------------------------------------------------------------+
En el archivo \MQL5\Include\DoEasy\Objects\Graph\WForms\Containers\GroupBox.mqh del objeto GroupBox, en su método para crear un nuevo objeto gráfico, añadiremos también una línea para crear un objeto de pista emergente:
//+------------------------------------------------------------------+
//| Create a new graphical object                                    |
//+------------------------------------------------------------------+
CGCnvElement *CGroupBox::CreateNewGObject(const ENUM_GRAPH_ELEMENT_TYPE type,
                                          const int obj_num,
                                          const string descript,
                                          const int x,
                                          const int y,
                                          const int w,
                                          const int h,
                                          const color colour,
                                          const uchar opacity,
                                          const bool movable,
                                          const bool activity)
  {
   CGCnvElement *element=NULL;
   switch(type)
     {
      case GRAPH_ELEMENT_TYPE_ELEMENT                 : element=new CGCnvElement(type,this.GetMain(),this.GetObject(),this.ID(),obj_num,this.ChartID(),this.SubWindow(),descript,x,y,w,h,colour,opacity,movable,activity); break;
      case GRAPH_ELEMENT_TYPE_FORM                    : element=new CForm(this.GetMain(),this.GetObject(),this.ChartID(),this.SubWindow(),descript,x,y,w,h);               break;

      //---...
      //---...

      case GRAPH_ELEMENT_TYPE_WF_HINT_MOVE_UP         : element=new CHintMoveUp(this.GetMain(),this.GetObject(),this.ChartID(),this.SubWindow(),descript,x,y,w,h);         break;
      case GRAPH_ELEMENT_TYPE_WF_HINT_MOVE_DOWN       : element=new CHintMoveDown(this.GetMain(),this.GetObject(),this.ChartID(),this.SubWindow(),descript,x,y,w,h);       break;
      case GRAPH_ELEMENT_TYPE_WF_TOOLTIP              : element=new CToolTip(this.GetMain(),this.GetObject(),this.ChartID(),this.SubWindow(),descript,x,y,w,h);            break;
      default  : break;
     }
   if(element==NULL)
      ::Print(DFUN,CMessage::Text(MSG_LIB_SYS_FAILED_CREATE_ELM_OBJ),this.TypeElementDescription(type));
   return element;
  }
//+------------------------------------------------------------------+
En el archivo \MQL5\Include\DoEasy\Objects\Graph\WForms\Containers\TabControl.mqh de la clase de objeto TabControl, necesitaremos añadir los métodos para obtener los objetos de botón con flechas usados para desplazar la barra de encabezados. Sin obtener punteros a estos objetos auxiliares, no podremos asignarles pistas emergentes.
En la sección privada de la clase, declararemos los métodos para obtener los punteros a los objetos de botón:
//--- Return the list of (1) headers, (2) tab fields, the pointer to the (3) up-down and (4) left-right button objects
   CArrayObj        *GetListHeaders(void)          { return this.GetListElementsByType(GRAPH_ELEMENT_TYPE_WF_TAB_HEADER);        }
   CArrayObj        *GetListFields(void)           { return this.GetListElementsByType(GRAPH_ELEMENT_TYPE_WF_TAB_FIELD);         }
   CArrowUpDownBox  *GetArrUpDownBox(void)         { return this.GetElementByType(GRAPH_ELEMENT_TYPE_WF_ARROW_BUTTONS_UD_BOX,0); }
   CArrowLeftRightBox *GetArrLeftRightBox(void)    { return this.GetElementByType(GRAPH_ELEMENT_TYPE_WF_ARROW_BUTTONS_LR_BOX,0); }

//--- Return the pointer to the (1) up, (2) down, (3) left and (4) right arrow button
   CArrowUpButton   *GetArrowUpButton(void);
   CArrowDownButton *GetArrowDownButton(void);
   CArrowLeftButton *GetArrowLeftButton(void);
   CArrowRightButton*GetArrowRightButton(void);

//--- Return the pointer to the (1) last and (2) first visible tab header
   CTabHeader       *GetLastHeader(void)           { return this.GetTabHeader(this.TabPages()-1);                                }
   CTabHeader       *GetFirstVisibleHeader(void);
//--- Set the tab as selected
En la sección pública, declararemos los métodos para configurar las pistas para los objetos de botón con flechas:
//--- Set the tab specified by index to selected/not selected
   void              Select(const int index,const bool flag);
//--- Returns the (1) index, (2) the pointer to the selected tab
   int               SelectedTabPageNum(void)      const { return (int)this.GetProperty(CANV_ELEMENT_PROP_TAB_PAGE_NUMBER);}
   CWinFormBase     *SelectedTabPage(void)               { return this.GetTabField(this.SelectedTabPageNum());             }

//--- Add Tooltip to the (1) up, (2) down, (3) left and (4) right arrow button
   bool              AddTooltipToArrowUpButton(CForm *tooltip);
   bool              AddTooltipToArrowDownButton(CForm *tooltip);
   bool              AddTooltipToArrowLeftButton(CForm *tooltip);
   bool              AddTooltipToArrowRightButton(CForm *tooltip);

//--- Set the object above all
   virtual void      BringToTop(void);
//--- Show the control
   virtual void      Show(void);
//--- Event handler
En el método que crea un nuevo objeto gráfico, añadiremos una línea para crear un objeto de pista emergente:
//+------------------------------------------------------------------+
//| Create a new graphical object                                    |
//+------------------------------------------------------------------+
CGCnvElement *CTabControl::CreateNewGObject(const ENUM_GRAPH_ELEMENT_TYPE type,
                                         const int obj_num,
                                         const string descript,
                                         const int x,
                                         const int y,
                                         const int w,
                                         const int h,
                                         const color colour,
                                         const uchar opacity,
                                         const bool movable,
                                         const bool activity)
  {
   CGCnvElement *element=NULL;
   switch(type)
     {
      case GRAPH_ELEMENT_TYPE_WF_TAB_HEADER           : element=new CTabHeader(this.GetMain(),this.GetObject(),this.ChartID(),this.SubWindow(),descript,x,y,w,h);          break;
      case GRAPH_ELEMENT_TYPE_WF_TAB_FIELD            : element=new CTabField(this.GetMain(),this.GetObject(),this.ChartID(),this.SubWindow(),descript,x,y,w,h);           break;
      case GRAPH_ELEMENT_TYPE_WF_ARROW_BUTTONS_UD_BOX : element=new CArrowUpDownBox(this.GetMain(),this.GetObject(),this.ChartID(),this.SubWindow(),descript,x,y,w,h);     break;
      case GRAPH_ELEMENT_TYPE_WF_ARROW_BUTTONS_LR_BOX : element=new CArrowLeftRightBox(this.GetMain(),this.GetObject(),this.ChartID(),this.SubWindow(),descript,x,y,w,h);  break;
      case GRAPH_ELEMENT_TYPE_WF_TOOLTIP              : element=new CToolTip(this.GetMain(),this.GetObject(),this.ChartID(),this.SubWindow(),descript,x,y,w,h);            break;
      default  : break;
     }
   if(element==NULL)
      ::Print(DFUN,CMessage::Text(MSG_LIB_SYS_FAILED_CREATE_ELM_OBJ),this.TypeElementDescription(type));
   return element;
  }
//+------------------------------------------------------------------+
Métodos que retornan los punteros a los botones con flechas:
//+------------------------------------------------------------------+
//| Return the pointer to the up arrow button                        |
//+------------------------------------------------------------------+
CArrowUpButton *CTabControl::GetArrowUpButton(void)
  {
   CArrowUpDownBox *box=this.GetArrUpDownBox();
   return(box!=NULL ? box.GetArrowUpButton() : NULL);
  }
//+------------------------------------------------------------------+
//| Return the pointer to the down arrow button                      |
//+------------------------------------------------------------------+
CArrowDownButton *CTabControl::GetArrowDownButton(void)
  {
   CArrowUpDownBox *box=this.GetArrUpDownBox();
   return(box!=NULL ? box.GetArrowDownButton() : NULL);
  }
//+------------------------------------------------------------------+
//| Return the pointer to the left arrow button                      |
//+------------------------------------------------------------------+
CArrowLeftButton *CTabControl::GetArrowLeftButton(void)
  {
   CArrowLeftRightBox *box=this.GetArrLeftRightBox();
   return(box!=NULL ? box.GetArrowLeftButton() : NULL);
  }
//+------------------------------------------------------------------+
//| Return the pointer to the right arrow button                     |
//+------------------------------------------------------------------+
CArrowRightButton *CTabControl::GetArrowRightButton(void)
  {
   CArrowLeftRightBox *box=this.GetArrLeftRightBox();
   return(box!=NULL ? box.GetArrowRightButton() : NULL);
  }
//+------------------------------------------------------------------+
Todos los métodos resultan idénticos entre sí. Primero, obtendremos el puntero al objeto correspondiente que contenga un par de botones izquierda-derecha o arriba-abajo, y ya desde estos objetos obtendremos y retornaremos el puntero al botón deseado: arriba, abajo, izquierda o derecha.
Métodos que añaden un objeto ToolTip a un botón de flecha arriba, abajo, izquierda y derecha:
//+------------------------------------------------------------------+
//| Add ToolTip to the up arrow button                               |
//+------------------------------------------------------------------+
bool CTabControl::AddTooltipToArrowUpButton(CForm *tooltip)
  {
   CArrowUpButton *butt=this.GetArrowUpButton();
   return(butt!=NULL ? butt.AddTooltip(tooltip) : false);
  }
//+------------------------------------------------------------------+
//| Add ToolTip to the down arrow button                             |
//+------------------------------------------------------------------+
bool CTabControl::AddTooltipToArrowDownButton(CForm *tooltip)
  {
   CArrowDownButton *butt=this.GetArrowDownButton();
   return(butt!=NULL ? butt.AddTooltip(tooltip) : false);
  }
//+------------------------------------------------------------------+
//| Add ToolTip to the left arrow button                             |
//+------------------------------------------------------------------+
bool CTabControl::AddTooltipToArrowLeftButton(CForm *tooltip)
  {
   CArrowLeftButton *butt=this.GetArrowLeftButton();
   return(butt!=NULL ? butt.AddTooltip(tooltip) : false);
  }
//+------------------------------------------------------------------+
//| Add ToolTip to the right arrow button                            |
//+------------------------------------------------------------------+
bool CTabControl::AddTooltipToArrowRightButton(CForm *tooltip)
  {
   CArrowRightButton *butt=this.GetArrowRightButton();
   return(butt!=NULL ? butt.AddTooltip(tooltip) : false);
  }
//+------------------------------------------------------------------+
Los métodos resultan idénticos entre sí. Primero, obtendremos el puntero al botón correspondiente usando los métodos anteriores, luego asignaremos al método del objeto obtenido el puntero al objeto de pista emergente transmitido. Si se obtiene correctamente el puntero al objeto de botón y se añade el puntero al objeto de pista emergente, el método retornará true, de lo contrario, false.
En el archivo \MQL5\Include\DoEasy\Objects\Graph\WForms\Helpers\TabField.mqh de la clase de objeto TabField, añadiremos una línea al método que crea un nuevo objeto gráfico para crear un nuevo objeto de pista emergente:
//+------------------------------------------------------------------+
//| Create a new graphical object                                    |
//+------------------------------------------------------------------+
CGCnvElement *CTabField::CreateNewGObject(const ENUM_GRAPH_ELEMENT_TYPE type,
                                          const int obj_num,
                                          const string descript,
                                          const int x,
                                          const int y,
                                          const int w,
                                          const int h,
                                          const color colour,
                                          const uchar opacity,
                                          const bool movable,
                                          const bool activity)
  {
   CGCnvElement *element=NULL;
   switch(type)
     {
      case GRAPH_ELEMENT_TYPE_ELEMENT                 : element=new CGCnvElement(type,this.GetMain(),this.GetObject(),this.ID(),obj_num,this.ChartID(),this.SubWindow(),descript,x,y,w,h,colour,opacity,movable,activity); break;
      case GRAPH_ELEMENT_TYPE_FORM                    : element=new CForm(this.GetMain(),this.GetObject(),this.ChartID(),this.SubWindow(),descript,x,y,w,h);               break;

      //---...
      //---...

      case GRAPH_ELEMENT_TYPE_WF_HINT_MOVE_UP         : element=new CHintMoveUp(this.GetMain(),this.GetObject(),this.ChartID(),this.SubWindow(),descript,x,y,w,h);         break;
      case GRAPH_ELEMENT_TYPE_WF_HINT_MOVE_DOWN       : element=new CHintMoveDown(this.GetMain(),this.GetObject(),this.ChartID(),this.SubWindow(),descript,x,y,w,h);       break;
      case GRAPH_ELEMENT_TYPE_WF_TOOLTIP              : element=new CToolTip(this.GetMain(),this.GetObject(),this.ChartID(),this.SubWindow(),descript,x,y,w,h);            break;
      default  : break;
     }
   if(element==NULL)
      ::Print(DFUN,CMessage::Text(MSG_LIB_SYS_FAILED_CREATE_ELM_OBJ),this.TypeElementDescription(type));
   return element;
  }
//+------------------------------------------------------------------+
En el archivo \MQL5\Include\DoEasy\Objects\Graph\WForms\Containers\SplitContainer.mqh de la clase de objeto SplitContainer, declararemos el método para establecer la pista para el objeto separador:
//--- Return the pointer to the separator
   CSplitter        *GetSplitter(void)                         { return this.GetElementByType(GRAPH_ELEMENT_TYPE_WF_SPLITTER,0);                      }
//--- Return a pointer to the (1) "Left shift", (1) "Right shift", (1) "Up shift" and (1) "Down shift" hint objects
   CHintMoveLeft    *GetHintMoveLeft(void)                     { return this.GetElementByType(GRAPH_ELEMENT_TYPE_WF_HINT_MOVE_LEFT,0);                }
   CHintMoveRight   *GetHintMoveRight(void)                    { return this.GetElementByType(GRAPH_ELEMENT_TYPE_WF_HINT_MOVE_RIGHT,0);               }
   CHintMoveUp      *GetHintMoveUp(void)                       { return this.GetElementByType(GRAPH_ELEMENT_TYPE_WF_HINT_MOVE_UP,0);                  }
   CHintMoveDown    *GetHintMoveDown(void)                     { return this.GetElementByType(GRAPH_ELEMENT_TYPE_WF_HINT_MOVE_DOWN,0);                }
//--- Add Tooltip to the separator
   bool              AddTooltipToSplitter(CForm *tooltip);

//--- (1) set and (2) return the minimum possible size of the panel 1 and 2
En el método que crea un nuevo objeto gráfico, añadiremos una línea para crear un nuevo objeto de pista emergente:
//+------------------------------------------------------------------+
//| Create a new graphical object                                    |
//+------------------------------------------------------------------+
CGCnvElement *CSplitContainer::CreateNewGObject(const ENUM_GRAPH_ELEMENT_TYPE type,
                                                const int obj_num,
                                                const string descript,
                                                const int x,
                                                const int y,
                                                const int w,
                                                const int h,
                                                const color colour,
                                                const uchar opacity,
                                                const bool movable,
                                                const bool activity)
  {
   CGCnvElement *element=NULL;
   switch(type)
     {
      case GRAPH_ELEMENT_TYPE_WF_SPLIT_CONTAINER_PANEL: element=new CSplitContainerPanel(this.GetMain(),this.GetObject(),this.ChartID(),this.SubWindow(),descript,x,y,w,h);break;
      case GRAPH_ELEMENT_TYPE_WF_SPLITTER             : element=new CSplitter(this.GetMain(),this.GetObject(),this.ChartID(),this.SubWindow(),descript,x,y,w,h);           break;
      case GRAPH_ELEMENT_TYPE_WF_HINT_BASE            : element=new CHintBase(this.GetMain(),this.GetObject(),this.ChartID(),this.SubWindow(),descript,x,y,w,h);           break;
      case GRAPH_ELEMENT_TYPE_WF_HINT_MOVE_LEFT       : element=new CHintMoveLeft(this.GetMain(),this.GetObject(),this.ChartID(),this.SubWindow(),descript,x,y,w,h);       break;
      case GRAPH_ELEMENT_TYPE_WF_HINT_MOVE_RIGHT      : element=new CHintMoveRight(this.GetMain(),this.GetObject(),this.ChartID(),this.SubWindow(),descript,x,y,w,h);      break;
      case GRAPH_ELEMENT_TYPE_WF_HINT_MOVE_UP         : element=new CHintMoveUp(this.GetMain(),this.GetObject(),this.ChartID(),this.SubWindow(),descript,x,y,w,h);         break;
      case GRAPH_ELEMENT_TYPE_WF_HINT_MOVE_DOWN       : element=new CHintMoveDown(this.GetMain(),this.GetObject(),this.ChartID(),this.SubWindow(),descript,x,y,w,h);       break;
      case GRAPH_ELEMENT_TYPE_WF_TOOLTIP              : element=new CToolTip(this.GetMain(),this.GetObject(),this.ChartID(),this.SubWindow(),descript,x,y,w,h);            break;
      default  : break;
     }
   if(element==NULL)
      ::Print(DFUN,CMessage::Text(MSG_LIB_SYS_FAILED_CREATE_ELM_OBJ),this.TypeElementDescription(type));
   return element;
  }
//+------------------------------------------------------------------+
Método que añade un Tooltip al separador:
//+------------------------------------------------------------------+
//| Add ToolTip to the separator                                     |
//+------------------------------------------------------------------+
bool CSplitContainer::AddTooltipToSplitter(CForm *tooltip)
  {
   CSplitter *obj=this.GetSplitter();
   return(obj!=NULL ? obj.AddTooltip(tooltip) : false);
  }
//+------------------------------------------------------------------+
Aquí, obtendremos el puntero al objeto separador y retornaremos el resultado de añadir el puntero al objeto de pista al objeto separador.
En el archivo \MQL5\Include\DoEasy\Objects\Graph\WForms\Helpers\SplitContainerPanel.mqh del objeto de la clase SplitContainerPanel, en el método que crea un nuevo objeto gráfico, añadiremos una línea para crear un nuevo objeto de pista emergente:
//+------------------------------------------------------------------+
//| Create a new graphical object                                    |
//+------------------------------------------------------------------+
CGCnvElement *CSplitContainerPanel::CreateNewGObject(const ENUM_GRAPH_ELEMENT_TYPE type,
                                                     const int obj_num,
                                                     const string descript,
                                                     const int x,
                                                     const int y,
                                                     const int w,
                                                     const int h,
                                                     const color colour,
                                                     const uchar opacity,
                                                     const bool movable,
                                                     const bool activity)
  {
   CGCnvElement *element=NULL;
   switch(type)
     {
      case GRAPH_ELEMENT_TYPE_ELEMENT                 : element=new CGCnvElement(type,this.GetMain(),this.GetObject(),this.ID(),obj_num,this.ChartID(),this.SubWindow(),descript,x,y,w,h,colour,opacity,movable,activity); break;
      case GRAPH_ELEMENT_TYPE_FORM                    : element=new CForm(this.GetMain(),this.GetObject(),this.ChartID(),this.SubWindow(),descript,x,y,w,h);               break;

      //---...
      //---...

      case GRAPH_ELEMENT_TYPE_WF_HINT_MOVE_UP         : element=new CHintMoveUp(this.GetMain(),this.GetObject(),this.ChartID(),this.SubWindow(),descript,x,y,w,h);         break;
      case GRAPH_ELEMENT_TYPE_WF_HINT_MOVE_DOWN       : element=new CHintMoveDown(this.GetMain(),this.GetObject(),this.ChartID(),this.SubWindow(),descript,x,y,w,h);       break;
      case GRAPH_ELEMENT_TYPE_WF_TOOLTIP              : element=new CToolTip(this.GetMain(),this.GetObject(),this.ChartID(),this.SubWindow(),descript,x,y,w,h);            break;
      default  : break;
     }
   if(element==NULL)
      ::Print(DFUN,CMessage::Text(MSG_LIB_SYS_FAILED_CREATE_ELM_OBJ),this.TypeElementDescription(type));
   return element;
  }
//+------------------------------------------------------------------+
Ahora, en cada objeto contenedor podremos crear un nuevo objeto de pista emergente y asignarlo a cualquiera de los elementos gráficos existentes.
Para procesar los objetos de pista emergente, deberemos realizar cambios en el archivo \MQL5\Include\DoEasy\Collections\GraphElementsCollection.mqh de la clase de colección de elementos gráficos.
En la sección privada de la clase, declararemos un método para procesar los objetos de pista:
//--- Post-processing of the former active form under the cursor
   void              FormPostProcessing(CForm *form,const int id, const long &lparam, const double &dparam, const string &sparam);
//--- Handle Tooltip elements
   void              TooltipProcessing(CForm *form,CForm *tooltip,CForm *tooltip_prev);
//--- Add the element to the collection list
   bool AddCanvElmToCollection(CGCnvElement *element);
En el método que busca objetos de interacción, añadiremos la omisión de un objeto de pista emergente:
//+------------------------------------------------------------------+
//| Search for interaction objects                                   |
//+------------------------------------------------------------------+
CForm *CGraphElementsCollection::SearchInteractObj(CForm *form,const int id,const long &lparam,const double &dparam,const string &sparam)
  {
//--- If a non-empty pointer is passed
   if(form!=NULL)
     {
      //--- Create the list of interaction objects
      int total=form.CreateListInteractObj();
      //--- In the loop by the created list
      for(int i=total-1;i>WRONG_VALUE;i--)
        {
         //--- get the next form object
         CForm *obj=form.GetInteractForm(i);
         //--- If the object is received, but is not visible, or not active, or should not be displayed, skip it
         if(obj==NULL || !obj.IsVisible() || !obj.Enabled() || !obj.Displayed())
            continue;

         //--- If this is Tooltip, skip such an object for now
         if(obj.TypeGraphElement()==GRAPH_ELEMENT_TYPE_WF_TOOLTIP)
           {
            continue;
           }

         //--- If the form object is TabControl, return the selected tab under the cursor
         if(obj.TypeGraphElement()==GRAPH_ELEMENT_TYPE_WF_TAB_CONTROL)
           {
            //---...
            //---...
Cuando estamos buscando un elemento gráfico que se encuentra debajo del cursor, si nos encontramos con un objeto de pista emergente, para no procesarlo, deberemos omitirlo aquí. Tras crear objetos de pista activos que permiten la interacción con el ratón, en lugar de omitir, verificaremos la disponibilidad de dicho objeto para la interacción con el ratón. Por el momento, omitiremos aquí dichos objetos.
Método para procesar los elementos ToolTip:
//+------------------------------------------------------------------+
//| Handle ToolTip elements                                          |
//+------------------------------------------------------------------+
void CGraphElementsCollection::TooltipProcessing(CForm *form,CForm *tooltip,CForm *tooltip_prev)
  {
//--- Get the chart width and height
   int w=(int)::ChartGetInteger(tooltip.ChartID(),CHART_WIDTH_IN_PIXELS,tooltip.SubWindow());
   int h=(int)::ChartGetInteger(tooltip.ChartID(),CHART_HEIGHT_IN_PIXELS,tooltip.SubWindow());
//--- Get cursor coordinates
   int x=this.m_mouse.CoordX();
   int y=this.m_mouse.CoordY();
//--- If at the current X coordinate (cursor) the tooltip goes beyond the right edge of the chart, adjust the X coordinate
   if(x+tooltip.Width()>w)
      x=w-tooltip.Width();
//--- If at the current Y coordinate (cursor) the tooltip goes beyond the bottom edge of the chart, adjust the Y coordinate
   if(y+tooltip.Height()>h)
      y=h-tooltip.Height();
//--- If the tooltip object is hidden
   if(!tooltip.IsVisible())
     {
      //--- If the tooltip object is shifted to the received cursor coordinates
      if(tooltip.Move(x,y))
        {
         //--- Get the object the tooltip object is assigned to
         CForm *base=tooltip.GetBase();
         //--- If the object is received, set new relative tooltip coordinates
         if(base!=NULL)
           {
            tooltip.SetCoordXRelative(tooltip.CoordX()-base.CoordX());
            tooltip.SetCoordYRelative(tooltip.CoordY()-base.CoordY());
           }
        }
     }
//--- Set the tooltip drawing flag, as well as full opacity, and display the object
   tooltip.SetDisplayed(true);
   tooltip.SetOpacity(255);
   tooltip.Show();
//--- If the previous tooltip object exists and its name is not equal to the name of the current object (it is the same object)
   if(tooltip_prev!=NULL && tooltip_prev.Name()!=tooltip.Name())
     {
      //--- Set the flag disabling the display, make the object completely transparent and hide it
      tooltip_prev.SetDisplayed(false);
      tooltip.SetOpacity(0);
      tooltip_prev.Hide();
     }
  }
//+------------------------------------------------------------------+
La lógica del método se detalla en los comentarios al código. Cuando obtenemos un objeto que se encuentra debajo del cursor, deberemos verificar si hay un objeto de pista configurado para él. Si lo hay, llamaremos a este método para procesar el objeto de pista. Después transmitiremos al método el propio objeto en el que se ha encontrado la pista, el puntero a la pista de ese objeto y el puntero al último objeto de pista procesado.
En el manejador de eventos de la clase OnChartEvent(), en el lugar donde se procesa la situación en que se borra la bandera para desplazar el objeto (el cursor se encuentra sobre el objeto, pero ninguno de los botones ha sido presionado todavía), escribiremos el siguiente bloque de código:
//---...
//---...

            //--- If the move flag is disabled
            else
              {
               //--- Get the ToolTip object assigned to the form and declare the previous ToolTip
               CForm *tooltip=form.GetTooltip();
               static CForm *tooltip_prev=NULL;
               //--- If the ToolTip object is received
               if(tooltip!=NULL)
                 {
                  //--- and if its type is indeed ToolTip (to avoid incorrect casting, which we sometimes get if we do not check the type)
                  if(tooltip.TypeGraphElement()==GRAPH_ELEMENT_TYPE_WF_TOOLTIP)
                    {
                     //--- Get the base object set in ToolTip
                     CForm *base=tooltip.GetBase();
                     //--- If the base object is received
                     if(base!=NULL)
                       {
                        //--- and if the name of the base object is the same as the name of the current form (the ToolTip is bound to the form)
                        if(base.Name()==form.Name())
                          {
                           //--- Handle the received and previous ToolTip and write the current ToolTip to the variable as the previous one
                           this.TooltipProcessing(form,tooltip,tooltip_prev);
                           tooltip_prev=tooltip;
                          }
                       }
                    }
                 }
               //--- If there is no ToolTip attached to the object
               else
                 {
                  //--- If the previous ToolTip exists
                  if(tooltip_prev!=NULL)
                    {
                     //--- and if its type is indeed ToolTip (to avoid incorrect casting, which we sometimes get if we do not check the type)
                     if(tooltip_prev.TypeGraphElement()==GRAPH_ELEMENT_TYPE_WF_TOOLTIP)
                       {
                        //--- Set the object non-display flag, make it completely transparent and hide it
                        tooltip_prev.SetDisplayed(false);
                        tooltip_prev.SetOpacity(0,false);
                        tooltip_prev.Hide();
                       }
                    }
                 }
               //--- The undefined mouse status in mouse_state means releasing the left button
               //--- Assign the new mouse status to the variable
               if(mouse_state==MOUSE_FORM_STATE_NONE)
                  mouse_state=MOUSE_FORM_STATE_INSIDE_ACTIVE_AREA_RELEASED;
               //--- Handle moving the cursor mouse away from the graphical element
               this.FormPostProcessing(form,id,lparam,dparam,sparam);
              }
           }
        }

      //--- If the cursor is not above the form
      if(form==NULL)
        {


//---...
//---...
La lógica de este bloque de código se describe en los comentarios. Resulta interesante, pero después de actualizar el terminal (o así me lo ha parecido), no siempre se procesan correctamente las condiciones lógicas en las que se verifica simultáneamente que el puntero no sea NULL más alguna propiedad del objeto comprobado. Por lo tanto, aquí las condiciones que se pueden escribir en una línea se dividirán en bloques entre paréntesis { }. Puede que me equivoque, pero en cualquier caso, este bloque de código se volverá a trabajar al continuar el desarrollo de la clase de objeto de pista. En este caso, el código solo nos permitirá encontrar el objeto para el que se establece una pista y mostrar dicha pista, ocultando además la anterior. Es decir, no habrá retrasos en la visualización de la pista, al igual que no existirá una apariencia uniforme de la misma. Todo esto lo implementaremos en artículos posteriores.
Bien, eso es todo lo que necesitábamos hacer hoy. Vamos a probar lo que tenemos.
Simulación
Para la prueba, tomaremos el asesor experto del artículo anterior y lo guardaremos en la nueva carpeta \MQL5\Experts\TestDoEasy\Part125\ con el nuevo nombre TestDoEasy125.mq5.
Asimismo, añadiremos dos nuevas variables a la configuración del asesor para indicar el tipo de icono utilizado en la pista emergente y para especificar el texto del encabezado de la pista:
//--- input parameters
sinput   bool                          InpMovable           =  true;                   // Panel Movable flag
sinput   ENUM_INPUT_YES_NO             InpAutoSize          =  INPUT_YES;              // Panel Autosize
sinput   ENUM_AUTO_SIZE_MODE           InpAutoSizeMode      =  AUTO_SIZE_MODE_GROW;    // Panel Autosize mode
sinput   ENUM_BORDER_STYLE             InpFrameStyle        =  BORDER_STYLE_SIMPLE;    // Label border style
sinput   ENUM_ANCHOR_POINT             InpTextAlign         =  ANCHOR_CENTER;          // Label text align
sinput   ENUM_INPUT_YES_NO             InpTextAutoSize      =  INPUT_NO;               // Label autosize
sinput   ENUM_ANCHOR_POINT             InpCheckAlign        =  ANCHOR_LEFT;            // Check flag align
sinput   ENUM_ANCHOR_POINT             InpCheckTextAlign    =  ANCHOR_LEFT;            // Check label text align
sinput   ENUM_CHEK_STATE               InpCheckState        =  CHEK_STATE_UNCHECKED;   // Check flag state
sinput   ENUM_INPUT_YES_NO             InpCheckAutoSize     =  INPUT_YES;              // CheckBox autosize
sinput   ENUM_BORDER_STYLE             InpCheckFrameStyle   =  BORDER_STYLE_NONE;      // CheckBox border style
sinput   ENUM_ANCHOR_POINT             InpButtonTextAlign   =  ANCHOR_CENTER;          // Button text align
sinput   ENUM_INPUT_YES_NO             InpButtonAutoSize    =  INPUT_YES;              // Button autosize
sinput   ENUM_AUTO_SIZE_MODE           InpButtonAutoSizeMode=  AUTO_SIZE_MODE_GROW;    // Button Autosize mode
sinput   ENUM_BORDER_STYLE             InpButtonFrameStyle  =  BORDER_STYLE_NONE;      // Button border style
sinput   bool                          InpButtonToggle      =  true ;                  // Button toggle flag
sinput   bool                          InpButtListMSelect   =  false;                  // ButtonListBox Button MultiSelect flag
sinput   bool                          InpListBoxMColumn    =  true;                   // ListBox MultiColumn flag
sinput   bool                          InpTabCtrlMultiline  =  false;                   // Tab Control Multiline flag
sinput   ENUM_ELEMENT_ALIGNMENT        InpHeaderAlignment   =  ELEMENT_ALIGNMENT_TOP;  // TabHeader Alignment
sinput   ENUM_ELEMENT_TAB_SIZE_MODE    InpTabPageSizeMode   =  ELEMENT_TAB_SIZE_MODE_FILL; // TabHeader Size Mode
sinput   int                           InpTabControlX       =  10;                     // TabControl X coord
sinput   int                           InpTabControlY       =  20;                     // TabControl Y coord
sinput   ENUM_CANV_ELEMENT_TOOLTIP_ICON InpTooltipIcon      =  CANV_ELEMENT_TOOLTIP_ICON_NONE;  // Tooltip Icon
sinput   string                        InpTooltipTitle      =  "";                     // Tooltip Title
//--- global variables
Después de crear el control TabControl, crearemos dos objetos de pista emergente y los asignaremos a los dos botones para desplazar la barra de encabezados de izquierda a derecha:
        //---...
        //---...

         //--- Create TabControl
         pnl.CreateNewElement(GRAPH_ELEMENT_TYPE_WF_TAB_CONTROL,InpTabControlX,InpTabControlY,pnl.Width()-30,pnl.Height()-40,clrNONE,255,true,false);
         CTabControl *tc=pnl.GetElementByType(GRAPH_ELEMENT_TYPE_WF_TAB_CONTROL,0);
         if(tc!=NULL)
           {
            tc.SetTabSizeMode((ENUM_CANV_ELEMENT_TAB_SIZE_MODE)InpTabPageSizeMode);
            tc.SetAlignment((ENUM_CANV_ELEMENT_ALIGNMENT)InpHeaderAlignment);
            tc.SetMultiline(InpTabCtrlMultiline);
            tc.SetHeaderPadding(6,0);
            tc.CreateTabPages(15,0,56,20,TextByLanguage("Вкладка","TabPage"));

            //--- Create Tooltip for the Left button
            tc.CreateNewElement(GRAPH_ELEMENT_TYPE_WF_TOOLTIP,0,0,10,10,clrNONE,0,false,false);
            CToolTip *tooltip=tc.GetElementByType(GRAPH_ELEMENT_TYPE_WF_TOOLTIP,0);
            if(tooltip!=NULL)
              {
               tooltip.SetDescription("Left Button Tooltip");
               tooltip.SetIcon(InpTooltipIcon);
               tooltip.SetTitle(InpTooltipTitle);
               tooltip.SetTooltipText(TextByLanguage("Нажмите для прокрутки заголовков вправо","Click to scroll headings to the right"));
               tc.AddTooltipToArrowLeftButton(tooltip);
              }
            //--- Create Tooltip for the Right button
            tc.CreateNewElement(GRAPH_ELEMENT_TYPE_WF_TOOLTIP,0,0,10,10,clrNONE,0,false,false);
            tooltip=tc.GetElementByType(GRAPH_ELEMENT_TYPE_WF_TOOLTIP,1);
            if(tooltip!=NULL)
              {
               tooltip.SetDescription("Right Button Tooltip");
               tooltip.SetIcon(ENUM_CANV_ELEMENT_TOOLTIP_ICON(InpTooltipIcon+1));
               tooltip.SetTitle(InpTooltipTitle);
               tooltip.SetTooltipText(TextByLanguage("Нажмите для прокрутки заголовков влево","Click to scroll headings to the left"));
               tc.AddTooltipToArrowRightButton(tooltip);
              }

            //--- Create a text label with a tab description on each tab
            for(int j=0;j<tc.TabPages();j++)
              {
                //---...
                //---...
Como podemos ver, tras crear un objeto ToolTip, le asignaremos directamente la descripción, el icono mostrado y los textos tanto de encabezado como de pista emergente, añadiéndolo después al botón correspondiente. Para el segundo objeto de pista, indicaremos como icono un valor una unidad superior al especificado en la configuración, lo cual permitirá ver dos iconos al mismo tiempo.
Vamos a compilar el asesor y a ejecutarlo en el gráfico:
Al colocar el puntero del ratón sobre los botones con flechas, las pistas emergentes aparecerán de inmediato. Cada una de ellas tendrá su propio icono. Las pistas no se saldrán de la pantalla: sus coordenadas se ajustarán correctamente. Ahora, en los botones con flechas, veremos las nuevas flechas dibujadas como primitivas gráficas estándar. Obviamente, el comportamiento de los objetos de pista emergente no puede calificarse de correcto, pero hoy no estábamos intentando lograr esto. Hemos realizado la prueba solo para ver cómo han resultado los objetos y qué aspecto tienen.
¿Qué es lo próximo?
En el próximo artículo, continuaremos trabajando con el objeto ToolTip.
Más abajo, adjuntamos todos los archivos de la versión actual de la biblioteca, así como los archivos del asesor de prueba y el indicador de control de eventos de los gráficos para MQL5.
*Artículos de esta serie:
DoEasy. Elementos de control (Parte 20): El objeto WinForms SplitContainer
DoEasy. Elementos de control (Parte 21): Elemento de control SplitContainer. Separador de paneles
DoEasy. Elementos de control (Parte 22): SplitContainer. Cambiando las propiedades del objeto creado
DoEasy. Elementos de control (Parte 23): mejorando los objetos WinForms TabControl y SplitContainer
DoEasy. Elementos de control (Parte 24): El objeto auxiliar WinForms "Pista"
Traducción del ruso hecha por MetaQuotes Ltd.
Artículo original: https://www.mql5.com/ru/articles/11700
Advertencia: todos los derechos de estos materiales pertenecen a MetaQuotes Ltd. Queda totalmente prohibido el copiado total o parcial.
Este artículo ha sido escrito por un usuario del sitio web y refleja su punto de vista personal. MetaQuotes Ltd. no se responsabiliza de la exactitud de la información ofrecida, ni de las posibles consecuencias del uso de las soluciones, estrategias o recomendaciones descritas.

- Aplicaciones de trading gratuitas
- 8 000+ señales para copiar
- Noticias económicas para analizar los mercados financieros
Usted acepta la política del sitio web y las condiciones de uso