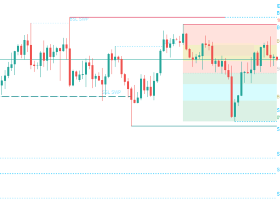
The Order Block Skeptic's Checklist: 5 Tests to Run Before You Trust Any Zone

Search "order block indicator" in any trading forum and you will find two crowds talking past each other. One insists order blocks are the closest thing retail trading has to reading institutional footprints. The other calls the whole idea a repackaged support and resistance line with a trendier name. Both crowds have a point. The concept is sound — large orders do leave a footprint, and price does react to unfilled interest — but the tool that draws the zone on your chart can range from genuinely rule-based to quietly curve-fit, and from your side of the screen the two look identical.
This post is a checklist, not a sales pitch. Five tests you can run on any order block indicator before you let it anywhere near your entries. I will run our own tool, Order Block Zones, through all five at the end, and I am not going to skip the ones it does not pass cleanly.
Why "does it work" is the wrong first question
"Does it work" invites a yes or no answer, and any seller can give you the answer they want you to hear. The five questions below cannot be answered with marketing copy. Each one asks you to look at something specific and verifiable — a zone's edges over time, a count, an outcome, a rule's origin, a higher timeframe. You do the looking. That is the point.
Test 1 — Does the zone ever move after the fact?
A legitimate order block is a historical fact the moment it forms: this candle, this range, this bar index. What is allowed to change afterward is its state — fresh, touched, broken — not its position. If you screenshot a zone's edges today and the same historical zone has different edges next week with no documented rule explaining why, that is repainting: the indicator quietly rewriting history so old signals look cleaner in hindsight than they were in real time.
You can test this by hand without any special tools. Save a screenshot of a handful of zones with a timestamp visible, wait a few sessions, then diff the edges against a fresh screenshot of the same history. Color or label can legitimately change. Coordinates should not, unless the indicator documents a re-scan rule you can predict in advance.
Test 2 — How many zones have you actually looked at?
A single well-chosen example on a sales page proves nothing. Order blocks are not rare — a busy H1 chart over a couple of weeks can produce a dozen candidates — which means it is trivial to screenshot the three that worked and never mention the nine that did not. The fix is boring but effective: pick a pair, pick a timeframe, and count every zone the indicator draws over a fixed window, win or lose, before you form an opinion about the method.
This is also where a lot of readers quietly give up, because manually keeping that tally by hand over more than a session or two is tedious.
Test 3 — What happens after the first touch?
This is the number sellers avoid most, because it is the least flattering one to publish. Of the zones that get touched — the ones that actually mattered because price returned to them — what fraction held and reversed versus what fraction got run straight through? A method that only shows you the zones that worked and quietly deletes the ones that failed is not backtesting, it is survivorship bias with a green highlight.
Track this yourself for two weeks. Every time a fresh zone gets touched, write down what happened next using a rule you fix in advance — reaction within N bars counts as a hold; a close through the far side counts as a break. Do not use a single number from a vendor as a substitute for this, including from us. Hit rates for order blocks vary enormously by pair, session, and volatility regime, and a single headline percentage from a curated backtest usually tells you more about how the sample was chosen than about how the method performs going forward.
Test 4 — Was the rule built to fit this chart, or applied to it?
Every order block definition needs a few parameters: how many bars count as "impulsive," how large the displacement needs to be relative to volatility, how far back the scan looks. The question is whether those parameters were picked once, in advance, and then applied blind to every pair and session — or whether they get quietly retuned per chart until the zones line up with what already happened. The second one is curve-fitting with extra steps, and it is invisible from a single screenshot.
Ask directly: does the indicator use one fixed rule everywhere, or does it need "the right settings" for each symbol to look convincing? If a seller cannot tell you the exact rule in one sentence — for example, "the last opposite candle before a move that clears the prior swing by at least one ATR" — be suspicious of what is happening under the hood.
Test 5 — Does this zone agree with the bigger picture?
A zone in isolation is guesswork with better branding. A demand zone on M15 sitting directly beneath H4 resistance is a much weaker signal than the same shape sitting inside an H4 demand zone. Testing this one is simple: pull up the higher timeframe next to whatever the indicator is showing you and ask whether they agree. If the tool cannot show you that context — if it only ever draws zones for the chart you happen to be looking at — you are doing this check manually every single time, and most traders eventually stop bothering.
Running the checklist on our own indicator
Here is where this stops being a general essay and becomes an audit.
Test 1, non-repaint. Mostly a pass, with one exception worth flagging. Zones only change state forward — fresh to mitigated to broken — never backward. The one place our own logic bends this: when two same-direction zones overlap, we keep the newer one and drop the older during the scan, so an old zone can disappear because a fresher one replaced it, not because price ever touched it. We treat that internally as deduplication rather than repainting, but from the chart alone the two look identical, which is exactly what test 1 is designed to catch. If you are auditing us, this is where to look.

Test 2, sample size. Instead of asking you to manually count zones over a screenshot, the panel keeps a running tally of demand, supply, and fresh zones on the chart right now, so the count is always visible rather than curated. It will not do the two-week tracking for you — that part is genuinely on you — but it removes the excuse of "I did not know how many there were."

Test 3, post-touch outcome. We do not publish a hit rate, on purpose. Any single number here would tell you more about which pair and which month we chose than about what to expect on your own chart. What the indicator gives you instead is the raw material to run the test yourself: every zone that survives the deduplication described above keeps its state visibly — fresh, mitigated, or broken — right on the chart, so you can tally outcomes over your own two-week window without taking anyone's word for it, ours included.
Test 4, fixed versus fitted rule. A genuine pass, and here is the actual rule so you can judge it the same way you would judge anyone else's: last opposite-colored candle before a move that clears the prior swing by at least one ATR of displacement. It does not change per symbol — no per-pair retuning happens behind the scenes, the same rule runs on gold, indices, and every FX pair.
Test 5, higher-timeframe context. This is the one the free version fails, by design. It only draws zones for the timeframe you are looking at. If an M15 zone is fighting an H4 trend, the free version will not tell you — you have to flip to H4 and check by hand, the same manual step described above. That gap is exactly what the Pro version exists to close: it overlays H1 and H4 zones on your execution timeframe so the agreement check happens on the chart instead of in your head, along with touch alerts so you are not staring at the screen waiting for it.

Why publish a checklist that includes a failing grade
Two of these five did not go cleanly for us. One of them — the higher-timeframe blind spot in test 5 — happens to point at a paid upgrade, so take it with the appropriate grain of salt. The other — the deduplication behavior in test 1 — does not sell anything at all; it is just a place where our own logic can look like repainting if you are not told about it in advance, and now you are. Because the alternative — a page that only ever shows you the parts that flatter the product — is exactly what test 2 and test 3 above are built to catch, and I would rather you catch it here than after a purchase.
If you run these five tests on us, on a competitor, or on your own hand-drawn levels, the process is more useful to you than any single review score, ours included.
If you try the checklist and something about how we track state does not match what you see on your own feed, that is worth a comment on the product page. I read every one.