A B fractals and voids projection lines
- Indicatori
- Versione: 1.0
- Attivazioni: 15

An indicator of independent technical analysis by fractals and breakouts. Semi-automatic drawing of lines along points "A and B" in a matter of clicks.
The classic version is available for free in my store under the name "BreakOut Space Center Projection" You can use it for your pleasure, the results of the indicators will be the same, but I wanted so much to simplify the process of technical analysis and created a quite comfortable indicator. My feeling is how to change from an old car to a new and comfortable one or change an old computer.
I don't know if you need this indicator. It is exciting and with it you can immerse yourself in technical analysis along well-known paths or derive your calculations and strategies. Also a good question. My plan is to do analysis on stocks, since their chart is active only for about 8 hours a day, and if you do an analysis on H4, you can return to the chart only 2-4 times during these 8 hours for a couple of minutes with a clear strategy.
The third version may be released not much later, there are already blanks, and it will be able to analyze itself under specified conditions, as well as give entry and exit signals.
Technical analysis by fractals has long been known among traders and analysts of price direction forecasts.
This indicator differs from the standard method of drawing lines along points "A and B".
In the standard way, the line is drawn along the low price of the candlestick for the lower fractal and the high price candlestick for the upper fractal. In my indicator, the lines are drawn in the center of the fractal, relative to the overlapping neighboring bars. I have repeatedly made sure that the forecast is more clear. When the price goes out of the average range of the price movement by dozens of times, touches the forecast line without crossing it even by 1 point, and a rollback from the line begins!! I had no doubts about the effectiveness of this type of analysis.
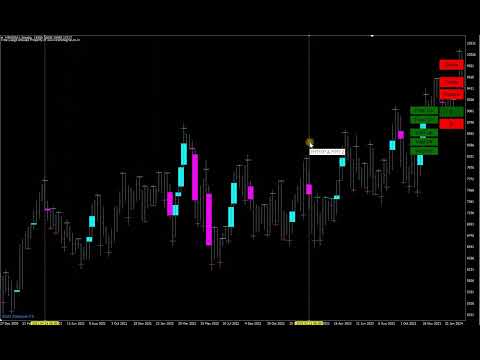
An additional calculation is carried out according to the centers of the void fresh, relative to the two neighboring bars. The middle of the void of the candlestick can be used for points "A and B".My favorite strategy is to start all the lines from one of the highest or lowest breakouts in the trend, and then with the appearance of new bars, plot the "B" points along the fractals, so the trend becomes visible, and if the price starts to exit it, then you can trade in the direction of the exit of the trend.
Apart from the standard strategy of searching for the trend by the upper and lower trend lines, you are not limited in other strategies. Which you can try out according to my recommendations or withdraw yourself.
* The version has been brought to the moment of comfort and saving time of analysis in which you can:
--- draw lines from several points A to several points B. Each point "A or B" can be marked with one click on each point or draw a range for points "A or B" in which all the desired points "A or B" will be marked.
--- to moveEach point "A or B" has its own group, and all lines linked to points "A or B" can be moved to another point/points "A or B" in a few clicks.
--- to delete lines in whole groupsAll lines linked to the same point A or B can be deleted in 2 clicks.
--- Highlight/hide fractals and breakout voids, which are separated by colors for top and bottom.
--- Change the colors of lines, markups, and even buttons to suit your style and to separate lines or groups of lines.
--- Lines can be drawn from " upper fractals / lower fractals / mid-void candle with breakout up / middle void candle with breakout down " along " upper fractals / lower fractals / void middle candle with breakout up / void middle candle with breakout down ".That is, the line can start from one type and go through the same or another type.
How to use the indicator.
## To remove all lines from the chart, press any key of the keyboard ##
1. Put the indicator on the chart and set up the parameters.
It is worth returning to this step when you have already learned how to work with lines and then customize the template to your style. If everything is well set up by default:)
Author chart - If you leave it "true", the chart will be in the author's style of chart colors and bars, matching the colors of the lines and marks. Zoom is also configured for a broad view of the situation; it will be more convenient to increase zoom for laying lines.
The following 3 parameters are responsible for the history on the chart. The old lines will begin to disappear if you choose to calculate in bars. If you are testing, for example, from 2020, then it is worth setting the calculation from the date, 1.1.2020
Voids also on gaps - Disabled by default, if you enable voids, voids will be shown not only on bars, but the indicator will also start recognizing gaps as voids.
You can then change the void colors of the rising and falling bars.
Number of bars to fix from fractal - if left as default, all possible fractals will be highlighted. If, for example, it is 3, then to the left and right by 3 bars, the fractals will not be highlighted and active. It is better to draw 2 lines from neighboring fractals and get 2 lines almost one on top of the other, for more accurate results.
Then there are the highlighting colors of the upper and lower fractals.
Level line Width is the width of the label by fractals and voids.
Mouse hover marker - Changes color when hovering over fractals and voids.
Width of the mouse hover marker - the thickness of the mark when hovering the mouse.
Then there are 3 colors of rays. Relative to point "A", the beginning of the beam.
And the width of the rays.
Marked level is the color of the mark on the "A" or "B" point when they are already marked.
In the "First Buttons" section, you can change the appearance of the permanent buttons on the chart. For a wide 4k screen extension, I set the "Button size coefficient" to "2", otherwise the buttons are cut off.
For a wide 4k screen extension, I set the "Button size coefficient" to "2.3", otherwise the buttons are cut off.
In the "Ray Button" section there is a parameter "Selecting an additional line for editing", if you change it to "true", then the laid parallel lines from the finished lines will be immediately selected and so you can immediately move them with the mouse or go to the color and style options.
The "Diapason" section of the style changes the style of the vertical lines to mark "A" or "B" points between the lines.
2. Illumination of fractals and voids.
Initially, fractals and voids are not shown. Click "Voids" to show voids.Click "Fractals" to show fractals.At any time you can click on them again to hide them from the chart. Optimal after the analysis is completed, for a cleaner chart.
3. Build new lines.
3.1 Single points "A" and "B" - mark points "A" and "B" with the mouse, clicking on each desired point for analysis.
Click on "A" then "Mouse", now you can mark the "A" points by clicking on fractals or voids.
When all the "A" points are fixed, the marked points are red by default, now mark the "B" points, click on the "B" button, then also on "Mouse".Mark all the desired "B" points by clicking on the fractals or voids.
Points "A" and "B" are specified. Press the "B" button and you're done. The lines have been laid. From all points "A" to all point's "B".
Practice several times to consolidate the lesson. You can use the uppermost "Delete" button to quickly remove all lines from the chart.
Colors help remind you of which points you are drawing, the button changes the color to the active one.
3.2 Automatically mark points in the range between two lines. We can draw two lines, and all possible points will be marked between them. Instead of marking each point yourself.Used for both "A" and "B" points. You can mark only "A" points in the range, and mark "B" points manually. that only one type of points can be selected in one range, along the lower or upper fractals, voids up, down, or all voids. However, this still simplifies manual point labeling and can be re-analyzed for a different type of point in just a few seconds.
And the way we draw points in a range.
Click on "A" then "Range", two vertical lines will immediately appear on the screen. Pull them with the mouse, for example, put the first line on the very bottom of the trend up, and the second line on the very top of the trend. Click on the desired type of points. A fractal up or down. Emptiness up or down or any emptiness. Click and see that the horizontal lines have disappeared and the clicked type of dots has red marks on the bars.
Now we need to draw points "B".Click on the "B" button and if you want to draw single points "B", then click on "Mouse", mark the points manually and press "B" again. If you want to draw points "B" in the range, click "Range". Two vertical lines will appear, pull them with the mouse, in the menu on the right, click on the type of points through which points "B" will pass and press the "B" button. The lines have been drawn.
4. Removing lines.
Delete one line. Click on the line you want to delete, click "Delete ray" in the drop-down menu.
Remove a group of lines from a single point "A". Click on any of the lines that come from point "A". Click "Group A", then the "A" button on the right. All lines originating from the same bar have been removed.
Delete a group of lines that pass through a single point "B". Click on any of the lines that pass through the same point "B". Click "Group B", then the "B" button on the right. All lines running on the same point "B" are deleted.
5. Moving already laid lines.
Any line drawn by the indicators can be changed to its beginning, point A and its continuation, point B. This is also possible for a whole group of lines.
Change point A for a single line:
Click on the line. Click on A from the menu. The line has disappeared and now the mouse cursor highlights the options for fixing points A.Now fix a new point A or even several points A with the mouse and then you will have several lines passing through the same point B.When the new point(s) are marked. On the right menu of the indicator, click A again. If you press B, the result may confuse you.
Change point B:
Same as point A.
Change the start or continuation of lines for a group.
Line Group - Whenever you draw more than one line in a single session. A group of lines is created and you can change its points A or B. This helps if you have drawn points and accidentally hooked the wrong point and want to change it, or if the graph develops, you can shift the analysis. one of the lines, then Group A if you want to change points A, mark the new points A and in the right menu on the graph click A. The same to change points B. With the buttons Group B, mark the new points B and press B.
6. Parallel line objects.
The indicator allows you to draw a parallel line from any line of the indicator. At a distance of 1 point or more. Such lines are plotted as an object and can be used with the EA for automated trading or alerts from the lines. The color of the parallel line will be the same color as the line from which it was taken, to change the color you need to click 1 or 2 times on the parallel line, then with the right mouse and "Trend line properties" where you can also change the style and width of the line. That is, the parallel line meets all the rules of the MetaTrader terminal, as you would draw it from the terminal menu.
To draw a parallel line, click on the line from the indicator, then "Ray add". An input field will appear, enter the distance of points from the line in it. (50) - 50 points above the line. (-50) - 50 points below the line.