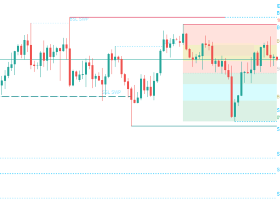
Trend Line Trading Strategy: Continuation, Breakout & Retest with Support and Resistance

Trend Line Trading Strategy
Full Forex Strategy
by PipModo
Introduction
This strategy uses trend lines as practical support and resistance zones. The setup starts with clear swing highs and swing lows, then waits for price to react at a trend line or break it with confirmation. Horizontal support and resistance zones are used as extra confluence before an entry.
The method can be used for trend continuation, breakout-and-retest trades and reversals. The important part is patience: a touch or line break alone is not enough. Price should show a clear bullish or bearish reaction before the trade is taken.
Strategy at a Glance
| Item | Details |
|---|---|
| Strategy Style | Price-action trend line continuation, breakout/retest and reversal |
| Market / Symbol | No fixed symbol is part of the method |
| Timeframe | No fixed timeframe is part of the method |
| Session | No fixed session is part of the method |
| Direction | Buy and Sell |
| Indicators | None; uses swing structure, trend lines and horizontal support/resistance zones |
| Entry Trigger | Bullish or bearish rejection/confirmation at a trend line zone, or after a confirmed break and retest |
| Stop Loss Method | Beyond the rejected/retest zone and local swing or confirmation candle |
| Take Profit Method | Next swing point or next horizontal support/resistance zone |
| Trade Management | If the first move is missed, wait for a later retest instead of chasing |
| Filters | Meaningful swing points, trend structure, horizontal-zone confluence, and strong confirmation; skip weak reactions |
Core Idea
A trend line is drawn from meaningful market turning points. In an uptrend, connect important swing lows or higher lows and treat the rising line as support. In a downtrend, connect important swing highs or lower highs and treat the falling line as resistance.
The line is not one exact price. Treat the area around it as a zone. A better setup appears when that trend line zone also meets a horizontal support or resistance area. The trader then waits for a clear rejection candle, breakout confirmation or a retest before entering.
Want to discuss this strategy with other traders?
Join PipModo - Strategy Lab, our free public discussion group on MQL5. Share your chart setups, ask questions, compare trading ideas and discuss practical strategy use with other traders.
Join the discussion:
Market, Timeframe and Session
The strategy is built around visible price structure rather than a fixed instrument, timeframe or trading session. Apply the same rules only where swing points, trend lines and support/resistance zones are clear enough to read.
Indicators and Exact Settings
No technical indicator is required. The chart tools used by the strategy are trend lines and horizontal support/resistance zones.
| Tool | Settings | Purpose |
|---|---|---|
| Trend Line | Draw through meaningful swing lows in an uptrend or swing highs in a downtrend | Defines rising support or falling resistance |
| Horizontal Zone | Mark nearby support or resistance as an area, not one exact price | Adds confluence and helps define retest, Stop Loss and target areas |
Chart Setup
- Mark the clear swing highs and swing lows first.
- For bullish structure, connect meaningful swing lows or higher lows with a rising trend line.
- For bearish structure, connect meaningful swing highs or lower highs with a falling trend line.
- Treat the trend line as a zone around the line, not one exact price.
- Mark nearby horizontal support and resistance zones.
- Give more weight to setups where the trend line and horizontal zone work together.
- Wait for a clear rejection or breakout confirmation before considering an entry.

Figure 1. Illustrative example - chart setup using swing points, a rising trend line zone and horizontal resistance.

Figure 2. Illustrative example - the area around a trend line is treated as the trading zone, not one exact price.
Buy Setup
Conditions
For a continuation buy, the market should show bullish structure with higher highs and higher lows.
Draw the rising trend line through meaningful swing lows or higher lows.
Wait for price to return to the rising trend line support zone. Horizontal support near the same area improves the setup.
For a breakout or reversal buy, start with a valid falling trend line drawn through lower highs. Price must break above it with strength and then hold above the broken structure.
Trigger
Continuation: a clear bullish rejection or strong bullish candle away from the rising trend line zone.
Breakout/reversal: a bullish confirmation after price retests the broken falling trend line or a nearby horizontal support zone.
Entry
Enter only after the bullish confirmation is visible. Do not buy just because price touches the trend line or makes the first break.
Stop Loss
Place the Stop Loss below the rejected or retest zone and beyond the nearby local swing or confirmation candle.
Take Profit
Target the next swing high or the next resistance zone. If a horizontal resistance zone is closer, use that zone first.
Management
If the first breakout move is missed, wait for a later retest of the broken zone. Do not chase price.
Invalidation
Skip the buy when the reaction is weak, the trend line is drawn from random candles, the breakout has no retest or structure confirmation, or there is no clear bullish confirmation.

Figure 3. Illustrative example - buy continuation after a retest of rising trend line support and bullish rejection.

Figure 4. Illustrative example - buy after a falling trend line breakout, support retest and bullish confirmation, with Stop Loss and Take Profit placement.
Sell Setup
Conditions
For a continuation sell, the market should show bearish structure with lower highs and lower lows.
Draw the falling trend line through meaningful swing highs or lower highs.
Wait for price to return to the falling trend line resistance zone. Horizontal resistance near the same area improves the setup.
For a breakdown or reversal sell, start with a valid rising trend line drawn through higher lows. Price must break below it and then retest the broken area or nearby horizontal zone.
Trigger
Continuation: a clear bearish rejection or strong bearish candle away from the falling trend line zone.
Breakdown/reversal: a bearish rejection or bearish close from the retest area after the rising support line has broken.
Entry
Enter only after the bearish confirmation is visible. Do not sell only because price touches the falling trend line or makes the first breakdown.
Stop Loss
Place the Stop Loss above the rejected or retest zone and beyond the nearby local swing or confirmation candle.
Take Profit
Target the next swing low or the next support zone. If a horizontal support zone is closer, use that zone first.
Management
If the first move is missed, wait for a later retest of the broken zone rather than entering late.
Invalidation
Skip the sell when the reaction is weak, the trend line is not anchored to meaningful swing highs, the breakdown has no retest or structure confirmation, or there is no clear bearish confirmation.

Figure 5. Illustrative example - sell continuation after a retest of falling trend line resistance and bearish rejection.

Figure 6. Illustrative example - sell after a rising trend line breakdown, resistance retest and bearish confirmation, with Stop Loss and Take Profit placement.
Stop Loss
The Stop Loss belongs beyond the area that should hold if the trade idea is correct. For a buy, place it below the rejected support or retest zone and beyond the nearby local swing or confirmation candle. For a sell, place it above the rejected resistance or retest zone and beyond the nearby local swing or confirmation candle.
Take Profit
Use market structure for the target. A buy aims for the next swing high or next resistance zone. A sell aims for the next swing low or next support zone. When a horizontal zone appears before the swing target, treat the closer zone as the first target area.
Trade Management
The strategy does not require chasing the first move. When the initial breakout has already moved away, wait for price to return to the broken trend line or horizontal structure. A later retest can provide a second entry if the same confirmation rules are still valid.

Figure 7. Illustrative example - skip a weak reaction and wait for a later retest instead of chasing the first move.
Filters and No Trade Conditions
- Use meaningful swing highs and swing lows. Avoid trend lines drawn from random candles.
- Treat the trend line as a zone. Do not demand an exact wick-to-line touch.
- Prefer a trend line setup that also meets a horizontal support or resistance zone.
- Do not enter on a touch alone. Wait for a clear bullish or bearish reaction.
- Weak candles sitting around the trend line are not enough for a high-quality entry.
- For breakout trades, a line break alone is not enough. Wait for a retest or structure confirmation.
- Skip a reversal when price breaks a line but has no clear structure zone, no retest and no confirmation candle.
Buy Example
A falling trend line is controlling price through lower highs. Price then breaks above the line with strength. Instead of buying immediately, wait for price to retest the broken area or a nearby horizontal support zone. When a bullish confirmation candle pushes away from that support, enter the buy. Place the Stop Loss below the retest zone and aim for the next resistance zone or swing high.
The same entry logic is shown in Figure 4.
Sell Example
A rising trend line is supporting price through higher lows. Price breaks below the support line, then returns to the broken area or a nearby resistance zone. After a clear bearish rejection or bearish close from the retest area, enter the sell. Place the Stop Loss above the retest zone and target the next support zone or swing low.
The same entry logic is shown in Figure 6.
Common Mistakes
- Drawing a trend line through random candles instead of clear swing points.
- Treating a trend line as one exact price and rejecting a valid zone reaction.
- Entering only because price touches the line.
- Buying or selling the first breakout without waiting for confirmation.
- Ignoring nearby horizontal support or resistance.
- Taking weak candle reactions around the trend line.
- Chasing price after the first move instead of waiting for a retest.
- Placing the Stop Loss inside the same zone that price is expected to respect.
Final Checklist
- Mark clear swing highs and swing lows.
- Draw the trend line through meaningful turning points.
- Confirm bullish higher-high/higher-low structure or bearish lower-high/lower-low structure when trading continuation.
- Treat the trend line as a zone.
- Mark nearby horizontal support and resistance.
- Wait for a clear rejection, breakout confirmation or retest.
- Check that the Stop Loss is beyond the invalidation area.
- Set the target at the next swing point or support/resistance zone.
- Skip weak reactions and trades without clear structure.
- If the first move is missed, wait for the next valid retest.
Final Summary
This is a simple structure-first trend line method. Start with meaningful swing points, draw the correct rising or falling trend line, and treat it as an area rather than an exact price. Continuation trades come from a clean rejection in the direction of the trend. Breakout and reversal trades need a confirmed break followed by a retest or structure confirmation. Horizontal zones improve the setup, while weak reactions and unconfirmed breaks are skipped.
PipModo
Join the discussion: PipModo - Strategy Lab
https://www.mql5.com/en/messages/030dc38f8c38dd01
Featured Product: Gold Beast MT5
https://www.mql5.com/en/market/product/191793