Congrats on getting the FxS Grid EA from MQL5.com! Now it’s time to get it up and running on your MetaTrader 5 (MT5) platform. Whether you're a beginner or a seasoned trader, this guide will walk you through every step—from purchase to deployment—so you can start using your new expert advisor with confidence.
✅ Step-by-Step Installation Guide
Step 1: Open MetaTrader 5
First things first:
- Launch the MetaTrader 5 terminal on your computer.
- Make sure you are logged in to the same MQL5 account you used to purchase the EA.
📌 You must be logged into your MQL5 account in the MT5 terminal to access your purchased products.
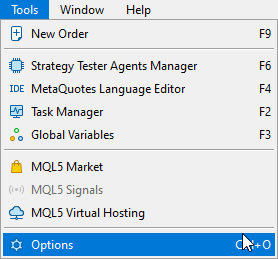
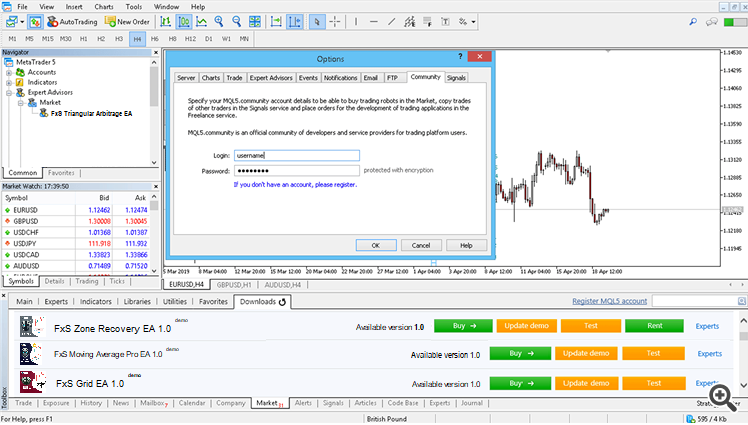
* Click on Tools -> Options -> Community Tab.
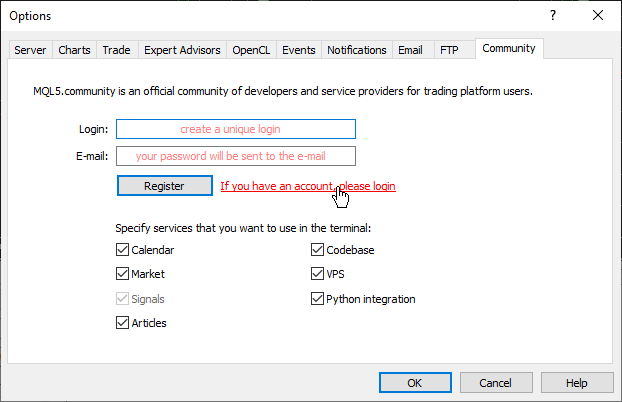
* Click on "If you have an account, please log-in".
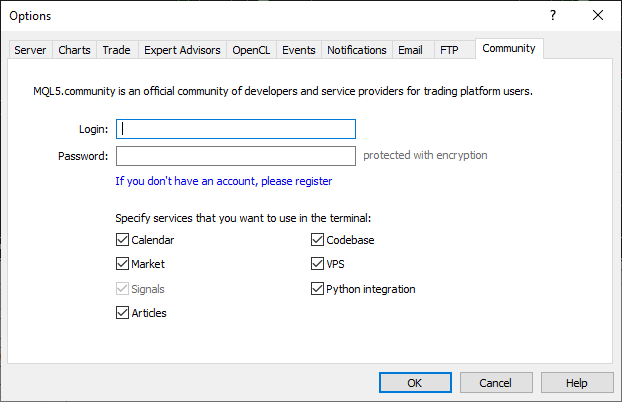
* Enter your mql5.com login and password.
* Then, activate the EA or Indicator in your platform. This will spend an activation.
Step 2: Access the Market Tab
-
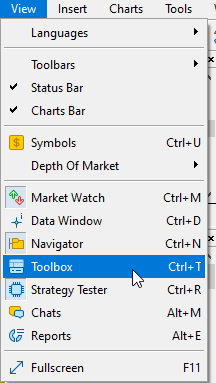
Click in View -> Toolbox -> Market -> Downloads Tab.
- The purchased EA/Indicator should be listed.

Step 3: Install the EA
-
Click the Download/Install button.

-
MT5 will automatically download and place FxS Grid EA into the correct directory under:
MQL5 > Experts > Market
Step 4: Attach FxS Grid EA to a Chart
Now that the EA is installed:
-
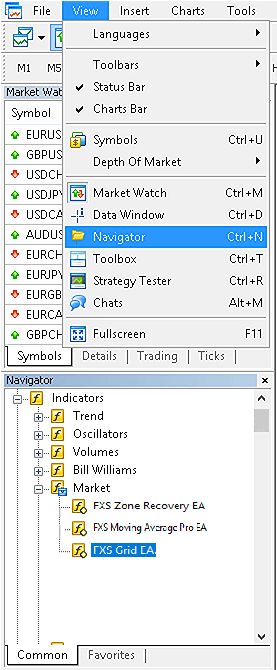
Click View -> Navigator to open the navigator.
-
The recently activated EA will be listed in Navigator -> Expert Advisors -> Market.
-
Drag and drop FxS Grid EA onto your chart.
Step 5: Configure the Settings
-
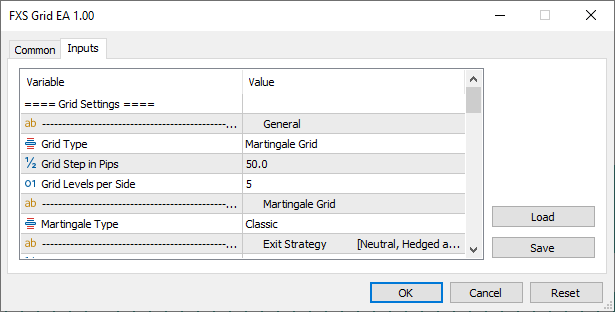
After attaching the EA, the Inputs tab will appear.
-
Here you can configure your preferred Grid settings, Trade settings, Entry Indicator, etc.
-
Click OK when you're ready.
Step 6: Enable AutoTrading
-
Make sure AutoTrading is turned on (green play button in the toolbar).
-
The blue mortarboard hat
 in the top-right corner of your chart confirms that the EA is running.
🧪 Optional: Test in Strategy Tester (Recommended Before Going Live)
-
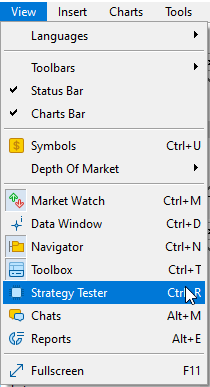
Go to View > Strategy Tester or press Ctrl + R.
-
Select FxS Grid EA from the dropdown.
-
Choose a symbol and timeframe.
-
Run a backtest to see how the EA performs under historical conditions.
💡 Tips & Reminders
-
Always use a demo account to test the EA and your settings before deploying it live.
-
Make sure the required symbols are visible in your Market Watch window.
-
Check that trading is enabled for the account and broker you’re using.
-
If any issues occur, check the Experts and Journal tabs for error messages.
🎉 You’re All Set!
You’ve now successfully installed FxS Grid EA and are ready to let it analyze the market and make trades based on grid trading logic.


