This is the fifth post in the order block series. The last one was a before-and-after story about adding a confirmation requirement to naked zone entries, and it ended where most posts about entries end: with a cleaner signal and a smaller trade count. Several readers wrote back with a version of the same question, which I will paraphrase bluntly, because it is the right question. Fine, the entry is cleaner. Now what? How much do I put on it, and does that decision belong to the entry at all?
It does not, and the place where these two decisions get tangled together is where I have seen more workflows quietly fail than at any indicator setting. So this post is not about a new tool or a better filter. It is about the seams between three layers you are already running, whether or not you have named them, and about the specific ways those seams leak.
Three questions that feel like one
Sit in front of a chart with a setup forming and you are actually answering three separate questions at once.
The first is where. Where on this chart is price plausibly going to do something other than continue? The second is whether. Does the rest of the chart agree that a reaction makes sense right now, or is this location arriving at the worst possible moment? The third is how much. How much of the account rides on the first two answers, which will be wrong a meaningful share of the time?
Most of us collapse all three into a single feeling that the trade looks good. The feeling is not useless. It is just unauditable. When a week goes badly you cannot tell whether the locations were poor, the timing was poor, or the locations and timing were fine and the size was simply too large to survive an ordinary run of losers. Three failure modes, one undifferentiated verdict, no way to fix anything.

The order you ask them in is not arbitrary
Ask them in the wrong order and you corrupt your own read. If you know before you have judged the chart that this one is going to be a two-percent trade because you are down on the week and want it back, you will find the agreement you are looking for. Motivated reasoning does not announce itself. It shows up as an unusually generous reading of an indicator you would have dismissed on a Tuesday.
So: location first, agreement second, size last. And one more rule, which took me longer to arrive at than it should have. Each layer may veto. No layer may promote. A beautiful zone does not earn a trade on its own. Perfect indicator agreement in the middle of nowhere does not either, because without a location you have no structural reference for a stop, and a stop placed at a round number or an arbitrary distance is not a stop, it is a wish. And if the size layer says the honest position for this stop distance is smaller than you can actually trade, that is a no, regardless of how good the first two answers were.
Veto asymmetry is the whole discipline in one line. It is also the part people drop first, because vetoing on the third layer feels like leaving money on the table after you have done the analytical work. It is not. It is the only layer that is arithmetically binding.
Layer one: where, and what a zone genuinely claims
An order block is a location hypothesis and nothing more. The construction is mechanical: a bearish candle whose high is subsequently broken upward by a displacement leg marks a demand zone, and the mirror case marks supply. Displacement is measured against ATR so that ordinary chop does not qualify. That rule is fixed in advance, applied to every candle, and it produces zones you would rather it did not.
What the rule cannot tell you is when. A zone drawn on Monday may be revisited on Thursday, or in six weeks, or never. Nor does it tell you that a reaction is likely on this particular touch. The state distinction most zone tools draw between fresh and mitigated is real and worth respecting, but it is a coarse filter, not a verdict. It says this level has not been traded through yet. It does not say the market cares about it today.
I keep pressing on this because the honest limits of layer one are what create the need for layer two. If a zone told you direction and timing, no confirmation layer would be necessary, and anyone selling you one would be selling redundancy.
Layer two: agreement, and what it costs
The second layer asks whether independent evidence supports acting at this location now. Higher-timeframe structure, trend state, volatility regime, session, relative currency strength, and an actual price-action trigger are the usual candidates. The word doing the work in that sentence is independent.
Three momentum oscillators agreeing is not three opinions. It is one opinion counted three times, and stacking correlated indicators produces the sensation of confirmation while adding almost no information. The test I use is crude but effective: can I describe a market state where this input says yes and that one says no? If I cannot construct such a state, the second input is decoration.
Agreement also costs something, and the cost is worth stating plainly because it is what people are unprepared for. You will take fewer trades, sometimes far fewer. You will enter later, because a trigger confirming after the fact is by definition behind the earliest possible entry. And you will watch clean moves run without you, which is psychologically more expensive than a loss of the same size. Anyone who tells you a filter is free has not run one through a quiet month.
The seam where workflows leak
Here is the failure I promised, and I have committed it myself. You add a confirmation layer. Trade count falls, exactly as designed. Weekly activity now feels thin, and thin feels like underperformance even when nothing has gone wrong. So, without ever deciding to, you compensate. Maybe size creeps up because there are fewer trades to spread risk across. Maybe a B-grade setup starts counting as an A on Friday afternoon. Maybe the stop moves in a little so the same nominal risk buys a bigger position.
Net exposure ends up unchanged or higher than before you added the filter, and the filter's actual contribution is now unmeasurable, buried under a sizing change you never wrote down. The layers were supposed to be independent. Silently, the second one started feeding the third.
Two things fix it, both boring. Settle the size rule before you add the filter and change one thing at a time. And record trades per week and average risk per trade for a fixed period before and after the change. If trade count halved and average risk doubled, you did not filter anything. You renamed it.
Layer three: the arithmetic that outlives the setup
The third layer does not care what the chart looks like. Position size follows from account equity, the risk fraction you have committed to, and the stop distance the structure hands you. The zone determines the stop; the stop determines the size. When those are wired in the correct order, a wider structural stop automatically produces a smaller position rather than a larger loss, and that single dependency removes a great deal of improvisation from a bad afternoon.
Two properties of this layer deserve more respect than they usually get. Drawdown recovery is asymmetric, so the damage from oversizing is not linear in the size, and the account that survives an ordinary losing run is worth more than the one that optimized the entry. And on a funded or evaluation account, the binding constraint is frequently a daily loss cap or a trailing maximum drawdown, which are schedule constraints, not per-trade ones. A sequence of individually correct position sizes can breach a daily cap collectively while every single trade looked reasonable in isolation. If you trade under such rules, the third layer has to reason about the day, not just the trade.
The mechanism you use for this matters far less than the fact that it is a mechanism rather than restraint. A spreadsheet that reverse-calculates maximum lots from your remaining daily allowance is entirely adequate. What is not adequate is deciding size in the moment, on a chart, while looking at a setup you like.
Doing it with software, and the obvious disclosure
Everything above can be run manually. I ran it manually for a long time, and the reason I eventually built parts of it into tools is that the manual version decays exactly when it matters most: late in a losing week, when redrawing zones honestly and reading agreement without bias are the first disciplines to go.
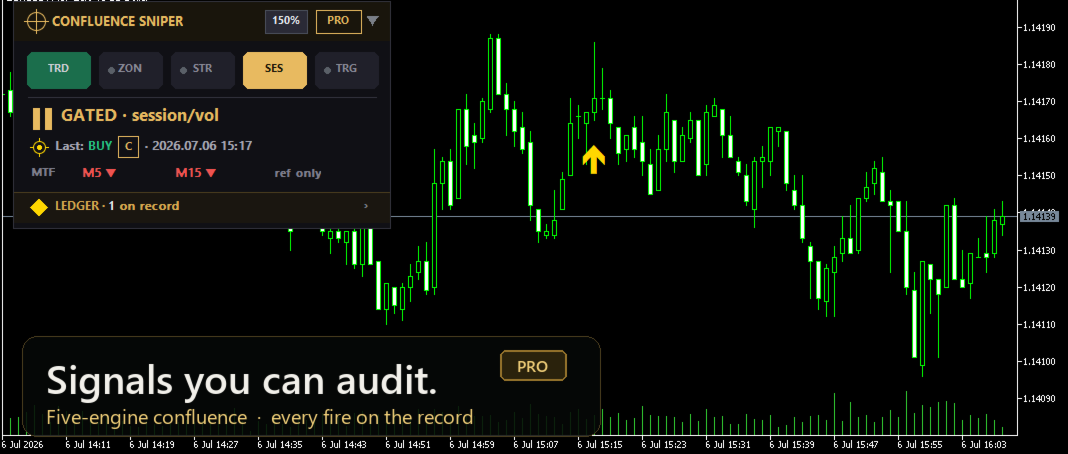
For transparency: I publish tools for the first two layers, and the skeptic's checklist from earlier in this series applies to them as much as to anyone else's. Order Block Zones handles the location layer, marking fresh and mitigated states from a fixed displacement rule and removing zones that price has closed through. Confluence Sniper handles the agreement layer, running five independent engines and grading a signal A, B or C by how many of them align, with every live signal written to a local ledger file at bar close so the history you audit tomorrow is the history that was recorded today. Neither makes a claim about outcomes, and the third layer is deliberately not their job.
Homework
Take the next twenty setups you look at, and before anything else, write down three things: the location, whether the rest of the chart agreed, and the size the stop distance implies at your committed risk fraction. Then add a fourth column that most journals do not have. Which layer pushed back, and did you override it?
My own tally from that exercise was unflattering in a specific way. The overrides were almost never on layer one. Zones I did not like, I skipped without difficulty. The overrides clustered on layer three, on trades where the first two layers had already said yes, the stop distance implied a position that felt too small to be worth taking, and I sized up rather than accept the arithmetic. That is not an analysis problem and no indicator will fix it. But you cannot address it until the three answers are written in three separate columns, which is the entire argument of this post.