

For those who don't want to read too much, there's "AB Universal Grid. Brief Description of Input Parameters."
MT5 version : https://www.mql5.com/en/market/product/145321
MT4 version : https://www.mql5.com/en/market/product/147482
Abbreviations
UG - AB Universal GridTS - Trailing Stop
CTS - Compensatory Trailing Stop
BE - Breakeven
AB - Accumulative buffer
“Expert settings” settings block

Watch magic number (drop-down list):
1) Only My
2) All
3) My and Add magic number4) My and Manual
The drop-down list determines which magic numbers the advisor sees .
The advisor's magic number is the number by which the advisor distinguishes its positions and orders from those set by another advisor or from those set manually.
1) Only My – UG sees only its own magic number on the symbol with the Magic Number (My) setting. It is not interested in other positions and orders and will not work with them. This is used when the EA opens orders based on its own strategies. See the Trading strategy settings block.
2) All – UG sees all orders and positions on the symbol it's placed on. This option is typically used to resolve difficult account situations. If you need to automatically recover from a drawdown, remove other EAs from all charts for this symbol and set it to All . You can verify that the EA has seen all orders in the Info panel. It will display the PL (profit/loss) for the specified periods and the number of positions in the market.
3) My and Add magic number – UG will see its own magic number (My) and an additional one, which should be entered in the Add magic number parameter. How do you use this? Let's say you open the first position with another advisor, and UG wants to manage this position. But you must be sure that your advisor does not manage this position itself, but only opens it.
4) My and Manual - UG sees orders and positions with their own magic numbers and those opened manually, even from a mobile terminal. You only need to open a position, and the advisor will pick it up and take profit or stop-loss.
___ Magic number (My) – The advisor will use this magic number to distinguish its positions and orders from those of others.
___Add magic number – This is an additional magic number. Enter the magic number of another advisor here if you plan to recover it from a drawdown using UG . The other advisor will need to be deleted, otherwise a conflict will arise between UG and the other advisor.
Maximum spread for opening market orders, pips (0=off) – This setting prohibits opening market positions if the symbol spread is equal to or greater than the specified value. This setting does not affect the placement of pending orders. When the info panel is enabled, exceeding this value is displayed as a red line.
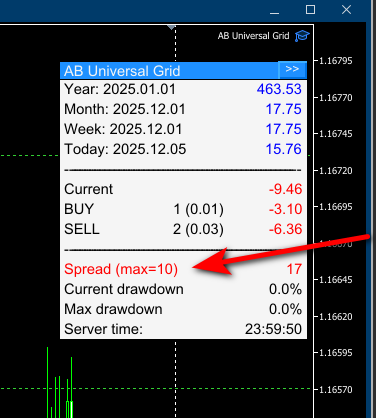
Info Panel – Enables or disables the display of the Info Panel on the chart. When the panel is enabled (On) , it can be minimized by clicking the ">>" button in the upper right corner of the panel. When the panel is disabled (Off) , it is completely hidden from the chart.

“Trading strategy settings” settings block

This settings block contains the Expert Advisor's built-in strategies. Currently, there's only one: "1) Always on the Market." This settings block is responsible for opening only the first position in any direction and setting its take profit and stop loss.
Trading strategy (drop-down list):
Off1) Always on the market
2) Gold mine
0) Off – All strategies are disabled. When selected, the UG Expert Advisor completely ignores the "Trading strategy settings" block.
1) Always on the market – A strategy for testing the EA. The signal to open a Buy position is the absence of a Buy position. The same applies to Sell positions. Simply opening a position without any analysis is used to test and study the various algorithms built into the UG EA. Even with this opening, the EA shows profit and good survivability.
2) Gold mine - Signal based on the proprietary indicator for trading gold.
Strategy Time Frame - The time frame on which we search for a signal for the selected strategy
Opening of the first (drop-down list):
Buy and Sell
only BUYonly SELL
BUY and SELL – the advisor opens positions in both directions based on the signal from the selected strategy
BUY only - the advisor opens only Buy positions when a Buy signal is received. Sell signals are ignored.
SELL only - the advisor opens only Sell positions when a Sell signal is received. Buy signals are ignored.
How to use it:
1) To explore various algorithms, select the " 1) Always on the Market" strategy and disable one of the directions so it doesn't interfere. Then, observe how the compensating trailing works or how Buy Stop and Sell Stop orders follow the price when selecting the "Stop" mode in the "Order Type for opening the grid" parameter.
2) If there's a non-reversal trend, disable the opposite direction and don't trade against the trend. If there are any counter-trend positions remaining in the market, the UG advisor will, if possible, manage them correctly.
Lot Mode (drop-down list):
FixedPart of the free margin
This parameter is responsible for lot calculation only when opening the first position according to the strategy. The lot calculation for the second and subsequent positions in the same direction is controlled by the " Grid LOT Mode" parameter in the "Grid Setting" settings block.
Fixed – the first position for the selected strategy will always be opened with the lot specified in the “___ First Lot” parameter.
Part of the free margin – the first position for the selected strategy will be the calculated lot. For every "___ Part of the free margin" specified in the parameter , "___ First Lot" will be opened.
Example of lot calculation in “ Part of the free margin” mode.
“___ First Lot” = 0.1
“___ Part of the free margin” = 1500
We have 5430 free funds at the time of opening
5430/1500 = 3.62 (3 whole parts of 1500, the remainder is discarded)
Lot = 3*0.1 = 0.3
The next deal will be opened with a lot of 0.3
I usually use the “Part of the free margin” lot calculation mode only during testing, since it’s not difficult for me to change the fixed lot size if necessary.
Stop Loss, pips (0=off) – the stop loss size for the first position in pips. Once set, the EA doesn't monitor the stop loss for one position until a second position is opened in the same direction. To disable stop loss, set the value to zero.
Take Profit, pips (0=off) – the take profit size for the first position in pips. Once set, the EA doesn't control the take profit for one position until a second position is opened in the same direction. To disable take profit, set the value to zero.
“Risk Management” settings block

This settings block allows you to set certain limits to prevent significant account drawdowns. Risk management is an essential element of a professional trader.
Max Lot EA (0=off) – Limits the maximum lot size in a single trade. If the calculated lot size is greater than this value, the position will be opened with the Max Lot EA volume. Please note that this setting does not prohibit opening multiple positions with the Max Lot EA volume.
Close all at Drawdown (drop-down list):
Off
in the deposit currencyin the percentage of the balance
If the drawdown reaches a specified value, UG closes all positions it sees (see the “Watch magic number” parameter)
Off – drawdown control is disabled.
In the deposit currency – drawdown control will be based on the amount in the deposit currency, which must be entered below in the "___ Drawdown Value" parameter. For example, in this mode, you would set the "___ Drawdown Value" parameter to 100. When the drawdown in the deposit currency reaches a value greater than or equal to 100, all positions will be closed and orders will be deleted.
In the percentage of the balance - drawdown control will be performed as a percentage of the balance. This percentage value should be entered below in the "Drawdown Value" parameter. For example, in this mode, you would set the "Drawdown Value" parameter to 8. The deposit balance is 1000. When the drawdown reaches 80 (1000 x 8/100), all orders will be closed.
___ Drawdown Value - The value for the selected mode.
___ Stop Trading after Drawdown – determines the EA's behavior after all positions are closed due to a drawdown . If set to "Off," UG will continue to operate according to its algorithm. If set to "On," UG will stop after all positions are closed. To resume operation, you must restart the terminal. Yes, that's how it works for now. Later, when the user interface is developed, a start button will be added.
Close all at Profit (drop-down list):
Off
in the deposit currencyin the percentage of the balance
If the profit reaches the specified UG value closes all positions it sees (see parameter "Watch magic number "
Off – profit control is disabled.
in the deposit currency – profit control will be carried out based on the amount in the deposit currency, which must be entered below in the parameter “___ Profit Value” . For example, in this mode you are in the parameter “___ Profit Value” bet 100. When the profit is in the deposit currency reaches a value greater than or equal to 100, all positions will be closed and orders will be deleted.
in the percentage of the balance - profit control will be carried out as a percentage of the balance, the percentage value must be entered below in the parameter “ ___Profit Value” . For example, in this mode, you are in the parameter “ ___Profit Value” set 8. Deposit balance = 1000. When the drawdown reaches greater than or equal to 80 (1000*8/100), all orders will be closed.
___ Profit Value - Value for the selected mode.
___ Stop Trading after Profit - determines the advisor's behavior after all positions are closed by drawdown. If you set the value “Off” UG will continue its work according to the algorithm. If you set the value “On” , then after closing all positions UG will stop working. To resume working, you need to restart the terminal.
“Market Position Management” settings block

This settings block contains functionality for managing open positions. This includes moving to breakeven and a trailing stop.
===== Trailing stop (TS) (drop-down list):
0) OFF
1) Simple2) Compensatory
0) OFF – trailing stop is disabled and all TS settings have no effect on the advisor.
1) Simple – A simple trailing order based on the breakeven level of all positions in the same direction. There is a breakeven level for each direction of open positions. This level can be viewed by setting "Drawing Breakeven Levels" to On in the "Visualization" settings group. It is blue for the Buy direction and red for the Sell direction. The calculation is based on this level, according to the parameters specified below.
2) Compensatory – A compensatory trailing trade is a powerful tool for unloading your deposit during aggressive trading. Its primary purpose is to close maximum market volumes at least to breakeven. A secondary objective is to trail the profit if the market moves.
A compensating trailing stop (CTS) works when there are two or more positions in the same direction. It trails the stop losses of all profitable positions and one or more losing positions, depending on the opportunity. Therefore, with a CTS, not all positions have a stop loss. Also, when adding new losing positions, the stop loss itself can be moved to a less profitable position, but this adds another losing position to the CTS .
___ Distance TS(CTS), pips – Distance from the price at which the stop loss will be trailed
___ Start TS , pips – The TS start distance. If you want to start trailing not from the BU point, but when the price moves a little further, set this value to > 0. Then the first stop-losses will be set when the price moves the distance Distance + Start . This setting does not affect the CTS , as it has other purposes.
___ Step TS(CTS) , pips – the TS (CTS) step in pips. To avoid sending stop loss changes to the server too frequently, you can set the TS (CTS) step.
===== Breakeven (BE) – Enables and disables the overall breakeven level for multiple orders in the same direction. Please note that the breakeven level is calculated taking swaps and commissions into account (if commissions can be calculated). Therefore, the breakeven level may change when swaps are calculated. The EA notices this and adjusts accordingly.
___ Distance for transfer to BE, pips – As soon as the price from the breakeven level passes this distance + Add pips to BE , a stop loss will be set at breakeven.
___ Add pips to BE – the number of pips that can be added to the BE level.
Grid settings block

This block allows you to configure the opening of the next position or grid order, as well as some parameters for managing the position grid.
On/Off the "Grid Settings" settings block – Enables/Disables the settings block. If set to Off , this block can be ignored; the Expert Advisor ignores it. If you don't need to automatically open the next position or order, or don't need to set overall take profits and stop losses for positions, disable this block.
Grid New Orders/Positions – This setting allows you to disable the opening of new positions and orders for the grid. However, existing open and placed positions will be controlled by the advisor based on the parameters in this settings block.
Grid Ban by Max number Positions (0=off) – the maximum number of positions in one direction. This setting limits the number of positions in one direction. Once the maximum number is reached, the EA will no longer open new positions or orders in that direction. A red text message will appear in the corresponding line in the Info panel, and the visualization line for the next order or position opening will be gray. I'll make these lines more informative later. When set to 0, this setting is disabled.
Grid Ban by Max Volume Positions (0=off) – the maximum volume of positions in one direction. This setting limits the total volume of positions in one direction. It should be noted that if the market volume has not yet been exceeded, this setting allows opening the next position with any volume, even if this parameter is exceeded several times. This should be taken into account when using this setting. When set to 0, this setting is disabled.
===== Grid STEP mode (drop-down list):
1) Fixed
2) First step +/- (Add pips*Number of open orders)
3) First step * (Ratio step*Number of open orders)4) ATR * Ratio step
Here you need to select the desired mode for calculating the step (distance) of the next position or order.
1) Fixed – Fixed step. The next step is constant, and each subsequent order or position will tend to open at the same distance from each other. The distance itself, in points, should be entered in the "First step, pips" parameter.
2) First step +/- (Add pips*Number of open orders) – For each new position, the grid step increases or decreases, depending on the sign in the parameter “Add pips for (2)” by this number of points. The calculation is tied to the number of positions and follows the formula:
STEP = First step + (Add pips*Number of open orders)
or
STEP = First step - (Add pips*Number of open orders)
3) First step * (Ratio step * Number of open orders) - The next step is calculated using the formula:
STEP = First step * (Ratio step *Number of open orders)
Where
First step – First step,
Ratio step – Coefficient,
Number of open orders – the number of open positions in the market in a given direction that the advisor sees (see the “Watch magic number” parameter).
4) ATR * Ratio step – The step calculation is based on current volatility. The ATR value is taken and multiplied by the Ratio step coefficient. The calculation uses the ATR parameters of the current candle. See the ATR parameters in the "Indicators" settings block.
___ First step, pips – The value in pips for the first step.
___Add pips for (2) – Additional pips for mode 2) First step +/- (Add pips * Number of open orders) . If the value is positive, the step will increase. If the value is negative, the step will decrease.
___ Ratio step for (3) and (4) – coefficient for modes 3) First step * (Ratio step * Number of open orders) and 4) ATR * Ratio step .
___ Min Step, pips (0=off) - the minimum grid step in pips, in case the calculation results in a smaller grid step. A value of 0 disables this parameter.
___ Max Step, pips (0=off) - the maximum grid step in pips, in case the calculation results in a grid step value greater than this value. A value of 0 disables this parameter.
===== Grid LOT Mode (drop-down list):
1) Fixed (First Lot)
2) Last lot +/- Add Lot
3) Last Lot * Ratio lot4) Total volume of positions * Ratio lot
The calculation mode for the volume of the next position or order. For all modes, the calculated lot is rounded to the broker's permitted parameters, and the "Max Lot EA (0=off)" parameter from the "Risk Management" settings block is also taken into account.
1) Fixed (First Lot) – All subsequent positions or orders are opened with the same volume. The value is taken from the "First Lot" parameter in the "Trading strategy settings" block, even if this block is disabled by setting "Trading strategy" to Off.
2) Last lot +/- Add Lot – The next lot is calculated using an arithmetic progression. The value from the “Add Lot for (2)” parameter is added to or subtracted from the lot of the last open position. Example: The last open position was 0.65, the “Add Lot for (2)” value = -0.01. Calculate the next lot as 0.65 - 0.01 = 0.64.
3) Last Lot * Ratio Lot – The next lot is calculated using a geometric progression. The lot of the last open position in the market is multiplied by the Ratio Lot . If Ratio Lot > 1, the result is the well-loved (or least-loved) martingale. Example: The last open position was 0.05, the "Ratio Lot for (3) and (4)" value is 2. Calculate the next lot: 0.05 * 2 = 0.10.
4) Total volume of positions * Ratio lot – The next lot is calculated using the formula: the total volume of the direction is multiplied by the coefficient “Ratio lot for (3) and (4)” , but not less than the “First Lot” settings block "Trading strategy settings." I haven't encountered this calculation method anywhere, although I primarily use it in my trading because I find it more flexible. Calculating the lot based on the last open position works well when all the lots in the accumulated positions are ordered from smallest to largest. However, if the market contains many positions with varying volumes, the next lot may open with a disproportionately small lot. This drawback precludes calculating the next lot (4).
Example: Ratio lot = 0.62, lot of the first position is 0.01, lot of the second position is 0.01, lot of the third position is 0.02. We calculate the next lot (0.01 + 0.01 + 0.02) * 0.62 = 0.0248, rounding up, the next lot = 0.03. By the way, the Ratio lot = 0.62 in this mode is my favorite, since it roughly follows the Fibonacci sequence when calculating the lot.
___ Add Lot for (2) – Additional lot for lot calculation mode 2) Last lot +/- Add Lot
___ Ratio lot for (3) or (4) – Coefficient for lot calculation modes 3) Last Lot * Ratio lot or 4) Total volume of positions * Ratio lot .
===== Order TYPE for opening the grid (drop-down list):
Market
LimitStop
This setting determines which order type will open the next position. If you enable the "Drawing the Next Level Opening" parameter in the "Visualization" settings group, the opening level of the next position or order will be drawn for all order types. This allows you to control where they will be opened.
Market – The position will be opened by a market order when the price reaches the specified target distance calculated in the " Grid STEP" parameter from the last position in the market.
Limit – The position will be opened with a Buy Limit or Sell Limit order. This is set immediately if there is no Buy Limit set. or Sell Limit. The advantage over Market Opening is that once placed by the algorithm, the advisor doesn't control the position of the Limit order. You can manually drag it to a more appropriate location at your discretion.
Stop – The position will be opened with a Buy Stop or Sell Stop order. This is a more advanced grid construction and requires further discussion.
There are two settings associated with this mode, located below:
___ Set distance for "Stop", pips – Distance to place an order
___ Set trailing distance for "Stop", pips – Order trailing distance
Let's look at how this mode works using the example of a Buy Stop order and a placement distance of 130 pips from the last open position. As we know, the Buy Stop order must be above the price. Therefore, the EA waits for the price to fall by 130 pips + Set distance and then places a Buy Stop order above the price . If the price reverses upward, the order is activated. If the price decides not to reverse but continues to fall, the opened Buy Stop order will trail the price by the Set trailing distance , thereby improving the market entry point. This is especially useful during asset price movements without reversals. Click on the image to see how it works.

Grid STOP LOSS Mode (drop-down list):
0) Off1) Pips from the furthest position
Important! The Expert Advisor monitors the presence or absence of stop-loss levels and restores them if changed manually or by another Expert Advisor. A "No Monitoring" mode is planned for development.
0) Off – Stop loss setting for the grid is disabled. If any stop losses are set, they are removed .
1) Pips from the furthest position - Stop loss is set for all positions at the level: for Buy, below the value specified in the “Stop Loss, pips” parameter in pips from the lowest position; for Sell, above the specified value in pips from the highest position.
___ Stop Loss, pips – Stop Loss value in pips for the selected mode.
Grid TAKE PROFIT Mode (drop-down list):
0) Off
1) Pips from the closest position2) Pips from Breakeven
Important! The Expert Advisor monitors the presence or absence of Take Profit levels and restores them if changed manually or by another Expert Advisor. A "No Monitoring" mode is planned for development.
0) Off – Take-profit is disabled. If any take-profits are set, they are deleted .
1) Pips from the closest position - Sets Take Profit for all positions at the following level: for Buy, set it higher by the specified value in pips from the highest position; for Sell, set it lower by the specified value in the “Take Profit, pips” parameter in pips from the lowest position.
3) Pips from Breakeven – Set to the specified number of points in the "Take Profit, pips" parameter from the breakeven level of all orders in the same direction. The breakeven level is calculated taking into account commissions and accumulated swaps, so it is adjusted when new swaps are accrued.
Close Grid the profit, account currency (0=off) – Closes all positions in a direction when a profit in the deposit currency is reached. If set to 50, all positions in that direction will be closed when the total profit for that direction reaches a value greater than 50. The journal entry will read “===Close by the Close Grid the profit parameter===.”
Settings block “Accumulative Buffer (AB)”

The Accumulation Buffer (AB) is a function for reducing drawdowns. It uses already recorded profits to close positions furthest from the market. Here's how it works! The advisor calculates the profit earned over a selected period (number of days). If any profit is made during this period (it's possible there won't be any), it uses a portion of it to close the furthest unprofitable position in the market, or part of it.
===== Accumulative Buffer – On/Off Accumulative Buffer
Choosing a direction to close unprofitable positions (drop-down list):
Buy
SellAuto
Selecting a direction whose losing positions will be closed
Buy – unprofitable positions in the Buy direction will be closed at the expense of AB
Sell – unprofitable positions in the Sell direction will be closed at the expense of AB
Auto - AB will close unprofitable positions in the direction with the higher overall market volume. In other words, if the overall market volume is higher in the Buy direction, Buy positions will be closed.
Threshold to activate AB – the AB activation threshold. Specified in the total number of lots for the selected direction.
Example: We set this parameter to 0.05. We opened a buy position with a volume of 0.01 lots. When the price declined, we opened two more positions at 0.01 each, for a total of 0.03. For us, these are acceptable risks, and we don't need to close anything. When the total buy volume reaches 0.05 or more, AB is activated and will check whether the accumulated profit over the selected period is sufficient to close the buy position furthest from the current price. If it is, the position will be closed immediately. It's possible that the accumulated profit won't be sufficient immediately. However, during a pullback, the loss on the furthest position will decrease, and when the accumulated profit is sufficient, it will be closed, even if the amount in AB itself hasn't changed.
Use AB profit for the number of days – For how many days should AB profit be calculated?
Percent use AB - The percentage of accumulated profit that will be used to close losing positions. If you want to keep some for yourself.
Lot calculation mode for closing a losing position (drop-down list):
Percent of the total volume of the directionFixed lot
This setting allows you to select the lot calculation mode for closing a losing position.
Percent of the total volume of the direction - The percentage of the total volume of the losing direction. For example, the buy direction grid is losing money, its total volume is 0.5 lots. If the ___ Value for Lot Calculation Mode parameter is set to 10, then we will close 0.5 * 10/100 = 0.05 lots, or the entire position if its lot size is smaller.
Fixed lot - Will close the lot specified in the ___ Value parameter for Lot calculation mode or the entire position if its lot is less.
___ Value for Lot calculation mode - Value for Lot calculation mode for closing a losing position .
“Visualization” settings block

Drawing the Next Level Opening – If you want to see the opening level of the next order or position, set this to On. For Buy positions and orders, the opening level is blue. For Sell orders, it is red. If opening is prohibited for any reason, these levels will be drawn in gray. Hovering over the level will display a tooltip. It displays the opening direction, the next lot, and the reason for the prohibition (if any). If you select the Order TYPE for opening the grid = Stop , two lines will be drawn. One is the order placement level (solid line), and the second line is the price level at which this order will be placed (dashed line).
Drawing Breakeven Levels – Draw breakeven levels. Enabling this setting will allow you to see the breakeven levels calculated by the Expert Advisor.
The blue level is for the Buy direction, the red level is for the Sell direction, and the pink level is common for both directions (if it can be calculated). Levels will not be drawn if there is only one position in each direction.
“Indicators” settings block

--- ATR ---
Settings of the ATR indicator, by which the grid step is calculated when selecting the “Grid STEP mode” parameter = 4) ATR * Ratio step .
ATR Time frame – the time frame from which the ATR value is taken
ATR Peroid – period of the ATR indicator.
MT5 version : https://www.mql5.com/en/market/product/145321
MT4 version : https://www.mql5.com/en/market/product/147482


")
![[XAUUSD]: Weekly Liquidity Activation Points (timings), June 22-26, 2026](https://c.mql5.com/6/1013/splash-preview-771790.png "[XAUUSD]: Weekly Liquidity Activation Points (timings), June 22-26, 2026")
