*** Launch Discount: For one purchase is just $45, Price is 200$.
Contact me to send you instruction and add you in "M1 Best One group" for sharing or seeing experiences with other users.
M1 Best One — User Manual
Professional Market Analysis for MetaTrader 4 & MetaTrader 5
M1 Best One is a powerful chart indicator designed to help traders quickly read market structure, important price zones, trend direction, and Swing signals from a single chart.
It combines Support & Resistance Zones, Trend MA, Swing signals, a market dashboard, and configurable alerts in one clean interface.
✨ Main Features
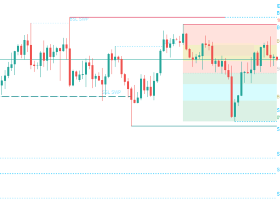
📍 Support & Resistance Zones
Clearly identify important areas of potential market reaction directly on your chart.
The indicator can display:
-
Support Zones
-
Resistance Zones
-
Support Becomes Resistance (SBR)
-
Resistance Becomes Support (RBS)
These zones provide a visual framework for monitoring price reactions and possible trading opportunities.
📈 Trend MA
The built-in Trend MA provides a simple visual representation of the current market direction.
Use the trend line together with the other chart information to understand whether the market environment is:
UP · DOWN · FLAT
The Trend MA can also be used as an optional filter for zone alerts.
🎯 Swing Signals
M1 Best One can display easy-to-read Buy and Sell arrows when a Swing setup is detected.
The signals are designed to make potential setups easier to spot without requiring the trader to constantly analyze every price movement manually.
BUY signal → potential bullish setup
SELL signal → potential bearish setup
The indicator can also display optional TP/SL information associated with the signal.
📊 On-Chart Dashboard
The integrated dashboard provides a quick overview of the current chart condition.
Depending on your settings, it can display:
Market Move
BULLISH / BEARISH / SIDEWAYS
Trend MA
UP / DOWN / FLAT
Reversal Setup
GOOD / MIXED / POOR
Active Zones
Number of currently active zones
Average Zone Width
Current average zone size
Alert Mode
Current alert filtering mode
The dashboard is designed to give you useful information without requiring you to inspect multiple indicators separately.
🚀 Installation
MetaTrader 5 / 4
For your first use, it is recommended to start with the default settings.
A simple configuration is:
Dashboard: ON
Trend MA: ON
SBR/RBS: OFF
Terminal Alerts: ON
Push Notifications: OFF initially
After becoming familiar with the indicator, you can customize the settings according to your trading style.
📖 How to Read the Chart
1. Identify the nearest zone
First look at the price location relative to the visible Support and Resistance zones.
Ask:
Is price approaching Support?
or
Is price approaching Resistance?
These areas can become important points for further analysis.
2. Check the Trend MA
Look at the Trend MA direction.
UP → bullish market context
DOWN → bearish market context
FLAT → less directional market environment
The Trend MA should be treated as market context, not as a guarantee of price direction.
3. Watch for Swing signals
When a new Buy or Sell arrow appears, examine the surrounding chart.
For example:
BUY
Support zone + bullish context + Buy signal
SELL
Resistance zone + bearish context + Sell signal
A signal should always be evaluated together with your own trading rules and risk management.
4. Check the Dashboard
Before taking any action, quickly review:
Market Move
Trend MA
Reversal Setup
Active Zones
This gives you a fast overview of the current environment.
🔔 Alerts
M1 Best One includes configurable alerts to help you monitor the chart.
Available options include:
Terminal Alerts
Shows an alert directly inside MetaTrader.
Push Notifications
Can send notifications to your mobile MetaTrader application when configured.
New Bar Alerts
Allows the indicator to check for new signal conditions when a new bar appears.
Signal Age
You can control how old a signal can be before it is no longer considered for alerting.
Alert Time
You can define the hours during which alerts are allowed.
🎯 Zone Alerts
M1 Best One can also monitor reactions around Support and Resistance zones.
The Minimum Move Away setting controls how far price should move away from a zone before a subsequent reaction can qualify for an alert.
You can also enable the Trend Filter.
When Trend Filter is enabled, zone alerts are restricted according to the Trend MA direction.
🎨 Chart Customization
The indicator provides several visual customization options.
You can customize:
-
Support zone color
-
Resistance zone color
-
SBR color
-
RBS color
-
Trend line appearance
-
Signal arrow style
-
TP/SL display
-
Dashboard position
-
Chart theme
-
Zone labels
-
Text spacing
This allows you to create a chart layout that matches your personal trading workspace.
📊 Dashboard Status Guide
Market Move
BULLISH
Recent market conditions favor upward movement.
BEARISH
Recent market conditions favor downward movement.
SIDEWAYS
The market currently lacks a strong directional bias.
Trend MA
UP
Trend line is pointing upward.
DOWN
Trend line is pointing downward.
FLAT
Trend line currently has limited directional movement.
Reversal Setup
GOOD
The current setup has favorable conditions according to the indicator's market analysis.
MIXED
Some conditions are supportive while others are not aligned.
POOR
The current conditions are less favorable.
These dashboard states are analytical information, not guarantees of future market movement.
🧭 Practical Trading Workflow
A simple workflow for using M1 Best One is:
1️⃣ Open your market
Select the symbol and timeframe you want to analyze.
2️⃣ Check the dashboard
Look at Market Move and Trend MA.
3️⃣ Find nearby zones
Identify the nearest Support or Resistance area.
4️⃣ Watch for a signal
Wait for a clear Buy or Sell Swing 1-2-3 signal.
5️⃣ Evaluate the context
Consider the zone, trend, dashboard information, current price action, and your own trading rules.
6️⃣ Manage risk
Determine your position size, Stop Loss, Take Profit, and maximum acceptable risk before entering a trade.
🛠️ Troubleshooting
The indicator does not appear
Check that:
-
The file is located in the correct Indicators folder.
-
MetaTrader has been restarted or the Navigator has been refreshed.
-
The indicator compiled correctly.
I do not receive alerts
Check:
-
Terminal Alert is enabled.
-
Push Notification is enabled if required.
-
Your alert time range is correct.
-
The signal is still within the allowed signal-age period.
-
A new qualifying signal or zone reaction has actually occurred.
The chart contains too many zones
Review the Zone Period Settings and visual options.
Changing zone sensitivity can change the number and appearance of displayed zones.
The dashboard is blocking the chart
Change the Dashboard Position.
Available positions include:
Top Left
Bottom Left
Top Right
Bottom Right
💡 Best Practices
For the best experience with M1 Best One:
Use the indicator as a decision-support tool, not as a standalone trading system.
Combine the information from the indicator with:
-
Price action
-
Market conditions
-
Your trading strategy
-
Proper position sizing
-
Stop Loss
-
Risk management
Before using a configuration on a live account, test it on historical data and in a demo/forward-testing environment.
✅ Quick Reference
BUY Arrow → Detected bullish Swing setup
SELL Arrow → Detected bearish Swing setup
Support Zone → Area to monitor for potential bullish reaction
Resistance Zone → Area to monitor for potential bearish reaction
SBR → Support becoming Resistance
RBS → Resistance becoming Support
Trend MA → Quick view of directional market context
Dashboard → Combined market information at a glance
Alerts → Optional terminal and mobile notifications