![💥 [+$1,462 Open] BTCUSD Setup || Supply Demand EA ProBot + Quant Direction](https://c.mql5.com/6/1016/splash-772626.png "💥 [+$1,462 Open] BTCUSD Setup || Supply Demand EA ProBot + Quant Direction")
💥 [+$1,462 Open] BTCUSD Setup || Supply Demand EA ProBot + Quant Direction

Hello traders,
$1,462 in open profit right now. I used the Supply Demand EA ProBot together with the Quant Direction indicator to identify and execute a high-probability setup on BTCUSD (Bitcoin).
Supply Demand zones for precise targets, Quant Direction for the entry signal and directional confirmation. When both tools agree, the probability of a winning trade goes up significantly.
Here is what the session looked like:
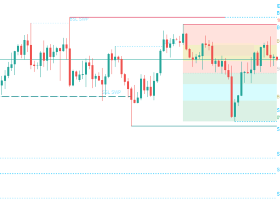
- ✅ BUY trade on BTCUSD M5, entry signal generated by Quant Direction, risk to reward set at 1:1, currently running with +$1,462 in open profit
This was a full 3-D confluence, the strongest signal the indicator can give. Scalping Analysis read 86% Bullish, showing extreme bullish momentum with moving averages steeply aligned upward across timeframes and strong momentum backing. Intraday Analysis confirmed at 69% Bullish, and Swing Analysis backed it up at 57% Bullish. All three dimensions pointing the same direction gave a clear green light to buy, and the market followed through with a strong upward move.
Quant Direction tells you WHEN the market momentum confirms a direction across timeframes. Supply and demand zones can then be used two ways: as targets for TP and SL levels, or as reference points for better entries. On this setup there was no demand zone sitting above price, meaning the way was clear with no obvious resistance to slow the move down. For that reason I set the take profit at a fixed 1:1 risk to reward instead of anchoring it to a zone. Check the photo below.

👉 Quant Direction MT5: https://www.mql5.com/en/market/product/175045
👉 Quant Direction MT4: https://www.mql5.com/en/market/product/175046
👉 Supply Demand EA ProBot MT5: https://www.mql5.com/en/market/product/117023
👉 Supply Demand EA ProBot MT4: https://www.mql5.com/en/market/product/116645
⚠️ DISCLAIMER: Trading Forex/CFDs carries risk. Past performance does not guarantee future results. Test on demo accounts first and only trade capital you can afford to lose. Results may vary by broker, leverage, market conditions, and settings.