
MVC design pattern and its application (Part 2): Diagram of interaction between the three components

1. Introduction
Let me briefly remind you the contents of the previous article. According to the MVC pattern, the code is divided into three components: Model, View and Controller. Each of the components can be developed by a separate programmer or a separate team: they create, support and update it. Furthermore, it is always easier to understand a script code, if it consists of functionally clear components.
Let us take a look at each component.
- View. View is responsible for the visual representation of information. It receives data from the Model without interfering in its operation. This can be anything visual: chart, table, image.
- Model. The model processes data. It receives data, processes it according to some internal rules and provides operation results to the View. However, the Model knows nothing about the View, and it only makes its operation results available. The Model receives source data from the Controller, while also knowing nothing about it.
- Controller. Its main role is to receive data from the user and to interact with the Model. The Controller knows nothing about the internal structure of the Model as it only passes the source data to it.
In this article, we will consider a diagram of possible interaction between these three components. This aspect was not covered in the first article, and one of the readers mentioned it in comments. If the interaction mechanism is not thoroughly considered or is inaccurate, all the advantages of using the pattern can be undermined. That is why this topic should be paid special attention to.
We need an object for experiments. We will use a standard indicator, let's say WPR. A separate folder should be created for the new indicator. This folder should have three subfolders: View, Controller and Model. Since the selected indicator is very simple, we will be adding more extra features, just to demonstrate separate ideas from the article. The indicator will have no practical value and it should not be used in real trading.
2. Controller in detail
We will start with the Controller, as it is responsible for interaction with the user. Thus, the Controller can undertake operations with input parameters through which the user interacts with the indicator or Expert Advisor.
2.1. Source data module
//--- input parameters
input int InpWPRPeriod = 14; // Period
input int dist         = 20; // Distance
We have only two parameters which require much work though. It is necessary to make sure the parameters do not contain invalid values. If they do, further action is needed. For example, both parameters cannot be less than zero. Suppose the first parameter is erroneously set to -2. One of the possible actions is to fix invalid data by setting it to a default value, which is equal to 14. The second input parameter should in any case be converted. This is how it may look like at this step:
//--- input parameters
input int InpWPRPeriod = 14; // Period
input int dist         = 20; // Distance

int       iRealPeriod;
double    dRealDist;
//+------------------------------------------------------------------+
//| Custom indicator initialization function                         |
//+------------------------------------------------------------------+
int OnInit() {

   if(InpWPRPeriod < 3) {
      iRealPeriod = 14;
      Print("Incorrect InpWPRPeriod value. Indicator will use value=", iRealPeriod);
   }
   else
      iRealPeriod = InpWPRPeriod;

   int tmp = dist;

   if (dist <= 0) {
      Print("Incorrect Distance value. Indicator will use value=", dist);
      tmp = 14;
   }
   dRealDist = tmp * _Point;

   .....

   return INIT_SUCCEEDED;
}
We have quite a lengthy code and two variables in the global scope. If there are more parameters, the OnInit handler will turn into a mess. Furthermore, the handler can have other tasks to do, except the validation and conversion of input parameters. For this reason, let's create a new module for the Controller which will handle all source data, including the input parameters.
In the Controller folder, create the Input.mqh file and move to it all inputs from WPR.mq5. In the same file, we will write the CInputParam class to work with available existing parameters:
class CInputParam {
   public:
      CInputParam() {}
     ~CInputParam() {}

     const int    GetPeriod()   const {return iWprPeriod;}
     const double GetDistance() const {return dDistance; }

   protected:
      int    iWprPeriod;
      double dDistance;
};
The class structure should be clear. Both input parameters are saved in protected fields, and there are two methods for accessing them. From now on, all components, including View, Controller and Model, will work only with this class object which is created in the Controller. So, the components will not work with regular inputs. View and Model will access this object and the input parameters using the GetXXX methods of this object. Parameter InpWPRPeriod will be accessed via GetPeriod(), and 'dist' will be accessed using the GetDistance() method.
Please note that the dDistance field has type double and is ready for use. Now, both parameters have been checked and are undoubtedly correct. However, no checks are performed inside the class. All the checks are performed in another class, CInputManager, which we will write in the same file. The class is simple, and it looks like this:
class CInputManager: public CInputParam {
   public:
                  CInputManager(int minperiod, int defperiod): iMinPeriod(minperiod),
                                                               iDefPeriod(defperiod)
                  {}
                  CInputManager() {
                     iMinPeriod = 3;
                     iDefPeriod = 14;
                  }
                 ~CInputManager() {}
           int   Initialize();

   protected:
   private:
           int    iMinPeriod;
           int    iDefPeriod;
};
The method has the Initialize() method which implements the required checks and converts the inputs, if necessary. If initialization fails, the method will return a value other than INIT_SUCCEEDED:
int CInputManager::Initialize() {

   int iResult = INIT_SUCCEEDED;

   if(InpWPRPeriod < iMinPeriod) {
      iWprPeriod = iDefPeriod;
      Print("Incorrect InpWPRPeriod value. Indicator will use value=", iWprPeriod);
   }
   else
      iWprPeriod = InpWPRPeriod;

   if (dist <= 0) {
      Print("Incorrect Distance value. Indicator will use value=", dist);
      iResult = INIT_PARAMETERS_INCORRECT;
   } else
      dDistance = dist * _Point;

   return iResult;
Now, do you remember how often we need to call functions of type SymbolInfoХХХХ(...) and similar ones? We do this when we need to obtain symbol parameters, open window data, etc. This is done very often. These function calls are implemented throughout the text, and they can be repeated. But they are also source data, similar to input data.
Suppose we need to get the value of SYMBOL_BACKGROUND_COLOR and then to use it in the View. Let's create a protected field in the CInputParam class:
class CInputParam {
     ...
     const color  GetBckColor() const {return clrBck;    }

   protected:
           ...
           color  clrBck;
};
Also, let's edit CInputManager:
class CInputManager: public CInputParam {
   public:
           ...
           int   Initialize();

   protected:
           int    VerifyParam();
           bool   GetData();
};
The work will be split into the two new methods:
int CInputManager::Initialize() {

   int iResult = VerifyParam();
   if (iResult == INIT_SUCCEEDED) GetData();

   return iResult;
}

bool CInputManager::GetData() {

  long tmp;

  bool res = SymbolInfoInteger(_Symbol, SYMBOL_BACKGROUND_COLOR, tmp);
  if (res) clrBck = (color)tmp;

  return res;

}

int CInputManager::VerifyParam() {

   int iResult = INIT_SUCCEEDED;

   if(InpWPRPeriod < iMinPeriod) {
      iWprPeriod = iDefPeriod;
      Print("Incorrect InpWPRPeriod value. Indicator will use value=", iWprPeriod);
   }
   else
      iWprPeriod = InpWPRPeriod;

   if (dist <= 0) {
      Print("Incorrect Distance value. Indicator will use value=", dist);
      iResult = INIT_PARAMETERS_INCORRECT;
      dDistance = 0;
   } else
      dDistance = dist * _Point;

   return iResult;
}
Such division into two methods provides another useful possibility: the ability to update some of the parameters whenever necessary. Let's add a public Update() method:
class CInputManager: public CInputParam {
   public:
           ...
           bool   Update() {return GetData(); }
           ...
};
The combination of input parameters specified by the user and those received form the terminal in one class (CInputParam) can hardly be seen as a perfect solution. Because it is inconsistent with the principles. This inconsistency consists in the different degrees of code mutability. The developer can change inputs frequently and easily: change the name of a separate parameter, its type, remove a parameter or add new ones. This operation style is one of the reasons why input parameters are implemented in a separate module. The situation is different with the data received through the SymbolInfoХХХХ() function call: the developer is much less inclined to make any changes here. The next reason is that the sources are different. In the first case, it is the user, while in the second case it is the terminal.
It is not difficult to fix these remarks. To do this, we can split all source data into two submodules. One of them will work with input parameters, the other one will handle terminal data. What if we need a third one? For example, to work with the configuration file containing XML or JSON? Write and add another submodule. Then, create composition in the CInputParam class, while leaving the CInputManager class as is. Of course, this complicates the entire code. So, we will not implement this, as our test indicator is very simple. But this approach can be justified for more complex scripts.
There is one moment which should be paid special attention to. Why do we need the second class CInputManager? All methods from this class can be easily moved to the CInputParam base class. However, there is a reason for this solution. You shouldn't enable all components to call Initialize(), Update() and similar methods from the CInputManager class. That is why an object of type CInputManager will be created in the Controller, while other components will access its CInputParam base class. This protects from repeated initializations or unexpected calls of Update(...) from other components.
2.2. CController class
Create the Controller.mqh file in the Controller folder. Connect the file with the source data module and create the CController class in this file. Add a private field to the class:
CInputManager pInput;
Now, we need to initialize this module, provide the possibility to update data in it and possibly to call other methods, which have not been implemented yet. At least we need the Release() method which can clean and release some resources used by source data. It is not needed in our case now, but it can be necessary later.
So, let's add the Initialize() and Update() update methods to the class. Now it looks as follows:
class CController {
 public:
                 CController();
                ~CController();

           int   Initialize();
           bool  Update();
 protected:
 private:
   CInputManager* pInput;
};

...

int CController::Initialize() {

   int iResult = pInput.Initialize();
   if (iResult != INIT_SUCCEEDED) return iResult;

   return INIT_SUCCEEDED;
}

bool CController::Update() {

   bool bResult = pInput.Update();

   return bResult;
}
We initialize the module with source data in the Initialize() method of the Controller class. If the result is unsatisfactory, break the initialization. Obviously, further operations cannot be performed in case of an error in source data.
Error can also appear when updating source data. The Update() will return false in this case.
The next task of the Controller is to provide other components with access to its source data module. This task can be easily solved if the Controller owns other components, i.e. includes the Model and the View:
class CController {
 public:
   ...
 private:
   CInputManager* pInput;
   CModel*        pModel;
   CView*         pView;
}
...
CController::CController() {
   pInput = new CInputManager();
   pModel = new CModel();
   pView  = new CView();
}
The Controller will be also responsible for the initialization, update and maintenance of the life cycle of all components, which the Controller can easily do if we add the Initialize() and Update() methods (as well as any other necessary ones) to the Model and View components.
So, the main file of the WPR.mq5 indicator will look as follows:
...

CController* pController;

int OnInit() {
   pController = new CController();
   return pController.Initialize();
}

...

void OnDeinit(const int  reason) {
   if (CheckPointer(pController) != POINTER_INVALID)
      delete pController;
}
The OnInit() handler creates the Controller and calls its Initialize() method. Next, the Controller calls the relevant Model and View methods. For example, for the OnCalculate(...) indicator handler, create the Tick(...) method in the Controller and call it in the OnCalculate(...) handler of the main indicator file:
int OnCalculate(const int rates_total,
                const int prev_calculated,
                const datetime &time[],
                const double &open[],
                const double &high[],
                const double &low[],
                const double &close[],
                const long &tick_volume[],
                const long &volume[],
                const int &spread[]) {

   return pController.Tick(rates_total, prev_calculated,
                           time,
                           open, high, low, close,
                           tick_volume, volume,
                           spread);

}
We will get back to the Controller's Tick(...) method later. Now, pay attention that:
- For each indicator event handler, we can create a relevant method in the Controller:
int CController::Initialize() {

   if (CheckPointer(pInput) == POINTER_INVALID ||
       CheckPointer(pModel) == POINTER_INVALID ||
       CheckPointer(pView)  == POINTER_INVALID) return INIT_FAILED;

   int iResult =  pInput.Initialize();
   if (iResult != INIT_SUCCEEDED) return iResult;

   iResult = pView.Initialize(GetPointer(pInput) );
   if (iResult != INIT_SUCCEEDED) return iResult;

   iResult =  pModel.Initialize(GetPointer(pInput), GetPointer(pView) );
   if (iResult != INIT_SUCCEEDED) return iResult;


   return INIT_SUCCEEDED;
}
...
bool CController::Update() {

   bool bResult = pInput.Update();

   return bResult;
}
...
- The main file of the WPR.mq5 indicator turns out to be very small and simple.
3. Model
Now, let's move on to the main part of our indicator, the Model. The Model is the component which makes the decisions. The Controller gives the Model data for calculation, and the Model receives the result. This includes source data. We have just created a module for working with this data. Also, this includes data received in the OnCalculate(...) handler and passed to the controller. There can be data from other handlers such as OnTick(), OnChartEvent() and others (they are not needed in our simple indicator).
In the existing Model folder, create the Model.mqh file with the CModel class and a private field of type CModel in the Controller. Now, we should enable the Model to access source data. This can be done in two ways. One is to replicate the required data in the model and initialize the data using SetXXX(...) methods:
#include "..\Controller\Input.mqh"

class CModel {
 public:
   ...
   void SetPeriod(int value) {iWprPeriod = value;}
   ...
private:
   int    iWprPeriod;
   ...
};
If there is a lot of input data, there will be a lot of SetXXX() functions, which is not a good solution.
Another one is to pass to the Model a pointer to the object of the CInputParam class from the Controller:
#include "..\Controller\Input.mqh"

class CModel {
 public:
   int Initialize(CInputParam* pI){
      pInput = pI;
      return INIT_SUCCEEDED;
   }
private:
   CInputParam* pInput;
};
The Model can now receive the source data using a set of GetXXX() functions:
pInput.GetPeriod();
But this method is also not very good. What is the purpose of the Model? It should make decisions. The main calculations are performed here. It generates the final result. It should be the concentration of business logic which should remain almost unchanged. For example, if the developer creates an Expert Advisor based on the intersection of two moving averages, the Model will determine the fact of such intersection and will decide whether the EA should enter the Market. The developer can change the set of inputs, output method, add/remove trailing stop and so on. But this does not affect the Model. There will still be the intersection of two Moving Averages. However, the following line in the file with the Model class:
#include "..\Controller\Input.mqh"
sets the dependence of the Model from the Controller module with source data! The controller informs the Model: "I have this source data. Take it. If I change anything, you will have to take this into account and change yourself". So, the most important, the central and rarely changing element depends on a module that can be easily and frequently changed. But it should be the opposite. The Model should instruct the Controller: "You perform initialization. I need data for work. Give the required data to me".
To implement this condition, we need to delete the line which includes Input.mqh (and similar lines) from the file with the CModel class. Then, we need to define how the Model wants to receive source data. To implement this task, in the Model folder create a file named InputBase.mqh. In this file, create the following interface:
interface IInputBase {
     const int    GetPeriod()   const;
};
Add the following code to the Model class:
class CModel {

 public:
   ...
   int Initialize(IInputBase* pI){
      pInput = pI;
      return INIT_SUCCEEDED;
   }
   ...
private:
   IInputBase* pInput;
};
Make the following changes to the CInputParam class. It will implement the newly written interface:
class CInputParam: public IInputBase
Again, we could eliminate the CInputManage class and move its functionality to CInputParam. But we will not do it in order to avoid uncontrolled calls of Initialize() and Update(). So, the ability to use a pointer to CInputParam instead of IInputBase might be needed for those modules for which we want to avoid dependence arising from connection of InputBase.mqh with an interface defined.
- No new dependence in the Model has formed. The added interface is part of the Model.
- Since we use a very simple example, all GetXXX() methods could be added to this interface, including those that are not related to the Model (GetBckColor() и GetDistance()).
Let's move on to the main calculations implemented by the Model. Here, based on the data received from the Controller, the Model will calculate the indicator values. We need to add the Tick(...) method, just as in the Controller. Then, we will move code from the original WRP indicator to this method and will add auxiliary methods. So, our Model is almost identical to the OnCalculate handler code of the original indicator.
However, we got a problem here: the indicator buffer. It is necessary to write data right to the buffer. However, it is not correct to place the indicator buffer to the Model, as it should be in the View. So again, we implement it as we already did earlier. Create the IOutputBase.mqh file in the same folder where the Model is located. Write interface in this file:
interface IOutputBase {

   void SetValue(int shift, double value);
   const double GetValue(int shift) const;

};
The first method saves values at the specified index, while the second one returns them. Later the View will implement this interface. Now we need to edit the Model initialization method so that it receives a pointer to the new interface. Add a private field:
   int Initialize(IInputBase* pI, IOutputBase* pO){
      pInput  = pI;
      pOutput = pO;
      ...
   }
      ...
private:
   IInputBase*  pInput;
   IOutputBase* pOutput;
In calculations, replace indicator buffer access with the method call:
pOutput.SetValue(...);
The resulting Tick(...) function in the Model looks as follows (compare it with the original OnCalculate handler):
int CModel::Tick(const int rates_total,const int prev_calculated,const datetime &time[],const double &open[],const double &high[],const double &low[],const double &close[],const long &tick_volume[],const long &volume[],const int &spread[]) {

   if(rates_total < iLength)
      return(0);

   int i, pOutputs = prev_calculated - 1;
   if(pOutputs < iLength - 1) {
      pOutputs = iLength - 1;
      for(i = 0; i < pOutputs; i++)
         pOutput.SetValue(i, 0);
   }

   double w;
   for(i = pOutputs; i < rates_total && !IsStopped(); i++) {
      double max_high = Highest(high, iLength,i);
      double min_low  = Lowest(low, iLength, i);
      //--- calculate WPR
      if(max_high != min_low) {
         w = -(max_high - close[i]) * 100 / (max_high - min_low);
         pOutput.SetValue(i, w);
      } else
            pOutput.SetValue(i, pOutput.GetValue(i - 1) );
   }
   return(rates_total);

}
Here we complete operations with the Model.
4. View
The last component of our indicator is the View. It is responsible for the rendering of data provided by the Model. Like the source data module, View is a frequently updated component. All frequent changes, such as adding a buffer, changing the style, default color and others, are implemented in the View. Another aspect which you should pay attention to: changes in the View often result from changes in the source data module and vice versa. This is another reason to separate the View and the source data module from the Model.
Again, repeat the above steps. Create the CView class in the View folder. Connect the IOutputBase.mqh file. In the View class, create the familiar Initialize(...) method. Note that we do not create Update(...) and Release(...) methods in the Model and in the View. Currently our indicator does not need them.
Let's add an indicator buffer as a regular private field, implement IOutputBase contract, and hide all IndicatorSetХХХ, PlotIndexSetХХХ and similar calls into Initialize(...). This removes most of the macros from the main indicator file:
class CView : public IOutputBase {

 private:
   const  CInputParam* pInput;
          double       WPRlineBuffer[];

 public:
                       CView(){}
                      ~CView(){}

          int          Initialize(const CInputParam* pI);
          void         SetValue(int shift, double value);
   const  double       GetValue(int shift) const {return WPRlineBuffer[shift];}
};

int CView::Initialize(const CInputParam *pI) {

   pInput = pI;

   IndicatorSetString(INDICATOR_SHORTNAME, NAME      );
   IndicatorSetInteger(INDICATOR_DIGITS, 2           );
   IndicatorSetDouble(INDICATOR_MINIMUM,-100         );
   IndicatorSetDouble(INDICATOR_MAXIMUM, 0           );
   IndicatorSetInteger(INDICATOR_LEVELCOLOR,clrGray  );
   IndicatorSetInteger(INDICATOR_LEVELWIDTH,1        );
   IndicatorSetInteger(INDICATOR_LEVELSTYLE,STYLE_DOT);
   IndicatorSetInteger(INDICATOR_LEVELS, 2           );
   IndicatorSetDouble(INDICATOR_LEVELVALUE,0,  -20   );
   IndicatorSetDouble(INDICATOR_LEVELVALUE,1,  -80   );

   SetIndexBuffer(0, WPRlineBuffer);

   PlotIndexSetInteger(0, PLOT_DRAW_TYPE, DRAW_LINE   );
   PlotIndexSetInteger(0, PLOT_LINE_STYLE, STYLE_SOLID);
   PlotIndexSetInteger(0, PLOT_LINE_WIDTH, 1          );
   PlotIndexSetInteger(0, PLOT_LINE_COLOR, clrRed     );
   PlotIndexSetString (0, PLOT_LABEL, NAME + "_View"  );

   return INIT_SUCCEEDED;
}

void CView::SetValue(int shift,double value) {

   WPRlineBuffer[shift] = value;

}
That's all. We have created the indicator and it works. The screenshot shows both of them — the original WPR and our custom one, which is available in the attachment below:
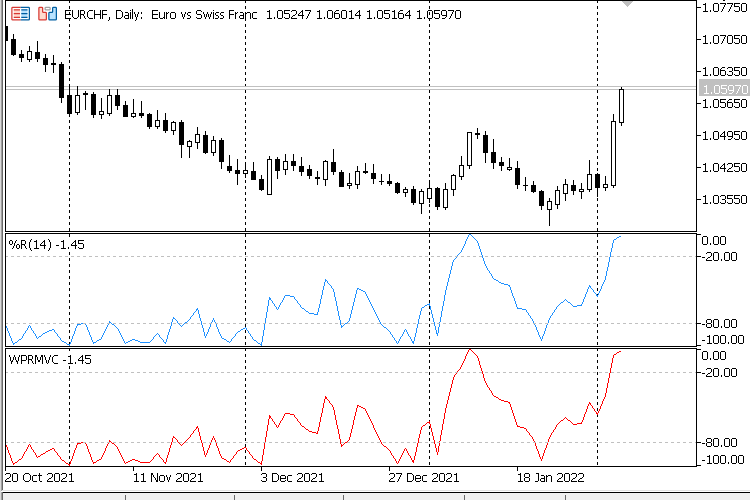
Obviously, their readings are the same. Now, let's try to implement additional features in the indicator, according to the above considered rules.
5. Working on a new indicator
Suppose we need to dynamically change the indicator drawing style from line to histogram. Let's add this option to see whether implementing of new features has become easier or not.
We need a way to signal. It will be a graphical object, a click on which will switch the indicator from line to histogram and vice versa. Let's create a button in the indicator subwindow:
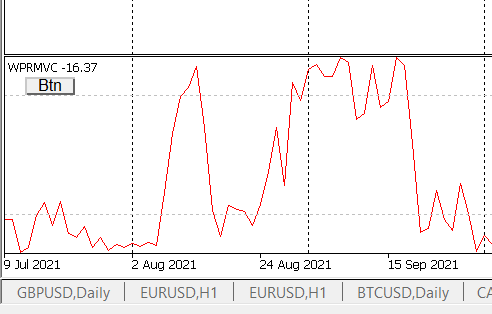
Create the CButtonObj class to initialize, store and delete the "Button" graphical object. This code class is very simple, so I will not show it here. The class (and the button) will be controlled by the Controller: this button is a user interaction element, which is the direct responsibility of the Controller.
Add the OnChartEvent handler to the main program file and add the relevant method to the Controller:
void OnChartEvent(const int     id,
                  const long   &lparam,
                  const double &dparam,
                  const string &sparam)
  {
      pController.ChartEvent(id, lparam, dparam, sparam);
  }
A major part of changes will be implemented in the View. Here, we need to add an enumeration for a signal and a few methods:
enum VIEW_TYPE {
   LINE,
   HISTO
};

class CView : public IOutputBase {

 private:
                       ...
          VIEW_TYPE    view_type;

 protected:
          void         SwitchViewType();

 public:
                       CView() {view_type = LINE;}
                       ...
   const  VIEW_TYPE    GetViewType()       const {return view_type;}
          void         SetNewViewType(VIEW_TYPE vt);

};
void CView::SetNewViewType(VIEW_TYPE vt) {

   if (view_type == vt) return;

   view_type = vt;
   SwitchViewType();
}

void CView::SwitchViewType() {
   switch (view_type) {
      case LINE:
         PlotIndexSetInteger(0, PLOT_DRAW_TYPE, DRAW_LINE      );
         break;
      case HISTO:
         PlotIndexSetInteger(0, PLOT_DRAW_TYPE, DRAW_HISTOGRAM );
         break;
   }
   ChartRedraw();
}
The resulting Controller method which is called in the OnChartEvent handler of the main indicator file looks as follows:
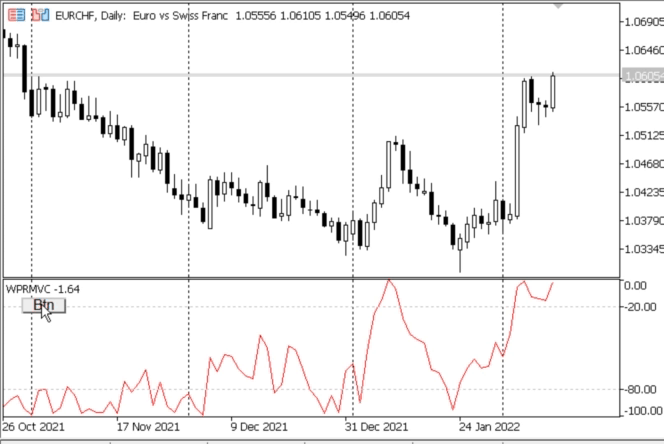
void CController::ChartEvent(const int id,const long &lparam,const double &dparam,const string &sparam) {

      switch (id) {
         case CHARTEVENT_OBJECT_CLICK:
            if (StringCompare(sparam, pBtn.GetName()) == 0) {
               if (pView.GetViewType() == LINE)
                  pView.SetNewViewType(HISTO);
               else pView.SetNewViewType(LINE);
            }
            break;
        default:
            break;
      }//switch (id)
}
The method checks whether the mouse was clicked on the right object, and then it switched the display mode in the View:
It was quite easy and quick to add the relevant changes. If we had to perform similar changes a year later, it wouldn't take much longer. The developer remembers the structure of the script and what is done in each of the components. So, the project is easy to maintain even if documentation is lost or if you forget the project principles.
7. Code comments
Now, let's conduct some analysis of the written code.
- The Model has almost no dependences. On the contrary, the Controller depends on all other modules: this is clear from the set of #include at the beginning of the file. Formally, it is true. When including a file, the developer introduces a dependence. The specific feature of the Controller is that it creates modules, controls their life cycles and forwards events to them. The controller serves as an "engine", it provides dynamics and implements interaction with the user.
- All components contain similar methods: Initialize, Update, Release. A further logical step can be the creation of a base class with a set of virtual methods. The signature of the Initialize method differs for different components, but it is possible to find some solution to this.
- Probably, a more attractive variant (though a more difficult one) would be to have CInputManager return pointers to interfaces:
class CInputManager {
  ...
 public:
   InputBase*   GetInput();
  ...
};
This idea, if implemented, would allow individual components to only have access to a limited set of input parameters. We will not do this here now. Please note that such a great deal of attention was paid to the module of input parameters throughout the article because I wanted to show possible approaches to building other modules which might be needed later. For example, the CView component does not have to implement the IOutputBase interface by way of hierarchical relationships, as done in the article. It can choose some other form of composition.
8. Conclusion
This topic can be considered complete here. In the first article, the MVC pattern was considered in general. This time we delved into the topic, examining possible interactions between the individual components of the MVC pattern. Of course, this subject is not very simple. But the provided information, if properly applied, can be very helpful.
Programs used in the article:
| # | Name | Type | Description |
|---|---|---|---|
| 1 | WPR_MVC.zip | ZIP archive | Revised WPR indicator |
Translated from Russian by MetaQuotes Ltd.
Original article: https://www.mql5.com/ru/articles/10249
Warning: All rights to these materials are reserved by MetaQuotes Ltd. Copying or reprinting of these materials in whole or in part is prohibited.
This article was written by a user of the site and reflects their personal views. MetaQuotes Ltd is not responsible for the accuracy of the information presented, nor for any consequences resulting from the use of the solutions, strategies or recommendations described.

 Learn how to design a trading system by Momentum
 Mathematics in trading: Sharpe and Sortino ratios
- Free trading apps
- Over 8,000 signals for copying
- Economic news for exploring financial markets
You agree to website policy and terms of use
The article MVC Design Pattern and the feasibility of using it (Part 2) has been published : Pattern of interaction between three components:
Author: Andrei Novichkov
New article MVC design pattern and its application (Part 2): Diagram of interaction between the three components has been published:
Author: Andrei Novichkov