DoEasy. Steuerung (Teil 12): WinForms-Objekte Basislistenobjekt, ListBox und ButtonListBox

Inhalt
- Konzept
- Verbesserung der Bibliotheksklassen
- Basisklasse für WinForms-Objektlisten
- ListBox und ButtonListBox WinForms Objektklassen
- Test
- Was kommt als Nächstes?
Konzept
In diesem Artikel werde ich meine Arbeit an WinForms-Objekten in der Bibliothek fortsetzen. Im vorherigen Artikel habe ich das Objekt CheckedListBox erstellt, das im Wesentlichen eine Liste von CheckBox-Objekten ist. Da wir aber weiterhin verschiedene Listen von WinForms-Objekten erstellen werden, wäre es jetzt sinnvoll, eine Klasse der Basisobjektliste von WinForms-Objekten zu erstellen und alle anderen Klassen auf deren Basis zu erstellen. Die Klasse enthält die Hauptfunktionalität für die Handhabung der Listen von WinForms-Objekten und anschließend verschiedene Daten, die an das Steuerelement gebunden sind (DataBindings in MS Visual Studio), deren Daten verwendet werden, um Listen von Elementen in Zeilen anzuzeigen. Dies ermöglicht die Anzeige völlig unterschiedlicher Daten aus der Umgebung der Bibliothek selbst und des Terminals und seiner Datenbanken und natürlich den Zugriff auf diese Daten über diese Listen.
Auf der Grundlage dieser Klasse werde ich das WinForms-Objekt ListBox erstellen, bei dem es sich um eine einfache Liste handelt, die eine bestimmte Sammlung von Daten anzeigt. In der Liste werden vorerst nur die Namen der Listenelemente angezeigt, die während der Erstellung der Liste erstellt wurden. Diese Elemente ermöglichen die Interaktion mit der Maus (Änderung der Hintergrundfarbe beim Hovern und Auswählen). Das Objekt wird noch keinen praktischen Nutzen haben (es wird nur eine visuelle Darstellung der zukünftigen Funktionalität des Objekts sein), da wir, um die Ereignisfunktionalität von WinForms-Objekten zu erstellen, noch eine gewisse Anzahl von ihnen erstellen müssen, um die Daten zu bestimmen, die an die Ereignisbehandler übergeben werden müssen. Je mehr verschiedene Objekte erstellt werden, desto mehr haben wir eine Vorstellung von den notwendigen Daten und ihrer Struktur, die für die korrekte Erstellung der Ereignisfunktionalität von WinForms-Objekten benötigt werden.
Außerdem werde ich das Schaltflächenlistenobjekt erstellen. Da die ListBox (ihre Zeilen) genau auf der Grundlage der Klasse des CButton-Objekts erstellt wird, wäre es recht logisch, ein zusätzliches Objekt zu erstellen, das eine Reihe von Schaltflächen in seiner Liste anzeigt (ähnlich wie das CheckedListBox-Objekt, das CheckBox-Objekte in seiner Liste anzeigt). Die Liste der Standard-Steuerelemente in MS Visual Studio enthält kein solches Objekt, also wird es ein Experiment sein.
Verbesserung der Bibliotheksklassen
Nach den letzten Aktualisierungen des Client-Terminals funktionierte die Handelsklasse CTrading der Bibliothek nicht mehr — der Zugriff auf die privaten Methoden OpenPosition() und PlaceOrder() von geerbten Klassen wurde deaktiviert.
Legen wir daher in \MQL5\Include\DoEasy\Trading.mqh den geschützten Klassenabschnitt für diese Methoden fest:
//--- Return the error handling method
   ENUM_ERROR_CODE_PROCESSING_METHOD   ResultProccessingMethod(const uint result_code);
//--- Correct errors
   ENUM_ERROR_CODE_PROCESSING_METHOD   RequestErrorsCorrecting(MqlTradeRequest &request,const ENUM_ORDER_TYPE order_type,const uint spread_multiplier,CSymbol *symbol_obj,CTradeObj *trade_obj);

//--- (1) Open a position, (2) place a pending order
protected:
   template<typename SL,typename TP>
   bool                 OpenPosition(const ENUM_POSITION_TYPE type,
                                    const double volume,
                                    const string symbol,
                                    const ulong magic=ULONG_MAX,
                                    const SL sl=0,
                                    const TP tp=0,
                                    const string comment=NULL,
                                    const ulong deviation=ULONG_MAX,
                                    const ENUM_ORDER_TYPE_FILLING type_filling=WRONG_VALUE);
   template<typename PR,typename PL,typename SL,typename TP>
   bool                 PlaceOrder( const ENUM_ORDER_TYPE order_type,
                                    const double volume,
                                    const string symbol,
                                    const PR price,
                                    const PL price_limit=0,
                                    const SL sl=0,
                                    const TP tp=0,
                                    const ulong magic=ULONG_MAX,
                                    const string comment=NULL,
                                    const datetime expiration=0,
                                    const ENUM_ORDER_TYPE_TIME type_time=WRONG_VALUE,
                                    const ENUM_ORDER_TYPE_FILLING type_filling=WRONG_VALUE);
private:
//--- Return the request object index in the list by (1) ID,
//--- (2) order ticket, (3) position ticket in the request
   int                  GetIndexPendingRequestByID(const uchar id);
   int                  GetIndexPendingRequestByOrder(const ulong ticket);
   int                  GetIndexPendingRequestByPosition(const ulong ticket);

public:
Hier habe ich den geschützten Bereich innerhalb des privaten Bereichs erstellt und den privaten Bereich anschließend zurückgegeben.
Wir fügen in \MQL5\Include\DoEasy\Defines.mqh drei neue Typen zur Enumeration der grafischen Elementtypen hinzu:
//+------------------------------------------------------------------+
//| The list of graphical element types                              |
//+------------------------------------------------------------------+
enum ENUM_GRAPH_ELEMENT_TYPE
  {
   GRAPH_ELEMENT_TYPE_STANDARD,                       // Standard graphical object
   GRAPH_ELEMENT_TYPE_STANDARD_EXTENDED,              // Extended standard graphical object
   GRAPH_ELEMENT_TYPE_SHADOW_OBJ,                     // Shadow object
   GRAPH_ELEMENT_TYPE_ELEMENT,                        // Element
   GRAPH_ELEMENT_TYPE_FORM,                           // Form
   GRAPH_ELEMENT_TYPE_WINDOW,                         // Window
   //--- WinForms
   GRAPH_ELEMENT_TYPE_WF_UNDERLAY,                    // Panel object underlay
   GRAPH_ELEMENT_TYPE_WF_BASE,                        // Windows Forms Base
   //--- 'Container' object types are to be set below
   GRAPH_ELEMENT_TYPE_WF_CONTAINER,                   // Windows Forms container base object
   GRAPH_ELEMENT_TYPE_WF_PANEL,                       // Windows Forms Panel
   GRAPH_ELEMENT_TYPE_WF_GROUPBOX,                    // Windows Forms GroupBox
   //--- 'Standard control' object types are to be set below
   GRAPH_ELEMENT_TYPE_WF_COMMON_BASE,                 // Windows Forms base standard control
   GRAPH_ELEMENT_TYPE_WF_LABEL,                       // Windows Forms Label
   GRAPH_ELEMENT_TYPE_WF_BUTTON,                      // Windows Forms Button
   GRAPH_ELEMENT_TYPE_WF_CHECKBOX,                    // Windows Forms CheckBox
   GRAPH_ELEMENT_TYPE_WF_RADIOBUTTON,                 // Windows Forms RadioButton
   GRAPH_ELEMENT_TYPE_WF_ELEMENTS_LIST_BOX,           // Base list object of Windows Forms elements
   GRAPH_ELEMENT_TYPE_WF_LIST_BOX,                    // Windows Forms ListBox
   GRAPH_ELEMENT_TYPE_WF_CHECKED_LIST_BOX,            // Windows Forms CheckedListBox
   GRAPH_ELEMENT_TYPE_WF_BUTTON_LIST_BOX,             // Windows Forms ButtonListBox
  };
//+------------------------------------------------------------------+
Ganz am Ende der Liste der ganzzahligen Eigenschaften eines grafischen Elements auf der Leinwand fügen wir zwei neue Eigenschaften hinzu und erhöhen wir die Anzahl der ganzzahligen Eigenschaften von 83 auf 85:
//+------------------------------------------------------------------+
//| Integer properties of the graphical element on the canvas        |
//+------------------------------------------------------------------+
enum ENUM_CANV_ELEMENT_PROP_INTEGER
  {
   CANV_ELEMENT_PROP_ID = 0,                          // Element ID
   CANV_ELEMENT_PROP_TYPE,                            // Graphical element type
   //---...
   //---...
   CANV_ELEMENT_PROP_CHECK_FLAG_COLOR_MOUSE_DOWN,     // Color of control checkbox when clicking on the control
   CANV_ELEMENT_PROP_CHECK_FLAG_COLOR_MOUSE_OVER,     // Color of control checkbox when hovering the mouse over the control
   CANV_ELEMENT_PROP_LIST_BOX_MULTI_COLUMN,           // Horizontal display of columns in the ListBox control
   CANV_ELEMENT_PROP_LIST_BOX_COLUMN_WIDTH,           // Width of each ListBox control column
  };
#define CANV_ELEMENT_PROP_INTEGER_TOTAL (85)          // Total number of integer properties
#define CANV_ELEMENT_PROP_INTEGER_SKIP  (0)           // Number of integer properties not used in sorting
//+------------------------------------------------------------------+
Wir sortieren nach neuer Eigenschaft zur Enumeration möglicher Kriterien zum Sortieren von grafischen Elementen auf der Leinwand hinzufügen:
//+------------------------------------------------------------------+
//| Possible sorting criteria of graphical elements on the canvas    |
//+------------------------------------------------------------------+
#define FIRST_CANV_ELEMENT_DBL_PROP  (CANV_ELEMENT_PROP_INTEGER_TOTAL-CANV_ELEMENT_PROP_INTEGER_SKIP)
#define FIRST_CANV_ELEMENT_STR_PROP  (CANV_ELEMENT_PROP_INTEGER_TOTAL-CANV_ELEMENT_PROP_INTEGER_SKIP+CANV_ELEMENT_PROP_DOUBLE_TOTAL-CANV_ELEMENT_PROP_DOUBLE_SKIP)
enum ENUM_SORT_CANV_ELEMENT_MODE
  {
//--- Sort by integer properties
   SORT_BY_CANV_ELEMENT_ID = 0,                       // Sort by element ID
   SORT_BY_CANV_ELEMENT_TYPE,                         // Sort by graphical element type
   //---...
   //---...
   SORT_BY_CANV_ELEMENT_CHECK_FLAG_COLOR_MOUSE_DOWN,  // Sort by color of control checkbox when clicking on the control
   SORT_BY_CANV_ELEMENT_CHECK_FLAG_COLOR_MOUSE_OVER,  // Sort by color of control checkbox when hovering the mouse over the control
   SORT_BY_CANV_ELEMENT_LIST_BOX_MULTI_COLUMN,        // Sort by horizontal column display flag in the ListBox control
   SORT_BY_CANV_ELEMENT_LIST_BOX_COLUMN_WIDTH,        // Sort by the width of each ListBox control column
//--- Sort by real properties

//--- Sort by string properties
   SORT_BY_CANV_ELEMENT_NAME_OBJ = FIRST_CANV_ELEMENT_STR_PROP,// Sort by an element object name
   SORT_BY_CANV_ELEMENT_NAME_RES,                     // Sort by the graphical resource name
   SORT_BY_CANV_ELEMENT_TEXT,                         // Sort by graphical element text
  };
//+------------------------------------------------------------------+
Jetzt können wir Objekte nach diesen beiden neuen Eigenschaften auswählen und sortieren. In der Tat gibt es dafür keine besondere Notwendigkeit bei der Behandlung von grafischen Objekten, um eine GUI zu bauen (ich sehe nicht die Optionen für die Verwendung der Suche durch diese Eigenschaften). Wir tragen jedoch absolut alle Eigenschaften von GUI-Objekten in diese Listen ein, sodass wir dann die GUI für unser Programm aufbauen können, indem wir eine grafische Oberfläche direkt im Chartfenster erstellen und bedienen. Hier müssen wir alle Eigenschaften der grafischen Elemente abrufen und ändern.
In \MQL5\Include\DoEasy\Data.mqh fügen wir die neue Nachrichtenindizes der Bibliothek hinzu, benennen den Index MSG_CHECKED_LIST_ERR_FAILED_CREATE_CHECK_BOX_OBJ um und entfernen den Index MSG_CHECKED_LIST_ERR_FAILED_GET_CHECK_BOX_OBJ:
//--- WinForms standard
   MSG_GRAPH_ELEMENT_TYPE_WF_COMMON_BASE,             // WinForms base standard control
   MSG_GRAPH_ELEMENT_TYPE_WF_LABEL,                   // Label control
   MSG_GRAPH_ELEMENT_TYPE_WF_CHECKBOX,                // CheckBox control
   MSG_GRAPH_ELEMENT_TYPE_WF_RADIOBUTTON,             // RadioButton control
   MSG_GRAPH_ELEMENT_TYPE_WF_BUTTON,                  // Button control
   MSG_GRAPH_ELEMENT_TYPE_WF_ELEMENTS_LIST_BOX,       // Base list object of Windows Forms elements
   MSG_GRAPH_ELEMENT_TYPE_WF_LIST_BOX,                // ListBox control
   MSG_GRAPH_ELEMENT_TYPE_WF_CHECKED_LIST_BOX,        // CheckedListBox control
   MSG_GRAPH_ELEMENT_TYPE_WF_BUTTON_LIST_BOX,         // ButtonListBox control

   MSG_GRAPH_OBJ_BELONG_PROGRAM,                      // Graphical object belongs to a program
   MSG_GRAPH_OBJ_BELONG_NO_PROGRAM,                   // Graphical object does not belong to a program
...
//--- CPanel
   MSG_PANEL_OBJECT_ERR_FAILED_CREATE_UNDERLAY_OBJ,   // Failed to create the underlay object
   MSG_PANEL_OBJECT_ERR_OBJ_MUST_BE_WFBASE,           // Error. The created object should be of WinForms Base type or be derived from it

//--- ElementsListBox
   MSG_ELM_LIST_ERR_FAILED_GET_GRAPH_ELEMENT_OBJ,     // Failed to get a graphical element


//--- CButtonListBox
   MSG_BUTT_LIST_ERR_FAILED_SET_GROUP_BUTTON,         // Failed to set the group for the button with the index
   MSG_BUTT_LIST_ERR_FAILED_SET_TOGGLE_BUTTON,        // Failed to set the Toggle flag to the button with the index

//--- Integer properties of graphical elements
...
   MSG_CANV_ELEMENT_PROP_CHECK_FLAG_COLOR_MOUSE_DOWN, // Color of control checkbox when clicking on the control
   MSG_CANV_ELEMENT_PROP_CHECK_FLAG_COLOR_MOUSE_OVER, // Color of control checkbox when hovering the mouse over the control
   MSG_CANV_ELEMENT_PROP_LIST_BOX_MULTI_COLUMN,       // Horizontal display of columns in the ListBox control
   MSG_CANV_ELEMENT_PROP_LIST_BOX_COLUMN_WIDTH,       // Width of each ListBox control column
//--- Real properties of graphical elements

//--- String properties of graphical elements
   MSG_CANV_ELEMENT_PROP_NAME_OBJ,                    // Graphical element object name
   MSG_CANV_ELEMENT_PROP_NAME_RES,                    // Graphical resource name
   MSG_CANV_ELEMENT_PROP_TEXT,                        // Graphical element text

  };
//+------------------------------------------------------------------+
und die Textnachrichten, die den neu hinzugefügten Indizes entsprechen:
//--- WinForms standard
   {"Базовый стандартный элемент управления WinForms","Basic Standard WinForms Control"},
   {"Элемент управления \"Label\"","Control element \"Label\""},
   {"Элемент управления \"CheckBox\"","Control element \"CheckBox\""},
   {"Элемент управления \"RadioButton\"","Control element \"RadioButton\""},
   {"Элемент управления \"Button\"","Control element \"Button\""},
   {"Базовый объект-список Windows Forms элементов","Basic Windows Forms List Object"},
   {"Элемент управления \"ListBox\"","Control element \"ListBox\""},
   {"Элемент управления \"CheckedListBox\"","Control element \"CheckedListBox\""},
   {"Элемент управления \"ButtonListBox\"","Control element \"ButtonListBox\""},

   {"Графический объект принадлежит программе","The graphic object belongs to the program"},
   {"Графический объект не принадлежит программе","The graphic object does not belong to the program"},
...
//--- CPanel
   {"Не удалось создать объект-подложку","Failed to create underlay object"},
   {"Ошибка. Создаваемый объект должен иметь тип WinForms Base или быть его наследником","Error. The object being created must be of type WinForms Base or be derived from it"},

//--- ElementsListBox
   {"Не удалось получить графический элемент ","Failed to get graphic element "},

//--- CButtonListBox
   {"Не удалось установить группу кнопке с индексом ","Failed to set group for button with index "},
   {"Не удалось установить флаг \"Переключатель\" кнопке с индексом ","Failed to set the \"Toggle\" flag on the button with index "},

//--- Integer properties of graphical elements
...
   {"Цвет флажка проверки элемента управления при нажатии мышки на элемент управления","Control Checkbox Colorl when the mouse is pressed on the control"},
   {"Цвет флажка проверки элемента управления при наведении мышки на элемент управления","Control Checkbox Colorl when hovering the mouse over the control"},
   {"Горизонтальное отображение столбцов в элементе управления ListBox","Display columns horizontally in a ListBox control"},
   {"Ширина каждого столбца элемента управления ListBox","The width of each column of the ListBox control"},

//--- String properties of graphical elements
   {"Имя объекта-графического элемента","The name of the graphic element object"},
   {"Имя графического ресурса","Image resource name"},
   {"Текст графического элемента","Text of the graphic element"},

  };
//+---------------------------------------------------------------------+
Wir müssen eine Beschreibung des angegebenen Typs eines grafischen Elements zurückgeben. Derzeit verfügt die Klasse des grafischen Basisobjekts der Bibliothek über die Methode TypeElementDescription(), die eine Beschreibung des Typs des aktuellen grafischen Objekts zurückgibt, mit anderen Worten, die Beschreibung seines eigenen Typs. Wir müssen jedoch die Beschreibung des in den Eingabeparametern der Methode angegebenen grafischen Elements zurückgeben. Fügen wir also Folgendes hinzu: Wir fügen der vorhandenen Methode einen formalen Parameter hinzu, in dem wir den Typ des Objekts übergeben, und implementieren eine überladene Methode, die den Typ des aktuellen Objekts zurückgibt.
Nehmen wir die erforderlichen Änderungen in \MQL5\Include\DoEasy\Objects\Graph\GBaseObj.mqh vor.
Im Abschnitt public deklarieren wir eine neue überladene Methode, in der wir einen Objekttyp übergeben, während die vorherige Methode den aktuellen Objekttyp an die neue Methode weitergibt:
//--- Return the graphical object type (ENUM_OBJECT) calculated from the object type (ENUM_OBJECT_DE_TYPE) passed to the method
   ENUM_OBJECT       GraphObjectType(const ENUM_OBJECT_DE_TYPE obj_type) const
                       {
                        return ENUM_OBJECT(obj_type-OBJECT_DE_TYPE_GSTD_OBJ-1);
                       }

//--- Return the description of the type of the graphical object (1) type, (2, 3) element, (4) affiliation and (5) species
string               TypeGraphObjectDescription(void);
string               TypeElementDescription(const ENUM_GRAPH_ELEMENT_TYPE type);
string               TypeElementDescription(void);
string               BelongDescription(void);
string               SpeciesDescription(void);
Schließen wir beide Methoden außerhalb des Klassenkörpers ab.
In der Methode mit einem formalen Parameter, fügen wir die Rückgabe der Beschreibung neuer Typen von grafischen Bibliothekselementen entsprechend dem angegebenen Typ ein:
//+------------------------------------------------------------------+
//| Return the description of the graphical element type             |
//+------------------------------------------------------------------+
string CGBaseObj::TypeElementDescription(const ENUM_GRAPH_ELEMENT_TYPE type)
  {
   return
     (
      type==GRAPH_ELEMENT_TYPE_STANDARD               ? CMessage::Text(MSG_GRAPH_ELEMENT_TYPE_STANDARD)              :
      type==GRAPH_ELEMENT_TYPE_STANDARD_EXTENDED      ? CMessage::Text(MSG_GRAPH_ELEMENT_TYPE_STANDARD_EXTENDED)     :
      type==GRAPH_ELEMENT_TYPE_ELEMENT                ? CMessage::Text(MSG_GRAPH_ELEMENT_TYPE_ELEMENT)               :
      type==GRAPH_ELEMENT_TYPE_SHADOW_OBJ             ? CMessage::Text(MSG_GRAPH_ELEMENT_TYPE_SHADOW_OBJ)            :
      type==GRAPH_ELEMENT_TYPE_FORM                   ? CMessage::Text(MSG_GRAPH_ELEMENT_TYPE_FORM)                  :
      type==GRAPH_ELEMENT_TYPE_WINDOW                 ? CMessage::Text(MSG_GRAPH_ELEMENT_TYPE_WINDOW)                :
      //--- WinForms
      type==GRAPH_ELEMENT_TYPE_WF_UNDERLAY            ? CMessage::Text(MSG_GRAPH_ELEMENT_TYPE_WF_UNDERLAY)           :
      type==GRAPH_ELEMENT_TYPE_WF_BASE                ? CMessage::Text(MSG_GRAPH_ELEMENT_TYPE_WF_BASE)               :
      //--- Containers
      type==GRAPH_ELEMENT_TYPE_WF_CONTAINER           ? CMessage::Text(MSG_GRAPH_ELEMENT_TYPE_WF_CONTAINER)          :
      type==GRAPH_ELEMENT_TYPE_WF_GROUPBOX            ? CMessage::Text(MSG_GRAPH_ELEMENT_TYPE_WF_GROUPBOX)           :
      type==GRAPH_ELEMENT_TYPE_WF_PANEL               ? CMessage::Text(MSG_GRAPH_ELEMENT_TYPE_WF_PANEL)              :
      //--- Standard controls
      type==GRAPH_ELEMENT_TYPE_WF_COMMON_BASE         ? CMessage::Text(MSG_GRAPH_ELEMENT_TYPE_WF_COMMON_BASE)        :
      type==GRAPH_ELEMENT_TYPE_WF_LABEL               ? CMessage::Text(MSG_GRAPH_ELEMENT_TYPE_WF_LABEL)              :
      type==GRAPH_ELEMENT_TYPE_WF_CHECKBOX            ? CMessage::Text(MSG_GRAPH_ELEMENT_TYPE_WF_CHECKBOX)           :
      type==GRAPH_ELEMENT_TYPE_WF_RADIOBUTTON         ? CMessage::Text(MSG_GRAPH_ELEMENT_TYPE_WF_RADIOBUTTON)        :
      type==GRAPH_ELEMENT_TYPE_WF_BUTTON              ? CMessage::Text(MSG_GRAPH_ELEMENT_TYPE_WF_BUTTON)             :
      type==GRAPH_ELEMENT_TYPE_WF_ELEMENTS_LIST_BOX   ? CMessage::Text(MSG_GRAPH_ELEMENT_TYPE_WF_ELEMENTS_LIST_BOX)  :
      type==GRAPH_ELEMENT_TYPE_WF_LIST_BOX            ? CMessage::Text(MSG_GRAPH_ELEMENT_TYPE_WF_LIST_BOX)           :
      type==GRAPH_ELEMENT_TYPE_WF_CHECKED_LIST_BOX    ? CMessage::Text(MSG_GRAPH_ELEMENT_TYPE_WF_CHECKED_LIST_BOX)   :
      type==GRAPH_ELEMENT_TYPE_WF_BUTTON_LIST_BOX     ? CMessage::Text(MSG_GRAPH_ELEMENT_TYPE_WF_BUTTON_LIST_BOX)    :
      "Unknown"
     );
  }
//+------------------------------------------------------------------+
Die vorherige Methode, die den aktuellen Objekttyp zurückgab, gibt nun das Ergebnis des Aufrufs ihrer überladenen Methode zurück , an die der aktuelle Objekttyp übergeben wird:
//+------------------------------------------------------------------+
//| Return the description of the graphical element type             |
//+------------------------------------------------------------------+
string CGBaseObj::TypeElementDescription(void)
  {
   return this.TypeElementDescription(this.TypeGraphElement());
  }
//+------------------------------------------------------------------+
Da die Funktion von Schaltflächen in einer Gruppe direkt davon abhängt, zu welcher Gruppe die Schaltfläche gehört, implementieren wir die Ausgabe des Gruppenindex in das Protokoll als Textmeldung, um die korrekte Auswahl der Schaltflächengruppe zu kontrollieren.
In \MQL5\Include\DoEasy\Objects\Graph\WForms\Common Controls\Button.mqh, und zwar in der Ereignisbehandlung „The cursor is inside the active area, the left mouse button is clicked“, fügen wir die Behandlung der Schaltfläche, die in der Gruppe arbeitet, hinzu und schreiben die Indizes der Schaltflächengruppe in die Ausgabezeichenfolge der Protokolldaten:
//+------------------------------------------------------------------+
//| 'The cursor is inside the active area,                           |
//| left mouse button released                                       |
//+------------------------------------------------------------------+
void CButton::MouseActiveAreaReleasedHandler(const int id,const long& lparam,const double& dparam,const string& sparam)
  {
//--- The mouse button released outside the element means refusal to interact with the element
   if(lparam<this.CoordX() || lparam>this.RightEdge() || dparam<this.CoordY() || dparam>this.BottomEdge())
     {
      //--- If this is a simple button, set the initial background color
      if(!this.Toggle())
         this.SetBackgroundColor(this.BackgroundColorInit(),false);
      //--- If this is the toggle button, set the initial color depending on whether the button is pressed or not
      else
         this.SetBackgroundColor(!this.State() ? this.BackgroundColorInit() : this.BackgroundColorToggleONInit(),false);
      //--- Set the initial frame color
      this.SetBorderColor(this.BorderColorInit(),false);
      //--- Send the test message to the journal
      Print(DFUN_ERR_LINE,TextByLanguage("Отмена","Cancel"));
     }
//--- The mouse button released within the element means a  click on the control
   else
     {
      //--- If this is a simple button, set the color for "The cursor is over the active area" status
      if(!this.Toggle())
         this.SetBackgroundColor(this.BackgroundColorMouseOver(),false);
      //--- If this is the toggle button,
      else
        {
         //--- if the button does not work in the group, set its state to the opposite,
         if(!this.GroupButtonFlag())
            this.SetState(!this.State());
         //--- if the button is not pressed yet, set it to the pressed state
         else if(!this.State())
            this.SetState(true);
         //--- set the background color for "The cursor is over the active area" status depending on whether the button is clicked or not
         this.SetBackgroundColor(this.State() ? this.BackgroundColorToggleONMouseOver() : this.BackgroundColorMouseOver(),false);
        }
      //--- Send the test message to the journal
      Print(DFUN_ERR_LINE,TextByLanguage("Щелчок","Click"),", this.State()=",this.State(),", ID=",this.ID(),", Group=",this.Group());
      //--- Set the frame color for "The cursor is over the active area" status
      this.SetBorderColor(this.BorderColorMouseOver(),false);
     }
//--- Redraw the object
   this.Redraw(false);
  }
//+------------------------------------------------------------------+
Wir haben mehrere Betriebsarten für die Umschalttasten. Eine einzelne Kipptaste kann entweder gedrückt oder losgelassen werden. Befinden sich mehrere Umschaltknöpfe im selben Container und haben sie dieselbe Gruppe, dann funktionieren sie so, dass das Drücken eines von ihnen zum Auslösen der übrigen Knöpfe dieser Gruppe führt. Wenn wir die bereits gedrückte Taste erneut drücken, wird sie freigegeben.
Wenn wir ein Gruppenbutton-Flag für jede Gruppe von Buttons hinzufügen und jeder von ihnen dieselbe Gruppe hat, dann funktionieren solche Buttons ein wenig anders. In ähnlicher Weise bewirkt das Drücken einer Taste, dass die übrigen Tasten gelöst werden, aber das Drücken einer bereits gedrückten Taste löst diese nicht aus. In diesem Fall wird also immer eine der Tasten gedrückt sein.
Die Protokollierung der Gruppennummer ist eine Debug-Meldung. Nach der Fehlersuche wird sie gelöscht, aber um die Gültigkeit der Operation zu überprüfen, müssen wir manchmal die Gruppe sehen, zu der die angeklickte Schaltfläche gehört.
Umbenennung der Methode GroupButton(), die das Flag der Gruppenschaltfläche zurückgibt, um klarzustellen, dass die Methode genau das Flag und nicht die Gruppennummer zurückgibt:
   bool              State(void)                         const { return (bool)this.GetProperty(CANV_ELEMENT_PROP_BUTTON_STATE);                                }

//--- (1) Set and (2) return the group flag
   void              SetGroupButtonFlag(const bool flag)       { this.SetProperty(CANV_ELEMENT_PROP_BUTTON_GROUP,flag);                                        }
   bool              GroupButtonFlag(void)               const { return (bool)this.GetProperty(CANV_ELEMENT_PROP_BUTTON_GROUP);                                }

//--- (1,2) Set and (3) return the main background color for the 'enabled' status
   void              SetBackgroundColorToggleON(const color colour,const bool set_init_color)
Basisklasse für WinForms-Objektlisten
Objekte der WinForms-Objektlist haben ähnliche Funktionalität, so ist es ratsam, ein Basisobjekt, das gemeinsame Funktionalität für seine Nachkommen hat, und von dem der Rest abgeleitet werden kann, sowie in denen ihre eigene einzigartige Funktionalität inhärent in der Kind-Klasse erstellt werden.
Im Bibliotheksordner \MQL5\Include\DoEasy\Objects\Graph\WForms\Common Controls\ erstellen wir die neue Datei ElementsListBox.mqh der Klasse CElementsListBox.
Die Klasse sollte von der Basisklasse des Containers geerbt werden und die Klassendatei sollte in die Klasse aufgenommen werden:
//+------------------------------------------------------------------+
//|                                              ElementsListBox.mqh |
//|                                  Copyright 2022, MetaQuotes Ltd. |
//|                             https://mql5.com/en/users/artmedia70 |
//+------------------------------------------------------------------+
#property copyright "Copyright 2022, MetaQuotes Ltd."
#property link      "https://mql5.com/en/users/artmedia70"
#property version   "1.00"
#property strict    // Necessary for mql4
//+------------------------------------------------------------------+
//| Include files                                                    |
//+------------------------------------------------------------------+
#include "..\Containers\Container.mqh"
//+------------------------------------------------------------------+
//| Class of the base object of the WForms control list              |
//+------------------------------------------------------------------+
class CElementsListBox : public CContainer
  {
  }
Deklarieren wir im privaten Abschnitt der Klasse eine Methode, die die Koordinaten des nächsten erstellten Objekts in der Liste zurückgibt. Im geschützten Abschnitt deklarieren wir eine Methode, die die angegebene Anzahl der angegebenen WinForms-Objekte erstellt. Im öffentlichen Teil der Klasse deklarieren wir einen parametrischen Konstruktor und die Methoden zum Setzen und Zurückgeben der Erlaubnis, Objekte in der Liste in mehreren Spalten zu platzieren, sowie eine Methode, die die Breite jeder Spalte festlegt:
//+------------------------------------------------------------------+
//| Class of the base object of the WForms control list              |
//+------------------------------------------------------------------+
class CElementsListBox : public CContainer
  {
private:
//--- Return the coordinates of the next object placed in the list
   void              GetCoordsObj(CWinFormBase *obj,int &x,int &y);
protected:
//--- Create the specified number of specified WinForms objects
   void              CreateElements(ENUM_GRAPH_ELEMENT_TYPE element_type,
                                    const int count,
                                    const int x,
                                    const int y,
                                    const int w,
                                    const int h,
                                    uint new_column_width=0,
                                    const bool autosize=true);
public:
//--- Constructor
                     CElementsListBox(const long chart_id,
                                      const int subwindow,
                                      const string name,
                                      const int x,
                                      const int y,
                                      const int w,
                                      const int h);
//--- (1) Set and (2) return the flag of horizontal display of columns
   void              SetMultiColumn(const bool flag)        { this.SetProperty(CANV_ELEMENT_PROP_LIST_BOX_MULTI_COLUMN,flag);          }
   bool              MultiColumn(void)                const { return (bool)this.GetProperty(CANV_ELEMENT_PROP_LIST_BOX_MULTI_COLUMN);  }
//--- (1) Set and (2) return the width of each column
   void              SetColumnWidth(const uint value)       { this.SetProperty(CANV_ELEMENT_PROP_LIST_BOX_COLUMN_WIDTH,value);         }
   uint              ColumnWidth(void)                const { return (uint)this.GetProperty(CANV_ELEMENT_PROP_LIST_BOX_COLUMN_WIDTH);  }

  };
//+------------------------------------------------------------------+
Schauen wir uns die angegebenen Methoden genauer an.
Im Klassenkonstruktor geben wir den Typ des grafischen Elements und den Typ des grafischen Objekts der Bibliothek an, legen die Größe eines einfachen Rahmens von einem Pixel fest, legen die Standardfarben für den Rahmen und die Texte innerhalb des Objekts fest, deaktivieren die spaltenweise Anordnung der Liste, und legen die Spaltenbreite auf Null fest:
//+------------------------------------------------------------------+
//| Constructor indicating the chart and subwindow ID                |
//+------------------------------------------------------------------+
CElementsListBox::CElementsListBox(const long chart_id,
                                   const int subwindow,
                                   const string name,
                                   const int x,
                                   const int y,
                                   const int w,
                                   const int h) : CContainer(chart_id,subwindow,name,x,y,w,h)
  {
   CGBaseObj::SetTypeElement(GRAPH_ELEMENT_TYPE_WF_ELEMENTS_LIST_BOX);
   CGCnvElement::SetProperty(CANV_ELEMENT_PROP_TYPE,GRAPH_ELEMENT_TYPE_WF_ELEMENTS_LIST_BOX);
   this.m_type=OBJECT_DE_TYPE_GWF_COMMON;
   this.SetBorderSizeAll(1);
   this.SetBorderStyle(FRAME_STYLE_SIMPLE);
   this.SetBorderColor(CLR_DEF_BORDER_COLOR,true);
   this.SetForeColor(CLR_DEF_FORE_COLOR,true);
   this.SetMultiColumn(false);
   this.SetColumnWidth(0);
  }
//+------------------------------------------------------------------+
Die Methode, die die angegebene Anzahl von bestimmten WinForms-Objekten erstellt:
//+------------------------------------------------------------------+
//| Create the specified number of certain WinForms objects          |
//+------------------------------------------------------------------+
void CElementsListBox::CreateElements(ENUM_GRAPH_ELEMENT_TYPE element_type,
                                      const int count,
                                      const int x,
                                      const int y,
                                      const int w,
                                      const int h,
                                      uint new_column_width=0,
                                      const bool autosize=true)
  {
//--- Set the width of columns if the value greater than zero has been passed
   if(new_column_width>0)
     {
      if(this.ColumnWidth()!=new_column_width)
         this.SetColumnWidth(new_column_width);
     }
//--- Create a pointer to the created WinFormBase object
   CWinFormBase *obj=NULL;
//--- In the loop through the specified number of objects
   for(int i=0;i<count;i++)
     {
      //--- Get the coordinates of the created object
      int coord_x=x, coord_y=y;
      this.GetCoordsObj(obj,coord_x,coord_y);
      //--- If the object could not be created, send the appropriate message to the log and move on to the next one
      if(!this.CreateNewElement(element_type,coord_x,coord_y,w,h,clrNONE,255,true,false))
        {
         ::Print(DFUN,MSG_LIB_SYS_FAILED_CREATE_ELM_OBJ,this.TypeElementDescription(element_type));
         continue;
        }
      //--- Get the created object from the list by the loop index
      obj=this.GetElement(i);
      //--- If the object could not be obtained, send the appropriate message to the log and move on to the next one
      if(obj==NULL)
        {
         ::Print(DFUN,MSG_ELM_LIST_ERR_FAILED_GET_GRAPH_ELEMENT_OBJ,this.TypeElementDescription(element_type));
         continue;
        }
      //--- Set the frame size of the created object to zero
      obj.SetBorderSizeAll(0);
      //--- Set the opacity of the base object and the default background color
      obj.SetOpacity(this.Opacity());
      obj.SetBackgroundColor(this.BackgroundColor(),true);
      obj.SetBackgroundColorMouseOver(CLR_DEF_CONTROL_STD_MOUSE_OVER);
      obj.SetBackgroundColorMouseDown(CLR_DEF_CONTROL_STD_MOUSE_DOWN);
     }
//--- If the flag of auto resizing the base object is passed to the method,
//--- set the auto resize mode to "increase and decrease"
   if(autosize)
      this.SetAutoSizeMode(CANV_ELEMENT_AUTO_SIZE_MODE_GROW_SHRINK,false);
  }
//+------------------------------------------------------------------+
Die Logik der Methode wird in den Codekommentaren beschrieben. Ich glaube, da ist alles klar. Die automatische Größenanpassung des Paneels, auf dem die erstellten Objekte aufgebaut sind, ist notwendig, um die Abmessungen des Paneels an die erstellten Elemente anzupassen. Bei einigen Klassen ist dies nicht erforderlich, weshalb ein Flag eingeführt wurde, um die Notwendigkeit anzuzeigen, die Abmessungen des Panels an seinem Inhalt auszurichten.
Die Methode, die die Koordinaten des nächsten in der Liste platzierten Objekts zurückgibt:
//+------------------------------------------------------------------+
//| Return the coordinates of the next object placed in the list     |
//+------------------------------------------------------------------+
void CElementsListBox::GetCoordsObj(CWinFormBase *obj,int &x,int &y)
  {
//--- Save the coordinates passed to the method in the variables
   int coord_x=x;
   int coord_y=y;
//--- If the flag of using multiple columns is not set,
   if(!this.MultiColumn())
     {
      //--- set the X coordinate the same as the one passed to the method,
      //--- set the Y coordinate for the first object in the list to be equal to the one passed to the method,
      //--- set the rest 4 pixels lower than the bottom edge of the previous object located above.
      //--- After setting the coordinates to the variables, leave the method
      x=coord_x;
      y=(obj==NULL ? coord_y : obj.BottomEdgeRelative()+4);
      return;
     }
//--- If multiple columns can be used
//--- If this is the first object in the list,
   if(obj==NULL)
     {
      //--- set the coordinates the same as those passed to the method and leave
      x=coord_x;
      y=coord_y;
      return;
     }
//--- If this is not the first object in the list
//--- If (the bottom border of the previous object + 4 pixels) is below the bottom border of the ListBox panel (the next object will go beyond the borders),
   if(obj.BottomEdge()+4>this.BottomEdge())
     {
      //--- If the columns width is zero, then the X coordinate of the created object will be the right border of the previous object + 6 pixels
      //--- Otherwise, if the width of the columns is greater than zero, then the X coordinate of the created object will be the X coordinate of the previous one + the column width
      //--- The Y coordinate will be the value passed to the method (start placing objects in a new column)
      x=(this.ColumnWidth()==0 ? obj.RightEdgeRelative()+6 : int(obj.CoordXRelative()+this.ColumnWidth()));
      y=coord_y;
     }
//--- If the created object is placed within the ListBox panel,
   else
     {
      //--- the X coordinate of the created object will be the offset of the previous one from the panel edge minus the width of its frame,
      //--- the Y coordinate will be the lower border of the previous object located above plus 4 pixels
      x=obj.CoordXRelative()-this.BorderSizeLeft();
      y=obj.BottomEdgeRelative()+4;
     }
  }
//+------------------------------------------------------------------+
Hier wird die Logik der Methode in den Kommentaren zum Code detailliert beschrieben. Die Methode berechnet die Koordinaten des nächsten Objekts auf der Grundlage der Anfangskoordinaten, an denen sich das allererste Objekt der Liste befinden soll, sowie auf der Grundlage der Koordinaten der vorherigen Objekte, die sich bereits in der Liste befinden. Wenn außerdem ein Flag gesetzt ist, das die Anordnung von Objekten in mehreren Spalten erlaubt, berechnet die Methode, ob das nächste erstellte Objekt in den Bereich seines Feldes passt (nur seine Positionskoordinate wird berücksichtigt, nicht das gesamte Objekt). Wenn ein Objekt (seine Y-Koordinate) in das Feld passt, wird es unter dem vorherigen Objekt aufgebaut. Wenn die Koordinate über das Feld hinausgeht, wird das Objekt relativ zum rechten Rand des vorherigen Objekts in der anfänglichen Y-Koordinate nach rechts gebaut. Dies bedeutet den Beginn des Aufbaus einer neuen Säule. Nachdem die Objekte im Panel positioniert sind, werden die Abmessungen des Panels in der Methode, von der aus die aktuelle Methode aufgerufen wird, an den internen Inhalt angepasst. So werden alle Ungenauigkeiten bei der Lokalisierung der untersten Objekte korrigiert. Ungenauigkeiten (die Y-Koordinate des untersten Objekts befindet sich innerhalb des Feldes, während sein übriger Teil außerhalb der Grenzen liegt) können dadurch entstehen, dass die Höhe eines Objekts in der Liste von der eines anderen abweicht, da wir später verschiedene Objekte in den Listen platzieren können. Anstatt die Abmessungen des künftigen Objekts zu berechnen und zu berücksichtigen, ob es vollständig in den Bereich des Paneels passt und ob der Abstand zwischen seiner Unterkante und der Unterkante des Paneels korrekt ist, ist es für uns viel einfacher, die Abmessungen des Paneels einfach an den bereits darin erstellten Inhalt anzupassen.
Da wir nun ein Basisobjekt für WinForms-Listenobjekte haben, müssen wir das bereits erstellte Listenobjekt CheckedListBox ändern.
Lassen Sie uns Verbesserungen an der Objektklasse in \MQL5\Include\DoEasy\Objects\Graph\WForms\Common Controls\CheckedListBox.mqh vornehmen.
Anstatt die Panel-Objektklasse in die Klassendatei aufzunehmen,
#include "..\Containers\Panel.mqh" wird stattdessen die Datei der neu erstellten Klasse eingebunden. Dementsprechend werden wir jetzt von ihr ableiten:
//+------------------------------------------------------------------+
//|                                               CheckedListBox.mqh |
//|                                  Copyright 2022, MetaQuotes Ltd. |
//|                             https://mql5.com/en/users/artmedia70 |
//+------------------------------------------------------------------+
#property copyright "Copyright 2022, MetaQuotes Ltd."
#property link      "https://mql5.com/en/users/artmedia70"
#property version   "1.00"
#property strict    // Necessary for mql4
//+------------------------------------------------------------------+
//| Include files                                                    |
//+------------------------------------------------------------------+
#include "ElementsListBox.mqh"
//+------------------------------------------------------------------+
//| CheckedListBox object class of the WForms controls               |
//+------------------------------------------------------------------+
class CCheckedListBox : public CElementsListBox
  {
Fügen wir in der Deklaration der Methode, die eine bestimmte Anzahl von CheckBox-Objekten erstellt, die formalen Parameter für die Angabe der Breite des erstellten Objekts und den Wert der neuen Spaltenbreite hinzu:
public:
//--- Create the specified number of CheckBox objects
   void              CreateCheckBox(const int count,const int width,const int new_column_width=0);
//--- Constructor
Im Klassenkonstruktor, d. h. in seiner Initialisierungsliste, übergeben wir die Parameter an die neue Elternklasse:
//+------------------------------------------------------------------+
//| Constructor indicating the chart and subwindow ID                |
//+------------------------------------------------------------------+
CCheckedListBox::CCheckedListBox(const long chart_id,
                                 const int subwindow,
                                 const string name,
                                 const int x,
                                 const int y,
                                 const int w,
                                 const int h) : CElementsListBox(chart_id,subwindow,name,x,y,w,h)
  {
   CGBaseObj::SetTypeElement(GRAPH_ELEMENT_TYPE_WF_CHECKED_LIST_BOX);
   CGCnvElement::SetProperty(CANV_ELEMENT_PROP_TYPE,GRAPH_ELEMENT_TYPE_WF_CHECKED_LIST_BOX);
   this.m_type=OBJECT_DE_TYPE_GWF_COMMON;
   this.SetBorderSizeAll(1);
   this.SetBorderStyle(FRAME_STYLE_SIMPLE);
   this.SetBorderColor(CLR_DEF_BORDER_COLOR,true);
   this.SetForeColor(CLR_DEF_FORE_COLOR,true);
  }
//+------------------------------------------------------------------+
Die Methode, mit der die angegebene Anzahl von CheckBox-Objekten erstellt wird, wurde jetzt umgestaltet, da die neue übergeordnete Klasse die Methode zur Erstellung einer bestimmten Anzahl von Objekten mit dem angegebenen Typ enthält:
//+------------------------------------------------------------------+
//| Create the specified number of CheckBox objects                  |
//+------------------------------------------------------------------+
void CCheckedListBox::CreateCheckBox(const int count,const int width,const int new_column_width=0)
  {
//--- Create a pointer to the CheckBox object
   CCheckBox *obj=NULL;
//--- Create the specified number of CheckBox objects
   CElementsListBox::CreateElements(GRAPH_ELEMENT_TYPE_WF_CHECKBOX,count,2,2,width,DEF_CHECK_SIZE+1,new_column_width);
//--- In the loop by the created number of objects
   for(int i=0;i<this.ElementsTotal();i++)
     {
      //--- Get the created object from the list by the loop index
      obj=this.GetElement(i);
      //--- If the object could not be obtained, send the appropriate message to the log and move on to the next one
      if(obj==NULL)
        {
         ::Print(DFUN,MSG_ELM_LIST_ERR_FAILED_GET_GRAPH_ELEMENT_OBJ,this.TypeElementDescription(GRAPH_ELEMENT_TYPE_WF_CHECKBOX));
         continue;
        }
      //--- Set the left center alignment of the checkbox and the text
      obj.SetCheckAlign(ANCHOR_LEFT);
      obj.SetTextAlign(ANCHOR_LEFT);
      //--- Set the object text
      obj.SetText("CheckBox"+string(i+1));
     }
  }
//+------------------------------------------------------------------+
Erstellen wir also zunächst die Objektliste und geben dann die erforderlichen Parameter für jedes Objekt in der Schleife nach der Anzahl der erstellten Objekte an.
Die Methode ist kürzer und lesbarer geworden.
ListBox und ButtonListBox WinForms Objektklassen
Beginnen wir mit der Entwicklung der neuen WinForms-Objektklasse ListBox.
Dieses Objekt ist eine einfache Textliste, in der Sie ein beliebiges Element auswählen können. Da wir wollen, dass die Zeilen der Liste mit der Maus interagieren können, während das Text-Label-Objekt (Klasse der CLabel-Bibliothek) nicht über eine solche Funktionalität verfügt, wäre es logisch, die Klasse der Button-Objekte zu verwenden, um die Liste anzuzeigen. Sie können darauf reagieren, wenn man mit der Maus über sie fährt, und ausgewählt werden (Taste drücken).
Um die Schaltflächen wie Textlistenelemente aussehen zu lassen, müssen wir ihre Rahmenfarbe an die Hintergrundfarbe anpassen. In diesem Fall verschwindet die Schaltfläche im Hintergrund und nur der Text ist sichtbar. Wenn man den Mauszeiger über den Schaltflächenbereich bewegt (visuell über den Text), ändert sich die Hintergrundfarbe des Textes. Wenn man auf den Text (die Schaltfläche) klickt, wird er ausgewählt (die Schaltfläche wird gedrückt).
Damit sich die aus Schaltflächen erstellte Liste wie die ListBox in MS Visual Studio verhält, müssen wir alle Schaltflächen der Liste in eine Gruppe aufnehmen (das Gruppenflag für sie setzen) und sie zu Umschaltern machen (mit der Möglichkeit, zwei Zustände zu haben - an/aus). Jede Schaltfläche (Listenzeile) hat einen Gruppenindex, der der Gruppennummer des Panels entspricht, während das Gruppenflag, das für jede der Listenschaltflächen gesetzt ist, das Abwählen eines bereits ausgewählten Listenelements nicht erlaubt.
Erstellen wir im Bibliotheksordner \MQL5\Include\DoEasy\Objects\Graph\WForms\Common Controls\ die neue Datei ListBox.mqh der Klasse CListBox.
Die Klasse sollte von der Basisklasse der Listenobjekte abgeleitet sein und ihre Datei sollte in die erstellte Klassendatei aufgenommen werden:
//+------------------------------------------------------------------+
//|                                                      ListBox.mqh |
//|                                  Copyright 2022, MetaQuotes Ltd. |
//|                             https://mql5.com/en/users/artmedia70 |
//+------------------------------------------------------------------+
#property copyright "Copyright 2022, MetaQuotes Ltd."
#property link      "https://mql5.com/en/users/artmedia70"
#property version   "1.00"
#property strict    // Necessary for mql4
//+------------------------------------------------------------------+
//| Include files                                                    |
//+------------------------------------------------------------------+
#include "ElementsListBox.mqh"
//+------------------------------------------------------------------+
//| Class of the base object of the WForms control list              |
//+------------------------------------------------------------------+
class CListBox : public CElementsListBox
  {
  }
Im privaten Teil der Klasse wird eine virtuelle Methode zur Erstellung eines neuen grafischen Objekts deklariert, während im öffentlichen Teil die Methode zur Erstellung der Liste und der parametrische Konstruktor deklariert werden:
//+------------------------------------------------------------------+
//| Class of the base object of the WForms control list              |
//+------------------------------------------------------------------+
class CListBox : public CElementsListBox
  {
private:
//--- Create a new graphical object
   virtual CGCnvElement *CreateNewGObject(const ENUM_GRAPH_ELEMENT_TYPE type,
                                          const int element_num,
                                          const string name,
                                          const int x,
                                          const int y,
                                          const int w,
                                          const int h,
                                          const color colour,
                                          const uchar opacity,
                                          const bool movable,
                                          const bool activity);
public:
//--- Create a list from the specified number of rows (Label objects)
   void              CreateList(const int line_count);
//--- Constructor
                     CListBox(const long chart_id,
                              const int subwindow,
                              const string name,
                              const int x,
                              const int y,
                              const int w,
                              const int h);
  };
//+------------------------------------------------------------------+
Im parametrischen Konstruktor geben wir den Grafikelementtyp und den Bibliotheksobjekttyp an, legen die Standardwerte für den Objektrahmen, die Rahmenfarbe und den Text fest und deaktivieren die Erstellung mehrerer Spalten. Wir setzen die Spaltenbreite auf Null:
//+------------------------------------------------------------------+
//| Constructor indicating the chart and subwindow ID                |
//+------------------------------------------------------------------+
CListBox::CListBox(const long chart_id,
                   const int subwindow,
                   const string name,
                   const int x,
                   const int y,
                   const int w,
                   const int h) : CElementsListBox(chart_id,subwindow,name,x,y,w,h)
  {
   CGBaseObj::SetTypeElement(GRAPH_ELEMENT_TYPE_WF_LIST_BOX);
   CGCnvElement::SetProperty(CANV_ELEMENT_PROP_TYPE,GRAPH_ELEMENT_TYPE_WF_LIST_BOX);
   this.m_type=OBJECT_DE_TYPE_GWF_COMMON;
   this.SetBorderSizeAll(1);
   this.SetBorderStyle(FRAME_STYLE_SIMPLE);
   this.SetBorderColor(CLR_DEF_BORDER_COLOR,true);
   this.SetForeColor(CLR_DEF_FORE_COLOR,true);
   this.SetMultiColumn(false);
   this.SetColumnWidth(0);
  }
//+------------------------------------------------------------------+
Die Methode, die eine Liste aus der angegebenen Anzahl von Zeilen erstellt:
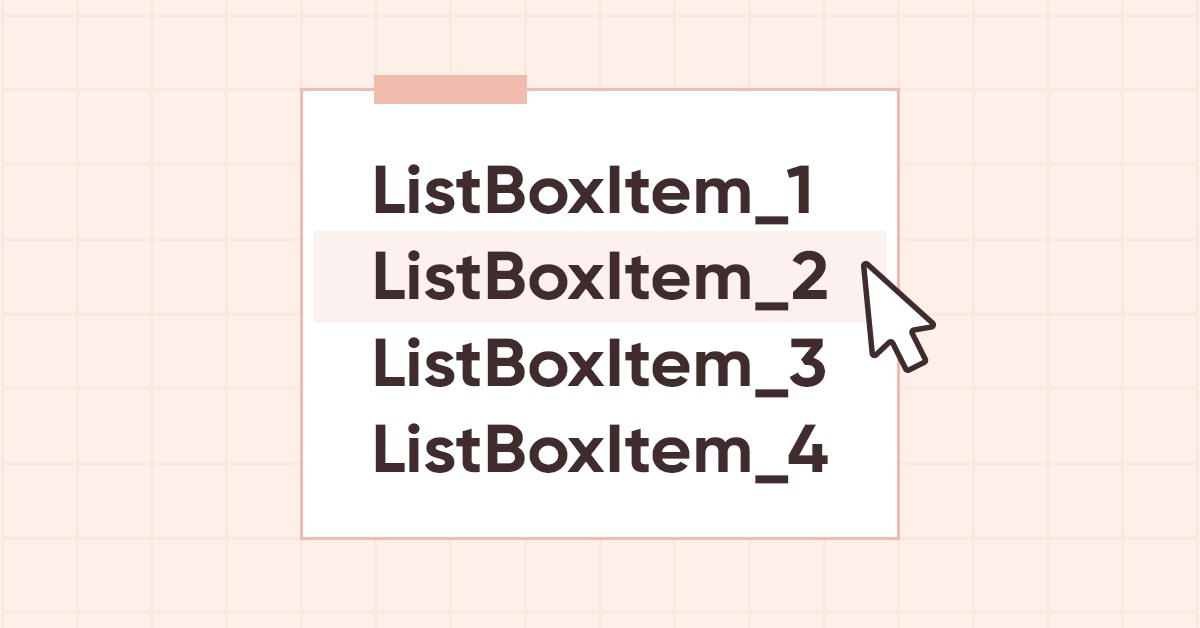
//+--------------------------------------------------------------------+
//| Create the list from the specified number of rows (Button objects) |
//+--------------------------------------------------------------------+
void CListBox::CreateList(const int count)
  {
//--- Create the pointer to the Button object
   CButton *obj=NULL;
//--- Create the specified number of Button objects
   CElementsListBox::CreateElements(GRAPH_ELEMENT_TYPE_WF_BUTTON,count,2,2,this.Width()-4,12,0,false);
//--- In the loop by the created number of objects
   for(int i=0;i<this.ElementsTotal();i++)
     {
      //--- Get the created object from the list by the loop index
      obj=this.GetElement(i);
      //--- If the object could not be obtained, send the appropriate message to the log and move on to the next one
      if(obj==NULL)
        {
         ::Print(DFUN,MSG_ELM_LIST_ERR_FAILED_GET_GRAPH_ELEMENT_OBJ,this.TypeElementDescription(GRAPH_ELEMENT_TYPE_WF_BUTTON));
         continue;
        }
      //--- Set left center text alignment
      obj.SetTextAlign(ANCHOR_LEFT);
      //--- Set the object text
      obj.SetFontSize(8);
      obj.SetText("ListBoxItem"+string(i+1));
      //--- Set the frame colors equal to the background colors and the flag of the toggle button
      obj.SetBorderColor(obj.BackgroundColor(),true);
      obj.SetBorderColorMouseDown(obj.BackgroundColorMouseDown());
      obj.SetBorderColorMouseOver(obj.BackgroundColorMouseOver());
      obj.SetToggleFlag(true);
      obj.SetGroupButtonFlag(true);
     }
  }
//+------------------------------------------------------------------+
Die Methode ist identisch mit der obigen überarbeiteten Methode CheckedListBox. Es erstellt Schaltflächenobjekte als Zeilen und stellt die Randfarbe für sie so ein, dass sie mit der Hintergrundfarbe verschmilzt. Das Flag für die Umschalttaste und das Flag für eine Schaltfläche, die in einer Gruppe arbeitet, wird für jede erstellte Schaltfläche gesetzt. Der Gruppenindex für jede Schaltfläche wird von dem Feld geerbt, auf dem sie platziert ist.
Die virtuelle Methode zur Erstellung eines neuen grafischen Objekts:
//+------------------------------------------------------------------+
//| Create a new graphical object                                    |
//+------------------------------------------------------------------+
CGCnvElement *CListBox::CreateNewGObject(const ENUM_GRAPH_ELEMENT_TYPE type,
                                         const int obj_num,
                                         const string obj_name,
                                         const int x,
                                         const int y,
                                         const int w,
                                         const int h,
                                         const color colour,
                                         const uchar opacity,
                                         const bool movable,
                                         const bool activity)
  {
   string name=this.CreateNameDependentObject(obj_name);
//--- create the Button object
   CGCnvElement *element=new CButton(this.ChartID(),this.SubWindow(),name,x,y,w,h);
   if(element==NULL)
      ::Print(DFUN,CMessage::Text(MSG_LIB_SYS_FAILED_CREATE_ELM_OBJ),": ",name);
//--- set the object relocation flag and relative coordinates
   element.SetMovable(movable);
   element.SetCoordXRelative(element.CoordX()-this.CoordX());
   element.SetCoordYRelative(element.CoordY()-this.CoordY());
   return element;
  }
//+------------------------------------------------------------------+
In der Methode wird das Button-Objekt erstellt und die Mindestparameter dafür festgelegt — das Verschiebungskennzeichen und die relativen Koordinaten des Objekts.
In diesem Stadium ist dies alles, was für das Funktionieren dieser Klasse erforderlich ist. Etwas später werde ich die Klassen unserer Listenobjekte um die Funktionen erweitern, die zum Abrufen der ausgewählten Objekte und zum Senden von Nachrichten erforderlich sind.
Erstellen wir nun eine Listenobjektklasse von Schaltflächenobjekten. Ein solches Objekt kombiniert die auf dem Panel erstellten Schaltflächen. Die Schaltflächen können verschiedenen Gruppen zugeordnet werden, für sie können Gruppenschaltflächen-Flags zusammen mit anderen Parametern ihrer Eigenschaften festgelegt werden. So wird es möglich sein, verschiedene Gruppen von Schaltflächen in einem Objekt (auf einem Panel) zu erstellen.
Im Bibliotheksordner \MQL5\Include\DoEasy\Objects\Graph\WForms\Common Controls\ erstellen wir die neue Datei ButtonListBox.mqh für die Klasse CButtonListBox.
Die Klasse sollte von der Basisklasse des Listenobjekts abgeleitet werden und ihre Datei sollte in die erstellte Klassendatei eingebunden werden:
//+------------------------------------------------------------------+
//|                                                ButtonListBox.mqh |
//|                                  Copyright 2022, MetaQuotes Ltd. |
//|                             https://mql5.com/en/users/artmedia70 |
//+------------------------------------------------------------------+
#property copyright "Copyright 2022, MetaQuotes Ltd."
#property link      "https://mql5.com/en/users/artmedia70"
#property version   "1.00"
#property strict    // Necessary for mql4
//+------------------------------------------------------------------+
//| Include files                                                    |
//+------------------------------------------------------------------+
#include "ElementsListBox.mqh"
//+------------------------------------------------------------------+
//| ButtonListBox object class of WForms controls                    |
//+------------------------------------------------------------------+
class CButtonListBox : public CElementsListBox
  {
  }
Im privaten Abschnitt der Klasse deklarieren wir die Methode zur Erstellung eines neuen grafischen Objekts. Im öffentlichen Abschnitt die Methode zur Erstellung einer bestimmten Anzahl von Schaltflächen deklarieren wir den parametrischen Konstruktor und die Methoden zur Behandlung der im Panel erstellten Schaltflächen:
//+------------------------------------------------------------------+
//| ButtonListBox object class of WForms controls                    |
//+------------------------------------------------------------------+
class CButtonListBox : public CElementsListBox
  {
private:
//--- Create a new graphical object
   virtual CGCnvElement *CreateNewGObject(const ENUM_GRAPH_ELEMENT_TYPE type,
                                          const int element_num,
                                          const string name,
                                          const int x,
                                          const int y,
                                          const int w,
                                          const int h,
                                          const color colour,
                                          const uchar opacity,
                                          const bool movable,
                                          const bool activity);
public:
//--- Create the specified number of CheckBox objects
   void              CreateButton(const int count,const int width,const int height,const int new_column_width=0);
//--- Constructor
                     CButtonListBox(const long chart_id,
                                    const int subwindow,
                                    const string name,
                                    const int x,
                                    const int y,
                                    const int w,
                                    const int h);

//--- (1) Set and (2) return the group of the button specified by index
   void              SetButtonGroup(const int index,const int group);
   int               ButtonGroup(const int index);
//--- (1) Set and (2) return the flag of the group button specified by the button index
   void              SetButtonGroupFlag(const int index,const bool flag);
   bool              ButtonGroupFlag(const int index);
//--- Sets the specified button "multiselect" mode
   void              SetMultiSelect(const bool flag);
//--- (1) Set and (2) return the "Toggle button" flag of the button specified by index
   void              SetButtonToggle(const int index,const bool flag);
   bool              ButtonToggle(const int index);
//--- Set the "Toggle button" flag for all buttons of the object
   void              SetToggle(const bool flag);

  };
//+------------------------------------------------------------------+
Schauen wir uns die angegebenen Methoden genauer an.
Im parametrischen Konstruktor geben wir den Grafikelementtyp und den Typ des Bibliotheksobjekts an und legen die Standardwerte für den Rahmen des Bedienfelds, seine Farbe und seinen Stil sowie die Farbe für die Objekttexte auf dem Bedienfeld fest:
//+------------------------------------------------------------------+
//| Constructor indicating the chart and subwindow ID                |
//+------------------------------------------------------------------+
CButtonListBox::CButtonListBox(const long chart_id,
                               const int subwindow,
                               const string name,
                               const int x,
                               const int y,
                               const int w,
                               const int h) : CElementsListBox(chart_id,subwindow,name,x,y,w,h)
  {
   CGBaseObj::SetTypeElement(GRAPH_ELEMENT_TYPE_WF_BUTTON_LIST_BOX);
   CGCnvElement::SetProperty(CANV_ELEMENT_PROP_TYPE,GRAPH_ELEMENT_TYPE_WF_BUTTON_LIST_BOX);
   this.m_type=OBJECT_DE_TYPE_GWF_COMMON;
   this.SetBorderSizeAll(1);
   this.SetBorderStyle(FRAME_STYLE_SIMPLE);
   this.SetBorderColor(CLR_DEF_BORDER_COLOR,true);
   this.SetForeColor(CLR_DEF_FORE_COLOR,true);
  }
//+------------------------------------------------------------------+
Die Methode, die die angegebene Anzahl von Button-Objekten erstellt:
//+------------------------------------------------------------------+
//| Create the specified number of Button objects                    |
//+------------------------------------------------------------------+
void CButtonListBox::CreateButton(const int count,const int width,const int height,const int new_column_width=0)
  {
//--- Create the pointer to the Button object
   CButton *obj=NULL;
//--- Create the specified number of Button objects
   CElementsListBox::CreateElements(GRAPH_ELEMENT_TYPE_WF_BUTTON,count,2,2,width,height,new_column_width);
//--- In the loop by the created number of objects
   for(int i=0;i<this.ElementsTotal();i++)
     {
      //--- Get the created object from the list by the loop index
      obj=this.GetElement(i);
      //--- If the object could not be obtained, send the appropriate message to the log and move on to the next one
      if(obj==NULL)
        {
         ::Print(DFUN,MSG_ELM_LIST_ERR_FAILED_GET_GRAPH_ELEMENT_OBJ,this.TypeElementDescription(GRAPH_ELEMENT_TYPE_WF_BUTTON));
         continue;
        }
      //--- Set left center text alignment
      obj.SetTextAlign(ANCHOR_CENTER);
      //--- Set the object text
      obj.SetText("Button"+string(i+1));
     }
  }
//+------------------------------------------------------------------+
Die Methode ist identisch mit ähnlichen Methoden der oben genannten Listenobjekte. Zunächst wird die angegebene Anzahl von Schaltflächenobjekten erstellt. Dann werden sie in einer Schleife durch die erstellte Anzahl von Objekten auf ihre Standardwerte gesetzt.
Die virtuelle Methode zur Erstellung eines neuen grafischen Objekts:
//+------------------------------------------------------------------+
//| Create a new graphical object                                    |
//+------------------------------------------------------------------+
CGCnvElement *CButtonListBox::CreateNewGObject(const ENUM_GRAPH_ELEMENT_TYPE type,
                                               const int obj_num,
                                               const string obj_name,
                                               const int x,
                                               const int y,
                                               const int w,
                                               const int h,
                                               const color colour,
                                               const uchar opacity,
                                               const bool movable,
                                               const bool activity)
  {
   string name=this.CreateNameDependentObject(obj_name);
//--- create the CButton object
   CGCnvElement *element=new CButton(this.ChartID(),this.SubWindow(),name,x,y,w,h);
   if(element==NULL)
      ::Print(DFUN,CMessage::Text(MSG_LIB_SYS_FAILED_CREATE_ELM_OBJ),": ",name);
//--- set the object relocation flag and relative coordinates
   element.SetMovable(movable);
   element.SetCoordXRelative(element.CoordX()-this.CoordX());
   element.SetCoordYRelative(element.CoordY()-this.CoordY());
   return element;
  }
//+------------------------------------------------------------------+
Hier ist alles genau gleich wie in den ähnlichen Methoden der List-Objektklassen.
Die Methode, die die Gruppe der durch index angegebenen Schaltfläche festlegt:
//+------------------------------------------------------------------+
//| Set the group of the button specified by index                   |
//+------------------------------------------------------------------+
void CButtonListBox::SetButtonGroup(const int index,const int group)
  {
   CButton *butt=this.GetElement(index);
   if(butt==NULL)
     {
      ::Print(DFUN,CMessage::Text(MSG_BUTT_LIST_ERR_FAILED_SET_GROUP_BUTTON),(string)index);
      return;
     }
   butt.SetGroup(group);
  }
//+------------------------------------------------------------------+
Abrufen des Objekts aus der Liste mit dem angegebenen Index. Wenn das Objekt nicht abgerufen werden kann, wird dies im Protokoll vermerkt und die Methode beendet.
Setzen des an die Methode übergebenen Gruppenindex für das erhaltene Objekt.
Die Methode, die die Gruppe der durch index angegebenen Schaltfläche zurückgibt:
//+------------------------------------------------------------------+
//| Return the group of the button specified by index                |
//+------------------------------------------------------------------+
int CButtonListBox::ButtonGroup(const int index)
  {
   CButton *butt=this.GetElement(index);
   return(butt!=NULL ? butt.Group() : WRONG_VALUE);
  }
//+------------------------------------------------------------------+
Abrufen des Objekts nach dem Index aus der Liste. Wenn das Objekt empfangen wurde, wird seine Gruppe ermittelt, andernfalls wird -1 zurückgegeben.
Die Methode, die das Flag der durch den Index angegebenen Gruppenschaltfläche setzt:
//+------------------------------------------------------------------+
//| Set the flag of the group button specified by the button index   |
//+------------------------------------------------------------------+
void CButtonListBox::SetButtonGroupFlag(const int index,const bool flag)
  {
   CButton *butt=this.GetElement(index);
   if(butt==NULL)
     {
      ::Print(DFUN,CMessage::Text(MSG_BUTT_LIST_ERR_FAILED_SET_GROUP_BUTTON),(string)index);
      return;
     }
   butt.SetGroupButtonFlag(flag);
  }
//+------------------------------------------------------------------+
Abrufen des Objekts aus der Liste mit dem angegebenen Index. Wenn das Objekt nicht abgerufen werden kann, wird dies im Protokoll vermerkt und die Methode verlassen.
Setzen des an die Methode übergebene Flags für das erhaltene Objekt.
Die Methode, die das Flag der durch den Schaltflächenindex angegebenen Gruppenschaltfläche zurückgibt:
//+------------------------------------------------------------------+
//| Return the flag of the group button specified by the button index|
//+------------------------------------------------------------------+
bool CButtonListBox::ButtonGroupFlag(const int index)
  {
   CButton *butt=this.GetElement(index);
   return(butt!=NULL ? butt.GroupButtonFlag() : false);
  }
//+------------------------------------------------------------------+
Abrufen des Objekts aus der Liste mit dem angegebenen Index. Wenn das Objekt empfangen wurde, wird das Flag der Gruppentaste zurückgegeben, andernfalls wird false zurückgegeben.
Die Methode, die den Modus „Mehrfachauswahl“ der Schaltflächen festlegt:
//+------------------------------------------------------------------+
//| Set the "multiselect" mode of the buttons                        |
//+------------------------------------------------------------------+
void CButtonListBox::SetMultiSelect(const bool flag)
  {
   int group=this.Group()+(flag ? 1 : 0);
   for(int i=0;i<this.ElementsTotal();i++)
      this.SetButtonGroup(i,group+(flag ? i : 0));
  }
//+------------------------------------------------------------------+
Die Methode ermöglicht es, dass die auf dem Bedienfeld angebrachten Tasten unabhängig voneinander funktionieren, so dass jede Taste unabhängig von den anderen Tasten auf dem Bedienfeld gedrückt bzw. losgelassen werden kann. Zu diesem Zweck sollte jede Schaltfläche eine eigene Gruppe haben.
Wir setzen zunächst den Anfangswert für die Gruppe der ersten Schaltfläche als die Gruppe des Panels plus 1, wenn wir eine Mehrfachauswahl von Schaltflächen zulassen wollen, oder 0, wenn die Schaltflächen voneinander abhängig sein sollen. Als Nächstes setzen wir in der Schleife über alle erstellten Schaltflächen entweder eine neue Gruppe für jede nachfolgende Schaltfläche, die sich aus der Nummer der Bedienfeldgruppe plus dem Zyklusindex errechnet, was bedeutet, dass jede Schaltfläche eine Gruppe hat, die der Position der Schaltfläche in der Liste + 1 entspricht, oder wir addieren Null zur Nummer der Bedienfeldgruppe, was bedeutet, dass alle Schaltflächen eine Gruppe haben, die der Bedienfeldgruppe entspricht.Die Methode, die das Flag „Toggle button“ (Schaltfläche umschalten) für die durch den Index angegebene Schaltfläche setzt:
//+------------------------------------------------------------------+
//| Set the "Toggle button" flag                                     |
//| button specified by index                                        |
//+------------------------------------------------------------------+
void CButtonListBox::SetButtonToggle(const int index,const bool flag)
  {
   CButton *butt=this.GetElement(index);
   if(butt==NULL)
     {
      ::Print(DFUN,CMessage::Text(MSG_BUTT_LIST_ERR_FAILED_SET_TOGGLE_BUTTON),(string)index);
      return;
     }
   butt.SetToggleFlag(flag);
  }
//+------------------------------------------------------------------+
Holt die Schaltfläche mit dem angegebenen Index aus der Liste. Wenn die Schaltfläche nicht abgerufen werden kann, ist dies im Protokoll zu vermerken und die Methode zu beenden.
Das in der Methode übergebene Flag wird für die erhaltene Schaltfläche gesetzt.
Die Methode, die das Flag „Toggle button“ (Schaltfläche umschalten) der durch den Index angegebenen Schaltfläche zurückgibt:
//+------------------------------------------------------------------+
//| Return the "Toggle button" flag                                  |
//| button specified by index                                        |
//+------------------------------------------------------------------+
bool CButtonListBox::ButtonToggle(const int index)
  {
   CButton *butt=this.GetElement(index);
   return(butt!=NULL ? butt.Toggle() : false);
  }
//+------------------------------------------------------------------+
Holt die Schaltfläche mit dem angegebenen Index aus der Liste. Wenn die Schaltfläche empfangen wurde, wird ihr Schaltknopf-Flag zurückgegeben, andernfalls wird false zurückgegeben.
Die Methode, die das Flag „Toggle button“ (Schaltfläche umschalten) für alle Schaltflächen des Objekts setzt:
//+------------------------------------------------------------------+
//| Set the "Toggle button" flag to all buttons of the object        |
//+------------------------------------------------------------------+
void CButtonListBox::SetToggle(const bool flag)
  {
   for(int i=0;i<this.ElementsTotal();i++)
      this.SetButtonToggle(i,flag);
  }
//+------------------------------------------------------------------+
In der Schleife über alle Listenobjekte setzen wir das angegebene Flag für jede nächste Schaltfläche mit der oben genannten Methode SetButtonToggle().
Ich habe alle für den aktuellen Artikel geplanten Objekte erstellt.
Jetzt müssen wir dafür sorgen, dass die Bibliothek von ihnen „weiß“ und wir sie aus unseren Programmen erstellen können.
Lassen Sie uns kleine Verbesserungen in \MQL5\Include\DoEasy\Objects\Graph\WForms\Containers\Container.mqh des Basis-Containerobjekts vornehmen. Später werden wir die bereits erstellten Objekte dem Container hinzufügen müssen, anstatt neue Objekte darin zu erstellen. Um diese Aktion zu vereinfachen, müssen wir die Methode, die das neue angehängte Objekt erstellt, in zwei Methoden aufteilen — eine Methode wird ein neues Objekt erstellen, und die andere wird einige Standardeigenschaften für das neue Objekt festlegen. Beim Hinzufügen eines Objekts wird kein neues Objekt erstellt, sondern das angegebene Objekt in die Liste aufgenommen und gegebenenfalls seine Parameter geändert.
Im geschützten Abschnitt der Klasse deklarieren wir die neue Methode, um Parameter für das erstellte Objekt festzulegen:
protected:
//--- Adjust the element size to fit its content
   bool              AutoSizeProcess(const bool redraw);
//--- Set parameters for the attached object
   void              SetObjParams(CWinFormBase *obj,const color colour);

public:
Schreiben wir nun die Implementierung außerhalb des Klassenkörpers:
//+------------------------------------------------------------------+
//| Set parameters for the attached object                           |
//+------------------------------------------------------------------+
void CContainer::SetObjParams(CWinFormBase *obj,const color colour)
  {
//--- Set the text color of the object to be the same as that of the base container
   obj.SetForeColor(this.ForeColor(),true);
//--- If the created object is not a container, set the same group for it as the one for its base object
   if(obj.TypeGraphElement()<GRAPH_ELEMENT_TYPE_WF_CONTAINER || obj.TypeGraphElement()>GRAPH_ELEMENT_TYPE_WF_GROUPBOX)
      obj.SetGroup(this.Group());
//--- Depending on the object type
   switch(obj.TypeGraphElement())
     {
      //--- For the Container, Panel and GroupBox WinForms objects
      case GRAPH_ELEMENT_TYPE_WF_CONTAINER         :
      case GRAPH_ELEMENT_TYPE_WF_PANEL             :
      case GRAPH_ELEMENT_TYPE_WF_GROUPBOX          :
        //--- set the frame color equal to the background color
        obj.SetBorderColor(obj.BackgroundColor(),true);
        break;
      //--- For "Label", "CheckBox" and "RadioButton" WinForms objects
      case GRAPH_ELEMENT_TYPE_WF_LABEL             :
      case GRAPH_ELEMENT_TYPE_WF_CHECKBOX          :
      case GRAPH_ELEMENT_TYPE_WF_RADIOBUTTON       :
        //--- set the object text color depending on the one passed to the method:
        //--- either the container text color, or the one passed to the method.
        //--- The frame color is set equal to the text color
        //--- Set the background color to transparent
        obj.SetForeColor(colour==clrNONE ? this.ForeColor() : colour,true);
        obj.SetBorderColor(obj.ForeColor(),true);
        obj.SetBackgroundColor(CLR_CANV_NULL,true);
        obj.SetOpacity(0,false);
        break;
      //--- For the Button WinForms object
      case GRAPH_ELEMENT_TYPE_WF_BUTTON            :
        //--- set the object text color as a container text color depending on the one passed to the method:
        //--- set the background color depending on the one passed to the method:
        //--- either the default standard control background color, or the one passed to the method.
        //--- The frame color is set equal to the text color
        obj.SetForeColor(this.ForeColor(),true);
        obj.SetBackgroundColor(colour==clrNONE ? CLR_DEF_CONTROL_STD_BACK_COLOR : colour,true);
        obj.SetBorderColor(obj.ForeColor(),true);
        obj.SetBorderStyle(FRAME_STYLE_SIMPLE);
        break;
      //--- For "ListBox", "CheckedListBox" and "ButtonListBox" WinForms object
      case GRAPH_ELEMENT_TYPE_WF_LIST_BOX          :
      case GRAPH_ELEMENT_TYPE_WF_CHECKED_LIST_BOX  :
      case GRAPH_ELEMENT_TYPE_WF_BUTTON_LIST_BOX   :
        //--- set the object text color as a container text color depending on the one passed to the method:
        //--- set the background color depending on the one passed to the method:
        //--- either the default standard control background color, or the one passed to the method.
        //--- The frame color is set equal to the text color
        obj.SetBackgroundColor(colour==clrNONE ? CLR_DEF_CONTROL_STD_BACK_COLOR : colour,true);
        obj.SetBorderColor(CLR_DEF_BORDER_COLOR,true);
        obj.SetForeColor(CLR_DEF_FORE_COLOR,true);
        break;
      default:
        break;
     }
  }
//+------------------------------------------------------------------+
Hier haben wir einfach den Codeblock verschoben, der die Objektparameter aus der Methode CreateNewElement() setzt. Wir übergeben der Methode den Zeiger auf das erstellte Objekt und die Farbe, die an die Methode CreateNewElement() übergeben wurde. Hier habe ich auch die Handhabung neuer Objekte hinzugefügt, die der Handhabung des zuvor erstellten CheckedListBox-Objekts ähnlich ist. Daher musste ich nichts Zusätzliches schreiben — ich habe nur angegeben, dass diese Objekte ähnlich wie das CheckedListBox-Objekt in einem „switch“-Fall behandelt werden.
Die geänderte Methode, die ein neues gebundenes Element erzeugt:
//+------------------------------------------------------------------+
//| Create a new attached element                                    |
//+------------------------------------------------------------------+
bool CContainer::CreateNewElement(const ENUM_GRAPH_ELEMENT_TYPE element_type,
                                  const int x,
                                  const int y,
                                  const int w,
                                  const int h,
                                  const color colour,
                                  const uchar opacity,
                                  const bool activity,
                                  const bool redraw)
  {
//--- If the object type is less than the base WinForms object
   if(element_type<GRAPH_ELEMENT_TYPE_WF_BASE)
     {
      //--- report the error and return 'false'
      CMessage::ToLog(DFUN,MSG_PANEL_OBJECT_ERR_OBJ_MUST_BE_WFBASE);
      return false;
     }
//--- If failed to create a new graphical element, return 'false'
   CWinFormBase *obj=CForm::CreateAndAddNewElement(element_type,x,y,w,h,colour,opacity,activity);
   if(obj==NULL)
      return false;
//--- Set parameters for the created object
   this.SetObjParams(obj,colour);
//--- If the panel has auto resize enabled and features bound objects, call the resize method
   if(this.AutoSize() && this.ElementsTotal()>0)
      this.AutoSizeProcess(redraw);
//--- Redraw the panel and all added objects, and return 'true'
   this.Redraw(redraw);
   return true;
  }
//+------------------------------------------------------------------+
Jetzt rufen wir die neue Methode auf, anstatt den Codeblock in die neue Methode zu verschieben. Dementsprechend ist der Code kürzer, einfacher und übersichtlicher geworden, und jetzt können wir diese Aufteilung einer Methode in zwei nutzen, um bereits erstellte Objekte an die Liste anzuhängen.
Verbessern wirr die Panel-Objektklasse in \MQL5\Include\DoEasy\Objects\Graph\WForms\Containers\Panel.mqh.
Fügen wir die neuen, heute erstellten Objektdateien in die Liste der Include-Dateien ein:
//+------------------------------------------------------------------+
//| Include files                                                    |
//+------------------------------------------------------------------+
#include "Container.mqh"
#include "GroupBox.mqh"
#include "..\..\WForms\Common Controls\ListBox.mqh"
#include "..\..\WForms\Common Controls\CheckedListBox.mqh"
#include "..\..\WForms\Common Controls\ButtonListBox.mqh"
//+------------------------------------------------------------------+
Fügen wir Codeblöcke für die Erstellung neuer Objekte zu der Methode zur Erstellung eines neuen grafischen Objekts hinzu:
//+------------------------------------------------------------------+
//| Create a new graphical object                                    |
//+------------------------------------------------------------------+
CGCnvElement *CPanel::CreateNewGObject(const ENUM_GRAPH_ELEMENT_TYPE type,
                                       const int obj_num,
                                       const string obj_name,
                                       const int x,
                                       const int y,
                                       const int w,
                                       const int h,
                                       const color colour,
                                       const uchar opacity,
                                       const bool movable,
                                       const bool activity)
  {
   string name=this.CreateNameDependentObject(obj_name);
   CGCnvElement *element=NULL;
   switch(type)
     {
      case GRAPH_ELEMENT_TYPE_ELEMENT :
         element=new CGCnvElement(type,this.ID(),obj_num,this.ChartID(),this.SubWindow(),name,x,y,w,h,colour,opacity,movable,activity);
        break;
      case GRAPH_ELEMENT_TYPE_FORM :
         element=new CForm(this.ChartID(),this.SubWindow(),name,x,y,w,h);
        break;
      case GRAPH_ELEMENT_TYPE_WF_CONTAINER         :
         element=new CContainer(this.ChartID(),this.SubWindow(),name,x,y,w,h);
        break;
      case GRAPH_ELEMENT_TYPE_WF_GROUPBOX          :
         element=new CGroupBox(this.ChartID(),this.SubWindow(),name,x,y,w,h);
        break;
      case GRAPH_ELEMENT_TYPE_WF_PANEL             :
         element=new CPanel(this.ChartID(),this.SubWindow(),name,x,y,w,h);
        break;
      case GRAPH_ELEMENT_TYPE_WF_LABEL             :
         element=new CLabel(this.ChartID(),this.SubWindow(),name,x,y,w,h);
        break;
      case GRAPH_ELEMENT_TYPE_WF_CHECKBOX          :
         element=new CCheckBox(this.ChartID(),this.SubWindow(),name,x,y,w,h);
        break;
      case GRAPH_ELEMENT_TYPE_WF_RADIOBUTTON       :
         element=new CRadioButton(this.ChartID(),this.SubWindow(),name,x,y,w,h);
        break;
      case GRAPH_ELEMENT_TYPE_WF_BUTTON            :
         element=new CButton(this.ChartID(),this.SubWindow(),name,x,y,w,h);
        break;
      case GRAPH_ELEMENT_TYPE_WF_LIST_BOX          :
         element=new CCheckedListBox(this.ChartID(),this.SubWindow(),name,x,y,w,h);
        break;
      case GRAPH_ELEMENT_TYPE_WF_CHECKED_LIST_BOX  :
         element=new CCheckedListBox(this.ChartID(),this.SubWindow(),name,x,y,w,h);
        break;
      case GRAPH_ELEMENT_TYPE_WF_BUTTON_LIST_BOX   :
         element=new CButtonListBox(this.ChartID(),this.SubWindow(),name,x,y,w,h);
        break;
      default:
        break;
     }
   if(element==NULL)
      ::Print(DFUN,CMessage::Text(MSG_LIB_SYS_FAILED_CREATE_ELM_OBJ),": ",name);
   return element;
  }
//+------------------------------------------------------------------+
Die gleichen Änderungen, die die Erstellung neuer Objekte betreffen, wurden auch der Methode CreateNewGObject() der Container-Objektklasse GroupBox in \MQL5\Include\DoEasy\Objects\Graph\WForms\Containers\GroupBox.mqh hinzugefügt. Ich werde hier nicht näher auf sie eingehen. Sie können alle Änderungen in den unten angehängten Dateien einsehen.
Die ButtonListBox-Objektklassendatei wird in die in die Datei \MQL5\Include\DoEasy\Collections\GraphElementsCollection.mqh der grafischen Kollektionsklasse der Elemente hinzugefügt:
//+------------------------------------------------------------------+
//| Include files                                                    |
//+------------------------------------------------------------------+
#include "ListObj.mqh"
#include "..\Services\Select.mqh"
#include "..\Objects\Graph\WForms\Containers\GroupBox.mqh"
#include "..\Objects\Graph\WForms\Containers\Panel.mqh"
#include "..\Objects\Graph\WForms\Common Controls\CheckedListBox.mqh"
#include "..\Objects\Graph\WForms\Common Controls\ButtonListBox.mqh"
#include "..\Objects\Graph\Standard\GStdVLineObj.mqh"
Danach werden alle anderen Objekte, die im aktuellen Artikel erstellt wurden, in Programmen, die auf der Grundlage der Bibliothek erstellt wurden, sichtbar.
Dies sind alles Objekte und Verbesserungen, die für heute geplant sind.
Test
Um den Test durchzuführen, verwenden wir den EA aus dem vorherigen Artikel und speichern ihn in \MQL5\Experts\TestDoEasy\Part112\ als TstDE112.mq5.
Wir erstellen in der zweiten Gruppe von Objekten GroupBox2 die neuen Listenobjekte ButtonListBox und ListBox. Die Koordinaten der letzten Objektposition im Container hängen vom Aussehen der Objekte CheckedListBox und ButtonListBox ab. Wenn das Flag, das die Möglichkeit der Erstellung von mehrspaltigen Listen anzeigt, für sie aktiviert ist, befindet sich das ListBox-Objekt unterhalb, ansonsten rechts von den ersten beiden.
Überprüfen wir auch die Funktion der Gruppentasten — die Möglichkeit, dass sie in verschiedenen Gruppen funktionieren und die Fähigkeit, die Taste bei erneutem Drücken wieder loszulassen.
Bei den EA-Eingaben fügen wir zwei neue Parameter hinzu:
//--- input parameters
sinput   bool                          InpMovable           =  true;                   // Panel Movable flag
sinput   ENUM_INPUT_YES_NO             InpAutoSize          =  INPUT_YES;              // Panel Autosize
sinput   ENUM_AUTO_SIZE_MODE           InpAutoSizeMode      =  AUTO_SIZE_MODE_GROW;    // Panel Autosize mode
sinput   ENUM_BORDER_STYLE             InpFrameStyle        =  BORDER_STYLE_SIMPLE;    // Label border style
sinput   ENUM_ANCHOR_POINT             InpTextAlign         =  ANCHOR_CENTER;          // Label text align
sinput   ENUM_INPUT_YES_NO             InpTextAutoSize      =  INPUT_NO;               // Label autosize
sinput   ENUM_ANCHOR_POINT             InpCheckAlign        =  ANCHOR_LEFT;            // Check flag align
sinput   ENUM_ANCHOR_POINT             InpCheckTextAlign    =  ANCHOR_LEFT;            // Check label text align
sinput   ENUM_CHEK_STATE               InpCheckState        =  CHEK_STATE_UNCHECKED;   // Check flag state
sinput   ENUM_INPUT_YES_NO             InpCheckAutoSize     =  INPUT_YES;              // CheckBox autosize
sinput   ENUM_BORDER_STYLE             InpCheckFrameStyle   =  BORDER_STYLE_NONE;      // CheckBox border style
sinput   ENUM_ANCHOR_POINT             InpButtonTextAlign   =  ANCHOR_CENTER;          // Button text align
sinput   ENUM_INPUT_YES_NO             InpButtonAutoSize    =  INPUT_YES;              // Button autosize
sinput   ENUM_AUTO_SIZE_MODE           InpButtonAutoSizeMode=  AUTO_SIZE_MODE_GROW;    // Button Autosize mode
sinput   ENUM_BORDER_STYLE             InpButtonFrameStyle  =  BORDER_STYLE_NONE;      // Button border style
sinput   bool                          InpButtonToggle      =  false;                  // Button toggle flag
sinput   bool                          InpListBoxMColumn    =  false;                  // ListBox MultiColumn flag
sinput   bool                          InpButtListMSelect   =  false;                  // ButtonListBox Button MultiSelect flag
//--- global variables
CEngine        engine;
color          array_clr[];
//+------------------------------------------------------------------+
Der erste Parameter gibt die Möglichkeit an, eine Liste zu erstellen, die aus mehreren Spalten besteht (wenn nicht alle Objekte in die Höhe des Panels passen), der zweite Parameter legt die Möglichkeit der Mehrfachauswahl von Schaltflächen in der Gruppe fest.
Den Codeblock für die Erstellung neuer Objekte fügen wir in OnInit() des EA ein (es wird nur ein Teil des Codes gezeigt):
      if(pnl.CreateNewElement(GRAPH_ELEMENT_TYPE_WF_GROUPBOX,x,2,w,h,C'0x91,0xAA,0xAE',0,true,false))
        {
         //--- get the pointer to the GroupBox object by its index in the list of bound GroupBox type objects
         gbox2=pnl.GetElementByType(GRAPH_ELEMENT_TYPE_WF_GROUPBOX,1);
         if(gbox2!=NULL)
           {
            //--- set the "indented frame" type, the frame color matches the main panel background color,
            //--- while the text color is the background color of the last attached panel darkened by 1
            gbox2.SetBorderStyle(FRAME_STYLE_STAMP);
            gbox2.SetBorderColor(pnl.BackgroundColor(),true);
            gbox2.SetForeColor(gbox2.ChangeColorLightness(obj.BackgroundColor(),-1),true);
            gbox2.SetText("GroupBox2");
            //--- Create the CheckedListBox object
            gbox2.CreateNewElement(GRAPH_ELEMENT_TYPE_WF_CHECKED_LIST_BOX,4,12,160,20,clrNONE,255,true,false);
            //--- get the pointer to the CheckedListBox object by its index in the list of bound objects of the CheckBox type
            CCheckedListBox *clbox=gbox2.GetElementByType(GRAPH_ELEMENT_TYPE_WF_CHECKED_LIST_BOX,0);
            //--- If CheckedListBox is created and the pointer to it is received
            if(clbox!=NULL)
              {
               clbox.SetMultiColumn(InpListBoxMColumn);
               clbox.SetColumnWidth(0);
               clbox.CreateCheckBox(4,66);
              }
            //--- Create the ButtonListBox object
            gbox2.CreateNewElement(GRAPH_ELEMENT_TYPE_WF_BUTTON_LIST_BOX,4,clbox.BottomEdgeRelative()+6,160,30,clrNONE,255,true,false);
            //--- get the pointer to the ButtonListBox object by its index in the list of attached objects of the Button type
            CButtonListBox *blbox=gbox2.GetElementByType(GRAPH_ELEMENT_TYPE_WF_BUTTON_LIST_BOX,0);
            //--- If ButtonListBox is created and the pointer to it is received
            if(blbox!=NULL)
              {
               blbox.SetMultiColumn(InpListBoxMColumn);
               blbox.SetColumnWidth(0);
               blbox.CreateButton(4,66,16);
               blbox.SetMultiSelect(InpButtListMSelect);
               blbox.SetToggle(InpButtonToggle);
               for(int i=0;i<blbox.ElementsTotal();i++)
                 {
                  blbox.SetButtonGroup(i,(i % 2==0 ? blbox.Group()+1 : blbox.Group()+2));
                  blbox.SetButtonGroupFlag(i,(i % 2==0 ? true : false));
                 }
              }
            //--- Create the ListBox object
            int lbx=4;
            int lby=blbox.BottomEdgeRelative()+6;
            int lbw=146;
            if(!InpListBoxMColumn)
              {
               lbx=blbox.RightEdgeRelative()+6;
               lby=14;
               lbw=100;
              }
            gbox2.CreateNewElement(GRAPH_ELEMENT_TYPE_WF_LIST_BOX,lbx,lby,lbw,70,clrNONE,255,true,false);
            //--- get the pointer to the ListBox object by its index in the list of attached objects of Button type
            CListBox *lbox=gbox2.GetElementByType(GRAPH_ELEMENT_TYPE_WF_LIST_BOX,0);
            //--- If ListBox has been created and the pointer to it has been received
            if(lbox!=NULL)
              {
               lbox.CreateList(4);
              }
           }
        }
      //--- Redraw all objects according to their hierarchy
      pnl.Redraw(true);
     }
//---
   return(INIT_SUCCEEDED);
  }
//+------------------------------------------------------------------+
Hier erstellen wir zwei neue Listenobjekte im Objekt GroupBox2. Wenn sie erfolgreich erstellt werden, legen wir in jedem von ihnen vier Objekte an.
Der vollständige Code von OnInit() des EA ist in den unten angehängten Dateien zu finden.
Kompilieren Sie den EA und starten Sie ihn auf einem Chart:

Hier sehen wir, dass die beiden oberen Schaltflächen der ButtonListBox etwas anders funktionieren als die beiden unteren. Dies hängt von den gesetzten Flags ab. Im ersten Fall können die Tasten bei erneutem Drücken nicht deaktiviert werden. Wir können eine Taste nur durch Drücken der zweiten Taste deaktivieren. Im zweiten Fall kann die Schaltfläche sowohl durch Klicken auf die zweite Schaltfläche als auch durch erneutes Drücken auf die bereits aktivierte Schaltfläche deaktiviert werden. Dies wird durch das Flag der Gruppentaste beeinflusst. Wenn es gesetzt ist, sind die Schaltflächen vollständig voneinander abhängig, da sie in der Gruppe arbeiten.
Das Listenobjekt funktioniert korrekt. Aber das Aussehen lässt viel zu wünschen übrig. In MS Visual Studio ist die Liste stärker komprimiert, die Objekte liegen näher beieinander. Aber hier werden wir immer noch durch die Tatsache daran gehindert, dass, wenn man Objekte näher beieinander platziert, die Änderung der Hintergrundfarbe des Objekts bei der Interaktion mit der Maus nicht immer korrekt funktioniert. Sobald wir dies gefunden und behoben haben, können wir das Aussehen der erstellten Objekte anpassen.
Was kommt als Nächstes?
Im nächsten Artikel werde ich meine Arbeit an grafischen Elementen von GUI-Programmen fortsetzen, die auf der Grundlage der Bibliothek erstellt wurden.
*Vorherige Artikel in dieser Reihe:
DoEasy. Steuerung (Teil 1): Erste Schritte
DoEasy. Steuerung (Teil 2): Arbeiten an der Klasse CPanel
DoEasy. Steuerung (Teil 3): Erstellen gebundener Steuerelemente
DoEasy. Steuerung (Teil 4): Paneel-Steuerung, Parameter für Padding und Dock
DoEasy. Steuerung (Teil 5): Basisobjekt von WinForms, Paneel-Steuerelement, Parameter AutoSize
DoEasy. Steuerung (Teil 6): Paneel-Steuerung, automatische Größenanpassung des Containers an den inneren Inhalt
DoEasy. Steuerung (Teil 7): Steuerung der Text Label
DoEasy. Steuerung (Teil 8): Objektkategorien von Basis-WinForms zur Steuerung von GroupBox- und CheckBox
DoEasy. Steuerung (Teil 9): Neuanordnung von WinForms-Objektmethoden, Steuerung von RadioButton und Steuerungen
DoEasy. Steuerung (Teil 10): WinForms-Objekte — Animieren der Nutzeroberfläche
DoEasy. Steuerung (Teil 11): WinForms Objekte — Gruppen, das WinForms-Objekt CheckedListBox
Übersetzt aus dem Russischen von MetaQuotes Ltd.
Originalartikel: https://www.mql5.com/ru/articles/11228
Warnung: Alle Rechte sind von MetaQuotes Ltd. vorbehalten. Kopieren oder Vervielfältigen untersagt.
Dieser Artikel wurde von einem Nutzer der Website verfasst und gibt dessen persönliche Meinung wieder. MetaQuotes Ltd übernimmt keine Verantwortung für die Richtigkeit der dargestellten Informationen oder für Folgen, die sich aus der Anwendung der beschriebenen Lösungen, Strategien oder Empfehlungen ergeben.

 Neuronale Netze leicht gemacht (Teil 22): Unüberwachtes Lernen von rekurrenten Modellen
 Neuronale Netze leicht gemacht (Teil 21): Variierter Autoencoder (VAE)
 Der Indikator CCI: Drei Transformationsschritte
- Freie Handelsapplikationen
- Über 8.000 Signale zum Kopieren
- Wirtschaftsnachrichten für die Lage an den Finanzmärkte
Sie stimmen der Website-Richtlinie und den Nutzungsbedingungen zu.