Design Patterns in software development and MQL5 (Part I): Creational Patterns

Introduction
In the field of programming, we have an important objective which is solving problems but we may face the same problem in different areas in the same software or different software. Let's imagine that every time we face this type of repeated problem we take the same steps and time to solve it this approach means that we keep reinventing the wheel. There is no doubt that this is a useless approach as it consumes a lot of time and effort. So, the following question is essential in this case: Is there a method that we can use that can save this ineffective time and effort?
The answer is yes, there are methods or let's say patterns that we can use in solving specific problems and these are design patterns. Design patterns are very helpful to apply the concept of DRY (Do not Repeat Yourself) which means that we can avoid reinventing the wheel. If we have a problem and we have a pattern that can be used to solve it effectively, just we will use this pattern to solve it and save time and effort.
Design patterns topic is that we will share one of its types based on its purpose and we will try to provide a practical guide about how we can use them in designing our software using MQL5.
We will cover the following topics:
- Design patterns definition
- Creational patterns
- Abstract Factory
- Builder
- Factory Method
- Prototype
- Singleton
- Conclusion
Design patterns the same as we will see is a very important topic to learn and use if you need to increase your performance and productivity as a software developer. We will try to simplify concepts of this interesting and important topic as much as possible to be well understood by beginners. We will also provide simple examples about how we can use these patterns in MQL5 if needed to try to provide a practical guide for anyone who needs to learn this important topic in general.
We will try to summarize every type of these patterns and be to the point as much as we can without ignoring what can make things difficult to understand when missing it. I hope that you will find this article insightful and learn a new thing in the world of programming if you are new in this field.
It is important to mention also that it is essential that you have knowledge about the Object-Oriented topic to understand what you will read in this article. If you want to learn about Object-Oriented-Programming (OOP) you can read the article of Understanding MQL5 Object-Oriented Programming (OOP).
Design Patterns definition
In this part, we will identify Design Patterns. They are simply those patterns that can be used as solutions to specific, described, and repeated problems in software development. Every Design Pattern focuses on a specific object-oriented problem. These patterns can be easily implemented in mainstream object-oriented programming languages like C++. We can say that when we talk about a design pattern we have four important elements for this pattern and they are the same as following:
- The pattern name: refers to the name of the pattern that can be used to solve a specific and described problem.
- The problem: refers to the described, repeated, and specific problem that we can face.
- The solution: refers to the described solution to solve a specific described problem.
- The consequences: refer to results after applying the pattern to solve the problem.
There are three main design pattern categories based on the purpose the same as following:
- Creational patterns: responsible for helping to create an independent system by creating, composing, and representing objects.
- Structural patterns: responsible for using created objects to form larger structures.
- Behavioral patterns: responsible for communication between objects.
Creational patterns
In this part, we will present information about the creational design patterns and how they can help in creating our software. The same we mentioned before this type of design pattern helps to create an independent system by creating, composing, and representing objects. These patterns not only contribute to solving issues or problems efficiently but also help to construct your software in an effective way to make sure that your software is reusable, extendable, and well and easily tested by helping to write clean code.
Classes of the creational pattern use the inheritance concept to vary the class as an instance, while the object of the creational pattern will give the task of instantiation to another object. When the software focuses more on the object composition than the class inheritance that make creational patterns gain more importance.
We can say that Creational patterns have two recurring themes:
- They use the concept of encapsulation to the knowledge about the concrete classes that can be used by the system.
- They make the method of creating instances of classes and putting them together hidden.
Creational patterns help to apply flexibility in what to create, who, and how it can be created, in addition to when it is created.
They help also abstract the instantiation process because they allow us to create objects without repeating the same implementation and that helps to make our code more flexible and simple.
In this article we will provide the Creational patterns the same following patterns:
- Abstract Factory: it helps to provide us with an interface to create families of objects without mentioning their classes.
- Builder: it helps to create complex objects and separates the construction of the object from its representation and that helps to create different representations of the same object by the same construction process.
- Factory Method: it helps to define the interface for creating objects and allows its subclasses to decide which class to be instantiated.
- Prototype: it helps to specify types of objects to create by using a prototypical instance and then copying this prototype to create new objects.
- Singleton: it helps to ensure that the class has one instance only then gives a global point of access.
We will learn about the previous patterns in detail and learn how we can apply and use them in MQL5 software through the following approach:
- What does the pattern do?
- What design problem does it solve?
- How we can use it in MQL5?
Abstract Factory
In this part, we will take a look at one of the creational patterns which is the Abstract Factory. The same as we will see in the Abstract Factory pattern that factories and products are the main parties in this pattern and it can be used to help us to guide us to create families of related product objects without direct instantiating classes. It can be used when the number and general types of product objects are constant but they differ in particular product families.
What does the pattern do?
This pattern provides the interface to create families of objects without specifying its classes and these created objects can be related or independent ones. It is known as Kit also. The following is for diagram that can explain how this pattern works and what it does.

As we can see in the previous diagram, when we face that we have many similar items produced by many different producers or factories the same as the previous example we can find that it is difficult to make future changes if we do not use the pattern of Abstract Factory. By using this pattern we can do that easily and smoothly.
What we do here in this pattern is that we define an abstract factory class that declares the interface for operations that create abstract products. We have also an abstract class for each factory with subclasses for two products and every factory will return its products based on which product will be called by the client.
What design problem does it solve?
So, we can use this pattern in the case of the following:
- We need an independent system.
- We need a configured system with one of many families of products.
- We need to use a family of related product objects together as per its design and enforce this constraint.
- We need to reveal just interfaces of the provided class, not their implementation.
So, we can say that applying this pattern can be beneficial based on the following as examples only:
- It helps in executing the isolation of concrete classes because it helps in controlling created object classes. This can be done through the encapsulation of the responsibility and the process to create objects, client isolation from implementation classes, throughout clients' abstract interfaces they can manipulate instances, and within the implementation of the concrete factory the class names of the product are isolated and they do not appear in client code.
- It makes it easy for product families to exchange.
How we can use it in MQL5?
In this part, we will see how we can code the structure of the Abstract Factory in the Include file but it is good to mention that here we code the structure but you can code what is suitable based on the trading field.
The following is for coding the structure through the following steps:
By using the namespace keyword we declare the AbstractFactory function to list all functions that we need within
namespace AbstractFactory By using the interface keyword we will declare the AbstractProductA function
interface AbstractProductA
  {
  };
By using the interface keyword we will declare the AbstractProductB function with a void Interact variable in the body of the function
interface AbstractProductB
  {
   void Interact(AbstractProductA*);
  };
Declaring an interface for operations to create abstract products
interface AbstractFactory
  {
   AbstractProductA* CreateProductA(void);
   AbstractProductB* CreateProductB(void);
  };
Constructing products A1, and A2 by defining the product object that we need to create by the concrete factory and its implements through the abstract product interface
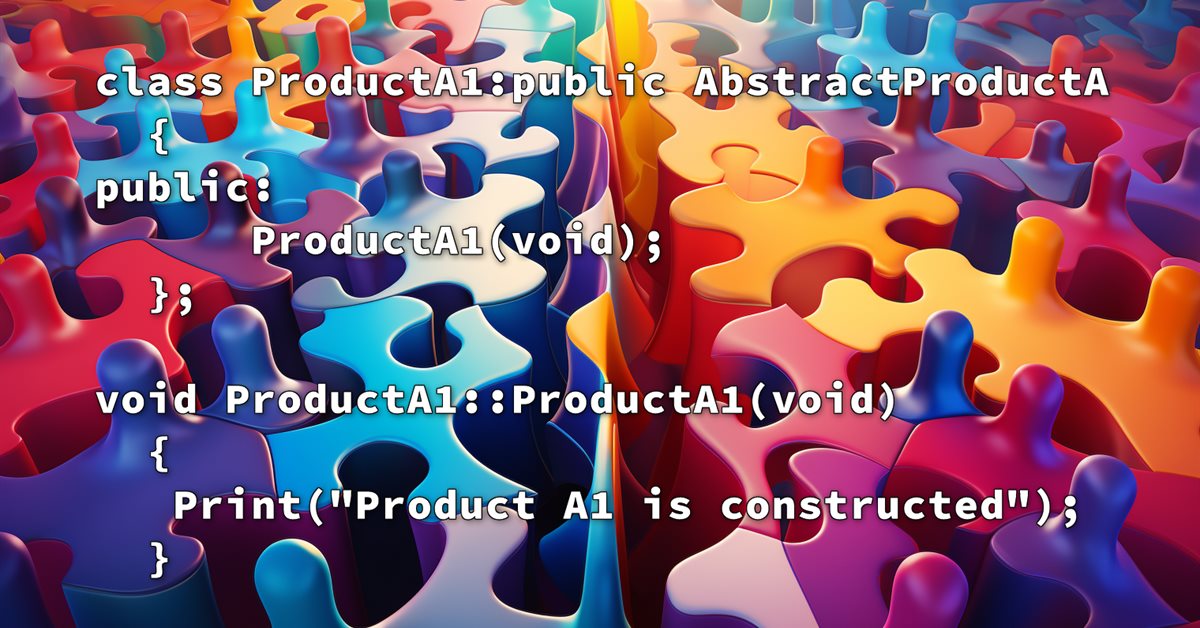
class ProductA1:public AbstractProductA
  {
public:
                     ProductA1(void);
  };
void ProductA1::ProductA1(void)
{
Print("Product A1 is constructed");
}
class ProductA2:public AbstractProductA
  {
public:
                     ProductA2(void);
  };
void ProductA2::ProductA2(void)
{
Print("Product A2 is constructed");
}
Constructing the concrete products B1, and B2 then letting the interaction with the abstractProductA
class ProductB1:public AbstractProductB
  {
public:
                     ProductB1(void);
   void              Interact(AbstractProductA*);
  };
void ProductB1::ProductB1(void)
{
Print("Product B1 is constructed");
}
void ProductB1::Interact(AbstractProductA*src)
  {
   Print("Product B1: ",&this," is interacting with Product A: ",src);
  }
class ProductB2:public AbstractProductB
  {
public:
                     ProductB2(void);
   void              Interact(AbstractProductA*);
  };
void ProductB2::ProductB2(void)
{
Print("Product B2 is constructed");
}
void ProductB2::Interact(AbstractProductA*src)
  {
   Print("Product B2: ",&this," is interacting with Product A: ",src);
  }
Declaring concrete factories factory 1, and 2 to create and return products A1, A2, B1, B2
class Factory1:public AbstractFactory
  {
public:
                     Factory1(void);
   AbstractProductA* CreateProductA(void);
   AbstractProductB* CreateProductB(void);
  };
void Factory1::Factory1(void)
  {
   Print("Factory 1: ",&this," is constructed");
  }
AbstractProductA* Factory1::CreateProductA(void)
  {
   Print("Factory 1 creates and returns Product A1");
   return new ProductA1;
  }
AbstractProductB* Factory1::CreateProductB(void)
  {
   Print("Factory 1 creates and returns Product B1");
   return new ProductB1;
  }
class Factory2:public AbstractFactory
  {
public:
                     Factory2(void);
   AbstractProductA* CreateProductA(void);
   AbstractProductB* CreateProductB(void);
  };
void Factory2::Factory2(void)
  {
   Print("Factory 2: ",&this," is constructed");
  }
AbstractProductA* Factory2::CreateProductA(void)
  {
   Print("Factory 2 creates and returns Product A2");
   return new ProductA2;
  }
AbstractProductB* Factory2::CreateProductB(void)
  {
   Print("Factory 2 creates and returns Product B2");
   return new ProductB2;
  }
Declaring the FactoryClient class and using interfaces that are declared by the abstract factory and the abstract product.
class FactoryClient
  {
public:
   void              Run(void);
   void              Switch(AbstractFactory*);
                     FactoryClient(AbstractFactory*);
                    ~FactoryClient(void);
protected:
   AbstractProductA* apa;
   AbstractProductB* apb;
   AbstractFactory*  factory;
   void              Delete(void);
  };
void FactoryClient::FactoryClient(AbstractFactory* af)
  {
   Print("Factory client created and received Abstract Factory ",af);
   Print("Factory client requests to accept/switch the factories");
   Switch(af);
  }
void FactoryClient::~FactoryClient(void)
  {
   Delete();
  }
void FactoryClient::Run(void)
  {
   Print("Factory client runs the abstract Product B");
   apb.Interact(apa);
  }
void FactoryClient::Delete(void)
  {
   delete apa;
   delete apb;
   delete factory;
  }
void FactoryClient::Switch(AbstractFactory *af)
  {
   string sFactory;
   StringConcatenate(sFactory,sFactory,factory);
   int iFactory=(int)StringToInteger(sFactory);
   if(iFactory>0)
     {
      Print("Factory client switches the old factory ",factory," to the new one ",af);
     }
   else
     {
      Print("Factory client accepts the new factory ",af);
     }
   Delete();
   factory=af;
   Print("Factory client saved the new factory");
   Print("Factory client requests its new factory to create the Product A");
   apa=factory.CreateProductA();
   Print("Factory client requests its new factory to create the Product B");
   apb=factory.CreateProductB();
  }
Defining the Client class and running the pattern
class Client
  {
public:
   string            Output(void);
   void              Run(void);
  };
string Client::Output(void) {return __FUNCTION__;}
void Client::Run(void)
  {
   Print("The client requests to create the Factory 1");
   Print("The client requests to create the Factory client");
   Print("The client requests the Factory client to manage the Factory 1");
   FactoryClient client(new Factory1);
   Print("The client requests the Factory client to operate");
   client.Run();
   Print("The client requests to create the new factory 2 and asks the factory client to switch factories");
   client.Switch(new Factory2);
   Print("The client requests the Factory client to run again");
   client.Run();
  }
So, we can see the full code in one block the same as the following:
namespace AbstractFactory
{
interface AbstractProductA
  {
  };
interface AbstractProductB
  {
   void Interact(AbstractProductA*);
  };
interface AbstractFactory
  {
   AbstractProductA* CreateProductA(void);
   AbstractProductB* CreateProductB(void);
  };
class ProductA1:public AbstractProductA
  {
public:
                     ProductA1(void);
  };
void ProductA1::ProductA1(void)
{
Print("Product A1 is constructed");
}
class ProductA2:public AbstractProductA
  {
public:
                     ProductA2(void);
  };
void ProductA2::ProductA2(void)
{
Print("Product A2 is constructed");
}
class ProductB1:public AbstractProductB
  {
public:
                     ProductB1(void);
   void              Interact(AbstractProductA*);
  };
void ProductB1::ProductB1(void)
{
Print("Product B1 is constructed");
}
void ProductB1::Interact(AbstractProductA*src)
  {
   Print("Product B1: ",&this," is interacting with Product A: ",src);
  }
class ProductB2:public AbstractProductB
  {
public:
                     ProductB2(void);
   void              Interact(AbstractProductA*);
  };
void ProductB2::ProductB2(void)
{
Print("Product B2 is constructed");
}
void ProductB2::Interact(AbstractProductA*src)
  {
   Print("Product B2: ",&this," is interacting with Product A: ",src);
  }
class Factory1:public AbstractFactory
  {
public:
                     Factory1(void);
   AbstractProductA* CreateProductA(void);
   AbstractProductB* CreateProductB(void);
  };
void Factory1::Factory1(void)
  {
   Print("Factory 1: ",&this," is constructed");
  }
AbstractProductA* Factory1::CreateProductA(void)
  {
   Print("Factory 1 creates and returns Product A1");
   return new ProductA1;
  }
AbstractProductB* Factory1::CreateProductB(void)
  {
   Print("Factory 1 creates and returns Product B1");
   return new ProductB1;
  }
class Factory2:public AbstractFactory
  {
public:
                     Factory2(void);
   AbstractProductA* CreateProductA(void);
   AbstractProductB* CreateProductB(void);
  };
void Factory2::Factory2(void)
  {
   Print("Factory 2: ",&this," is constructed");
  }
AbstractProductA* Factory2::CreateProductA(void)
  {
   Print("Factory 2 creates and returns Product A2");
   return new ProductA2;
  }
AbstractProductB* Factory2::CreateProductB(void)
  {
   Print("Factory 2 creates and returns Product B2");
   return new ProductB2;
  }
class FactoryClient
  {
public:
   void              Run(void);
   void              Switch(AbstractFactory*);
                     FactoryClient(AbstractFactory*);
                    ~FactoryClient(void);
protected:
   AbstractProductA* apa;
   AbstractProductB* apb;
   AbstractFactory*  factory;
   void              Delete(void);
  };
void FactoryClient::FactoryClient(AbstractFactory* af)
  {
   Print("Factory client created and received Abstract Factory ",af);
   Print("Factory client requests to accept/switch the factories");
   Switch(af);
  }
void FactoryClient::~FactoryClient(void)
  {
   Delete();
  }
void FactoryClient::Run(void)
  {
   Print("Factory client runs the abstract Product B");
   apb.Interact(apa);
  }
void FactoryClient::Delete(void)
  {
   delete apa;
   delete apb;
   delete factory;
  }
void FactoryClient::Switch(AbstractFactory *af)
  {
   string sFactory;
   StringConcatenate(sFactory,sFactory,factory);
   int iFactory=(int)StringToInteger(sFactory);
   if(iFactory>0)
     {
      Print("Factory client switches the old factory ",factory," to the new one ",af);
     }
   else
     {
      Print("Factory client accepts the new factory ",af);
     }
   Delete();
   factory=af;
   Print("Factory client saved the new factory");
   Print("Factory client requests its new factory to create the Product A");
   apa=factory.CreateProductA();
   Print("Factory client requests its new factory to create the Product B");
   apb=factory.CreateProductB();
  }
class Client
  {
public:
   string            Output(void);
   void              Run(void);
  };
string Client::Output(void) {return __FUNCTION__;}
void Client::Run(void)
  {
   Print("The client requests to create the Factory 1");
   Print("The client requests to create the Factory client");
   Print("The client requests the Factory client to manage the Factory 1");
   FactoryClient client(new Factory1);
   Print("The client requests the Factory client to operate");
   client.Run();
   Print("The client requests to create the new factory 2 and asks the factory client to switch factories");
   client.Switch(new Factory2);
   Print("The client requests the Factory client to run again");
   client.Run();
  }
}
Builder
The Builder pattern is a creational one that can be used when we need to create complex objects and separates the construction of the object from its representation. This can be helpful to create different representations of the same object by the same construction process.
What does the pattern do?
The following is a graph that shows how this creational pattern is working through showing its structure:

As we can see based on the structure of the builder we have the Builder that specifies the interface for creating parts of the product object, the Director that constructs the object using the interface of the Builder, the ConcreteBuilder that can be used to do the following:
- Construct and assemble parts of the product through the implementation of the interface of the Builder
- Define the representation and keep track of it.
- Retrieving the product by providing the interface.
Finally, we have the product that represents the complex object being built.
What design problem does it solve?
We can use this pattern when we need the following:
- An independent algorithm to create a complex object of components of parts of the object and their assembly.
- Allowance of different representations for the object by the construction process.
So, we will get the following
- Based on the product's internal representation the Builder pattern gives us the permission to vary them.
- By encapsulating the method of constructing and representing the complex object, it helps to improve modularity which means that it makes the code isolated for construction and representation.
- It gives us more accurate control over the process of the construction of products.
How we can use it in MQL5?
In this part, we present the code for the structure of the Builder pattern.
By using the namespace function we declare the Builder function
namespace Builder In the body of the function we will create the Product class the same as the following
class Product
  {
public:
   void              Add(string);
   void              Show();
protected:
   string            parts[];
  };
Adding the part
void Product::Add(string part)
  {
   int size=ArraySize(parts);
   ArrayResize(parts,size+1);
   parts[size]=part;
   Print("The product added ",part," to itself");
  }
Showing all parts of the product
void Product::Add(string part)
  {
   int size=ArraySize(parts);
   ArrayResize(parts,size+1);
   parts[size]=part;
   Print("The product added ",part," to itself");
  }
Creating the Builder abstract interface to create the product parts A, B, and C
interface Builder
  {
   void BuildPartA();
   void BuildPartB();
   void BuildPartC();
   Product* GetResult();
  };
Creating the Director class that constructs an object with the Builder interface by using the class function
class Director
  {
public:
   void              Construct();
                     Director(Builder*);
                    ~Director();
protected:
   Builder*          builder;
  };
Creating and receiving the Builder by the Director through creating the following functions
void Director::Director(Builder *b)
  {
   builder=b;
   Print("The director created and received the builder ",b);
  }
void Director::~Director(void)
  {
   delete builder;
  }
Starting to build the product parts A, B, and C by the Director
void Director::Construct(void)
  {
   Print("The director started the construction");
   Print("The director requestd its builder to build the product parts");
   builder.BuildPartA();
   builder.BuildPartB();
   builder.BuildPartC();
   Print("The director's builder constructed the product from parts");
  }
Creating the ConcreteBuilder class with three public members for parts of the product and one protected member for the Product the same as the following
class ConcreteBuilder:public Builder
  {
public:
   void              BuildPartA();
   void              BuildPartB();
   void              BuildPartC();
   Product*          GetResult();
protected:
   Product           product;
  };
Adding the A, B, and C parts to the product by the builder then returning the product through the following functions
void ConcreteBuilder::BuildPartA(void)
  {
   Print("The builder requests the product to add part A to itself");
   product.Add("part a");
   Print("The builder made the part of A and added it to the product");
  }
void ConcreteBuilder::BuildPartB(void)
  {
   Print("The builder requests the product to add part B to itself");
   product.Add("part b");
   Print("The builder made the part of B and added it to the product");
  }
void ConcreteBuilder::BuildPartC(void)
  {
   Print("The builder requests the product to add part C to itself");
   product.Add("part c");
   Print("The builder made part C and added it to the product");
  }
Product* ConcreteBuilder::GetResult(void)
  {
   Print("The builder is returns the product");
   return &product;
  }
Creating the Client class with two public members for the Output and Run constructors then running the Client
class Client
  {
public:
   string            Output();
   void              Run();
  };
string Client::Output() {return __FUNCTION__;}
void Client::Run()
  {
   Print("The client requests to create a new concrete builder");
   Builder* builder=new ConcreteBuilder;
   Print("The client requests to create a director and give him the builder");
   Director director(builder);
   Print("The client requests the director to perform the construction");
   director.Construct();
   Print("The client requests the builder to return the result product");
   Product* product=builder.GetResult();
   Print("The client is requests the product to describe itself");
   product.Show();
  }
So, the following code is for the full code in one block for the Builder structure
namespace Builder
{
class Product
  {
public:
   void              Add(string);
   void              Show();
protected:
   string            parts[];
  };
void Product::Add(string part)
  {
   int size=ArraySize(parts);
   ArrayResize(parts,size+1);
   parts[size]=part;
   Print("The product added ",part," to itself");
  }
void Product::Show(void)
  {
   Print("The product shows all parts that it is made of");
   int total=ArraySize(parts);
   for(int i=0; i<total; i++)
      Print(parts[i]);
  }
interface Builder
  {
   void BuildPartA();
   void BuildPartB();
   void BuildPartC();
   Product* GetResult();
  };
class Director
  {
public:
   void              Construct();
                     Director(Builder*);
                    ~Director();
protected:
   Builder*          builder;
  };
void Director::Director(Builder *b)
  {
   builder=b;
   Print("The director created and received the builder ",b);
  }
void Director::~Director(void)
  {
   delete builder;
  }
void Director::Construct(void)
  {
   Print("The director started the construction");
   Print("The director requestd its builder to build the product parts");
   builder.BuildPartA();
   builder.BuildPartB();
   builder.BuildPartC();
   Print("The director's builder constructed the product from parts");
  }
class ConcreteBuilder:public Builder
  {
public:
   void              BuildPartA();
   void              BuildPartB();
   void              BuildPartC();
   Product*          GetResult();
protected:
   Product           product;
  };
void ConcreteBuilder::BuildPartA(void)
  {
   Print("The builder requests the product to add part A to itself");
   product.Add("part a");
   Print("The builder made the part of A and added it to the product");
  }
void ConcreteBuilder::BuildPartB(void)
  {
   Print("The builder requests the product to add part B to itself");
   product.Add("part b");
   Print("The builder made the part of B and added it to the product");
  }
void ConcreteBuilder::BuildPartC(void)
  {
   Print("The builder requests the product to add part C to itself");
   product.Add("part c");
   Print("The builder made part C and added it to the product");
  }
Product* ConcreteBuilder::GetResult(void)
  {
   Print("The builder is returns the product");
   return &product;
  }
class Client
  {
public:
   string            Output();
   void              Run();
  };
string Client::Output() {return __FUNCTION__;}
void Client::Run()
  {
   Print("The client requests to create a new concrete builder");
   Builder* builder=new ConcreteBuilder;
   Print("The client requests to create a director and give him the builder");
   Director director(builder);
   Print("The client requests the director to perform the construction");
   director.Construct();
   Print("The client requests the builder to return the result product");
   Product* product=builder.GetResult();
   Print("The client is requests the product to describe itself");
   product.Show();
  }
}
Factory Method
The Factory Method pattern is another creational design pattern that defines the interface to create the object and gives the permission for subclasses to decide the class to instantiate, in addition to that it lets a class postpone instantiation to subclasses. It is also known as Virtual Constructor.
What does the pattern do?
The following is a graph for the structure of the Factory Method pattern:

As we can see in the previous graph we have the following:
- The (Product) defines the interface of objects created by the factory method.
- The (ConcreteProduct) is responsible for implementing the Product interface.
- The (Creator) that returns the product object after the declaration of the factory method, can provide an implementation as a default for the factory method which returns the default object of the ConcreteProduct, and it may create an object of the product by calling the factory method.
- The (ConcreteCreator) returns the ConcreteProduct instance by overriding the factory method.
What design problem does it solve?
We can use this Factory method pattern when:
- We have a class that can not predict what is the class of objects that must be created.
- The class desires to specify the objects that are created by its subclasses.
- One of several helper subclasses is delegated as a responsible by classes and we need to know which helper subclass is the delegate.
How we can use it in MQL5?
We can code the structure of the Factory method in mql5 as an include file the same as the following steps
By using the namespace we will declare FactoryMethod to list the function of the structure inside
namespace FactoryMethod Creating the Product object interface by the Factory Method
interface Product
  {
  };
Creating the ConcreteProduct class and implementing the product interface
class ConcreteProduct:public Product
  {
public:
                     ConcreteProduct(void);
  };
ConcreteProduct::ConcreteProduct(void)
  {
   "The concrete product: ",&this," created");
  }
Creating the Creator class, returning the object of the product type, implementing to return the concrete product, creating the product object
class Creator
  {
public:
   virtual Product*  FactoryMethod(void)=0;
   void              AnOperation(void);
                    ~Creator(void);
protected:
   Product*          product;
  };
Creator::~Creator(void) {delete product;}
void Creator::AnOperation(void)
  {
   Print("The creator runs its operation");
   delete product;
   product=FactoryMethod();
   Print("The creator saved the product that received from the virtual factory method");
  }
Running the factory method, creating, and returning a new concrete product
class ConcreteCreator:public Creator
  {
public:
   Product*          FactoryMethod(void);
  };
Product* ConcreteCreator::FactoryMethod(void)
  {
   Print("The creator runs the factory method");
   Print("The concrete creator creates and returns the new concrete product");
   return new ConcreteProduct;
  }
Creating the Client class with two public members Output and Run
class Client
  {
public:
   string            Output(void);
   void              Run(void);
  };
string Client::Output(void) {return __FUNCTION__;}
Running the Client class to request to create the creator, return the product, run the operation of the creator
void Client::Run(void)
  {
   Print("requests to make the creator");
   ConcreteCreator creator;
   Print("requests the creator to run its factory method to return the product");
   Product* product=creator.FactoryMethod();
   Print("requests the creator to run its operation");
   creator.AnOperation();
   delete product;
  }
The following is the full code in one block to provide the structure of the Factory Method
namespace FactoryMethod
{
interface Product
  {
  };
class ConcreteProduct:public Product
  {
public:
                     ConcreteProduct(void);
  };
ConcreteProduct::ConcreteProduct(void)
  {
   Print("The concrete product: ",&this," created");
  }
class Creator
  {
public:
   virtual Product*  FactoryMethod(void)=0;
   void              AnOperation(void);
                    ~Creator(void);
protected:
   Product*          product;
  };
Creator::~Creator(void) {delete product;}
void Creator::AnOperation(void)
  {
   Print("The creator runs its operation");
   delete product;
   product=FactoryMethod();
   Print("The creator saved the product that received from the virtual factory method");
  }
class ConcreteCreator:public Creator
  {
public:
   Product*          FactoryMethod(void);
  };
Product* ConcreteCreator::FactoryMethod(void)
  {
   Print("The creator runs the factory method");
   Print("The concrete creator creates and returns the new concrete product");
   return new ConcreteProduct;
  }
class Client
  {
public:
   string            Output(void);
   void              Run(void);
  };
string Client::Output(void) {return __FUNCTION__;}
void Client::Run(void)
  {
   Print("requests to make the creator");
   ConcreteCreator creator;
   Print("requests the creator to run its factory method to return the product");
   Product* product=creator.FactoryMethod();
   Print("requests the creator to run its operation");
   creator.AnOperation();
   delete product;
  }
}
Prototype
The Prototype is another creational pattern that uses a prototype instance to create specified types of objects and then copies this prototype to create new objects.
What does the pattern do?
The following is the graph of the structure of the Prototype design pattern:

As we can see in the previous graph we have the following:
- The (Prototype): it creates the interface that can be able to clone itself.
- The (ConcretePrototype): it is cloning itself through implementing the operation for that.
- The (Client): it asks the prototype to clone itself to create a new object.
What design problem does it solve?
We can use this Prototype pattern when:
- The classes that we need to instantiate or create are specified at run-time.
- We need to avoid building the factories class hierarchy that can be parallel to the products class hierarchy.
- We have class instances that can have one of only a few different state combinations.
So, we can say that the consequences of applying the Prototype pattern are the same as the following:
- It gives us the ability to add or remove products at runtime easily because the client has the ability to install and remove prototypes.
- It gives us the ability to specify new objects by specifying values for the object's variables.
- It gives us the ability to specify new objects through structure variation.
- Instead of making a new object the Prototype clones a prototype which means subclassing reduction.
- It helps that the application can configure with classes dynamically.
How we can use it in MQL5?
The following is a method to write the code of the Prototype pattern structure.
Using the namespace keyword to declare the Prototype and list all functions within
namespace Prototype Creating the Prototype class or interface to clone itself
class Prototype
  {
public:
   virtual Prototype* Clone(void)=0;
                     Prototype(int);
protected:
   int               id;
  };
Prototype::Prototype(int i):id(i)
  {
   Print("The prototype ",&this,", id - ",id," is created");
  }
Creating the concretePrototype1, and 2 implements the operation to clone themselves
class ConcretePrototype1:public Prototype
  {
public:
                     ConcretePrototype1(int);
   Prototype*        Clone(void);
  };
ConcretePrototype1::ConcretePrototype1(int i):
   Prototype(i)
  {
   Print("The concrete prototype 1 - ",&this,", id - ",id," is created");
  }
Prototype* ConcretePrototype1::Clone(void)
  {
   Print("The cloning concrete prototype 1 - ",&this,", id - ",id);
   return new ConcretePrototype1(id);
  }
class ConcretePrototype2:public Prototype
  {
public:
                     ConcretePrototype2(int);
   Prototype*        Clone(void);
  };
ConcretePrototype2::ConcretePrototype2(int i):
   Prototype(i)
  {
   Print("The concrete prototype 2 - ",&this,", id - ",id," is created");
  }
Prototype* ConcretePrototype2::Clone(void)
  {
   Print("The cloning concrete prototype 2 - ",&this,", id - ",id);
   return new ConcretePrototype2(id);
  }
Creating the Client class to create a new object through cloning the Prototype to itself
class Client
  {
public:
   string            Output(void);
   void              Run(void);
  };
string Client::Output(void) {return __FUNCTION__;}
Running the Client that asks the Prototype to clone itself
void Client::Run(void)
  {
   Prototype* prototype;
   Prototype* clone;
   Print("requests to create the concrete prototype 1 with id 1");
   prototype=new ConcretePrototype1(1);
   Print("requests the prototype ",prototype," to create its clone");
   clone=prototype.Clone();
   delete prototype;
   delete clone;
   Print("requests to create the concrete prototype 2 with id 2");
   prototype=new ConcretePrototype2(2);
   Print("requests the prototype ",prototype," to create its clone");
   clone=prototype.Clone();
   delete prototype;
   delete clone;
  }
So, the following is the full code of the structure of the Prototype pattern in one block
namespace Prototype
{
class Prototype
  {
public:
   virtual Prototype* Clone(void)=0;
                     Prototype(int);
protected:
   int               id;
  };
Prototype::Prototype(int i):id(i)
  {
   Print("The prototype ",&this,", id - ",id," is created");
  }
class ConcretePrototype1:public Prototype
  {
public:
                     ConcretePrototype1(int);
   Prototype*        Clone(void);
  };
ConcretePrototype1::ConcretePrototype1(int i):
   Prototype(i)
  {
   Print("The concrete prototype 1 - ",&this,", id - ",id," is created");
  }
Prototype* ConcretePrototype1::Clone(void)
  {
   Print("The cloning concrete prototype 1 - ",&this,", id - ",id);
   return new ConcretePrototype1(id);
  }
class ConcretePrototype2:public Prototype
  {
public:
                     ConcretePrototype2(int);
   Prototype*        Clone(void);
  };
ConcretePrototype2::ConcretePrototype2(int i):
   Prototype(i)
  {
   Print("The concrete prototype 2 - ",&this,", id - ",id," is created");
  }
Prototype* ConcretePrototype2::Clone(void)
  {
   Print("The cloning concrete prototype 2 - ",&this,", id - ",id);
   return new ConcretePrototype2(id);
  }
class Client
  {
public:
   string            Output(void);
   void              Run(void);
  };
string Client::Output(void) {return __FUNCTION__;}
void Client::Run(void)
  {
   Prototype* prototype;
   Prototype* clone;
   Print("requests to create the concrete prototype 1 with id 1");
   prototype=new ConcretePrototype1(1);
   Print("requests the prototype ",prototype," to create its clone");
   clone=prototype.Clone();
   delete prototype;
   delete clone;
   Print("requests to create the concrete prototype 2 with id 2");
   prototype=new ConcretePrototype2(2);
   Print("requests the prototype ",prototype," to create its clone");
   clone=prototype.Clone();
   delete prototype;
   delete clone;
  }
}
Singleton
The main purpose of this pattern is to make sure that there is only one instance of a class and access to it by providing a global point.
What does the pattern do?
The following is a graph of the structure of the Singleton design pattern:

As we can see in the previous graph we have the (Singleton) that defines the operation of the instance that gives the permission for its instance to be accessed by clients. This Singleton pattern can be responsible also for creating its own single instance.
What design problem does it solve?
This Singleton design pattern that can be used when:
- It is obligatory that there is only one class instance and it has to be accessible to clients through the known access point.
- We need this as an extended single instance by subclassing and it can be used without modification.
The following are some examples of consequences that can be produced when applying the Singleton pattern:
- Because of the encapsulation from the class to its single instance in this pattern, this lets the access to this instance be controlled.
- When applying the Singleton pattern will be more flexible than using class operation.
How we can use it in MQL5?
The following is about steps to code the structure of the Singleton pattern in MQL5
Using the namespace keyword to declare the Singleton t list all functions within
namespace Singleton Creating the Singleton class
class Singleton
  {
public:
   static Singleton* Instance(void);
   void              SingletonOperation(void);
   string            GetSingletonData(void);
protected:
                     Singleton(void);
   static Singleton* uniqueInstance;
   string            singletonData;
  };
Singleton* Singleton::uniqueInstance=NULL;
Creating the Singleton object
Singleton::Singleton(void)
  {
   Print("The singleton ",&this," is created");
  }
Running the Singleton operation and setting its data
void Singleton::SingletonOperation(void)
  {
   Print("runs the singleton operation > setting singleton data");
   singletonData="singleton data";
  }
Reading and getting the Singleton data
string Singleton::GetSingletonData(void)
  {
   Print("reads and returns the singleton data");
   return singletonData;
  }
Getting or returning the unique instance
Singleton* Singleton::Instance(void)
  {
   Print("The singleton instance method runs");
   if(!CheckPointer(uniqueInstance))
     {
      Print("The unique instance of the singleton is an empty");
      uniqueInstance=new Singleton;
      Print("singleton assigned to unique instance");
     }
   Print("The unique instance contains singleton: ",uniqueInstance);
   Print("returns the unique instance ",uniqueInstance," of the singleton");
   return uniqueInstance;
  }
Create the Client class
class Client
  {
public:
   string            Output(void);
   void              Run(void);
  };
string Client::Output(void) {return __FUNCTION__;}
The Client gets access to the Singleton through the instance
void Client::Run(void)
  {
   Print("requests the singleton instance 1");
   Singleton* instance1=Singleton::Instance();
   Print("requests the singleton instance 2");
   Singleton* instance2=Singleton::Instance();
   string compareInstances=
      (instance1==instance2)?
      "instances 1 and instance 2 are the same objects":
      "instances are different objects";
   Print(compareInstances);
   Print("requests singleton operation on the instance 1");
   instance1.SingletonOperation();
   Print("requests singleton data by the singleton instance 2");
   string singletonData=instance2.GetSingletonData();
   Print(singletonData);
   delete instance1;
  }
The following is the full code of this Singleton pattern in one block
namespace Singleton
{
class Singleton
  {
public:
   static Singleton* Instance(void);
   void              SingletonOperation(void);
   string            GetSingletonData(void);
protected:
                     Singleton(void);
   static Singleton* uniqueInstance;
   string            singletonData;
  };
Singleton* Singleton::uniqueInstance=NULL;
Singleton::Singleton(void)
  {
   Print("The singleton ",&this," is created");
  }
void Singleton::SingletonOperation(void)
  {
   Print("runs the singleton operation > setting singleton data");
   singletonData="singleton data";
  }
string Singleton::GetSingletonData(void)
  {
   Print("reads and returns the singleton data");
   return singletonData;
  }
Singleton* Singleton::Instance(void)
  {
   Print("The singleton instance method runs");
   if(!CheckPointer(uniqueInstance))
     {
      Print("The unique instance of the singleton is an empty");
      uniqueInstance=new Singleton;
      Print("singleton assigned to unique instance");
     }
   Print("The unique instance contains singleton: ",uniqueInstance);
   Print("returns the unique instance ",uniqueInstance," of the singleton");
   return uniqueInstance;
  }
class Client
  {
public:
   string            Output(void);
   void              Run(void);
  };
string Client::Output(void) {return __FUNCTION__;}
void Client::Run(void)
  {
   Print("requests the singleton instance 1");
   Singleton* instance1=Singleton::Instance();
   Print("requests the singleton instance 2");
   Singleton* instance2=Singleton::Instance();
   string compareInstances=
      (instance1==instance2)?
      "instances 1 and instance 2 are the same objects":
      "instances are different objects";
   Print(compareInstances);
   Print("requests singleton operation on the instance 1");
   instance1.SingletonOperation();
   Print("requests singleton data by the singleton instance 2");
   string singletonData=instance2.GetSingletonData();
   Print(singletonData);
   delete instance1;
  }
}
Conclusion
At the end of this article, we provided simple information about the Design Patterns topic and learned about the Creational patterns type which is responsible for helping us to create objects that can be reusable, extended, and tested, or in other words patterns that help us to write a clean code.
We identified the following creational patterns:
- Abstract Factory
- Builder
- Factory Method
- Prototype
- Singleton
We learned about the previous creational design patterns after identifying what design patterns, how much they can be useful in our software when we write Object-Oriented software, what structures these design patterns are, and what software or design problems can be solved by design patterns.
The design patterns topic is an important in software development and your good understanding and use concepts of will help you a lot in your software development and solve a lot of issues that can appear in your code. So, I recommend reading and learning more about this important topic to able to overcome any problems that may be solved by one of these Design Patterns inside reinventing the Wheel.
The following are resources that can be used to learn more:
- Design Patterns - Elements of Reusable Object-Oriented Software by Eric Gamma, Richard Helm, Ralph Johnson, and John Vlissides
- Design Patterns for Dummies by Steve Holzner
- Head First Design Patterns by Eric Freeman, Elisabeth Robson, Bert Bates, and Kathy Sierra
I hope that you found this article useful and you learned a new thing about the Design patterns topic I hope also that this article encourages you to learn more about this interesting topic which can be a game changer in your code. It is very important also to learn first about the Object-Oriented-Programming (OOP) because it will you to well understand the Design patterns topic and you can read my previous article understanding MQL5 Object-Oriented Programming (OOP) about that. If you want also to read more about how you can design trading systems based on the most popular technical indicators in MQL5 and other topics about MQL5 you can read more about that through my publications page and you will find many articles about that and I hope that you find them useful for you.
Warning: All rights to these materials are reserved by MetaQuotes Ltd. Copying or reprinting of these materials in whole or in part is prohibited.
This article was written by a user of the site and reflects their personal views. MetaQuotes Ltd is not responsible for the accuracy of the information presented, nor for any consequences resulting from the use of the solutions, strategies or recommendations described.

- Free trading apps
- Over 8,000 signals for copying
- Economic news for exploring financial markets
You agree to website policy and terms of use
I thought the translators made a little mistake in the subsection about abstract factory, but no - the author himself.
Какую проблему проектирования он решает?
So, we can use this template when:
Examples of using such an Abstract Factory:
In the English source code it is:
What design problem does it solve?
So, we can use this pattern in the case of the following:
I'm going to be a little bit more grumpy...
To be precise in terminology, I will look at the English source of the article. So, the author writes "How can we use it in MQL5?" about each template. It should be noted here that MQL5 is an applied specialised language. So what is it? Do we really learn from the material how to use templates in MQL5? No! We see that we just see the implementation of a template in MQL5. Imho, since it is a template, we should first describe it in pseudocode, and only then in MQL5. Ideally, it would be interesting to see practical examples of using design patterns in MQL5. I don't know, maybe I'm getting ahead of myself and the author plans to consider each template in a separate opus. But for now we have what we have....
As someone who knows MQL and also knows and uses OOP at some degrees, but has no idea about design patterns, I have to say I did not understand what you explained.
I did not read it fully, because whats the point of reading paragraph after paragraph if I didn't understand any of them.
The way I'm going to continue learning from this article would be to stick to your code examples only, and try to understand the concept from that.
I wrote this purely to share a feedback.
Thanks again.
I don't understand this method.
Why can't we compare if these 2 pointers are the same and just use:
if (factory != ap) factory = ap;
Also, the documentation says
and factory is not of a simple type.