软件开发和 MQL5 中的设计范式(第一部分):创建范式

概述
在编程领域,我们有一个重要的标的物,那就是解决问题,但我们也许会在同一个软件、或不同软件的不同领域面临相同的问题。我们想象一下,每次我们面对这种重复问题时,我们都要采取相同步骤和时间来解决它,这种方式意味着我们要不断重新发明轮子。毫无疑问,这是一种低能的方式,因为它消耗了大量的时间和精力。那么,在这种情况下,以下问题至关重要:我们可否采用一种方法来节省这种低效的时间和精力?
答案是肯定的,有一些方法可用来解决具体问题,或者说范式,即设计范式。设计范式对于应用 DRY(不要重复自己)的概念非常有帮助,这意味着我们可以避免重新发明轮子。如果我们有一个问题,且我们已有一个可以有效解决它的范式,我们就理应用这个范式来解决它,即可节省时间和精力。
设计范式的主题是,我们将基于其目的分享其中一种类型,我们将尝试提供一个在设计 MQL5 软件时如何使用它们的实施指南。
我们将涵盖以下主题:
- 设计范式定义
- 创建(Creational)范式
- 抽象工厂(Abstract Factory)
- 建造器(Builder)
- 工厂方法(Factory Method)
- 原型(Prototype)
- 单例(Singleton)
- 结束语
如同我们将要看到的那样,设计范式是一个非常重要的主题,如果您作为软件开发人员,需要提高绩效和生产力,则必须要学习和运用。我们将尝试尽可能简化这个有趣且重要主题的概念,以便初学者能更好地理解。如果需要,我们还会提供有关如何在 MQL5 中使用这些范式的简单示例,为任何需要尝试学习这一重要主题的人提供实施指南。
我们将尝试总结这些范式的每种类型,并尽可能多地切中要害,且不会忽略缺了它就会令事情难以理解的东西。如果您是这个领域的新人,我希望您会发现这篇文章十分有见地,并学到编程领域新的东西。
值得一提的重点是,您必须先领会面向对象主题,才能理解您将在本文中阅读的内容。如果您想了解面向对象编程(OOP),您可以去阅读理解 MQL5 面向对象编程(OOP)的文章。
设计范式定义
在这一部分中,我们将见识设计范式。它们只是一些范式,可在软件开发中作为具体的、可描述和可重复问题的解决方案。每个设计范式都专注于一个具体的面向对象问题。这些范式可以在主流的面向对象编程语言(如 C++)中轻松实现。我们可以说,当我们谈论设计范式时,该范式有四个重要元素,它们与以下内容相同:
- 范式名称:指可用于解决具体的、可描述问题的范式名称。
- 问题:指我们可能面临的可描述的、重复的、具体的问题。
- 解决方案:指所描述的解决方案,以解决具体描述的问题。
- 后果:指应用范式解决问题之后的结果。
基于目的,主要有三种设计范式类别,如下所示:
- 创建范式:负责通过创建、组合和表达对象来帮助创建独立系统。
- 结构范式:负责使用创建的对象来形成更大的结构。
- 行为范式:负责对象之间的沟通。
创建(Creational)范式
在这一部分中,我们将讲解有关创建设计范式的信息,以及它们如何帮助我们创建软件。我们之前提到过这种类型的设计范式有助于通过创建、组合和表达对象来创建一个独立的系统。这些范式不仅有助于有效地解决问题,还有助于以有效的方式构建您的软件,确保您的软件是可重用的、可扩展的,更好更轻松地测试,据此帮助就能编写干净的代码。
创建范式的类都采用继承概念,故各种类都可作为一个实例,而创建范式对象实例的任务则交给另一个对象。当软件更多地关注对象组合远超类继承时,就会令创建范式变得更加重要。
我们可以说创建范式有两个反复出现的主题:
- 它们用到封装的概念来把握系统可以使用的具体类。
- 它们把创建类实例的方法组合在一起,并加以隐藏。
除了创建之时,创建范式还有助于在创建什么、创建谁、以及如何创建、等方面灵活应用。
它们还有助于抽象实例化过程,因为它们允许我们在不重复相同实现的情况下创建对象,这有助于令我们的代码更加灵活和简单。
在本文中,我们将为创建范式提供下范式:
- 抽象工厂:它有助于为我们提供一个接口,在创建对象家族时,无需提及它们的类。
- 建造器:它有助于创建复杂的对象,并将对象的构造与其表达分离,并有助于按照相同的建造过程创建同一对象的不同表达。
- 工厂方法:它有助于定义创建对象的接口,并允许由其子类决定所要实例化的类。
- 原型:它有助于使用原型实例创建指定的对象类型,以及复制该原型来创建新对象。
- 单例:它有助于确保该类只有一个实例,然后给定一个全局访问点。
我们将详细学习前面的范式,并学习如何通过以下方法在 MQL5 软件中应用和使用它们:
- 范式有什么作用?
- 它解决了什么设计问题?
- 我们如何在 MQL5 中使用它?
抽象工厂(Abstract Factory)
在这一部分中,我们将看看其中一种创造范式,即抽象工厂。正如我们将在抽象工厂范式中所见,工厂和产品是该范式中的主要参与方,它可帮助我们指导如何创建相关产品对象家族,而无需类的直接实例化。当产品对象的数量和一般类型是恒定的,但具体产品家族有所不同时,就可以使用它。
范式有什么作用?
该范式提供的接口,可在不指定其所属类的情况下创建对象家族,而创建的对象既可是相关的,也可以是独立的。它也被称为套件。下面是可以解释该范式如何工作及其作用的示意图。
")
正如我们在上图中看到的,当我们如上个示例一样,面对来自许多不同的生产者或厂家生产的许多相似项目时,我们就会发现,如果我们不使用抽象工厂范式,未来就很难再进行更改。而采用这种范式,我们可以轻松顺利地做到这一点。
在该该式中,我们要做的就是定义一个抽象工厂类,该类声明创建抽象产品的操作接口。我们还为每个工厂提供了一个抽象类,其中包含两个产品的子类,每个工厂将根据客户端的调用返回其产品。
它解决了什么设计问题?
如此这般,我们能在以下情况下使用该范式:
- 我们需要一个独立的系统。
- 我们需要一个配置系统,其中包含众多产品家族之一。
- 我们需要把相关的产品对象家族与其设计搭配,并强制执行此约束。
- 我们只需要揭示所提供类的接口,而非它们的实现。
如此,我们仅基于以下示例就可以说应用该范式是有益的:
- 它有助于执行具体类的隔离,因为它有助于控制所创建的对象类。这可以通过职责封装和过程来创建对象来完成,客户端与实现类隔离,经由客户端的抽象接口能够操实例,并且在具体工厂的实现中,产品的类名是隔离的,它们不会出现在客户端代码之中。
- 它令产品家族易于更换。
我们如何在 MQL5 中使用它?
在这一部分中,我们将看到如何在包含文件中针对抽象工厂的结构进行编码,值得一提的是,于此我们是对结构进行编码,但您可以基于交易字段编写适合的代码。
以下是通过按照步骤对结构进行编码:
通过使用 namespace 关键字,我们声明了 AbstractFactory 函数来列出我们需要的所有函数
namespace AbstractFactory 通过使用 interface 关键字,我们将声明 AbstractProductA 函数
interface AbstractProductA
  {
  };
通过使用 interface 关键字,我们将在函数主体中使用 void Interact 变量声明 AbstractProductB 函数
interface AbstractProductB
  {
   void Interact(AbstractProductA*);
  };
声明创建抽象产品操作的接口
interface AbstractFactory
  {
   AbstractProductA* CreateProductA(void);
   AbstractProductB* CreateProductB(void);
  };
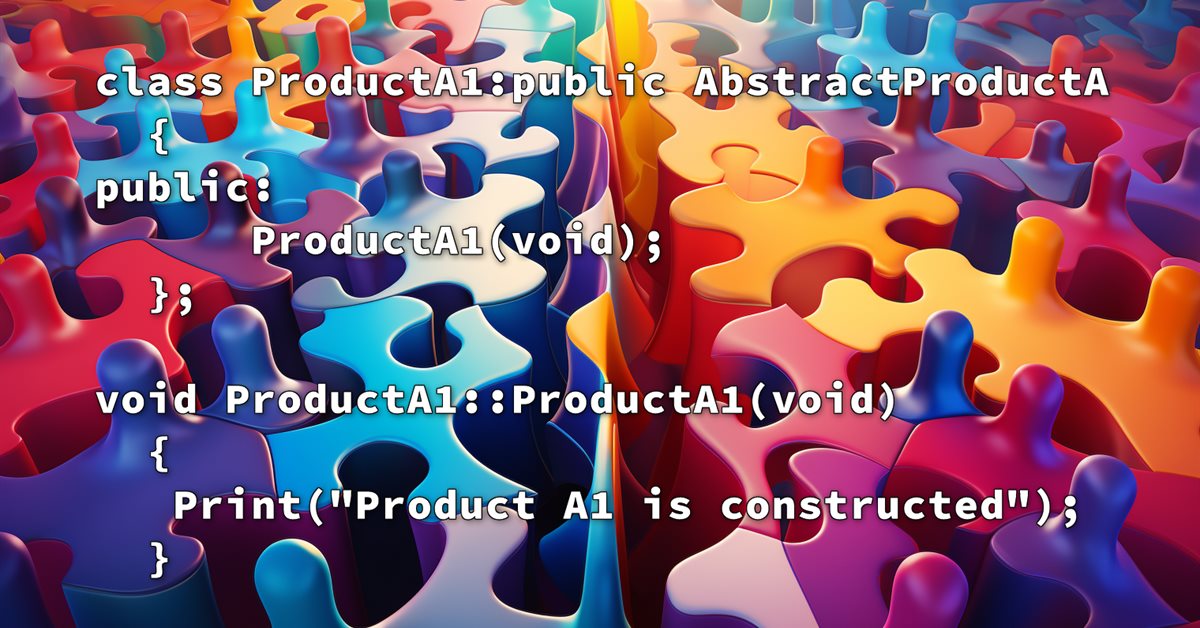
再通过抽象的产品接口,定义需要由混凝土工厂创建的产品对象,构造产品 A1 和 A2,及其实现
class ProductA1:public AbstractProductA
  {
public:
                     ProductA1(void);
  };
void ProductA1::ProductA1(void)
{
Print("Product A1 is constructed");
}
class ProductA2:public AbstractProductA
  {
public:
                     ProductA2(void);
  };
void ProductA2::ProductA2(void)
{
Print("Product A2 is constructed");
}
构造具体产品 B1 和 B2,然后由 abstractProductA 进行交互
class ProductB1:public AbstractProductB
  {
public:
                     ProductB1(void);
   void              Interact(AbstractProductA*);
  };
void ProductB1::ProductB1(void)
{
Print("Product B1 is constructed");
}
void ProductB1::Interact(AbstractProductA*src)
  {
   Print("Product B1: ",&this," is interacting with Product A: ",src);
  }
class ProductB2:public AbstractProductB
  {
public:
                     ProductB2(void);
   void              Interact(AbstractProductA*);
  };
void ProductB2::ProductB2(void)
{
Print("Product B2 is constructed");
}
void ProductB2::Interact(AbstractProductA*src)
  {
   Print("Product B2: ",&this," is interacting with Product A: ",src);
  }
声明两个混凝土工厂 1、2,制造并返回产品 A1、A2、B1、B2
class Factory1:public AbstractFactory
  {
public:
                     Factory1(void);
   AbstractProductA* CreateProductA(void);
   AbstractProductB* CreateProductB(void);
  };
void Factory1::Factory1(void)
  {
   Print("Factory 1: ",&this," is constructed");
  }
AbstractProductA* Factory1::CreateProductA(void)
  {
   Print("Factory 1 creates and returns Product A1");
   return new ProductA1;
  }
AbstractProductB* Factory1::CreateProductB(void)
  {
   Print("Factory 1 creates and returns Product B1");
   return new ProductB1;
  }
class Factory2:public AbstractFactory
  {
public:
                     Factory2(void);
   AbstractProductA* CreateProductA(void);
   AbstractProductB* CreateProductB(void);
  };
void Factory2::Factory2(void)
  {
   Print("Factory 2: ",&this," is constructed");
  }
AbstractProductA* Factory2::CreateProductA(void)
  {
   Print("Factory 2 creates and returns Product A2");
   return new ProductA2;
  }
AbstractProductB* Factory2::CreateProductB(void)
  {
   Print("Factory 2 creates and returns Product B2");
   return new ProductB2;
  }
声明 FactoryClient 类,并使用由抽象工厂和抽象产品声明的接口。
class FactoryClient
  {
public:
   void              Run(void);
   void              Switch(AbstractFactory*);
                     FactoryClient(AbstractFactory*);
                    ~FactoryClient(void);
protected:
   AbstractProductA* apa;
   AbstractProductB* apb;
   AbstractFactory*  factory;
   void              Delete(void);
  };
void FactoryClient::FactoryClient(AbstractFactory* af)
  {
   Print("Factory client created and received Abstract Factory ",af);
   Print("Factory client requests to accept/switch the factories");
   Switch(af);
  }
void FactoryClient::~FactoryClient(void)
  {
   Delete();
  }
void FactoryClient::Run(void)
  {
   Print("Factory client runs the abstract Product B");
   apb.Interact(apa);
  }
void FactoryClient::Delete(void)
  {
   delete apa;
   delete apb;
   delete factory;
  }
void FactoryClient::Switch(AbstractFactory *af)
  {
   string sFactory;
   StringConcatenate(sFactory,sFactory,factory);
   int iFactory=(int)StringToInteger(sFactory);
   if(iFactory>0)
     {
      Print("Factory client switches the old factory ",factory," to the new one ",af);
     }
   else
     {
      Print("Factory client accepts the new factory ",af);
     }
   Delete();
   factory=af;
   Print("Factory client saved the new factory");
   Print("Factory client requests its new factory to create the Product A");
   apa=factory.CreateProductA();
   Print("Factory client requests its new factory to create the Product B");
   apb=factory.CreateProductB();
  }
定义客户类,以及运行范式
class Client
  {
public:
   string            Output(void);
   void              Run(void);
  };
string Client::Output(void) {return __FUNCTION__;}
void Client::Run(void)
  {
   Print("The client requests to create the Factory 1");
   Print("The client requests to create the Factory client");
   Print("The client requests the Factory client to manage the Factory 1");
   FactoryClient client(new Factory1);
   Print("The client requests the Factory client to operate");
   client.Run();
   Print("The client requests to create the new factory 2 and asks the factory client to switch factories");
   client.Switch(new Factory2);
   Print("The client requests the Factory client to run again");
   client.Run();
  }
如此,我们可以在一个模块中看到完整的代码,如下所示:
namespace AbstractFactory
{
interface AbstractProductA
  {
  };
interface AbstractProductB
  {
   void Interact(AbstractProductA*);
  };
interface AbstractFactory
  {
   AbstractProductA* CreateProductA(void);
   AbstractProductB* CreateProductB(void);
  };
class ProductA1:public AbstractProductA
  {
public:
                     ProductA1(void);
  };
void ProductA1::ProductA1(void)
{
Print("Product A1 is constructed");
}
class ProductA2:public AbstractProductA
  {
public:
                     ProductA2(void);
  };
void ProductA2::ProductA2(void)
{
Print("Product A2 is constructed");
}
class ProductB1:public AbstractProductB
  {
public:
                     ProductB1(void);
   void              Interact(AbstractProductA*);
  };
void ProductB1::ProductB1(void)
{
Print("Product B1 is constructed");
}
void ProductB1::Interact(AbstractProductA*src)
  {
   Print("Product B1: ",&this," is interacting with Product A: ",src);
  }
class ProductB2:public AbstractProductB
  {
public:
                     ProductB2(void);
   void              Interact(AbstractProductA*);
  };
void ProductB2::ProductB2(void)
{
Print("Product B2 is constructed");
}
void ProductB2::Interact(AbstractProductA*src)
  {
   Print("Product B2: ",&this," is interacting with Product A: ",src);
  }
class Factory1:public AbstractFactory
  {
public:
                     Factory1(void);
   AbstractProductA* CreateProductA(void);
   AbstractProductB* CreateProductB(void);
  };
void Factory1::Factory1(void)
  {
   Print("Factory 1: ",&this," is constructed");
  }
AbstractProductA* Factory1::CreateProductA(void)
  {
   Print("Factory 1 creates and returns Product A1");
   return new ProductA1;
  }
AbstractProductB* Factory1::CreateProductB(void)
  {
   Print("Factory 1 creates and returns Product B1");
   return new ProductB1;
  }
class Factory2:public AbstractFactory
  {
public:
                     Factory2(void);
   AbstractProductA* CreateProductA(void);
   AbstractProductB* CreateProductB(void);
  };
void Factory2::Factory2(void)
  {
   Print("Factory 2: ",&this," is constructed");
  }
AbstractProductA* Factory2::CreateProductA(void)
  {
   Print("Factory 2 creates and returns Product A2");
   return new ProductA2;
  }
AbstractProductB* Factory2::CreateProductB(void)
  {
   Print("Factory 2 creates and returns Product B2");
   return new ProductB2;
  }
class FactoryClient
  {
public:
   void              Run(void);
   void              Switch(AbstractFactory*);
                     FactoryClient(AbstractFactory*);
                    ~FactoryClient(void);
protected:
   AbstractProductA* apa;
   AbstractProductB* apb;
   AbstractFactory*  factory;
   void              Delete(void);
  };
void FactoryClient::FactoryClient(AbstractFactory* af)
  {
   Print("Factory client created and received Abstract Factory ",af);
   Print("Factory client requests to accept/switch the factories");
   Switch(af);
  }
void FactoryClient::~FactoryClient(void)
  {
   Delete();
  }
void FactoryClient::Run(void)
  {
   Print("Factory client runs the abstract Product B");
   apb.Interact(apa);
  }
void FactoryClient::Delete(void)
  {
   delete apa;
   delete apb;
   delete factory;
  }
void FactoryClient::Switch(AbstractFactory *af)
  {
   string sFactory;
   StringConcatenate(sFactory,sFactory,factory);
   int iFactory=(int)StringToInteger(sFactory);
   if(iFactory>0)
     {
      Print("Factory client switches the old factory ",factory," to the new one ",af);
     }
   else
     {
      Print("Factory client accepts the new factory ",af);
     }
   Delete();
   factory=af;
   Print("Factory client saved the new factory");
   Print("Factory client requests its new factory to create the Product A");
   apa=factory.CreateProductA();
   Print("Factory client requests its new factory to create the Product B");
   apb=factory.CreateProductB();
  }
class Client
  {
public:
   string            Output(void);
   void              Run(void);
  };
string Client::Output(void) {return __FUNCTION__;}
void Client::Run(void)
  {
   Print("The client requests to create the Factory 1");
   Print("The client requests to create the Factory client");
   Print("The client requests the Factory client to manage the Factory 1");
   FactoryClient client(new Factory1);
   Print("The client requests the Factory client to operate");
   client.Run();
   Print("The client requests to create the new factory 2 and asks the factory client to switch factories");
   client.Switch(new Factory2);
   Print("The client requests the Factory client to run again");
   client.Run();
  }
}
建造器(Builder)
建造器范式是一种创建范式,当我们需要创建复杂对象,并将对象的构造与其表达分开时,可以使用它。这有助于通过相同的构造过程创建同一对象的不同表达形式。
范式有什么作用?
下图显示了这种创建范式的工作原理,展示了其结构:
")
正如我们所见,根据构建器的结构,我们的 Builder 拥有指定接口的构建器,可创建部分产品对象,Director 使用构建器的接口构造对象,ConcreteBuilder 可执行以下操作:
- 通过实现 Builder 的接口来构建和组装产品的部件
- 定义表达并跟踪它。
- 通过提供的接口来检索产品。
最后,我们拥有的产品,能表达正在构建的复杂对象。
它解决了什么设计问题?
当我们需要以下内容时,我们可以使用此范式:
- 一种独立的算法,用于创建对象各部件及其组件的复杂对象。
- 在构造过程中允许对象的不同表达。
如此,我们将得到以下内容
- 根据产品的内部表达,建造器范式允许我们更改它们。
- 通过封装构造方法和表达复杂对象,它有助于提高模块化,这意味着它能把构造和表达的代码隔离。
- 它赋予我们更准确地全程控制产品构造过程。
我们如何在 MQL5 中使用它?
在这一部分中,我们将介绍建造器范式结构的代码。
通过 namespace 函数,我们声明了 Builder 函数
namespace Builder 在函数的主体中,我们将创建如下 Product 类
class Product
  {
public:
   void              Add(string);
   void              Show();
protected:
   string            parts[];
  };
添加部件
void Product::Add(string part)
  {
   int size=ArraySize(parts);
   ArrayResize(parts,size+1);
   parts[size]=part;
   Print("The product added ",part," to itself");
  }
展示产品的所有部件
void Product::Add(string part)
  {
   int size=ArraySize(parts);
   ArrayResize(parts,size+1);
   parts[size]=part;
   Print("The product added ",part," to itself");
  }
创建 Builder 抽象接口,用以创建产品部件 A、B 和 C
interface Builder
  {
   void BuildPartA();
   void BuildPartB();
   void BuildPartC();
   Product* GetResult();
  };
使用 class 函数创建 Director 类,依据 Builder 接口构造对象
class Director
  {
public:
   void              Construct();
                     Director(Builder*);
                    ~Director();
protected:
   Builder*          builder;
  };
创建以下函数,接收 Builder 来构造 Director
void Director::Director(Builder *b)
  {
   builder=b;
   Print("The director created and received the builder ",b);
  }
void Director::~Director(void)
  {
   delete builder;
  }
由 Director 开始构建产品部件 A、B 和 C
void Director::Construct(void)
  {
   Print("The director started the construction");
   Print("The director requestd its builder to build the product parts");
   builder.BuildPartA();
   builder.BuildPartB();
   builder.BuildPartC();
   Print("The director's builder constructed the product from parts");
  }
创建 ConcreteBuilder 类,该类拥有三个公开成员(对应产品的各个部件),和一个受保护成员(对应产品),如下所示
class ConcreteBuilder:public Builder
  {
public:
   void              BuildPartA();
   void              BuildPartB();
   void              BuildPartC();
   Product*          GetResult();
protected:
   Product           product;
  };
把部件 A、B 和 C 添加到由建造器生成的产品当中,然后通过以下函数返回产品
void ConcreteBuilder::BuildPartA(void)
  {
   Print("The builder requests the product to add part A to itself");
   product.Add("part a");
   Print("The builder made the part of A and added it to the product");
  }
void ConcreteBuilder::BuildPartB(void)
  {
   Print("The builder requests the product to add part B to itself");
   product.Add("part b");
   Print("The builder made the part of B and added it to the product");
  }
void ConcreteBuilder::BuildPartC(void)
  {
   Print("The builder requests the product to add part C to itself");
   product.Add("part c");
   Print("The builder made part C and added it to the product");
  }
Product* ConcreteBuilder::GetResult(void)
  {
   Print("The builder is returns the product");
   return &product;
  }
创建 Client 类,拥有两个公开成员 Output 和 Run 函数,然后运行 Client
class Client
  {
public:
   string            Output();
   void              Run();
  };
string Client::Output() {return __FUNCTION__;}
void Client::Run()
  {
   Print("The client requests to create a new concrete builder");
   Builder* builder=new ConcreteBuilder;
   Print("The client requests to create a director and give him the builder");
   Director director(builder);
   Print("The client requests the director to perform the construction");
   director.Construct();
   Print("The client requests the builder to return the result product");
   Product* product=builder.GetResult();
   Print("The client is requests the product to describe itself");
   product.Show();
  }
那么,以下代码是 Builder 结构的一个完整模块代码
namespace Builder
{
class Product
  {
public:
   void              Add(string);
   void              Show();
protected:
   string            parts[];
  };
void Product::Add(string part)
  {
   int size=ArraySize(parts);
   ArrayResize(parts,size+1);
   parts[size]=part;
   Print("The product added ",part," to itself");
  }
void Product::Show(void)
  {
   Print("The product shows all parts that it is made of");
   int total=ArraySize(parts);
   for(int i=0; i<total; i++)
      Print(parts[i]);
  }
interface Builder
  {
   void BuildPartA();
   void BuildPartB();
   void BuildPartC();
   Product* GetResult();
  };
class Director
  {
public:
   void              Construct();
                     Director(Builder*);
                    ~Director();
protected:
   Builder*          builder;
  };
void Director::Director(Builder *b)
  {
   builder=b;
   Print("The director created and received the builder ",b);
  }
void Director::~Director(void)
  {
   delete builder;
  }
void Director::Construct(void)
  {
   Print("The director started the construction");
   Print("The director requestd its builder to build the product parts");
   builder.BuildPartA();
   builder.BuildPartB();
   builder.BuildPartC();
   Print("The director's builder constructed the product from parts");
  }
class ConcreteBuilder:public Builder
  {
public:
   void              BuildPartA();
   void              BuildPartB();
   void              BuildPartC();
   Product*          GetResult();
protected:
   Product           product;
  };
void ConcreteBuilder::BuildPartA(void)
  {
   Print("The builder requests the product to add part A to itself");
   product.Add("part a");
   Print("The builder made the part of A and added it to the product");
  }
void ConcreteBuilder::BuildPartB(void)
  {
   Print("The builder requests the product to add part B to itself");
   product.Add("part b");
   Print("The builder made the part of B and added it to the product");
  }
void ConcreteBuilder::BuildPartC(void)
  {
   Print("The builder requests the product to add part C to itself");
   product.Add("part c");
   Print("The builder made part C and added it to the product");
  }
Product* ConcreteBuilder::GetResult(void)
  {
   Print("The builder is returns the product");
   return &product;
  }
class Client
  {
public:
   string            Output();
   void              Run();
  };
string Client::Output() {return __FUNCTION__;}
void Client::Run()
  {
   Print("The client requests to create a new concrete builder");
   Builder* builder=new ConcreteBuilder;
   Print("The client requests to create a director and give him the builder");
   Director director(builder);
   Print("The client requests the director to perform the construction");
   director.Construct();
   Print("The client requests the builder to return the result product");
   Product* product=builder.GetResult();
   Print("The client is requests the product to describe itself");
   product.Show();
  }
}
工厂方法(Factory Method)
工厂方法范式是另一种创建设计范式,它定义了创建对象的接口,并允许子类决定要实例化的类,此外,它还允许类推迟对子类的实例化。它也被称为虚拟构造函数。
范式有什么作用?
下面是工厂方法范式结构的图形:
")
正如我们在上图中看到的,我们有以下内容:
- (Product)定义工厂方法创建对象的接口。
- (ConcreteProduct)负责实现 Product 接口。
- (Creator)返回工厂方法声明后的产品对象,可以为工厂方法提供默认实现,其返回 ConcreteProduct 的默认对象,且可通过调用工厂方法创建产品对象。
- (ConcreteCreator)返回由重写工厂方法生成的 ConcreteProduct 实例。
它解决了什么设计问题?
我们可使用工厂方法范式的场景如下:
- 我们有一个类,它无法预测哪个对象类必须创建。
- 该类希望指定由其子类创建对象。
- 若干辅助子类之一受委托作为类的负责人,我们需要知道哪个辅助子类是委托者。
我们如何在 MQL5 中使用它?
我们可以将 mql5 中工厂方法的结构编码为包含文件,步骤如下
通过使用 namespace,我们将声明 FactoryMethod, 列出内部结构的函数
namespace FactoryMethod 通过 Factory 方法创建 Product 对象接口
interface Product
  {
  };
创建 ConcreteProduct 类,并实现产品接口
class ConcreteProduct:public Product
  {
public:
                     ConcreteProduct(void);
  };
ConcreteProduct::ConcreteProduct(void)
  {
   "The concrete product: ",&this," created");
  }
创建 Creator 类,返回产品类型的对象,实现返回混凝土产品,创建的产品对象
class Creator
  {
public:
   virtual Product*  FactoryMethod(void)=0;
   void              AnOperation(void);
                    ~Creator(void);
protected:
   Product*          product;
  };
Creator::~Creator(void) {delete product;}
void Creator::AnOperation(void)
  {
   Print("The creator runs its operation");
   delete product;
   product=FactoryMethod();
   Print("The creator saved the product that received from the virtual factory method");
  }
运行工厂方法,创建和返回新的混凝土产品
class ConcreteCreator:public Creator
  {
public:
   Product*          FactoryMethod(void);
  };
Product* ConcreteCreator::FactoryMethod(void)
  {
   Print("The creator runs the factory method");
   Print("The concrete creator creates and returns the new concrete product");
   return new ConcreteProduct;
  }
创建 Client 类,拥有两个公开成员 Output 和 Run
class Client
  {
public:
   string            Output(void);
   void              Run(void);
  };
string Client::Output(void) {return __FUNCTION__;}
运行 Client 类请求创建 creator,返回产品,运行 creator 操作
void Client::Run(void)
  {
   Print("requests to make the creator");
   ConcreteCreator creator;
   Print("requests the creator to run its factory method to return the product");
   Product* product=creator.FactoryMethod();
   Print("requests the creator to run its operation");
   creator.AnOperation();
   delete product;
  }
下面是一个模块的完整代码,提供了工厂方法的结构
namespace FactoryMethod
{
interface Product
  {
  };
class ConcreteProduct:public Product
  {
public:
                     ConcreteProduct(void);
  };
ConcreteProduct::ConcreteProduct(void)
  {
   Print("The concrete product: ",&this," created");
  }
class Creator
  {
public:
   virtual Product*  FactoryMethod(void)=0;
   void              AnOperation(void);
                    ~Creator(void);
protected:
   Product*          product;
  };
Creator::~Creator(void) {delete product;}
void Creator::AnOperation(void)
  {
   Print("The creator runs its operation");
   delete product;
   product=FactoryMethod();
   Print("The creator saved the product that received from the virtual factory method");
  }
class ConcreteCreator:public Creator
  {
public:
   Product*          FactoryMethod(void);
  };
Product* ConcreteCreator::FactoryMethod(void)
  {
   Print("The creator runs the factory method");
   Print("The concrete creator creates and returns the new concrete product");
   return new ConcreteProduct;
  }
class Client
  {
public:
   string            Output(void);
   void              Run(void);
  };
string Client::Output(void) {return __FUNCTION__;}
void Client::Run(void)
  {
   Print("requests to make the creator");
   ConcreteCreator creator;
   Print("requests the creator to run its factory method to return the product");
   Product* product=creator.FactoryMethod();
   Print("requests the creator to run its operation");
   creator.AnOperation();
   delete product;
  }
}
原型(Prototype)
原型是另一种创建范式,它使用原型实例创建指定类型的对象,然后复制此原型,从而创建新对象。
范式有什么作用?
以下是原型设计范式的结构图:
")
正如我们在上图中看到的,我们有以下内容:
- (原型):它创建可以克隆自身的接口。
- (ConcretePrototype):它通过实现该操作来克隆自己。
- (Client):它要求原型克隆自身,从而创建新对象。
它解决了什么设计问题?
我们可以使用此原型范式的场景:
- 我们需要实例化或创建的类需在运行时指定。
- 我们需要避免构建层次结构与产品类平行的工厂类。
- 我们有类实例,它们只能有几种不同的状态组合之一。
如此,我们可以说应用原型范式的后果如下:
- 它令我们能够在运行时轻松添加或删除产品,因为客户端有能力安装和删除原型。
- 它令我们能够按指定对象变量的值来指定新对象。
- 它令我们能够通过结构变化来指定新对象。
- 替代创建一个新对象,Prototype 是克隆一个原型,这意味着子类减少。
- 这有助于应用程序动态配置类。
我们如何在 MQL5 中使用它?
下面是一个编写原型范式结构代码的方法。
使用 namespace 关键字声明 Prototype,并列出其中的所有函数
namespace Prototype 创建 Prototype 类或接口以克隆自身
class Prototype
  {
public:
   virtual Prototype* Clone(void)=0;
                     Prototype(int);
protected:
   int               id;
  };
Prototype::Prototype(int i):id(i)
  {
   Print("The prototype ",&this,", id - ",id," is created");
  }
创建 concretePrototype1 和 2,实现克隆自身的操作
class ConcretePrototype1:public Prototype
  {
public:
                     ConcretePrototype1(int);
   Prototype*        Clone(void);
  };
ConcretePrototype1::ConcretePrototype1(int i):
   Prototype(i)
  {
   Print("The concrete prototype 1 - ",&this,", id - ",id," is created");
  }
Prototype* ConcretePrototype1::Clone(void)
  {
   Print("The cloning concrete prototype 1 - ",&this,", id - ",id);
   return new ConcretePrototype1(id);
  }
class ConcretePrototype2:public Prototype
  {
public:
                     ConcretePrototype2(int);
   Prototype*        Clone(void);
  };
ConcretePrototype2::ConcretePrototype2(int i):
   Prototype(i)
  {
   Print("The concrete prototype 2 - ",&this,", id - ",id," is created");
  }
Prototype* ConcretePrototype2::Clone(void)
  {
   Print("The cloning concrete prototype 2 - ",&this,", id - ",id);
   return new ConcretePrototype2(id);
  }
创建 Client 类,通过将 Prototype 克隆到自身来创建新对象
class Client
  {
public:
   string            Output(void);
   void              Run(void);
  };
string Client::Output(void) {return __FUNCTION__;}
运行 Client,要求 Prototype 克隆自身
void Client::Run(void)
  {
   Prototype* prototype;
   Prototype* clone;
   Print("requests to create the concrete prototype 1 with id 1");
   prototype=new ConcretePrototype1(1);
   Print("requests the prototype ",prototype," to create its clone");
   clone=prototype.Clone();
   delete prototype;
   delete clone;
   Print("requests to create the concrete prototype 2 with id 2");
   prototype=new ConcretePrototype2(2);
   Print("requests the prototype ",prototype," to create its clone");
   clone=prototype.Clone();
   delete prototype;
   delete clone;
  }
如此,下面是一个模块中原型范式结构的完整代码
namespace Prototype
{
class Prototype
  {
public:
   virtual Prototype* Clone(void)=0;
                     Prototype(int);
protected:
   int               id;
  };
Prototype::Prototype(int i):id(i)
  {
   Print("The prototype ",&this,", id - ",id," is created");
  }
class ConcretePrototype1:public Prototype
  {
public:
                     ConcretePrototype1(int);
   Prototype*        Clone(void);
  };
ConcretePrototype1::ConcretePrototype1(int i):
   Prototype(i)
  {
   Print("The concrete prototype 1 - ",&this,", id - ",id," is created");
  }
Prototype* ConcretePrototype1::Clone(void)
  {
   Print("The cloning concrete prototype 1 - ",&this,", id - ",id);
   return new ConcretePrototype1(id);
  }
class ConcretePrototype2:public Prototype
  {
public:
                     ConcretePrototype2(int);
   Prototype*        Clone(void);
  };
ConcretePrototype2::ConcretePrototype2(int i):
   Prototype(i)
  {
   Print("The concrete prototype 2 - ",&this,", id - ",id," is created");
  }
Prototype* ConcretePrototype2::Clone(void)
  {
   Print("The cloning concrete prototype 2 - ",&this,", id - ",id);
   return new ConcretePrototype2(id);
  }
class Client
  {
public:
   string            Output(void);
   void              Run(void);
  };
string Client::Output(void) {return __FUNCTION__;}
void Client::Run(void)
  {
   Prototype* prototype;
   Prototype* clone;
   Print("requests to create the concrete prototype 1 with id 1");
   prototype=new ConcretePrototype1(1);
   Print("requests the prototype ",prototype," to create its clone");
   clone=prototype.Clone();
   delete prototype;
   delete clone;
   Print("requests to create the concrete prototype 2 with id 2");
   prototype=new ConcretePrototype2(2);
   Print("requests the prototype ",prototype," to create its clone");
   clone=prototype.Clone();
   delete prototype;
   delete clone;
  }
}
单例(Singleton)
该范式的主要目的是确保类只有一个实例,并通过提供全局点来访问它。
范式有什么作用?
下图是单例设计范式的结构图:
")
正如我们在上图中所加,我们有(Singleton)来定义实例的操作,该实例为客户端访问其实例提供了权限。单例范式还可以负责创建自身的单一实例。
它解决了什么设计问题?
这种单例设计范式可在以下场景使用:
- 必须只有一个类实例,并且客户端必须可以通过已知访问点访问该实例。
- 我们需要它作为子类的扩展单一实例,并且无需修改即可使用。
以下是应用单例范式时可能产生的后果的一些示例:
- 由于在该范式中从类到其单一实例的封装,因此可以控制对此实例的访问。
- 应用单例范式时,将比使用类操作更灵活。
我们如何在 MQL5 中使用它?
以下是在 MQL5 中对单例范式结构进行编码的步骤
使用 namespace 关键字声明 Singleton,并在其内列出所有函数
namespace Singleton 创建 Singleton 类
class Singleton
  {
public:
   static Singleton* Instance(void);
   void              SingletonOperation(void);
   string            GetSingletonData(void);
protected:
                     Singleton(void);
   static Singleton* uniqueInstance;
   string            singletonData;
  };
Singleton* Singleton::uniqueInstance=NULL;
创建 Singleton 对象
Singleton::Singleton(void)
  {
   Print("The singleton ",&this," is created");
  }
运行 Singleton 操作,并设置其数据
void Singleton::SingletonOperation(void)
  {
   Print("runs the singleton operation > setting singleton data");
   singletonData="singleton data";
  }
读取和获取单例数据
string Singleton::GetSingletonData(void)
  {
   Print("reads and returns the singleton data");
   return singletonData;
  }
获取或返回唯一实例
Singleton* Singleton::Instance(void)
  {
   Print("The singleton instance method runs");
   if(!CheckPointer(uniqueInstance))
     {
      Print("The unique instance of the singleton is an empty");
      uniqueInstance=new Singleton;
      Print("singleton assigned to unique instance");
     }
   Print("The unique instance contains singleton: ",uniqueInstance);
   Print("returns the unique instance ",uniqueInstance," of the singleton");
   return uniqueInstance;
  }
创建 Client 类
class Client
  {
public:
   string            Output(void);
   void              Run(void);
  };
string Client::Output(void) {return __FUNCTION__;}
客户端通过实例访问 Singleton
void Client::Run(void)
  {
   Print("requests the singleton instance 1");
   Singleton* instance1=Singleton::Instance();
   Print("requests the singleton instance 2");
   Singleton* instance2=Singleton::Instance();
   string compareInstances=
      (instance1==instance2)?
      "instances 1 and instance 2 are the same objects":
      "instances are different objects";
   Print(compareInstances);
   Print("requests singleton operation on the instance 1");
   instance1.SingletonOperation();
   Print("requests singleton data by the singleton instance 2");
   string singletonData=instance2.GetSingletonData();
   Print(singletonData);
   delete instance1;
  }
下面是该单例范式一个模块的完整代码
namespace Singleton
{
class Singleton
  {
public:
   static Singleton* Instance(void);
   void              SingletonOperation(void);
   string            GetSingletonData(void);
protected:
                     Singleton(void);
   static Singleton* uniqueInstance;
   string            singletonData;
  };
Singleton* Singleton::uniqueInstance=NULL;
Singleton::Singleton(void)
  {
   Print("The singleton ",&this," is created");
  }
void Singleton::SingletonOperation(void)
  {
   Print("runs the singleton operation > setting singleton data");
   singletonData="singleton data";
  }
string Singleton::GetSingletonData(void)
  {
   Print("reads and returns the singleton data");
   return singletonData;
  }
Singleton* Singleton::Instance(void)
  {
   Print("The singleton instance method runs");
   if(!CheckPointer(uniqueInstance))
     {
      Print("The unique instance of the singleton is an empty");
      uniqueInstance=new Singleton;
      Print("singleton assigned to unique instance");
     }
   Print("The unique instance contains singleton: ",uniqueInstance);
   Print("returns the unique instance ",uniqueInstance," of the singleton");
   return uniqueInstance;
  }
class Client
  {
public:
   string            Output(void);
   void              Run(void);
  };
string Client::Output(void) {return __FUNCTION__;}
void Client::Run(void)
  {
   Print("requests the singleton instance 1");
   Singleton* instance1=Singleton::Instance();
   Print("requests the singleton instance 2");
   Singleton* instance2=Singleton::Instance();
   string compareInstances=
      (instance1==instance2)?
      "instances 1 and instance 2 are the same objects":
      "instances are different objects";
   Print(compareInstances);
   Print("requests singleton operation on the instance 1");
   instance1.SingletonOperation();
   Print("requests singleton data by the singleton instance 2");
   string singletonData=instance2.GetSingletonData();
   Print(singletonData);
   delete instance1;
  }
}
结束语
在本文的最后,我们提供了有关设计范式主题的简单信息,并学习了创建范式类型,该类型负责帮助我们创建可重用、扩展和测试的对象,或者换句话说,范式可帮助我们编写干净代码。
我们见识了以下创建范式:
- 抽象工厂(Abstract Factory)
- 建造器(Builder)
- 工厂方法(Factory Method)
- 原型(Prototype)
- 单例(Singleton)
我们之前学习的创建设计范式,在见识过设计范式是什么之后,当我们编写面向对象软件时,它们在我们的软件中有很多用处,这些设计范式是什么结构,以及设计范式可以解决哪些软件或设计问题。
设计范式主题在软件开发中十分重要,您对设计范式的良好理解,以及概念运用将对您的软件开发有很大帮助,并解决代码中可能出现的许多问题。因此,我建议阅读并了解有关这个重要主题的更多信息,以便能够克服任何问题,譬如这些设计范式之一就能解决重新发明轮子。
以下是学习详细信息的资源:
- 设计范式 — 可重用面向对象软件的元素,作者:Eric Gamma、Richard Helm、Ralph Johnson 和 John Vlissides
- 傻瓜设计范式,史蒂夫·霍尔兹纳(Steve Holzner)
- 先出头(Head First)设计范式,埃里克·弗里曼(Eric Freeman)、伊丽莎白·罗布森(Elisabeth Robson)、伯特·贝茨(Bert Bates)、和凯西·塞拉(Kathy Sierra)
我希望您感觉到这篇文章很实用,并且您学到了关于设计范式主题的新知识,我也希望这篇文章能鼓励您更多地了解这个有趣的主题,它可以在您的代码中改变游戏规则。首先学习面向对象编程(OOP)也非常重要,因为它能令您更好地理解设计范式主题,您可以阅读我之前的文章《理解 MQL5 面向对象编程(OOP)》。如果您还想了解更多关于如何基于 MQL5 中最流行的技术指标,以及利用 MQL5 来设计交易系统的其它主题信息,您可以通过我的出版物页面阅读更多相关信息,您会发现许多关于这方面的文章,我希望您发现它们对您有用。
本文由MetaQuotes Ltd译自英文
原文地址: https://www.mql5.com/en/articles/13622
注意: MetaQuotes Ltd.将保留所有关于这些材料的权利。全部或部分复制或者转载这些材料将被禁止。
本文由网站的一位用户撰写,反映了他们的个人观点。MetaQuotes Ltd 不对所提供信息的准确性负责,也不对因使用所述解决方案、策略或建议而产生的任何后果负责。

我以为翻译人员在关于抽象工厂 的小节中犯了一点小错误,但不是,是作者自己犯的。
Какую проблему проектирования он решает?
所以,我们可以在以下情况下使用这个模板
使用抽象工厂的示例:
在英文源代码中是这样的:
它解决了什么设计问题?
因此,我们可以在以下情况中使用这种模式:
我的脾气会比较暴躁......
为了准确地使用术语,我将查看文章的英文原文。因此,作者就每个模板写道:" 我们如何在 MQL5 中使用它?这里需要注意的是,MQL5 是一种应用专业语言。那么它是什么呢?我们真的 能从材料中学 到 如何在 MQL5 中使用模板吗?不!我们看到的只是模板在 MQL5 中的实现。我认为,既然是模板,我们就应该先用伪代码来描述它,然后再用 MQL5 来描述它。理想的情况是,我们能看到在MQL5 中使用设计模式的实际例子。我不知道,也许我想得太多了,作者计划在单独的著作中考虑每种模板。但现在我们所拥有的....
作为一个了解 MQL,也在一定程度上了解和使用 OOP,但对设计模式一无所知的人,我不得不说我没有理解您所解释的内容。
我没有完全读懂,因为如果我一个都不懂,那读了一段又一段又一段又有什么意义呢?
我要继续学习这篇文章的方法是只看你的代码示例,并试着从中理解概念。
我写这篇文章纯粹是为了分享反馈意见。
再次感谢您。
我不明白这种方法。
为什么我们不能比较这两个指针是否相同,而只是使用:
if (factory != ap) factory = ap;
另外,文档中说
而 factory 并非简单类型。