

VIRA EA User Guide: Installation, Trade Modes, Risk Settings and Strategy Tester Workflow
VIRA EA is a rule-based multi-logic Expert Advisor for XAUUSD (Gold) in MetaTrader 5.
This guide explains how to install VIRA after purchase, how the trading logic works, how to choose between Config1 and Config2, how Trade Modes differ from Risk Modes, how to use fixed-lot and drawdown-based position sizing, and how to evaluate the EA correctly in Strategy Tester and under live market conditions.
VIRA contains nine independent trading modules. The modules use different entry conditions, timing, market-structure parameters and trade-management rules.
The system does not use Martingale, Grid, Averaging, Arbitrage, Machine Learning or Neural Networks.
Every trading module works according to predefined rules and protective trade-management logic, including Stop Loss and Take Profit.
Historical tests and previous live results do not guarantee future performance. Broker conditions, spread, commission, slippage, execution and market behavior can change actual results.

After Purchase: Installing and Activating VIRA
After purchasing VIRA through MQL5 Market, install the protected Market version directly from MetaTrader 5.
Use the same MQL5.community account that was used for the purchase.
A typical installation sequence is:
- Open MetaTrader 5.
- Open Tools → Options → Community and log in to your MQL5.community account.
- Open Navigator → Market → My Purchases.
- Find VIRA and click Install.
- After installation, locate VIRA under Navigator → Expert Advisors → Market.
- Open your broker's Gold chart.
- Use XAUUSD / H1 as the standard starting configuration.
- Attach VIRA to the chart and enable Algo Trading both in MetaTrader 5 and in the EA settings.
- Start with Config1 and choose the required Trade Mode and Risk Mode.
- Test the configuration before considering live use.
Installing a Market product on another hardware or operating-system configuration may consume another MQL5 Market activation. The number of available activations is controlled by the Market system.
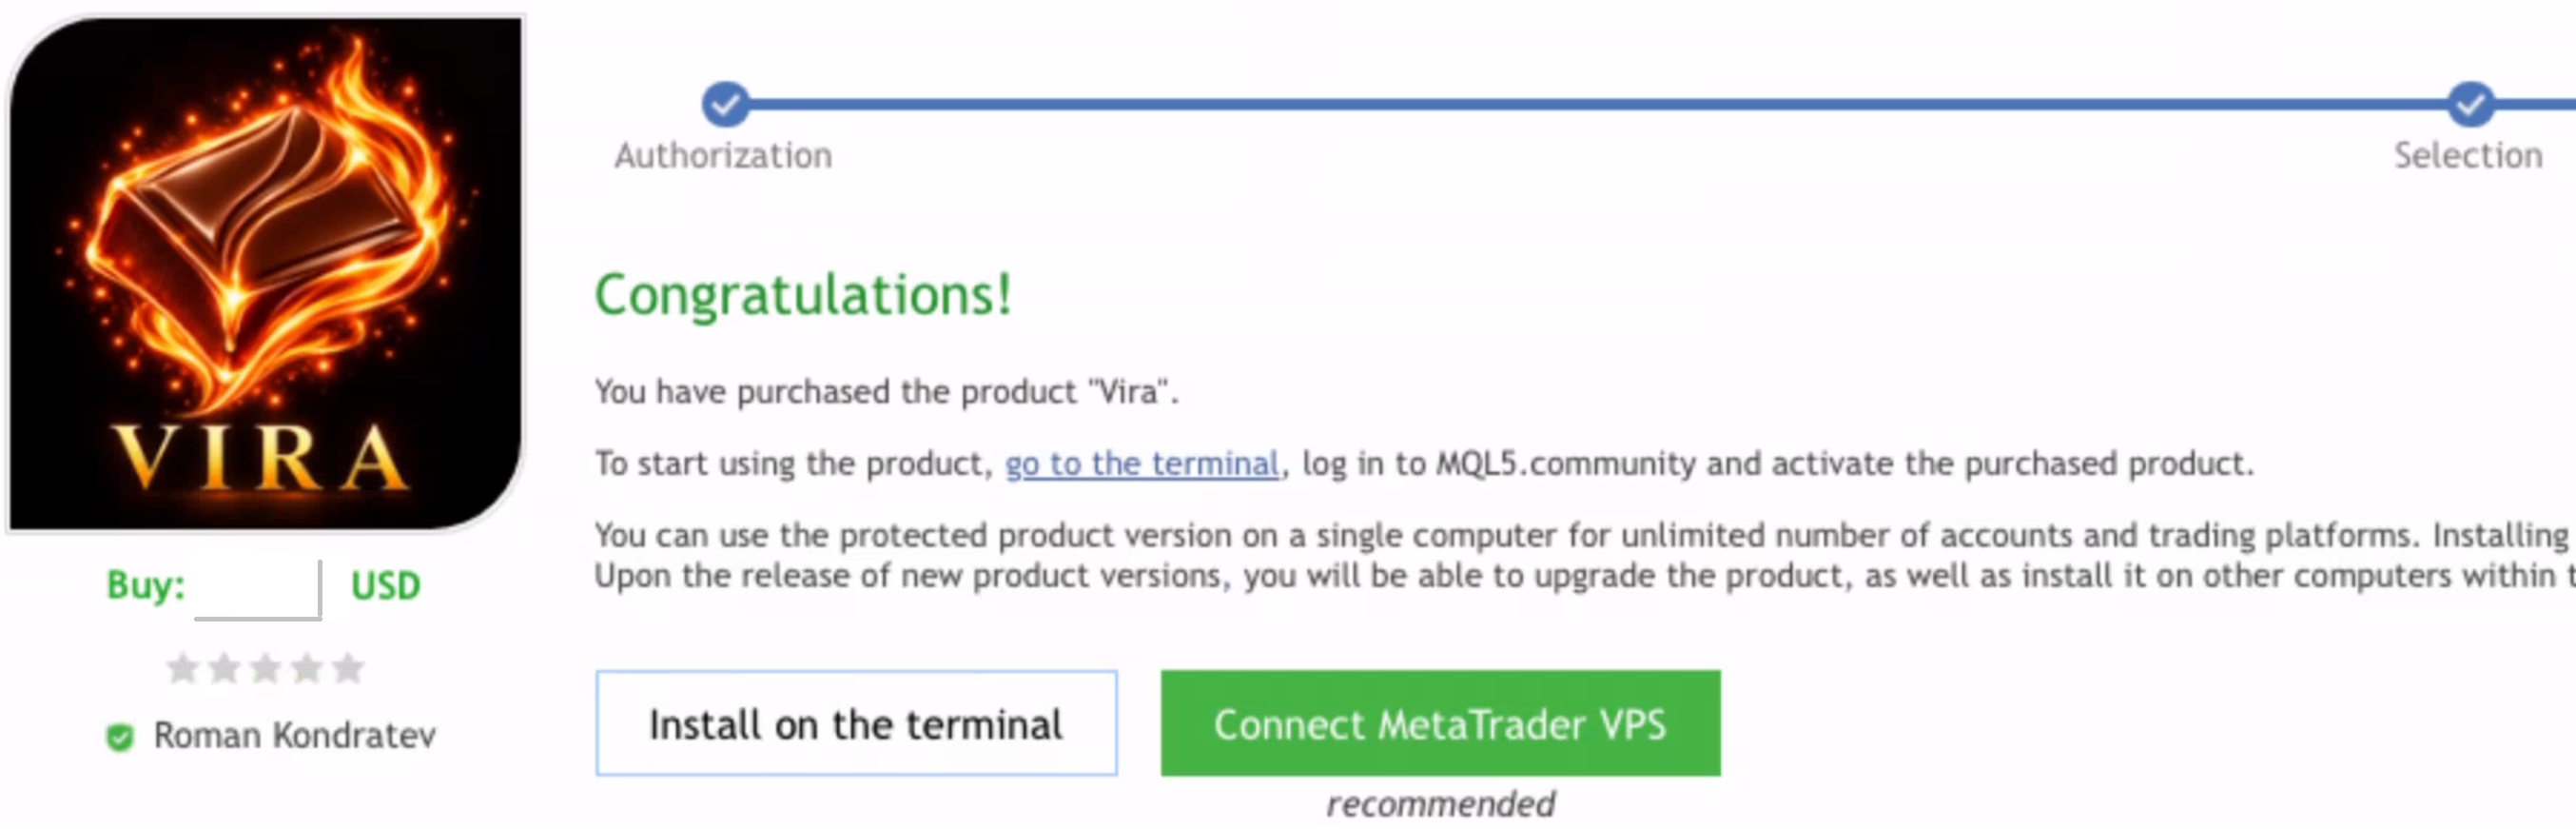
A MetaTrader VPS is optional. It can be useful when continuous EA operation is required, but it is not necessary for learning the system or running local Strategy Tester tests.
If you migrate VIRA to VPS, verify the symbol, inputs, Algo Trading state and trading permissions after migration.
Quick Start
For a first VIRA test, keep the setup simple.
- Platform: MetaTrader 5
- Instrument: XAUUSD or the broker's Gold symbol
- Timeframe: H1
- Configuration: Config1
- Buy trades: enabled
- Sell trades: enabled
- NFP protection: enabled
- High-impact USD news filter: enabled
Broker suffixes are supported when they form part of the broker's Gold symbol. For example, a broker may use a symbol such as XAUUSD.p instead of simply XAUUSD .
A new user mainly needs to understand three controls:
Configuration → Trade Mode → Risk Mode
The internal strategy parameters can normally remain unchanged while you learn how the system behaves.
How the Trading Algorithm Works
VIRA is primarily built around price-level breakout logic.
In simplified form, the process can be described as:
Market Structure → Price Level → Breakout Condition → Filters → Entry → SL/TP → Trade Management
The EA first analyzes relevant market structure and identifies price levels according to the parameters of the active trading module.
It then waits for conditions associated with a breakout of that level.
However, VIRA does not simply buy every upward breakout or sell every downward breakout.
Each module can use its own:
- lookback and structure parameters;
- timing conditions;
- breakout criteria;
- false-breakout filtering;
- entry parameters;
- Stop Loss and Take Profit logic;
- break-even behavior;
- trailing logic;
- order-management rules.
Therefore, two VIRA modules can observe the same Gold market and still produce different decisions.
This is also the reason VIRA uses nine modules instead of applying one identical algorithm repeatedly.
The diversification takes place inside the trading logic of one instrument.
A single trading approach can experience periods when its assumptions are less effective. With multiple modules, different rule sets can contribute to the overall portfolio at different times.
This does not eliminate losses or drawdown. It is simply the architecture of the system.
For that reason, VIRA should be evaluated over a meaningful sample of trades rather than from one or two individual positions.
Config1 and Config2
VIRA separates the strategy configuration from the overall trading activity.
These are different controls.
Config1
VIRA_aConfig = Config1
Config1 is the main VIRA configuration.
It is the base configuration used for the primary testing on IC Markets and Tickmill.
For a first test, I normally suggest starting with Config1 so that the user's broker results can be compared with the main reference tests.
Config2
VIRA_aConfig = Config2
Config2 is an additional alternative configuration containing another parameter sets.
Some of these settings were inspired by familiar GR-style strategy ideas that influenced my earlier research and were used as a starting point during development.
Config2 is provided for experimentation, alternative broker testing and deeper comparison.
It should not be interpreted as automatically improved than Config1.
A reasonable workflow is:
Config1 → test on your broker → understand the behavior → compare Config2 separately
When comparing configurations, change only one major variable at a time.
Trade Modes
VIRA_TradeMode controls the overall strategy-activity profile.
VIRA provides the following operating modes.
Extreme Conservative
The lowest-activity profile.
It is intended for users who want to study the system with the most restrictive portfolio activity.
Conservative
Lower trading activity and lower overall portfolio exposure than the more active modes.
Moderate
A more balanced activity profile.
Intense
More active use of the strategy portfolio and therefore a more aggressive operating profile.
Extreme
The highest standard activity profile.
This is explicitly a high-risk mode.
Auto
The EA uses its internal balance/risk logic to determine the operating profile.
Manual Strategy Selection
The user manually selects which of the nine strategy modules should run.
Trade Mode Is Not Risk Mode
This distinction is important.
Trade Mode controls the activity of the strategy portfolio.
Risk Mode controls how position size is calculated.
For example, choosing Conservative does not automatically make a large fixed lot appropriate for a small account.
A Conservative Trade Mode combined with an oversized fixed lot can still create high account risk.
The two controls should therefore be considered separately.
Risk Settings
The main selector is:
VIRA_Risk
This parameter is a dropdown selecting the position-sizing method.
It is not a field where a percentage is entered directly.
VIRA provides three main risk-sizing approaches.
Fixed Lot
Select:
VIRA_Risk = Fixed Lot
Then set:
VIRA_InpStartLots
Example:
VIRA_Risk = Fixed Lot VIRA_InpStartLots = 0.01
In this mode, lot size is controlled directly by the fixed-lot setting rather than by the automatic drawdown model.
This is the simplest position-sizing method to understand.
However, the same lot can represent very different risk on different account balances.
For this reason, the user remains responsible for choosing an appropriate fixed lot for the account.
Max Total DD
Select:
VIRA_Risk = Max Total DD
Then configure:
VIRA_MaxAllowedDD
Example:
VIRA_Risk = Max Total DD VIRA_MaxAllowedDD = 5 or 20 ...
In this mode, VIRA uses its portfolio drawdown model when calculating position size across the system.
One important point should be understood:
MaxAllowedDD is a risk-sizing target used by the model. It is not a guaranteed hard account stop.
For example, setting MaxAllowedDD = 20 does not mean that real account drawdown can never move beyond exactly 20%.
Actual results can differ because of spread, slippage, gaps, commissions, execution, broker conditions and future market behavior.
Max Allowed DD per Strategy
The third risk approach applies the risk model at the individual strategy level rather than only at the combined portfolio level.
This can be useful when each internal strategy should be treated separately by the position-sizing engine.
For a first setup, Max Total DD is generally easier to understand and compare.
Example Risk Profiles for Testing
The following values are examples for testing and configuration comparison.
They are not guaranteed future drawdown limits or performance targets.
Conservative example
VIRA_TradeMode = Conservative VIRA_Risk = Max Total DD VIRA_MaxAllowedDD = 10
Moderate example
VIRA_TradeMode = Moderate VIRA_Risk = Max Total DD VIRA_MaxAllowedDD = 15–20
Higher-risk example
VIRA_TradeMode = Intense VIRA_Risk = Max Total DD VIRA_MaxAllowedDD = 20–30
Extreme example
VIRA_TradeMode = Extreme VIRA_Risk = Max Total DD VIRA_MaxAllowedDD = 30
A practical way to study increasing activity is:
Conservative → Moderate → Intense → Extreme
There is no need to start with Extreme only because a particular historical test produced higher profit.
Higher activity also means that the user should pay closer attention to exposure and drawdown.
Combining Fixed Lot with Trade Modes
Fixed Lot can be combined with any Trade Mode.
For example:
VIRA_TradeMode = Conservative VIRA_Risk = Fixed Lot VIRA_InpStartLots = 0.01
or:
VIRA_TradeMode = Moderate VIRA_Risk = Fixed Lot VIRA_InpStartLots = 0.01
The lot can remain the same while Trade Mode changes.
Again, this demonstrates the difference between the two systems:
Trade Mode = portfolio activity
Risk Mode = position sizing
Main Inputs
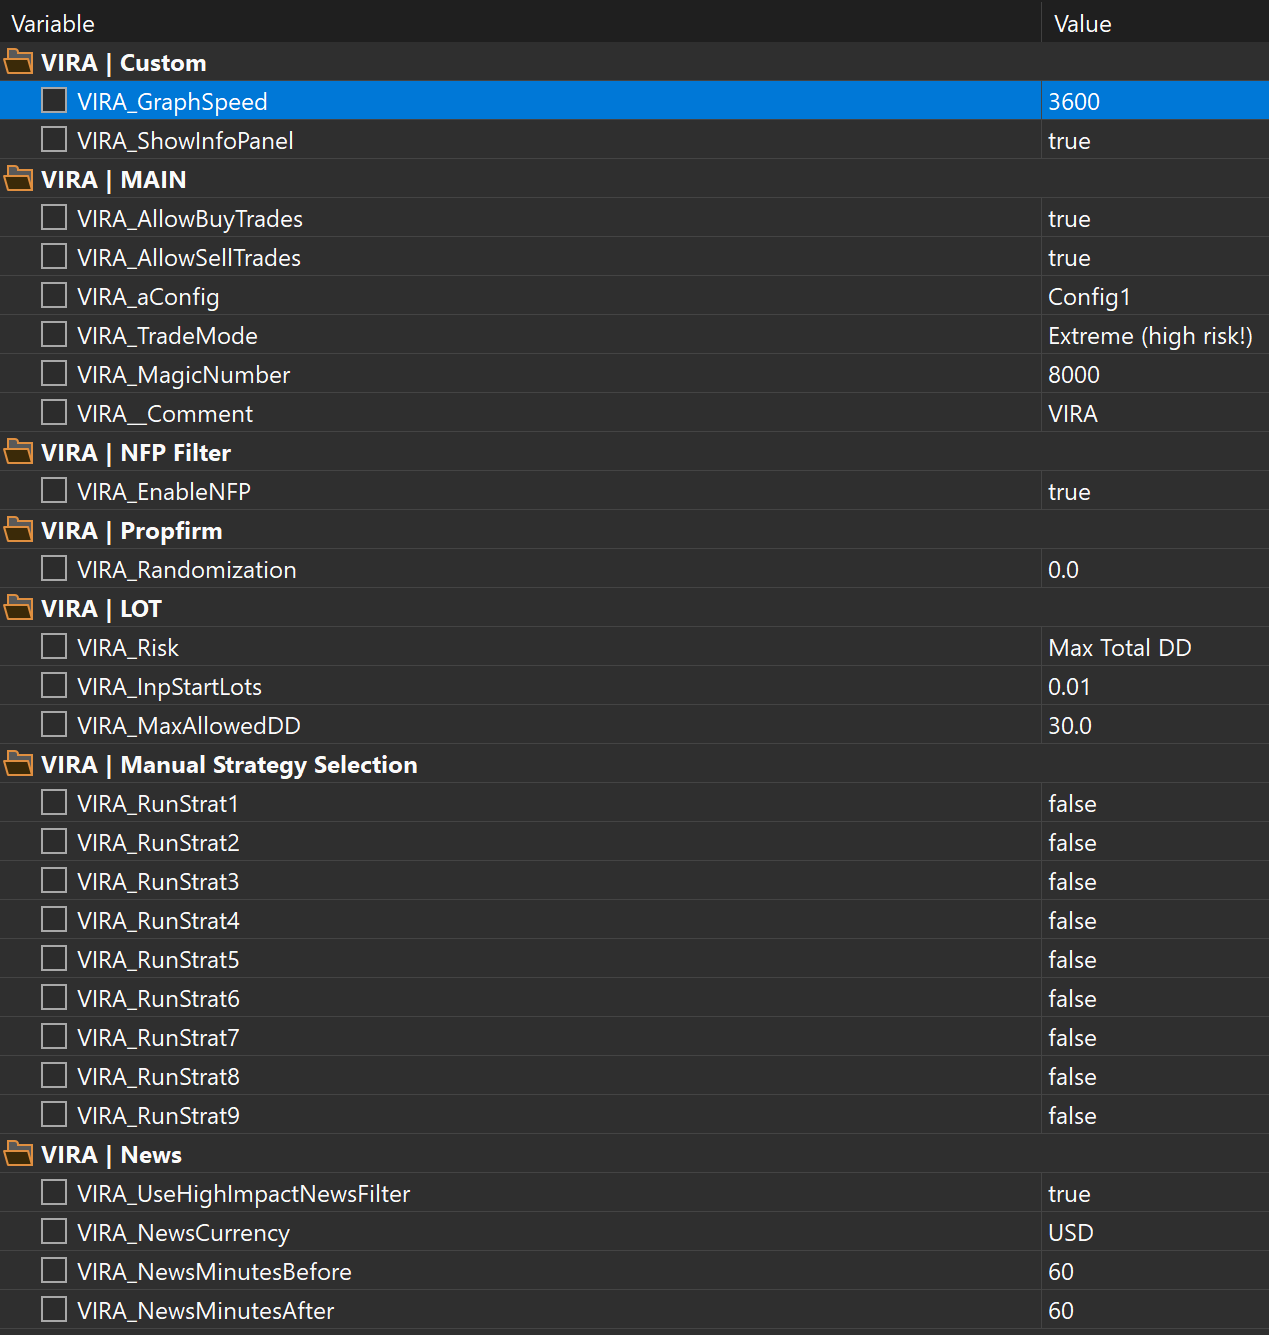
Some of the most important user-facing parameters are:
- VIRA_AllowBuyTrades — allows or blocks new BUY trades.
- VIRA_AllowSellTrades — allows or blocks new SELL trades.
- VIRA_aConfig — selects Config1 or Config2.
- VIRA_TradeMode — selects the overall activity profile.
- VIRA_MagicNumber — base identifier used for VIRA trades.
- VIRA_EnableNFP — activates dedicated NFP protection.
- VIRA_Randomization — optional randomized adjustment.
- VIRA_Risk — selects the lot/risk calculation method.
- VIRA_InpStartLots — manual starting lot used for Fixed Lot mode.
- VIRA_MaxAllowedDD — target used by the DD-based sizing model.
NFP Protection
Gold can react sharply around major US economic releases.
VIRA therefore contains dedicated NFP protection.
With:
VIRA_EnableNFP = true
the EA applies its NFP-specific protection logic around the event.
Depending on the internal rules, this protection can affect normal trading, pending exposure and open positions around the NFP period.
For ordinary comparison and testing, I recommend keeping the NFP protection enabled so that different test runs use a consistent configuration.
High-Impact News Filter
VIRA also provides a general high-impact economic-news filter.
A typical setup is:
VIRA_UseHighImpactNewsFilter = true VIRA_NewsCurrency = USD VIRA_NewsMinutesBefore = 60 VIRA_NewsMinutesAfter = 60
With this configuration, new entries are blocked during the selected period around high-impact USD calendar events.
This is separate from the dedicated NFP protection.
When comparing two configurations, keep the news settings unchanged. Otherwise, you may unintentionally compare several variables at once.
Randomization
VIRA_Randomization provides an optional randomized adjustment.
The standard value is:
VIRA_Randomization = 0.0
At zero, the feature is disabled.
Unless you have a specific testing reason to use randomization, leave it at its default value when establishing a baseline test.
Manual Strategy Selection
Advanced users can select:
VIRA_TradeMode = Manual Strategy Selection
and then enable individual modules using:
VIRA_RunStrat1 through VIRA_RunStrat9 .
This is useful when you want to study an individual strategy separately.
For example, when researching one module, enable only that strategy and run it over the same historical period and broker data used for the portfolio tests.
Manual mode can also be used to build custom combinations of modules.
For normal use, the predefined Trade Modes are simpler.
Understanding the VIRA Panel
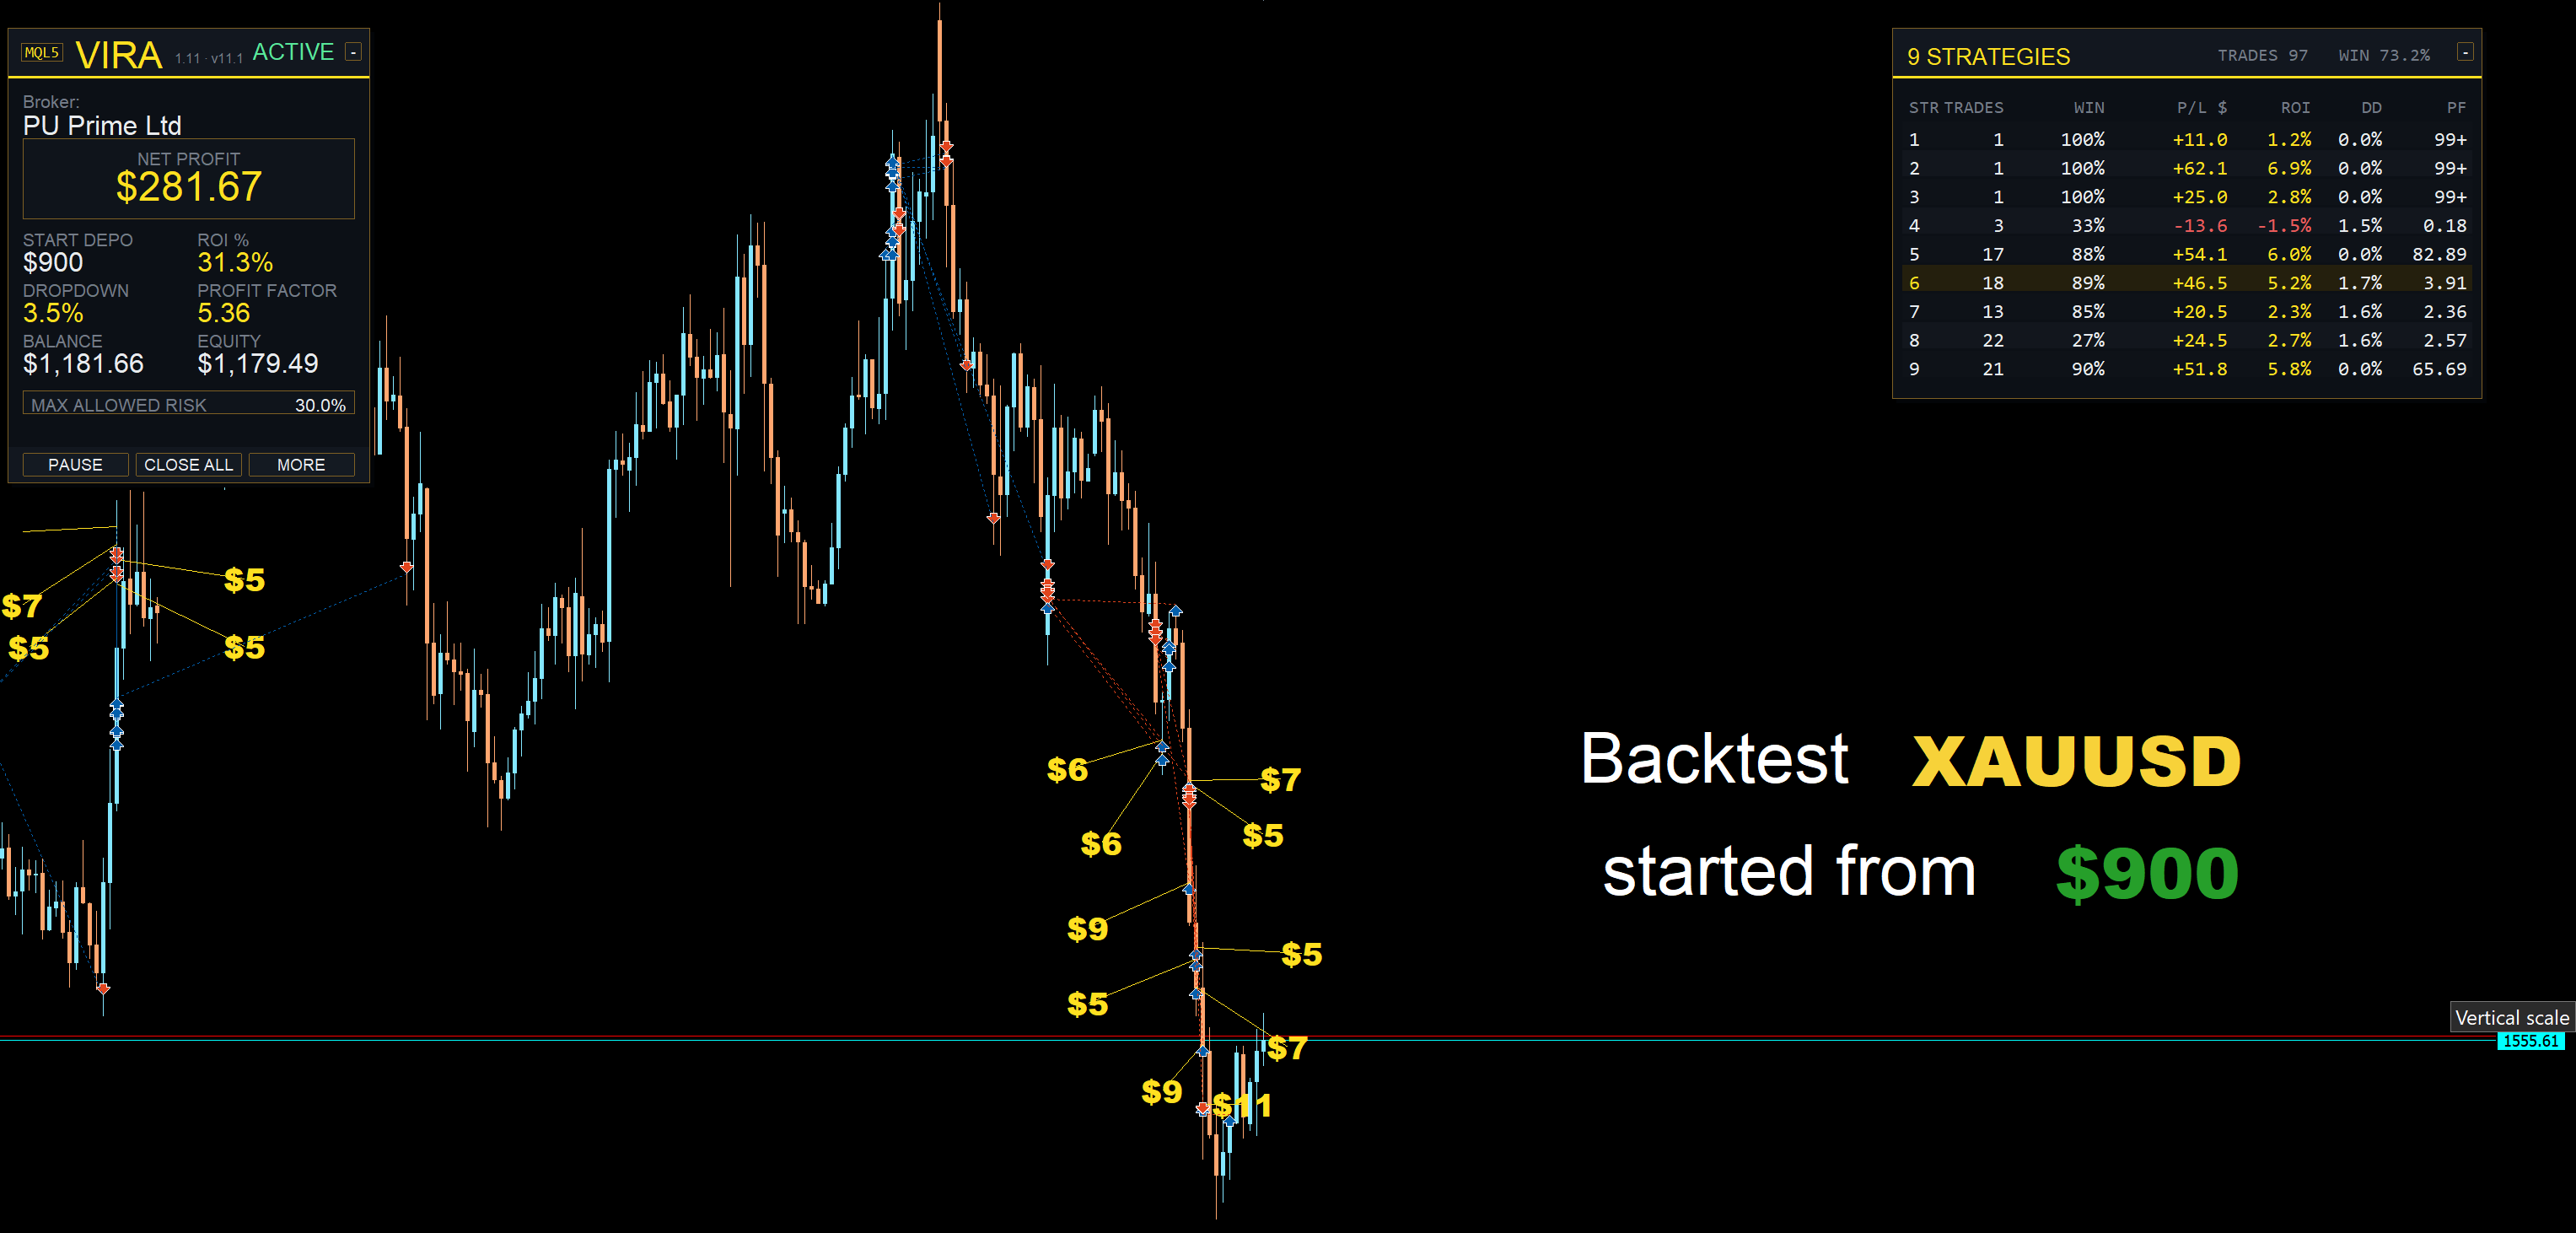
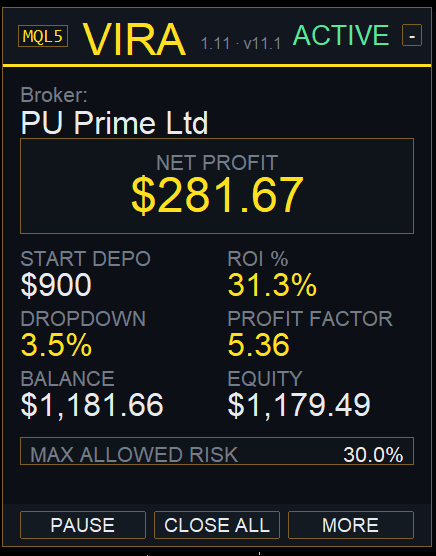
VIRA includes an integrated information and strategy dashboard.
The left information card displays portfolio-level information including:
Net Profit, Start Deposit, ROI, Drawdown, Profit Factor, Balance, Equity and the selected risk target.
The right-hand table separates the nine strategy modules.
For each module, the panel can display:
Trades, Win Rate, P/L, ROI, Drawdown and Profit Factor.
The purpose of this table is not simply visual presentation.
A final backtest equity curve shows the combined result but does not show which modules produced it.
The strategy table makes it possible to see whether activity and performance are distributed across several modules or concentrated in only a few.
Figures displayed during Strategy Tester runs belong to that specific historical test and should not be interpreted as future expectations.
Strategy Tester Workflow
Before live use, test VIRA using the MetaTrader 5 Strategy Tester and the Gold symbol supplied by the broker you intend to use.
A useful testing workflow is:
- Select the broker's Gold symbol.
- Use H1.
- Select the deposit and leverage you want to evaluate.
- Start with Config1.
- Choose one Trade Mode and one Risk Mode.
- Run the test.
- Enable Visual Mode and inspect entries, exits and the strategy table.
- Change only one major setting at a time.
- Compare the new result with the previous test.
- Test Config2 separately if you want to compare the alternative configuration family.
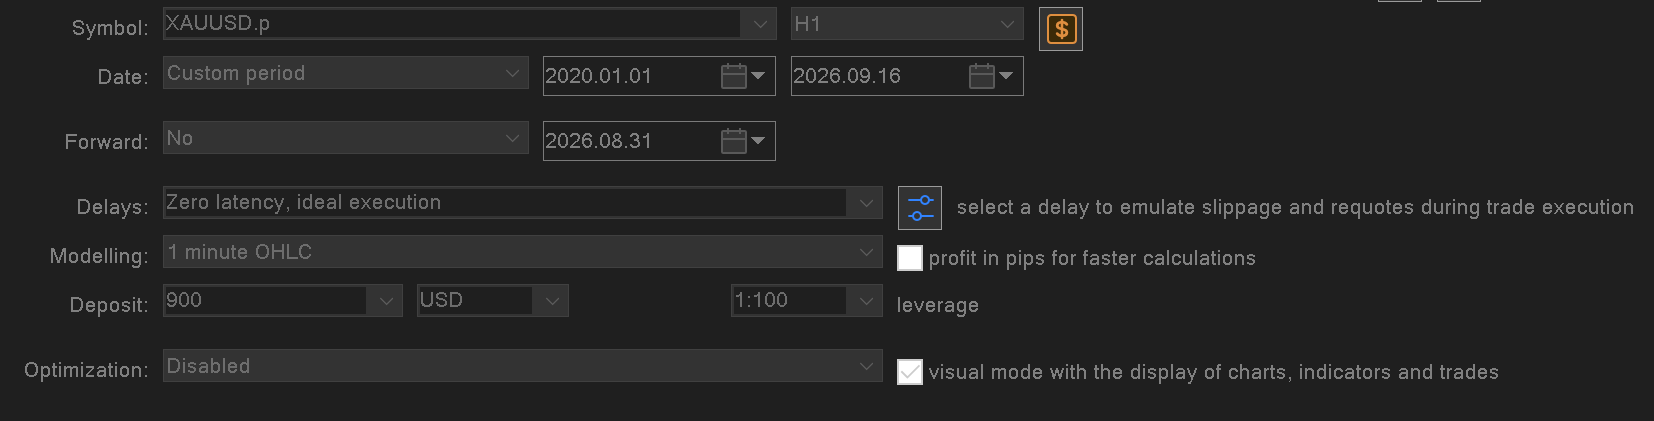
Do not judge a configuration using only a very short historical period or a small number of trades.
Breakout-based systems can produce different sequences when two brokers have slightly different prices around an entry level.
What a Backtest Can and Cannot Show
A historical test can help you study:
trade frequency, historical drawdown, interaction between strategies, sensitivity to risk settings and differences between broker datasets.
It cannot prove how an EA will perform in future market conditions.
Historical results should therefore be treated as research data, not as a guarantee.
Brokers and Datasets Used for Testing
VIRA has been tested using several broker datasets because XAUUSD pricing and trading conditions are not identical between brokers.
Tickmill
Main Config1 historical testing has been performed using Tickmill XAUUSD data.
Reference period: 2020–2026
History Quality: 99%
The published reference run contained approximately 5,943 trades.
IC Markets RAW
IC Markets RAW is another main Config1 test environment.
Reference period: 2023–2026
History Quality: 99%
The published reference run contained approximately 2,363 trades.
Vantage Demo RAW
VIRA has also been tested using Vantage Demo RAW historical data.
The available dataset showed only 3% History Quality.
For this reason, that test should be treated only as an additional reference and should not be directly compared with the 99% Tickmill and IC Markets datasets.
PU Prime
Additional visual compatibility testing has been performed using the broker symbol:
XAUUSD.p
This is useful for checking operation with broker-specific Gold suffixes.
Why Results Differ Between Brokers
Identical settings do not necessarily produce identical trades on different brokers.
Differences can come from:
price history, spread, commission, swap, server time, symbol specification, tick generation, liquidity, Stop Level, slippage and execution.
Breakout systems are particularly sensitive to small differences around an entry level.
For example, Broker A may trade slightly through a particular level while Broker B may stop just before it.
One EA can therefore receive a valid entry on one dataset and no entry on another.
That is not unusual.
The purpose of multi-broker testing is not to make every broker produce identical trades.
The more useful question is whether the system's behavior remains understandable over sufficiently long and reasonably good-quality data.
Visual Tester
VIRA includes a visual testing workflow intended to make individual trades easier to inspect.
Strategy callouts can identify which internal module generated a trade.
This allows the user to study:
entry points, exits, trade timing, module activity and the effect of different configurations directly on the chart.
Visual Mode is especially useful when comparing Config1 and Config2 or when isolating individual strategies.
Remember that everything displayed in Strategy Tester is still historical simulation.
Evaluating VIRA
I prefer to separate the evaluation process into three different sources of information.
Historical backtests
Useful for studying long historical periods, trade frequency, drawdown and broker differences.
Your own Strategy Tester
Useful for observing VIRA with the historical data and symbol specification supplied by your own broker.
Public MQL5 Signal
Useful for observing current behavior under real trading conditions while the live sample develops.
The public monitoring started on 7 September 2026, so the amount of live history should be considered when interpreting it.
A sensible evaluation process is therefore:
Historical tests → your broker test → Visual Mode → risk comparison → broker comparison → live monitoring
No single result should be evaluated in isolation.
Video Instructions and Additional Notes
In addition to this written guide, video walkthroughs can be published through the video section associated with the VIRA materials on MQL5.
Video material is useful for demonstrating practical operations that are easier to understand visually, including:
installation, Strategy Tester setup, Visual Mode, risk parameters and the strategy dashboard.
I also publish additional development notes through my MQL5 News and Blog posts.
These posts can cover topics that do not fit comfortably into the basic manual, for example:
- tester workflows;
- broker-specific nuances;
- configuration comparisons;
- interpretation of the strategy table;
- risk-control decisions;
- observations from additional historical tests;
- observations from live operation;
- version-specific behavior and setup notes.
Some of these details are easy to miss when first using a multi-strategy EA, so the additional posts are intended to explain the reasoning behind particular workflows and provide practical implementation notes.
They should be treated as educational material and technical observations rather than performance promises.
Support
For questions about VIRA installation, configuration or product operation, use the MQL5 product comments or the MQL5 messaging system.
During releases or major updates, response time can vary.
Keeping support communication inside MQL5 also helps preserve the relevant product and account context.
Activation or Market-platform issues that are unrelated to the EA itself may need to be handled through the appropriate MQL5 support resources.
Frequently Asked Questions
Why does VIRA have both Trade Mode and Risk Mode?
They perform different tasks.
Trade Mode controls the activity profile of the strategy portfolio.
Risk Mode controls how lot size is calculated.
What should I change first if I want lower exposure?
Normally reduce the Trade Mode and/or reduce VIRA_MaxAllowedDD .
When using Fixed Lot, reduce VIRA_InpStartLots .
Should I begin with Config2?
Config1 is the standard starting point because it is the base configuration used for the main Tickmill and IC Markets tests.
Config2 is an alternative bonus configuration that can be tested separately later.
Can I test only one strategy?
Yes.
Choose Manual Strategy Selection and enable only the required module.
This can be useful for research and Strategy Tester comparison.
Why does my broker produce different trades?
Even small differences in Gold price history, spread, server time and execution can change whether a breakout condition is triggered.
Does MaxAllowedDD guarantee that my account can never exceed that drawdown?
No.
VIRA_MaxAllowedDD is part of the EA's risk-sizing model.
It is not a guaranteed hard ceiling on future real-account drawdown.
Should I modify internal strategy parameters?
For a first setup, normally no.
Begin with the standard configurations and change major user-facing controls one at a time.
This makes comparisons easier to understand.
Final Starting Checklist
For a first structured test:
- XAUUSD / H1
- Start with Config1.
- Choose a Trade Mode.
- Choose Fixed Lot or DD-based sizing.
- Keep the NFP and high-impact news filters enabled.
- Run a historical test.
- Use Visual Mode.
- Compare behavior on your broker.
- Review the strategy-level statistics.
- Compare alternative settings one at a time.
- Use public live monitoring only as an additional source of information, not as a prediction of future results.
Risk Disclosure
Trading Gold involves substantial risk.
Historical backtests and past live performance do not guarantee future results.
Actual performance can differ because of market conditions, broker data, spreads, commissions, swaps, gaps, slippage, execution and selected settings.
Users should perform their own testing and choose a level of risk appropriate for their account.