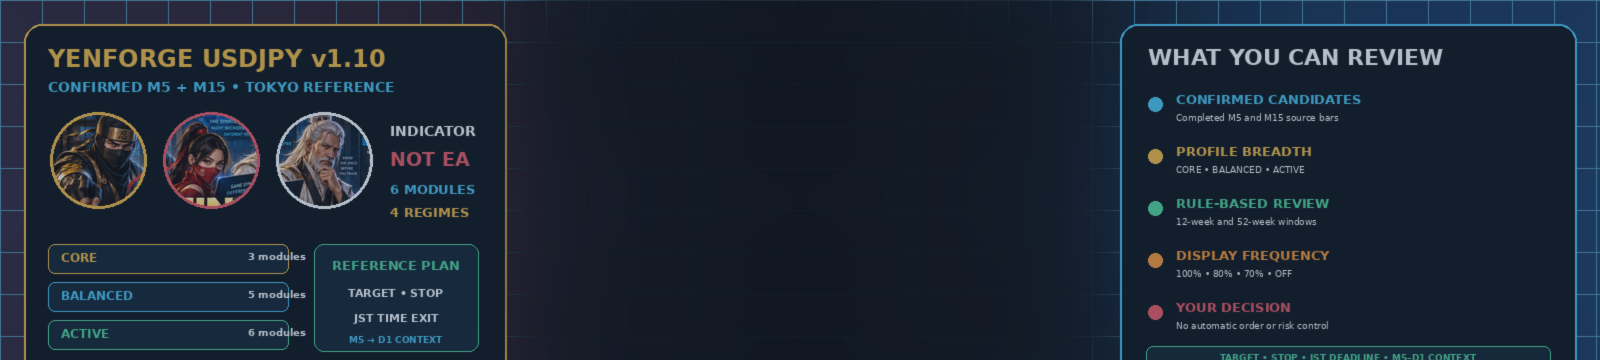
How to Review Confirmed USDJPY Candidates Across Changing Market Regimes | YENFORGE v1.10

When you trade USDJPY manually, the difficult part is not simply finding more arrows.
The harder task is deciding which completed candidates deserve your attention when USDJPY changes from a range to a trend, produces a short-term sweep, or reacts to event-driven volatility.
An arrow by itself also leaves several practical questions unanswered:
- Was the candidate formed on a completed bar?
- How selective was the active signal set?
- What Target, Stop, and monitoring deadline are being shown?
- Does the short-term candidate agree with the higher-timeframe context?
- How has the module been treated by the recent and longer rule-based review?
YENFORGE USDJPY v1.10 — Adaptive Fusion 5 is designed to organize those questions in one MetaTrader 5 indicator.
It evaluates confirmed M5 and M15 candidates through six raw signal modules and a four-regime USDJPY framework, then displays reference information for your own trading decision.
It is not an Expert Advisor. It does not place or close orders, choose your lot size, manage account risk, or control positions.
At the time of this article, the MQL5 listing shows Version 1.10 at 59 USD.
See the Complete Workflow Before Deciding Whether It Fits You
Watch the published YENFORGE USDJPY v1.10 long-form guide
The approximately six-and-a-half-minute video shows the confirmed-bar workflow, the three current profiles, six modules, four regimes, rule-based review, shadow tracking, reference levels, alerts, and the boundary between a discretionary indicator and order execution.
What You Can Check Before Acting on a Candidate
A displayed YENFORGE candidate can bring the following information together:
- BUY or SELL direction
- A chart arrow
- Relative strength information
- An adaptive reference Target
- An adaptive reference Stop
- A JST Time-exit deadline
- M5, M15, H1, H4, and D1 trend context
This gives you a structured reference plan instead of asking you to interpret an arrow in isolation.
You can check the short-term candidate, the suggested monitoring window, the risk boundary, and the higher-timeframe relationship before deciding whether the setup belongs in your own method.
The displayed Target, Stop, and Time Exit are references. They are not broker orders and do not determine the actual outcome of a trade.
Why the Indicator Waits for M5 and M15 Bars to Close
An unfinished candle can change before the close.
A temporary breakout may disappear. A reversal shape may weaken. A fast USDJPY move may look complete in the middle of a bar and finish differently.
YENFORGE evaluates candidates from confirmed M5 and M15 source bars so that your review is based on a completed source condition rather than only an intrabar impression.
This makes it easier to:
- Review the same completed condition later
- Compare the candidate with its displayed Target, Stop, and Time Exit
- Avoid treating every temporary intrabar shape as a finished setup
The design is described as confirmed-bar and non-repainting. The careful meaning is that candidate generation is tied to completed source bars—not a promise that every visual element under every possible platform condition can never change.
Choose the Profile That Matches How Many Candidates You Want to Review
The three profiles do not represent good, better, and best.
They let you choose how broad or selective the public candidate set should be.
CORE — For a Narrower Candidate Set
CORE uses three base modules and places the greatest emphasis on selectivity.
This profile may suit you when you prefer fewer displayed opportunities and are comfortable waiting longer between candidates.
BALANCED — For a Middle Ground
BALANCED uses five base modules and is the default profile.
It is intended for users who want a balance between selectivity and the number of candidates available for review.
ACTIVE — For the Broadest Candidate Set
ACTIVE uses all six base modules and includes the short-term sweep setup.
It may suit you when you want to review more types of short-term opportunity and accept that a broader set requires more attention.
ACTIVE is not presented as the most profitable or most accurate profile. The practical difference is the number of modules included and the number of situations you may need to review.
Why Six Modules Matter When USDJPY Changes Regime
YENFORGE uses four M15 modules and two M5 modules.
Those six raw modules are reviewed inside a four-regime framework designed for USDJPY.
The private formulas and thresholds remain internal, but the user-facing purpose is clear:
You are not limited to one fixed candidate type being displayed the same way in every market condition.
A range, a trend, a short-term sweep, and an event-driven move do not necessarily create the same type of review opportunity.
The multi-module structure gives YENFORGE more than one way to identify a completed candidate, while the regime framework provides a rule-based context for how those modules are treated.
This does not mean the product predicts every regime correctly or knows what USDJPY will do next.
What You Need Before the First Full Review
YENFORGE uses a 52-week historical bootstrap and a two-week warm-up.
For the full preparation process, at least 54 weeks of M5 and M15 history is recommended.
On a terminal with insufficient history, the indicator may need time to download, synchronize, and process the required data.
That initial preparation is relevant to the buyer because the 12-week and 52-week module review cannot be interpreted properly without enough source history.
If the preparation is still in progress, old reconstructed candidates are not treated as new live alerts.
How Rule-Based Review Adjusts What You See
Each module is reviewed using two virtual-result windows:
- 12 weeks for a more recent reference
- 52 weeks for a longer reference
The review is deterministic and rule-based.
It is not self-learning AI, machine learning, or a black box that discovers a winning strategy.
Based on the implemented review rules, a module can receive one of four public display levels:
- 100%
- 80%
- 70%
- OFF
Read 100%, 80%, 70%, and OFF as Display Levels—not Probabilities
The display level controls how often a module's raw candidates are shown publicly. It is not a probability that the next candidate will win.
These levels are not:
- Win rates
- Confidence percentages
- Profit probabilities
- Account-risk percentages
- Recommendations to take a trade
A module at 100% is allowed to show its complete public candidate stream under the implemented rules. A reduced level displays a smaller portion. OFF suppresses public display from that module.
The level changes what reaches the chart. It does not convert the next candidate into a known outcome.
Why Reduced Modules Continue to Be Reviewed
A module is not permanently forgotten when its public level becomes 80%, 70%, or OFF.
Its raw candidates can continue to be tracked internally for later 12-week and 52-week review.
This continuous shadow tracking matters because a temporarily reduced module can still be evaluated for a later recovery or change in its display level.
Shadow data is virtual review data. It is not:
- A live broker trade
- Your actual order
- A live-account performance statement
- Untouched forward performance
- Evidence of future profitability
See the Main Idea in About One Minute
Watch the published YENFORGE USDJPY v1.10 Shorts overview
The Short uses its own English script, newly generated Andrew narration, a new vertical layout, moving NINJA action, and large English captions.
It is a quick overview. The long-form video provides the fuller workflow.
Use Target, Stop, and JST Time Exit as a Reference Plan
Each candidate can include an adaptive reference Target and Stop rather than one fixed pip distance for every module and market condition.
The JST Time-exit deadline adds a time dimension to the plan.
Before deciding whether to act, you can ask:
- Where is the reference objective?
- Where is the reference risk boundary?
- How long is the candidate intended to remain under review?
- Has price already moved too far away from the original candidate?
YENFORGE does not place these levels into the market.
You decide whether to trade, where to enter, what lot size to use, where to place a real Stop, and when to exit.
Check the Candidate Against Five Timeframes
The panel displays trend context for:
- M5
- M15
- H1
- H4
- D1
This lets you compare a short-term candidate with broader context without repeatedly switching among five separate charts.
Full alignment does not guarantee a successful outcome. The value is that the relationship is visible for your own review.
Set Up the Indicator with Four Main Inputs
The main user settings are deliberately limited:
- Profile: BALANCED by default
- Popup Alert: ON by default
- Push Notification: OFF by default
- Sound Alert: ON by default
Mobile Push requires the standard MetaQuotes ID configuration in MetaTrader 5.
Notification delivery depends on the terminal, connection, mobile configuration, and platform state. Test each notification method before depending on it.
What Happens After a Reconnect, Timeframe Change, or Restart
The operating design includes:
- A three-second M5 monitor
- Reconnect catch-up
- Duplicate-alert protection
- Visual restoration after timeframe changes
- Internal-state restoration after timeframe changes and supported restart conditions
These features are intended to reduce the need to rebuild the working state after normal platform changes.
They cannot bypass one basic limitation:
While MT5 or the VPS is fully stopped, that stopped terminal cannot send its own notification.
What to Expect on OANDA Japan and Other Broker Feeds
The main validation reference is:
- Platform: MetaTrader 5
- Symbol: USDJPY
- Recommended chart: M5
- Server reference: OANDA Japan MT5 Tokyo server
- Recommended history: at least 54 weeks of M5 and M15 data
The indicator can start on other broker feeds, but you should not assume an identical result.
Differences may appear in:
- Candidate timing
- Displayed prices
- Spread filtering
- Historical reconstruction
- Available history
- Session data and server behavior
Testing on OANDA Japan does not establish universal behavior across every broker.
When the 59 USD Purchase Makes Sense
YENFORGE may be a practical fit when you want:
- Confirmed M5 and M15 USDJPY candidates
- A choice between narrow, balanced, and broad candidate sets
- Six candidate modules instead of one fixed setup type
- A four-regime USDJPY review framework
- Rule-based 12-week and 52-week module review
- Continuous shadow tracking of reduced modules
- A reference Target, Stop, and JST Time Exit with each candidate
- M5-to-D1 context in one panel
- Alerts without handing order control to the indicator
- Reconnect, duplicate-alert, and restoration support
The value is not that the indicator makes the final decision for you.
The value is that it gives you a more structured way to review confirmed USDJPY candidates while you retain control over every order and risk decision.
When a Different Product Is the Better Choice
YENFORGE is not designed for someone who wants fully automated execution, identical candidates on every broker, self-learning AI, a candidate on every bar, or percentages that can be read as future win rates.
It is also a poor fit for a user who will not load sufficient history or test the intended broker feed on demo.
What YENFORGE Does Not Do
YENFORGE is a MetaTrader 5 indicator.
It does not:
- Send or close orders
- Calculate or set your lot size
- Manage account exposure or account risk
- Control open positions
- Predict intervention, news, or broker execution
- Promise that a displayed Target, Stop, or Time Exit will produce a specific result
Every Entry, Exit, Lot, Stop, and Risk decision remains with you.
A Demo-First Checklist Before You Buy or Rely on It
- Confirm that your intended symbol is USDJPY and note the broker's exact naming.
- Load at least 54 weeks of M5 and M15 history.
- Start with the default BALANCED profile.
- Wait for bootstrap and warm-up preparation to complete.
- Check a confirmed candidate together with its Target, Stop, JST Time Exit, and five-timeframe context.
- Compare CORE, BALANCED, and ACTIVE based on the number of candidates you can realistically review.
- Test Popup, Push, and Sound separately.
- Reconnect the terminal and confirm expected catch-up and duplicate-alert behavior.
- If you use another broker, compare candidate timing and displayed prices with the OANDA Japan reference expectations.
- Keep all order and risk decisions under your own rules.