Building RiskFrame: From a Simple MT5 Panel to a Visual Trade Manager
RiskFrame began as a small panel for planning my own manual MT5 trades. Visual trade planning itself was not a new idea: other tools already used Entry, Stop Loss and Take Profit levels on the chart.
The part I wanted to approach differently was the interaction with the plan.
1. Starting with the Control Panel
First iteration of Control Panel was nothing like final version. I didn't yet have a good understanding of what it'll contain and because I wasn't planing(at first) placing my own Trade Manager on the market, symbols/functionality we super limited. 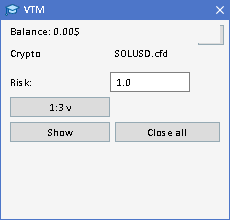
It was limited, but it provided a working base for testing Risk%, reward/risk settings, symbol-specific volume rules and the first versions of the Visual Trade Plan.
2. The first(almoust) Visual Trade Plan
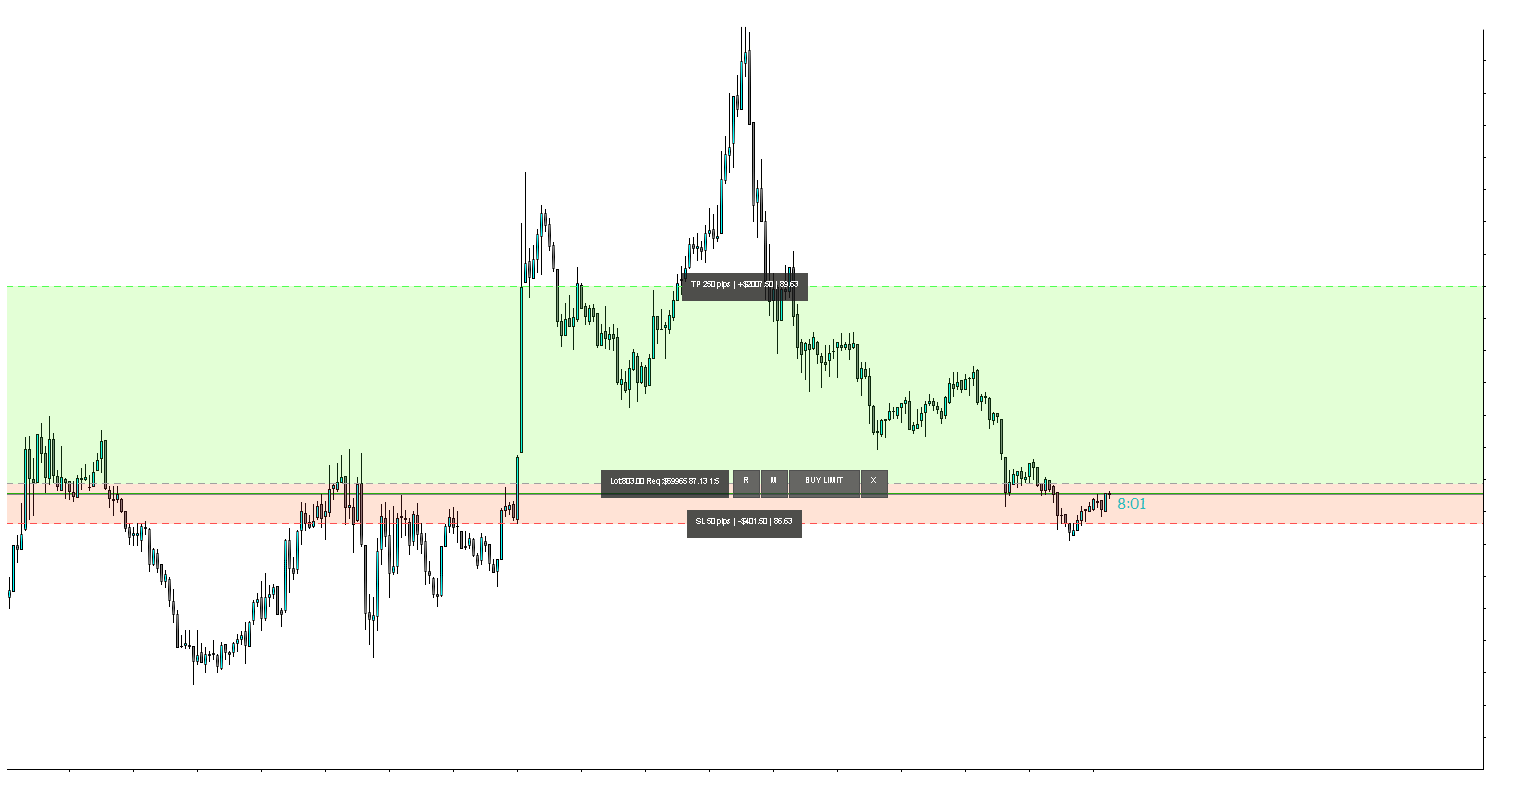
One of the first versions of Trade Plan was deliberately basic. The interface was rough, with interaction difficulties(one of them is, that I was figuring out how to make its width not the same as full chart and changeable), but the main pieces were already there: Entry / SL / TP on the chart, risk-based lot sizing, rotate/magnet buttons, required margin, risk and reward ratio, order send btn. And I already had some idea on color palette, I wanted to use.
3. Making the plan easier to read + Toolbar + Price Tags
The next step was mostly about readability. Before sending, I wanted the important numbers to be easy to find:
- TP/entry/SL level prices
- lot size and required margin
- planned risk and projected result
- whether the target is following the selected RR
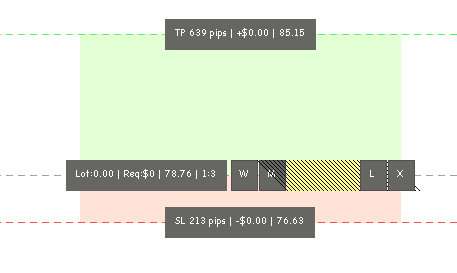
Somewhere at this stage I realized that I couldn’t keep all the necessary information right inside TP/Entry/SL plaques, without making them too big.
That's when Toolbar and price tags came into play, which allowed me to remove from Trade Plan, stuff like buttons and level prices.
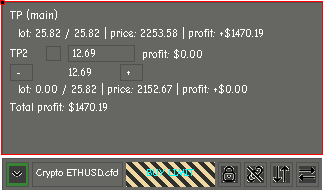
Toolbar allowed me to have more space for additional functionality and info. Here I started to think of RiskFrame as a commercial product. Thats why, I expanded the number of available symbols, began implementing TP2, did think of other easy-to-use/practical things.
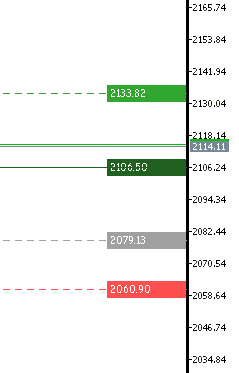
Price tags had to stay readable while the chart lines were being dragged. If the numbers jump around or disappear at that point, the visual plan is not very useful.
I really wanted to make price tags to look the same way as built in ones, but sadly I didn't find a way to do so. I did achive something similar, but due to some problems(they were kinda out of sync with Trade Plan Entry / SL / TP and they couldn't being redraw with dotted lines instead of solid lines), had to drop this idea.
3.1. Control Panel v2 and Faster interaction: hotkeys
As the layout became more stable, I focused on reducing the amount of cursor travel between the chart and separate settings.
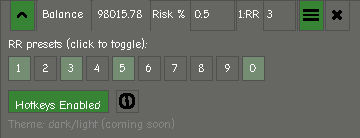
Basically, the idea was to make user focus on the Trade Plan and price action and spend less time trying to find and click specific buttons.
4.Validation came later
One thing I wanted to reduce was clicking Send and only then finding an obvious problem with the plan.

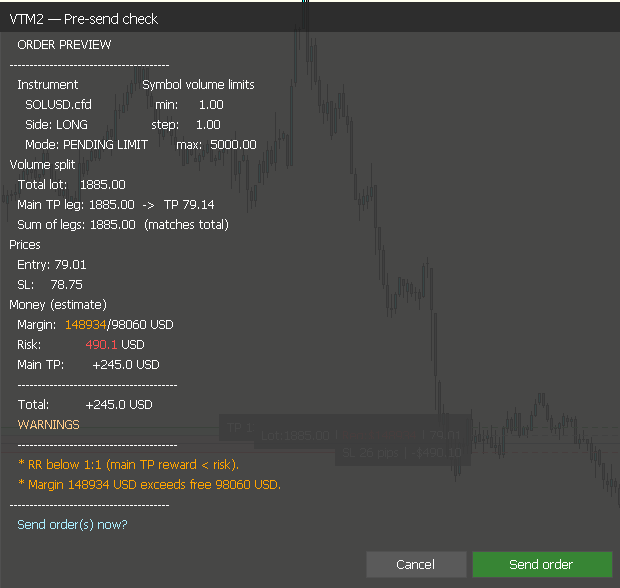
In v1.1, the strip and the Send action use the same validation result. A green Ready means RiskFrame found no known pre-send block at that moment. If it finds one, the panel shows the reason and does not open the confirmation dialog.
Ready does not mean a broker can never reject an order. Market, account or server conditions can still change after validation.
5.The last surviving prototype screenshot
Historical prototype — this is not the current RiskFrame interface.
Another problem became obvious during manual testing: when the Entry, SL and TP plaques were centred inside the plan, they often covered the candles and the exact area I was analysing.
Making them transparent would have reduced readability. Instead, I attached the information plaques to one edge of the plan and allowed the plan body to extend in the opposite direction.
The plaque side can be switched. The plan can also be moved, resized horizontally and vertically, and flipped. This makes it possible to place the information beside the setup rather than directly over it.
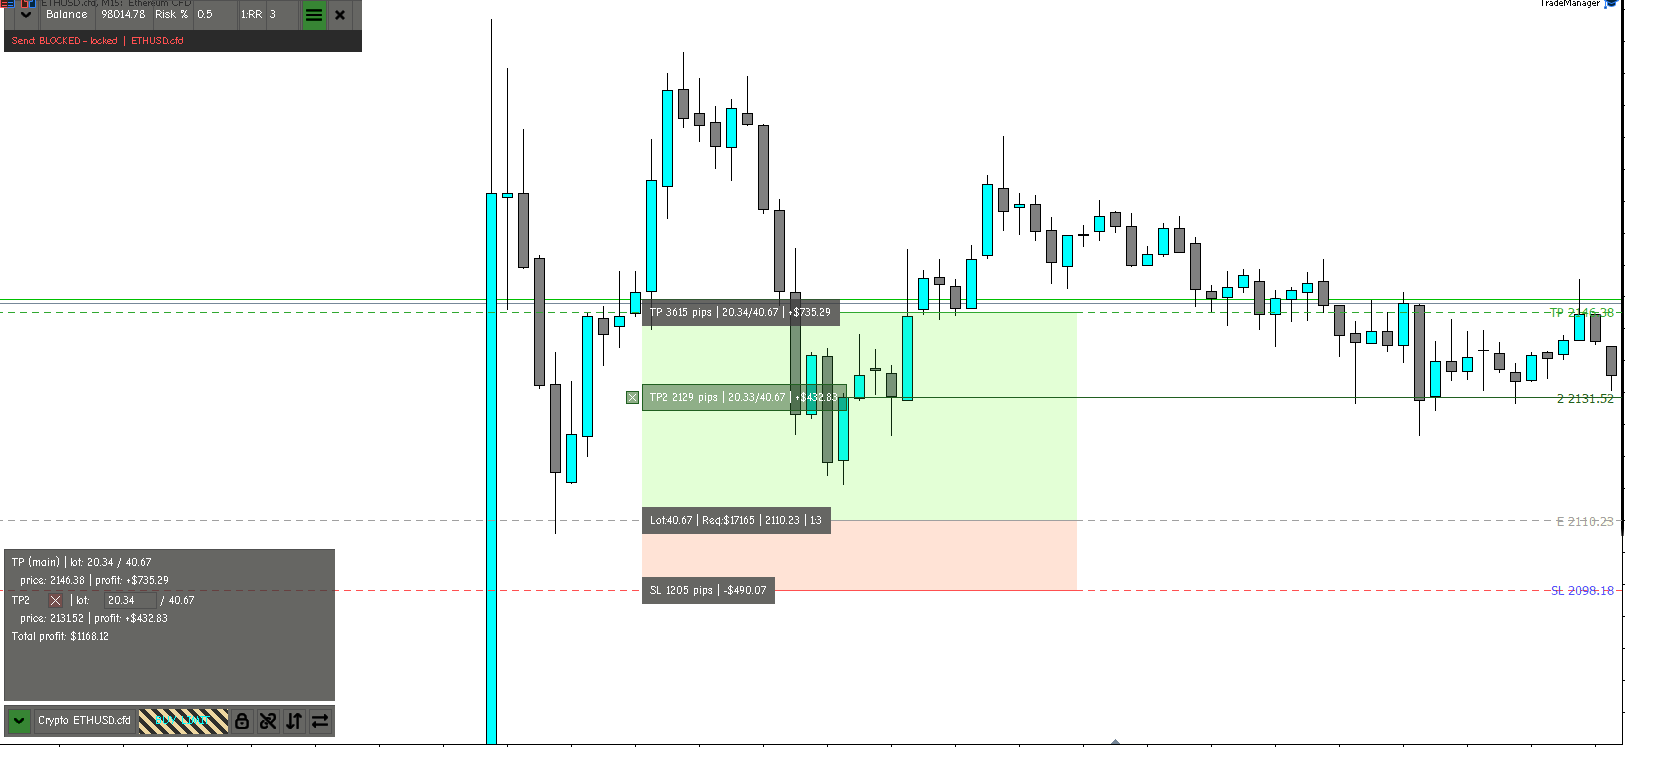
This is the last screenshot I still have from the prototype period. There was a large development gap between this build and RiskFrame v1, and I did not save images of every intermediate version. The Control Panel was rebuilt, the toolbar and chart controls were reorganized, validation and trade-management features were expanded, and many interactions changed through testing.
One problem visible here was the position of the Entry, SL and TP plaques. Keeping them in the middle of the plan often covered the candles. Making them transparent would have reduced readability, so I moved them to the side and allowed the Trade Plan to expand in the opposite direction.
That decision remained, but almost everything around it continued to evolve. The next current screenshot jumps forward to RiskFrame v1.1.
6. Testing a mouse-driven MT5 panel
Testing became a large part of RiskFrame’s development. A small change to one chart control can affect risk sizing, another drag mode, validation or order management, so I test complete workflows rather than only individual buttons.
The MT5 Strategy Tester does not reproduce every mouse-driven chart interaction in the same way as a regular chart. For that reason, RiskFrame is also tested on regular demo and live charts.
Testing included:
- Chart interaction: dragging Entry, SL, TP and TP2; RR-linked targets; resizing; timeframe changes and restarts.
- Calculations and symbol rules: risk sizing, minimum and stepped volumes, margin, stop restrictions and different symbol specifications.
- Order workflows: market and pending orders, netting and hedging accounts, closed sessions and broker-side restrictions.
- Management and safety: Break-even, Trailing Stop, TP2, Daily Loss Guard, validation states and STOP NOW.
I also test failure conditions, such as AutoTrading being disabled, insufficient margin, invalid stops or a closed market. Where visual observation is not enough, audit logs help confirm which path was taken and why an action was sent or blocked. After fixing a problem, I rerun the related earlier scenarios to check that the fix did not break another part of the workflow.
This is more useful for an interactive panel than relying on one backtest and assuming every chart interaction behaves the same way.
7. The layout in RiskFrame v1.1
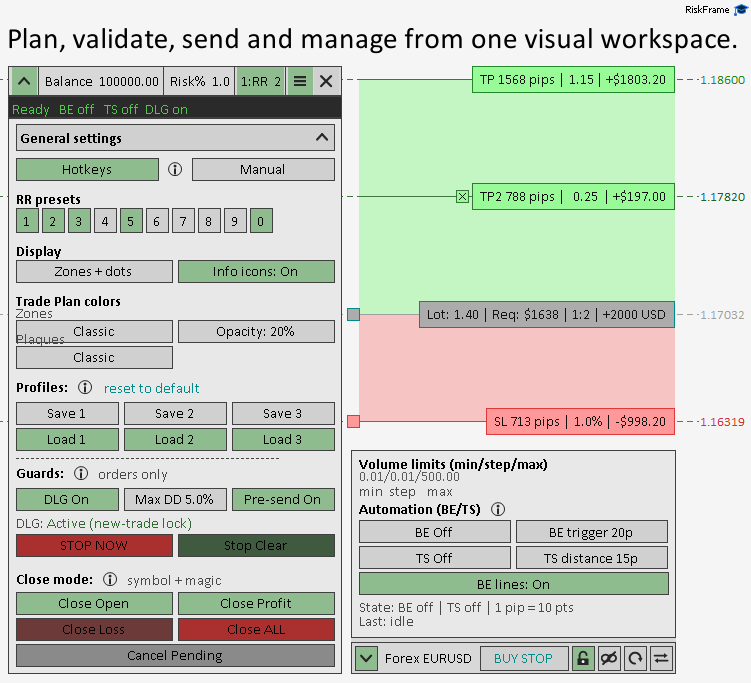
By v1.1, the separate pieces had become one workspace: the Visual Trade Plan on the chart, a Control Panel for risk and guards, a Quick Toolbar for common actions, and a clear send status.
Version 1.1 mainly cleaned up and strengthened that workflow:
- five interface languages for the trade workflow: English, Russian, German, Spanish and Portuguese
- unified pre-send validation (strip and send use the same result)
- new / clearer blocks for known send conditions such as broker side restrictions, invalid SL/TP prices and closed sessions
- clearer risk feedback when lot-step rounding changes the resulting planned risk
- fixes for STOP NOW reporting and TP2 edge cases
- the product name and interface updated to RiskFrame
What stayed the same
- The trader still decides the setup.
- The panel still shows the important order details before Send.
- No profit promises. No “never rejected by the broker” claims.
- Demo testing first, especially on a new broker or unusual CFD symbol.
Links
Product page:
RiskFrame Trade Manager MT5
v1.1 update post:
RiskFrame v1.1 — What’s new
Full manual:
RiskFrame user manual