Creating an EA that works automatically (Part 14): Automation (VI)

Introduction
In the previous article Creating an EA that works automatically (Part 13): Automation (V), I explained how a trader even without any programming knowledge can create the required basis for converting a trading system into an automated EA. This is what we have been doing throughout this series of articles. These concepts and information apply to any EA including any you create. In this article, we will consider one of the many ways to accomplish this task.
It is very important to fully understand the content of the previous article in order to truly understand what we will be discussing here. Without this knowledge, it might be difficult to understand the contents of this article. So, if you have not read the previous article yet, I recommend reading it before moving on. Now let's move on to the main subject of the article: how to turn an initially manual Expert EA into an automated one.
The birth of the C_Automaton class
We have seen the following figure in the previous article:

Figure 01 - Manual mode
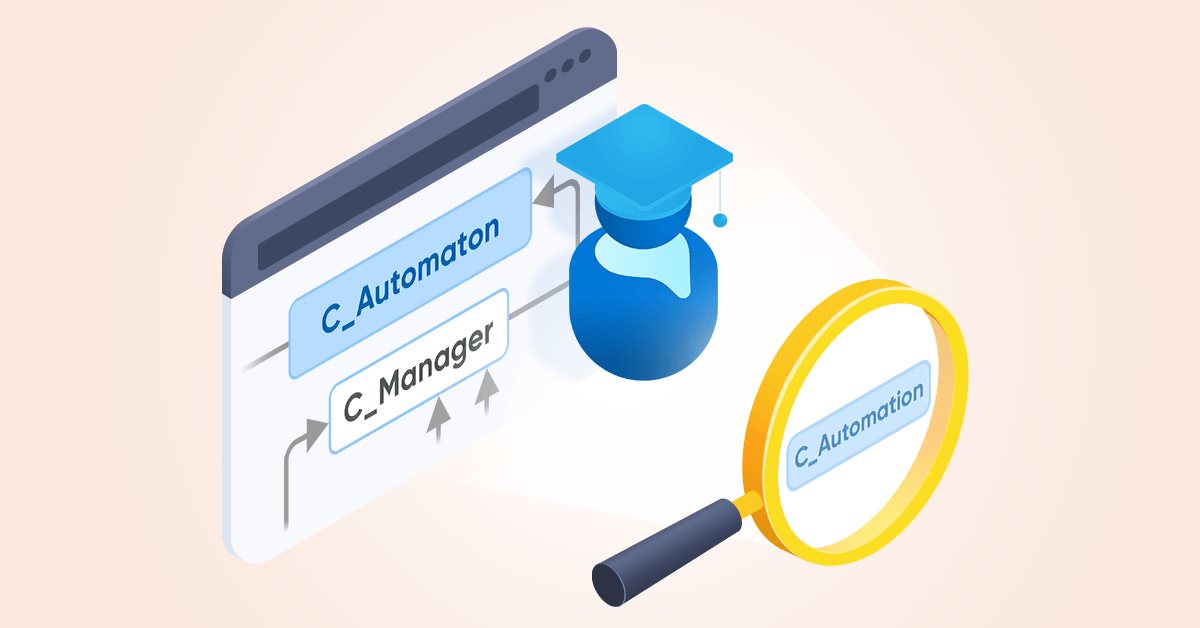
In this figure, we see how the trader interacts with the platform to open and close positions on the trading server. To automate this process, we need to make some changes to this figure. So, figure 01 representing the manual model turns into figure 02. This figure represents an EA that operates automatically based on some operational rules defined at the programming stage.

Figure 02 - Automated mode
Pay attention that fig 02 contains an image of a person who acts as the system supervisor. An automated system should never be operated unsupervised. The trader must always control the process even if he is only watching and does nothing else.
The same figure contains an additional class between the EA and the C_Manager class, which is called C_Automaton. This article will mainly cover this class and its connection with the EA and the C_Manager class, which replaces the trader when opening and closing positions or placing pending orders in the order book.
Again, it is important to note that we are not making any modifications to the existing system, which should already be working correctly, safely, reliably, robustly and stably before we implement the C_Automaton class. And if you want to modify anything in the system itself, you should remove the C_Automaton class, restore C_Mouse, and test the system with all the modifications. Only when you are sure that the system works perfectly, you can again add the C_Automaton class to make the EA operate without human intervention. But always remember that supervision is necessary. Human intervention should be the last resort, but supervision should be constant.
Before we see how the C_Automaton is programmed, let's take a look at the EA code that has been modified for automated use. The full EA code will be shown below:
#property copyright "Daniel Jose"
#property description "This one is an automatic Expert Advisor"
#property description "for demonstration. To understand how to"
#property description "develop yours in order to use a particular"
#property description "operational, see the articles where there"
#property description "is an explanation of how to proceed."
#property version   "1.14"
#property link      "https://www.mql5.com/pt/articles/11318"
//+------------------------------------------------------------------+
#include <Generic Auto Trader\C_Automaton.mqh>
//+------------------------------------------------------------------+
C_Automaton *automaton;
//+------------------------------------------------------------------+
input int       user01   = 1;           //Leverage Factor
input double    user02   = 100;         //Take Profit ( FINANCE )
input double    user03   = 75;          //Stop Loss ( FINANCE )
input bool      user04   = true;        //Day Trade ?
input double    user08   = 35;          //BreakEven ( FINANCE )
//+------------------------------------------------------------------+
input string    user90  = "00:00 - 00:00";      //Sunday
input string    user91  = "09:05 - 17:35";      //Monday
input string    user92  = "10:05 - 16:50";      //Tuesday
input string    user93  = "09:45 - 13:38";      //Wednesday
input string    user94  = "11:07 - 15:00";      //Thursday
input string    user95  = "12:55 - 16:25";      //Friday
input string    user96  = "00:00 - 00:00";      //Saturday
//+------------------------------------------------------------------+
#define def_MAGIC_NUMBER 987654321
//+------------------------------------------------------------------+
int OnInit()
{
        string szInfo;

        automaton = new C_Automaton(def_MAGIC_NUMBER, user03, user02, user01, user04, user08, PERIOD_M5);
        for (ENUM_DAY_OF_WEEK c0 = SUNDAY; c0 <= SATURDAY; c0++)
        {
                switch (c0)
                {
                        case SUNDAY     : szInfo = user90; break;
                        case MONDAY     : szInfo = user91; break;
                        case TUESDAY    : szInfo = user92; break;
                        case WEDNESDAY  : szInfo = user93; break;
                        case THURSDAY   : szInfo = user94; break;
                        case FRIDAY     : szInfo = user95; break;
                        case SATURDAY   : szInfo = user96; break;
                }
                (*automaton).SetInfoCtrl(c0, szInfo);
        }
        (*automaton).CheckToleranceLevel();
        EventSetMillisecondTimer(100);

        return INIT_SUCCEEDED;
}
//+------------------------------------------------------------------+
void OnDeinit(const int reason)
{
        delete automaton;
        EventKillTimer();
}
//+------------------------------------------------------------------+
void OnTick() { }
//+------------------------------------------------------------------+
void OnTimer()
{
        (*automaton).Triggers();
}
//+------------------------------------------------------------------+
void OnTradeTransaction(const MqlTradeTransaction &trans, const MqlTradeRequest &request, const MqlTradeResult &result)
{
        switch (trans.type)
        {
                case TRADE_TRANSACTION_POSITION:
                        (*automaton).UpdatePosition(trans.position);
                        break;
                case TRADE_TRANSACTION_ORDER_DELETE:
                        if (trans.order == trans.position) (*automaton).PendingToPosition();
                        else
                        {
                                (*automaton).UpdatePosition(trans.position);
                                (*automaton).EraseTicketPending(trans.order);
                        }
                        break;
                case TRADE_TRANSACTION_ORDER_UPDATE:
                        (*automaton).UpdatePending(trans.order);
                        break;
                case TRADE_TRANSACTION_REQUEST: if ((request.symbol == _Symbol) && (result.retcode == TRADE_RETCODE_DONE) && (request.magic == def_MAGIC_NUMBER)) switch (request.action)
                        {
                                case TRADE_ACTION_DEAL:
                                        (*automaton).UpdatePosition(request.order);
                                        break;
                                case TRADE_ACTION_SLTP:
                                        (*automaton).UpdatePosition(trans.position);
                                        break;
                                case TRADE_ACTION_REMOVE:
                                        (*automaton).EraseTicketPending(request.order);
                                        break;
                        }
                        break;
        }
}
//+------------------------------------------------------------------+
Note that only a few changes have been made to this code. The OnChartEvent handler has been removed because it is no longer needed and the OnTime event has received a new function. Further details will be provided later. The rest of the code remained the same as in the previous manual operation mode. It is extremely important to note that you should not modify the entire EA code when automating it. You should only make the necessary changes which, in our case, is only the addition of a new function in the time event.
Despite everything, this EA code IS NOT a definitive and immutable code. Depending on the system you are going to use, there can be more or less things to be defined by the user, which we will see here. Therefore, there may be variations in the C_Automaton class constructors. So, you may need more or less parameters. So, do not think that this code can be used in all possible cases.
But apart from the earlier mentioned points, it will basically remain without major changes. So, I recommend studying what really needs to be done for the system you are going to use. Leave certain pre-configured parts that should not be adjusted by the trader and allow the user to adjust only the necessary parts depending on the scenario used.
One other thing you may have noticed is that the C_Automaton class is inheriting the C_Manager class. Because of this, the code has practically not undergone any changes. So, as you may see, everything will happen inside the C_Automaton class.
And if you want to use the same EA structure and classes that I'm showing, it will be enough to modify the C_Automaton class to have your trading system within this class. Thus, the creation of new EAs that utilize different trading systems will be faster, safer and more consistent, since the only difference between them is the C_Automaton class itself. When creating the class, using the constructor, you can inform some particular things in accordance with the trading system itself. This will maintain a high level of flexibility, usability, robustness and reusability.
Your EA will always have a good level of quality required by actual users. But anyway, you can make some changes in order to make things a lot more interesting. Perhaps in the future, I will make public some of these modifications. In any case, I recommend that you change and adapt the system to your mode of operation. After all, that's what I'm writing these articles for and allowing free access to the code.
My only request is that if you make any use of it, even just part of it, please mention the source of the content. It is nothing shameful, while it is not good to use or distribute something without indicating the source.
Now let's see what's inside the black box of the C_Automaton class.
Analyzing the C_Automaton class code
As mentioned above, both the EA code and the C_Automaton class code depend on what, how and when you are going to we trade. But, regardless of this, the C_Automaton class will basically have three internal functions: a constructor, a function that will be called by the EA's time event, and another internal and private function of the class.
It is important that you pay attention to these three functions. It may happen that for some other reason, more or less functions may be needed to help these three, but in essence we will always have these three functions.
Not to be limited to theory, let's watch the video below. It may seem long, but it's still worth watching. I want to emphasize that no matter what system you trade, everyone, without exception, will have some kind of loss, whether large or small. But first watch the video to understand what will be explained below.
Video 01 - Demonstration of the automated EA (about 25 minutes)
In this video, I'm using the trading system based on the 9-period exponential moving average which the EA uses to create entries at the beginning of each new bar. The creation of this system was described in the previous article, so I recommend carefully reading that article in order to understand all underlying processes. Again, let's not be limited to theory. To understand how the C_Automaton class enables the EA to create, manage and close trades, let's look at some code examples that create the specific setup.
Follow the explanation of each method, see how it was developed and coded. This way you will be able to develop practically any setup, although there can be very specific cases that will need a little more code. But since they are rare and the vast majority will actually use indicators, these examples will help a lot in the creation of the 100% automatic model. Before getting into the code, let's look at some small details.
Common parts, dependent parts
We need to make some clarification so that you don't get confused in the C_Automaton class when viewing the examples.
The C_Automaton class code is very peculiar, but for experienced programmers it is something quite common. There are parts that are common to all operations and parts that are specific to a particular operation. Pay attention to this when describing your method as shown in the previous article. Because if you don't understand that all models have common parts, you might think that the C_Automaton class can't cover your model, when in fact it can cover any. Sometimes you will need to add some variables, but I will show you how to do it the right way so that you can work with any model type.
Common code parts will always be repeated, regardless of the model you want to use. Dependent parts make your model unique and they are not repeated in other models.
Here is the common code for any model:
#property copyright "Daniel Jose"
//+------------------------------------------------------------------+
#include "C_Manager.mqh"
//+------------------------------------------------------------------+
class C_Automaton : public C_Manager

{
        protected:
                enum eTrigger {TRIGGER_NONE, TRIGGER_BUY, TRIGGER_SELL};
        private :
                struct st00
                {
                        int     Shift,
                                nBars;
                        double  OverBought,
                                OverSold;
                }m_Infos;
                double  m_Buff[];
                int     m_nBars,
                        m_Handle;
                ENUM_TIMEFRAMES m_TF;
//+------------------------------------------------------------------+
static eTrigger m_Memory;
//+------------------------------------------------------------------+
inline eTrigger CheckTrigger(void)
                        {
                               int iRet;

                               if (((iRet = iBars(NULL, m_TF)) > m_nBars) && (m_Handle != INVALID_HANDLE))
			       {
			       }

                               return TRIGGER_NONE;
                        }
//+------------------------------------------------------------------+
        public  :
//+------------------------------------------------------------------+
                C_Automaton(const ulong magic, double FinanceStop, double FinanceTake, uint Leverage,
                                                bool IsDayTrade, double Trailing, const ENUM_TIMEFRAMES iPeriod,
                                                const double OverBought = 70, const double OverSold = 30, const int iShift = 1)
                        :C_Manager(magic, FinanceStop, FinanceTake, Leverage, IsDayTrade, Trailing, true, 10),
                         m_TF(iPeriod),
                         m_Handle(INVALID_HANDLE)
                        {
                                m_Infos.Shift      = iShift;
                                m_Infos.OverBought = OverBought;
                                m_Infos.OverSold   = OverSold;
                                ArraySetAsSeries(m_Buff, true);
                                m_nBars = iBars(NULL, m_TF);
                        }
//+------------------------------------------------------------------+
inline virtual void Triggers(void) final
                        {
                                if (!CtrlTimeIsPassed()) ClosePosition(); else switch (CheckTrigger())
                                {
                                        case TRIGGER_BUY:
                                                if (m_Memory == TRIGGER_SELL) ClosePosition();
                                                if (m_Memory != TRIGGER_BUY) ToMarket(ORDER_TYPE_BUY);
                                                m_Memory = TRIGGER_BUY;
                                                break;
                                        case TRIGGER_SELL:
                                                if (m_Memory == TRIGGER_BUY) ClosePosition();
                                                if (m_Memory != TRIGGER_SELL) ToMarket(ORDER_TYPE_SELL);
                                                m_Memory = TRIGGER_SELL;
                                                break;
                                }
                        };
//+------------------------------------------------------------------+
};
//+------------------------------------------------------------------+
static C_Automaton::eTrigger C_Automaton::m_Memory = TRIGGER_NONE;
//+------------------------------------------------------------------+
Everything you see in the above code is part of the common code that is present in any model. Regardless of the model, this code will always be used in it. It is true that there may be some new variables or C_Manager calls, as you will see in the example codes. But essentially the above code will remain largely intact.
Anything not present in this code above is part of the model-dependent code specific to your model. So let's see the code to understand how it works. In this way, you will be able to understand what to add or not to add to the code, in order to cover a more specific model.
Let's start with the class declaration in the following code:
#include "C_Manager.mqh"
//+------------------------------------------------------------------+
class C_Automaton : public C_Manager
{
        protected:
                enum eTrigger {TRIGGER_NONE, TRIGGER_BUY, TRIGGER_SELL};
Here we declare that the C_Automaton class will be publicly inherited from the C_Manager class. This will allow us to access the C_Manager class procedures when using the C_Automaton class. This is important for the initialization of some members associated with the control class. If you look at the EA code, you can see these points where the procedures are accessed. Although these procedures are not declared in the C_Automaton class, they come from other classes. This has already been explained in another article within this series.
We have also created an enumerator to have high-class programming in the class. This enumeration indicates which type of trigger was activated. One more detail: although this enumerator is declared in a protected part of the code, it will not be used outside the class. But it was necessary to put it in this part in order to be able to initialize a static class variable. But we will see more on that later.
Next, let's see the variables in the code below:
        private :
                struct st00
                {
                        int     Shift,
                                nBars;
                        double  OverBought,
                                OverSold;
                }m_Infos;
                double  m_Buff[];
                int     m_nBars,
                        m_Handle;
                ENUM_TIMEFRAMES m_TF;
//+------------------------------------------------------------------+
static eTrigger m_Memory;
This is the structure in which we will hardly need to make changes since it covers a wide range of cases related to indicators. However, if you are using more than one indicator, you may need to add more structures. But you won't need to modify the elements of the structure itself.
To understand this, let us view the following example: the structure is referenced by one variable. This allows using one indicator whatever it may be. But what if we need to use more than one indicator? What to do in this case? In this case, we will need to implement some additions. They will be shown in examples. For now, let's focus on the basics to understand this simpler system.
We also have a variable which will serve as a buffer to receive indicator values, a variable to store the number of bars on the chart, another one for the indicator reference and a variable to determine the timeframe used for the indicator. And finally, there is one more variable which stores the last trigger state. This static variable is initialized outside the class body, as shown in the code below:
static C_Automaton::eTrigger C_Automaton::m_Memory = TRIGGER_NONE;
Note that it must be initialized with a neutral trigger meaning no query was made to the trigger system. We don't want an accidental trigger to happen. Although, depending on the trading model, this static variable will not be so useful, since the model always generates triggers in a crossed way. But to avoid having random triggers immediately after placing the EA on the chart, we use this variable to ensure nothing random happens at startup or trading hand change.
The next point to pay attention to is the private function of the class shown below:
inline eTrigger CheckTrigger(void)
                        {
                                int iRet;

                                if (((iRet = iBars(NULL, m_TF)) > m_nBars) && (m_Handle != INVALID_HANDLE))
                                {
                                };
                                return TRIGGER_NONE;
                        }
By default, this function will always return a null trigger, that is, this is neither buy nor sell. The specific calculation for your trading model will be implemented in this function. So further calculations can be different.
But regardless of the required calculation type, we will always test the system in the following way: calculation will only be performed on a new bar; if there is no new bar, the calculation will be ignored. Also, the handle must point to something valid; otherwise nothing will be calculated. It is important to clearly define these rules in order to avoid problems during the EA operation.
The following function is the class constructor:
                C_Automaton(const ulong magic, double FinanceStop, double FinanceTake, uint Leverage,
                            bool IsDayTrade, double Trailing, const ENUM_TIMEFRAMES iPeriod,
                            const double OverBought = 70, const double OverSold = 30, const int iShift = 1)
                        :C_Manager(magic, FinanceStop, FinanceTake, Leverage, IsDayTrade, Trailing, true, 10),
                         m_TF(iPeriod),
                         m_Handle(INVALID_HANDLE)
                        {
                                m_Infos.Shift      = iShift;
                                m_Infos.OverBought = OverBought;
                                m_Infos.OverSold   = OverSold;
                                ArraySetAsSeries(m_Buff, true);
                                m_nBars = iBars(NULL, m_TF);
                        }
It is extremely important to fully understand this constructor. I understand that the code may seem confusing for those with no experience or who are just getting started. However, understanding this code is critical to getting the most out of the C_Automaton class and creating a fully automated EA. Let's start by understanding what this seemingly confusing text actually does.
Since the C_Automaton is inherited from C_Manager, we must initialize the C_Manager constructor. For this reason, it will receive data from the EA, which is fully passed to the C_Manager class for initialization.
But pay attention to two additional parameters. If you need, they can be passed back to the EA. But this depends on the type of trade created in the C_Automaton class. I mention these parameters here so that their meaning is clear. These parameters can be understood by looking at C_Manager. The code that describes the class constructor can be found in previous articles, so I won't repeat it here.
The EA will also inform which chart period to use for the C_Automaton class. This parameter is used for that.
It is important that the automation system always works in a certain timeframe, regardless of what the supervisor sees. If you use the same timeframe which is visible to the supervisor, here in the automation class, we can make the EA accidentally trigger at inappropriate times. This is a very common error in some EAs, where the programmer is not aware that the user can change the chart timeframe during the EA working time. This causes immense inconvenience. But by doing so, we guarantee that the EA will always work with the same timeframe, regardless of what is visible to the trader.
At this point we have some parameters with default values. Accordingly, they may or may not be declared in the EA code.
Using default values does not prevent you from indicating another value in the EA code or even allowing the trader to define a value when launching the EA. But since in the vast majority of cases these values will stay the same and in other cases they will not be actually used, I define these parameters with some default value to avoid constructor overloading. This makes the code more compact and simpler to be analyzed and understood. Note that these values are stored in the internal structure for further use.
One important detail: if you are using a system where these values can be changed by the trader depending on the type of indicator being used, this code may need to be changed to accommodate more variables. In this case, it is suitable for use with one indicator or several ones as long as they all use the same data.
Finally, we initialize the value of the handle, so that it doesn't point to any indicator. This is important to avoid breaking security, in case we have the handle pointing to something unknown. Besides, we adjust the last system variables. This constructor is the basics and it will receive a few more lines of code, depending on the type of system that will be implemented. But this will be shown in code examples.
To finish the base code of the C_Automaton class, let's see the last code part:
inline virtual void Triggers(void) final
                        {
                                if (!CtrlTimeIsPassed()) ClosePosition(); else switch (CheckTrigger())
                                {
                                        case TRIGGER_BUY:
                                                if (m_Memory == TRIGGER_SELL) ClosePosition();
                                                if (m_Memory != TRIGGER_BUY) ToMarket(ORDER_TYPE_BUY);
                                                m_Memory = TRIGGER_BUY;
                                                break;
                                        case TRIGGER_SELL:
                                                if (m_Memory == TRIGGER_BUY) ClosePosition();
                                                if (m_Memory != TRIGGER_SELL) ToMarket(ORDER_TYPE_SELL);
                                                m_Memory = TRIGGER_SELL;
                                                break;
                                }
                        };
The above procedure is not 100% finished code, and it may undergo some small changes depending on your trading system. Basically it shows what will happen on each call coming from the OnTime event. Many may want to move this into the OnTick event, but I have already explained why this should not be done. I recommend that you read the previous articles to understand the reasons.
The code tells the C_Manager class to always work with market requirements. That is why I say that the code is not 100% finished, since depending on the model you are implementing, the order system can be different. Even the way in which the trading side changes can make this code look different.
Another thing is that the above code does not allow the EA to increase a position when new signals occur. This is because we are using a memory variable.
It prevents the EA from increasing the position if a new entry signal is generated. But anyone with some programming knowledge will be able to get around this block, which I added on purpose. If someone tries to do this without proper knowledge, they will surely end up with serious losses on the account, as the EA can run orders uncontrollably, losing all the available balance in a matter of seconds. So don't change this code if you don't know exactly what you are doing..
For this reason, we won't go too deep into explaining this code. However, there is something I would like to mention before moving on to the examples. It is the declaration of this procedure, which may seem strange and meaningless at first glance.
Let's try to understand the reason. The whole system was designed to use a class system. This, in addition to making the code more reliable, secure and robust, allows its expansion over time, which makes it more complex than originally designed. But this increase in complexity does not involve a considerable increase in code, since the class system allows us to make things much more modular, thus reducing the code while increasing the complexity.
Since C_Automaton is not the final class, it makes the procedure declaration as-is in a larger system. We tell the compiler to help ensure that this particular procedure will not in any way be modified in another class. This ensures that it will be unique throughout the inherited class system.
This kind of thing is very important when dealing with modular and very well structured code. Because no matter how much you structure them, sooner or later you may end up making the mistake of overwriting an inherited procedure. If this happens, it will put all of our code at risk. But luckily, the MLQ5 language provides the tools to avoid this kind of problem.
To understand how the C_Automaton class can assist in automating the EA, let's look at some code examples, where we will focus on the explanation regarding how to implement a trading system. Before we start, there are a few things to clarify:
- No automated trading system is 100% secure.
- There is no system that guarantees profit in all operations.
- Make no mistake when you see the system working at first, as can be seen in video 01.
- Only use or automate the system that you already know. Do not try to combine several strategies imagining that this way you will achieve better results. Simplicity is everything.
- Use the models shown here at your own risk, knowing that they can generate profit and also loss.
For a better understanding of how to apply the code, each of the models will be accompanied by a specific EA, allowing you to compare codes and learn from them.
Conclusion
However, due to the volume of the topic, only three examples of automation will be presented in this article. The corresponding codes will be discussed in the next article, which may be the last one in this sequence. So don't miss the next article. In that article, we will see how all of these elements fit together perfectly, bringing the EA into action in a fully automated mode while following the pattern you specify.
Translated from Portuguese by MetaQuotes Ltd.
Original article: https://www.mql5.com/pt/articles/11318
Warning: All rights to these materials are reserved by MetaQuotes Ltd. Copying or reprinting of these materials in whole or in part is prohibited.
This article was written by a user of the site and reflects their personal views. MetaQuotes Ltd is not responsible for the accuracy of the information presented, nor for any consequences resulting from the use of the solutions, strategies or recommendations described.

 Multilayer perceptron and backpropagation algorithm (Part 3): Integration with the Strategy Tester - Overview (I).
- Free trading apps
- Over 8,000 signals for copying
- Economic news for exploring financial markets
You agree to website policy and terms of use