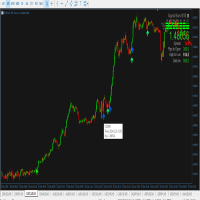
JesVersal Universal EA
- エキスパート
- Justine Kelechi Ekweh
- バージョン: 1.0
- アクティベーション: 5
Jesversal Universal EA – The Ultimate Automated Trading Experience
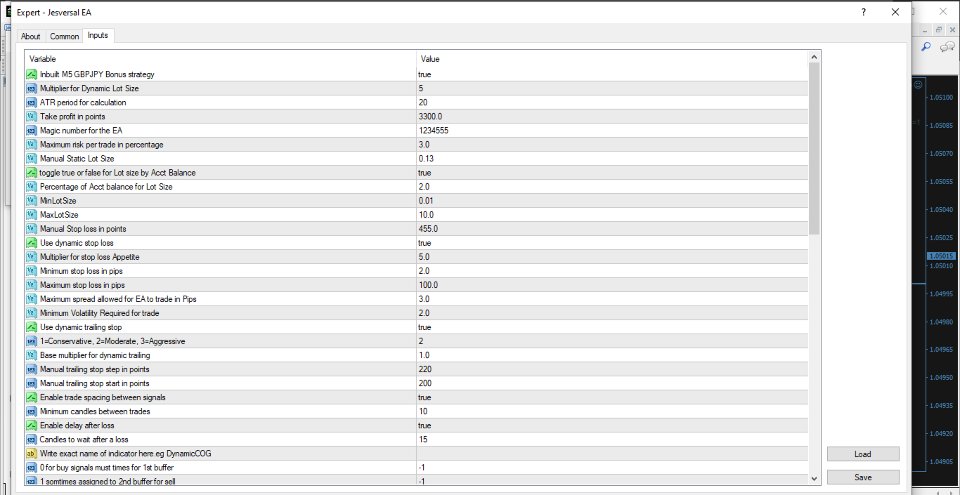
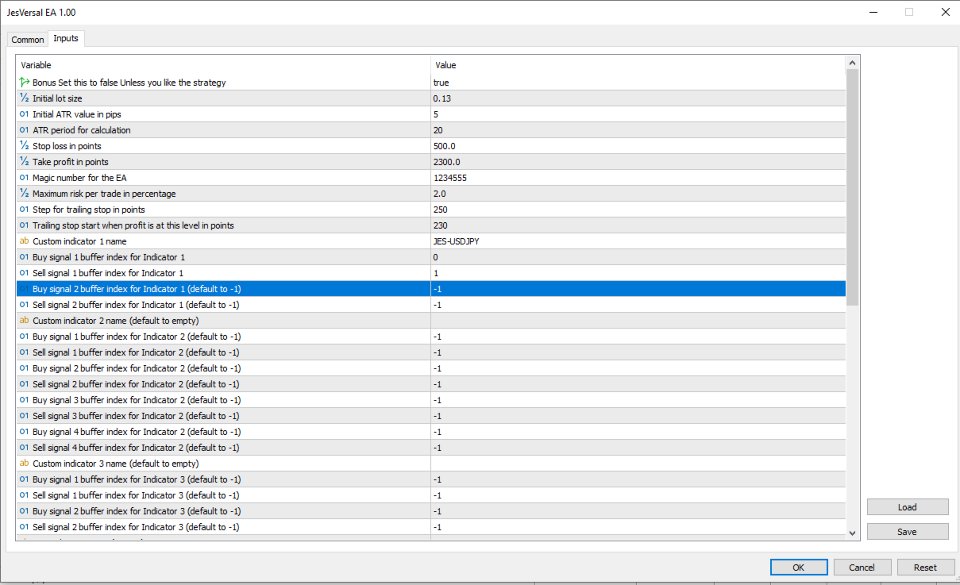
The Jesversal EA is a powerful Universal EA that can take trades from any indicator with buy and sell signal buffers. Once you know the buffer integer for the signals—most indicators assign their first buy signal with “0” and the second for sell with “1”—simply feed these values into the EA and watch it work its magic. Packed with advanced functions, Jesversal EA makes your trading look as professional as that of institutional traders. Let’s explore its features in the order they appear in the settings parameters.
- Inbuilt M5 GBPJPY Bonus Strategy:
When set to true, this parameter disables external indicators and instead activates the EA’s built-in strategy, which is rigorously tested and proven on the GBPJPY M5 timeframe. - Multiplier for Dynamic Lot Size:
This value adjusts the automatic lot size based on market volatility and instability. It helps mitigate risk during sudden spikes and maximize profit during choppy periods. - ATR Period for Calculation:
The ATR period (defaulted to 20) is used along with other measures for volatility calculations. If you’re unsure, keep it at 20—but seasoned traders can tweak it to suit their market view. - Take Profit in Points:
This sets the profit target for each trade. While you can choose a high take profit level—especially if you plan to use the EA’s dynamic trailing stop that rides trends to their fullest—you should adjust it to match your trading style. - Magic Number for the EA:
A unique identifier for the EA’s trades. It is critical that you change this number when using the EA on multiple charts (even on the same broker) to prevent trade conflicts. - Maximum Risk per Trade in Percentage:
This parameter caps the percentage of your account balance risked on any single trade when calculating the lot size. It is an essential safeguard to protect your capital. - Manual Static Lot Size:
When lot size by account balance is disabled (set to false), the EA uses this fixed lot size for every trade—ensuring consistency while still adhering to your maximum risk per trade. - Toggle for Lot Size by Account Balance (True/False):
Enable this to have the EA calculate the lot size as a percentage of your current balance, or disable it to stick with the manual static lot size. - Percentage of Account Balance for Lot Size:
Specifies the percentage of your account to be used in calculating the lot size. For most traders, keeping this between 1% and 2% per trade is advised—1% is often ideal given the EA’s ability to handle multiple signals. - Max and Min Lot Size:
These parameters ensure that the lot size remains within your acceptable risk range by defining upper and lower limits. - Manual Stop Loss in Points:
When dynamic stop loss is disabled, the EA uses this fixed stop loss value for every trade. - Use Dynamic Stop Loss:
When enabled, the EA calculates the stop loss dynamically using market logic and volatility—adapting to changing conditions instead of relying on a fixed value. - Multiplier for Stop Loss Appetite:
Adjust this multiplier to widen or tighten the dynamic stop loss. Increasing it results in a wider stop loss, while decreasing it makes for a tighter exit. - Max and Min Stop Loss in Pips:
These settings define the boundaries (in pips) for the stop loss. For example, 2 pips equal 20 points and 100 pips equal 1000 points—helping ensure the stop loss neither over-expands during volatile news events nor tightens excessively during choppy sessions. - Maximum Spread Allowed for EA to Trade in Pips:
This parameter protects your trading by preventing trade execution when the spread is too high, such as during erratic market sessions or closing hours. - Minimum Volatility Required for Trade:
Ensures that the EA only takes trades when market volatility is sufficient. In very slow or “unreasonable” market conditions, even if the trade moves in your favor, high spreads might keep you out of profit—so this filter avoids those scenarios. - Use Dynamic Trailing Stop:
A favorite feature that enables the EA to monitor market conditions, volatility, and strategy before automatically setting and adjusting a trailing stop. This dynamic trailing stop makes pre-setting take profit levels unnecessary by effectively locking in profits as the trend develops. - Trailing Stop Sensitivity (1 = Conservative, 2 = Moderate, 3 = Aggressive):
This setting directs the EA on how closely to trail the price. A setting of 1 follows the trade very closely, 2 uses a moderate approach, and 3 gives the trade more room to breathe. - Base Multiplier for Dynamic Trailing:
An additional integer factor that refines the dynamic trailing stop calculations. It helps determine whether the trailing style is more conservative or aggressive—so adjust with care. - Manual Trailing Start and Step:
When dynamic trailing is disabled, the EA falls back on these manually defined values to set the starting point and step size for the trailing stop. - Enable Trade Spacing Between Signals & Minimum Candles Between Trades:
This parameter introduces a deliberate delay between consecutive trades—even if multiple signals occur—by waiting for a set number of candles. It’s different from the max trade limits (like MaxOpenTrades) and helps avoid over-trading. - Enable Delay After Loss & Candles to Wait After a Loss:
When activated, the EA will pause new trades for a specified number of candles following a loss. This delay can be crucial in preventing further losses during unfavorable market conditions. - Indicator Name (e.g., DynamicCOG):
Enter the exact name of your custom indicator here. If not used, leave the field blank to prevent the EA from misinterpreting signals. - 0 for Buy Signals (First Buffer):
This specifies that the first indicator buffer (typically 0) is used for buy signals. Confirm with your indicator programmer to ensure this is correct. - 1 (Sometimes Assigned to Second Buffer for Sell):
Commonly, the second buffer (usually 1) is assigned for sell signals. Some indicators may differ, so verify the integer assignments. (For instance, if an indicator has multiple buffers, it might use 0 for buy, 1 for sell, 2 for buy, 3 for sell, etc.) - -1 to Disable a Signal:
If your indicator does not use certain buffers, set the unused buffer parameters to -1. This tells the EA to ignore any signal from those buffers. - No-Trade Start (HH:MM):
Sets the time at which the EA stops trading and closes all active trades—ideal for avoiding periods of market uncertainty. - No-Trade End (HH:MM):
Specifies the time at which the EA resumes trading for the day. - Use Time Filter:
When enabled, the EA adheres to the specified start and end times. Disabling this means the EA will trade continuously—even during high-spread or erratic sessions like the New York close. - CloseOnOppositeSignal:
If activated, the EA will close an open trade immediately upon detecting an opposite signal (e.g., closing a buy trade if a sell signal is triggered). - Kelechi (Logical Martingale):
Designed for martingale enthusiasts, this feature adds logic by waiting for confirmation that the market will resume in your favor after a loss before re-entering a trade. This prevents blind martingale doubling. - Threshold Point:
Defines the specific price point where you want the market to reverse in your favor before the EA initiates a martingale trade. - Max Look Back Bars Before Forgetting:
This parameter tells the EA how many candles to consider after a loss. If too many candles pass without a favorable reversal, the EA will forgo the martingale trade—avoiding a potential “revenge” trade in a changed trend. - JesLyn (Reverse Trading on Loss):
A favorite for strategies where market reversals are steep. When enabled, the EA will open a trade in the opposite direction if the market moves against your initial position. Note that this style might not suit all strategies. - Percentage of Loss:
Sets the percentage of the stop loss distance that must be reached before an opposite trade is triggered. For example, a 50% setting means an opposite trade is initiated when half of the stop loss is reached; a 99% setting means the reversal trade kicks in at full stop loss. - Jes Stoploss and Takeprofit:
These settings allow you to define separate stop loss and take profit levels specifically for the JesLyn reverse trading feature. - Maximum Open Trade (JesLyn Specific):
This parameter restricts the maximum number of open trades for the JesLyn feature alone, ensuring that reverse trading remains controlled. - CloseByEma:
For traders who prefer EMA cross-based exits, enabling this feature will have the EA close buy trades if the price drops below the EMA or close sell trades if the price rises above it. You also have the flexibility to set how many candles must confirm the EMA crossover. - EMA_Period:
Defines the period for the EMA used in the CloseByEma feature (for example, an EMA of 50). For a buy trade, if enough candles cross below this EMA, the trade is closed—regardless of profit or loss. - ConsecutiveCandles:
Determines the number of consecutive candles that must close below (for buy trades) or above (for sell trades) the EMA before the EA closes the trade. This helps avoid premature closures based on short-term fluctuations.
Why You Should Buy Jesversal Universal EA
- Versatility & Customization: Whether you trade using custom indicators, prefer fixed or dynamic lot sizing, or want to integrate advanced risk management strategies, Jesversal Universal EA is built to adapt to your unique trading style.
- Professional-Grade Features: With functionalities like dynamic stop loss, dynamic trailing, EMA-based exits, and smart martingale logic, this EA brings institutional-level trading techniques to your desktop.
- Risk Control & Flexibility: The comprehensive set of parameters—from risk per trade to trade spacing and time filters—ensures that your trades are executed under optimal conditions, protecting your capital while maximizing profit potential.
- Proven Strategy Included: Benefit from an inbuilt profitable M5 GBPJPY strategy that lets you start trading right away without needing to configure external indicators.
- User-Friendly & Transparent: Every parameter is clearly explained and arranged in a logical order, ensuring you have full control over your trading decisions without any hidden complexities.

