
Optimization management (Part II): Creating key objects and add-on logic

Table of contents
- Introduction
- External terminal manager (ITerminalManager and Config)
- Directory structure objects
- Objects working with reports and EA settings files (OptimisatorSettingsManager, ReportReader, SetFileManager)
- Testing key objects
- Optimization manager (OptimissationManager)
- The resulting model class (IExtentionGUI_M and its implementation)
- Conclusion and attachments
Introduction
This article provides a further description of a convenient GUI creation process intended for managing optimizations in multiple terminals simultaneously. The previous article considered a method of launching a terminal from the console and contained a description of the configuration file. In this we proceed to the creation of a C# wrapper for the terminal, which will enable optimization management as a third-party process. The earlier considered GUI had no logic and could not perform any actions. It could only respond to keystrokes which output text of the pressed key to console (from which it is launched). In this part, a logic will be added, which will process GUI events and will implement the embedded logic. A number of objects working with files will be created, which will enable the implementation of the logic part of program operation through these objects, instead of working with files — this will simplify operation and will make the code more informative. Within this article, the application will finally takes on the form demonstrated in the video.
External terminal manager (ITerminalManager and Config)
Earlier, we examined the creation of a graphical layer for our add-on. The logical component creation method is considered in this part. Using the advantages of OOP, the logical part was split into a number of classes, each of which is responsible for its specific area. Let us begin with classes that perform specific actions related to files and the terminal. After that we will proceed with the resulting ExtentionGUI_M class, in which the final logic is described. Let us begin with the classes used in logic implementation.
This chapter describes operations with terminals. The following components will be considered:
- Work with configuration files
- Work with the terminal like with the third-party process
Let us start with configuration files. The details are provided in the terminal reference. First of all we need to create all required variables, which we will apply in the configuration file: numeric values of these variables can be viewed in the terminal, while their implementation is available in file Config.cs. Let us have a look at the implementation of a convenient method for passing the server address. Note that it should be passed in a certain format with an additionally specified port number. This problem is solved by creating a class which stores the server address received via a constructor, and it checks its correctness before installation.
/// <summary>
/// IPv4 server address and port
/// </summary>
class ServerAddressKeeper
{
    public ServerAddressKeeper(IPv4Adress ip, uint port)
    {
        IP = ip;
        Port = port;
    }
    public ServerAddressKeeper(string adress)
    {
        if (string.IsNullOrEmpty(adress) || string.IsNullOrWhiteSpace(adress))
            throw new ArgumentException("adress is incorrect");

        string[] data = adress.Split(':');

        if (data.Length != 2)
            throw new ArgumentException("adress is incorrect");

        IP = new IPv4Adress(data[0]);
        Port = Convert.ToUInt32(data[1]);
    }

    public IPv4Adress IP { get; }
    public uint Port { get; }

    public string Address => $"{IP.ToString()}:{Port}";
}

/// <summary>
/// IPv4 server address
/// </summary>
struct IPv4Adress
{
    public IPv4Adress(string adress)
    {
        string[] ip = adress.Split('.');
        if (ip.Length != 4)
            throw new ArgumentException("ip is incorrect");

        part_1 = (char)Convert.ToInt32(ip[0]);
        part_2 = (char)Convert.ToInt32(ip[1]);
        part_3 = (char)Convert.ToInt32(ip[2]);
        part_4 = (char)Convert.ToInt32(ip[3]);
    }

    public char part_1;
    public char part_2;
    public char part_3;
    public char part_4;

    public new string ToString()
    {
        return $"{(int)part_1}.{(int)part_2}.{(int)part_3}.{(int)part_4}";
    }
}
The class contains the IPv4Adress structure which stores the IP address of the server. When preparing data for this article, I haven't met a single server address different from the IPv4 format, therefore exactly this format is implemented. In its constructor, the structure accepts a string with the address, then parses it and saves to the appropriate fields. If the number of digits in the address is less than 4, an error is returned. The main class constructor has two overloads, one of which accepts a string with the server address, the other one accepts formed IP address and port number. In addition, the IPv4Adress structure has the overloaded ToString method, which was derived from the basic Object class, from which all C# objects are implicitly inherited. The ServerAddressKeeper class has the Address property, which implements the same objects. As a result we have the wrapper class which stores the server address in a convenient form and can assemble it to a form required for configuration files.
Now we need to consider methods for working with configuration files of *.ini format. As already mentioned, this file format is considered obsolete and is rarely used now. C# does not have built-in interfaces for working with these files, similar to those for working with the XML markup which we considered in the previous article. However WinApi still supports the WritePrivateProfileString and GetPrivateProfileString functions for working with this file format. Here is a note from Microsoft:
This function is provided only for compatibility with 16-bit Windows-based applications. Applications should store initialization information in the registry.
We can use it and avoid the need to develop our own solution. To do this, we will have to import the data of C functions into our C# code. In C#, this can be done similarly to MQL5:
[DllImport("kernel32.dll", SetLastError = true)]
private extern static int GetPrivateProfileString(string AppName, string KeyName, string Default, StringBuilder ReturnedString, int Size, string FileName);

[DllImport("kernel32.dll", SetLastError = true)]
private extern static int WritePrivateProfileString(string AppName, string KeyName, string Str, string FileName);
In contrast to #import, here we must specify the DLLImport attribute and pass to it the name of the dll, from which the function should be imported, as well as other optional parameters. In particular, during import, I specified the parameter SetLastErro = true, which gives the opportunity to receive errors from C++ code using GetLastError() in our C# code and thus to control the correct execution of these methods. Since C# and C feature different methods for operations with strings, let us use the wrapper methods which enable convenient work with exported functions and which can process possible errors. I implemented them the following way:
/// <summary>
/// Convenient wrapper for WinAPI function GetPrivateProfileString
/// </summary>
/// <param name="section">section name</param>
/// <param name="key">key</param>
/// <returns>the requested parameter or null if the key was not found</returns>
protected virtual string GetParam(string section, string key)
{
    //To get the value
    StringBuilder buffer = new StringBuilder(SIZE);

   //Get value to buffer
    if (GetPrivateProfileString(section, key, null, buffer, SIZE, Path) == 0)
        ThrowCErrorMeneger("GetPrivateProfileStrin", Marshal.GetLastWin32Error());

    //Return the received value
    return buffer.Length == 0 ? null : buffer.ToString();
}

/// <summary>
/// Convenient wrapper for WinAPI WritePrivateProfileString
/// </summary>
/// <param name="section">Section</param>
/// <param name="key">Key</param>
/// <param name="value">Value</param>
protected virtual void WriteParam(string section, string key, string value)
{
    //Write value to the INI-file
    if (WritePrivateProfileString(section, key, value, Path) == 0)
        ThrowCErrorMeneger("WritePrivateProfileString", Marshal.GetLastWin32Error());
}

/// <summary>
/// Return error
/// </summary>
/// <param name="methodName">Method name</param>
/// <param name="er">Error code</param>
private void ThrowCErrorMeneger(string methodName, int er)
{
    if (er > 0)
    {
        if (er == 2)
        {
            if (!File.Exists(Path))
                throw new Exception($"{Path} - File doesn1t exist");
        }
        else
        {
            throw new Exception($"{methodName} error {er} " +
                $"See System Error Codes (https://docs.microsoft.com/ru-ru/windows/desktop/Debug/system-error-codes) for detales");
        }
    }
}
When working with these methods, I came across an interesting feature. After searching for additional information I made sure that this is not only my problem. The feature is that the GetPrivateProfileString method returns ERROR_FILE_NOT_FOUND (error code = 2) not only when the file is not found, but also in the following cases:
- The section does not exist in the read file
- The requested key does not exist
Due to this specific feature, in case of an error we perform a check in the ThrowCErrorMeneger method of whether the file exists. To get the last error (method GetLastError), C# has a static method of the Marshal class (Marshal.GetLastWin32Error()), which we will use to retrieve error after each file reading or writing method call. For convenience, methods for reading and writing only strings were imported, since any data type can be casted into a string.
Another interesting function operation aspect is the way data is deleted from the file. For example, in order to delete the entire section, it is necessary to pass to the WriteParam method the key name equal to null. Using this possibility, I created an appropriate method. All section names were previously added to ENUM_SectionType:
/// <summary>
/// Section deletion
/// </summary>
/// <param name="section">section selected for deletion</param>
public void DeleteSection(ENUM_SectionType section)
{
    WriteParam(section.ToString(), null, null);
}
There is also a way to delete a specific key, for which the key name must be specified, however the key value must be null. In this method implementation, the name of the passed key is left as a string field, since each section has mostly unique keys.
/// <summary>
/// Key deletion
/// </summary>
/// <param name="section">section from which key should be deleted</param>
/// <param name="key">Key to delete</param>
public void DeleteKey(ENUM_SectionType section, string key)
{
    if (string.IsNullOrEmpty(key) || string.IsNullOrWhiteSpace(key))
        throw new ArgumentException("Key is not vailed");

    WriteParam(section.ToString(), key, null);
}
For convenient access to section, I decided to implement them through properties, so that the Config class instance allowed access to any section via the point (.) operator and then access to any key of this sections, as is shown in the below snippet:
Config myConfig = new Config("Path");

myConfig.Tester.Expert = MyExpert;
string MyExpert = myConfig.Tester.Expert;
Obviously to implement this idea we need to create a class for each of the sections. In every section's class, we need to specify the properties which write and read this specific string in the file. Since sections are actually the components of this specific initialization file, while the Config is an object oriented representation of this file, a reasonable solution is to create the classes describing these sections as nested classes of the Config class, and then set read-only properties in the Config class, which should be typed by these specific classes. In the below example, unnecessary code parts are omitted, so it demonstrates only the above description:
class Config
{
    public Config(string path)
    {
        Path = path;
        CreateFileIfNotExists();

        Common = new CommonSection(this);
        Charts = new ChartsSection(this);
        Experts = new ExpertsSection(this);
        Objects = new ObjectsSection(this);
        Email = new EmailSection(this);
        StartUp = new StartUpSection(this);
        Tester = new TesterSection(this);
    }

    protected virtual void CreateFileIfNotExists()
    {
        if (!File.Exists(Path))
        {
            File.Create(Path).Close();
        }
    }

    public readonly string Path; // path to file

    public virtual Config DublicateFile(string path)
    {
        File.Copy(Path, path, true);
        return new Config(path);
    }

    #region Section managers
    internal class CommonSection
    {
    }
    internal class ChartsSection
    {
    }
    internal class ExpertsSection
    {
    }
    internal class ObjectsSection
    {
    }
    internal class EmailSection
    {
    }
    internal class StartUpSection
    {
    }
    internal class TesterSection
    {
    }
    #endregion

    public CommonSection Common { get; }
    public ChartsSection Charts { get; }
    public ExpertsSection Experts { get; }
    public ObjectsSection Objects { get; }
    public EmailSection Email { get; }
    public StartUpSection StartUp { get; }
    public TesterSection Tester { get; }
}
The implementation of each of the nested classes which describe a particular section is similar; consider it using the example of the Config.ChartsSection class.
internal class ChartsSection
{
    private readonly Converter converter;
    public ChartsSection(Config parent)
    {
        converter = new Converter(parent, "Charts");
    }

    public string ProfileLast
    {
        get => converter.String("ProfileLast");
        set => converter.String("ProfileLast", value);
    }
    public int? MaxBars
    {
        get => converter.Int("MaxBars");
        set => converter.Int("MaxBars", value);
    }
    public bool? PrintColor
    {
         get => converter.Bool("PrintColor");
         set => converter.Bool("PrintColor", value);
    }
    public bool? SaveDeleted
    {
         get => converter.Bool("SaveDeleted");
         set => converter.Bool("SaveDeleted", value);
    }
 }
The class describing the section contains a Nullable section, which uses another intermediary class to read and write to file. The class implementation will be considered later. Now I would like to point your attention to the return data: if the class is not written in the file, the wrapper class will return null instead of the key value. If we pass null to any key property, this value will simply be ignored. In order to delete a field, use a special DeleteKey method which was considered above.
Now let us consider the Converter class which writes and reads data from file: it is also a nested class, and thus it can use the WriteParam and GetParam methods of the main class, despite the fact that they are marked with the 'protected' access modifier. The class has overloads of read and write methods for the following types
- Bool
- Int
- Double
- String
- DateTime
All other types are cast to one of the most suitable types. The class implementation is shown below:
private class Converter
{
    private readonly Config parent;
    private readonly string section;
    public Converter(Config parent, string section)
    {
        this.parent = parent;
        this.section = section;
    }

    public bool? Bool(string key)
    {
        string s = parent.GetParam(section, key);
        if (s == null)
            return null;

        int n = Convert.ToInt32(s);
        if (n < 0 || n > 1)
            throw new ArgumentException("string mast be 0 or 1");
        return n == 1;
    }
    public void Bool(string key, bool? val)
    {
        if (val.HasValue)
            parent.WriteParam(section, key, val.Value ? "1" : "0");
    }

    public int? Int(string key)
    {
        string s = parent.GetParam(section, key);
        return s == null ? null : (int?)Convert.ToInt32(s);
    }
    public void Int(string key, int? val)
    {
        if (val.HasValue)
            parent.WriteParam(section, key, val.Value.ToString());
    }

    public double? Double(string key)
    {
        string s = parent.GetParam(section, key);
        return s == null ? null : (double?)Convert.ToDouble(s);
    }
    public void Double(string key, double? val)
    {
        if (val.HasValue)
            parent.WriteParam(section, key, val.Value.ToString());
    }

    public string String(string key) => parent.GetParam(section, key);
    public void String(string key, string value)
    {
        if (value != null)
            parent.WriteParam(section, key, value);
    }

    public DateTime? DT(string key)
    {
        string s = parent.GetParam(section, key);
        return s == null ? null : (DateTime?)DateTime.ParseExact(s, "yyyy.MM.dd", null);
    }
    public void DT(string key, DateTime? val)
    {
        if (val.HasValue)
            parent.WriteParam(section, key, val.Value.ToString("yyyy.MM.dd"));
    }
}
The class converts the passed data to a form expected in the file and writes the data to that file. When reading from file, it converts strings to a return file and passes the result to class which describes the specific section and which then converts the value to the expected format. Please note that in case of access to any of the properties, this class writes or reads data directly to/from the file. This ensures actual data when working with the file, but can take more time compared to memory access. Given that reading and writing take microseconds, this delay is not noticeable during program operation.
Next, let us consider the terminal operation manager. The purpose of this class: terminal start and stop, possibility to obtain data about whether the terminal is running or not, setting configuration file and launch flags. In other words, the class must understand all terminal launch methods described in the terminal manual and it should enable the management of the terminal operation process. Based on these requirements, the following interface was written, which describes the signatures of required properties and methods. Further operations with the terminal will be implemented via the interface presented below.
interface ITerminalManager
{
    uint? Login { get; set; }
    string Profile { get; set; }
    Config Config { get; set; }
    bool Portable { get; set; }
    System.Diagnostics.ProcessWindowStyle WindowStyle { get; set; }
    DirectoryInfo TerminalInstallationDirectory { get; }
    DirectoryInfo TerminalChangeableDirectory { get; }
    DirectoryInfo MQL5Directory { get; }
    List<string> Experts { get; }
    List<string> Indicators { get; }
    List<string> Scripts { get; }
    string TerminalID { get; }
    bool IsActive { get; }

    bool Run();
    void Close();
    void WaitForStop();
    bool WaitForStop(int miliseconds);

    event Action<ITerminalManager> TerminalClosed;
}
As can be seen from the interface, the first 4 properties accept the values of flags provided in the instructions and discussed in GUI creation part. The fifth flag sets terminal window size at start - it can minimize the terminal, launch in a full mode or in small window mode. But if Hidden value is selected (to hide the window) the expected behavior is not performed. To hide the terminal, we need to edit another initialization file. However since the behavior is crucial, I decided not to complicate the code.
The class, which inherits this interface, has two constructor overloads.
public TerminalManager(DirectoryInfo TerminalChangeableDirectory) :
    this(TerminalChangeableDirectory, new DirectoryInfo(File.ReadAllText(TerminalChangeableDirectory.GetFiles().First(x => x.Name == "origin.txt").FullName)), false)
{
}

public TerminalManager(DirectoryInfo TerminalChangeableDirectory, DirectoryInfo TerminalInstallationDirectory, bool isPortable)
{
    this.TerminalInstallationDirectory = TerminalInstallationDirectory;
    this.TerminalChangeableDirectory = TerminalChangeableDirectory;

    TerminalID = TerminalChangeableDirectory.Name;

    CheckDirectories();

    Process.Exited += Process_Exited;

    Portable = isPortable;
}
According to the article by Vladimir Karputov, the variable terminal directory has file origin.txt, in which path to installation directory is stored. This fact is used in the first constructor overload. This overload searches for file origin.txt, reads the entire file and creates the DirectiryInfo class, which describes this directory by passing to it data read from the file. Also note that all actions related to preparing class for operation is performed by the second constructor, which accepts three parameters:
- The path to the variable directory (the one in AppData).
- The path to the installation directory.
- The flag of terminal launch in Portable mode.
The last parameter in this constructor was added for ease of configuration. It should be assigned intentionally at the end of the constructor. When the terminal is launched in Portable mode, its MQL5 directory in which all Expert Advisors and indicators are stores, is created (if it has not been created before) in the terminal installation directory. Initially, if the terminal has never been run in Portable mode, this directory does not exist, therefore, when this flag is set, it is necessary to check if this directory exists. The property that sets this flag and reads it is described as follows.
/// <summary>
/// Flag of terminal launch in /portable mode
/// </summary>
private bool _portable;
public bool Portable
{
    get => _portable;
    set
    {
        _portable = value;
        if (value && !TerminalInstallationDirectory.GetDirectories().Any(x => x.Name == "MQL5"))
        {
            WindowStyle = System.Diagnostics.ProcessWindowStyle.Minimized;
            if (Run())
            {
                System.Threading.Thread.Sleep(100);
                Close();
            }
	    WaitForStop();
            WindowStyle = System.Diagnostics.ProcessWindowStyle.Normal;
        }
    }
}
When assigning a passed value, the existence of the MQL5 directory is checked. If there is no such directory, launch the terminal and hold the thread until the terminal is launched. According to the previously set terminal launch flag, the terminal will be launched in the Portable mode, and the desired directory will be created at the first launch. Once the terminal is launched, we close it using the Close command from our wrapper for working with the terminal an wait till the terminal is closed. After that, the desired MQL5 directory will be created, provided there are no problems with access. Our property which returns path to the MQL5 folder of the terminal works via a conditional construct: it returns path to the desired directory either from the installation directory or from the directory with mutable files, depending on the above mentioned flag.
/// <summary>
/// Path to the MQL5 folder
/// </summary>
public DirectoryInfo MQL5Directory => (Portable ? TerminalInstallationDirectory : TerminalChangeableDirectory).GetDirectory("MQL5");
Another note should be made concerning the constructor overload. If, instead of the variable directory, you suddenly pass the path to the installation directory, then, provided there was at least one start in Portable mode (or when the isPortable = true flag is set), this class should work correctly. However it will only see the terminal’s installation directory, and in this case TerminalID will not be a set of numbers and Latin characters, which is indicated in the terminal's variable directory, but will be equal to the name of the folder in which the terminal is installed, i.e. the name of the installation directory.
Also pay attention to properties which provide information about trading robots, indicators and scripts available in the terminal. The properties are implemented through the private GetEX5FilesR method.
#region .ex5 files relative paths
/// <summary>
/// List of full EA names
/// </summary>
public List<string> Experts => GetEX5FilesR(MQL5Directory.GetDirectory("Experts"));
/// <summary>
/// List of full indicator names
/// </summary>
public List<string> Indicators => GetEX5FilesR(MQL5Directory.GetDirectory("Indicators"));
/// <summary>
/// List of full script names
/// </summary>
public List<string> Scripts => GetEX5FilesR(MQL5Directory.GetDirectory("Scripts"));
#endregion

private List<string> GetEX5FilesR(DirectoryInfo path, string RelativeDirectory = null)
{
    if (RelativeDirectory == null)
        RelativeDirectory = path.Name;
    string GetRelevantPath(string pathToFile)
    {
        string[] path_parts = pathToFile.Split('\\');
        int i = path_parts.ToList().IndexOf(RelativeDirectory) + 1;
        string ans = path_parts[i];
        for (i++; i < path_parts.Length; i++)
        {
            ans = Path.Combine(ans, path_parts[i]);
        }

        return ans;
    }

    List<string> files = new List<string>();
    IEnumerable<DirectoryInfo> directories = path.GetDirectories();

    files.AddRange(path.GetFiles("*.ex5").Select(x => GetRelevantPath(x.FullName)));

    foreach (var item in directories)
        files.AddRange(GetEX5FilesR(item, RelativeDirectory));

    return files;
}
In these properties, we do not try to obtain possible paths to EA files. Instead we get paths to EAs relative to the Experts folder (or relative to Indicators folder for indicators and to Scripts folder for scripts). During selection, the class checks the file extension (searches only for EX5 files).
The method returning the list of found EX5 files uses recursion. Let us consider this method in detail. Firstly, it checks the values of its second parameter, which is optional: if the parameter is nor set, the name of the current passed directory is assigned to it. Thus we can understand relative to which directory file paths should be generated. Another C# language construction used is nested functions. These functions only exist within the current method. We used this construction because the function will not be used anymore. Its body is not too large and thus it can be fit inside this method. This function accepts the path to the EX5 file as an input and splits it using the "\\" symbol as a separator. As a result we get an array of directory names, and the name of the EX5 file is available at the end of this array. In the next step, assign to i variable the index of the directory relative to which path to the file is searched. Increase it by 1 and shift the pointer to the next directory or file. The 'ans' variable will store the found address: to do this assign the value of the specified directory to it and then add a new directory or file in a loop until we exit the loop (i.e. until the name of the desired file is added). The GetEX5FilesR method operates as follows:
- Receive paths to all nested directories.
- Search EX5 files in the current directory and save their relative paths.
- In a loop, launch recursion for each nested directory while passing the name of the directory relative to which we need to receive the path. Add to list of relative paths of EX5 files.
- Return the found file paths.
Thus, this method performs a full file search and returns all found Expert Advisors and other MQL5 executable files.
Now let us consider how third-party applications are launched in the C# language. It features very convenient functionality for launching and working with other applications: the Process class, which is a wrapper for any external process that is launched. For example, in order to start notepad from C#, you need to write only 3 lines of code:
System.Diagnostics.Process Process = new System.Diagnostics.Process();
Process.StartInfo.FileName = "Notepad.exe";
Process.Start();
We will use this class to implement the process of managing of third-party terminals from our add-on. Here is the method launching the terminal:
public bool Run()
{
    if (IsActive)
        return false;
    // Set path to terminal
    Process.StartInfo.FileName = Path.Combine(TerminalInstallationDirectory.FullName, "terminal64.exe");
    Process.StartInfo.WindowStyle = WindowStyle;
    // Set data for terminal launch (if any were installed)
    if (Config != null && File.Exists(Config.Path))
        Process.StartInfo.Arguments = $"/config:{Config.Path} ";
    if (Login.HasValue)
        Process.StartInfo.Arguments += $"/login:{Login.Value} ";
    if (Profile != null)
        Process.StartInfo.Arguments += $"/profile:{Profile} ";
    if (Portable)
        Process.StartInfo.Arguments += "/portable";

    // Notify the process of the need to call an Exit event after closing the terminal
    Process.EnableRaisingEvents = true;

    // Run the process and save the launch status to the IsActive variable
    return (IsActive = Process.Start());
}
When configuring the terminal before launch, the following should be done:
- Specify path to executable file to be launched.
- Set window type of the process.
- Set keys (in the console app these were all values specified after after the name of the file to be launched).
- Set flag Process.EnableRaisingEvents= true. If this flag is not set, the process termination event will not trigger.
- Start the process and save the launch status to the IsActive variable.
The IsActive property again becomes equal to false at callback which triggers after terminal closure. The TerminalClosed event is also called in this callback.
/// <summary>
/// Terminal closing event
/// </summary>
/// <param name="sender"></param>
/// <param name="e"></param>
private void Process_Exited(object sender, EventArgs e)
{
    IsActive = false;
    TerminalClosed?.Invoke(this);
}
Other terminal management methods (waiting for terminal stop and closure) are a wrapper over standard methods of the Process class.
public void WaitForStop()
{
    if (IsActive)
        Process.WaitForExit();
}
/// <summary>
/// Stop the process
/// </summary>
public void Close()
{
    if (IsActive && !Process.HasExited)
        Process.Kill();
}
/// <summary>
/// Wait for terminal completion for specified time
/// </summary>
public bool WaitForStop(int miliseconds)
{
    if (IsActive)
        return Process.WaitForExit(miliseconds);
   return true;
}
Thus, using the standard Process class, we created a convenient wrapper that works with the MetaTrader 5 terminal. This enables a more convenient operation with the terminal than directly using the Process class.
Directory structure objects
In the first part of the article we already considered working with directories. Now let us discuss the methods of accessing the file system. Let us start with the method used for creating file and directory paths. For this, C# provides a convenient class Path. It enables the safe creation of paths to files and directories and thus possible errors are also eliminated. The directory is presented using the DirectoryInfo class, due to which we can quickly obtain data about nested directories, parent directory, directory name and full path to it, as well as access many other useful properties. For example, this class allows you to get all the files in this directory by calling only one method. The FileInfo class is used for object-oriented presentation of any of the file. This class is an analogue of DirectoryInfo in terms of functionality. As a result entire operation with files and directories is implemented as operation with presented classes, which allows focusing on the main problem, with almost no need to create intermediary functions and methods.
In earlier described TerminalManager class, GetDirectory method on the DirectoryInfo class instance was often used. This method is not included in the standard DirectoryInfo class layout and was added for convenience. C# features a method for expanding functionality of standard and and custom classes by adding extension methods to them. We used this functionality of the C# language to add GetDirectory extension method.
static class DirectoryInfoExtention
{
    public static DirectoryInfo GetDirectory(this DirectoryInfo directory, string Name, bool createIfNotExists = false)
    {
        DirectoryInfo ans = new DirectoryInfo(Path.Combine(directory.FullName, Name));
        if (!ans.Exists)
        {
            if (!createIfNotExists)
                return null;
            ans.Create();
        }
        return ans;
    }
}
To create an extension method it is necessary to create a static class, in which we create a public static method. Its first parameter must be typed using exactly that type for which the extension is being created. The keyword 'this' must precede it. This parameter is specified during automatic extension method call, there is no need to pass it to the function explicitly, while this is exactly that class instance for which the extension was created. There is no need to create a sample of a class storing extension methods, while all extension methods are automatically added to the methods set of the class for which they were created. The specific method operates according to the following algorithm:
- If parameter createIfNotExists=false (or it is not specified), it returns a subfolder with a passed name, passed to the DirectoryInfo type (if this folder exists), or null.
- If createIfNotExists=true, then if folder has not been created, it will be created and the folder cast to type DirectoryInfo will be returned.
For convenient operations with folders of variable terminal directories, we created a class which is an object oriented presentation of the directory.
~\AppData\Roaming\MetaQuotes\Terminal
This class is implemented as follows.
class TerminalDirectory
{
    public TerminalDirectory() :
        this(Path.Combine(System.Environment.GetFolderPath(System.Environment.SpecialFolder.ApplicationData), "MetaQuotes", "Terminal"))
    {
    }

    public TerminalDirectory(string path)
    {
        pathToTerminal = path;
    }

    private readonly string pathToTerminal;

    public List<DirectoryInfo> Terminals
    {
        get
        {
            List<DirectoryInfo> ans = new List<DirectoryInfo>();
            string[] dir_array = Directory.GetDirectories(pathToTerminal);
            foreach (var item in dir_array)
            {
                string pathToOrigin = Path.Combine(pathToTerminal, item, "origin.txt");
                if (!File.Exists(pathToOrigin))
                    continue;
                if (!File.Exists(Path.Combine(File.ReadAllText(pathToOrigin), "terminal64.exe")))
                    continue;
                ans.Add(new DirectoryInfo(Path.Combine(pathToTerminal, item)));
            }

            return ans;
        }
    }
    public DirectoryInfo Common => new DirectoryInfo(Path.Combine(pathToTerminal, "Common"));
    public DirectoryInfo Community => new DirectoryInfo(Path.Combine(pathToTerminal, "Community"));
}
It has three fields:
- Terminals
- Common
- Community
These fields correspond to the names of the subdirectories within this directory. The Terminals property returns the list of directories which belong to the terminal file system. Often, after deletion of a terminal, the terminal folder still remains in this directory, therefore I decided to add check of directory relevance. The check is performed according to the following criteria:
- The presence of the "origin.txt" file in the root of the analyzed directory: this file enables access to the terminal directory path.
- The presence of an executable terminal file in the appropriate directory.
Pay attention that the extension is designed for the 64-bit terminal version. In order to work with the 32-bit version, "terminal64.exe" should be renamed to "terminal.exe" everywhere in the program (namely TerminalManager and the currently discussed class). Thus it ignores the directories for which executable terminal files cannot be found.
Move in to considering the first constructor. This constructor enables the automatic generation of path to terminal files directory:
System.Environment.GetFolderPath(System.Environment.SpecialFolder.ApplicationData)
The Environment class allows automatically getting path to the "AppData", thus we do not have to specify the user name. Thanks to this line the extension will be able to find the list of all terminals which were installed on your PC using a standard installation method.
In addition to the class describing the folder with terminal data directories, the extension has its own directory in which temporary files and optimization reports are stored. Here is the class describing this directory.
class OptimisationExtentionWorkingDirectory
{
    public OptimisationExtentionWorkingDirectory(string DirectoryName)
    {
        DirectoryRoot = CreateIfNotExists(DirectoryName);
        Configs = CreateIfNotExists(Path.Combine(DirectoryName, "Configs"));
        Reports = CreateIfNotExists(Path.Combine(DirectoryName, "Reports"));
    }

    public DirectoryInfo DirectoryRoot { get; }

    public DirectoryInfo Configs { get; }

    public DirectoryInfo Reports { get; }

    protected DirectoryInfo CreateIfNotExists(string path)
    {
        DirectoryInfo ans = new DirectoryInfo(path);
        if (!ans.Exists)
            ans.Create();
        return ans;
    }
}
As can be seen from the class constructor, during its creation we check the existence of the root and nested directories. If these directories are not available, they will be created.
- "DirectoryRoot" is the main directory inside which the add-on stores its files and directories.
- "Configs" is the directory to which we will copy configuration files, change them and then set as input parameters at terminal start.
- The "Reports" directory will store the structure of files and folders with reports and optimization settings which are loaded after each test.
The internal structure of the Reports directory is created in the "OptimisationManager" class and is formed for each optimization upon its completion. It consists of the following points:
- The directory with the name equal to terminal ID.
- The directory with the name equal to the robot name. Contains the following:
- Settings.xml — file with optimization settings (formed inside the program)
- History.xml — copied historical optimization file (formed by the terminal)
- Forward.xml — copied forward optimization file (formed by the terminal)
Thus we have created two classes which are the starting points for working with the file system. Further work with the file system in the code is performed using standard C# classes - this allows avoiding errors in file paths and significantly speeds up programming.
Objects working with report and EA settings files (OptimisatorSettingsManager, ReportReader, SetFileManager)
This chapter considers operation with files. The add-on must be able to work with the following files:
- EA settings tab
- Trading report file
- Optimization settings file, which is saved with reports in the "Reports" directory of the add-on.
Let us start with the file containing EA parameters for optimization. EA settings files have extension (*.set). However there are several setup files, which contain settings at launch on the chart and settings for running in a tester. We are interested in the second file format: these files are stored in the terminal's variable directory at
~\MQL5\Profiles\Tester
Note that sometimes during pure installation this directory does not exist, therefore you should check it and create if necessary. If this directory does not exist, the terminal will not be able to save optimization settings. This is an often reason for the following issue: in case of such pure terminal installation, after each new test or optimization run the optimization settings tab still features default settings. The described file structure is somewhat similar to INI files and looks as follows:
Variable_name=Value||Start||Step||Stop||(Y/N)
In other words, the key in these files is the name of the EA parameter, and the key value can take a list of its values, the names of which in the given example are identical to the appropriate columns in the strategy tester. The last variable can take one of the two values (Y/N) and it enables/disables optimization for this specific EA parameter. An exception to this rule is the writing of string parameters, which have the format like in an INI-file:
Variable_name=Value
Similarly to initialization files, SET files also have comments. A comment line always starts with ";" (semicolon). Here are simple examples:
; saved automatically on 2019.05.19 09:04:18
; this file contains last used input parameters for testing/optimizing 2MA_Martin expert advisor
;
Fast=12||12||1||120||N
Slow=50||50||1||500||N
maxLot=1||1||0.100000||10.000000||N
pathToDB=C:\Users\Administrator\Desktop\test_2MA_8
To work with these files, we need to create a wrapper class which allows reading these files as well as a class which stores values of each read string. This class was mentioned in the 'View' description part within this article, therefore we will not consider it here. Let us consider the main class which reads and writes parameters set from the graphical interface — SetFileManager. Here is the implementation of this class:
class SetFileManager
{
    public SetFileManager(string filePath, bool createIfNotExists)
    {
        if ((FileInfo = new FileInfo(filePath)).Extension.CompareTo(".set") != 0)
            throw new ArgumentException("File mast have '.set' extention!");
        if (createIfNotExists)
            File.Create(filePath).Close();
        if (!File.Exists(filePath))
            throw new ArgumentException("File doesn`t exists");

    }

    public FileInfo FileInfo { get; }

    #region File data

    private List<ParamsItem> _params = new List<ParamsItem>();
    public List<ParamsItem> Params
    {
        get
        {
            if (_params.Count == 0)
                UpdateParams();
            return _params;
        }
        set
        {
            if (value != null && value.Count != 0)
                _params = value;
        }
    }
    #endregion

    public virtual void SaveParams()
    {
        if (_params.Count == 0)
            return;

        using (var file = new StreamWriter(FileInfo.FullName, false))
        {
            file.WriteLine(@"; saved by OptimisationManagerExtention program");
            file.WriteLine(";");
            foreach (var item in _params)
            {
                file.WriteLine($"{item.Variable}={item.Value}||{item.Start}||{item.Step}||{item.Stop}||{(item.IsOptimize ? "Y" : "N")}");
            }
        }
    }

    public virtual SetFileManager DublicateFile(string pathToFile)
    {
        if (new FileInfo(pathToFile).Extension.CompareTo(".set") != 0)
            throw new ArgumentException("File mast have '.set' extention!");

        File.Copy(FileInfo.FullName, pathToFile, true);
        return new SetFileManager(pathToFile, false);
    }

    public virtual void UpdateParams()
    {
        _params.Clear();

        using (var file = FileInfo.OpenText())
        {
            string line;
            while ((line = file.ReadLine()) != null)
            {
                if (line[0].CompareTo(';') != 0 && line[0].CompareTo('#') != 0)
                {
                    string[] key_value = line.Replace(" ", "").Split('=');
                    string[] value_data = key_value[1].Split(new[] { '|' }, StringSplitOptions.RemoveEmptyEntries);

                    ParamsItem item = new ParamsItem(key_value[0])
                    {
                        Value = (value_data.Length > 0 ? value_data[0] : null),
                        Start = (value_data.Length > 1 ? value_data[1] : null),
                        Step = (value_data.Length > 2 ? value_data[2] : null),
                        Stop = (value_data.Length > 3 ? value_data[3] : null),
                        IsOptimize = (value_data.Length > 4 ? value_data[4].CompareTo("Y") == 0 : false)
                    };

                    _params.Add(item);
                }
            }
        }
    }
}
The first thing you should pay attention to is the file format check, which is provided in the class constructor. If the file format differs from the SET file format, this class will return an error, because we will try to work with the file which is unknown to the terminal. The file is stored in the public read-only property FileInfo. File reading is performed in the UpdateParams method which in the 'using' construction reads the file from the first line to the last one, while ignoring comment lines. Also pay attention to setting of parameters of the read-file. The read line is first divided into two, and the equal sign ("=") is used as a separator. Thus the variable name is separated from its values. At the next step, the variable values are divided into an array of 4 elements [Value, Start, Step, Stop, IsOptimise]. In case of strings the array will not be divided into these strings because two lines ("||") separating the symbols will not be found. To avoid errors with strings, we do not recommend using this character in them. If for each new element there are no data in the array, the null value is assigned to it, otherwise a value from the array is used.
Saving of values is performed in method SaveParams. Please pay attention to the data writing format in the file. This is done in the following code line:
file.WriteLine($"{item.Variable}={item.Value}||{item.Start}||{item.Step}||{item.Stop}||{(item.IsOptimize ? "Y" : "N")}");
No matter what type of data it is, the data will be written as NON-string type. The terminal can understand whether it is a string or not, therefore a single data writing type was selected. One of the disadvantages of this class is that it is not possible to find out the data type. We cannot know the file's format, because the file structure does not provide such information. The terminal receives this information directly from the Expert Advisor.
Access to the read file and setting of its parameters are implemented via the Params property. Since operations with file data are implemented via the described property, for convenience check if the file has already been read or not. If the file has not been read, the UpdateParams method is called. In general, the procedure for working with this class is as follows:
- Instantiate, thereby obtaining the OOP representation of the file
- Read by calling the 'Params' method (or UpdateParams if necessary, for example if the file was changed from the outside)
- Set custom values using 'Setter' or change data using the received array via 'Getter'.
- Save changes using the SaveParams method
The main drawback compared to INI files is that between reading and writing, data is stored in the program memory. However if the file is excluded accidentally or intentionally, the file can be changed from the outside. The class also has the DublicateFile method, which aims at copying the file at the passed path (done through replacement, if there was file with the same name at this path).
Further class RepirtReader reads optimization reports generated by the terminal and parses these reports to prepared data for the table. The optimization history file is available in the XML format created for MS Excel. Its root node (the very first tag) — <Workbook/> — describes the book. The next node <DocumentProperties/> describes parameters with which optimization was performed. The following useful information is contained in this node:
- Header which is formed of the robot name, asset name, timeframe and optimization period.
- Creation date
- The name of the server on which optimization was performed
- Deposit and deposit currency
- Leverage
Node <Styles/> is of no use for us - it is created mainly for Excel. The next node <Worksheet/> describes the worksheet with optimization passes. This node contains the <Table/> node which stores the searched data: the list of optimization results, divided into columns like after testing all parameters in the Strategy Tester. Note that the first row of the table contains column headers, while further rows contain values. Each <Row/> node contains the list of table values inside the <Cell/> tag. Also, each <Cell/> tag contains the Type attribute which indicates the value type in this cell. Since this file is too large, I will not provide it here. You can review the entire file by optimizing any Expert Advisor and opening its optimization results from the Reports folder of our add-on. Now let us move on to considering the described class: start with the review of properties describing the optimization file.
#region DocumentProperties and column names
/// <summary>
/// Document column names
/// </summary>
protected List<string> columns = new List<string>();
/// <summary>
/// Access to the collection of document columns from outside, collection copy is returned
/// to protect the initial collection from modification
/// </summary>
public List<string> ColumnNames => new List<string>(columns);
/// <summary>
/// Document header
/// </summary>
public string Title { get; protected set; }
/// <summary>
/// Document author
/// </summary>
public string Author { get; protected set; }
/// <summary>
/// Document creation date
/// </summary>
public DateTime Created { get; protected set; }
/// <summary>
/// Server on which optimization was performed
/// </summary>
public string Server { get; protected set; }
/// <summary>
/// Initial deposit
/// </summary>
public Deposit InitialDeposit { get; protected set; }
/// <summary>
/// Leverage
/// </summary>
public int Leverage { get; protected set; }
#endregion
These properties are available in <DocumentProperties/>. The properties are filled in the following method:
protected virtual void GetDocumentProperties(string path)
{
    document.Load(path);

    Title = document["Workbook"]["DocumentProperties"]["Title"].InnerText;
    Author = document["Workbook"]["DocumentProperties"]["Author"].InnerText;
    string DT = document["Workbook"]["DocumentProperties"]["Created"].InnerText;
    Created = Convert.ToDateTime(DT.Replace("Z", ""));
    Server = document["Workbook"]["DocumentProperties"]["Server"].InnerText;
    string[] deposit = document["Workbook"]["DocumentProperties"]["Deposit"].InnerText.Split(' ');
    Deposit = new Deposit(Convert.ToDouble(deposit[0]), deposit[1]);
    Leverage = Convert.ToInt32(document["Workbook"]["DocumentProperties"]["Leverage"].InnerText);

    enumerator = document["Workbook"]["Worksheet"]["Table"].ChildNodes.GetEnumerator();
    enumerator.MoveNext();

    foreach (XmlElement item in (XmlElement)enumerator.Current)
    {
        columns.Add(item["Data"].InnerText);
    }
}
Thus, working with (*.xml) files using C# tools is almost as easy as working with arrays. The 'document' object is an instance of the XmlDocument class, which stores the read file and provides convenient work with it. The enumerator field, to which the value is assigned is used in the Read method, which reads the document line by line. During class declaration, the IDisposable interface is used:
class ReportReader : IDisposable This interface contains only one Dispose() method, which enables the use this this class in the 'using' construct. The 'using' construct ensures correct operation, which means that at each reading from the file there is no need to close the file. Instead, the file is closed in the Dispose() method, which is called automatically after exiting the curly brackets block in which operations with the file are performed. In this particular case, we will clear the document field in the 'Dispose' method in order not to store a lot of unnecessary information on a read file. Implementation of this method looks as follows:
public void Dispose()
{
    document.RemoveAll();
}
Now let us view the IEnumerator interface, which is a standard C# interface. It is as follows:
//
// Summary:
//     Supports a simple iteration over a non-generic collection.
[ComVisible(true)]
[Guid("496B0ABF-CDEE-11d3-88E8-00902754C43A")]
public interface IEnumerator
{
    object Current { get; }

    bool MoveNext();

    void Reset();
}
It consists of two methods and one property. This interface serves as a kind of wrapper for the collection, iterated over one value at a time. The MoveNext method moves the cursor one value forward, and so on, until the collection ends. If we try to call this method after passing through the entire collection, it will return false, which will mean the end of the iteration. The Reset method allows restarting the iteration anew, i.e. it moves the cursor to the zero index of the collection. The 'Current' property contains the current selected collection element for the index which was received after a shift in MoveNext. This interface is widely used in C#. Thus, 'foreach' loops are based on it. However we need this for the implementation of the Read method.
/// <summary>
/// Command to read a row from the optimizations table
/// </summary>
/// <param name="row">
/// Read row key - column header; value - cell value</param>
/// <returns>
/// true - if the row has been read
/// false - if the row has not been read
/// </returns>
public virtual bool Read(out List<KeyValuePair<string, object>> row)
{
    row = new List<KeyValuePair<string, object>>();

    if (enumerator == null)
        return false;

    bool ans = enumerator.MoveNext();
    if (ans)
    {
        XmlNodeList nodes = ((XmlElement)enumerator.Current).ChildNodes;

        for (int i = 0; i < columns.Count; i++)
        {
            string value = nodes[i]["Data"].InnerText;
            string type = nodes[i]["Data"].Attributes["ss:Type"].Value;
            KeyValuePair<string, object> item = new KeyValuePair<string, object>(columns[i], ConvertToType(value, type));
            row.Add(item);
        }
    }
    return ans;
}
The purpose of method 'Read' is similar to that of MoveNext(). In addition, it returns the operation result via a parameter passed to it. Since it should only return rows with values, when setting a value to the enumerator variable we call the MoveNext method once and thus we move cursor from the zero position (table column headers) to index 1 (the first row with values). When reading data we also use the ConvertToType, which converts the read values from the string format to the format set by the 'Type' attribute. That is why the type 'object' is specified in the return list — thus we can convert any type to the return type. The implementation of the ConvertToType method is shown below.
private object ConvertToType(string value, string type)
{
    object ans;
    switch (type)
    {
        case "Number":
            {
                System.Globalization.NumberFormatInfo provider = new System.Globalization.NumberFormatInfo()
                {
                    NumberDecimalSeparator = ","
                };

                ans = Convert.ToDouble(value.Replace('.', ','), provider);
            }
            break;
        case "DateTime": ans = Convert.ToDateTime(value); break;
        case "Boolean":
            {
                try
                {
                    ans = Convert.ToBoolean(value.ToLower());
                }
                catch (Exception)
                {
                    ans = Convert.ToInt32(value) == 1;
                }
            }
            break;
        default: ans = value; break; // String
    }

    return ans;
}
Within this method, string is converted to a numeric format. Since there are different data and time representation formats in different countries, it is necessary to explicitly specify the decimal separator.
The reader restart is enabled via the 'ResetReader' method which is a wrapper for the IEnumerator.Reset method. It is implemented as follows:
public void ResetReader()
{
    if (enumerator != null)
    {
        enumerator.Reset(); // Reset
        enumerator.MoveNext(); // Skip the headers
    }
}
Thus, using the convenient wrapper for parsing XML files available in C#, we can easily write a wrapper class to parse report files, to read them and to obtain additional data.
The next class works with the optimizer settings files, which are generated by the add-on itself and not by the terminal directly. One of the target features is the possibility to launch an EA in the tester by a double click on an optimization parameter. But where do we take settings for the tester (date range, symbol name and other parameters)? The optimization report stores only part of these data, but not all of them. Obviously, to solve this problem, you need to save these settings to a file. XML markup was selected for the convenient data storage format. XML file reading example was shown in the above class. In addition to reading, we will also write to a file. First we need to determine information to be saved in the settings file.
The first object to save is the structure in which optimizer settings data (available in the Settings tab of the lower area of the main Settings tab) are stored. This structure is implemented as follows.
struct OptimisationInputData
{
    public void Copy(OptimisationInputData data)
    {
        Login = data.Login;
        ForvardDate = data.ForvardDate;
        IsVisual = data.IsVisual;
        Deposit = data.Deposit;
        Laverage = data.Laverage;
        Currency = data.Currency;
        DepositIndex = data.DepositIndex;
        ExecutionDelayIndex = data.ExecutionDelayIndex;
        ModelIndex = data.ModelIndex;
        CurrencyIndex = data.CurrencyIndex;
        LaverageIndex = data.LaverageIndex;
        OptimisationCriteriaIndex = data.OptimisationCriteriaIndex;
    }

    public uint? Login;
    public DateTime ForvardDate;
    public bool IsVisual;
    public int Deposit;
    public string Laverage;
    public string Currency;
    public int DepositIndex, ExecutionDelayIndex, ModelIndex,
               CurrencyIndex, LaverageIndex, OptimisationCriteriaIndex;
    public ENUM_Model Model => GetEnum<ENUM_Model>(ModelIndex);
    public ENUM_OptimisationCriteria GetOptimisationCriteria => GetEnum<ENUM_OptimisationCriteria>(OptimisationCriteriaIndex);
    public ENUM_ExecutionDelay ExecutionDelay => GetEnum<ENUM_ExecutionDelay>(ExecutionDelayIndex);
    private T GetEnum<T>(int ind)
    {
        Type type = typeof(T);
        string[] arr = Enum.GetNames(type);
        return (T)Enum.Parse(type, arr[ind]);
    }
}
The structure was initially created as a container for passing data from View to Model, therefore in addition to data it contains indices for ComboBox. For efficient operations with the structure in the model and other classes, I created methods for converting values of enumerations (enum), which are stored in the structure by the index number to the desired enumeration types. The enumeration operates as follows: to output to ComboBox the values of these lists they are stored in a convenient string format. Method GetEnum<T> is used for back conversion. It is a Generic method which is analogous to C++ templates. To find the desired Enum in this method, find out the specific value of the passed type for which the Type class storing the type value is used. Then decompose this enumeration type to a list of rows and then use back conversion from string to enum — to get the value of the specific enumeration not in the string view but as a desired enumeration.
The next object containing the saved data is ConfigCreator_inputData. This structure contains data from the table with the selected terminal and is used in the OptimisationManager class for creating a configuration file. The structures looks as follows:
struct ConfigCreator_inputData
{
    public ENUM_Timeframes TF;
    public uint? Login;
    public string TerminalID, pathToBot, setFileName,
           Pass, CertPass, Server, Symbol, ReportName;
    public DateTime From, Till;
    public ENUM_OptimisationMode OptimisationMode;
}
The third and the last one of all saved data is the list of EA parameters types by a list element ParamItem (List<ParamsItem>). Now let us see the file which is created during the class operation:
<Settings>
        <OptimisationInputData>
                <Item Name="Login" />
                <Item Name="ForvardDate">2019.04.01</Item>
                <Item Name="IsVisual">False</Item>
                <Item Name="Deposit">10000</Item>
                <Item Name="Laverage">1:1</Item>
                <Item Name="Currency">USD</Item>
                <Item Name="DepositIndex">2</Item>
                <Item Name="ExecutionDelayIndex">0</Item>
                <Item Name="ModelIndex">1</Item>
                <Item Name="CurrencyIndex">1</Item>
                <Item Name="LaverageIndex">0</Item>
                <Item Name="OptimisationCriteriaIndex">0</Item>
        </OptimisationInputData>
        <ConfigCreator_inputData>
                <Item Name="TF">16386</Item>
                <Item Name="Login">18420888</Item>
                <Item Name="TerminalID">0CFEFA8410765D70FC53545BFEFB44F4</Item>
                <Item Name="pathToBot">Examples\MACD\MACD Sample.ex5</Item>
                <Item Name="setFileName">MACD Sample.set</Item>
                <Item Name="Pass" />
                <Item Name="CertPass" />
                <Item Name="Server" />
                <Item Name="Symbol">EURUSD</Item>
                <Item Name="ReportName">MACD Sample</Item>
                <Item Name="From">2019.01.01</Item>
                <Item Name="Till">2019.06.18</Item>
                <Item Name="OptimisationMode">2</Item>
        </ConfigCreator_inputData>
        <SetFileParams>
                <Variable Name="InpLots">
                        <Value>0.1</Value>
                        <Start>0.1</Start>
                        <Step>0.010000</Step>
                        <Stop>1.000000</Stop>
                        <IsOptimize>False</IsOptimize>
                </Variable>
                <Variable Name="InpTakeProfit">
                        <Value>50</Value>
                        <Start>50</Start>
                        <Step>1</Step>
                        <Stop>500</Stop>
                        <IsOptimize>False</IsOptimize>
                </Variable>
                <Variable Name="InpTrailingStop">
                        <Value>30</Value>
                        <Start>30</Start>
                        <Step>1</Step>
                        <Stop>300</Stop>
                        <IsOptimize>False</IsOptimize>
                </Variable>
                <Variable Name="InpMACDOpenLevel">
                        <Value>3</Value>
                        <Start>3</Start>
                        <Step>1</Step>
                        <Stop>30</Stop>
                        <IsOptimize>True</IsOptimize>
                </Variable>
                <Variable Name="InpMACDCloseLevel">
                        <Value>2</Value>
                        <Start>2</Start>
                        <Step>1</Step>
                        <Stop>20</Stop>
                        <IsOptimize>True</IsOptimize>
                </Variable>
                <Variable Name="InpMATrendPeriod">
                        <Value>26</Value>
                        <Start>26</Start>
                        <Step>1</Step>
                        <Stop>260</Stop>
                        <IsOptimize>False</IsOptimize>
                </Variable>
        </SetFileParams>
</Settings>
The file was created during the EA operation shown in the video. As can be seen from its structure, the root file node is <Settings/>, with three other nodes inside it: <OptimisationInputData/>, <ConfigCreator_inputData/>, <SetFileParams/>. Data types in these nodes correspond to their names. The final element in nodes storing tester settings data is the 'Item' tag which contains the 'Name' attribute, via which we set the name of the saved parameter. Tag <Variable/> is used for the EA parameters list. The 'Name' attribute stores the name of the parameter and the corresponding optimization parameter value is saved in nested tags. To create this file, the OptimisatorSettingsManager class is inherited from the IDisposable interface, and the specified values will be saved to the file in the Dispose method. Getters of corresponding properties are used to read data from the file.
#region OptimisationInputData
/// <summary>
/// The OptimisationInputData structure for saving data
/// </summary>
private OptimisationInputData? _optimisationInputData = null;
/// <summary>
/// Get and save the OptimisationInputData structure
/// </summary>
public virtual OptimisationInputData OptimisationInputData
{
    get
    {
        return new OptimisationInputData
        {
            Login = StrToUintNullable(GetItem(NodeType.OptimisationInputData, "Login")),
            ForvardDate = DateTime.ParseExact(GetItem(NodeType.OptimisationInputData, "ForvardDate"), DTFormat, null),
            IsVisual = Convert.ToBoolean(GetItem(NodeType.OptimisationInputData, "IsVisual")),
            Deposit = Convert.ToInt32(GetItem(NodeType.OptimisationInputData, "Deposit")),
            Laverage = GetItem(NodeType.OptimisationInputData, "Laverage"),
            Currency = GetItem(NodeType.OptimisationInputData, "Currency"),
            DepositIndex = Convert.ToInt32(GetItem(NodeType.OptimisationInputData, "DepositIndex")),
            ExecutionDelayIndex = Convert.ToInt32(GetItem(NodeType.OptimisationInputData, "ExecutionDelayIndex")),
            ModelIndex = Convert.ToInt32(GetItem(NodeType.OptimisationInputData, "ModelIndex")),
            CurrencyIndex = Convert.ToInt32(GetItem(NodeType.OptimisationInputData, "CurrencyIndex")),
            LaverageIndex = Convert.ToInt32(GetItem(NodeType.OptimisationInputData, "LaverageIndex")),
            OptimisationCriteriaIndex = Convert.ToInt32(GetItem(NodeType.OptimisationInputData, "OptimisationCriteriaIndex"))
        };
    }
    set => _optimisationInputData = value;
}
#endregion
In this specific example, the OptimisationInputData structure is obtained in Getter. Values for the structure are taken from the above file. The GetItem method in the getter is used to receive data from the file. The method has 2 parameters:
- The type of node from which data are used
- The name of the parameters which is specified in the 'Name' attribute.
Here is the method implementation:
/// <summary>
/// Get element from a settings file
/// </summary>
/// <param name="NodeName">Structure type</param>
/// <param name="Name">Field name</param>
/// <returns>
/// Field value
/// </returns>
public string GetItem(NodeType NodeName, string Name)
{
    if (!document.HasChildNodes)
        document.Load(Path.Combine(PathToReportDataDirectory, SettingsFileName));

    return document.SelectSingleNode($"/Settings/{NodeName.ToString()}/Item[@Name='{Name}']").InnerText;
}
This data obtaining method uses the Xpath language which is similar to SQL but is applied to XML format. To get data from the desired node at the specified attribute value, specify the full path to this node, then in the final Item node we need to indicate the following condition: the Name attribute must be equal to the passed name. Thus all structures are read from the file. Another method is used for the list of parameters, because this node structure is more complex.
#region SetFileParams
/// <summary>
/// List of parameters to save
/// </summary>
private List<ParamsItem> _setFileParams = new List<ParamsItem>();
/// <summary>
/// Get and set (.set) file parameters to save
/// </summary>
public List<ParamsItem> SetFileParams
{
    get
    {
        if (!document.HasChildNodes)
            document.Load(Path.Combine(PathToReportDataDirectory, SettingsFileName));
        var data = document["Settings"]["SetFileParams"];

        List<ParamsItem> ans = new List<ParamsItem>();
        foreach (XmlNode item in data.ChildNodes)
        {
            ans.Add(new ParamsItem(item.Attributes["Name"].Value)
            {
                Value = item["Value"].InnerText,
                Start = item["Start"].InnerText,
                Step = item["Step"].InnerText,
                Stop = item["Stop"].InnerText,
                IsOptimize = Convert.ToBoolean(item["IsOptimize"].InnerText)
            });
        }

        return ans;
    }
    set { if (value.Count > 0) _setFileParams = value; }
}
#endregion
In this case, we loop through all <Variable/> nodes. From each of them, we get the Name attribute value and fill the ParamItem class with the data contained in this specific ParamsItem node.
The completing Dispose() method in which we decided to save data to file, is represented by the following implementation:
public virtual void Dispose()
{
    // Nested method which assists in writing of structure elements
    void WriteItem(XmlTextWriter writer, string Name, string Value)
    {
        writer.WriteStartElement("Item");

        writer.WriteStartAttribute("Name");
        writer.WriteString(Name);
        writer.WriteEndAttribute();

        writer.WriteString(Value);

        writer.WriteEndElement();
    }
    void WriteElement(XmlTextWriter writer, string Node, string Value)
    {
        writer.WriteStartElement(Node);
        writer.WriteString(Value);
        writer.WriteEndElement();
    }

    // firstly clean the file storing xml markup of the settings file
    if (document != null)
        document.RemoveAll();

    // then check if the results can be saved
    if (!_configInputData.HasValue ||
        !_optimisationInputData.HasValue ||
        _setFileParams.Count == 0)
    {
        return;
    }

    using (var xmlWriter = new XmlTextWriter(Path.Combine(PathToReportDataDirectory, SettingsFileName), null))
    {
        xmlWriter.Formatting = Formatting.Indented;
        xmlWriter.IndentChar = '\t';
        xmlWriter.Indentation = 1;

        xmlWriter.WriteStartDocument();

        xmlWriter.WriteStartElement("Settings");

        xmlWriter.WriteStartElement("OptimisationInputData");
        WriteItem(xmlWriter, "Login", _optimisationInputData.Value.Login.ToString());
        WriteItem(xmlWriter, "ForvardDate", _optimisationInputData.Value.ForvardDate.ToString(DTFormat));
        WriteItem(xmlWriter, "IsVisual", _optimisationInputData.Value.IsVisual.ToString());
        WriteItem(xmlWriter, "Deposit", _optimisationInputData.Value.Deposit.ToString());
        WriteItem(xmlWriter, "Laverage", _optimisationInputData.Value.Laverage);
        WriteItem(xmlWriter, "Currency", _optimisationInputData.Value.Currency);
        WriteItem(xmlWriter, "DepositIndex", _optimisationInputData.Value.DepositIndex.ToString());
        WriteItem(xmlWriter, "ExecutionDelayIndex", _optimisationInputData.Value.ExecutionDelayIndex.ToString());
        WriteItem(xmlWriter, "ModelIndex", _optimisationInputData.Value.ModelIndex.ToString());
        WriteItem(xmlWriter, "CurrencyIndex", _optimisationInputData.Value.CurrencyIndex.ToString());
        WriteItem(xmlWriter, "LaverageIndex", _optimisationInputData.Value.LaverageIndex.ToString());
        WriteItem(xmlWriter, "OptimisationCriteriaIndex", _optimisationInputData.Value.OptimisationCriteriaIndex.ToString());
        xmlWriter.WriteEndElement();

        xmlWriter.WriteStartElement("ConfigCreator_inputData");
        WriteItem(xmlWriter, "TF", ((int)_configInputData.Value.TF).ToString());
        WriteItem(xmlWriter, "Login", _configInputData.Value.Login.ToString());
        WriteItem(xmlWriter, "TerminalID", _configInputData.Value.TerminalID.ToString());
        WriteItem(xmlWriter, "pathToBot", _configInputData.Value.pathToBot);
        WriteItem(xmlWriter, "setFileName", _configInputData.Value.setFileName);
        WriteItem(xmlWriter, "Pass", _configInputData.Value.Pass);
        WriteItem(xmlWriter, "CertPass", _configInputData.Value.CertPass);
        WriteItem(xmlWriter, "Server", _configInputData.Value.Server);
        WriteItem(xmlWriter, "Symbol", _configInputData.Value.Symbol);
        WriteItem(xmlWriter, "ReportName", _configInputData.Value.ReportName);
        WriteItem(xmlWriter, "From", _configInputData.Value.From.ToString(DTFormat));
        WriteItem(xmlWriter, "Till", _configInputData.Value.Till.ToString(DTFormat));
        WriteItem(xmlWriter, "OptimisationMode", ((int)_configInputData.Value.OptimisationMode).ToString());
        xmlWriter.WriteEndElement();

        xmlWriter.WriteStartElement("SetFileParams");
        foreach (var item in _setFileParams)
        {
            xmlWriter.WriteStartElement("Variable");

            xmlWriter.WriteStartAttribute("Name");
            xmlWriter.WriteString(item.Variable);
            xmlWriter.WriteEndAttribute();

            WriteElement(xmlWriter, "Value", item.Value);
            WriteElement(xmlWriter, "Start", item.Start);
            WriteElement(xmlWriter, "Step", item.Step);
            WriteElement(xmlWriter, "Stop", item.Stop);
            WriteElement(xmlWriter, "IsOptimize", item.IsOptimize.ToString());

            xmlWriter.WriteEndElement();
        }
        xmlWriter.WriteEndElement();

        xmlWriter.WriteEndElement();
        xmlWriter.WriteEndDocument();
        xmlWriter.Close();
    }
}
Two nested functions are created at the beginning of this method. The WriteItem function allows detaching the repeating code block which use used for writing the structure elements. The WriteElement function is designed for saving the values of optimization parameters, such as Start, Step, Stop, IsOptimize. All the three tags must be available in the settings file. Therefore we add a checking unit before writing, the purpose of which is to prevent file writing if not all the required parameters have been passed. Next, data are written to the file in the earlier described 'using' construct. The use of nested functions allowed to reduce the code related to data writing to file by more than three times.
Testing key objects
In the end, I would like to add a few notes about the application testing. Since the add-on will be further expanded and modified, I decided to write tests to check the key objects. Later we will be able to easily check their performance if it becomes necessary to modify them. Current tests partially cover the following classes:
- Config
- ReportReader
- OptimisationSettingsManager
- SetFileManager
- TerminalManager
In the first article, the classes described in further chapters will be modified. These changes concern the logic and execution results of some of the methods, that is why these classes are nor covered by Unit tests. Tests for these classes will be implemented in the next article. Also note that though the tests are implemented as Unit Tests, currently all of them are integration tests since they interact with external objects (terminal, file system, etc). Further objects are planned to be tested without dependence on the above mentioned objects, i.e. as pure Unit Tests. For this purpose, each of the above described objects are preceded by creation fabrics. An example of such a fabric is the one for creating the ReportReader class:
#region ReportReaderFabric
abstract class ReportReaderCreator
{
    public abstract ReportReader Create(string path);
}

class MainReportReaderCreator : ReportReaderCreator
{
    public override ReportReader Create(string path)
    {
        return new ReportReader(path);
    }
}
#endregion
Its code is simple: we actually wrap the creation of a ReportReader type object to the MainReportReaderCreator class which is derived from the ReportReaderFabric class. This approach enables passing of an object types as ReportReaderFabric to key objects (described in further chapters). Here, implementation of a specific fabric can be different. Thus classes working with the files and the terminal can be replaced by key objects in Unit Tests. The dependence of classes on each other is also reduced. This approach to the formation of objects is called the Factory Method.
The implementation of future tests will be considered in detail in the next article. Example of the use of the fabric method for the creation of objects will be considered in further chapters. Now let is consider testing of a class working with configuration files. All tests within the current project should be included into a separate project, "Unit Test Project"
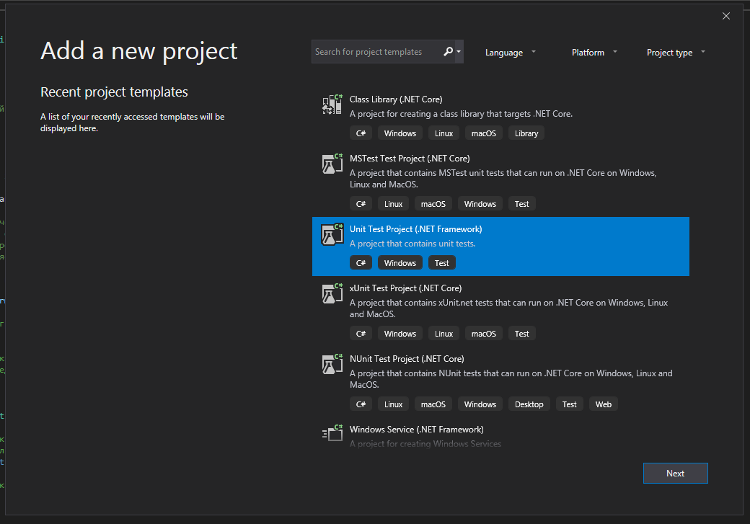
Let us entitle it "OptimisationManagerExtentionTests", because tests will be written for the "OptimisationManagerExtention" project. The next step is to add links to the "OptimisationManagerExtention" project, i.e. to our DLL with the graphic interface and logic. We need to test objects which are not marked with the 'public' access modifier. There are two methods to make them available in our test project:
- Make them public (which is wrong because they are only used inside the project)
- Add the possibility to view internal classes within the specific project (which is a more preferable method)
I used the second method to solve this problem and added the following attribute to the main project code:
[assembly: InternalsVisibleTo("OptimisationManagerExtentionTests")] The next step is to write tests for the selected classes. Since the test project is only an auxiliary one, we will not consider each test class. Instead here is one class given as an example. For convenience, here is the full class for testing the Config class. The first condition to make this class testing is to add the attribute [TestClass]. Also the tested class needs to be public, and its test methods should have the [TestMethod] attribute, while the whole testing process will be implemented in them. The method marked with [TestInitialize] is launched every time before the testing is started. There is a similar [ClassInitialize] attribute, which is not used in this test, but is used in other tests. Unlike a method marked with [TestInitialize], it is launched only ones before the very first testing start. At the end of each of the test methods, there is the call of one of the Assert class methods, which compare the test value with the required one. Thus the test is either confirmed or disproved.
[TestClass]
public class ConfigTests
{
    private string ConfigName = $"{Environment.CurrentDirectory}\\MyTestConfig.ini";
    private string first_excention = "first getters call mast be null because file doesn't contain this key";
    Config config;

    [TestInitialize]
    public void TestInitialize()
    {
        if (File.Exists(ConfigName))
            File.Delete(ConfigName);
        config = new Config(ConfigName);
    }
    [TestMethod]
    public void StringConverter_GetSetTest()
    {
        string expected = null;

        // first get
        string s = config.Common.Password;
        Assert.AreEqual(expected, s, first_excention);

        // set
        expected = "MyTestPassward";
        config.Common.Password = expected;
        s = config.Common.Password;
        Assert.AreEqual(expected, s, "Login mast be equal to MyTestLogin");

        // set null
        config.Common.Login = null;
        s = config.Common.Password;
        Assert.AreEqual(expected, s, "Login mast be equal to MyTestLogin");
    }
    [TestMethod]
    public void ServerConverter_GetSetTest()
    {
        ServerAddressKeeper expected = null;

        // first get;
        ServerAddressKeeper server = config.Common.Server;
        Assert.AreEqual(expected, server);

        // set
        expected = new ServerAddressKeeper("193.219.127.76:4443"); // Open broker demo server
        config.Common.Server = expected;
        server = config.Common.Server;
        Assert.AreEqual(server.Address, expected.Address, $"Address must be {expected.Address}");
    }
    [TestMethod]
    public void BoolConverter_GetSetTest()
    {
        bool? expected = null;

        // first get
        bool? b = config.Common.ProxyEnable;
        Assert.AreEqual(expected, b, first_excention);

        // set
        Random gen = new Random();
        int prob = gen.Next(100);
        expected = prob <= 50;
        config.Common.ProxyEnable = expected;
        b = config.Common.ProxyEnable;
        Assert.AreEqual(expected.Value, b.Value, "ProxyEnables must be equal to true");

        // set null
        config.Common.ProxyEnable = null;
        b = config.Common.ProxyEnable;
        Assert.AreEqual(expected.Value, b.Value, "ProxyEnables must be equal to true");

    }
    [TestMethod]
    public void ENUMConverter_GetSetTest()
    {
        ENUM_ProxyType? expected = null;

        // first get
        ENUM_ProxyType? p = config.Common.ProxyType;
        Assert.AreEqual(expected, p, first_excention);

        // set
        Random gen = new Random();
        int prob = gen.Next(300);
        int n = prob <= 100 ? 0 : (prob > 100 && prob <= 200 ? 1 : 2);
        expected = (ENUM_ProxyType)n;

        config.Common.ProxyType = expected;
        p = config.Common.ProxyType;
        Assert.AreEqual(expected.Value, p.Value, $"ProxyType must be equal to {expected.Value}");

        // set null
        config.Common.ProxyEnable = null;
        p = config.Common.ProxyType;
        Assert.AreEqual(expected.Value, p.Value, $"ProxyType must be equal to {expected.Value}");
    }
    [TestMethod]
    public void DTConverter_GetSetTest()
    {
        DateTime? expected = null;

        // first get
        DateTime? p = config.Tester.FromDate;
        Assert.AreEqual(expected, p, first_excention);

        // set
        expected = DateTime.Now;

        config.Tester.FromDate = expected;
        p = config.Tester.FromDate;
        Assert.AreEqual(expected.Value.Date, p.Value.Date, $"ProxyType must be equal to {expected.Value}");

        // set null
        config.Common.ProxyEnable = null;
        p = config.Tester.FromDate;
        Assert.AreEqual(expected.Value.Date, p.Value.Date, $"ProxyType must be equal to {expected.Value}");
    }
    [TestMethod]
    public void DoubleConverter_GetSetTest()
    {
        double? expected = null;

        // first get
        double? p = config.Tester.Deposit;
        Assert.AreEqual(expected, p, first_excention);

        // set
        Random rnd = new Random();
        expected = rnd.NextDouble();

        config.Tester.Deposit = expected;
        p = config.Tester.Deposit;
        Assert.AreEqual(Math.Round(expected.Value, 6), Math.Round(p.Value, 6), $"Deposit must be equal to {expected.Value}");

        // set null
        config.Common.ProxyEnable = null;
        p = config.Tester.Deposit;
        Assert.AreEqual(Math.Round(expected.Value, 6), Math.Round(p.Value, 6), $"Deposit must be equal to {expected.Value}");
    }
    [TestMethod]
    public void DeleteKeyTest()
    {
        config.Common.Login = 12345;
        config.DeleteKey(ENUM_SectionType.Common, "Login");

        Assert.AreEqual(null, config.Common.Login, "Key must be deleted");
    }
    [TestMethod]
    public void DeleteSectionTest()
    {
        config.Common.Login = 12345;
        config.DeleteSection(ENUM_SectionType.Common);

        Assert.AreEqual(null, config.Common.Login, "Key must be deleted");
    }
}
If we consider this particular test class, it should be noted that it does not cover all the required methods, instead it tests the Config.Converter class, which essentially performs the entire logic of operations with the configuration file. However, since it is a private class, we need to write tests not for the class itself, but for the properties using this class. For example, DoubleConverter_GetSetTest() tests the correctness of the conversion of 'string' to 'Double' via the config.Tester.Deposit property. This specific test consists of three parts:
- Requesting parameter of double type from the field which has not been created — null should be returned
- Writing a random value to file and reading it
- Null entry which should be ignored
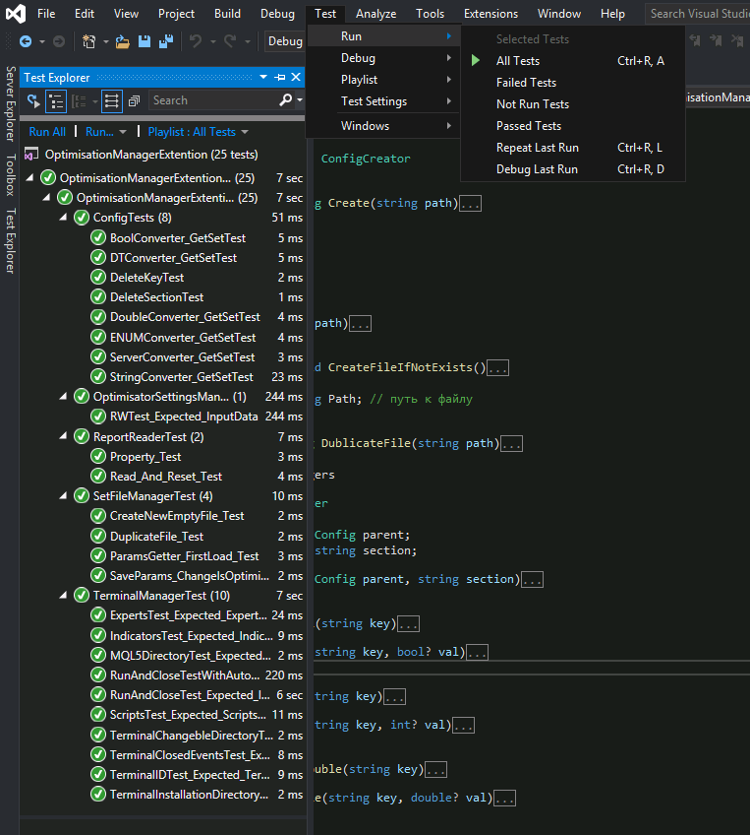
If an error is detected at any of the stages, it can be easily detected and corrected. Thus, the tests are useful of application development. After creating all the tests, you can run them directly from VisualStudio, the launch is performed at the path Test => Run => AllTests
They can also be useful to readers with different computer regional standards: by running these tests, you can detect possible errors (for example, relating to the decimal separator) and fix them.
Optimization manager (OptimissationManager)
One of the criteria for the application is extensibility. The optimization process will be changed in the next article, while the main add-on UI does not require significant changes. That is why I decided to implement the optimization process not as a model class, but as an abstract class, the implementation of which can depend on the method of the requested optimization. This class is written according to the abstract class factory template. Let's begin with the factory:
/// <summary>
/// Factory for creating classes that manage the optimization process
/// </summary>
abstract class OptimisationManagerFabric
{
    /// <summary>
    /// Constructor
    /// </summary>
    /// <param name="ManagerName">The name of the created optimization manager</param>
    public OptimisationManagerFabric(string ManagerName)
    {
        this.ManagerName = ManagerName;
    }
    /// <summary>
    /// Name reflecting the type of the created optimization manager (its features)
    /// </summary>
    public string ManagerName { get; }
    /// <summary>
    /// Method creating the optimization manager
    /// </summary>
    /// <returns>Optimization manager</returns>
    public abstract OptimisationManager Create(Dictionary<string, BotParamKeeper> botParamsKeeper,
                                               List<ViewModel.TerminalAndBotItem> selectedTerminals);
}
As can be seen from the abstract factory class, it contains the name of the implemented class, which will be used in further articles, as well as the method creating the optimization manager. It is assumed that the optimization manager is created before each optimization, and then it takes operation with the terminal. Therefore, parameters such as a dictionary with a list of Expert Advisor and a list of terminals (i.e. parameters that are different in different optimizations) are passed to the object creating method. All other required parameters will be passed to the class of the specific factory from the constructor. Now let us consider the OptimisationManager class. This class is designed to manage optimization. Additionally it is responsible for launching tests. Since the launch of tests is almost always performed according to the same algorithm, this functionality is implemented directly in the considered abstract class. We will consider the class implementation below. As for optimization start and stop, this functionality is implemented in two abstract methods which require implementation in the child class. The class constructor accepts the excess volume of factories and thus can operate with all the objects considered above.
public OptimisationManager(TerminalDirectory terminalDirectory,
                                   TerminalCreator terminalCreator,
                                   ConfigCreator configCreator,
                                   ReportReaderCreator reportReaderCreator,
                                   SetFileManagerCreator setFileManagerCreator,
                                   OptimisationExtentionWorkingDirectory currentWorkingDirectory,
                                   Dictionary<string, BotParamKeeper> botParamsKeeper,
                                   Action<double, string, bool> pbUpdate,
                                   List<ViewModel.TerminalAndBotItem> selectedTerminals,
                                   OptimisatorSettingsManagerCreator optimisatorSettingsManagerCreator)
The AllOptimisationsFinished event is used to notify the model class of optimization completions. The following property allows accessing data about terminals and robots contained in this optimizations manager, from the model class.
/// <summary>
/// Dictionary where:
/// key - terminal ID
/// value - full path to the robot
/// </summary>
public virtual Dictionary<string, string> TerminalAndBotPairs
{
    get
    {
        Dictionary<string, string> ans = new Dictionary<string, string>();
        foreach (var item in botParamsKeeper)
        {
            ans.Add(item.Key, item.Value.BotName);
        }
        return ans;
    }
}
This property is implemented in an abstract class, but it can be rewritten because it is marked with the 'virtual' keyword. To provide the model class with the ability to find out whether the optimization/testing process has been launched, an appropriate property was created. The values for the property are set from the methods which launch the optimization/testing process.
public bool IsOptimisationOrTestInProcess { get; private set; } = false;
For convenience a long class, which will stay unchanged in most cases in optimization and test launch classes, is implemented directly in the abstract class. This is the method forming a configuration file.
protected virtual Config CreateConfig(ConfigCreator_inputData data,
                                      OptimisationInputData optData)
{
    DirectoryInfo termonalChangableFolder = terminalDirectory.Terminals.Find(x => x.Name == data.TerminalID);

    Config config = configCreator.Create(Path.Combine(termonalChangableFolder.GetDirectory("config").FullName, "common.ini"))
                                         .DublicateFile(Path.Combine(currentWorkingDirectory.Configs.FullName, $"{data.TerminalID}.ini"));

    // Fill the configuration file
    config.Common.Login = data.Login;
    config.Common.Password = data.Pass;
    config.Common.CertPassword = data.CertPass;
    if (!string.IsNullOrEmpty(data.Server) || !string.IsNullOrWhiteSpace(data.Server))
    {
        try
        {
            config.Common.Server = new ServerAddressKeeper(data.Server);
        }
        catch (Exception e)
        {
            System.Windows.MessageBox.Show($"Server address was incorrect. Your adress is '{data.Server}' but mast have following type 'IPv4:Port'" +
                                           $"\nError message:\n{e.Message}\n\nStack Trace is {e.StackTrace}");
            return null;
        }
    }

    bool IsOptimisation = (data.OptimisationMode == ENUM_OptimisationMode.Fast_genetic_based_algorithm ||
                           data.OptimisationMode == ENUM_OptimisationMode.Slow_complete_algorithm);

    config.Tester.Expert = data.pathToBot;
    config.Tester.ExpertParameters = data.setFileName;
    сonfig.Tester.Symbol = data.Symbol;
    config.Tester.Period = data.TF;
    config.Tester.Login = optData.Login;
    config.Tester.Model = optData.Model;
    config.Tester.ExecutionMode = optData.ExecutionDelay;
    config.Tester.Optimization = data.OptimisationMode;
    с data.From;
    config.Tester.ToDate = data.Till;
    config.Tester.ForwardMode = ENUM_ForvardMode.Custom;
    config.Tester.ForwardDate = optData.ForvardDate;
    config.Tester.ShutdownTerminal = IsOptimisation;
    config.Tester.Deposit = optData.Deposit;
    config.Tester.Currency = optData.Currency;
    config.Tester.Leverage = optData.Laverage;
    config.Tester.OptimizationCriterion = optData.GetOptimisationCriteria;
    config.Tester.Visual = optData.IsVisual;

    if (IsOptimisation)
    {
        config.Tester.Report = data.ReportName;
        config.Tester.ReplaceReport = true;
    }

    return config;
}
Firstly, using the class describing the variable directory of the terminal, and the factory creating objects of Config type, we create a configuration file object and copy it to the appropriate directory of our add-on. Set its name equal to the ID of the terminal, to which the original configuration file belonged. Then fill the [Tester] section of the copied configuration file. All data to fill this section are taken directly from the passed structures which are either formed in the code (in case of optimization) or are taken from the file (in case of test start). If the server is passed incorrectly, an appropriate message is output as a MessageBox, while null is returned instead of the config file. For the same purpose, to separate repeating code, a method creating the terminal manager is implemented in the abstract class. Here it is:
protected virtual ITerminalManager GetTerminal(Config config, string TerminalID)
{
    DirectoryInfo TerminalChangebleFolder = terminalDirectory.Terminals.Find(x => x.Name == TerminalID);

    ITerminalManager terminal = terminalCreator.Create(TerminalChangebleFolder);
    terminal.Config = config;

    if (MQL5Connector.MainTerminalID == terminal.TerminalID)
        terminal.Portable = true;

     return terminal;
}
If ID of the required terminal matches the ID of the terminal from which the add-on is launched, the terminal is configured to launch in Portable mode, but the app can only operate properly when the terminal is launched in the standard mode. Therefore it has a filter which ignores the the current terminal and does not add it to the list of available terminals.
The method launching the test in the selected terminal at a double-click event is also implemented in the abstract class:
/// <summary>
/// Method for launching a test upon a double-click event
/// </summary>
/// <param name="TerminalID">ID of the selected terminal</param>
/// <param name="pathToBot">Path to the robot relative to the experts tab</param>
/// <param name="row">Row from the optimizations table</param>
public virtual void StartTest(ConfigCreator_inputData data,
                              OptimisationInputData optData)
{
    pbUpdate(0, "Start Test", true);

    double pb_step = 100.0 / 3;

    IsOptimisationOrTestInProcess = true;

    pbUpdate(pb_step, "Create Config File", false);
    Config config = CreateConfig(data, optData);
    config.Tester.Optimization = ENUM_OptimisationMode.Disabled;
    config.Tester.ShutdownTerminal = false;
    config.DeleteKey(ENUM_SectionType.Tester, "ReplaceReport");
    config.DeleteKey(ENUM_SectionType.Tester, "Report");

    pbUpdate(pb_step, "Create TerminalManager", false);
    ITerminalManager terminal = GetTerminal(config, data.TerminalID);

    pbUpdate(pb_step, "Testing", false);
    terminal.Run();
    terminal.WaitForStop();
    IsOptimisationOrTestInProcess = false;
    pbUpdate(0, null, true);
}
In its inputs, it accepts the data which are received in the class describing the model, from the file with the saved settings. Inside the method, the Progress Bar values and operation status are also set via the delegate passed. The generated configuration file is adjusted to run the tester: the keys that describe the optimizer report are deleted, and the automatic terminal shutdown after tester end is turned off. After the terminal launch, the thread that launched the terminal freezes and waits for its operation to complete. Thus the form is notified of test end. To avoid the freezing of the form at optimization/testing launch, these processes are launched in the context of the secondary thread. As for optimization, as already mentioned earlier, this process is implemented in a protected abstract method. However there is one public method implemented in the abstract class, which is required for a correct operation of the class and cannot be rewritten.
/// <summary>
/// Launching optimization/testing for all planned terminals
/// </summary>
/// <param name="BotParamsKeeper">List of terminals, robots and robot parameters</param>
/// <param name="PBUpdate">The delegate editing the values of the progress bar and the status</param>
/// <param name="sturtup_status">Response from the function - only used if optimization/test could not be started
/// reason for that is written here</param>
/// <returns>true - if successful</returns>
public void StartOptimisation()
{
    pbUpdate(0, "Start Optimisation", true);
    IsOptimisationOrTestInProcess = true;

    DoOptimisation();
    OnAllOptimisationsFinished();
    IsOptimisationOrTestInProcess = false;
    pbUpdate(0, null, true);
}
protected abstract void DoOptimisation();

/// <summary>
/// The method interrupting optimizations
/// </summary>
public abstract void BreakOptimisation();
This method regulates in what order the optimization process triggers in relation to the update of the progress bar, setting of optimization start and completion flags, as well as to the call of optimization pass completion events.
The last method implemented in the abstract class is the method that moves the report to the working directory of the add-on. In addition to report moving, a file with optimization settings should be created, therefore these actions are implemented in a separate method.
protected virtual void MoveReportToWorkingDirectery(ITerminalManager terminalManager,
                                                    string FileName,
                                                    ConfigCreator_inputData ConfigCreator_inputData,
                                                    OptimisationInputData OptimisationInputData)
{
    FileInfo pathToFile_history = new FileInfo(Path.Combine(terminalManager.TerminalChangeableDirectory.FullName, $"{FileName}.xml"));
    FileInfo pathToFile_forward = new FileInfo(Path.Combine(terminalManager.TerminalChangeableDirectory.FullName, $"{FileName}.forward.xml"));
    int _i = 0;
    while (_i <= 100 && (!pathToFile_history.Exists && !pathToFile_forward.Exists))
    {
        _i++;
        System.Threading.Thread.Sleep(500);
    }

    string botName = new FileInfo(terminalManager.Config.Tester.Expert).Name.Split('.')[0];
    DirectoryInfo terminalReportDirectory = currentWorkingDirectory.Reports.GetDirectory(terminalManager.TerminalID, true);
    if (terminalReportDirectory == null)
        throw new Exception("Can`t create directory");
    DirectoryInfo botReportDir = terminalReportDirectory.GetDirectory(botName, true);
    if (botReportDir == null)
        throw new Exception("Can`t create directory");

    FileInfo _history = new FileInfo(Path.Combine(botReportDir.FullName, "History.xml"));
    FileInfo _forward = new FileInfo(Path.Combine(botReportDir.FullName, "Forward.xml"));

    if (_history.Exists)
        _history.Delete();
    if (_forward.Exists)
        _forward.Delete();

    if (pathToFile_history.Exists)
    {
        pathToFile_history.CopyTo(_history.FullName, true);
        pathToFile_history.Delete();
    }
    if (pathToFile_forward.Exists)
    {
        pathToFile_forward.CopyTo(_forward.FullName, true);
        pathToFile_forward.Delete();
    }

    string pathToSetFile = Path.Combine(terminalManager.TerminalChangeableDirectory
                                        .GetDirectory("MQL5")
                                        .GetDirectory("Profiles")
                                        .GetDirectory("Tester").FullName,
                                        ConfigCreator_inputData.setFileName);

    using (OptimisatorSettingsManager manager =
           optimisatorSettingsManagerCreator.Create(botReportDir.FullName))
    {
        manager.OptimisationInputData = OptimisationInputData;
        manager.ConfigCreator_inputData = ConfigCreator_inputData;
        manager.SetFileParams = setFileManagerCreator.Create(pathToSetFile, false).Params;
    }
}
First of all in this method we obtain paths to files with reports. Then wait in a loop till one of the desired files is created (only one, because not always these two files will be generated - this may happen during historic optimization without a forward period). Then form the paths to the directory in which files with the report will be stored. In fact, this code snippet contains the layout of subfolders of the Reports directory. Next, we create paths to future files and delete old ones, if there were any. After that reports are copied to the add-on directory. In the end, we create an *.xml file with the settings which were used during optimization launch. Since this process should be performed in stages and it is unlikely to be changed, it was moved to an abstract class, and to start it, we can simply call this method from the child class.
Now let us consider the implemented optimization process. Currently it is a usual terminal launch with selected optimization parameters as in a standard tester. The most interesting aspects of its implementation are the launch process and the handler of the optimization completion event.
private readonly List<ITerminalManager> terminals = new List<ITerminalManager>();
/// <summary>
/// The method interrupts the optimization process and forcibly closes the terminals
/// </summary>
public override void BreakOptimisation()
{
    foreach (var item in terminals)
    {
        if (item.IsActive)
            item.Close();
    }
}
private void UnsubscribeTerminals()
{
    if (terminals.Count > 0)
    {
        foreach (var item in terminals)
        {
            item.TerminalClosed -= Terminal_TerminalClosed;
        }
        terminals.Clear();
    }
}

protected override void DoOptimisation()
{
    UnsubscribeTerminals();

    double pb_step = 100.0 / (botParamsKeeper.Count + 1);

    foreach (var item in botParamsKeeper)
    {
        pbUpdate(pb_step, item.Key, false);

        ConfigCreator_inputData configInputData = GetConfigCreator_inputData(item.Key);
        OptimisationInputData optData = item.Value.OptimisationData;

        Config config = CreateConfig(configInputData, optData);

        ITerminalManager terminal = GetTerminal(config, item.Key);
        terminal.TerminalClosed += Terminal_TerminalClosed;
        terminal.Run();

        terminals.Add(terminal);
    }

    pbUpdate(pb_step, "Waiting for Results", false);

    foreach (var item in terminals)
    {
        if (item.IsActive)
            item.WaitForStop();
    }
}
The list of terminal managers is implemented in a field and can be accessed from different methods. This also enables the implementation of the BreakOptimisations method. In the optimization process launch method, after creating the terminal, we subscribe to the terminal closing event and thus we can track optimization completion. After optimization launch, we hold th thread in a loop until all the launched terminals are closed. The UnsubscribeTerminals method is used to unsubscribe from all previously subscribed events in case of optimization restart. The method is called in class destructor. The optimization stop event handler is implemented as follows:
protected virtual void Terminal_TerminalClosed(ITerminalManager terminalManager)
{
    string FileName = new FileInfo(terminalManager.Config.Tester.Expert).Name.Split('.')[0];

    ConfigCreator_inputData ConfigCreator_inputDat = GetConfigCreator_inputData(terminalManager.TerminalID);
    OptimisationInputData optData = botParamsKeeper[terminalManager.TerminalID].OptimisationData;

    MoveReportToWorkingDirectery(terminalManager, FileName, ConfigCreator_inputDat, optData);
}

private ConfigCreator_inputData GetConfigCreator_inputData(string TerminalID)
{
    ViewModel.TerminalAndBotItem settingsData = selectedTerminals.Find(x => x.TerminalID == TerminalID);
    BotParamKeeper ParamKeeper = botParamsKeeper[TerminalID];

    ConfigCreator_inputData ConfigCreator_inputDat = new ConfigCreator_inputData
    {
        TerminalID = TerminalID,
        pathToBot = ParamKeeper.BotName,
        CertPass = settingsData.CertPass,
        From = settingsData.From,
        Till = settingsData.Till,
        Login = settingsData.Login,
        OptimisationMode = settingsData.GetOptimisationMode,
        Pass = settingsData.Pass,
        Server = settingsData.Server,
        setFileName = botParamsKeeper[TerminalID].BotParams.FileInfo.Name,
        Symbol = settingsData.AssetName,
        TF = settingsData.GetTF,
        ReportName = new FileInfo(ParamKeeper.BotName).Name.Split('.')[0]
    };

    return ConfigCreator_inputDat;
}
Its main purpose is to move the files with the optimizations report to the appropriate directory. Thus the optimization and testing launch logic is implemented. One of the operations that we will perform in the next article is the implementation of additional optimization methods according to the described sample. We have examined almost the entire created application. Now let us see the main resulting class which describes the model referred to from ViewModel.
The resulting model class (IExtentionGUI_M and its implementation)
This part of the described project implements the IExtentionGUI_M interface and is the starting point that implements the logic of the described form. The graphic part and ViewModel refer to this class to receive data and delegate the execution of various commands. Let us begin with the interface which is implemented as follows.
/// <summary>
/// Model interface
/// </summary>
interface IExtentionGUI_M : INotifyPropertyChanged
{
    #region Properties

    bool IsTerminalsLVEnabled { get; }
    List<FileReaders.ParamsItem> BotParams { get; }
    VarKeeper<string> Status { get; }
    VarKeeper<double> PB_Value { get; }
    ObservableCollection<string> TerminalsID { get; }
    DataTable HistoryOptimisationResults { get; }
    DataTable ForvardOptimisationResults { get; }
    ObservableCollection<ViewExtention.ColumnDescriptor> OptimisationResultsColumnHeadders { get; }
    ObservableCollection<string> TerminalsAfterOptimisation { get; }
    VarKeeper<int> TerminalsAfterOptimisation_Selected { get; set; }
    ObservableCollection<string> BotsAfterOptimisation { get; }
    VarKeeper<int> BotsAfterOptimisation_Selected { get; set; }

    #endregion

    void LoadOptimisations();
    void LoadBotParams(string fullExpertName,
        string TerminalID,
        out OptimisationInputData? optimisationInputData);
    List<string> GetBotNamesList(int terminalIndex);
    uint? GetCurrentLogin(int terminalIndex);
    void StartOptimisationOrTest(List<ViewModel.TerminalAndBotItem> SelectedTerminals);
    void StartTest(ENUM_TableType TableType, int rowIndex);
    bool RemoveBotParams(string TerminalID);
    bool IsEnableToAddNewTerminal();
    void SelectNewBotsAfterOptimisation_forNewTerminal();
    void UpdateTerminalOptimisationsParams(OptimisationInputData optimisationInputData);
}

#region Accessory objects

/// <summary>
/// Enum characterizing the type of tables with optimization results
/// </summary>
enum ENUM_TableType
{
    History,
    Forvard
}
This is the interface with which ViewModel operates. If necessary, its implementation can be replaced with any other implementation. In this case there is no need to change the graphical part of the program. On the other hand we can change the graphical part without changing its logic. The interface is inherited from the INotifyPropertyChanged interface and thus we get the opportunity to notify ViewModel and View if any of the properties implemented in this data model, has changed. For convenience, I added a universal wrapper class VarKeeper, which in addition to storing any type value, can implicitly cast to the stored type, as well as notify ViewModel if the stored value has changed. Here is the class implementation:
/// <summary>
/// Class storing the variable _Var of type T_keeper.
/// We can implicitly cast to type T_keeper and also change the value of the stored variable
/// At the time of changing the value it notifies all those which have subscribed
/// </summary>
/// <typeparam name="T_keeper">Type of stored variable</typeparam>
class VarKeeper<T_keeper>
{
    /// <summary>
    /// Constructor specifying the variable identification name
    /// </summary>
    /// <param name="propertyName">Variable identification name</param>
    public VarKeeper(string propertyName)
    {
        this.propertyName = propertyName;
    }
    /// <summary>
    /// Constructor specifying the variable identification name
    /// and the initial value of the variable
    /// </summary>
    /// <param name="PropertyName">Identification name of the variable</param>
    /// <param name="Var">initial value of the variable</param>
    public VarKeeper(string PropertyName, T_keeper Var) : this(PropertyName)
    {
        _Var = Var;
    }
    /// <summary>
    /// Overloading the implicit type conversion operator.
    /// Converts this type to T_keeper
    /// </summary>
    /// <param name="obj"></param>
    public static implicit operator T_keeper(VarKeeper<T_keeper> obj)
    {
        return obj._Var;
    }
    /// <summary>
    /// stored variable
    /// </summary>
    protected T_keeper _Var;
    /// <summary>
    /// Identification name of the variable
    /// </summary>
    public readonly string propertyName;
    #region Event
    /// <summary>
    /// Event notifying about the change of the stored variable
    /// </summary>
    public event Action<string> PropertyChanged;
    /// <summary>
    /// Method that calls the event notifying about the change of the stored variable
    /// </summary>
    protected void OnPropertyChanged()
    {
        PropertyChanged?.Invoke(propertyName);
    }
    #endregion
    /// <summary>
    /// Method which sets the value of a variable with the 'value' value
    /// </summary>
    /// <param name="value">new value of the variable</param>
    public void SetVar(T_keeper value)
    {
        SetVarSilently(value);
        OnPropertyChanged();
    }
    public void SetVarSilently(T_keeper value)
    {
        _Var = value;
    }
}
In the class constructor we pass the initial value of the stored variable and the name of the variable which will be used to notify of value change. The variable is stored in the protected field of this class. The name of the variable used to notify of a value change is stored in a public read-only field ropertyName. Variable value setting methods are divided into the method which sets its value and calls an event to notifies all subscribers of this change, and the method which only sets the variable value. To enable implicit class conversion to the stored value type, overloading of type casting operator is used in it. This class enables us to store variable values, read them without using explicit type conversion and notify the environment of a change in the variable value. In the constructor of the class implementing the IExtentionGUI_M interface, set values to properties and subscribe to be notified of an update of these properties. In this class destructor, unsubscribe from the property events.
public ExtentionGUI_M(TerminalCreator TerminalCreator,
                      ConfigCreator ConfigCreator,
                      ReportReaderCreator ReportReaderCreator,
                      SetFileManagerCreator SetFileManagerCreator,
                      OptimisationExtentionWorkingDirectory CurrentWorkingDirectory,
                      OptimisatorSettingsManagerCreator SettingsManagerCreator,
                      TerminalDirectory terminalDirectory)
{
    // Assign the current working directory
    this.CurrentWorkingDirectory = CurrentWorkingDirectory;
    this.terminalDirectory = terminalDirectory;
    //Create factories
    this.TerminalCreator = TerminalCreator;
    this.ReportReaderCreator = ReportReaderCreator;
    this.ConfigCreator = ConfigCreator;
    this.SetFileManagerCreator = SetFileManagerCreator;
    this.SettingsManagerCreator = SettingsManagerCreator;
    CreateOptimisationManagerFabrics();

    // subscribe to the event of a change in columns of the historic optimizations table
    HistoryOptimisationResults.Columns.CollectionChanged += Columns_CollectionChanged;

    // Assign initial status
    Status = new VarKeeper<string>("Status", "Wait for the operation");
    Status.PropertyChanged += OnPropertyChanged;
    // Assign initial values for the progress bar
    PB_Value = new VarKeeper<double>("PB_Value", 0);
    PB_Value.PropertyChanged += OnPropertyChanged;
    // Create a variable storing the index of terminal selected from the list of available terminals for which optimization was done
    TerminalsAfterOptimisation_Selected = new VarKeeper<int>("TerminalsAfterOptimisation_Selected", 0);
    TerminalsAfterOptimisation_Selected.PropertyChanged += OnPropertyChanged;
    // Create a variable storing the index of robot selected from the list of available robots for which optimization was done
    BotsAfterOptimisation_Selected = new VarKeeper<int>("BotsAfterOptimisation_Selected", -1);
    BotsAfterOptimisation_Selected.PropertyChanged += OnPropertyChanged;

    _isTerminalsEnabled = new VarKeeper<bool>("IsTerminalsLVEnabled", true);
    _isTerminalsEnabled.PropertyChanged += OnPropertyChanged;

    // Load data on terminals installed on the computer
    FillInTerminalsID();
    FillInTerminalsAfterOptimisation();
    LoadOptimisations();
}
The following methods are called in the constructor:
- CreateOptimisationManagerFabrics — factories creating optimization managers: they are added to array; later the required optimizations manager will be selected from it according to our specific criteria.
- FillInTerminalsID — fills the list of terminal IDs, which are shown in the drop-down terminal selection list before optimization. All found terminals except the current one are added to the list.
- FillInTerminalsAfterOptimisation — fills the list of terminals in which any of the optimizations was already performed and for which there are data to load to the optimizations data.
- LoadOptimiations — fills the optimizations table in accordance with the selected terminal and robot (both parameters currently have a zero index).
Thus we implement the main task of the constructor: preparing program for operation, filling all tables and variables with initial values. The next stage involves operation with the tables of terminals selected for optimization. All selected terminals are stored in the vocabulary, in one of the class fields.
/// <summary>
/// Presenting the table of selected terminals at the start tab of the add-on
/// key - Terminal ID
/// value - bot params
/// </summary>
private readonly Dictionary<string, BotParamKeeper> BotParamsKeeper = new Dictionary<string, BotParamKeeper>();
/// <summary>
/// Currently selected terminal
/// </summary>
private string selectedTerminalID = null;
/// <summary>
/// List of robot parameters to be edited
/// </summary>
List<ParamsItem> IExtentionGUI_M.BotParams
{
    get
    {
        return (BotParamsKeeper.Count > 0 && selectedTerminalID != null) ?
               BotParamsKeeper[selectedTerminalID].BotParams.Params :
               new List<ParamsItem>();
    }
}
The BotParams receives the list of EA parameters from this vocabulary, and when the selected robot is changed (the mechanism will be described further) we access a new key in this vocabulary. The vocabulary contents are controlled by the LoadBotParam method which is called immediately after a click on the button for adding a new terminal, which was selected from the drop-down list in the first tab of this add-on. This method is implemented as follows:
void IExtentionGUI_M.LoadBotParams(string fullExpertName,
            string TerminalID,
            out OptimisationInputData? optimisationInputData)
{
    PBUpdate(0, "Loading params", true);
    optimisationInputData = null;

    if (!IsTerminalsLVEnabled)
        return;

    _isTerminalsEnabled.SetVar(false);

    if (!BotParamsKeeper.Keys.Contains(TerminalID))
    {
        PBUpdate(100, "Add New Terminal", false);
        AddNewTerminalIntoBotParamsKeeper(fullExpertName, TerminalID);
    }
    else
    {
        if (selectedTerminalID != null)
            BotParamsKeeper[selectedTerminalID].BotParams.SaveParams();
        else
        {
            foreach (var item in BotParamsKeeper)
            {
                item.Value.BotParams.SaveParams();
            }
        }
    }

    selectedTerminalID = TerminalID;
    optimisationInputData = BotParamsKeeper[selectedTerminalID].OptimisationData;

    if (BotParamsKeeper[selectedTerminalID].BotName != fullExpertName)
    {
        PBUpdate(100, "Load new params", false);
        BotParamKeeper param = BotParamsKeeper[selectedTerminalID];
        param.BotName = fullExpertName;
        param.BotParams = GetSetFile(fullExpertName, TerminalID);
        BotParamsKeeper[selectedTerminalID] = param;
    }
    PBUpdate(0, null, true);
    _isTerminalsEnabled.SetVar(true);
}
As can be seen from the code, in addition to blocking the user interface during optimization an test (as is shown in the video), the code also includes a check of whether the list of robot (and possibly terminal) parameters can be updated. If the robot or terminal parameters can be updated, then block the graphical interface. Then either a new robot is added, or parameters earlier entered via GUI are saved. After that the selected terminal ID is saved (a key in the vocabulary) and the parameters of the newly selected robot are passed back to ViewModel. If we changed the selected robot compared to the earlier selected one, upload parameters for it via the GetSetFile method. The method adding a new terminal is very simple and almost fully repeats the last conditional construction of the considered method. The main work is performed by the GetSetFile method.
private SetFileManager GetSetFile(string fullExpertName, string TerminalID)
{
    DirectoryInfo terminalChangableFolder = terminalDirectory.Terminals.Find(x => x.Name == TerminalID);

    // Creating a manager for working with the terminal
    ITerminalManager terminalManager = TerminalCreator.Create(terminalChangableFolder);

    // Creating path to the Tester folder (which is under ~/MQL5/Profiles)
    // If there is no such folder, create it yourself
    // Files with optimization parameter settings are stored in it
    DirectoryInfo pathToMqlTesterFolder = terminalManager.MQL5Directory.GetDirectory("Profiles").GetDirectory("Tester", true);
    if (pathToMqlTesterFolder == null)
        throw new Exception("Can`t find (or create) ~/MQL5/Profiles/Tester directory");

    // Create a configuration file and copy it to the Configs folder of the current working add-on directory
    Config config = ConfigCreator.Create(Path.Combine(terminalChangableFolder.GetDirectory("config").FullName, "common.ini"))
                                 .DublicateFile(Path.Combine(CurrentWorkingDirectory.Configs.FullName, $"{TerminalID}.ini"));
    // Configure the terminal so that it launches the selected robot test and immediately shuts down
    // Thus the terminal will create a .set file with this Expert Advisor settings.
    // To have it immediately shut down, specify the test end one day lower than the start date.
    config.Tester.Expert = fullExpertName;
    config.Tester.Model = ENUM_Model.OHLC_1_minute;
    config.Tester.Optimization = ENUM_OptimisationMode.Disabled;
    config.Tester.Period = ENUM_Timeframes.D1;
    config.Tester.ShutdownTerminal = true;
    config.Tester.FromDate = DateTime.Now.Date;
    config.Tester.ToDate = config.Tester.FromDate.Value.AddDays(-1);

    // Set configuration file to the terminal manager, launch it and wait for he terminal to close
    // To enable automatic terminal shut down after testing completion,
    // assign the true value to field config.Tester.ShutdownTerminal
    terminalManager.Config = config;
    terminalManager.WindowStyle = System.Diagnostics.ProcessWindowStyle.Minimized;
    string fileName = $"{new FileInfo(fullExpertName).Name.Split('.')[0]}.set";

    while (!terminalManager.Run())
    {
        System.Windows.MessageBoxResult mb_ans =
            System.Windows.MessageBox.Show(@"Can`t start terminal
Close manually all MetaTrader terminals that are running now (except main terminal)",
"Can`t start terminal", System.Windows.MessageBoxButton.OKCancel);
        if (mb_ans == System.Windows.MessageBoxResult.Cancel)
            break;
    }
    terminalManager.WaitForStop();

    bool isSetFileWasCreated = pathToMqlTesterFolder.GetFiles().Any(x => x.Name == fileName);

    return SetFileManagerCreator.Create(Path.Combine(pathToMqlTesterFolder.FullName, fileName), !isSetFileWasCreated);
}
This method is well commented. Let us explain its main purpose. The method receives parameters of the selected robot, i.e. its SET file. This file is created by the terminal once the robot is started in the tester, so the only way to generate the file is to run the selected algorithm in the tester. Not to perform this explicitly, the terminal with a running tester is launched in a minimized mode. For the tester to quickly complete operation and to shut down, we set the testing end date a day earlier than testing start date. If the terminal is already running, an attempt to open it is performed in a loop, and an appropriate message is displayed. After operation, return the object-oriented representation of the SET file.
The next interesting point in this class is the optimization start process, which is performed by the asynchronous StartOptimisationOrTest method.
async void IExtentionGUI_M.StartOptimisationOrTest(List<ViewModel.TerminalAndBotItem> SelectedTerminals)
{
    if (BotParamsKeeper.Count == 0)
       return;
    foreach (var item in BotParamsKeeper)
    {
        item.Value.BotParams.SaveParams();
    }

    SetOptimisationManager(SelectedTerminals);

    // Run the optimization and wait for it to finish
    _isTerminalsEnabled.SetVar(false);
    await System.Threading.Tasks.Task.Run(() => selectedOptimisationManager.StartOptimisation());
    _isTerminalsEnabled.SetVar(true);
}

private void SetOptimisationManager(List<ViewModel.TerminalAndBotItem> SelectedTerminals)
{
    // Select a factory to create an optimization manager from the list
    OptimisationManagerFabric OMFabric = optimisationManagerFabrics[0];
    // Unsubscribe from a previously used optimization manager
    if (selectedOptimisationManager != null)
    {
        // Check if optimization is running at the moment
        if (selectedOptimisationManager.IsOptimisationOrTestInProcess)
            return;

        selectedOptimisationManager.AllOptimisationsFinished -= SelectedOptimisationManager_AllOptimisationsFinished;
    }

    // Create an optimization manager and subscribe it to the optimization completion event
    selectedOptimisationManager = OMFabric.Create(BotParamsKeeper, SelectedTerminals);
    selectedOptimisationManager.AllOptimisationsFinished += SelectedOptimisationManager_AllOptimisationsFinished;
}
The implementation demonstrates the use of the optimizations manager: it is re-created before each optimization start. In this implementation, the creation is performed only for the first manager from the corresponding array. A more complicated process will be demonstrated in the next article. Testing launch is similar to optimization start. However here robot parameters are replaced with those selected by a double click.
async void IExtentionGUI_M.StartTest(ENUM_TableType TableType, int rowIndex)
{
    if (!IsTerminalsLVEnabled)
        return;

    string TerminalID = TerminalsAfterOptimisation[TerminalsAfterOptimisation_Selected];
    string pathToBot = BotsAfterOptimisation[BotsAfterOptimisation_Selected];
    DirectoryInfo terminalChangableFolder = terminalDirectory.Terminals.Find(x => x.Name == TerminalID);

    DataRow row = (TableType == ENUM_TableType.History ? HistoryOptimisationResults : ForvardOptimisationResults).Rows[rowIndex];

    ConfigCreator_inputData configInputData;
    OptimisationInputData OptimisatorSettings;

    DirectoryInfo BotReportDirectory = CurrentWorkingDirectory.Reports.GetDirectory(TerminalID).GetDirectory(pathToBot);
    using (OptimisatorSettingsManager settingsManager = SettingsManagerCreator.Create(BotReportDirectory.FullName))
    {
        configInputData = settingsManager.ConfigCreator_inputData;
        OptimisatorSettings = settingsManager.OptimisationInputData;

        string setFilePath = Path.Combine(terminalChangableFolder
                                          .GetDirectory("MQL5")
                                          .GetDirectory("Profiles")
                                          .GetDirectory("Tester", true).FullName,
                                           configInputData.setFileName);

        SetFileManager setFile = SetFileManagerCreator.Create(setFilePath, true);
        setFile.Params = settingsManager.SetFileParams;

        foreach (var item in setFile.Params)
        {
            if (row.Table.Columns.Contains(item.Variable))
                item.Value = row[item.Variable].ToString();
        }
        setFile.SaveParams();
    }

    _isTerminalsEnabled.SetVar(false);
    if (selectedOptimisationManager == null)
        SetOptimisationManager(new List<ViewModel.TerminalAndBotItem>());

    await System.Threading.Tasks.Task.Run(() =>
    {
        selectedOptimisationManager.StartTest(configInputData, OptimisatorSettings);
    });
    _isTerminalsEnabled.SetVar(true);
}
This method is also asynchronous. It also involves the creation of optimization manager, provided that it has not been created before. To obtain inputs for the test, call the settings file located next to the selected robot's optimization report. Once the robot settings file is created, find those parameters which were specified in the optimizations report and set the value from the selected optimizations line in the 'Value' parameter. After saving parameters, proceed to test launch.
To upload the optimization results to the appropriate table, the following method containing the nested method is used.
public void LoadOptimisations()
{
    // Internal method filling the table with data
    void SetData(bool isForvard, DataTable tb)
    {
        // Clear the table from previously added data
        tb.Clear();
        tb.Columns.Clear();

        // Get data
        string TerminalID = TerminalsAfterOptimisation[TerminalsAfterOptimisation_Selected];
        string botName = BotsAfterOptimisation[BotsAfterOptimisation_Selected];
        string path = Path.Combine(CurrentWorkingDirectory.Reports
                                                          .GetDirectory(TerminalID)
                                                          .GetDirectory(botName)
                                                          .FullName,
                                                          $"{(isForvard ? "Forward" : "History")}.xml");
        if (!File.Exists(path))
            return;

        using (ReportReader reader = ReportReaderCreator.Create(path))
        {
            if (reader.ColumnNames.Count == 0)
                return;

            // Fill the columns
            foreach (var item in reader.ColumnNames)
            {
                tb.Columns.Add(item);
            }

            // Fill the rows
            while (reader.Read(out List<KeyValuePair<string, object>> data))
            {
                DataRow row = tb.NewRow();
                foreach (var item in data)
                {
                    row[item.Key] = item.Value;
                }
                tb.Rows.Add(row);
            }
        }
    }

    if (TerminalsAfterOptimisation.Count == 0 && BotsAfterOptimisation.Count == 0)
    {
        return;
    }

    // Fill historic optimization data first, then add forward test results
    SetData(false, HistoryOptimisationResults);
    SetData(true, ForvardOptimisationResults);
}
The method executes a double call of the nested function in which the operation is performed. The following is performed in the nested function:
- clearing the passed table (and its columns)
- Setting path to the report file
- Reading the reports using the ReportReader class and loading data to table.
The following code line is contained in the constructor:
// subscribe to the event of a change in columns of the historic optimizations table
HistoryOptimisationResults.Columns.CollectionChanged += Columns_CollectionChanged;
It subscribes the Columns_CollectionChanged method to column update events related to the historic optimization table. Using this method we track addition of columns. In the subscribed method (please see the code in the attached files) column names are automatically added or deleted from the OptimisationResultsColumnHeaders collection, from which they are delivered to ViewModel and View, and then they are added to ListView using the above described extension for automatic column loading. Thus, when the list of columns is edited in the historic optimization table, columns in View in both tables are automatically edited.
In this chapter, we examined the implementation details of the optimization launch, program loading and loading of files with historic and forward optimization passes, as well as we analyzed a method for launching test passes upon a double-click event. Thus the application shown in the video is almost ready, while only its launch from the terminal needs to be implemented. This will be done by the following wrapper implemented as an Expert Advisor.
//+------------------------------------------------------------------+
//|                                 OptimisationManagerExtention.mq5 |
//|                        Copyright 2019, MetaQuotes Software Corp. |
//|                                             https://www.mql5.com |
//+------------------------------------------------------------------+
#property copyright "Copyright 2019, MetaQuotes Software Corp."
#property link      "https://www.mql5.com"
#property version   "1.00"

#import "OptimisationManagerExtention.dll"
//+------------------------------------------------------------------+
//| Expert initialization function                                   |
//+------------------------------------------------------------------+
int OnInit()
  {
//---

   string data[];
   StringSplit(TerminalInfoString(TERMINAL_DATA_PATH),'\\',data);
   MQL5Connector::Instance(data[ArraySize(data)-1]);

   while(!MQL5Connector::IsWindowActive())
     {
      Sleep(500);
     }

   EventSetMillisecondTimer(500);
//---
   return(INIT_SUCCEEDED);
  }
//+------------------------------------------------------------------+
//|                                                                  |
//+------------------------------------------------------------------+
void OnTimer()
  {
   if(!MQL5Connector::IsWindowActive())
      ExpertRemove();
  }
//+------------------------------------------------------------------+
//|                                                                  |
//+------------------------------------------------------------------+
void OnDeinit(const int reason)
  {
   EventKillTimer();
  }
//+------------------------------------------------------------------+
After compiling the C# project (Release mode), add it to the appropriate directory (~/Libraries) and connect to the robot. To get the current terminal ID, find the path to its variable directory, and then using the StringSplit method divide it into component parts. The last directory will contain the terminal ID. After graphics launch, current thread delay is enabled until the window is loaded. Then launch the timer. The timer enables the tracking of the window closing event. Once the window is closed, the Expert Advisor needs to be removed from the chart. Thus the behavior shown in the video is achieved.
Conclusion and attachments
AT the beginning of this research we set a goal to create a flexibly extensible add-on to the terminal with a GUI, to manage optimization processes. The C# language is used for implementation, because it provides a convenient interface for developing graphic applications, as well as a lot of additional stunning options which greatly simplify the programming process. In this article we considered the entire process for creating the application starting with the console program launch basics up to the creation of a wrapper for MetaTrader launch from another terminal using C# technologies. I hope the reader will find the research interesting and useful. In my opinion, the classes described in the last chapters of the current article can be improved, so in the next article may present code refactoring.
The attached archive contains two folders:
- MQL5 is intended for the main MetaTrader 5 terminal, in which the add-on is to be launched. It contains a file running the add-on.
- Visual Studio contains the three described projects for Visual Studio. Compile them before using. The *.dll library obtained by compilation of OptimisationManagerExtention should be added to the Libraries directory of the terminal, from which the project will be launched.
Translated from Russian by MetaQuotes Ltd.
Original article: https://www.mql5.com/ru/articles/7059
Warning: All rights to these materials are reserved by MetaQuotes Ltd. Copying or reprinting of these materials in whole or in part is prohibited.
This article was written by a user of the site and reflects their personal views. MetaQuotes Ltd is not responsible for the accuracy of the information presented, nor for any consequences resulting from the use of the solutions, strategies or recommendations described.

 A New Approach to Interpreting Classic and Hidden Divergence. Part II
- Free trading apps
- Over 8,000 signals for copying
- Economic news for exploring financial markets
You agree to website policy and terms of use
Incidentally, the author has not checked the code he has included.
The compiler already complains when loading...
"tip" seems to be too much here.
I tried to realise the project.
Created the DLL OptimisationManagerExtention and compiled the EA.
After starting the EA, the MT5 crashes and is gone.
Build 2408
Solutions ?
Sure ... start the MT with admin rights :-)
Thank you
I did not have any problems with compiling and using this program. In attechments is the last variant of my code. This progect is not supported anymore becouse now I am doing auto optimiser that hase some parts of this code.
Problems are solved.
Metatrader5 needs admin rights to load the DLL.
Everything is ok