LabTrend
LabTrend Indicators and Strategies
LabTrend is constructed based on three indicators:
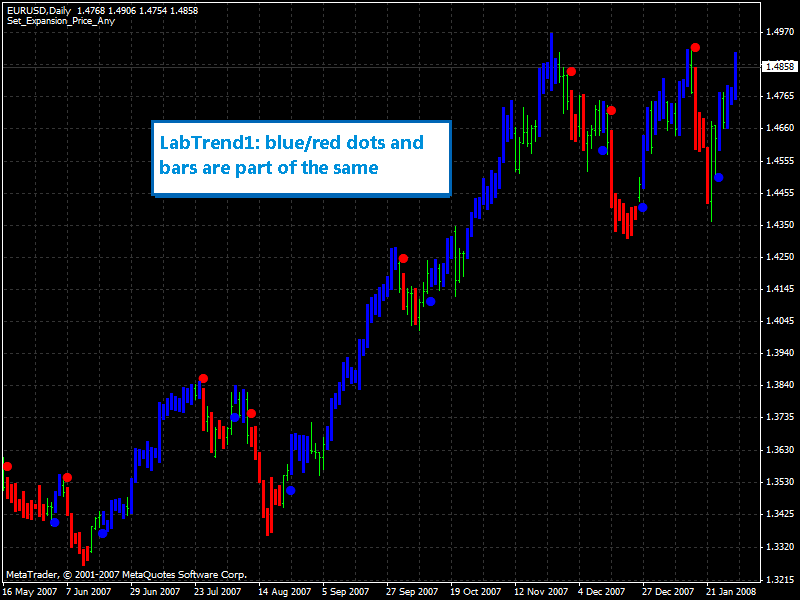
Labtrend1
Labtrend2
Labtrend3
And the system provides different entry strategies like Significant Trend Change, Break Out, Low Risk, Retracement, etc
LabTrend1 is two indicator in one, it's the entry signal and trend strength together.
Also, the trend strength is composed by two indicators, one for up trends and one for down trends.
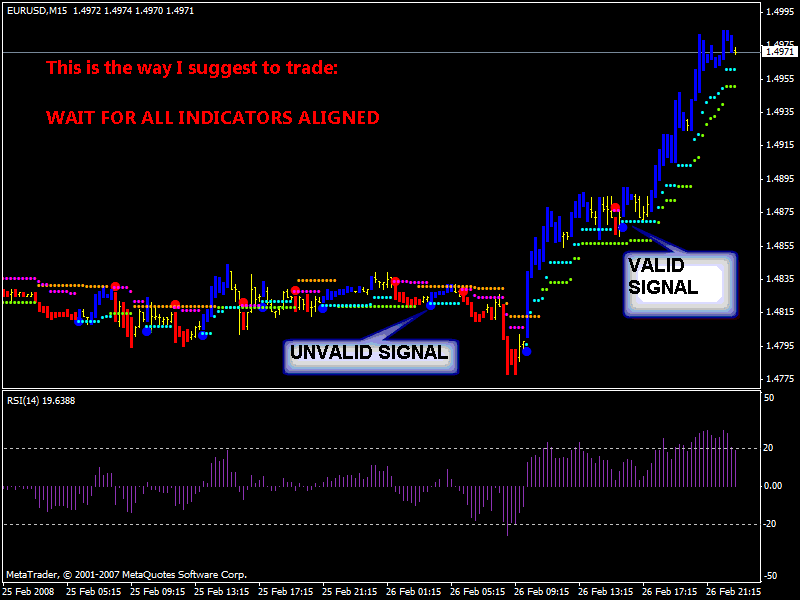
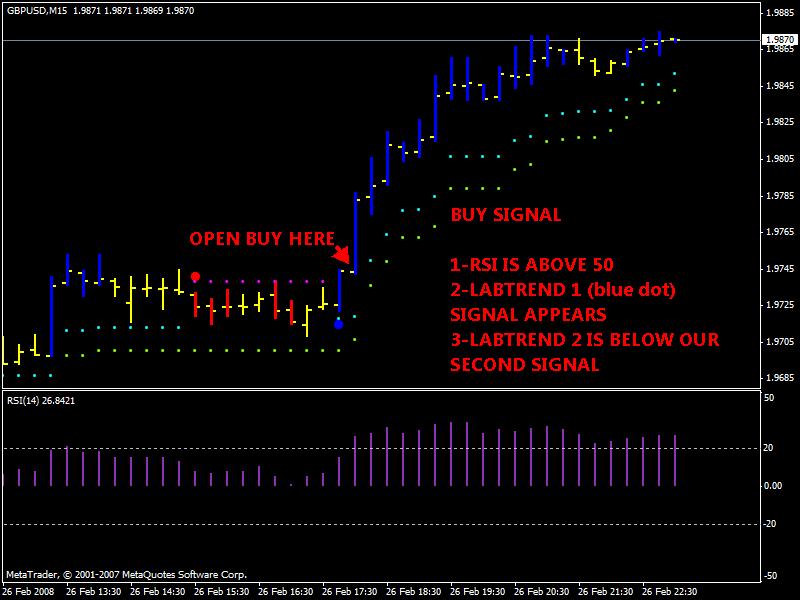
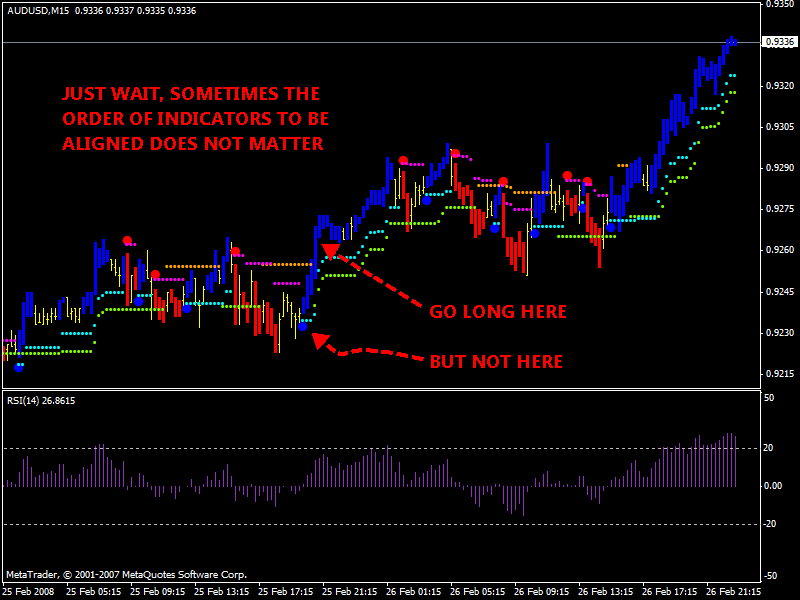
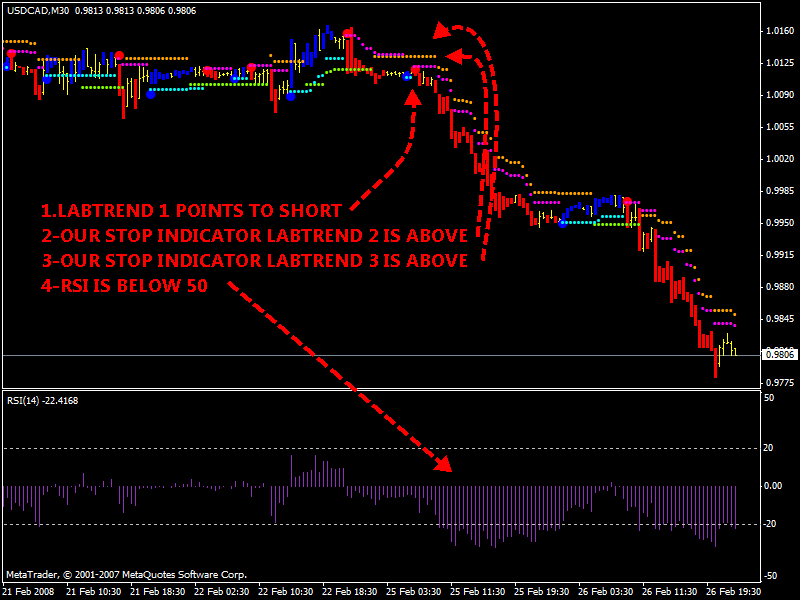
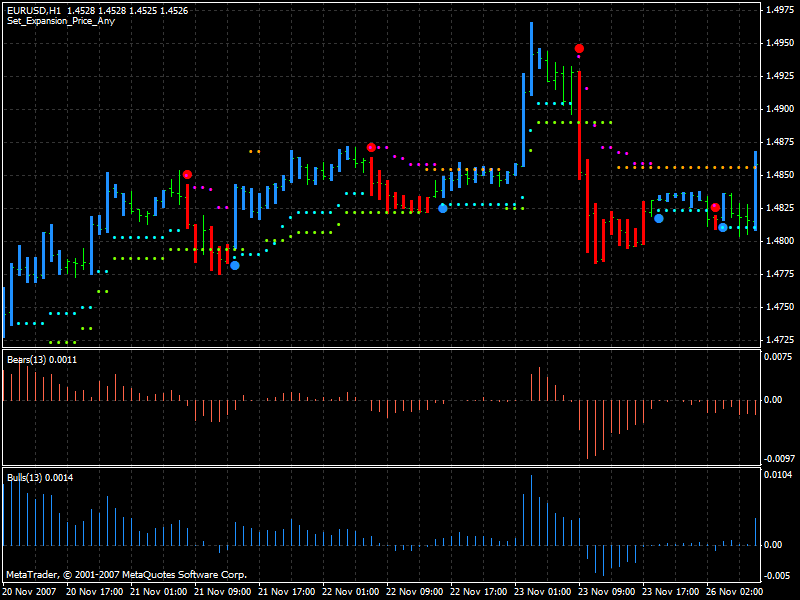
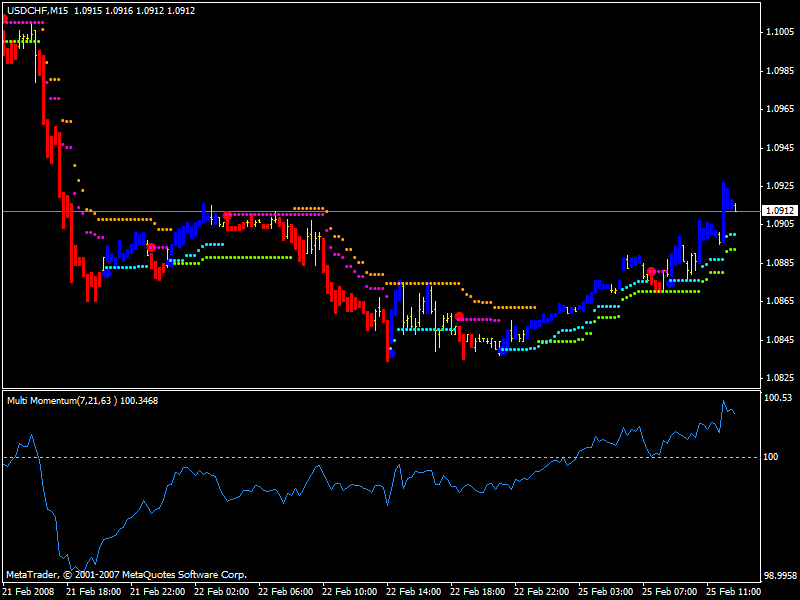
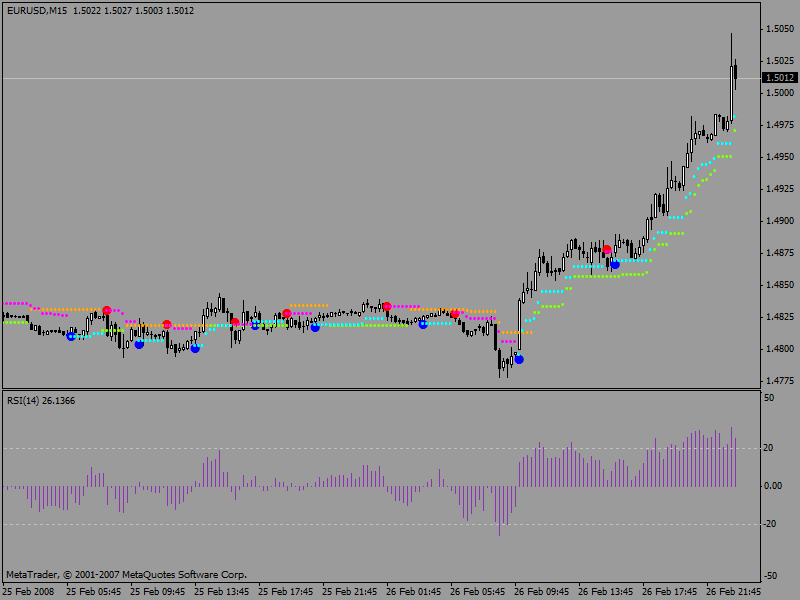
LabTrend1 is the market "direction" indicator. It shows trend direction by colors, when the market changes to or stays in an up-trend, the bars become or remain BLUE. When the market changes to or stays in a downtrend, the bars become or remain RED. When the market goes sideways or is not strong on either side, the bars become or remain Green. LabTrend1 indicator can work with any time bar charts.
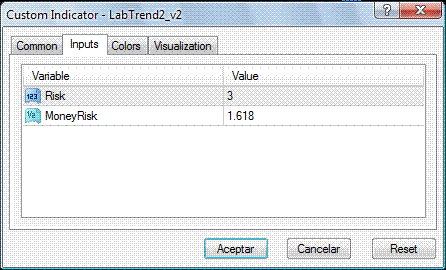
"RISK" level of LabTrend1 can be changed from 1 to 10. "1" is the most sensitive with minimum delay and "10" is the least sensitive. The default value of RISK is 3. Under normal conditions, the default setting should be your first choice.
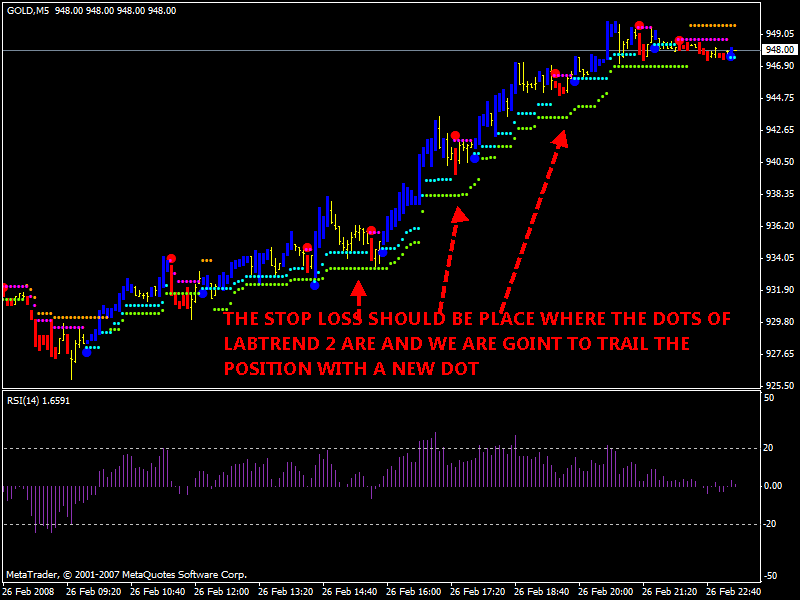
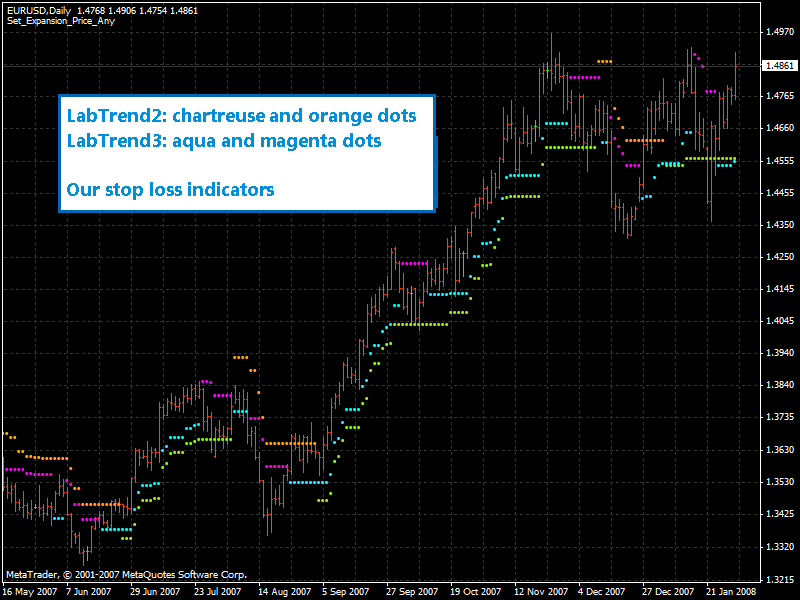
LabTrend2 and LabTrend3 are "Trend-Stop" indicators with Chartreuse/Orange Dots and Aqua/Magenta Dots
LabTrend2 are demonstrated by different COLOR DOTS.
For distinguishing purposes, LabTrend22 uses Chartreuse and Orange dots, and LabTrend3 uses Aqua and Magenta dots.
Both LabTrend 2 and LabTrend 3 must identify a trend first then begin to paint the dots. This is why you may not see any blue or red dots sometimes.
CHARTREUSE DOTS below the lows of the bars indicate two things: (1) the market is in an up-trend; (2) the values of the CHARTREUSE dots are the protection stops or the profit target stops (if the position had profit) for the long position. The value of the CHARTREUSE points can be seen in the Data Window.
The ORANGE DOTS above the highs of the bars indicate two things: (1) the market is in a down-trend; (2) the values of the ORANGE DOTS are the protection stops or the profit target stops (if the position had profit) for the short position.
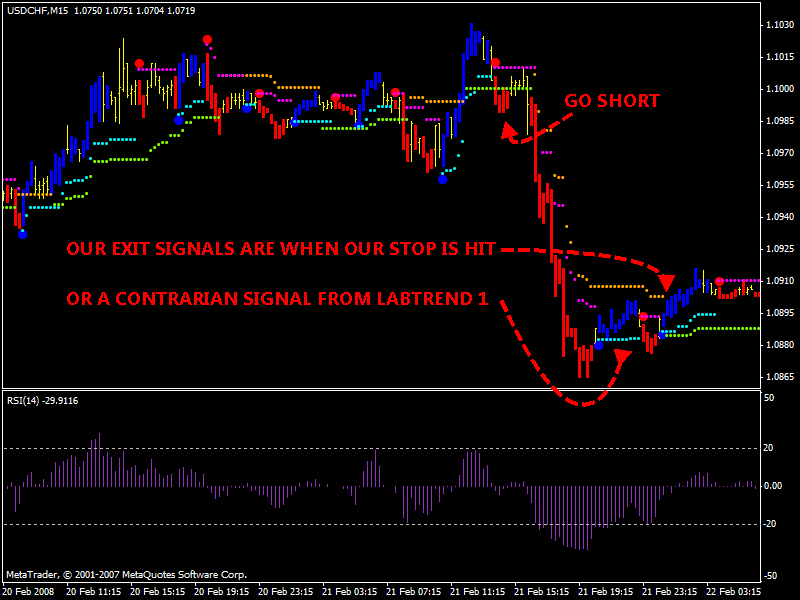
Many studies reveal that it is more difficult to know how to exit the market than to enter the market. One can get into the market at any time if one knows how to get out of the market. Labrend2 and LabTrend3 are TREND-Stops indicators which are precisely and objectively defined by the market’s own prices. They help traders enter and stay in the right market direction with minimal risk. You can back test Trend-STOPS with the historical data. LabTrend2 and LAbTrend3 work in very similar ways, but the trend definition and stop calculations are different. LabTrend3 is about 50% more sensitive than LAbTrend2. Use LabTrend3 to enter the market, use LAbTrend2 as trailing stops.
LabTrend3 is a trend-stop indicator. It is similar to LabTrend2 indicator. It is more sensitive than LabTrend2; therefore, it is mainly used for entry and exit with lower risk trading in short term. You may refer to LAbTrend2 for details.
This is looking good 
Defaults

TimeFrame option is the capability of LabTrend 1 to Scan a higher Timeframe
Inputs depend on which timeframe are you sitting. Available setups are 5/15/30/60/240/1440 and son on.
Color bar has two options on/off. Set 1 for colored bars and set 0 to avoid Labtrend1 paint bars-
SoundAlertMode has two options on/off. If set to 1 MT4 would give you an sound alarm you when a Blue/Red dots appears.
Ah!, yet another incredible system/indicator group from the mind of Igorad and the talented group at the Lab!
I have to say that you rarely find an individual and group with such talent for creating indicators that are based on such sound prinicpals and talented coding.
Not sucking up here or anything, but with his amazing contributions, he may be well on his way to becoming the J. Welles Wilder of FX.

RSI Histogram indicator is here.
I prefer a different template but it's just because I like to see the things on this way. And because colored bars does not mean too much.
If you don't want to see the colored bars just change "ColorBar" option to 0 into LabTrend1.
Because we can trade almost every timeframe (depending on which pair we like trade of course) I will try to post trades in real time.
Good luck.
- Free trading apps
- Over 8,000 signals for copying
- Economic news for exploring financial markets
You agree to website policy and terms of use
LabTrend is a complete trading system developed by Igorad and is based on the popular ASCTrend.
LabTrend is Forex TSD system because the indicators have origin in our forum.
Being a complete trading system it could be traded alone or with the help of some extra indicators.
In the following post we discuss how to implement LabTrend, what every indicator do, and how to trade with Labtrend.
LabTrend is a trend follower system because it's based on the philosophy of ASCTrend. This philosophy is more or less: Trade the Trend when it's established.
Sometimes LabTrend as their cousin have problem to detect trend exhaustion and this is one of our main goals to correct and create a profitable trend follower system.
Igorad is working to create the EA for LabTrend, but as we like to have flavors for all taste on this thread initially we will talk about Manual Trading
Latest Indicators on Post #7.
Keep in touch
Why Mechanical System Trading?