Ekai Volume Profile
- 指标
- 版本: 1.0

Institutional-grade Fixed Range Volume Profile for MetaTrader 5 with mouse-draggable range handles, buy/sell split, POC and Value Area
Overview
EKAI Anchored Volume Profile Pro brings the visual power of TradingView's Fixed Range Volume Profile and NinjaTrader's Order Flow Volume Profile natively to MetaTrader 5. Two draggable handles define a time range on the chart, and the indicator draws a full-featured volume profile inside that range: histogram, buy/sell split by tick direction, Point of Control (POC), and Value Area (VAH/VAL).
You can move either handle at any time by clicking and dragging it. The profile recomputes automatically. If you cross one handle over the other, the indicator detects the swap and reorders them silently.
Under the hood, the indicator uses a 3-tier volume classification cascade: it prefers real broker tick flags (available on futures and stock exchanges), falls back to the Lee-Ready algorithm for Forex (using bid/ask/last quote analysis), and finally to tick volume distribution if no tick data is available. This means the same tool works on ES, NQ, CL futures, on stock CFDs, and on any Forex pair, always giving you the best classification available for that instrument.
The result is a professional-grade volume analysis tool that traders can use to identify high-volume nodes (institutional accumulation), low-volume nodes (breakout targets), and buy/sell aggressor imbalance within any custom time window — for prop firm challenge preparation, key level identification, or day-trading structure.
What Makes It Different
The MQL5 Market has plenty of volume profile indicators, but most fall into one of three categories:
- Session profiles (Asia / London / NY) with no user control over the range
- Fixed range (visible range or fixed number of bars) with no manual selection
- Basic anchored VWAP-style tools that only anchor a single point
Very few indicators combine:
- Two mouse-draggable range handles — you select the range visually, just like TradingView Fixed Range VP
- Real-time buy/sell split — each histogram bar is split into buy (green) and sell (red) portions based on tick direction
- 3-tier volume classification — real broker flags → Lee-Ready → tick volume distribution, transparent about which method it's using
- Full Value Area calculation — POC, VAH, VAL computed with the standard 70% expansion algorithm from the POC
- Persistent state per chart — the range you set stays after MT5 restarts
If you've been jumping between TradingView (for the volume analysis) and MetaTrader (for execution), this indicator lets you keep everything in MT5.
Key Features
Two Draggable Range Handles
The core of the indicator is a range — not a single anchor point. Two vertical gold lines define the left and right boundaries of the range:
- Click on either line → it becomes selected (MT5 native)
- Drag horizontally → move the boundary to any bar
- Release → the profile recomputes automatically
- Cross one handle over the other → the indicator detects the swap and reorders both handles + rectangle silently
Between the two handles, a semi-transparent navy background (toggleable) marks the selected range clearly across the chart. This background sits behind the price bars so it never obstructs your view of the candles.
Buy/Sell Split Histogram
For each price bin inside the range, the indicator computes buy volume and sell volume separately:
- Green portion (buy) — aggressive buying at that price level
- Red portion (sell) — aggressive selling at that price level
The two portions are drawn side-by-side inside a single bar, so you can immediately see whether accumulation or distribution dominated at each price level. Bars grow from the left handle toward the right, with the POC (largest bar) reaching a configurable percentage of the total range width (default 65%).
Alternative style: single-color bars per dominant side (green if buy dominated, red if sell dominated).
3-Tier Volume Classification Cascade
MetaTrader 5 does not provide a single reliable way to classify a tick as buy or sell. This indicator uses a cascade to always give you the best classification available for the instrument:
Tier 1 — Real broker flags ( TICK_FLAG_BUY / TICK_FLAG_SELL )
- Available on futures exchanges (CME: ES, NQ, CL, GC, etc.) and stock exchanges
- The exchange itself marks each trade with the side of the aggressor
- Most accurate classification possible
Tier 2 — Lee-Ready quote test
- For Forex spot and CFDs, where broker flags are typically absent
- Uses the tick's bid, ask, and last price to classify:
- Trade above the midpoint of the spread → BUY (aggressor bought at the ask)
- Trade below the midpoint → SELL (aggressor sold at the bid)
- Trade exactly at the midpoint → falls to Tier 3
- Standard academic algorithm used in institutional flow analysis
Tier 3 — Tick test
- Ultimate fallback when no bid/ask context is available
- Compares the current tick's price to the previous tick:
- Price up → BUY
- Price down → SELL
- Same price → inherit the previous direction
Tier 4 — Bar-level distribution fallback
- If CopyTicksRange returns no data at all (rare, some brokers with limited tick history), the indicator distributes bar tick_volume across the bar's high-low range, weighted 65/35 toward the bullish/bearish side based on close vs open
The Info Panel always shows which tier was used, so you know the reliability of the classification:
- Real (broker flags): 45230 ticks — top confidence
- Lee-Ready (est.): 45230 ticks — high confidence
- Tick test (est.): 45230 ticks — reasonable confidence
- Tick volume (bar dist.): 250 bars — approximation
Point of Control (POC) + Value Area
Standard institutional volume profile levels, computed correctly:
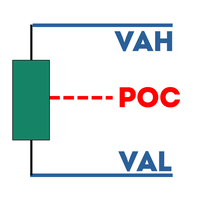
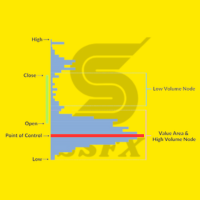
- POC (Point of Control) — the price level with the highest volume, drawn as a solid gold line across the range
- VAH (Value Area High) — the top of the 70% value area, drawn as a cyan dashed line
- VAL (Value Area Low) — the bottom of the 70% value area, drawn as a cyan dashed line
The Value Area is computed with the standard expansion algorithm: start at the POC, then repeatedly add the adjacent bin (above or below) with the higher volume until the accumulated volume reaches 70% (configurable) of the total volume in the range.
These three levels are your key trading reference points inside the range. Price rejections at VAH/VAL are institutional decisions to stay within value. Breaks of VAH/VAL are structural direction moves. The POC is the fair-value magnet — price tends to return to it.
Info Panel with Range Statistics
A compact info panel in the top-left corner shows everything you need at a glance:
═══════ AVP Pro ═══════ [Reset] [Hide] ═ RANGE ═ Start: 2026.09.27 14:00 End: 2026.09.28 22:00 Bars: 100 Source: Lee-Ready (est.): 45230 ticks ═ PROFILE ═ POC: 4285.60 VAH: 4291.20 VAL: 4278.50 ═ VOLUME ═ Buy %: 52.3% Sell %: 47.7% Delta: +12.4K Total: 1.85M [POC ON] [VA ON] [HIST ON]
Buttons in the panel:
- Reset — restores the range to the initial size (100 bars back to current, or your configured default)
- Hide — collapses the panel (the small [x] AVP button in the corner brings it back)
- POC ON/OFF — toggle POC line visibility instantly
- VA ON/OFF — toggle VAH/VAL visibility instantly
- HIST ON/OFF — toggle histogram visibility instantly
The external toggle button [x] AVP / [ ] AVP is always visible even when the panel is hidden, so you can bring the panel back with one click.
Full State Persistence
Everything is saved automatically to a per-chart file:
- Range start and end times
- Panel position and visibility
- POC / VA / Histogram toggle states
Close MT5, reopen it, reattach the indicator — the range, the panel state, and all your toggles are exactly as you left them.
Use Cases
The Fixed Range Analyst
You want to analyze the volume distribution during a specific swing, session, or news event. Instead of guessing where the important levels are, you draw the range around the move: POC gives you the fair value, VAH/VAL give you the acceptance boundaries, HVN and LVN in the histogram give you support/resistance for the next move. Perfect for post-mortem analysis of key sessions.
The Order Flow Trader
You need to know who was in control during a specific price move — buyers or sellers. The buy/sell split histogram shows you at each price level whether accumulation or distribution dominated. Bars with dominant green at the lows tell you buyers absorbed the pullback. Bars with dominant red at the highs tell you sellers took liquidity from the buyers. This is institutional order flow analysis, natively in MT5.
The Prop Firm Challenge Trader
You're running an FTMO or Alpha Capital challenge and need to identify key levels for the day. Set the range on yesterday's session → get yesterday's POC, VAH, VAL. These are the reference points every institutional trader will react to at open. Combined with your entry rules, this gives you a structural edge.
The Multi-Session Comparison Trader
Open two charts of the same instrument. Set the range on the London session in one, on the NY session in the other. Compare POCs, deltas, and value areas. Where is the true institutional interest? Where did most of the volume trade? This context is invisible on price charts alone.
The Post-News Level Mapper
FOMC just released. Price is in chaos. You need to know where the initial acceptance zones formed. Set the range from 15 minutes before the news to 30 minutes after → the profile shows you the exact price band where volume concentrated after the initial shock. That band becomes support/resistance for the rest of the day.
The Multi-Range Comparative Analyst (Roadmap)
Coming in a future update: attach the indicator multiple times to the same chart with different ranges. Compare POCs across ranges. Identify naked POCs (POCs that have never been retested). Build a full institutional level map.
Requirements
- MetaTrader 5 build 3550 or newer
- Any broker
- Any instrument — futures, stocks, CFDs, Forex, indices, crypto
- No external DLLs, no third-party dependencies
- No network access required — all computation is local
- Tick data preferred — the indicator works best when your broker provides tick history via CopyTicksRange . If not available, it falls back to bar-based distribution.
Installation
- Download from the MQL5 Market
- Attach to any chart (works on any timeframe)
- Two gold vertical lines appear defining the initial range (last 100 bars by default)
- The volume profile is drawn inside the range
- Drag either line to redefine the range
- Use the info panel to toggle POC / VA / Histogram visibility
- Adjust InpBins (default 60) if you want more or less granularity
- Adjust InpMaxWidthPct (default 65%) if the histogram is too wide/narrow
FAQ
Q: Does this work on Forex? Yes. On Forex, most brokers don't provide the TICK_FLAG_BUY / TICK_FLAG_SELL flags, so the indicator automatically falls back to the Lee-Ready algorithm (quote test using bid/ask/last). The Info Panel will show "Lee-Ready (est.)" as the source. Classification accuracy is high (typically 75-85% match against real flags when both are available).
Q: Does this work on futures? Yes, and it works best on futures. CME instruments (ES, NQ, CL, GC, ZB) provide real TICK_FLAG_BUY/SELL flags via most brokers with exchange connectivity. The Info Panel will show "Real (broker flags)" as the source. This is the most accurate classification available in MT5.
Q: What if my broker doesn't provide tick data? The indicator gracefully falls back to bar-level distribution. It reads tick_volume for each bar in the range and distributes it across the high-low band, weighted 65/35 toward the bullish/bearish direction based on close vs open. The Info Panel will show "Tick volume (bar dist.)". This is an approximation but still gives you meaningful POC and Value Area levels.
Q: How accurate is the Lee-Ready classification? The Lee-Ready algorithm is the academic gold standard for classifying trades when you have bid/ask/last data but no explicit flags. Empirical studies show 75-90% classification accuracy vs known aggressor data. For prop trading purposes this is more than sufficient to identify buy/sell imbalance zones.
Q: How is the Value Area computed? Standard institutional method: start at the POC bin (highest volume price), then repeatedly add the adjacent bin (above or below) with the higher volume, accumulating until you capture 70% (configurable via InpValueAreaPct ) of the total volume in the range. VAH = top of the covered range, VAL = bottom.
Q: Can I have multiple ranges on the same chart? Not in v1.00. Currently each chart has one range at a time. Multi-range support is on the Fase 2 roadmap and will allow up to 3 simultaneous ranges (A/B/C) with different colors.
Q: Can I use it as an Anchored Volume Profile (fixed start, floating end)? Yes. Just place the right handle at the current bar and never move it — as new bars form, you can drag the right handle forward to include them, effectively behaving as an anchored VP with a growing right side. Or configure InpInitialRange = RANGE_SESSION to always start from the day session open.
Q: Does it slow down MT5? No. The profile is rebuilt only when you move a handle or a new bar closes, and the rebuild is throttled to a timer (default every 2 seconds), never on every tick. Memory-wise, only one range worth of tick data is held. The indicator has been tested with 500,000 ticks in a single range on an average PC without noticeable lag.
Q: How many bins should I use? Default is 60 which works well for most timeframes. Increase to 100-200 for very tight scalping precision on futures. Decrease to 30-40 for higher timeframes where you want cleaner, broader zones.
Q: What if my range crosses the weekend / market close? The indicator handles gaps naturally — bars without volume simply don't contribute. However, if you're on a Forex Sunday chart, the anchor may fall in a gap. Just drag the left handle forward to the first bar with actual volume.
Q: Does it persist between MT5 restarts? Yes. Range boundaries, panel position, panel visibility, and all toggles are saved to a per-chart file in the MT5 sandbox. Restart MT5 and everything reappears exactly as you left it.
Q: Can I customize the colors? Yes. Handle color, buy color, sell color, POC color, VAH/VAL colors, and the range background color are all configurable inputs.
Q: Does it work in the Strategy Tester? The indicator initializes correctly in the Strategy Tester but its usefulness there is limited since tick history in the Tester doesn't always provide real flag data. For meaningful volume analysis, run it on live/demo charts.
Data Source: Technical Deep Dive
For advanced users who want to understand exactly what the indicator is doing:
How volume is fetched
The indicator calls CopyTicksRange(_Symbol, ticks, COPY_TICKS_ALL, from_msc, to_msc) to retrieve all ticks between the range start and end. COPY_TICKS_ALL returns bid/ask/last/volume/flags for every tick, which is the maximum information available in MT5.
If CopyTicksRange returns 0 or fails, the indicator falls back to CopyRates and uses bar tick_volume with bar-classification heuristics.
How each tick is classified
For each returned tick, the classifier runs through the 3 tiers in order:
-
if(ticks[i].flags & TICK_FLAG_BUY) → BUY. TICK_FLAG_BUY and TICK_FLAG_SELL are set by the broker/exchange when the tick has real aggressor data. Present on futures, stock exchanges, some crypto exchanges.
-
If flags are absent, and the tick has valid bid/ask/last, compute the mid = (bid + ask) / 2 and threshold = half_spread * 0.3 :
- last > mid + threshold → BUY (aggressor bought above mid)
- last < mid - threshold → SELL (aggressor sold below mid)
- Else → falls to tick test
-
If still unclassified, compare the tick's price to the previous tick:
- Price up → BUY
- Price down → SELL
- Same → inherit previous direction
Ultimate fallback: alternate 50/50 to avoid biasing the profile.
How volume is measured
For each tick, the classifier extracts volume with this priority:
- ticks[i].volume_real if InpUseRealVol=true and available (fractional volume, most accurate on some exchanges)
- Else ticks[i].volume (integer volume, standard)
- Else 1 (contribution counter, when no volume data is present)
How the histogram is built
The price range from range-min to range-max is divided into InpBins equal-width bins. Each classified tick contributes its volume to the bin containing its price:
- binIdx = floor((price - priceMin) / binWidth)
- binBuyVol[binIdx] += vol if BUY
- binSellVol[binIdx] += vol if SELL
Then binTotalVol[i] = binBuyVol[i] + binSellVol[i] for each bin.
How POC is found
Simple max scan: pocBin = argmax(binTotalVol) . This is the bin with the highest total volume. pocPrice = binPrice[pocBin] (bin center).
How Value Area is computed
Standard expansion:
target = totalVolume * InpValueAreaPct / 100.0   (default 70%)
lo = hi = pocBin
acc = binTotalVol[pocBin]

while acc < target and (lo > 0 or hi < binCount - 1):
    volLo = binTotalVol[lo - 1]  (or -1 if lo == 0)
    volHi = binTotalVol[hi + 1]  (or -1 if hi == binCount - 1)
    if volHi > volLo:
        hi += 1
        acc += binTotalVol[hi]
    else:
        lo -= 1
        acc += binTotalVol[lo]

vahPrice = binPrice[hi] + binWidth / 2
valPrice = binPrice[lo] - binWidth / 2
Performance profile
- Rebuild cost: O(N) where N = number of ticks in range. Bounded by InpMaxTicks (default 500,000).
- Rebuild is triggered by: handle drag release, new bar close, panel toggle affecting histogram.
- Rebuild is throttled to OnTimer (default 2 seconds), never on every tick.
- Memory: O(bins + ticks). Typical usage: 500K ticks × 24 bytes = 12 MB peak during rebuild, released after.
Version History
v1.00 (initial release)
- Two mouse-draggable range handles
- Semi-transparent range background (toggleable)
- Buy/Sell split histogram with side-by-side coloring
- Alternative single-color histogram (dominant-side style)
- POC (Point of Control) line
- VAH / VAL (Value Area High/Low) with configurable percentage (default 70%)
- 3-tier volume classification: real broker flags → Lee-Ready → tick test
- Bar-level fallback when no tick data available
- Info panel with range statistics
- POC / VA / Histogram toggles from the panel
- External [x] AVP toggle button to hide/show the panel
- Full state persistence per chart (range, panel, toggles)
- Auto-swap detection when user crosses handles
- Configurable colors, bins, value area percentage, histogram width
- Works on any symbol, any timeframe, any account type
- No external DLLs, no network access
EKAITRADING / TSDCCORP Built by traders, for traders.