Lune Algo Premium MT4
- Индикаторы
-
Minh Truong Pham
 Hello, my name is Pham and I am a programmer and trader! At here, I create amazing forex indicators and expert advisors for Metatrader.
I will try:
+ Provide best tools base on my 5 years experience as a trader and 10 years as a programmer. - Версия: 1.0
- Активации: 20
Lune Algo Premium — Four Strategies, a Confidence Score on Every Signal, and a Trade Manager That Draws Your Exits
Every arrow comes with a number on it. That number is how many of five checks agree with the trade.
Most signal tools print an arrow and walk away. You're left guessing whether this one is the good one, because on the chart they all look identical.
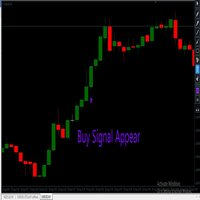
Lune Algo scores each signal as it fires. Five unrelated checks vote (trend, directional strength, accumulation, money flow, momentum slope) and the tally gets printed right next to the arrow: Buy 4. Sell 1. After a week on one symbol you'll know your own cutoff, and you'll stop taking the 1s.
Around that sits the rest: an adaptive trend cloud, four entry engines on one dropdown, drawn stop and targets, and a panel that keeps score.
What you get
| Module | What it does |
|---|---|
| EK Cloud | Two Ehlers-Kaufman adaptive averages. They speed up when price is going somewhere and flatten when it isn't. Green pair = long bias, red = short |
| Four strategies | Lune Confirmation (KAMA crosses Vidya), RE Beta (trend + RSI + engulfing candle), MS Beta (trend + squeeze release), SRT Beta (SSL + TDFI + RSI extreme) |
| Signal strength 0-5 | The number on every arrow. CCI(5), ADX(14) with DI direction, A/D against its 21 average, MFI(14) against its 9 average, and a 14-bar regression of momentum |
| Trade manager | Entry, stop and TP 1/2/3 drawn and priced from the signal bar, in ATR multiples or percent |
| Staged targets | TP 1, then TP 2, then TP 3 marked in order on the chart. The trade closes at TP 3 or the stop, not before |
| Lune lines | The Vidya and KAMA pair behind the default strategy, so you can see the cross coming |
| Reversal bands | EMA-70 with rails at 2, 2.75 and 3.5 standard deviations. Statistical stretch, not a round number |
| Reversal signals | Triangles where price reaches 5 sigma. The "this has gone far enough" marker |
| Engulfing signals | Body-size filtered bullish and bearish engulfing candles |
| SSL channel | An SMA high/low channel. I mostly use it as a manual trailing stop |
| Vray | Volume-at-price heatmap with a dashed point of control line |
| Panel | Strategy, current signal, trend, volatility, plus a trade scoreboard |
| Themes | Five colour sets, and candle tinting to the side you're on (MT5) |
Only the cloud, the arrows and the panel are on by default. Your chart starts readable and you switch on what you actually use.
How to trade / read signals with it
Reading the chart
| What you see | What it means |
|---|---|
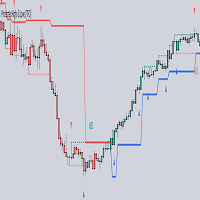
| Two green rails around price | Long bias. Take buys, skip sells |
| Two red rails around price | Short bias. Take sells, skip buys |
| Rails flat and tangled together | No bias. The filter is telling you there's nothing to adapt to |
| Green ▲ with "Buy 4" | Long trigger, 4 of 5 checks agree |
| Red ▼ with "Sell 1" | Short trigger, only 1 check agrees. The weak class |
| Green and red line pair | Vidya and KAMA. The default strategy fires where they cross |
| Small ▲▼ on a second row | Engulfing candle. Context, not an entry by itself |
| Grey line, "Entry Level" | Close of the signal bar |
| Red line, "Stop Loss" | Beyond the signal bar's extreme, at your ATR multiple |
| Green lines, "Take Profit" | TP 1, 2 and 3 off the same ATR |
| "TP 1" / "TP 2" / "TP 3" text | That target was reached. Scale out, don't open something new here |
| "SL" text | Stop hit, trade closed |
| Dotted rails far from price | The 2 / 2.75 / 3.5 sigma reversal bands |
| Triangle past the outer rail | Price hit 5 sigma. Fade it or take profit, but don't chase it |
| Cyan heatmap with a dashed line | Vray. The dashed line is where most volume traded |
| Panel Volatility: High | Fast ATR above slow ATR. This is when the signals work |
| Panel Volatility: Low | Fast ATR below slow. This is when they don't |
Taking a long
- Rails green, panel says Up-Trend and Volatility: High .
- A green ▲ prints.
- Read the number. 3 or more is a trade, 2 is a watch, 0 or 1 is a pass no matter how good the chart looks.
- Stop goes on the drawn Stop Loss rail. Set Exit Target Method: ATR and it draws itself, 2x ATR(21) past the signal bar low by default.
- TP 1 at 1x ATR pays for the trade. TP 2 and TP 3 need the move to keep working, and the nearest reversal rail above price is a fair early exit.
- Scale at the "TP 1" marker, stop to entry, then trail behind the SSL channel or the slow rail.
- Out on "TP 3", the stop, a red cloud, or an opposite arrow.
Shorts are the mirror of all of that. Red rails, Down-Trend , a red ▼ with 3 or better, stop above the signal bar high.
Signals to skip
This list is worth more than the arrows.
- Anything with a strength of 0 or 1. Five checks looked at the market and at most one agreed.
- Anything while the panel reads Volatility: Low . The range is contracting, so ATR-sized targets won't be reached before the stop is.
- Anything against the cloud colour. A green ▲ under red rails is a bounce, not an entry.
- Anything while the rails are flat and crossing. Same reason, drawn on the chart.
- A buy that fires with price already past the outer reversal rail, and the mirror for sells. That's the fade zone.
- A new entry on the same bar as a "TP 3" or "SL" marker. Give it a bar.
- The first ~400 bars of a fresh chart. The slow average and the 200-period ATR are still warming up.
Where I'd start
Leave it on Lune Confirmation with exits off for the first day. Arrows, cloud, panel, nothing else. Once you trust the arrows, switch Exit Target Method to ATR with TP 1/2/3 at 1/2/3 and stop at 2, and the rails plus the scoreboard turn on.
MS Beta is the one to try next if you like breakouts. It only fires when a squeeze releases in the direction of the cloud, so it's quiet, and the signals it does give tend to move.
The panel
LUNE ALGO PREMIUM Strategy Lune - Confirmation Current Signal In Long Trade Market Trend Up-Trend Volatility High
Four rows with exits off. Switch exits on and it grows to nine, adding total trades, the long/short split, the hit rate at each target, the loss rate, and a Quality line that compares your TP 1 hit rate against the break-even rate your own TP/SL ratio needs. With the default 1:2 you need better than 66.7% at TP 1 to be ahead, and the panel says so.
Those counts come from your own chart history at your current settings. Change a setting and they recount.
Settings
Everything sits in labelled groups. Basic settings hold the strategy dropdown, sensitivity, rigor and the colour theme. Features is a column of on/off switches, one per module. The exit group has the method, three TP levels, the stop level and the rail toggles. Then drawing, Vray, panel position, and alerts.
Alerts go to popup, mobile push, e-mail or Telegram, one message per event per bar. But if live-bar alerts bother you, there's a switch to only fire once the signal bar has closed.
What to expect, honestly
A few things I'd rather you hear from me than find out later.
SRT Beta is rare. It needs the SSL channel, TDFI and an RSI cross of 65 or 35 lined up at once, and on a quiet pair you might see a handful of signals a month. That's the design, but don't buy it for that engine alone.
Sensitivity and Rigor set the KAMA and Vidya lengths behind the confirmation strategy. They don't change the EK cloud, which uses its own fixed adaptation windows. That's how the original works and I kept it, but the names suggest more reach than they have.
The scoreboard isn't a backtest. It counts what the selected strategy would have done on the bars in front of you, with no spread, no commission and no slippage. Use it to sanity check your TP/SL ratio, not as a performance claim.
Vray is off by default because 250 rows of boxes is heavy. It rebuilds once per bar and the row count is adjustable, so turn it down if your chart feels sticky.
And the usual: signals on closed bars never move, but the forming bar updates with price until it closes, same as every indicator that reacts to live price.
MT4 and MT5
Same maths in both. MT4 can't recolour chart candles, so the trade tint is MT5 only, and the information lives in the panel row and the cloud colour instead. The cloud shows its two lines without a shaded fill there, and colour-changing lines are drawn as buffer pairs. Telegram alerts are MT5 only too.
Support
Ask me anything about settings, or tell me the pair and timeframe you trade and I'll suggest a starting point. A screenshot with the panel visible helps a lot.