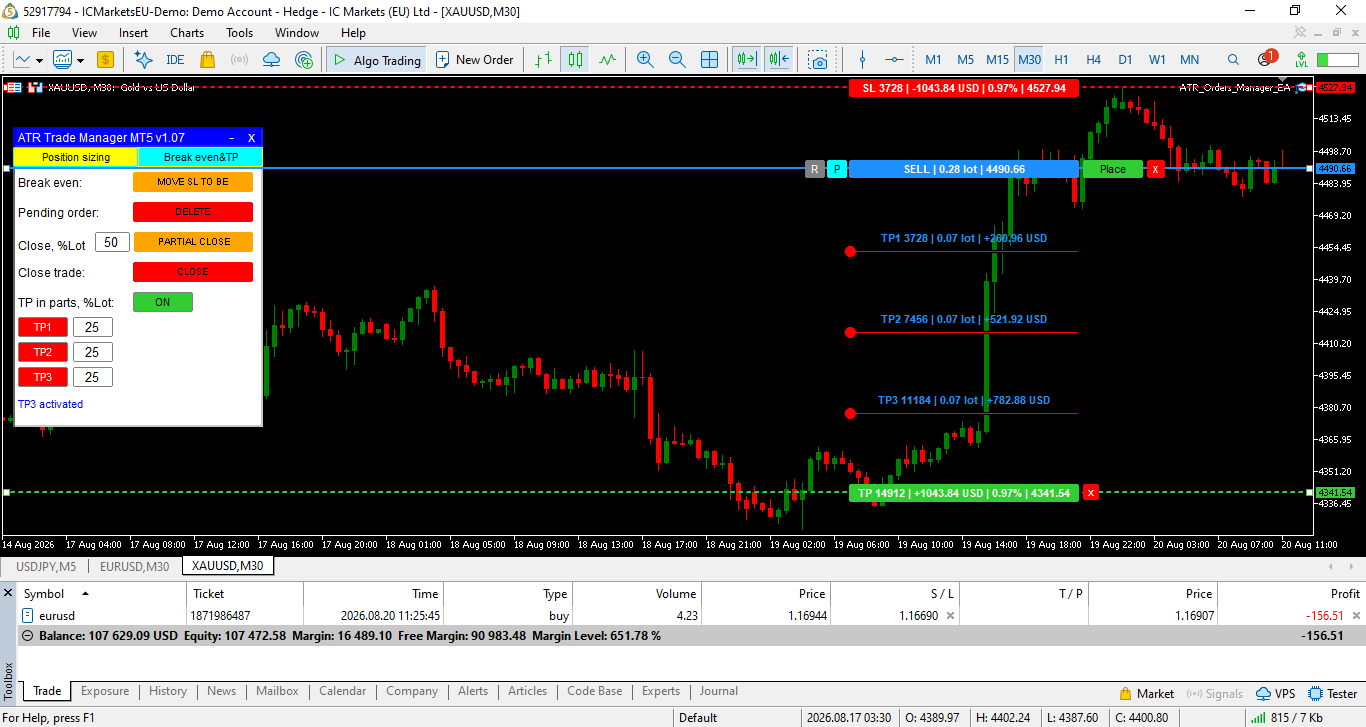

ATR Trade Manager MT5
A Trader's Guide to Every Button and Every Rule (v1.07)
Most traders lose money not because they can't find good setups, but because of what happens after they find one: sizing the trade, placing it accurately, and managing it without emotion. ATR Trade Manager MT5 is an Expert Advisor (EA) built for MetaTrader 5 that handles exactly that part of the job.
Think of it less as a "strategy robot" and more as a co-pilot. It does not decide when to buy or sell. You still choose the direction and the setup. What it does is turn your decision into a properly sized, properly protected trade — and then keep managing that trade's stop loss and take profit while you focus on the next opportunity.
The engine behind almost every calculation is the ATR or Average True Range, a well-known volatility measurement. You still place your own stop loss, wherever your setup calls for it. What the EA does is translate that distance into ATR terms behind the scenes, so it always knows how that stop compares to the symbol's real volatility and it uses that reading for two things: sizing your position correctly for the risk you want to take, and later, driving the trailing stop once the trade is running.
Who It's For
Any discretionary or semi-automated trader who enters trades manually on the chart but wants: correct position sizing based on real account risk, one-click order placement, and hands-off trade management afterwards (break-even, trailing stop, partial profit-taking) , without babysitting the trade all day.
The Core Philosophy: Risk First, Not Lot Size FirstTraditionally, traders pick a lot size and hope the stop loss doesn't hurt too much. ATR Trade Manager MT5 flips that order:
● Step 1 — You decide how much of your account you're willing to risk (as a percentage).
● Step 2 — You place your stop loss yourself by dragging it on the chart or typing a price wherever your setup actually calls for it. The EA is not choosing this for you.
● Step 3 — The EA calculates the exact position size that makes those two numbers agree using the broker's own margin and profit calculation engine, not a rough estimate. Behind the scenes, it also converts your stop loss distance into an equivalent ATR multiple, which becomes important later for the trailing stop.
This is the single biggest habit change the tool encourages: you never eyeball lot size again.
The Two Tab Control PanelThe EA's on chart panel is split into two tabs, so you're never staring at more controls than the moment calls for.
Tab 1 — Position Sizing
This is where a new trade is built from scratch, before anything is sent to the broker.
● Order Mode button — Switches between a Market order (fills immediately at the current price) and a Pending order (waits at a price you set, like a Buy Stop or Sell Stop).
● Trade Direction button — Switches the trade between Long (buy) and Short (sell). This also flips the color of the Place Order button, so you always have a visual confirmation of direction before you click.
● Account Balance — Shows your live account balance, updated automatically. All risk percentages are calculated from this number.
● Risk % field — The percentage of your account you're willing to lose if the stop loss is hit. There is a hard ceiling on this value, so a fat finger entry can't accidentally risk half the account.
● Entry Price field — For pending orders, this is where you set your trigger price. For market orders, this field is locked and simply displays the live price, because a market order fills at whatever the current price is.
● Stop Loss placement & ATR Period — Your stop loss is placed manually by dragging its line on the chart or typing a price, not generated from an ATR input. The ATR Period setting simply controls how far back the EA looks when reading current volatility. There is no separate "ATR Multiplier" you set for the initial stop loss: once you place your SL, the EA quietly works out how many ATR units that distance represents, and reuses that same multiple later for the trailing stop.
● Trailing Stop toggle — Turns automatic trailing stop management on or off for the trade you're about to place (explained in detail below).
● Stop Loss / Position Size display — Read-only outputs showing exactly what stop loss price and what lot size the EA has calculated for the risk percentage you entered.
● Place Order button — Sends the order to your broker using everything configured above. The panel then resets, ready for the next trade.
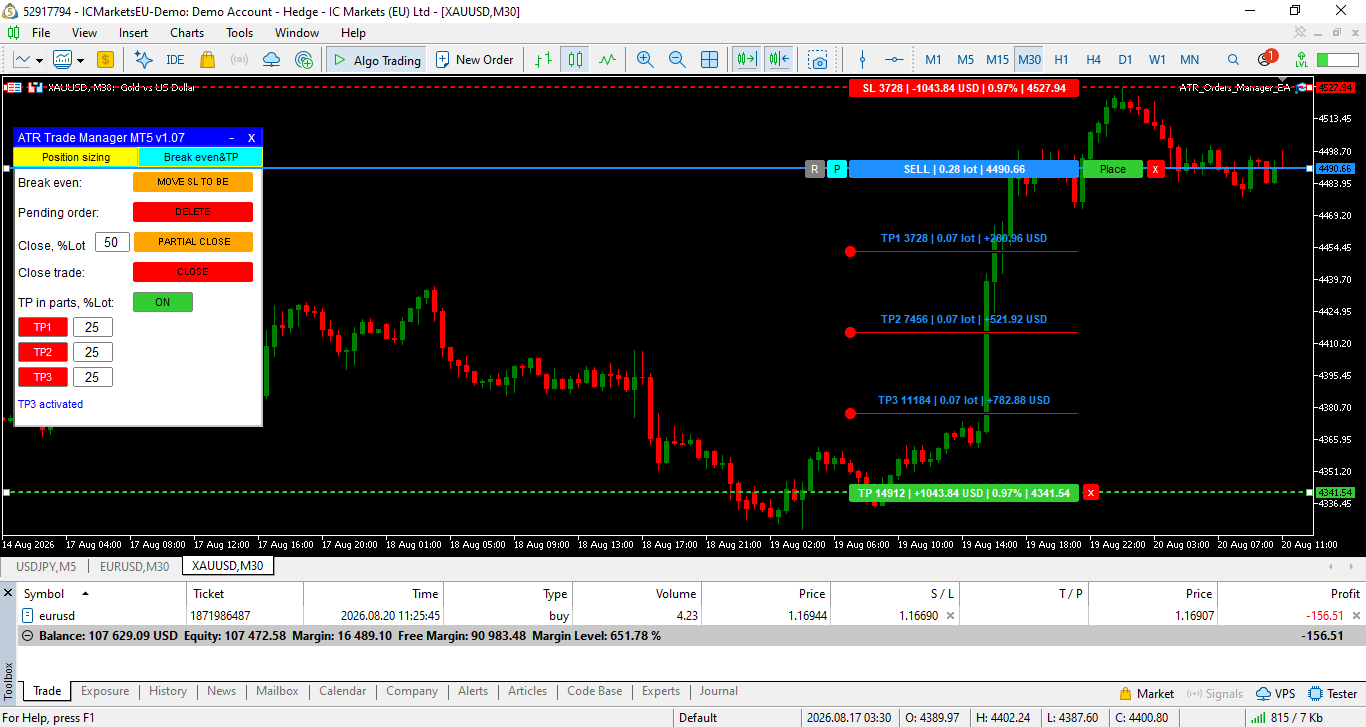
Tab 2 — Break Even & TP
This tab is about managing a trade that is already open (or already placed as a pending order). It contains:
● Break-Even control — you can press the button once price has moved in your favor by a set distance. Basically moves your stop loss to your entry price, so the trade can no longer turn into a loss.
● Partial Close control — Closes a portion of your open position at market price while leaving the rest running, letting you bank some profit early without abandoning the trade.
● Delete Pending Order control — Cancels a pending order that hasn't been triggered yet.
● Close Trade control — Closes the entire position immediately at market price.
● Take Profit in Parts — A three level automatic take profit system (TP1, TP2, TP3) that closes portions of the trade as price reaches each target, explained in its own section below.
The Visual Trade Panel — Plan the Trade on the Chart ItselfRather than typing numbers into boxes, you can drag three horizontal lines directly on the chart: one for your entry, one for your stop loss, and one for your take profit. As you drag:
● The EA automatically detects whether you're planning a Long or a Short trade, based purely on where you place the stop loss relative to entry.
● On-screen tags update live with your risk/reward ratio and the expected profit or loss in account currency, calculated the same way your broker would calculate it, not a theoretical estimate.
● A Market / Pending toggle and Place Order button sit right there on the chart, so the whole trade can be planned and fired without ever touching the main panel.
Once the order is sent, the Visual Trade panel automatically closes itself and hands off to the Live Position Monitor below.
The Live Position Monitor — Manage a Real Trade by Dragging LinesOnce you have an actual order sitting with your broker (filled or still pending), the EA displays its real entry, stop loss, and take profit as draggable lines on the chart, not a simulation, the real thing.
● Drag the stop loss or take profit line to a new level, and the EA sends a real modification request to your broker. If the broker rejects it (for example, because it's too close to the current price), the line automatically snaps back to its last valid position so you can never end up with a broken or invisible order.
● The moment the trade closes by hitting stop loss, take profit, or being closed manually it’s lines disappear from the chart on their own. There is no manual clean-up.
ATR Trailing Stop, Explained SimplyA trailing stop follows price in your favor and locks in gains as the trade moves, without you having to move anything by hand. This EA's trailing stop has one important design choice: it does not use a separate distance setting you have to configure yourself. Instead, it reuses the stop-loss distance you originally placed.
Here is exactly how that works. When you place your stop loss, by dragging it on the chart or typing a price, the EA quietly measures how far that is from your entry and expresses it as a multiple of the current ATR value (for example, "your stop is 2.5x the current ATR"). That multiple then becomes the trailing distance for the rest of the trade.
Once price closes far enough in your favor, the stop loss starts stepping up (for a Long trade) or down (for a Short trade), always staying that same ATR multiple behind the most favorable closed price reached so far. It only ever moves in the direction that protects more profit, never backwards, and it only re-evaluates on newly closed candles, not on every tick, so it won't fight you if you nudge the line yourself.
Take Profit in Parts (TP1 / TP2 / TP3), Explained SimplyInstead of one single take profit level, you can set up to three targets by dragging three small circular handles on the chart. As price reaches each one, the EA automatically closes a portion of the original position size, the size the trade started with, not whatever remains after earlier partial closes. This means your TP2 and TP3 percentages stay predictable even after TP1 has already fired.
What Can't Be Used Together (and Why)The EA enforces a handful of rules automatically, so you can't accidentally put a trade into a contradictory state. You don't need to remember these, the relevant buttons will simply be disabled but understanding the logic helps you plan trades faster.
| If this is active… | …this becomes unavailable | Why |
| Trailing Stop | Take Profit in Parts | Trailing stop keeps moving your stop loss to lock in floating profit as price runs. TP in Parts closes chunks of the trade at fixed levels instead. Running both at once would mean the EA is fighting itself over how the trade should end, so only one management style can be active on a given trade at a time. |
| Take Profit in Parts | Partial Close | TP in Parts already manages partial exits automatically at your three levels. Allowing a manual partial close on top of that would make the remaining position size unpredictable and break the TP1/TP2/TP3 percentages. |
| An open or pending trade on a symbol | Placing a second trade on that same symbol | The EA enforces a strict one trade per-instrument rule. This keeps risk calculations honest. A second overlapping trade would make the original risk percentage meaningless and it prevents accidentally doubling up exposure on the same pair. |
| Market order mode | The Entry Price field | A market order fills at whatever price is available right now, so the entry field is locked and simply mirrors the live price rather than accepting manual input. |
Built-In Safety Rails
● Maximum risk per trade cap — Even if you type in a large risk percentage by mistake, the EA will not let a single trade risk more than a hard maximum of your account balance.
● Margin safety check — Before finalising a lot size, the EA checks it against the amount of free margin available and your broker's margin requirements, scaling the position down rather than letting you place a trade you can't actually afford to hold including on tight stop, low margin symbols.
● Minimum stop distance protection — If your stop loss is placed closer to price than your broker allows, the EA adjusts it to the nearest valid distance and recalculates the position size to match, rather than sending an order your broker would simply reject.
● Clear error messages — If an order is rejected by the broker (wrong price, no money, no connection, etc.), the panel shows a plain english explanation instead of a numeric error code.
The Bottom LineATR Trade Manager MT5 doesn't try to replace your trading decisions instead it removes the manual, error-prone arithmetic and babysitting that surrounds them. You still choose direction and setup. The EA turns that choice into a correctly sized order, places it accurately, and then manages the exit, break-even, trailing stop, or staged take profits without needing you glued to the screen.
For a discretionary trader, that's the difference between a good idea executed sloppily and a good idea executed the same, disciplined way every single time.
Link to product: https://www.mql5.com/en/market/product/175190