Prop Trade Assistant, risk manager, local & remote copy trader, all in one box

Hi guys. I'm starting this post to introduce you to Prop Trade Assistant, which I've recently finished. It's a complete program, but there's more to come yet. This is the full walk-through of the panel, top to bottom, so grab a brew and I'll take you through everything it does.
Why I built it
I'm a prop trader myself, with varying degrees of success. And if I'm honest, I always knew exactly where my shortfall was. It was risk management. Revenge trading. Sizing a position too big on a chart I wasn't that familiar with and overcooking it. We've all been there.
So I built this to help myself, to keep myself inside my own risk parameters. Then, once it was done, I thought it was good enough that other people might want it too. There are similar panels out there, but I wanted to make my own, with my own flavour, and one that actually felt right to me.
That's the thing I care about most: the aesthetics and the ergonomics. A lot of the trade panels I've used before are clunky and unituitive. They don't quite feel right. I built this one from the ground up, with ease of use as the very first thing in mind.
It's all clicked the same way
Everything runs on a simple single-click, double-click, and hold system, and once it clicks it clicks everywhere.
You single-click anything on the panel to type into it, whether that's numbers or text, whatever the field needs. You double-click things like your take profits, your partial stops, and your partials, and you can then move your mouse away from the panel. If you've got chart objects you want to move about before you commit, you can do that, and you can even scroll-wheel the numbers right off the panel. That gives you a lot more control than you normally get. And of course, you can drag and drop your lines straight onto the chart.
Hold is the third one. Where a button toggles something important, holding it gives you a two-beat confirm so you can't fire it by accident. You'll feel it the first time you use it. destructive features have this like, close all, break even any thing that will permanently modify a position or a group of them.
Resize it, roll it up, make it yours
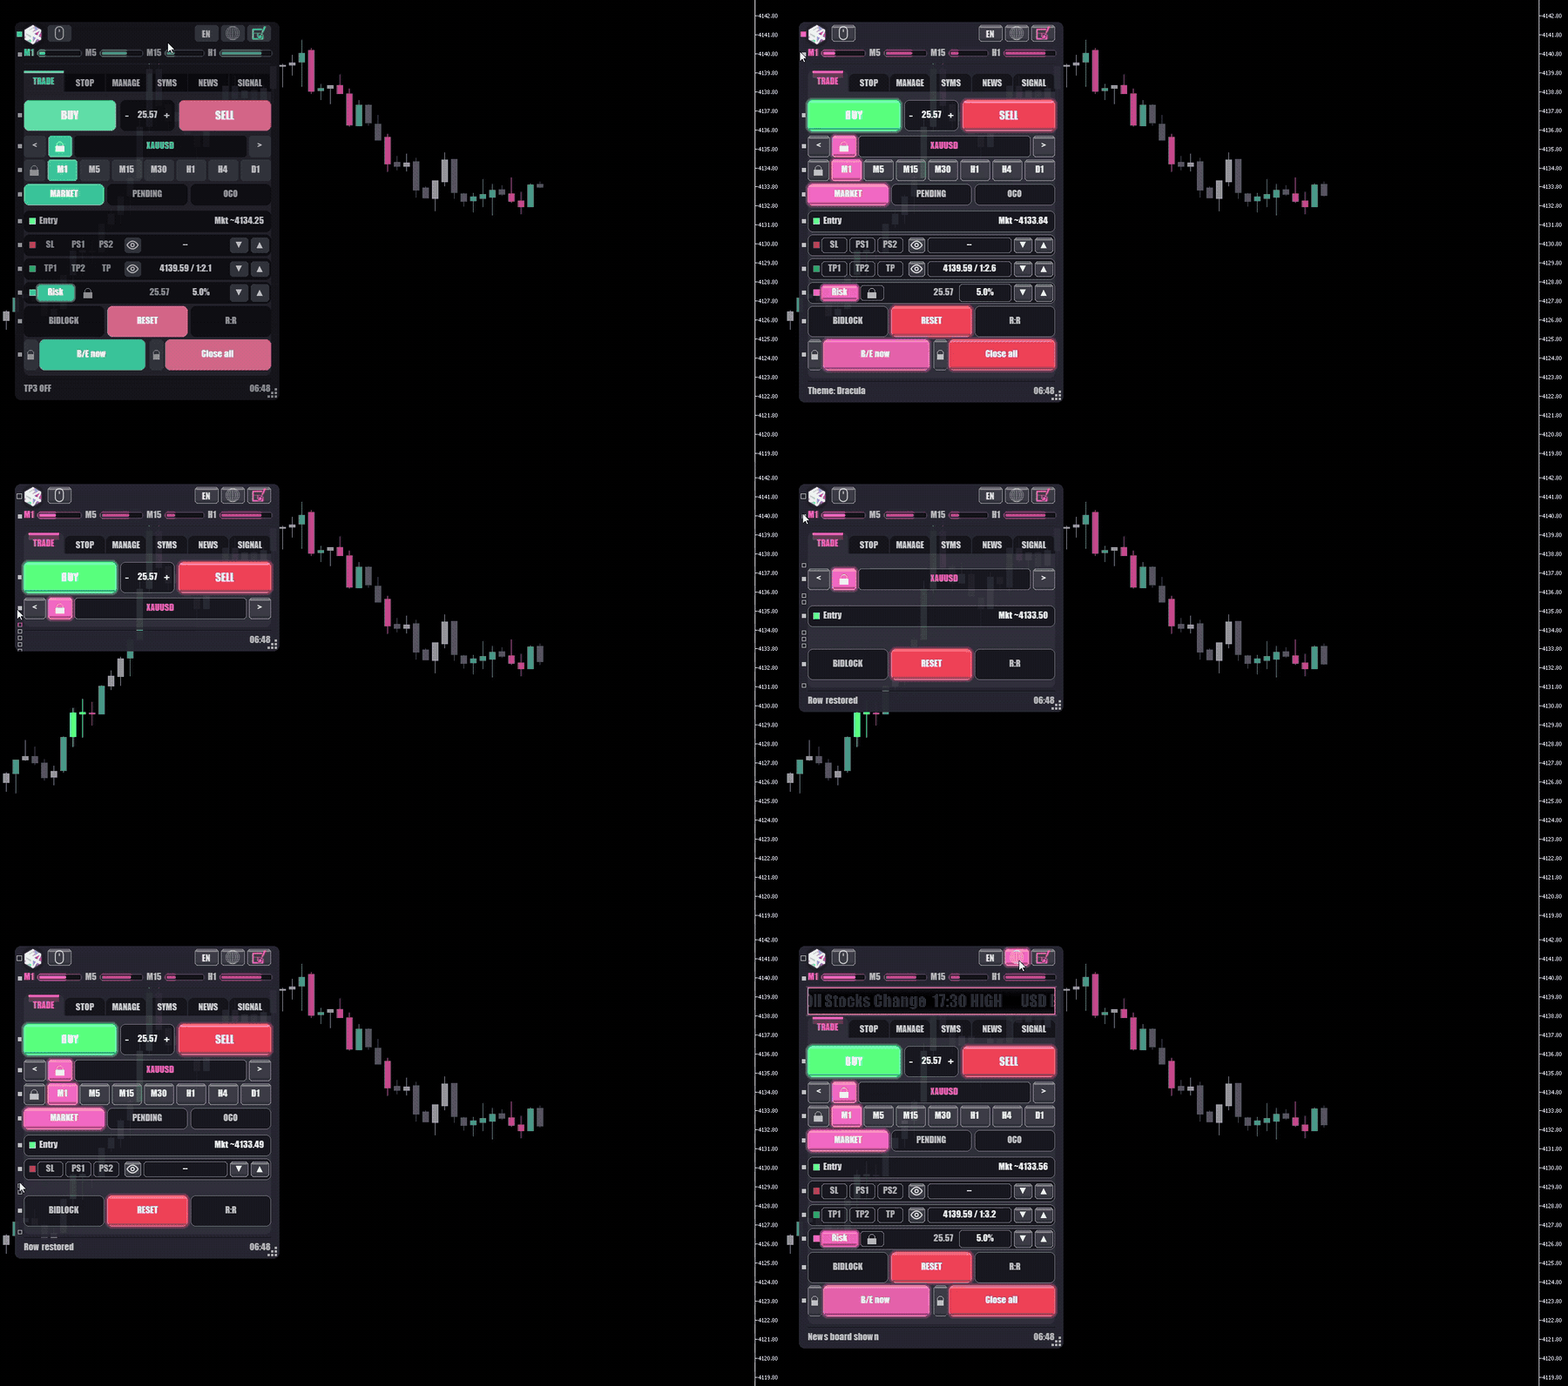
The panel is fully yours to shape. To begin with, it looks like quite a big panel on the chart, and that's because there's a lot you can do with it. You can resize it from the bottom-right corner and lock that size in. If you hold that corner for a second, you'll see a double-flash, and it snaps back to its original size automatically. double click locks it for you
You can also roll up the parts you don't use. Every row has a little dot on the left, and clicking it folds that row away. If your risk is always one percent or half a percent, lock it in and hide that row to save yourself the space. You can fold the panel down to a slim strip, or a minimal timer bar, or shrink it into a scroll able mini-window. I built all of that in on purpose, because the panel should fit your workflow, not the other way round. Your layout, your size, your theme, and every setting you touch is remembered across restarts.
The TRADE tab, and three ways to get in
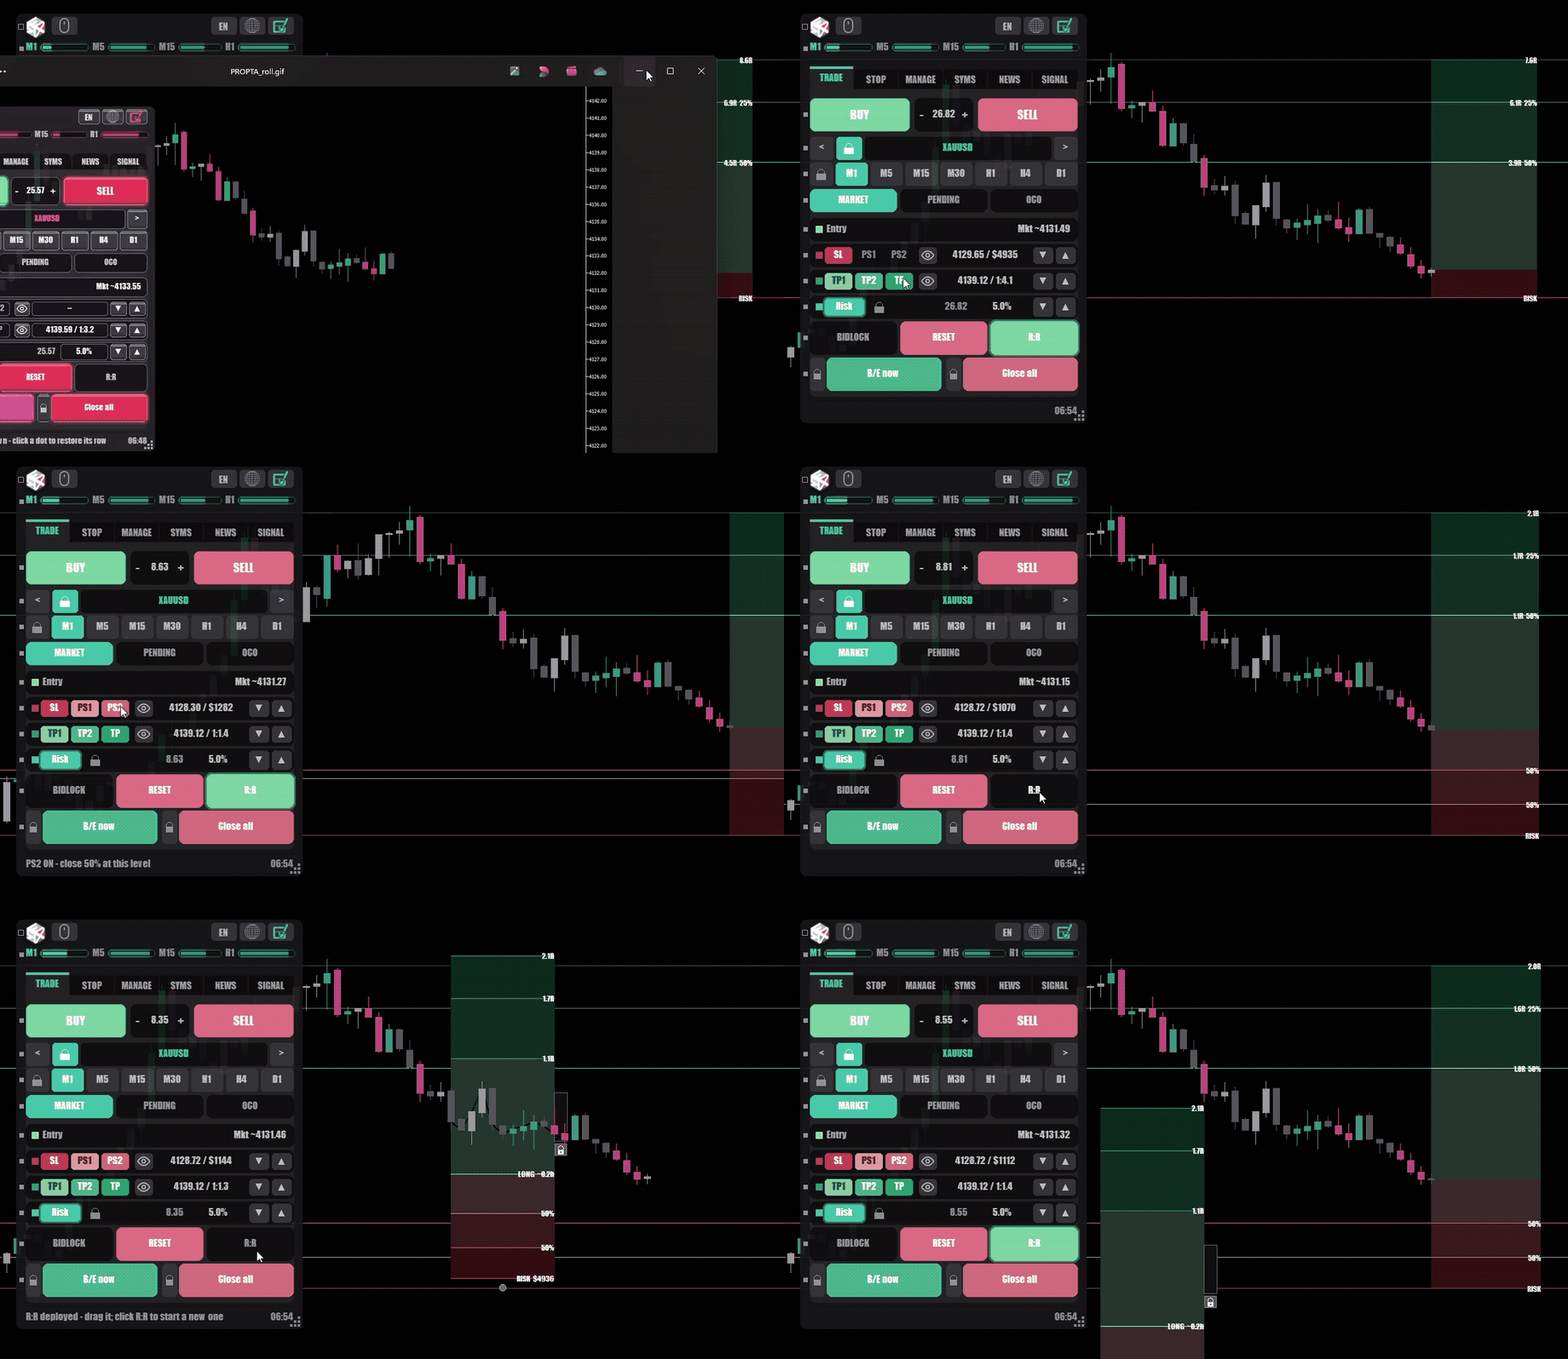
This is where you place trades. Your BUY and SELL buttons sit at the top and they always show you the live lot size, so you're never guessing. Under them is the symbol row and your timeframes.
There are three ways to enter. You've got your market entry, which is your standard entry, in now at the price. You've got your pending orders, which rest at your chosen level and carry the whole plan with them, so the stop, target and partials all attach the instant the order fills. And you've got the straddle, or OCO, which places orders on both sides and cancels the opposite side automatically once one fills. So if you're away from the charts, you don't have to rush in and pull the other order yourself, because it's already gone. There's no worrying about the market coming back to take you out.
Your plan, drawn on the chart
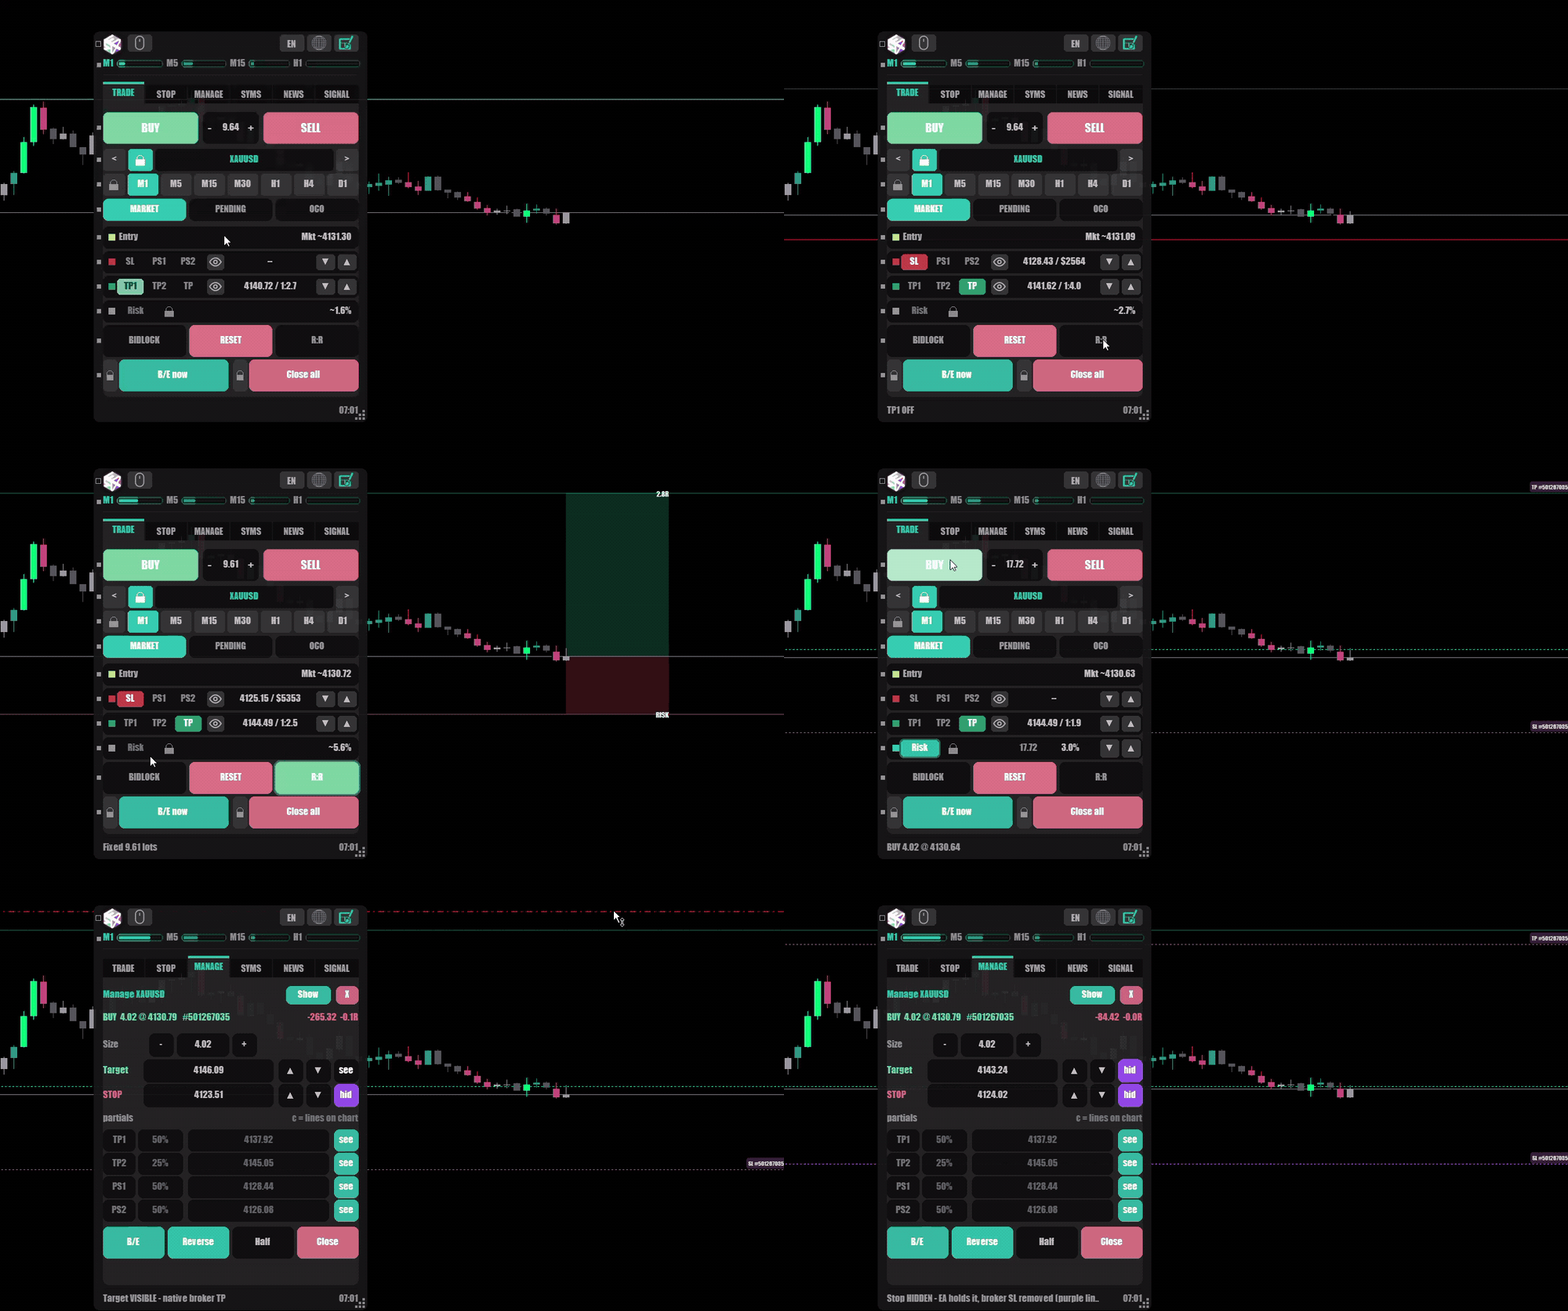
Your entry, your stop, your partial stops and your take profits are all draggable lines on the chart, with a live risk-to-reward box anchored to the entry. Drag anything and every number updates instantly. There's an eye on each row that hides or shows the lines, so you can keep the chart clean when you want to.
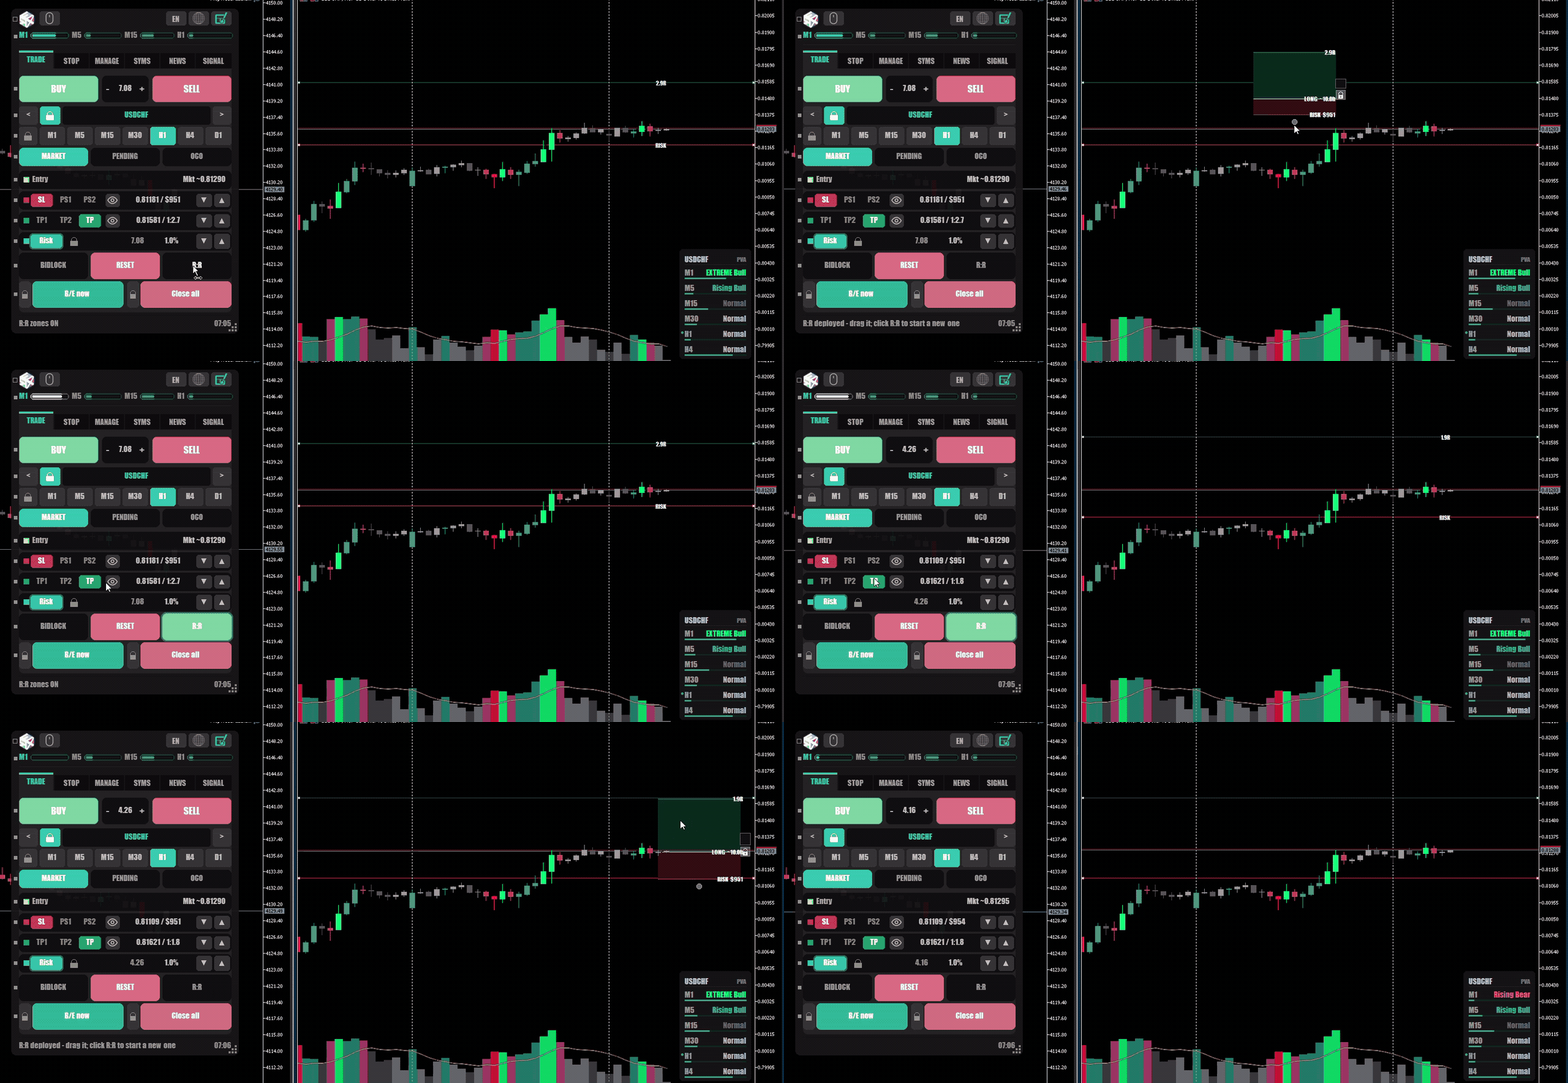
The risk-reward box is a favorite of mine. It pops out onto the chart, and it flips over on itself. Draw one on a buy setup, grab the top of the box, and drag it down, and it turns into a sell. You can pick it up, move it around, and resize it as much as you like. And you can deploy as many free-standing R:R boxes as you want, so you can map out a few ideas at once before you commit to any of them. BIDLOCK lets the whole plan ride the live price while you wait for your moment.
The STOP tab, and ten ways to trail
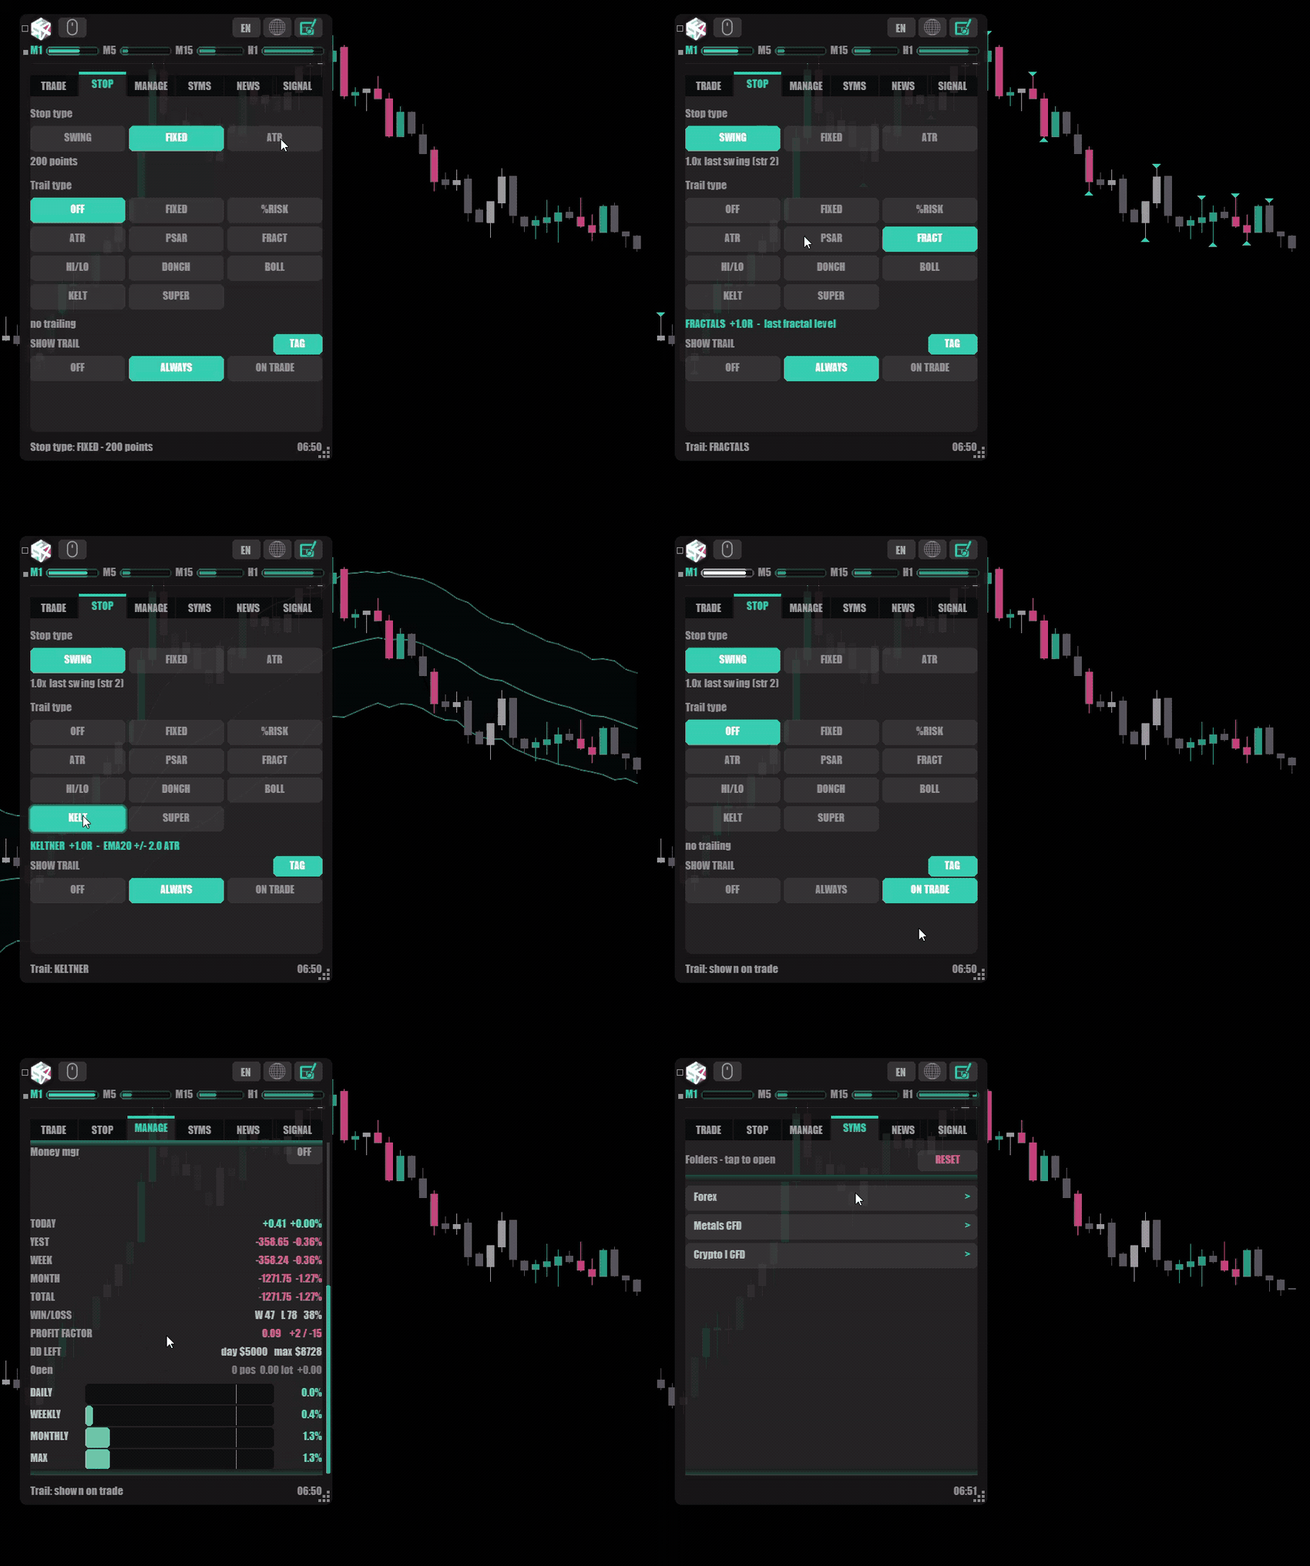
You've got three stop types to start with: Swing, Fixed, and ATR. The panel places your stop automatically, so there isn't much moving about to do. If you change your timeframe, it's as easy as pressing Reset, and that brings everything back to those levels, and then you can move it wherever you want.
Your risk is always tied to the stop and the entry, and it shows you exactly how many lots you need to trade. It's built that way to keep things simple. And if you don't want to trade by risk, and you'd rather just trade fixed lots, you can turn it all off. That's absolutely fine.
Once a trade is on and moving your way, you can trail it, and there are ten different trailing engines to pick from: Fixed distance, %Risk, ATR, Parabolic SAR, Fractals, high and low bars, Donchian, Bollinger, Keltner, and SuperTrend. There's a Show Trail preview that draws the line on your chart before you commit to it, so you can actually see how each one would have behaved on your own history before you trust it with a live trade. Breakeven is here too, so you can move your stop to entry at whatever R you like, with a buffer to lock a little in.
The MANAGE tab, and the money manager
Once you're in a trade, the MANAGE tab is your control room for it. Every open position gets a row, and you can move its stop and targets, take partials, reverse it, or close it, all from here. This is also where the feature switches live: breakeven, hidden stops, the reverse settings, and the money manager itself.
Hidden, or stealth, stops are worth a mention. When you turn them on, your stop and target are never sent to the broker. The panel holds them itself, watches every tick, and closes the position when a level is crossed. They survive a terminal restart, and there's an optional hard stop that sits behind them as disconnect insurance. Handy when you don't want your exits sitting in the broker's book, or when you need a stop tighter than the broker would normally allow.
And then there's the money manager, which is the part the whole thing is really named after. This is your prop-firm guard. You set your firm's limits, so your daily, weekly and monthly loss limits and your maximum drawdown, measured either from your starting balance or trailing from your peak. You add a warning buffer, a daily profit-target lockout so you stop after a good morning, and caps on your trades per day, your open positions, and your risk per trade. As you get near a limit it warns you. At the limit it can block new trades, or flatten everything you've got, instantly. There are live DD-left meters on the panel the whole time, so you always know exactly how much room you have. On a funded account, that one feature is worth the price on its own.
Control every chart from one panel
Next to the symbol there's a lock. Undo it, and you can scroll up and down, or click left and right, to move through the symbols you've enabled in the SYMS tab.
When it's unlocked, it changes the actual chart for you. That's great for single-screen and laptop users who want to flick through their charts without opening anything up. When it's locked, you can control another chart from where you're sitting. You can see the stop loss and take profit, move them about, and deploy risk-reward boxes onto those charts too, even the charts the panel isn't running on. One deployment controls the lot.
Here's a handy one. If you double-click a stop, you can move your cursor over to that chart and still scroll-wheel it up and down. So you're adjusting that stop or take profit while you do your drawings.
Your news, always in view
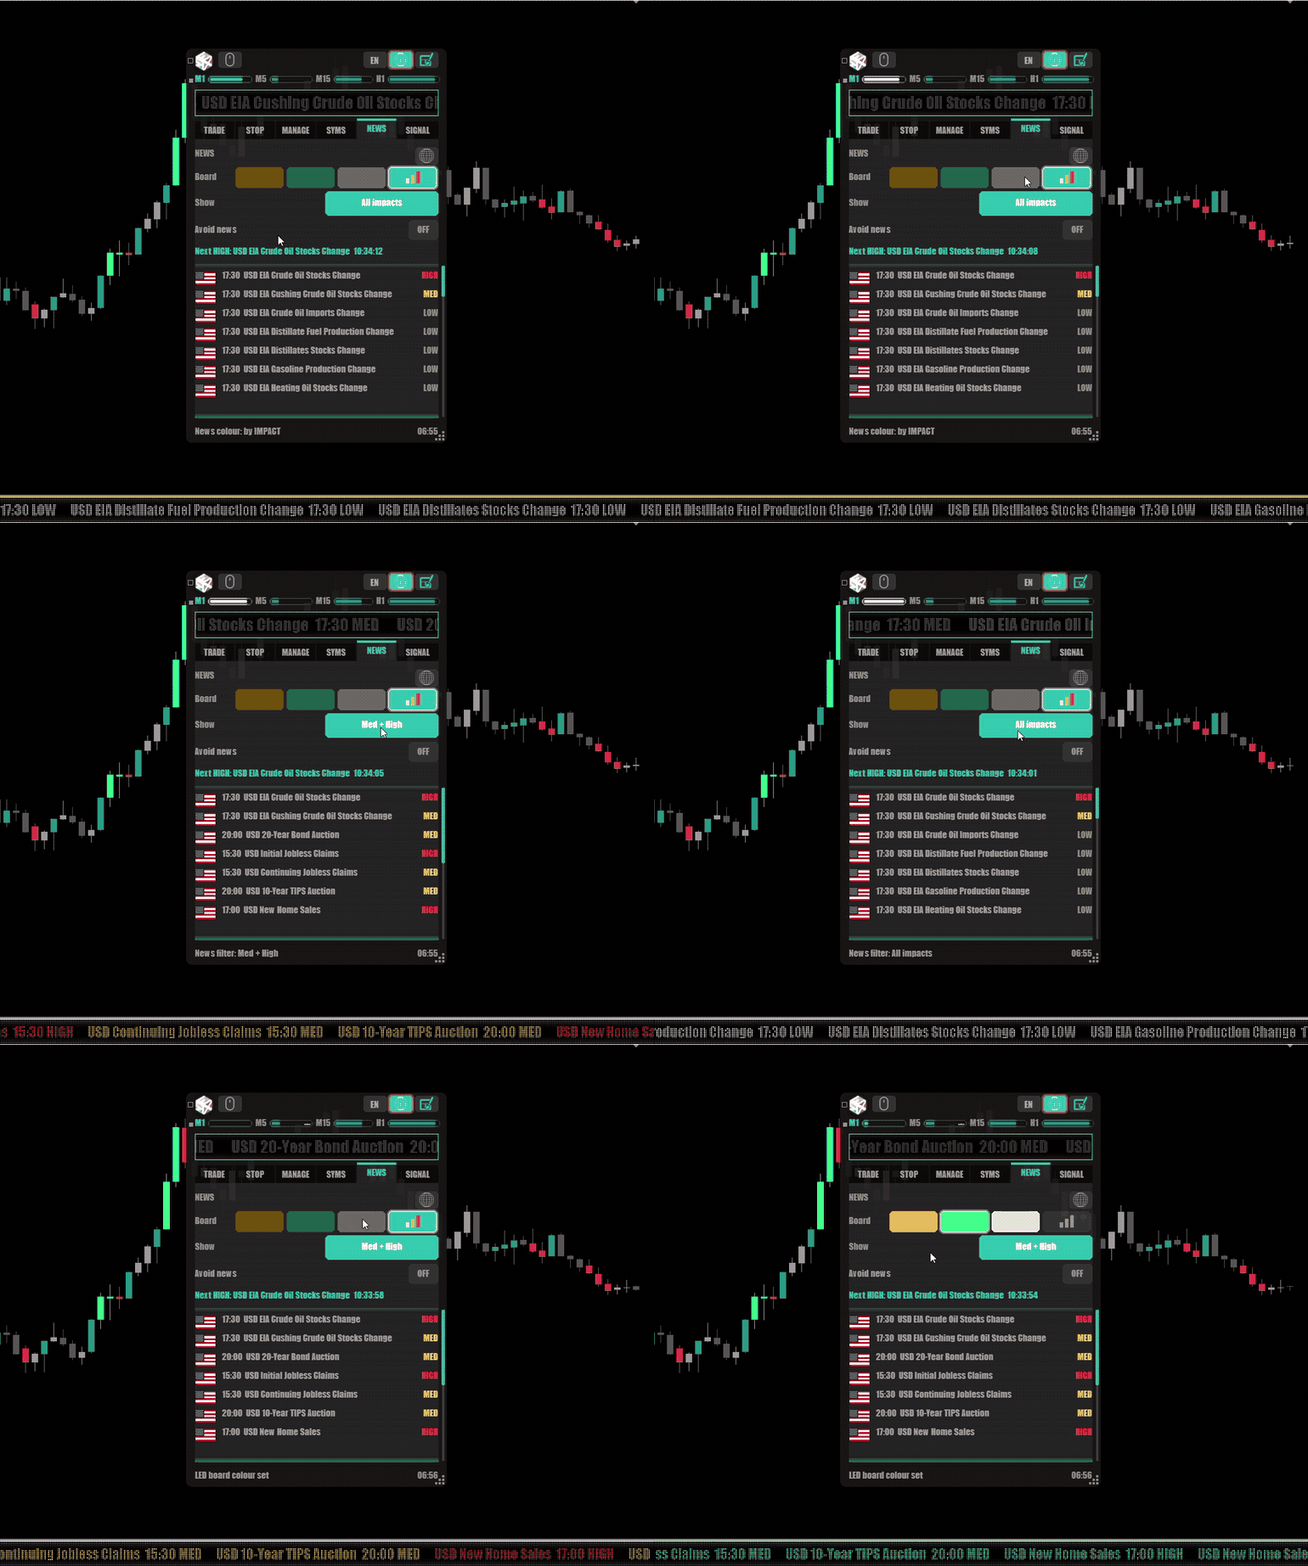
At the top of the panel there is the dot-matrix, and it's tied to the calendar. It gives you all of your news releases conveniently in one place. You can filter it down by impact, so if you only want to see high impact, or medium and high, or all of them, it's up to you. There are a few different colours to choose from as well, so you can change it to fit in with your chart.
It comes in two flavours. One sits in the panel and runs along the top, and the other is a pop-out that lives along the bottom of your screen, so you can use whichever is easier for you. Either way, it's a nice reminder of what's coming up today, or over the next few days. It saves you having to go through the calendar and double-check what time things are being released, because sometimes you forget to check the calendar altogether. We've all done it.
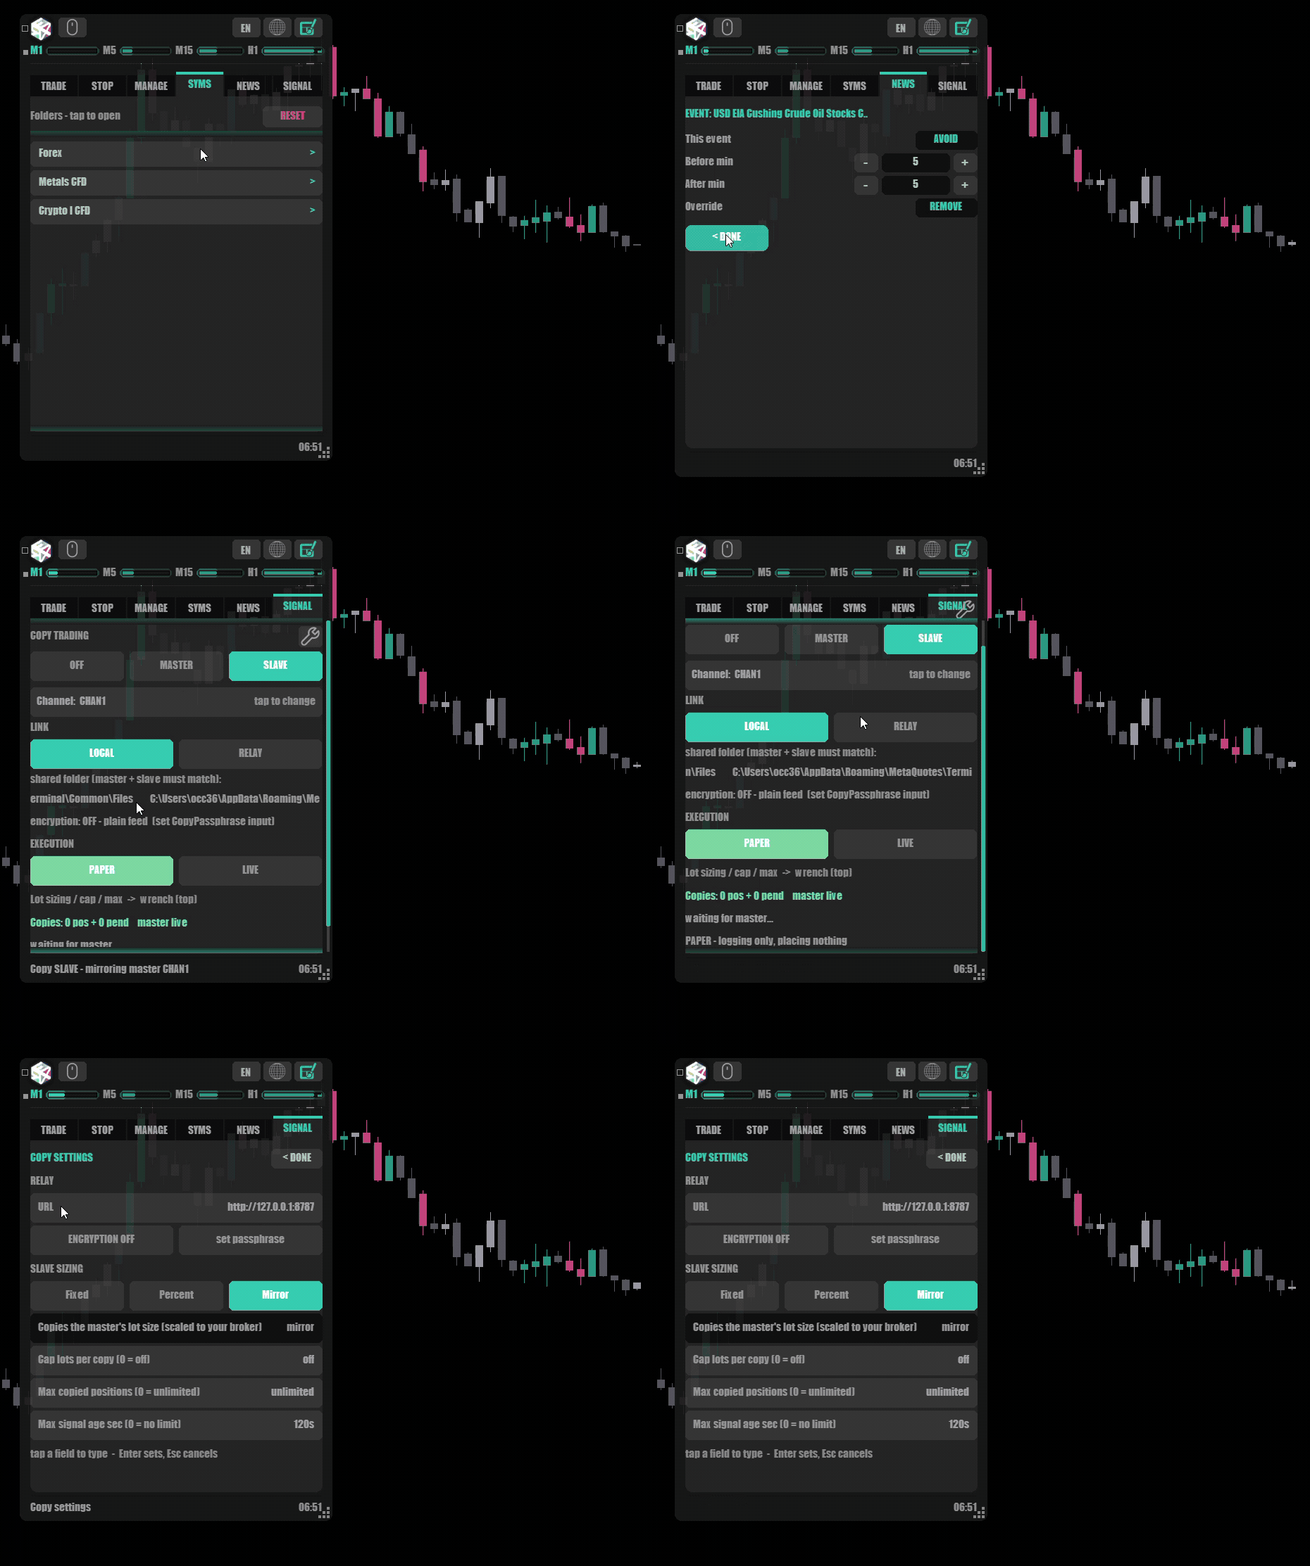
And it's not just a reminder. The NEWS tab lets you turn on news protection, so the panel blocks new trades in a window around the impact levels you choose, marks those no-trade windows right on your chart, and lets you give individual events their own settings. Your open positions are never touched.
The SIGNAL tab, and copy trading without handing over your password
This is the one I'm proudest of, and it's a big enough subject that it gets its own post next. In short: the panel has a copy trader built right in, and it mirrors the state of your account, not your button clicks. Every position, every pending, every stop you drag by hand or every partial you close from your phone gets copied across.
Two terminals on the same PC or VPS link up with zero setup. Across machines, your trades travel over your own private network, with no third-party copier, no cloud, and no monthly fee. Your account password never leaves your desk. Set a passphrase and the whole feed is encrypted. One master can feed up to ten channels, and each receiver can copy the trade exactly or size it its own way. I'll walk through the whole setup in the copy-trading post.
And the finishing touches
It comes with six hand-tuned themes and sixteen languages, both switchable live, so the whole panel re-skins and re-labels on the spot. There are bar timers along the top so you can see when your candles are about to close and preempt your next move. I use them all the time, because it's just easier glancing at the screen than looking down at the clock. There are sounds, an auto-screenshot journal, and a status line that always tells you exactly what the panel just did. And the whole thing is built to feel instant, so it never stutters your chart, even on a busy wall of them.
That's the full tour of the front of the panel and the trade side. There's still plenty more to go deeper on, including the money manager, the news protection, and the copy trading, and I'll cover those in their own posts. If you've got a question, drop it in the comments. I'm the developer, so I actually answer them.