

In order to vet a potential trading strategy, it is imperative to ensure that the results obtained from optimizations and strategy tests are a true reflection of the performance of your EA. Unfortunately, the history data provided within metatrader is not high quality and also you will not get more than a few years worth of history data to test your expert advisor on.
If you want to get a 100% history quality of your backtest and optimisation, this is the guide for you!
The problem with using broker requested data in mt4 and mt5
On MT4, back-testing on “ Every tick” with a default environment is the highest accuracy possible. This will deliver a similar result on MT5, but MT5 does offer a more accurate modelling method, namely “ Every tick based on real ticks”.
The utilization of “ Every tick” modelling causes a variety of issues. Prices that are randomly simulated from bar data when the default tick data is downloaded from the broker through MetaTrader’s Strategy Tester. By a process of interpolation, it uses the bar price data together with the tick count to generate the prices for each bar so that they start at the bar open price, touch the bar high and low, ending at the close price.
Similarly, on MT5, when testing on “ Every tick based on real ticks”, and requesting the tick data from the broker directly, there is a scope for missing data. If there are numerous data mismatches, this could yet again lead to an improper testing result.
To summarize, the default testing environment will not cycle through every tick that was delivered at the specific points in history. This will be a lesser issue for higher timeframe EAs, but for scalping EAs, as in the image above, the results will divergence extensively.
The solution
The two third-party tick providers (intermediaries) allow for a user-friendly method for accurate testing with relatively low costs. The steps below will outline how to utilize Tick Data Suite (TDS) for the entire process. A similar process can be followed for Tick Story.
TDS is a paid service, but does allow for a 14-Day free trial, available here.
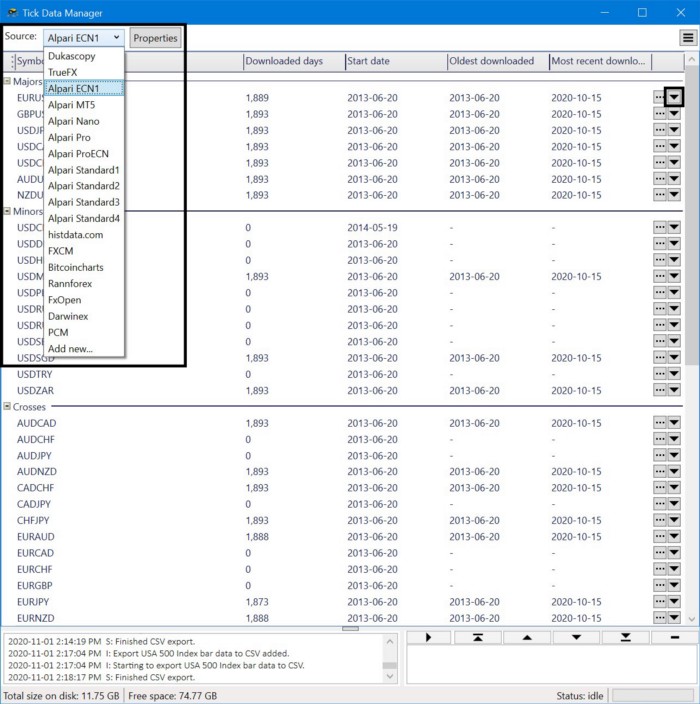
Downloading Tick Data
Once TDS has been downloaded, run “ Tick Data Manager” from the Windows start menu.
- Choose the source (broker)
- Dukascopy has almost every forex, commodity, stock/equity, bonds and more available as CFDs
- Alpari ECN1 and Alpari ProECN are both ideal for users who are planning on live trading on ECN accounts (orderbook), but does not offer as much history data as Dukascopy. Therefore, if you want to backtest your EA on history data older than 2015, you probably want to go for Dukascopy.
Then click the download button on the far right of each desired pair’s row. Users can also scroll between different sources to download pairs that may be exclusive on specific sources/brokers.
Exporting 1 minute bar data from Tick Data Suite
We need to import both the 1m bar data and the tick data into mt5 for everything to work correctly. We will start by exporting the 1m bar data.
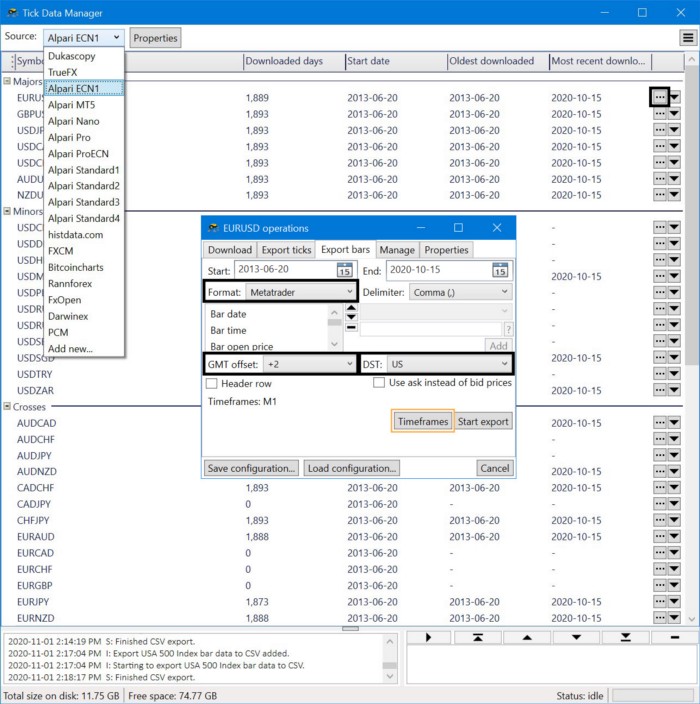
- Click on the “…” button on the far right side of a specific pair:
- On the popup window click on the “Export bars” tab:
- Adjust the following parameters:
- Format: MetaTrader
- GMT offset: Check your broker, for example IC Markets is +2
- DST: Check with your broker, for example IC Markets DST is based on US time
- Click on the “Timeframes” button
- Select the M1 timeframe then click “OK” (see example below).

Exporting Ticks from Tick Data Suite
Once we have exported the 1m bar chart data, next step is to do the same, but for the tick data.
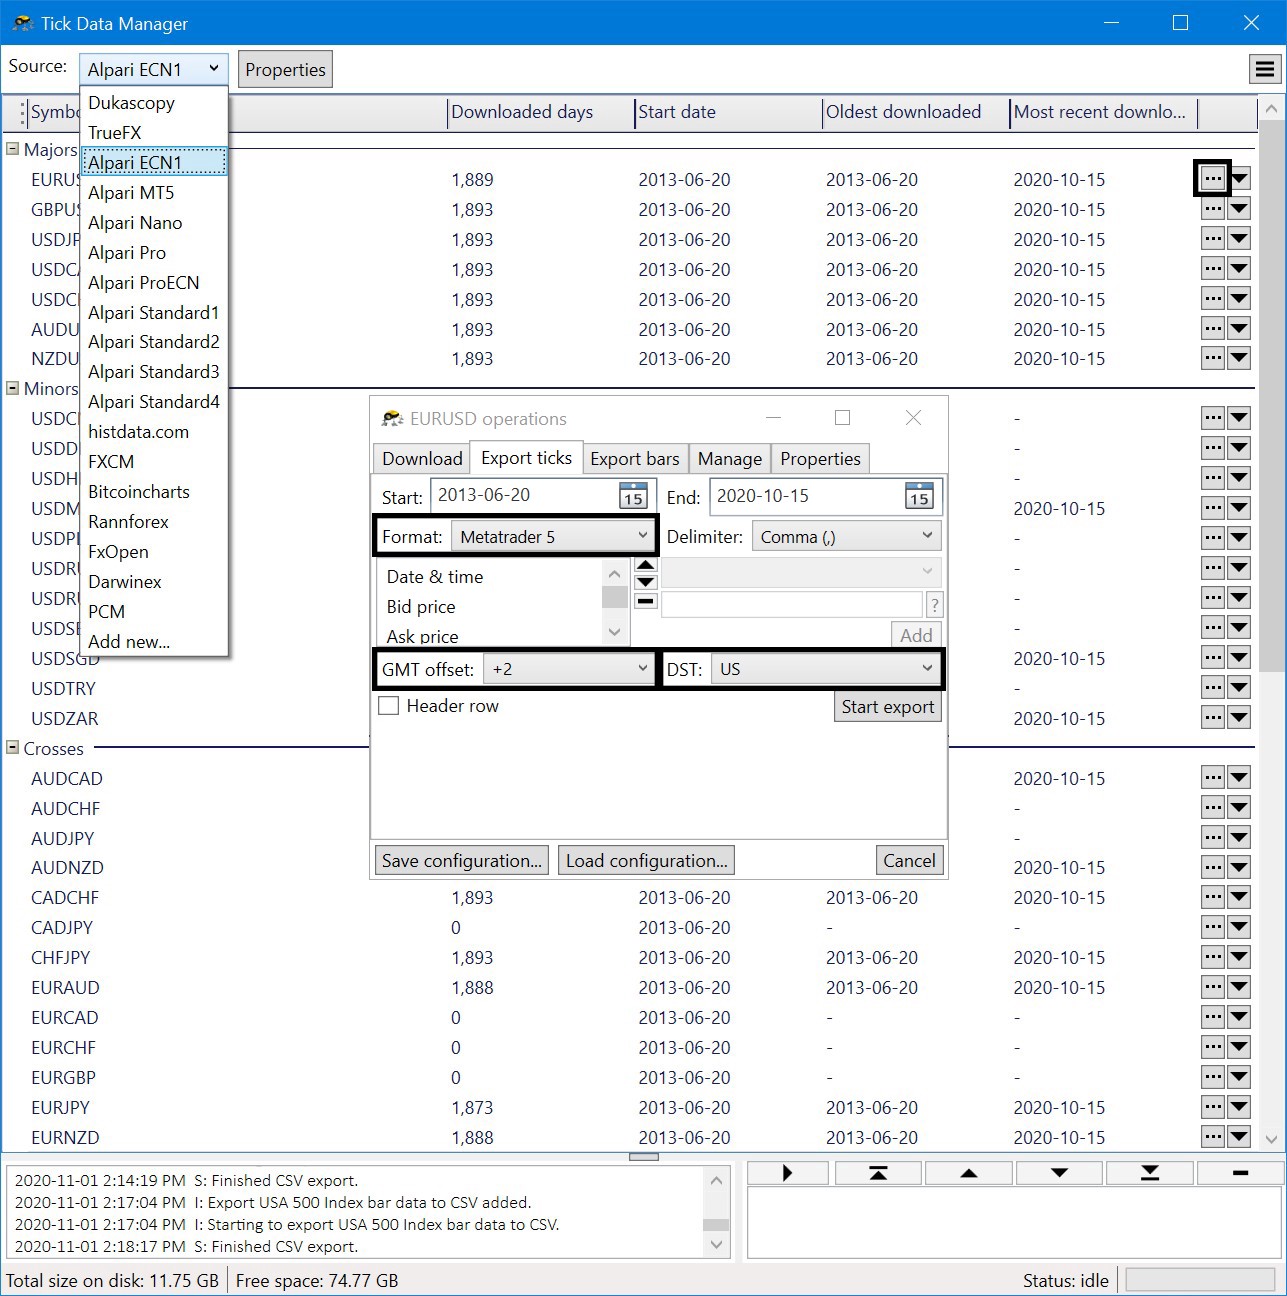
- Click on the “Start export” button.
- Click on the “…” button on the far right side of a specific pair:
- On the popup window click on the “Export ticks” tab:
- Adjust the following parameters:
- Format: MetaTrader 5
- GMT offset: Check your broker, for example IC Markets is +2
- DST: Check with your broker, for example IC Markets DST is based on US time
- Click on the “Start export” button.
Creating a Custom Symbol on MetaTrader 5 and importing tick data
Once we have exported our 1m bar and tick data, we are ready to import the data into mt5. In mt5 we need to create a custom symbol to do that.
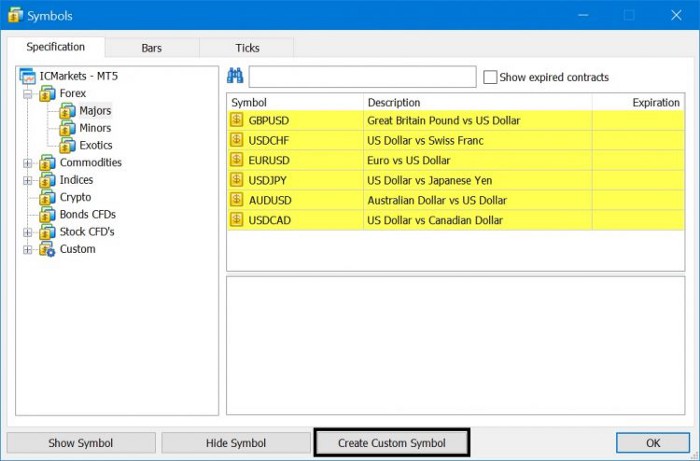
- Right click on the Market Watch window and click on “Symbols”
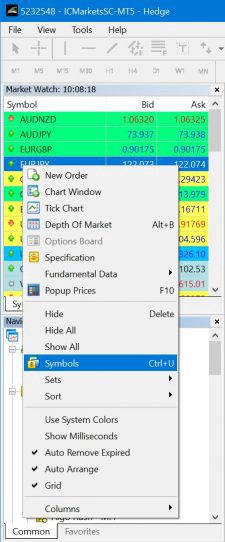
- Click “Create Custom Symbol”.
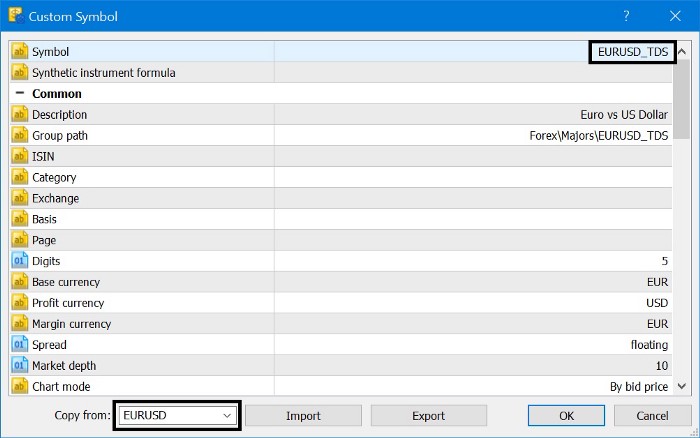
- Within the Custom Symbol window, do the following in order:
- On the Copy From: field, select the symbol that you would like to use. Note: this will copy EURUSD symbol settings from the current broker.
- When the symbol is inputted and loaded within the column, rename the pair to have _TDS *Adding more than 4 characters at the end of the custom symbol (i.e. PAIR _123) will result in issues on strategy tester.
- Click “OK” when all symbol settings have been confirmed.
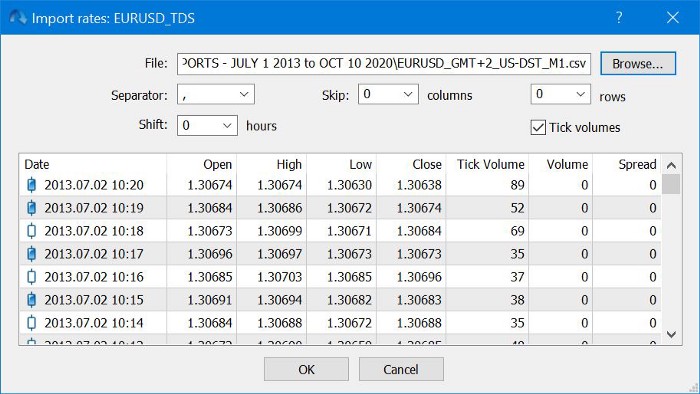
Importing Bar/OHLC Data on MetaTrader 5
So once we have created our new custom symbol, we are now ready to import the bar and tick data into it.
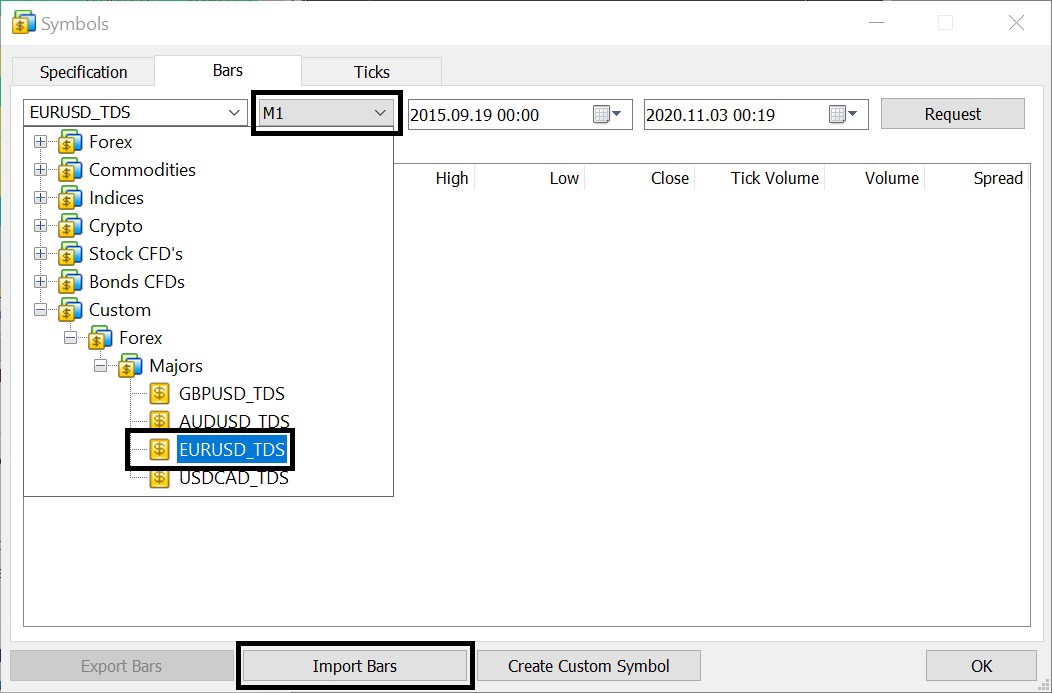
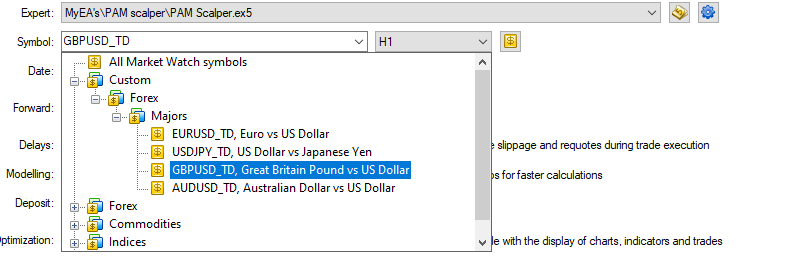
- Now click on the Symbols dropdown input and select the new custom pair you created (under the Custom category within the dropdown).
- Once the new custom symbol has been selected, make sure that the timeframe input beside it is set to M1.
- Then click on “Import Bars”.
- Click on “Browse”.
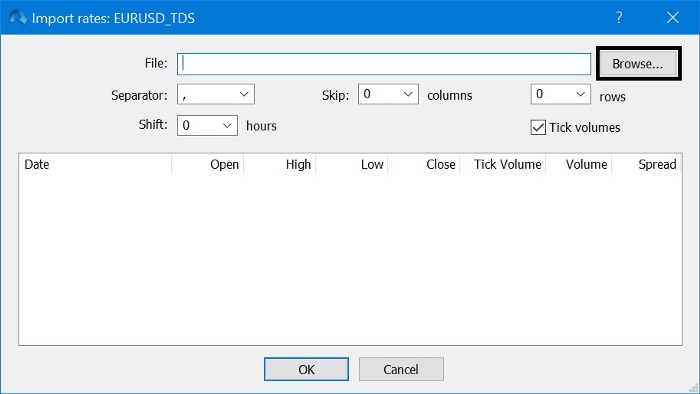
- Select the bar export file. You will be able to distinguish the difference since the file suffix will contain _M1.csv.
- In our example this is the distinguishing factor: EURUSD_GMT+2_US-DST_M1.csv

- Once the import is finished, click “OK”.
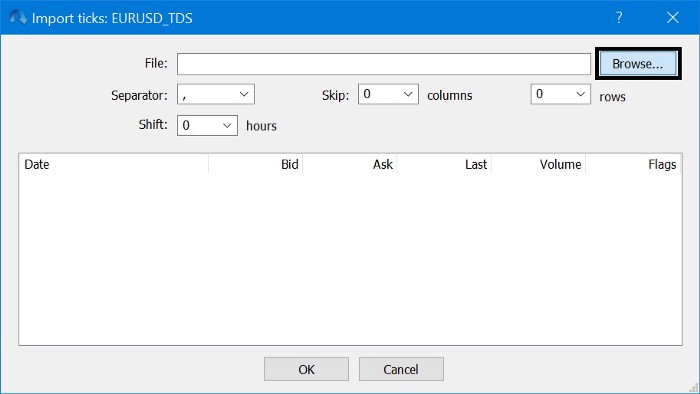
Importing Tick Data on MetaTrader 5
Now that we have imported the bar data, the next step is to import the tick data.
- Once importing bar data is complete, navigate over to the “Ticks” tab.
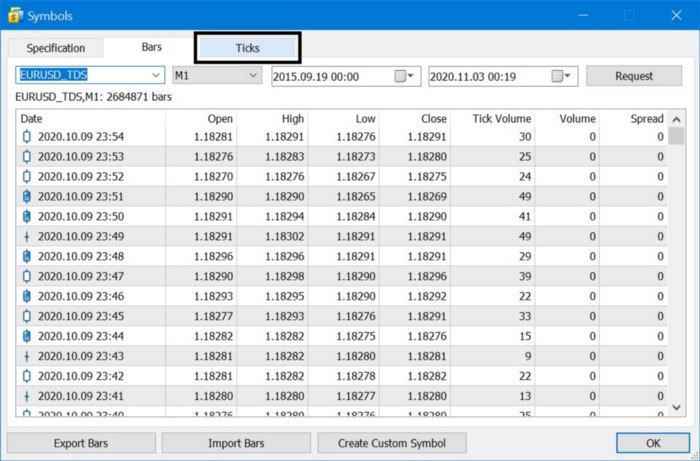
- Make sure that the custom symbol is inputted on the symbol input field. Then click on “Import Ticks”.

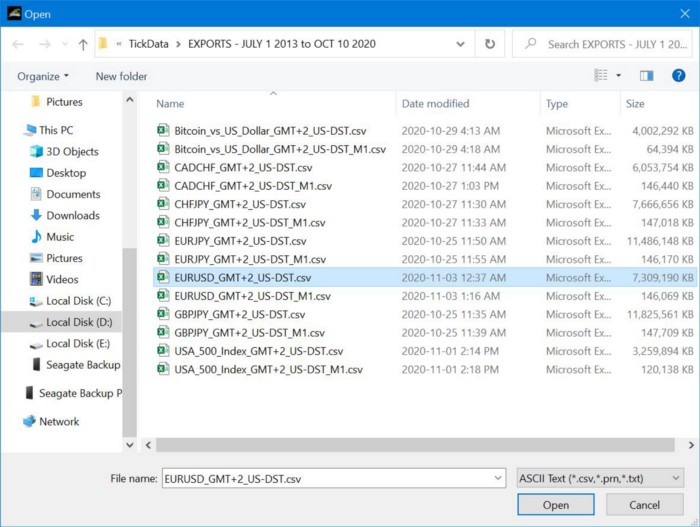
- Click on “Browse”.
- Select the tick export file. You will be able to distinguish the difference since the file suffix will not contain _M1.csv.
- In our example this is the file we used: EURUSD_GMT+2_US-DST.csv
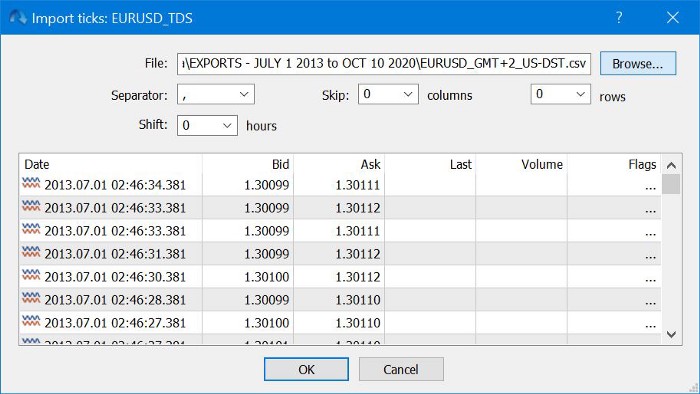
Click “OK”. Keep all settings at their default values since any offset or formatting would’ve been accounted for from Tick Data Manager.
- Once the import is finished, click “OK”.
- Go to the Symbols window once more and make sure the new custom chart is activated.
- If the chart shows a white dollar sign icon, double click to make it enabled. If double clicking the sign does not enable the symbol -> restart your mt5 terminal.
- Disabled chart:

-
Enabled chart:


- Click OK and you’re all done.
When you open the strategy tester you will now find a new path to your custom symbols. Simply select the new symbol and start testing your EA on it.
Now that you have made sure that the trade execution of your backtest will match that of live trading, you need to make sure to also add trading fees to get trustworthy backtests. You can follow my guide on how to do that here.
For more information on Custom symbols: https://www.metatrader5.com/en/terminal/help/trading_advanced/custom_instruments


")
![[XAUUSD]: Weekly Liquidity Activation Points (timings), June 22-26, 2026](https://c.mql5.com/6/1013/splash-preview-771790.png "[XAUUSD]: Weekly Liquidity Activation Points (timings), June 22-26, 2026")
")