
Real Expert Settings
In this section, you can see the "Real Expert" configuration guide.
If you have any problems or questions, I will be happy to answer.
MT4: https://www.mql5.com/en/market/product/67818
MT5: https://www.mql5.com/en/market/product/67819
Magic Number:
You can use these settings to use multiple experts at the same time
Magic numbers are especially useful when you are trading across multiple timeframes, using the same forex pair. For instance, you might wish to use two EAs, one that is tracking the EUR/USD on a one hour chart, while another that is tracking the same pair on a 15 minute chart. So, while one EA is trend following, the other is scalping. Can you imagine one EA trying to track a single trade across different time frames? You wouldn’t want to do that even to an enemy, and an expert advisor is your best friend in forex.
So, while trading across different time lines, you might want to manage the trades differently for each time line. This means that apart from the usual take profit and stop loss exits, you might want to run a channel stop for one trade and a trailing stop for another. In such situations, trying to identify trades using only the currency pair will make it chaotic, given that the currency pair is the same across the different trades, such as the EUR/USD in the example above.
This is where magic numbers come to the rescue. A unique number is assigned to each trade, when it is opened. The EAs now track trades by their magic numbers, simplifying the process. For instance, the trend-following EA might follow the magic number 214, while the scalping one follows 316.
To summarize, magic numbers can be used to separate orders across different strategies, separate orders across different timeframes for the same currency pair, and to separate orders across different EAs.
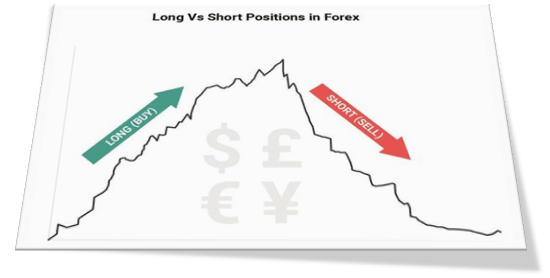
Long Trade:
If you disable these settings, Expert will not trade "Buy"
"Long" trading means "Buy" in Forex trading. Expert do both "Buy" and "Sell" trades in defaults. You can use these settings if you want to disable "Buy" trades.
Short Trade:
If you disable these settings, Expert will not trade "Sell"
"Short" trading means "Sell" in Forex trading. Expert do both "Sell" and "Buy" trades in defaults. You can use these settings if you want to disable "Sell" trades.
Displays a Message:
If you enable these settings, you will receive an alarm on the chart when the expert trades
The alerts are intended for signaling about events in the market. Having created alerts, one may leave the monitor as the client terminal will automatically inform about the server event.

Send Notifications:
If you enable these settings, you will receive an alarm on your mobile phone when the expert trades
there’s a convenient feature on the Metatrader Platform called “alerts” for desktop or “push notifications” for mobile that allows you to get a notification when the market of your choosing reaches a particular level you are watching.

Perform Manually Lot:
If you want to set the lot value yourself and do not use the default settings, enable these settings
In the following cases, you may want to use these settings:
1- If your account currency is not dollars, Expert will not determine the "Lot" correctly.
For example, if your account currency is the Japanese yen, it is better to determine the "Lot” yourself.
2- In case of default, the expert risks 5% per transaction. You can use these settings if you want to trade with a specific “Lot”.
3- For any other reason, you may need to set the “Lot” yourself.
This setting has two parts, first activate these settings, then in the next section, enter the desired “Lot” value.
Volume:
If you want to determine the value of the lot yourself, write the value here
If you have enabled the settings of the previous section, in this section you can enter your desired “Lot”.
Minimum number you can enter: 0.01
If the number entered is less, the expert will automatically set it to 0.01
Maximum number you can enter: The maximum “Lot” that your broker will accept.
If the number entered is greater than the maximum value, your broker will not allow you to trade
Max Spread Points:
In this section, set the maximum amount of spreads so that if your broker has more spreads, the expert will not trade (the lower spread, is better)
For any reason, the amount of spreads in your broker may increase. In this case, if the expert wants to trade, you may lose a few points. So it is better to set a setting for the spread so that if the spread value is high, the expert will not trade and will trade when the spread value decreases.
In the daily time frame and when the amount of profit and loss limits is high, you can set this number up to 100 points, but we recommend reducing this number. The lower the number, the better. To set this number, you need to check the spread of the currency pair's spread in your broker.
Risk Amount Percentage:
Specify the risk percentage here. By default, the expert risks 5% per trade. This means that if you make a profit or a loss, 5% of your capital will increase or decrease per trade.
This number is based on your capital. For example, if your capital is $ 1,000 and these settings are set to 5, then the expert will make a profit or loss of $ 50 per trade.
The higher this number, the higher the probability of Drawdown. It is better not to take too many risks early in using this expert and finding the best settings. The best risk is 1 to 5 percent.
Volume Change:
If this setting is enabled, the lot value is based on total capital (equity)
In the previous settings, we understood the concept of risk. Enable these settings if you want the risk to be floating, not capital-based. For example, if your capital is $ 1,000 and you have already made $ 200, the risk is based on $ 1,200, not $ 1,000. So in each trade, if you risk 5%, you will make a profit or loss of $ 60.
BreakEven Enable:
Enable this section if you want to use the breakeven settings
Suppose your trade is currently running and has more than 500 points in profit, and you want to close the trade if the reversal and trading process is at a loss. To do this, enable these settings. That is, equal the loss limit with the opening price of the trade. In this case, if the trend returns, you will not lose and the trade will be closed with 0 points of profit and 0 points of loss.
BreakEven Points:
After reaching this amount of profit (based on the points), the expert sets the loss limit equal to the opening price of the expert.
In the previous section, we found out what these settings are. Now we need to set these settings to be activated after a few points of profit. In default mode, the expert activates these settings after reaching 450 points of profit. That is, after 450 points of profit, the expert equates the amount of the loss limit with the opening price of the same transaction.

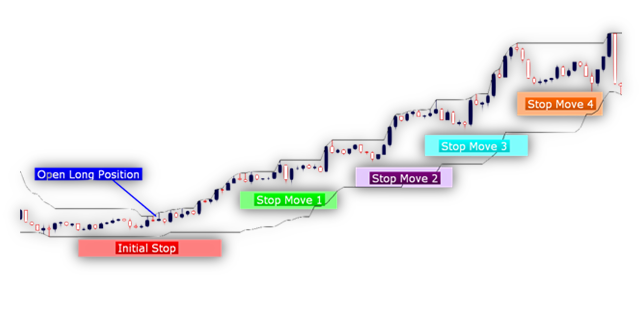
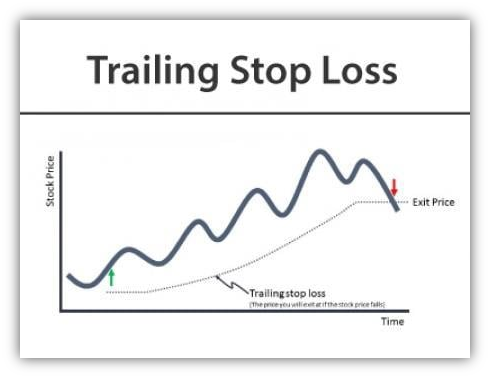
Stop Loss Trailing Enable:
If you want to use the stop loss trailing settings, enable this section.
A trailing stop is a modification of a typical stop order that can be set at a defined percentage or dollar amount away from a security's current market price. For a long position, an investor places a trailing stop loss below the current market price. For a short position, an investor places the trailing stop above the current market price.
A trailing stop is designed to protect gains by enabling a trade to remain open and continue to profit as long as the price is moving in the investor’s favor. The order closes the trade if the price changes direction by a specified percentage or dollar amount.
Stop Loss Trailing Start:
After reaching this amount of profit (based on the point), the stop loss trailing settings are activated.
For example, if this number is set to 500, these settings will be activated after the trade reaches 500 points.
Stop Loss Trailing Step:
The amount of your floating loss limit after activating these settings
For example, if this number is set to 200, after activating these settings, your loss limit will be set equal to 200 points and the price distance from your loss limit will not be more than 200 points, and whenever the price increases its distance Slowly, the loss level is moving behind the price by 200 points.
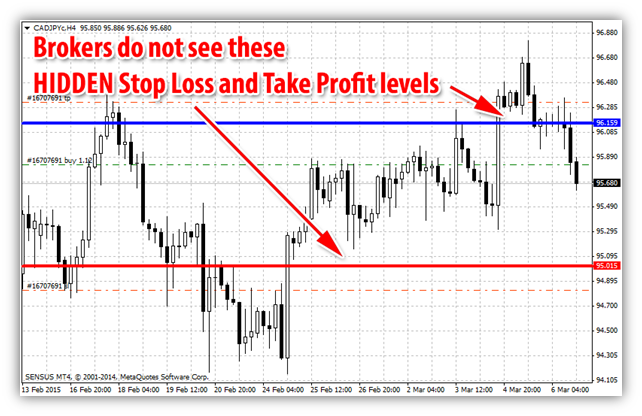
Hidden SL and TP:
If you enable these settings, brokers will not be able to see your profit and loss limits.
If the number of people who use an expert is large, brokers may make price changes to the detriment of those who use that expert. By enabling these settings, brokers can not figure out the amount of the loss limit and, as a result, can not cause problems for traders.
Take Profit:
You can adjust the TP value yourself.
In default mode, this number is equal to 2220, if you want to increase or decrease it, you can use these settings. Maybe in different currency pairs, it is better to change this number. So we made these settings.
Do not change these settings if you do not know what the profit or loss limit is. It is better to research websites for more information.
Stop Loss:
You can adjust the SL value yourself.
In default mode, this number is equal to 2220, if you want to increase or decrease it, you can use these settings. Maybe in different currency pairs, it is better to change this number. So we made these settings.
Do not change these settings if you do not know what the profit or loss limit is. It is better to research websites for more information.
Comment:
You can set what comments should be written in the comments section.
If you have run different experts, you can use these settings to find out which trade is for which expert.
In default mode, you can see the name of the expert in the comments section. You can write different comments. For example, if you have performed Expert in EURUSD currency pair, it is better to write the name of the currency pair and the name of Expert in this section, so that in the future, you will know which trades this expert has done.


