 MetaTrader 5
 Uzmanlar
 Göstergeler
 Komut dosyaları
 Kütüphaneler
 Depo
Depo
Fan sayfamıza katılın

XAUUSD MTF Liquidity OB Reversal Breakout - MetaTrader 5 için gösterge

- Görüntülemeler:
- 3962
- Derecelendirme:
- Yayınlandı:
- Güncellendi:
-
 Alım-satım fırsatlarını kaçırıyorsunuz:
- Ücretsiz alım-satım uygulamaları
- İşlem kopyalama için 8.000'den fazla sinyal
- Finansal piyasaları keşfetmek için ekonomik haberler
Kayıt Giriş yapWeb sitesi politikasını ve kullanım şartlarını kabul edersiniz
Hesabınız yoksa, lütfen kaydolun -
 Bu koda dayalı bir robota veya göstergeye mi ihtiyacınız var? Freelance üzerinden sipariş edin
Freelance'e git
Bu koda dayalı bir robota veya göstergeye mi ihtiyacınız var? Freelance üzerinden sipariş edin
Freelance'e git
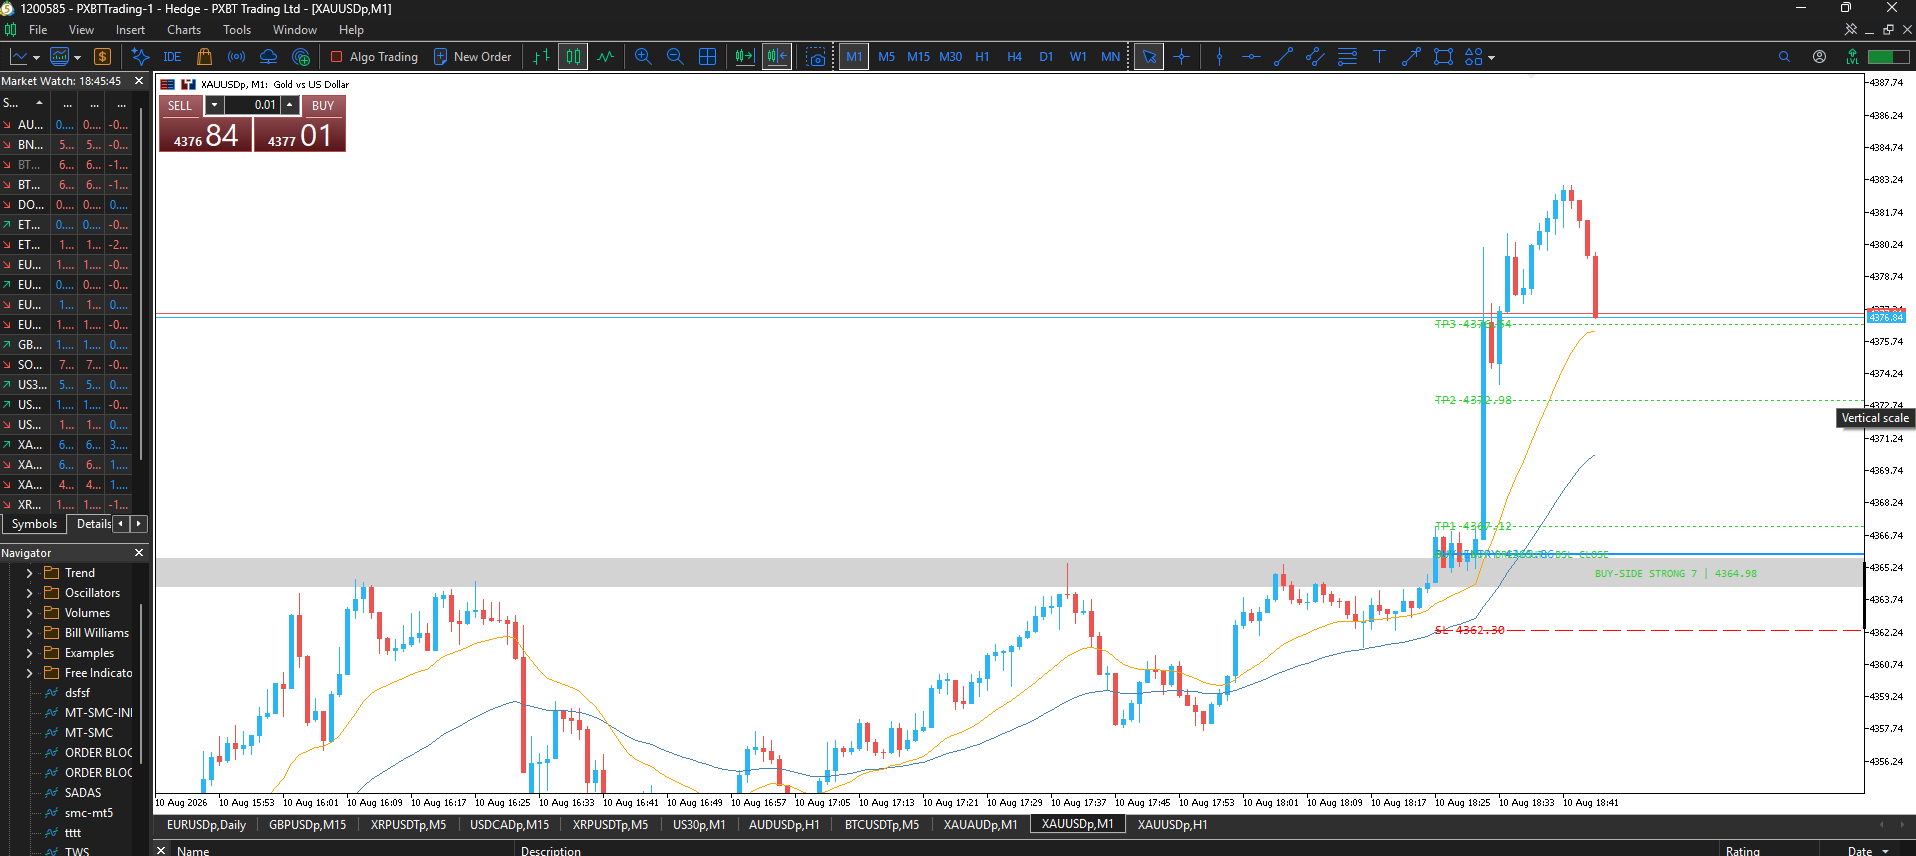
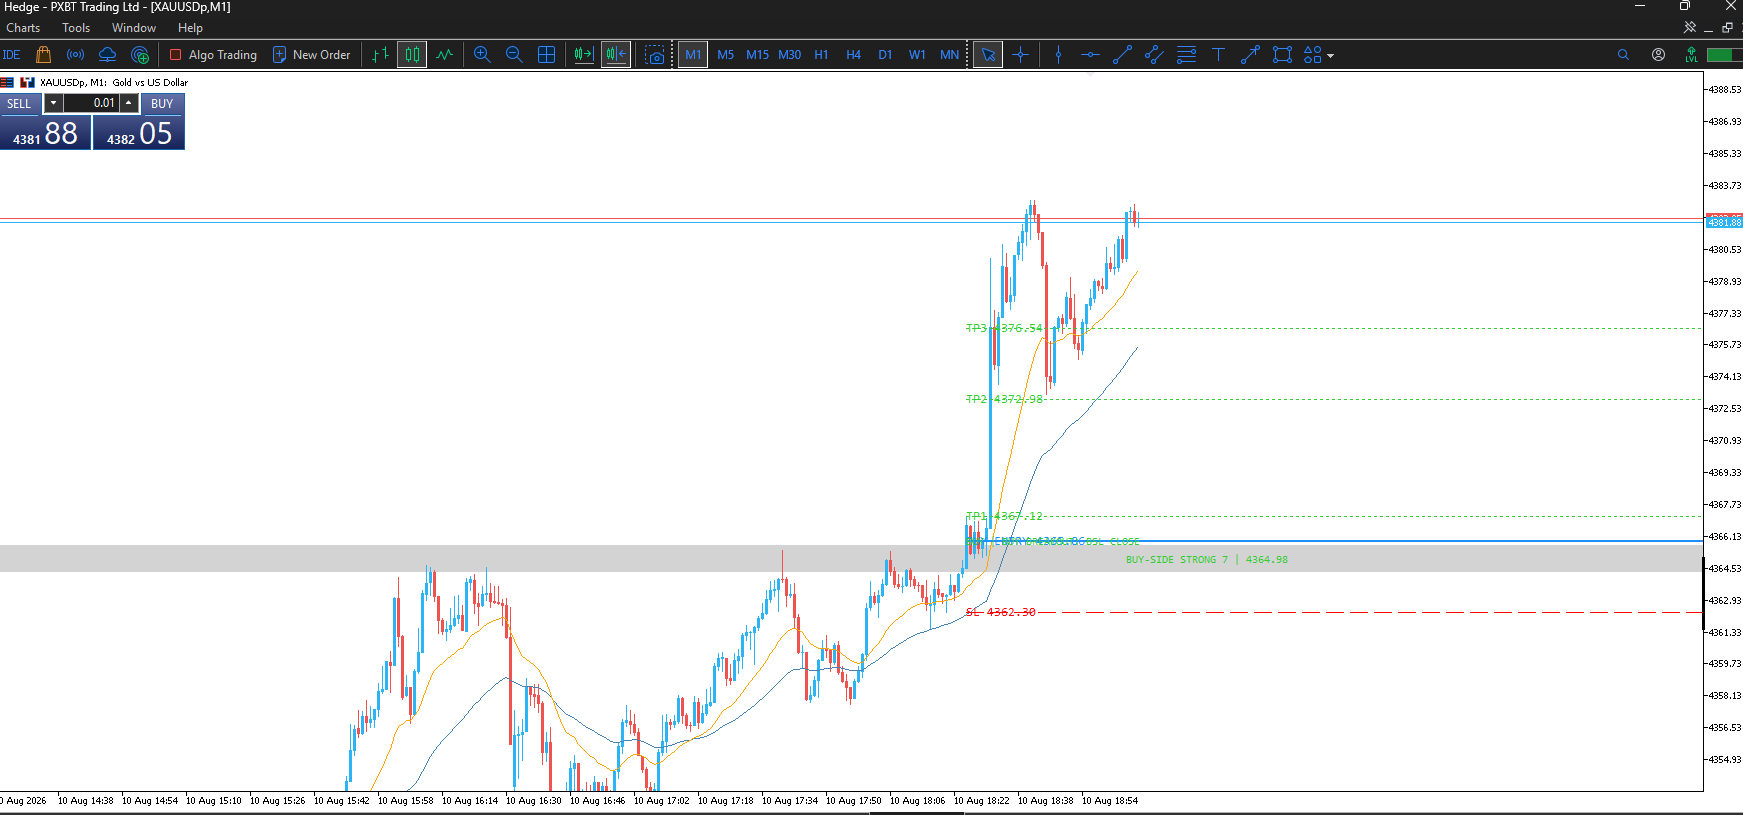
XAUUSD MTF Liquidity & Order Block Reversal Strategy
A professional Smart Money Concepts (SMC) based MT5 indicator designed primarily for XAUUSD (Gold). The strategy combines multi-timeframe liquidity, order blocks, liquidity sweeps, breakout/reversal confirmation, and M1 swing-based risk management to identify high-probability BUY and SELL opportunities.
Strategy Features
1. Multi-Timeframe Liquidity Detection
The indicator identifies important liquidity and order-block levels from:
-
Best Day-wise Liquidity
-
H4 Liquidity & Order Blocks
-
M30 Liquidity & Order Blocks
-
M15 Liquidity & Order Blocks
-
M5 Liquidity & Order Blocks
The strongest day-wise liquidity replaces simple Previous Day High/Low logic and searches historical daily candles for significant liquidity concentrations.
2. Liquidity Confluence
Liquidity levels from higher timeframes are compared with M5 levels.
When multiple timeframes identify liquidity around the same price area, the level is classified as Strong Liquidity.
These strong areas are displayed as BUY-side and SELL-side zones on the M5 chart.
3. Order Block Detection
The indicator identifies bullish and bearish order blocks around important liquidity areas and uses multi-timeframe confluence to improve signal quality.
4. Liquidity Sweep Detection
The strategy detects when price sweeps a liquidity level before looking for a reversal or breakout.
Liquidity sweep levels are drawn directly on the chart for reference.
5. Candle Close Confirmation
A trade signal is not confirmed simply because price touches a liquidity level.
The strategy waits for the appropriate M5 candle close confirmation before generating the setup.
This helps reduce false intrabar signals.
6. Reversal & Breakout Strategy
The indicator supports two primary setups:
Liquidity Reversal
Liquidity ↓ Sweep ↓ M5 rejection ↓ Candle close confirmation ↓ BUY / SELL
Liquidity Breakout
Liquidity / OB ↓ Price breaks level ↓ M5 candle closes beyond level ↓ Confirmation ↓ BUY / SELL
7. M1 Swing-Based Stop Loss
After a valid M5 setup is confirmed, the stop loss is calculated using the relevant M1 swing high or swing low.
-
BUY → SL below the relevant M1 swing low
-
SELL → SL above the relevant M1 swing high
8. Multi-Level Take Profit
Each trade setup contains:
-
Entry
-
SL
-
TP1
-
TP2
-
TP3
All levels are drawn directly on the chart with their corresponding prices.
9. TradingView-Style Position Tool
The position tool displays a visual risk/reward area similar to TradingView:
-
Red zone → Risk / SL
-
Green zone → Profit / TP3
-
Entry line
-
TP1
-
TP2
-
TP3
-
Exact price labels
-
Risk/Reward information
The position tool has a short configurable width to keep the chart clean.
10. Same-Side Trade Protection
The strategy prevents repeated signals in the same direction while a trade is active.
For example:
BUY running:
BUY #1 ↓ TP1 → Continue ↓ TP2 → Continue ↓ TP3 → Trade completed ↓ Next BUY allowed
If SL is hit:
BUY #1 ↓ SL HIT ↓ Next BUY allowed
The same rule applies to SELL trades.
11. Opposite-Side Opportunities
An opposite-direction setup can still be detected while another direction is running.
For example:
BUY running ↓ Valid SELL setup ↓ SELL position tool drawn
The BUY position tool remains on the chart.
12. Five-Minute Recalculation
The liquidity and order-block analysis is recalculated every 5 minutes.
The current liquidity/OB levels are refreshed while historical position tools and trade setups remain available for analysis.
13. Clean Chart Design
The indicator is designed without a dashboard so the chart remains focused on:
-
Liquidity
-
Order blocks
-
Sweeps
-
Entry
-
SL
-
TP1
-
TP2
-
TP3
-
Position tools
Recommended Usage
Primary instrument: XAUUSD
Recommended execution timeframe: M5
Stop-loss reference: M1 swing high/low
Higher-timeframe analysis:
Best Day ↓ H4 ↓ M30 ↓ M15 ↓ M5 ↓ M1 execution levels
The indicator is intended as a decision-support and market-structure tool, not a guarantee of profitable trades. Results should be validated with historical testing and forward testing on your broker's XAUUSD feed before using real capital.
Swing Trading Dashboard
Swing Trading Dashboard is a visual indicator for MetaTrader 5 (it does not generate automatic trade signals — it only displays information on the chart). Essentially it's a "dashboard" panel that calculates the recent swing trading range and shows where the current price sits relative to it — mid-range, near a boundary, or already broken out.
Scalping Dashboard
This indicator is a professional Scalping Dashboard utility designed specifically for MetaTrader 5 (MT5). It displays real-time vital market status information and scalping strategy conditions (based on Exponential Moving Arrows/EMAs), automatically computing spreads, momentum, and moving averages to output instant BUY/SELL SETUP visual signals.
 MT5 Cash Risk Probe - Read-Only Sizing
Read-only MT5 script that estimates stop-distance cash loss in account currency, reserves explicit cash costs and floors volume to the broker grid. It never sends or modifies an order.
Channel Breakout Dashboard
Channel Breakout Dashboard is an informational panel (not an automated trading robot) that runs on the MetaTrader 5 chart and centralizes, in one place, several market conditions that would otherwise require 4-5 separate indicators open at the same time.