Liquidity HeatMap Profile
- Göstergeler
- Israr Hussain Shah
- Sürüm: 1.3
- Etkinleştirmeler: 5
1. Tool Description
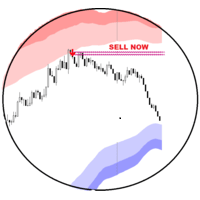
The Dynamic Liquidity HeatMap Profile is an advanced technical indicator originally designed by BigBeluga (Pine Script) and ported to MQL5. Unlike a standard Volume Profile which shows where volume has occurred, this tool attempts to visualize where liquidity (limit orders and stop losses) is likely waiting (resting liquidity).
It works by identifying pivots (local highs and lows) weighted by volume and ATR. Crucially, if price moves through a level, that liquidity is considered "swept" or "taken" and is removed from the map. This leaves you with a chart showing only the "Untaken" levels.
2. Key Features
-
Dynamic Filtering: The core feature. As soon as the current price crosses a historical liquidity level, that level disappears. This reduces chart clutter and prevents you from trading off "dead" support/resistance.
-
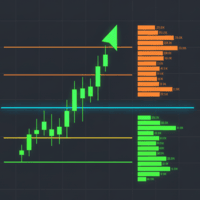
Liquidity Heatmap (Histogram): On the right side of the chart, it groups these levels into bins. The longer the bar, the more "resting volume" is calculated to be at that price level.
-
Point of Control (POC): The level with the highest density of liquidity is highlighted in Orange (or your Max Point Liquidity color). This acts as a magnet for price.
-
Liquidity Lines: Thin lines extending from past candles to the present. These show exactly how old the support/resistance is.
-
Buy vs. Sell Zones:
-
Green/Lime (Below Price): Buy Liquidity / Support.
-
Blue (Above Price): Sell Liquidity / Resistance.
-
3. What Information Do You Get?
By looking at the HeatMap, you gain three specific types of market intelligence:
-
Magnetic Zones (POC): The orange POC line represents the heaviest concentration of orders. Markets often drift toward the POC to facilitate trade before choosing a direction.
-
High Resistance Areas: Large clusters of bars in the heatmap indicate "Walls." Price is likely to bounce off these areas on the first touch because absorbing that liquidity takes significant effort.
-
Liquidity Voids (Low Volume Nodes): Areas with no lines or very short heatmap bars represent "thin" liquidity. Price usually moves through these areas very quickly (Expansion/Imbalance).
4. How to Use It
-
Timeframe: Best used on H1, H4, and Daily. On lower timeframes (M1-M5), the noise creates too many levels that are swept too quickly.
-
Installation: Attach it to your chart. Ensure LookBack is sufficient (default 300 is good for H1/H4).
-
Visual Check:
-
Look at the right side of your chart.
-
Identify the largest protrusions (Longest bars). These are your major Key Levels.
-
5. Best Results Strategy: "The Liquidity Sweep & Reclaim"
This strategy focuses on the market hunting liquidity (Stop Runs) into the HeatMap zones and then reversing.
The Setup
-
Timeframe: H1 or H4.
-
Direction: Counter-trend to the immediate impulse, but pro-trend to the higher structure.
Step 1: Identify the Wall
Look for a dense cluster of lines on the HeatMap (a long histogram bar) that is notably larger than the surrounding bars.
-
If Shorting: Look for a large Blue cluster above current price.
-
If Longing: Look for a large Green cluster below current price.
Step 2: Wait for the Sweep (The Touch)
Do not place a limit order blindly at the line. Wait for price to enter the zone.
-
Price should pierce into the Liquidity level.
-
Note: The indicator might update and remove some lines as price hits them. This is normal; we are watching the reaction to that zone.
Step 3: The Trigger (Rejection)
Watch for a Reversal Candle Pattern inside or just after touching the liquidity zone.
-
Bullish: Hammer, Pin Bar, or Bullish Engulfing candle rejecting a Green Zone.
-
Bearish: Shooting Star or Bearish Engulfing candle rejecting a Blue Zone.
