 MetaTrader 5
 Uzmanlar
 Göstergeler
 Komut dosyaları
 Kütüphaneler
 Depo
DepoFan sayfamıza katılın

APB Channel EA — Heikin-Ashi reversal with channel confirmation and swing-structure stops - MetaTrader 4 için uzman

- Görüntülemeler:
- 84
- Derecelendirme:
- Yayınlandı:
-
 Alım-satım fırsatlarını kaçırıyorsunuz:
- Ücretsiz alım-satım uygulamaları
- İşlem kopyalama için 8.000'den fazla sinyal
- Finansal piyasaları keşfetmek için ekonomik haberler
Kayıt Giriş yapWeb sitesi politikasını ve kullanım şartlarını kabul edersiniz
Hesabınız yoksa, lütfen kaydolun -
 Bu koda dayalı bir robota veya göstergeye mi ihtiyacınız var? Freelance üzerinden sipariş edin
Freelance'e git
Bu koda dayalı bir robota veya göstergeye mi ihtiyacınız var? Freelance üzerinden sipariş edin
Freelance'e git
How it works
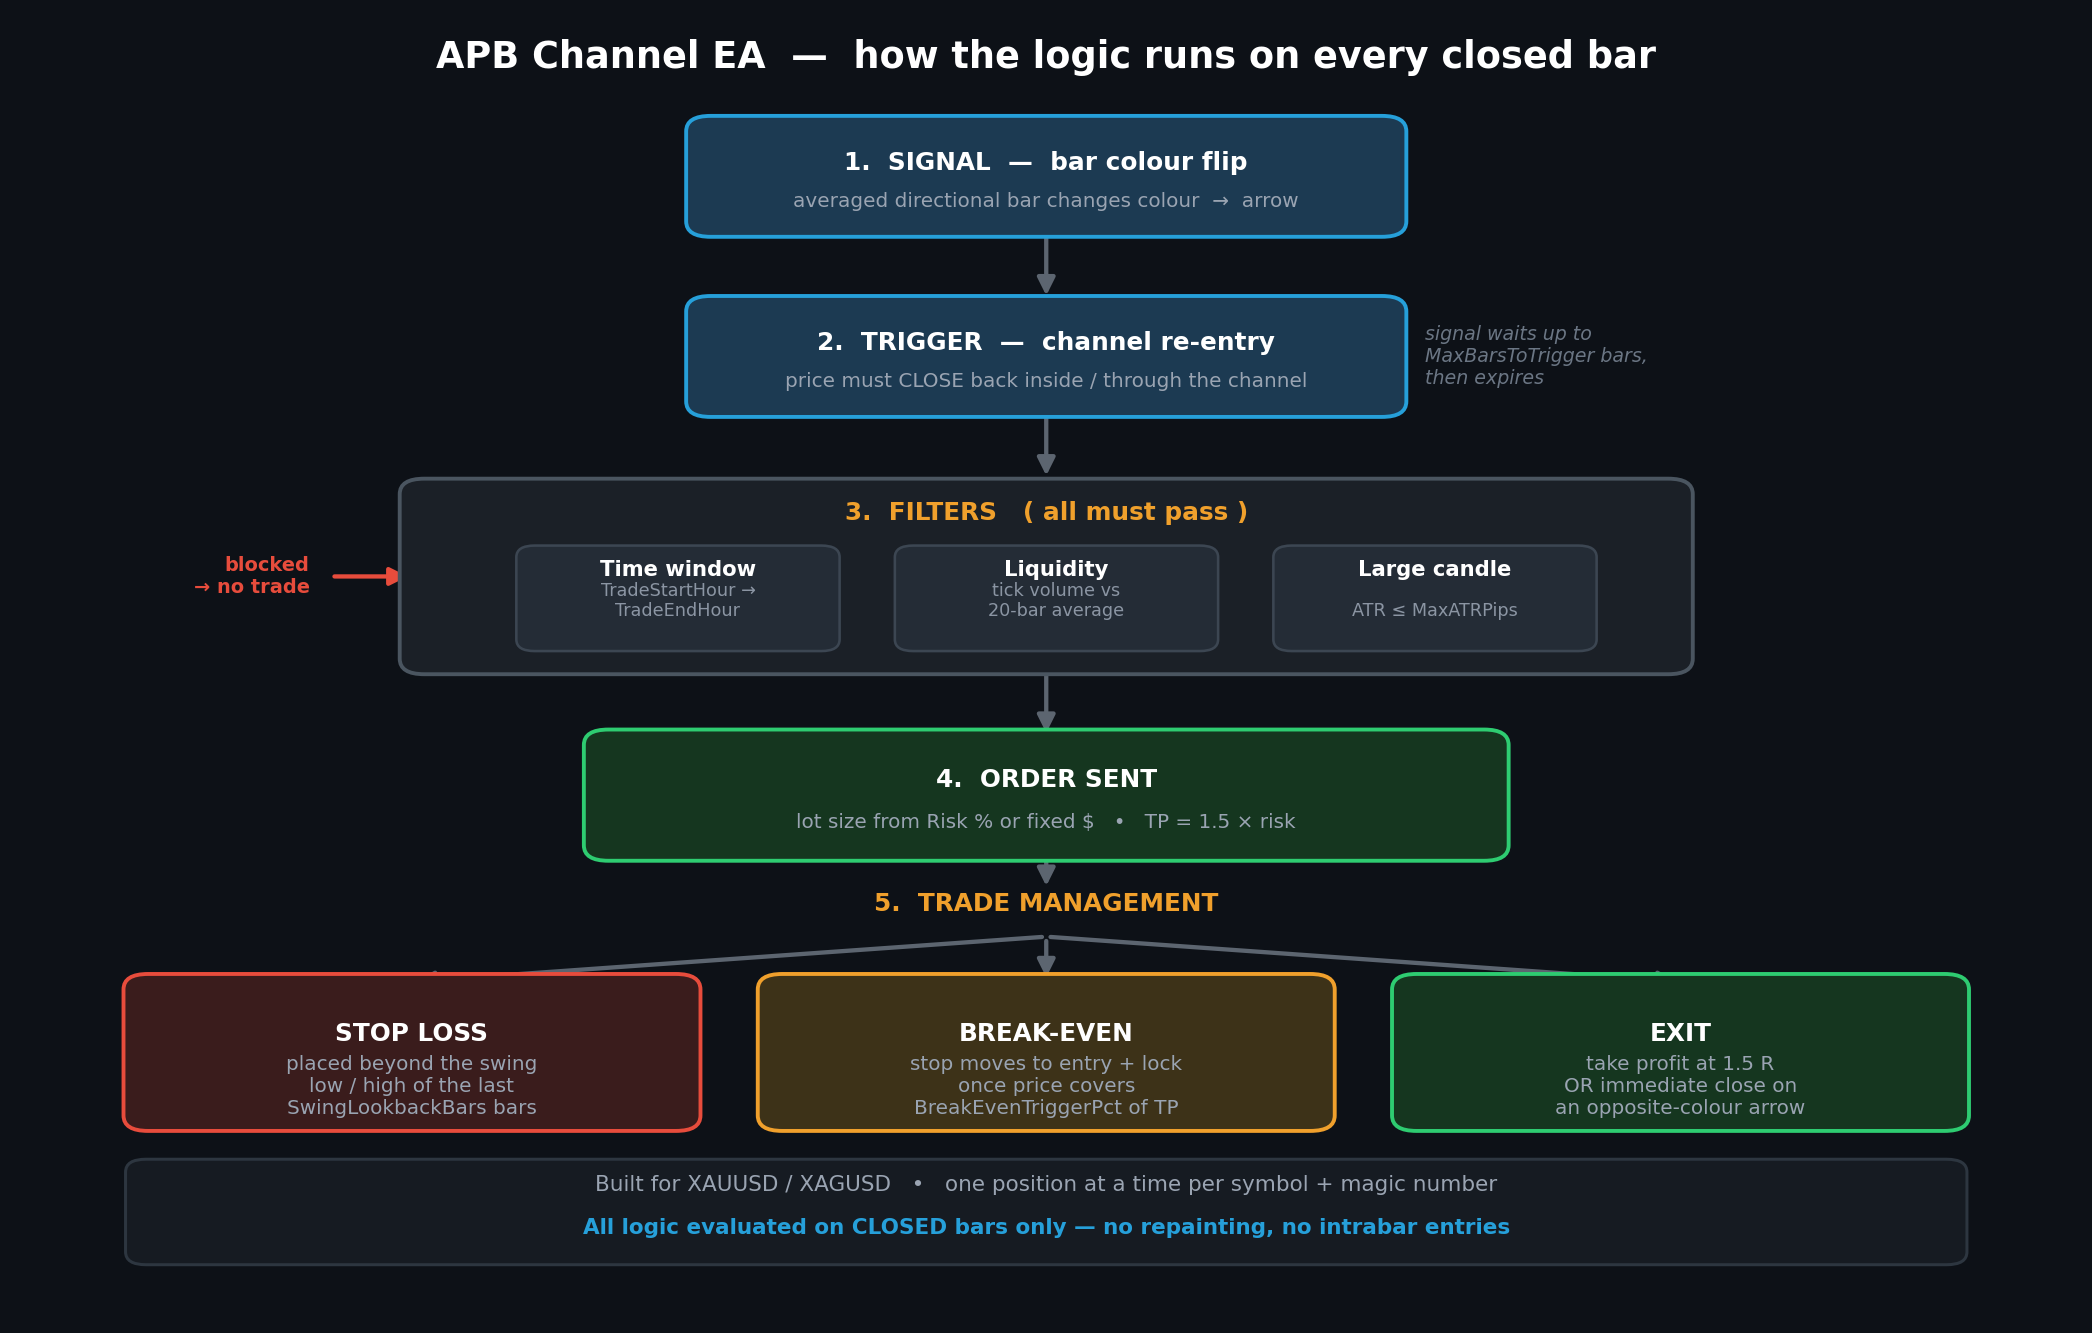
The EA runs its full logic once per closed bar, in five stages.
1. Signal — the colour flip Heikin-Ashi bars are recalculated on each new bar. When a bar's colour changes relative to the previous bar (bearish → bullish, or bullish → bearish), the EA registers a directional arrow and arms a pending signal. Heikin-Ashi averaging smooths out the noise that causes raw candles to flip back and forth in choppy conditions, so reversals are marked with fewer false alarms.
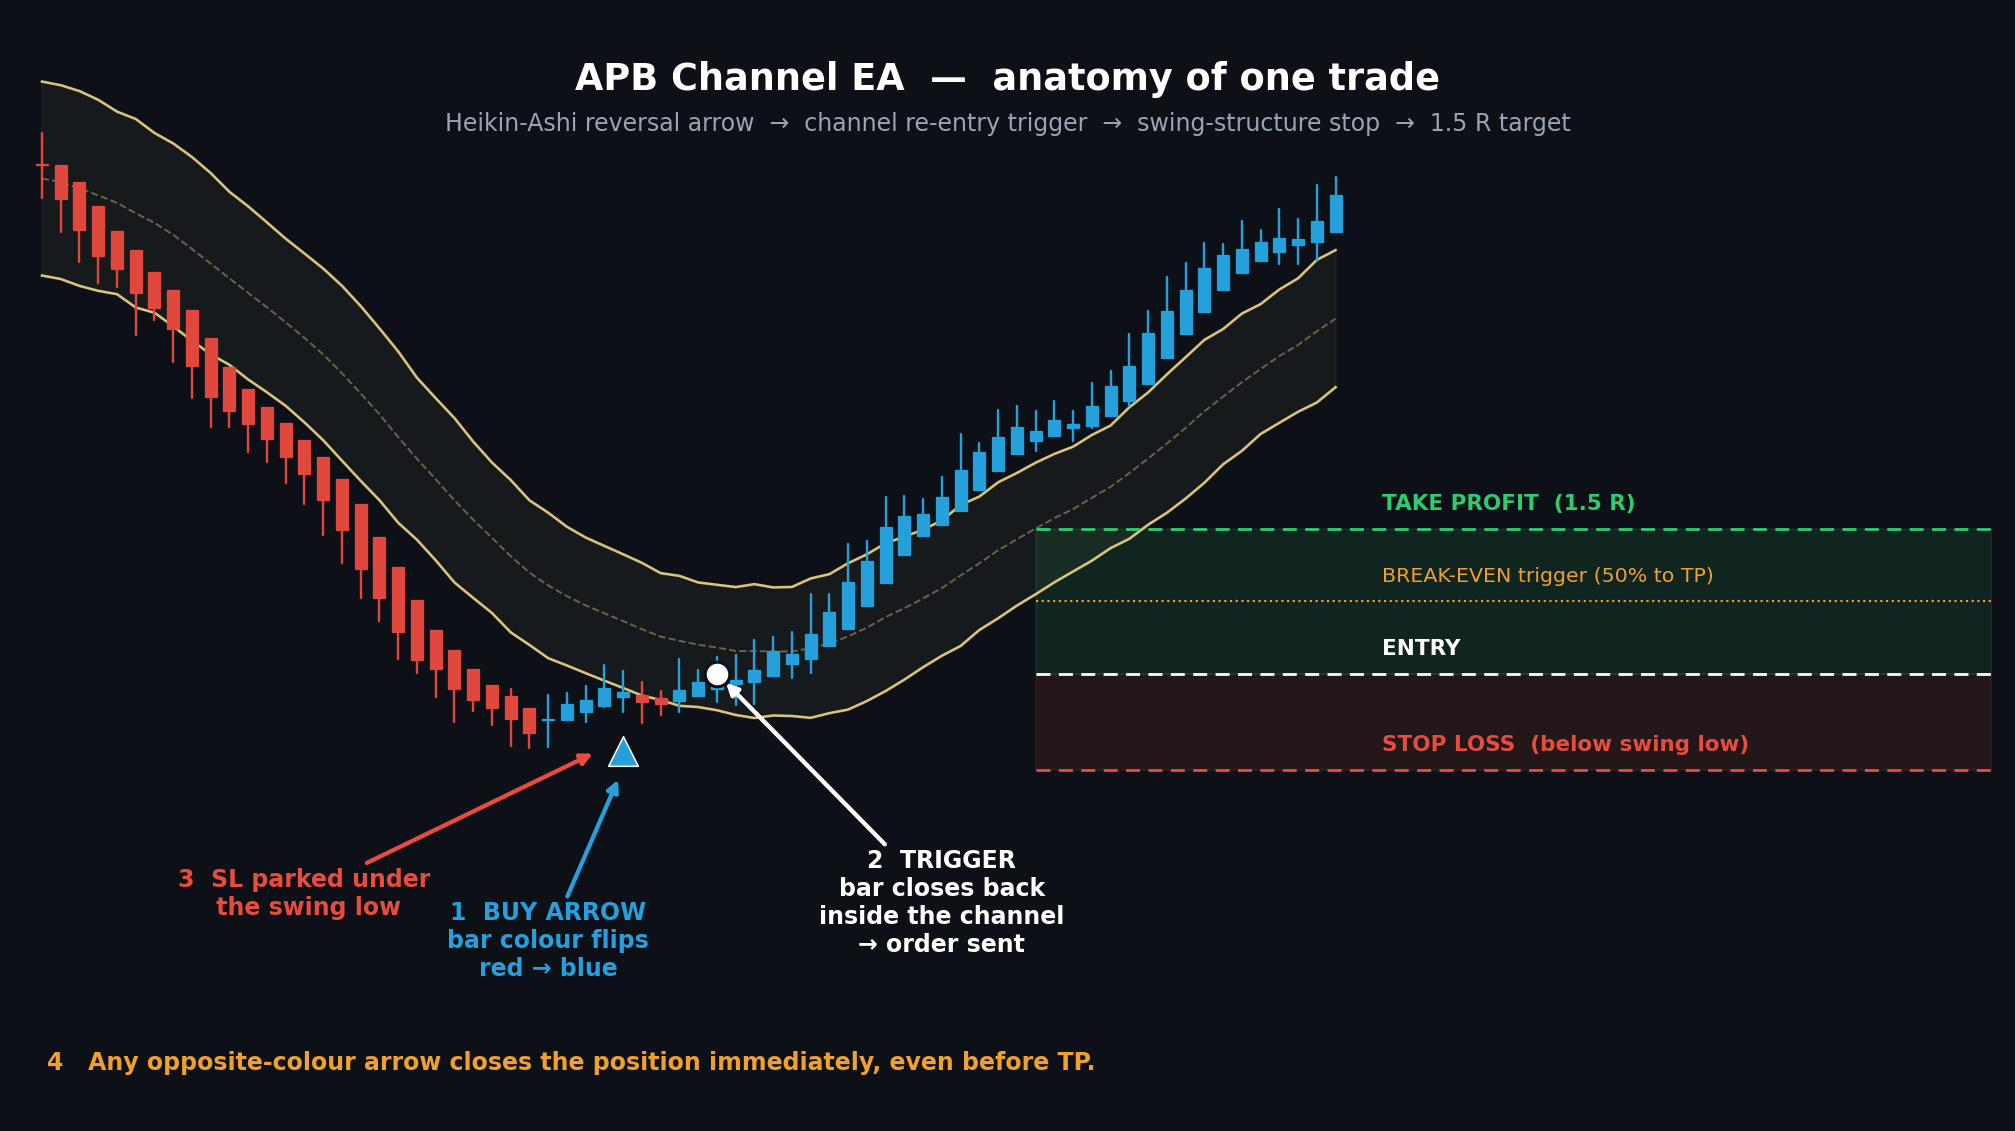
2. Trigger — channel re-entry An arrow alone does not open a trade. The EA then waits for price to close back inside or through a Keltner-style channel (EMA ± ATR × multiplier) in the arrow's direction:
- Buy: a bar must close at or above the lower band
- Sell: a bar must close at or below the upper band
-
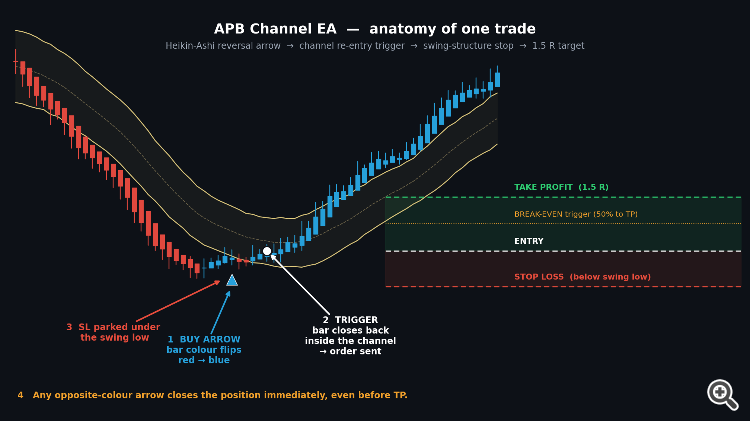
This is the core filter of the system. It stops the EA from buying into a falling knife the moment a single bar changes colour, and instead waits for price to demonstrate it has actually returned into the value area. If the trigger does not occur within MaxBarsToTrigger bars, the pending signal expires and is discarded (set to 0 to wait indefinitely).
3. Filters Before any order is sent, three independent filters must all pass:
- Time window — only trade between TradeStartHour and TradeEndHour (server time; correctly handles windows that wrap past midnight). An optional Friday cut-off hour avoids the thin weekend close.
- Liquidity — the signal bar's tick volume must be at least MinVolumeRatio × the recent average, which keeps the EA out of dead, gappy sessions.
- Large-candle / volatility — if ATR exceeds MaxATRPips , entries are skipped. This blocks entries during news spikes where stops are unreliable and spreads widen.
4. Order placement Lot size is calculated from the distance between entry and stop, so the monetary risk stays constant regardless of how wide the structural stop happens to be. Take profit is placed at RR_Ratio × the risk distance (1.5 by default). The EA validates the stop distance against the broker's StopLevel before sending, so you get a clear log message instead of a silent error 130.
5. Trade management
- Stop loss is placed beyond the lowest low (for buys) or highest high (for sells) of the last SwingLookbackBars closed bars, plus a configurable buffer — a real structural invalidation point rather than an arbitrary fixed distance.
- Break-even moves the stop to entry plus a small lock once price has covered BreakEvenTriggerPct of the distance to target.
- Exit occurs at the 1.5R take profit, at the stop, or immediately on an opposite-direction arrow — whichever comes first. The opposite-signal exit does not wait for that new signal's own channel trigger; it closes as soon as the reversal is detected.
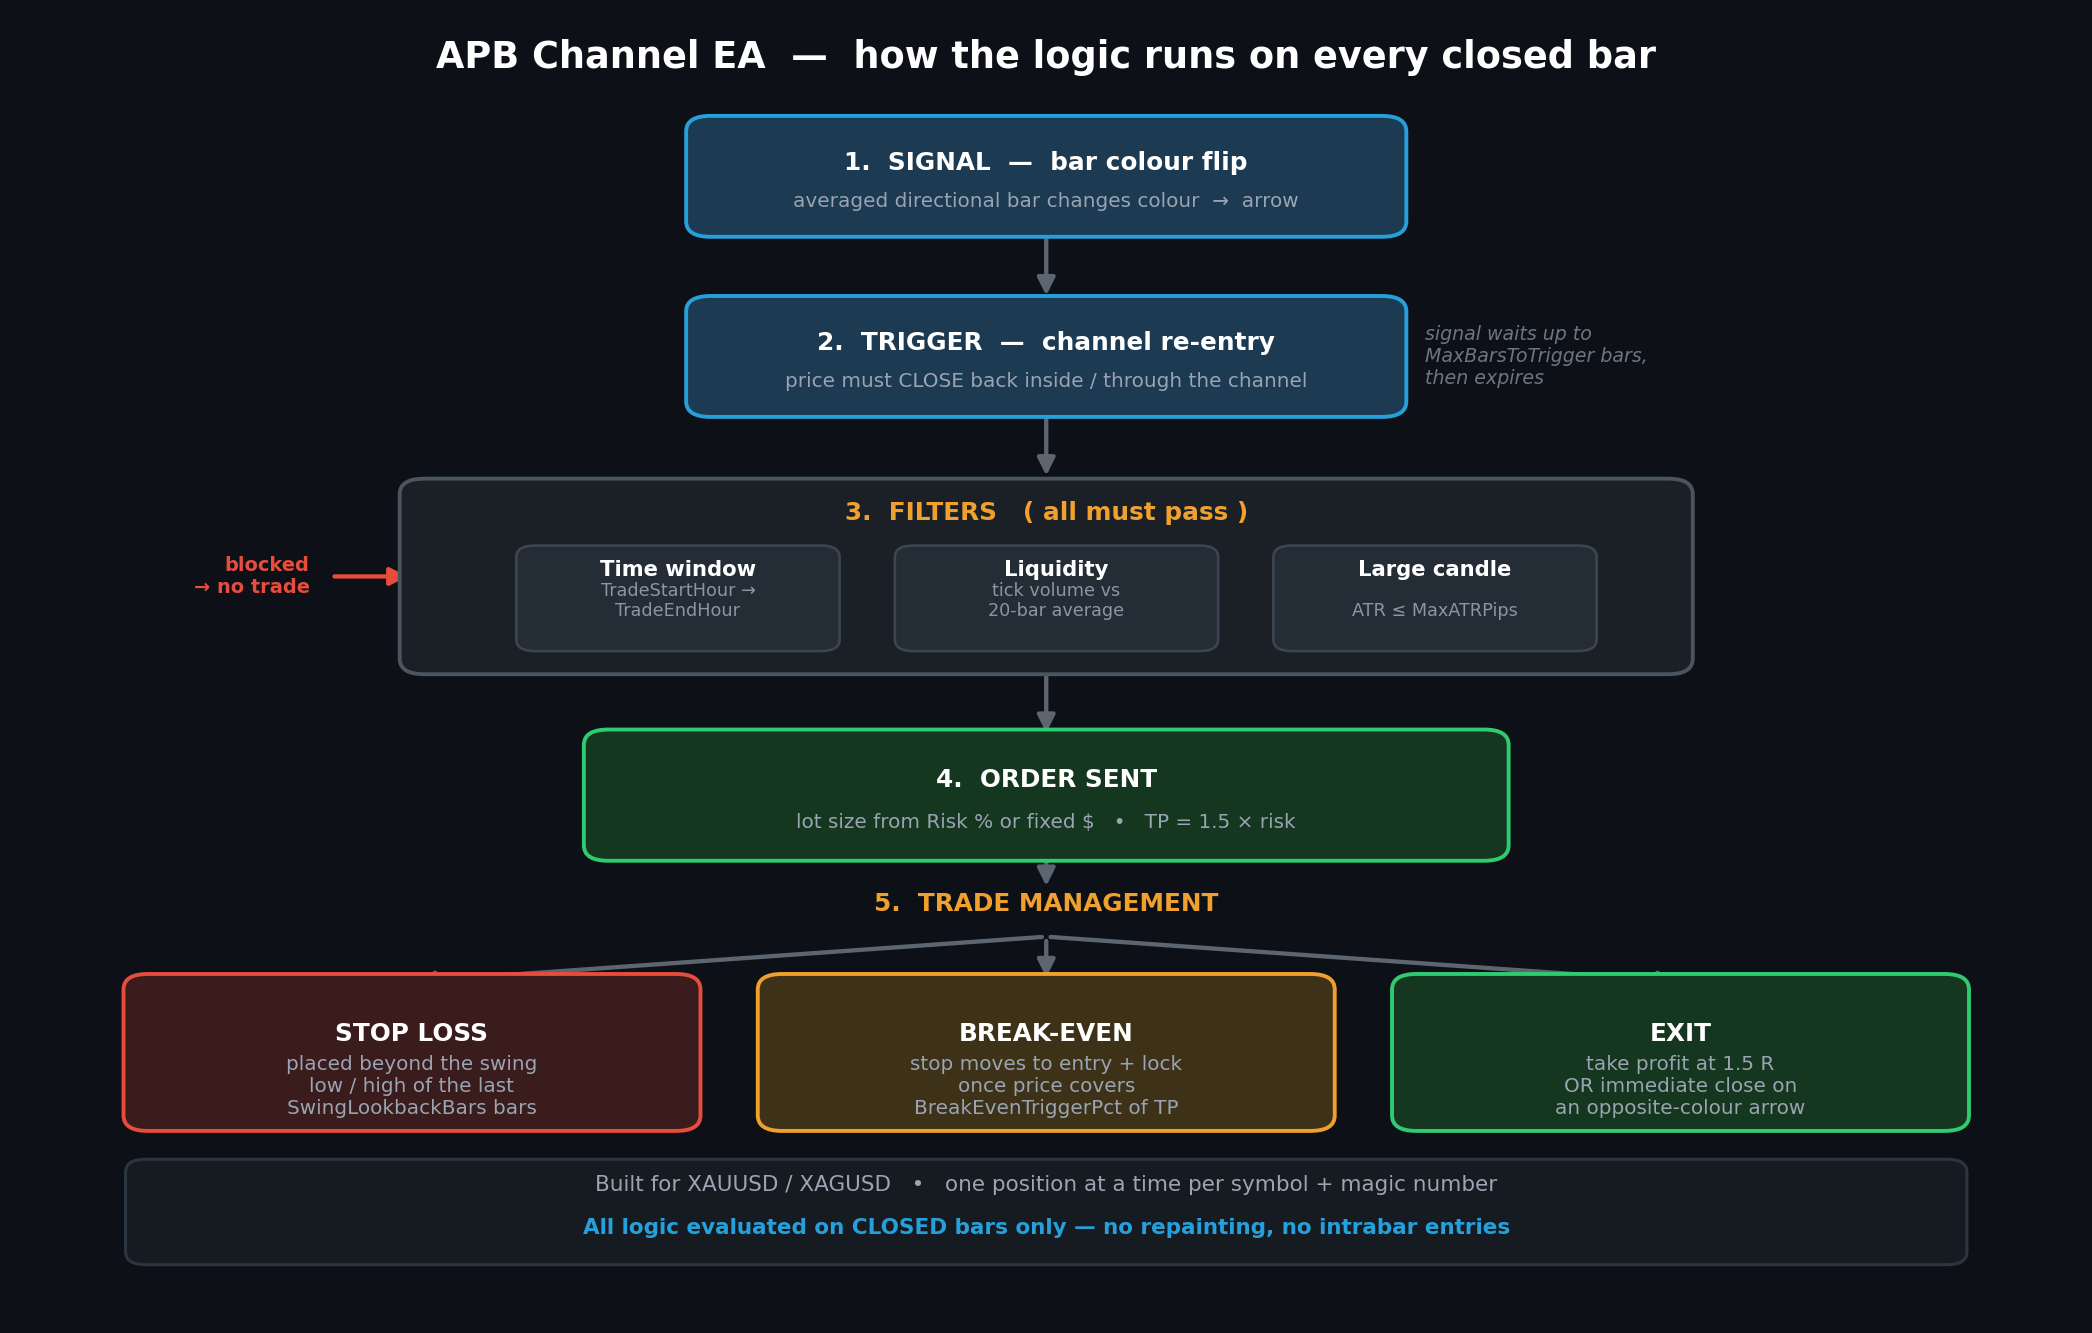
Only one position is held at a time per symbol and magic number.
Inputs
Signal and channel
| Input | Default | Meaning |
|---|---|---|
| HeikinAshiBars | 60 | Lookback recomputed each new bar |
| Channel_MA_Period | 20 | EMA period for the channel midline |
| Channel_ATR_Period | 20 | ATR period for channel width |
| Channel_Multiplier | 1.5 | Band distance = ATR × this |
| MaxBarsToTrigger | 15 | Bars to wait for the trigger; 0 = wait indefinitely |
Risk and targets
| Input | Default | Meaning |
|---|---|---|
| RiskMode | RISK_PERCENT | Risk as % of balance, or a fixed cash amount |
| RiskValue | 1.0 | Percent or currency amount, per RiskMode |
| RR_Ratio | 1.5 | Take profit as a multiple of risk |
| UseInitialStopLoss | true | Send a hard stop to the broker |
| SLMethod | SL_SWING_STRUCTURE | Swing-based or ATR-based stop |
| SwingLookbackBars | 10 | Bars scanned for the swing low/high |
| SL_BufferPips | 20 | Extra room beyond the swing point |
| FixedLots | 0.01 | Fallback if the risk calculation fails |
Break-even
| Input | Default | Meaning |
|---|---|---|
| UseBreakEven | true | Enable break-even management |
| BreakEvenTriggerPct | 50 | % of TP distance before the stop moves |
| BreakEvenLockPips | 2 | Pips locked beyond entry |
Filters and general
| Input | Default | Meaning |
|---|---|---|
| UseTimeFilter / TradeStartHour / TradeEndHour | true / 7 / 21 | Session window, server time |
| AvoidFridayLateSession / FridayCutoffHour | true / 20 | Skip the Friday close |
| UseLiquidityFilter / MinVolumeRatio | true / 0.5 | Minimum tick volume vs average |
| UseLargeCandleFilter / MaxATRPips | true / 100 | Skip abnormally volatile conditions |
| CloseOnOppositeSignal | true | Close on a reversal arrow |
| PointsPerPip | 10 | 10 for 3/5-digit quotes, 1 for 2/4-digit |
| DebugLog | true | Print decision diagnostics to the Journal |
Setup notes
Set PointsPerPip correctly for your broker before anything else — it drives every pip-based input (stop buffer, break-even lock, ATR filter). Use 10 if XAUUSD is quoted with 3 decimals (3450.500) and 1 if it shows 2 decimals (3450.50). Getting this wrong will make your stops ten times too wide or too narrow.
TradeStartHour and TradeEndHour are in broker server time, not your local time. Check your broker's server offset before setting the session window.
With DebugLog enabled, the Journal shows exactly why each bar did or did not produce a trade — arrow detection, trigger evaluation, which filter blocked an entry, and the result of every OrderSend . Turn it off for long optimisation runs.
Tuning suggestions
- SwingLookbackBars should roughly match your typical swing size on the timeframe you trade. Shallower pullbacks call for 5–7; wider structure calls for 12–15. A lookback that is too long produces distant stops and small position sizes.
- Channel_Multiplier controls how deep a retracement is required before entry. Larger values mean fewer but more selective entries.
- If you get very few trades, MaxBarsToTrigger is the first thing to relax — signals may be expiring before price returns to the channel.
Notes and limitations
This EA is published as a working, readable starting point rather than a finished commercial system. It ships with no optimised parameter set, and the defaults are sensible starting values, not tested edges.
Test it in the Strategy Tester on your own broker's data and then forward-test on a demo account before risking real capital. Results vary considerably between brokers because of differences in spread, swap, quote precision and server time. A reversal system of this type will naturally underperform during strong sustained trends, when colour flips generate repeated counter-trend entries — the channel trigger reduces this but does not eliminate it.
Feedback and improvements are welcome.
Credits / originality statement
All signal logic in this EA is original and built from publicly documented techniques: Heikin-Ashi bar averaging and a Keltner-style EMA/ATR channel. It is not derived from, and does not reproduce, any commercial or licence-protected indicator. The EA has no external indicator dependencies and calls no DLLs.
 Supertrend MTF Indicator
Free multi-timeframe Supertrend indicator for MetaTrader 4 with clear trend lines and Buy/Sell signal arrows.
H1 Container MTF Boxes
Visual MT4 indicator that draws the current or selected H1 range and nested M30, M15, M5 and M1 boxes. An EA based on this logic is in development.
Three Colors
Example: Moving Average indicator filling by different colors
MACD Sample
Classical MACD Sample.