Indicator Signal Strategy Builder
- Experts
-
Fernando Altair Kuhn
 Trader and MQL5 developer from Brazil. I build MetaTrader 5 tools for risk control and trade execution: lot calculators, loss limits, stop managers, a trade copier and strategy builders. Every product shows its limits and its tester results with real costs. No profit promises. Support through MQL5
- Versione: 1.1
- Attivazioni: 10
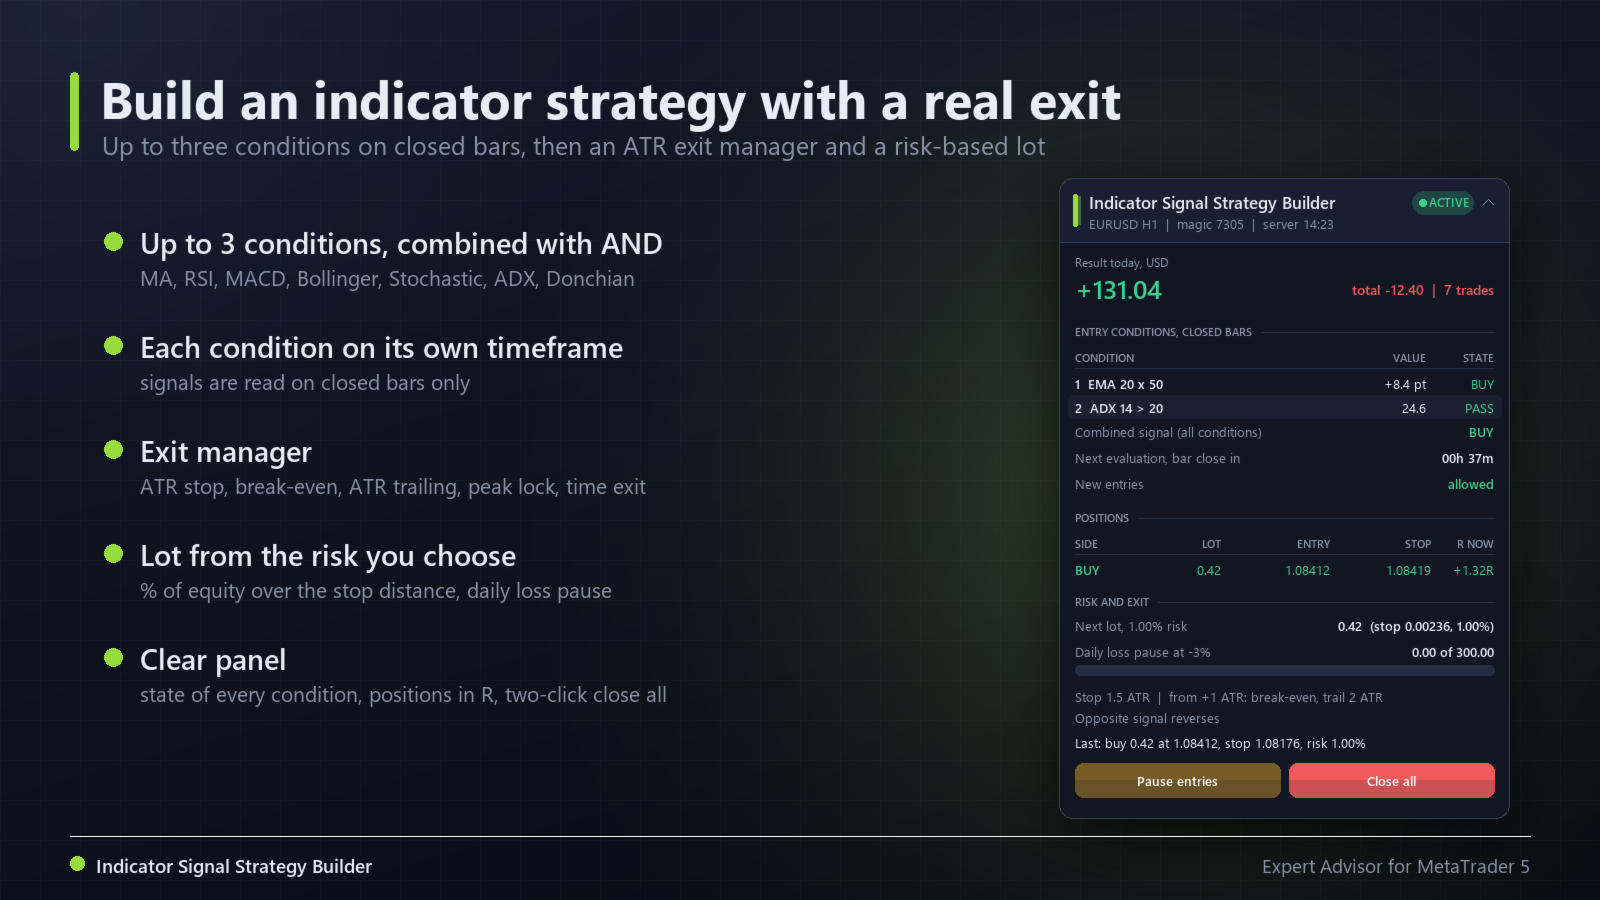
Indicator Signal Strategy Builder lets you build a trading rule from up to three indicator conditions and runs it with a complete exit manager and a lot computed from the risk you choose. Signals are read on closed bars only, so the robot acts the same way in the Strategy Tester and on a live chart.
Why the exit and the size come first
In our own research, changing the exit (a trailing stop instead of a fixed target) and the position size changed the results more than changing the entry rule. Classic indicator entries with a fixed target were not profitable after costs in our tests. This product does not promise a profitable rule. It gives you a clean way to build and test one, with the exit and the risk handled properly from the start.
How a rule is built
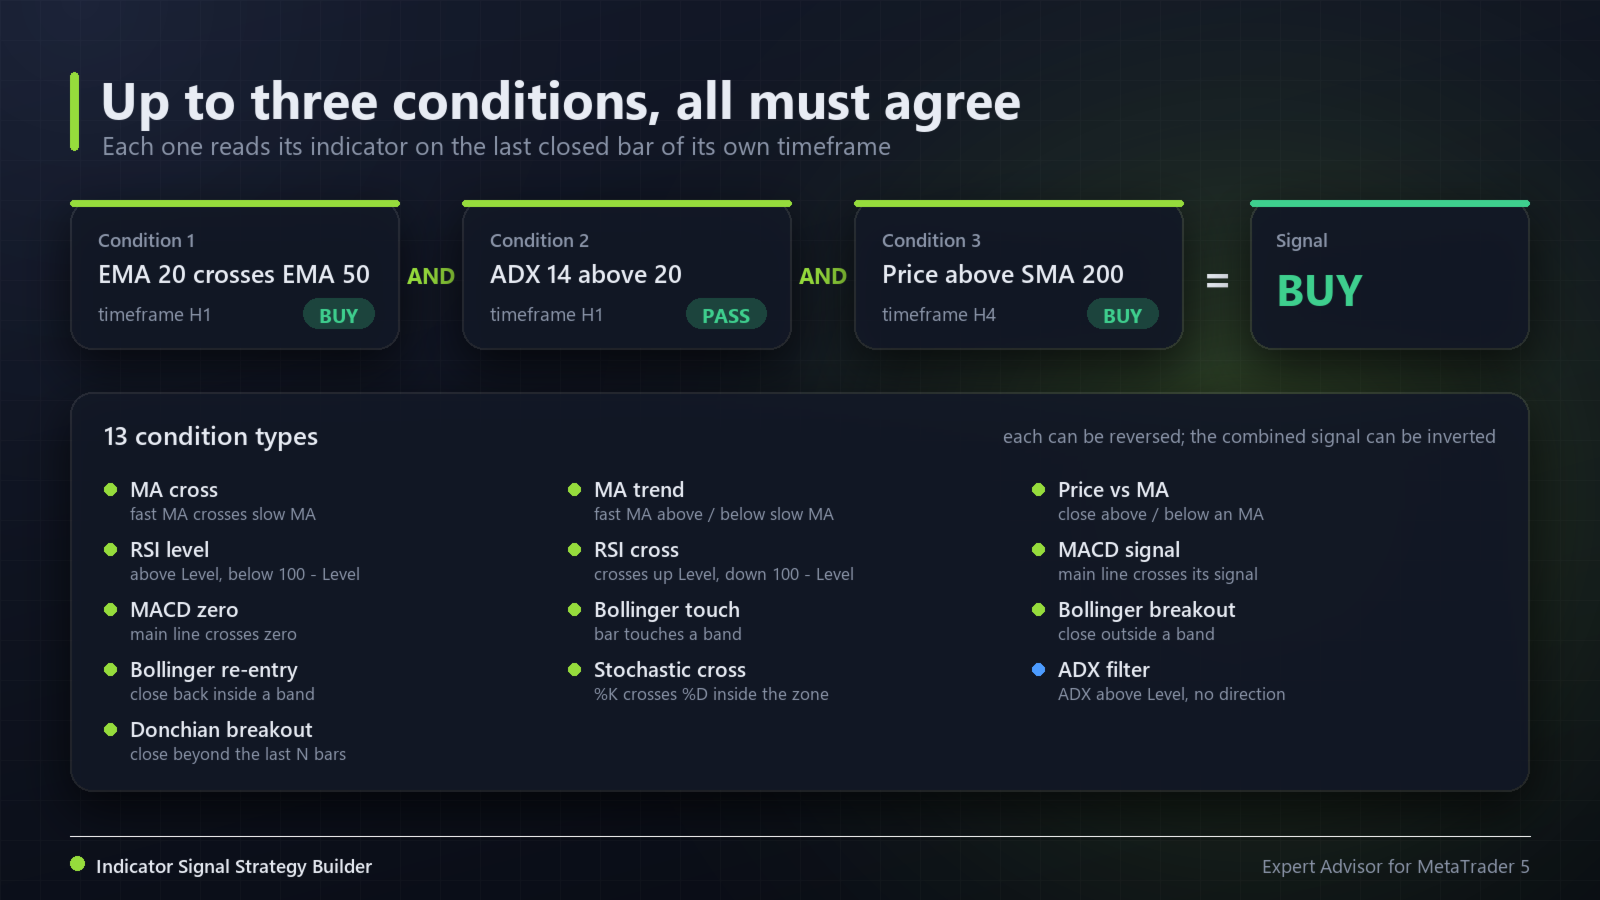
- Up to 3 conditions. Each one has its own type, timeframe, periods, MA method, applied price and level, and can be reversed (buy and sell swapped).
- All active conditions must agree (logical AND). The ADX condition is a filter: it allows both directions while ADX is above the level.
- Crosses and breakouts are events: valid on the closed bar where they happen (or for N bars, an input) and used for one entry at most. An event on a higher timeframe stays valid until that higher bar is replaced.
- Optional: the first entry after attaching may follow the current state of an MA or MACD cross (for example fast MA above slow MA) instead of waiting for a fresh cross. On by default; after the first entry only fresh crosses count.
- The combined signal can be inverted, and entries can be limited to buys only or sells only.
Condition types
- MA cross: fast MA crosses slow MA.
- MA trend: fast MA above (buy) or below (sell) slow MA.
- Price vs MA: close above (buy) or below (sell) an MA.
- RSI level: RSI above Level (buy), below 100 - Level (sell).
- RSI cross: RSI crosses up Level (buy), crosses down 100 - Level (sell).
- MACD signal: main line crosses its signal line. MACD zero: main line crosses zero.
- Bollinger touch (bar touches the lower or upper band), Bollinger breakout (close outside a band), Bollinger re-entry (close back inside a band).
- Stochastic cross: %K crosses %D coming from the zone below Level (buy) or above 100 - Level (sell).
- ADX filter: ADX above Level, no direction.
- Donchian breakout: close above the highest high (buy) or below the lowest low (sell) of the previous N bars.
Entry filters
- Trading hours (server time, overnight windows allowed) and week days.
- Maximum spread in points.
- Maximum positions on the symbol (hedging accounts), buy only or sell only.
- No new entry in the bar where a stop or target was hit.
Exit manager
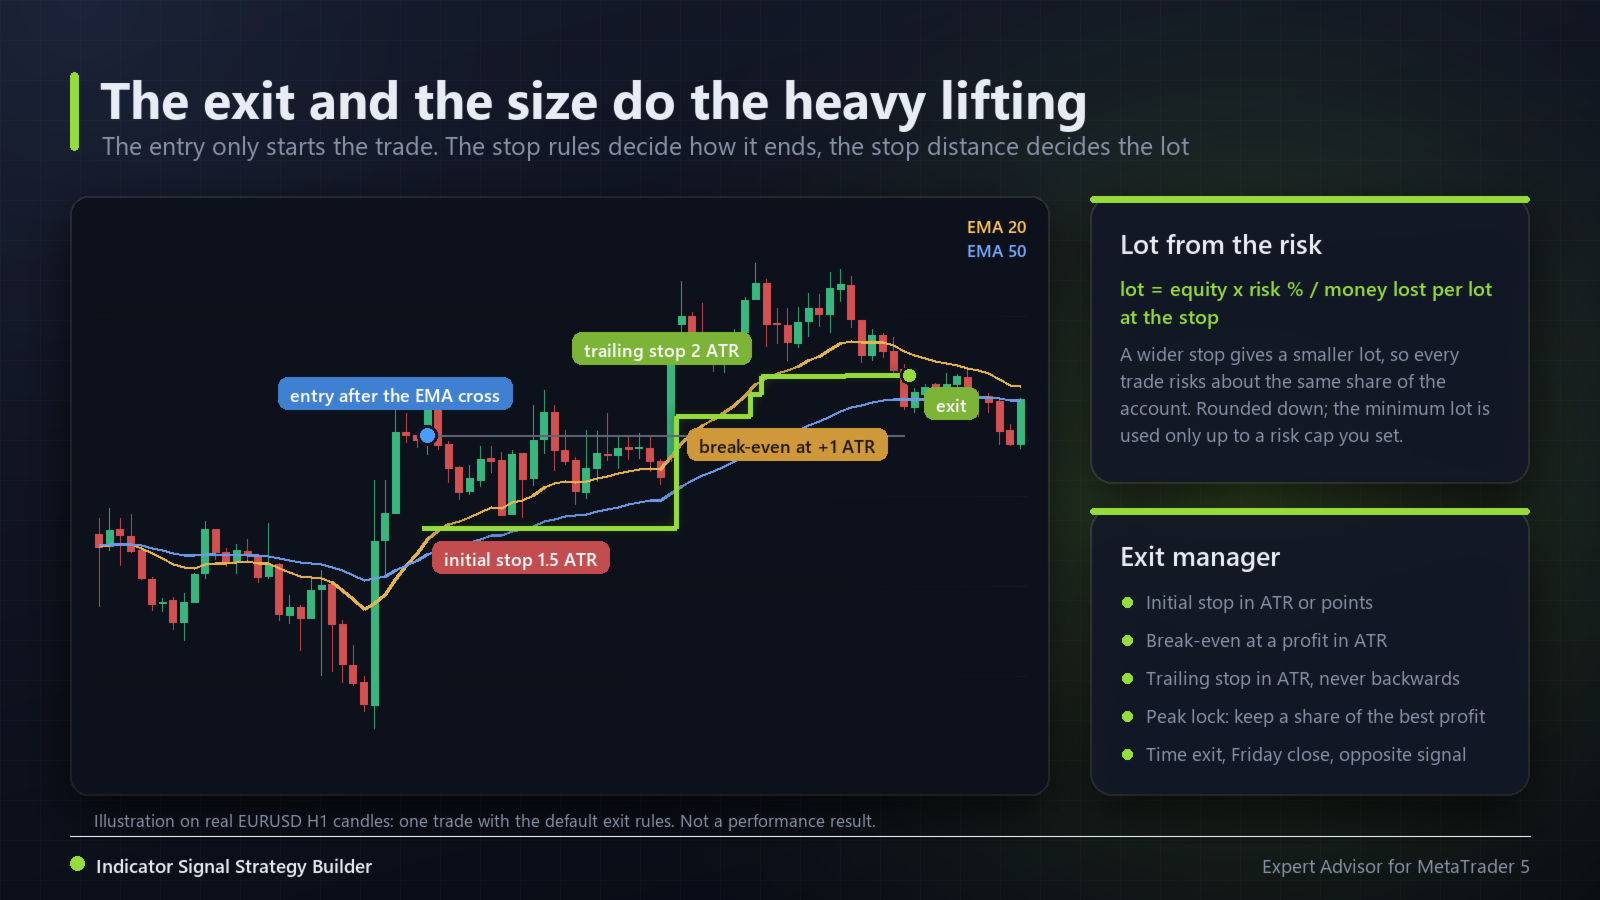
- Initial stop in ATR or points (required, the lot is sized on it). Optional target in ATR or points (off by default).
- Break-even and ATR trailing stop: once the profit reaches a chosen number of ATRs, the stop moves to the entry (plus the spread) and then trails the price at a chosen ATR distance. It never moves backwards.
- Peak lock: keeps a chosen share of the best profit reached (off by default).
- Time exit after N hours, Friday close at a chosen hour.
- Stops are evaluated once per closed bar of the exit timeframe (default) or on every tick.
Position size and risk
- Lot from the risk: equity x risk % divided by the money lost per lot at the stop, rounded down. A wider stop gives a smaller lot.
- Or a fixed lot. Optional maximum lot.
- When the risk lot is below the broker's minimum lot, the minimum lot is used only if it risks at most a chosen share of equity (default 10%); otherwise the signal is skipped. The panel shows the real risk of the next lot.
- The lot is reduced to fit the free margin and the symbol volume limit.
- Daily loss pause: no new entries for the rest of the day once this robot's closed plus floating result reaches a chosen loss (default 3%). Open positions keep their stops.
Opposite signal, hedging and netting
- Opposite signal with a position open: close and open the other side (default), close only, or ignore.
- The robot never holds a buy and a sell at the same time.
- Netting accounts: one position per symbol (maximum positions is always 1). A reversal is sent as a close followed by a new order. If another robot or a manual trade already has a position on the symbol, this robot does not open, because the positions would be merged.
Panel
- Every condition with its indicator value and state: green BUY or PASS, red SELL, grey when it does not agree.
- The combined signal, time to the next bar close, and whether new entries are allowed (or why not).
- Positions in a table: side, lot, entry, current stop and the result in R (multiples of the initial risk).
- Result of the day and total of this robot on the symbol, next lot and its real risk, daily loss pause bar, exit rules in use.
- Buttons: Pause entries / Resume, Close all (needs a second click to confirm). The panel collapses with a click on its header.
Default settings
EMA 20 crosses EMA 50 on the chart timeframe, filtered by ADX(14) above 20. Stop 1.5 ATR(14); break-even and a 2 ATR trailing stop from +1 ATR of profit; no target; opposite signal reverses; 1% risk per trade; daily pause at -3%.
These defaults are a starting point so the robot trades out of the box. They are not optimized and they are not a recommendation: in our own checks on recent H1 data they lost money after costs. Build and test your own rule in the Strategy Tester before using it on a live account.
Limitations and risks
- Past results, in a backtest or live, do not guarantee future results.
- Every indicator rule has losing streaks. Trend rules lose in ranging markets; reversal rules lose in strong trends. A rule that looks good on one symbol and period often fails on another.
- Stops can be filled worse than their level in gaps and fast markets, so a loss can be larger than the chosen risk.
- On small accounts the minimum lot can risk more than the chosen percentage (see the minimum lot cap).
- One chart trades one symbol. Use a different magic number on each chart.
- The terminal must stay running with Algo Trading enabled.
Inputs
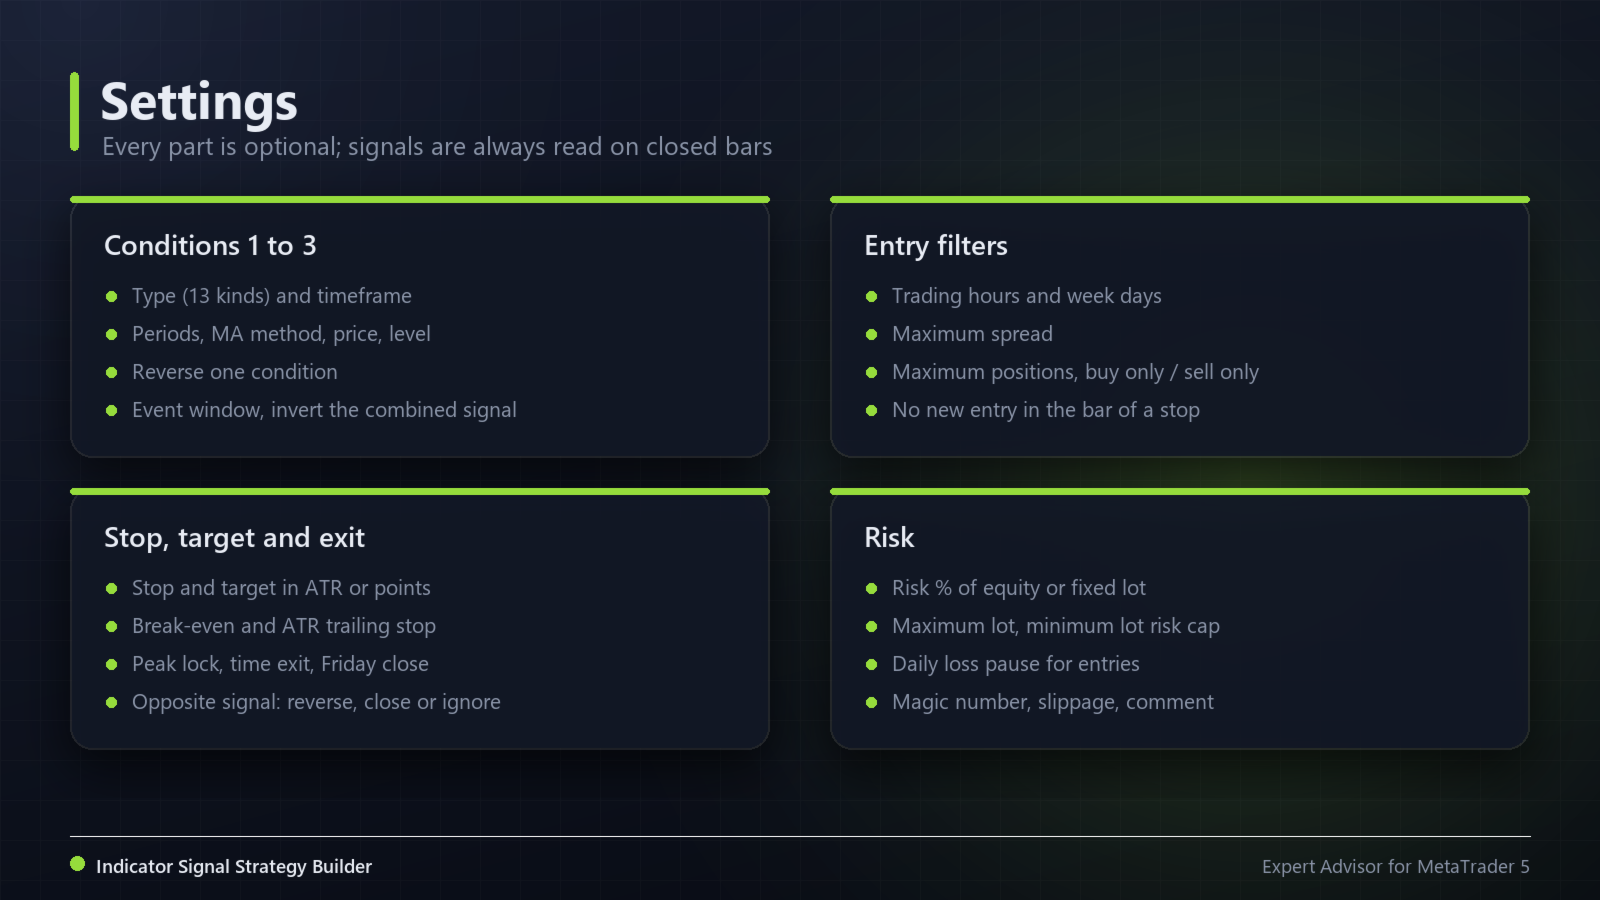
- Conditions 1 to 3: type, timeframe, Period 1 / 2 / 3, MA method, applied price, Level (or Bollinger deviation), reverse.
- Signal: event window in bars, first entry on the current state, invert, allowed entries, opposite signal action.
- Entry filters: hours, week days, maximum spread, maximum positions, no entry in the bar of a stop.
- Stop and target: types and values, ATR timeframe and period.
- Exit manager: break-even start, trailing distance, peak lock share and start, time exit, evaluation per bar or tick, Friday close and hour.
- Risk: lot mode, risk %, fixed lot, maximum lot, minimum lot risk cap, daily loss pause.
- General and display: magic number, slippage, order comment, panel corner and offsets.